




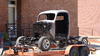


My 40 pickup
Thread Starter
|
Senior User
Joined: Jan 2010
Posts: 216
Likes: 0
From: Emerald Coast of Florida
I am on a roll! I got off work early so I jumped on the truck as soon as I got home. I removed the leaf springs first

Then set off cutting the old spring perches off the frame.


That took the majority of my time and sawzall blades! I then removed the poly gas tank and drained it.

My next plans are to remove all the fuel line as I am going to replace it anyway and then remove what is left of the exhaust. It is going to be in the way as I work around the rear end and it too will be replaced.
More later, Red
Then set off cutting the old spring perches off the frame.
That took the majority of my time and sawzall blades! I then removed the poly gas tank and drained it.
My next plans are to remove all the fuel line as I am going to replace it anyway and then remove what is left of the exhaust. It is going to be in the way as I work around the rear end and it too will be replaced.
More later, Red
Thread Starter
|
Senior User
Joined: Jan 2010
Posts: 216
Likes: 0
From: Emerald Coast of Florida
Here is the latest. I got the spring perches in.


I was really impressed with the fit and ease of installation. The directions were not so easy to figure out. I read them over about ten times to make sure I got it. I had no issues during the installation so far and everything fit as it should. The rear perches needed to be finessed a bit (I clamped it in several locations to get it to the contour of the frame) to get the front mounting holes to line up.


The upper shock mounts went in pretty easy as well. The rear end had some square tubing as lowering blocks, so I ordered new aluminum lowering blocks from Speedway. They should be here in a couple days and I can get the rest of the rear end buttoned up. Barring any issues, I hope to have mock up complete this weekend and have it back apart and ready to paint. I am ordering some rust encapsulator and chassis black to finish it off.
Red
I was really impressed with the fit and ease of installation. The directions were not so easy to figure out. I read them over about ten times to make sure I got it. I had no issues during the installation so far and everything fit as it should. The rear perches needed to be finessed a bit (I clamped it in several locations to get it to the contour of the frame) to get the front mounting holes to line up.
The upper shock mounts went in pretty easy as well. The rear end had some square tubing as lowering blocks, so I ordered new aluminum lowering blocks from Speedway. They should be here in a couple days and I can get the rest of the rear end buttoned up. Barring any issues, I hope to have mock up complete this weekend and have it back apart and ready to paint. I am ordering some rust encapsulator and chassis black to finish it off.
Red
Thread Starter
|
Senior User
Joined: Jan 2010
Posts: 216
Likes: 0
From: Emerald Coast of Florida
I got everything done for the mock up that I can minus lowering blocks which should be here tomorrow. Today, I worked on cleaning up the rear pumpkin and rolling it back into place while hand tightening the rear shackles.


I might have to cut a small section in the rear cross member for shock clearance but that is minor. I look forward to getting the lowering blocks to get it completely buttoned up.
More to come!
Red
I might have to cut a small section in the rear cross member for shock clearance but that is minor. I look forward to getting the lowering blocks to get it completely buttoned up.
More to come!
Red
Thread Starter
|
Senior User
Joined: Jan 2010
Posts: 216
Likes: 0
From: Emerald Coast of Florida
Thanks, I think it is going to be much better myself. In my last steps of mock up, I cut one of the U bolts to short as I misread the directions and put the bottom shock mount in the wrong place. So I ordered two new U Bolts and my chassis paint and stopped working until that came in. It all came in friday so saturday, I finished cleaning the underside of the frame and coated the rear section with Rust neutralizer. It has to sit for 48 hours so I was essentially done with that for a while. I painted the new brackets and the rear end with the chassis paint and it looks awesome! My school starts today so my work will slow down again. Tonight I will paint the rear section of the frame with rust encapsulator so hopefully I can weld in the box plates this weekend.


I forgot to take some pictures of the frame before I started painting the rust encapsulator. The rust neutralizer literally turned the frame black.


The brackets came out nice as well. I can't wait to get this all back together!


Red
I forgot to take some pictures of the frame before I started painting the rust encapsulator. The rust neutralizer literally turned the frame black.
The brackets came out nice as well. I can't wait to get this all back together!
Red
Last edited by Flathead Red; Nov 7, 2011 at 07:27 PM. Reason: updated pictures
FTE Stories
Ford Trucks for Ford Truck Enthusiasts

2027 Ford Super Duty Buyer's Guide (Every Model, Engine, & Package)
Brett Foote
Top 10 Ford Truck Tragedies
Joe Kucinski
AEV FXL Super Duty - the Super Duty Raptor Ford Doesn't Make
Brett Foote
Lobo Vs Lobo: Proof the F-150 Lobo Should Be Even Lower!
Michael S. Palmer
Ford's 2001 Explorer Sportsman Concept Looks For a New Home
Verdad Gallardo
10 Best Ford Truck Engines We Miss the Most!
Joe Kucinski
2026 Shelby F-150 Off-Road: Better Than a Raptor R?
Brett Foote
2027 Super Duty Carhartt Package First Look: 12 Things You NEED to Know!
Michael S. Palmer
10 Most Surprising 2026 Ford Truck Features!
Joe Kucinski
Tuned

Joined: May 2001
Posts: 268
Likes: 1
From: a little S/E of Nome
I went a little bit different on my rear shock setup by removing the cross member behind the rear end housing. The reason being, I needed more room for shocks to avoid them binding and it provided me with mounting anchor for the gas tank. I saw no reason to retain the cross member as it did nothing for the build. You be the judge, check it out.
[IMG] [/IMG]
[IMG]
[/IMG]I got everything done for the mock up that I can minus lowering blocks which should be here tomorrow. Today, I worked on cleaning up the rear pumpkin and rolling it back into place while hand tightening the rear shackles.
I might have to cut a small section in the rear cross member for shock clearance but that is minor. I look forward to getting the lowering blocks to get it completely buttoned up.
More to come!
Red
I might have to cut a small section in the rear cross member for shock clearance but that is minor. I look forward to getting the lowering blocks to get it completely buttoned up.
More to come!
Red
Thread Starter
|
Senior User
Joined: Jan 2010
Posts: 216
Likes: 0
From: Emerald Coast of Florida
I think if I had an X member it would be no issue to remove the rear cross member. But I don't have one and the rear cross member provides the ridgidity in the frame I need. Plus I see no binding in my shocks with the mounts as they are. I made some small half oval cuts in the cross member for shock clearance. I was considering replacing the X member with an after market one but am unsure right now. The front clip is 74 Nova and was grafted to the frame all the way back to below the cab. I want to replace that set up with an IFS but am not sure if that frame will work due to all the grafting. I will tackle that after the rear end is completed. Thanks for your inputs. It helps to have others opinions and tips.
Red
Red
Thread Starter
|
Senior User
Joined: Jan 2010
Posts: 216
Likes: 0
From: Emerald Coast of Florida
I am having a dilema right now and partly due to not knowing. The front portion of the frame was grafted from a 74 Nova. The grafted section extends to below the cab. I want to scrap the front suspension and install an IFS. Additionally I want to add in the X member whether it be a bolt in tubular one or one close to stock. I found that fatman fabrications does a front frame that grafts into damaged frames. My dilema comes from "do I just scrap my existing frame and but new rails, front crossmemer and X member or do I attempt to remedy the existing frame? I need to get the cab off and strip the frame down and find out the extent of the graft first. Just thinking out loud really. I welcome all inputs.
Red
Red
Last edited by Flathead Red; Nov 12, 2011 at 11:01 AM. Reason: spelling
Senior User
Joined: Feb 2011
Posts: 114
Likes: 0
I am having a dilema right now and partly due to not knowing. The front portion of the frame was grafted from a 74 Nova. The grafted section extends to below the cab. I want to scrap the front suspension and install an IFS. Additionally I want to add in the X member whether it be a bolt in tubular one or one close to stock. I found that fatman fabrications does a front frame that grafts into damaged frames. My dilema comes from "do I just scrap my existing frame and but new rails, front crossmemer and X member or do I attempt to remedy the existing frame? I need to get the cab off and strip the frame down and find out the extent of the graft first. Just thinking out loud really. I welcome all inputs.
Red
Red
Last edited by jotram; Nov 28, 2011 at 12:31 AM. Reason: needed to add more

New User
Joined: May 2011
Posts: 17
Likes: 0
From: Boise, Idaho
I am having a dilema right now and partly due to not knowing. The front portion of the frame was grafted from a 74 Nova. The grafted section extends to below the cab. I want to scrap the front suspension and install an IFS. Additionally I want to add in the X member whether it be a bolt in tubular one or one close to stock. I found that fatman fabrications does a front frame that grafts into damaged frames. My dilema comes from "do I just scrap my existing frame and but new rails, front crossmemer and X member or do I attempt to remedy the existing frame? I need to get the cab off and strip the frame down and find out the extent of the graft first. Just thinking out loud really. I welcome all inputs.
Red
Red