2wd to 4wd with d60
#16
 12-28-2009, 09:02 PM


Senior User
Join Date: Feb 2006
Location: MA
Posts: 165
Likes: 0
Received 0 Likes
on
0 Posts
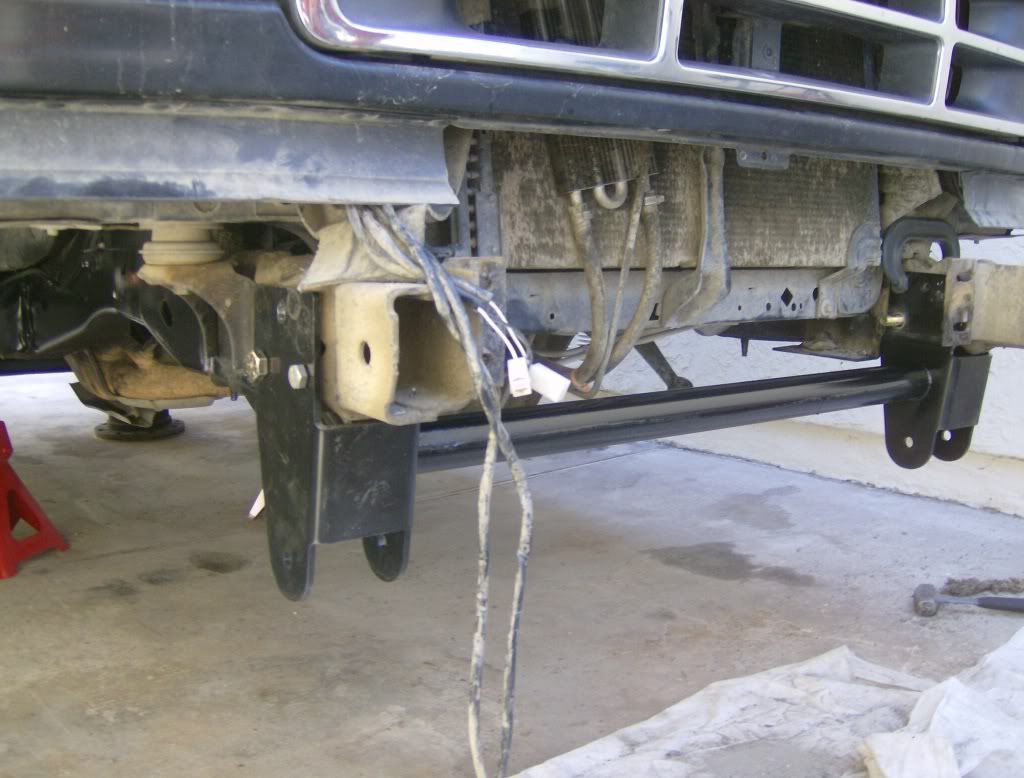
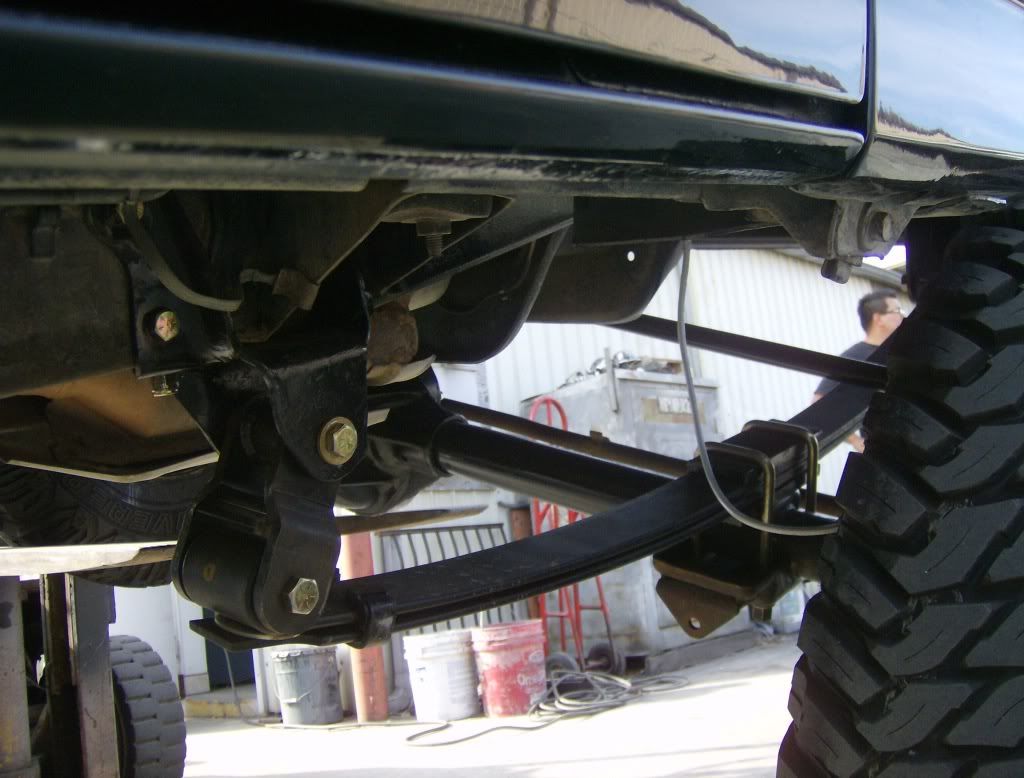
You will be installing a basic shackle reverse kit. This will bolt to the front of the frame with some modification, and then you will bolt up some factory spring hangers inwhich the new shackles will hanf from. This is where the new leafs will bolt to:
Not 100% sure whether or no this is the easiest way to perform your particular task, but it appears that this is the direction in which you are headed.
Not 100% sure whether or no this is the easiest way to perform your particular task, but it appears that this is the direction in which you are headed.
sorry for the hi-jack, btw...
#17
12-29-2009, 09:45 AM

By reversing the shackle, you gain at the very least, 3 inches. There is no avoiding it!! Trust me, I didn't want any lift either, but its just how it works..
#18
12-29-2009, 10:02 AM
Nope! brand spanking new! I'm pretty sure Putnam went out of business, and some company must have bought out the inventory. The only crappy thing was I couldn't find any pictures or install information about it, so it was a blind purchase and hope it would fit and work for what I wanted. And it did.. mostly..
#19
12-29-2009, 11:42 AM
Senior User
Join Date: Apr 2008
Location: above ground
Posts: 249
Likes: 0
Received 0 Likes
on
0 Posts
Yes I saw that. I think that is look like a clean product is $300 a good price? There are also some options like the 4.5 rear shackle flip is this something I have to add too?
Thank You guys I will post some progress as soon as I get the axle and parts cleaned and ready to go. This kit looks like it will make it work nicely and save Me some time getting brackets I will have to modify anyways. Btw I do have the leaf spring rear bracket the only one missing is the front bracket so with this kit I should be set then.
Also do I need a 3" lift? I want to keep the truck at the same hight if possible, I use it for hauling heavy stuff.
#20
12-30-2009, 06:57 AM

Join Date: Dec 2008
Posts: 101
Likes: 0
Received 0 Likes
on
0 Posts
 .
.
#21
12-30-2009, 12:49 PM

Ed, from looking at your pics, you don't have the trac arm or the anti sway bar installed. Just asking as I'm at that point in my Sky RSK install and The sway bar won't mount without contacting the spring. My question, Do I still need it????
93Ford, I have some pics in my Gallery about this. I'm almost done converting my '96 f350 2wd to a 4wd.
93Ford, I have some pics in my Gallery about this. I'm almost done converting my '96 f350 2wd to a 4wd.
#22
12-30-2009, 03:11 PM
It sounds like more work because you are drilling twice, but in reality, its faster to drill in stages then try to pass the core of a 1/2" bit on one pass and will tire you a lot less. You will have to push hard to get the pilot drill to bite and the moment it stops cutting under pressure, it can overheat and dull the bit. Stop a few times to add more lube.
Oil also helps cool the tip, so do use something. Blue cuttings, means you are getting to the upper temperature limit. If they start to show some black, you are too hot.
When drilling, you will have to feel when the tip starts biting and will see when the shavings start rolling out. You will have to control the drill speed to get the ideal bite. Too fast will overheat, too slow will not bite and the bit may snag and chip. Pushing too hard and drilling too slow on a pilot drilled hole will also cause a snag or chip.
Small sizes need higher RPM and more pressure, larger pilot drilled holes need lower RPM and LESS pressure.
One final warning. When you break through with any of the bits, there is a high risk of it snagging on the last shard of steel. Larger bits will be more prone. Brace yourself against something solid, and reduce pressure on the bit when you are about to break though all the way. The drill can either punch you, or twist crooked resulting in a chipped or broken bit (or all of thee above).
Full face protection and gloves are a good idea because the shavings are hot and hurt like hell when they land on you.
#23
12-30-2009, 06:37 PM
Join Date: Dec 2008
Posts: 101
Likes: 0
Received 0 Likes
on
0 Posts
Use bits that are rated for "high speed steel" (should say "HSS" on them) and use the correct cutting fluid (2 stroke oil works ok if nothing else is available but not ideal). Don't attempt to drill full size on the first pass. Start out with something small and manageable like 3/16" or 1/4", then go to the full size of 1/2". If you need a larger hole, add another size between them, 3/8" for example. The idea is to have a pilot hole large enough for the core of your final size drill bit to pass through.
It sounds like more work because you are drilling twice, but in reality, its faster to drill in stages then try to pass the core of a 1/2" bit on one pass and will tire you a lot less. You will have to push hard to get the pilot drill to bite and the moment it stops cutting under pressure, it can overheat and dull the bit. Stop a few times to add more lube.
Oil also helps cool the tip, so do use something. Blue cuttings, means you are getting to the upper temperature limit. If they start to show some black, you are too hot.
When drilling, you will have to feel when the tip starts biting and will see when the shavings start rolling out. You will have to control the drill speed to get the ideal bite. Too fast will overheat, too slow will not bite and the bit may snag and chip. Pushing too hard and drilling too slow on a pilot drilled hole will also cause a snag or chip.
Small sizes need higher RPM and more pressure, larger pilot drilled holes need lower RPM and LESS pressure.
One final warning. When you break through with any of the bits, there is a high risk of it snagging on the last shard of steel. Larger bits will be more prone. Brace yourself against something solid, and reduce pressure on the bit when you are about to break though all the way. The drill can either punch you, or twist crooked resulting in a chipped or broken bit (or all of thee above).
Full face protection and gloves are a good idea because the shavings are hot and hurt like hell when they land on you.
I saw some guys using a different bit type that looks like an arrow and increases the size of a smaller predrilled hole but I really don't know where to get such a tool and if I don't then I'll use the fast drill for the small hole and the big slow drill for the bigger hole.
I'll check the gallery too.

Thank You.
#24
12-30-2009, 08:10 PM
#25
12-30-2009, 10:04 PM

Senior User
Join Date: Jun 2008
Location: Los Angeles, CA
Posts: 106
Likes: 0
Received 0 Likes
on
0 Posts
Just to add to all that good drilling advice. . . make sure you hang on real tight to the drill. On the last pass with the 1/2 bit, near the end of the hole is where the bit catches the last piece of metal and locks the drill. I've had the drill twist my wrist and damn near brake my arm. For a thick frame, a big powerful corded 1/2 drill works best, the ones that have the two handles.
#26
12-30-2009, 10:53 PM
#27
12-31-2009, 11:20 AM
I was a bit wary of them, but after using one a few times, they work pretty well! When I was doing my swap, I think it was pilot hole with a small bit, step bit up to final size, and clean/finish it up with regular bit if needed. The step bits seem to cut off larger chips, and like the drill to run faster. Use plenty of oil on them, and watch out as the chips are HOT!! They don't work well on thicker metal, anything thicker than the size of a step will really bog it down and won't finish the hole, you have to go back from the opposite side, or finish with a regular bit. One added benefit, they are maybe half the length of a regular 1/2 inch bit, so can get into some pretty tight places, especially with a right angle drill.
I'm cheap and use old motor oil to lube the bits. It might not be the best, but its free and I have a ton of it. One caution as well, check the back side of what you're drill. You definitely don't want to drill into a brake or fuel line, and hitting some wiring will ruin your day as well. I'll also second the safety equipment! Metal shards in your eye suck a lot! Rusty bits and dirt also suck, and will be falling off the frame as you work so make sure to wear at least safety goggles if not a full face shield. The face shield is really needed when you're under the drill going straight up.
#28
01-02-2010, 01:30 PM
Join Date: Dec 2008
Posts: 101
Likes: 0
Received 0 Likes
on
0 Posts
Ok I got the step bits and some cut off wheels to remove the rivets, I looked at the reverse kits from some of the members here on their trucks and looks like I will have to box the frame for the front spring bracket since mine isn't. What thickness should I use? is it ok to use a foot of square steel tube cut it in half and weld each halve on the frame where the bracket will bolt?
Any other tips always welcome
Any other tips always welcome


