
E4OD Transgo shift kit install

Thread Starter
|
FTE Chapter Leader


Joined: May 2006
Posts: 11,273
Likes: 100
From: North Dakota

E4OD Transgo shift kit install
I just finished installing a Transgo shift kit into my E4OD trans. I have to warn u, there are alot of pictures.. First I drove the front tires onto car ramps, and set the E brake. Next i pulled the trans pan, and the filter. 10mm socket fot the trans pan. This is what u should see at this point.

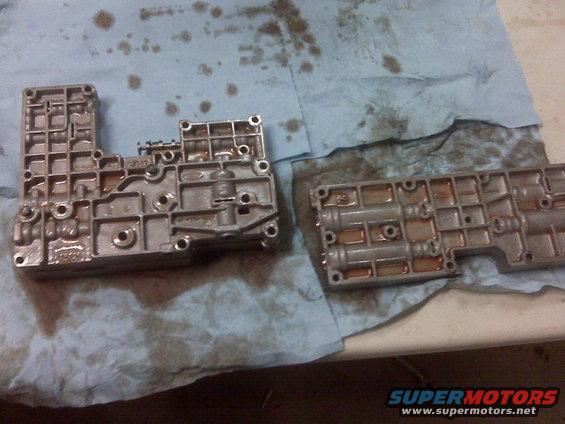
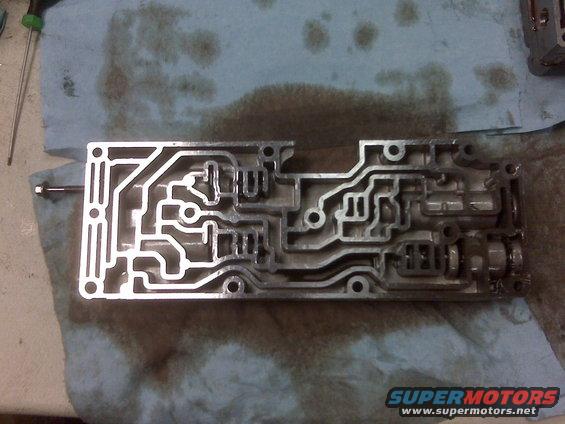
Next u have to pull the main valve body, and the accumulator valve body. there are alot of bolts(8mm head) and 2 nuts (10mm) on each one. Drop them down, and take them to the bench. Here they are.
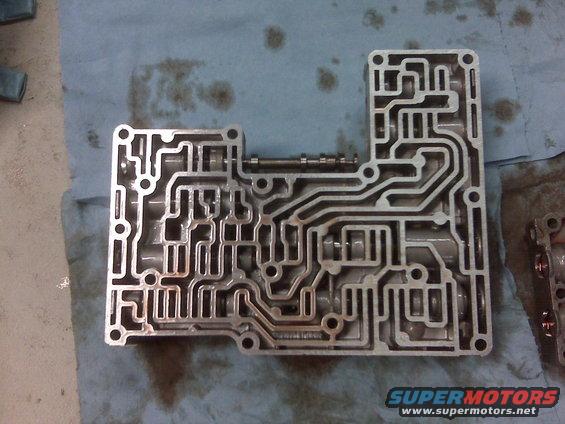
Start with the main valve body..

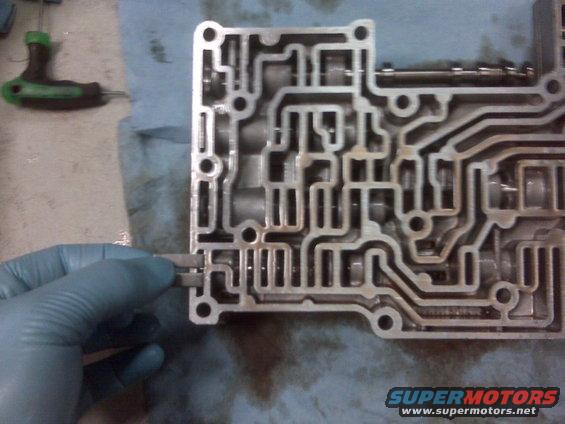
I for got to take a pic of how to identify if u have a 2nd type a first type valvbody, but i have a 1st type valve body, so u flip it over, and u will see this.
there is a retainer in this spot
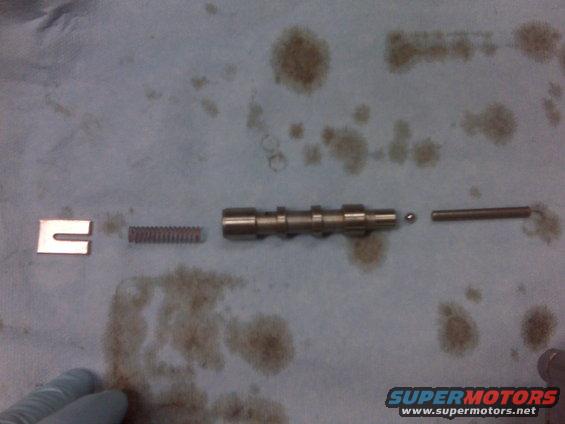
and u pull this stuff out...
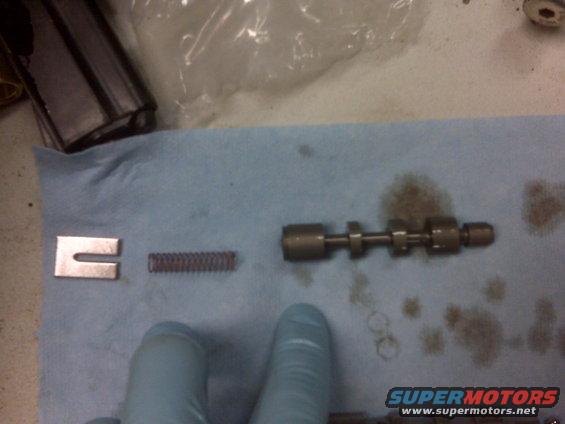
and replace it with this stuff, but only if the new valve is LONGER than the original..(THIS MOD IS SO I CAN PUT IT INTO 1ST AT ANY SPEED AND HOLD IT TO ANY SPEED)
On this next valve I had issues gettin the "cap" out, but they are threaded, and low and behold, the bolts that hold the valve body in the trans, are the same thread size as the threads in the cap..

Than u put a PLAIN tight wound spring in there and put the cap back in, I just now realized, I forgot to take pics of how to remove the spring clips that hold that in.. it just pops out with a little pull with a small pick, just dont let it go flyin and loose it..
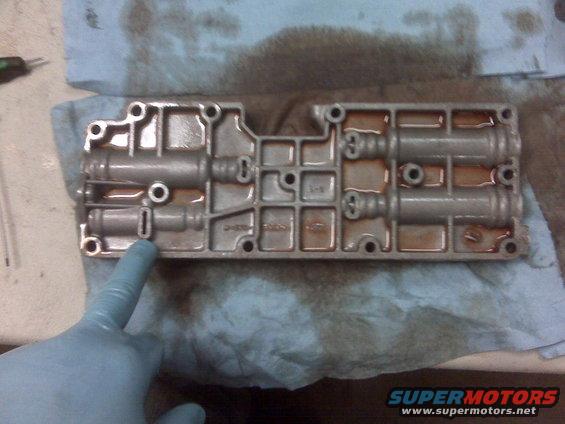
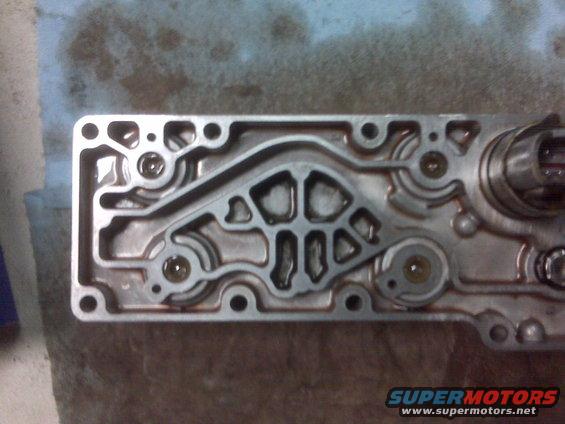
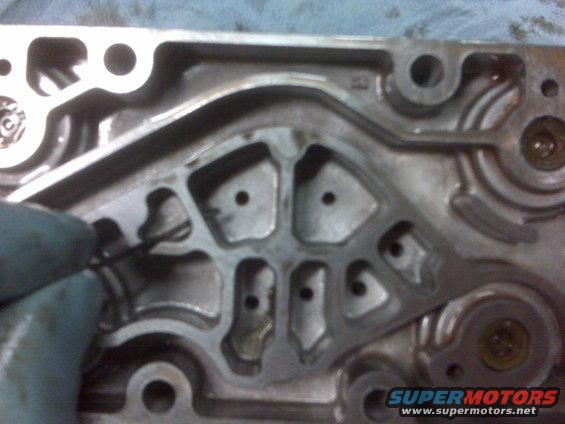
Next up is the Accumulator valve body. Look at this side, if there is a slot there like there is here, u flip it over, and move on, if not, u have to drill two holes there.
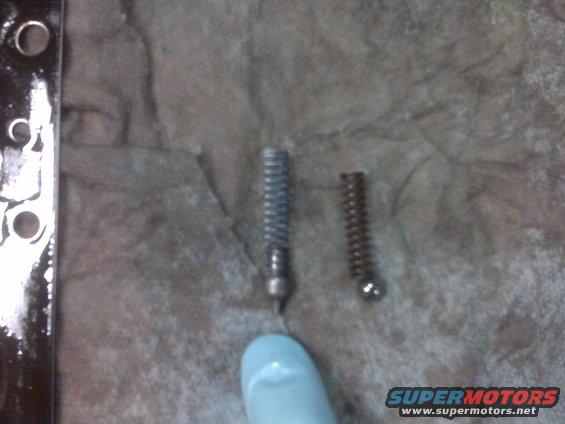
Pull out the 4th accumulator, notice the broken spring.. Its a common problem for them to break. toss the old springs and, install three orange springs. Missing pic for that, but its the same as a later pic...
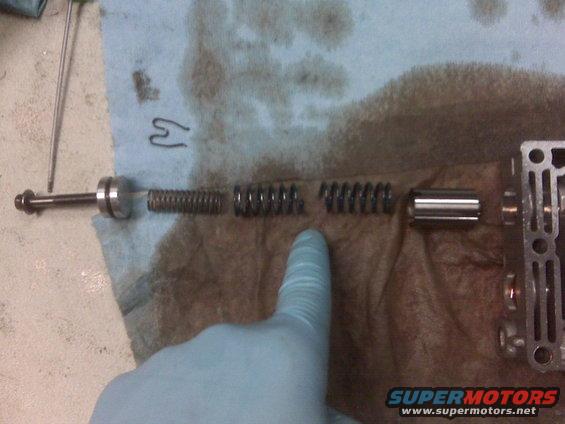
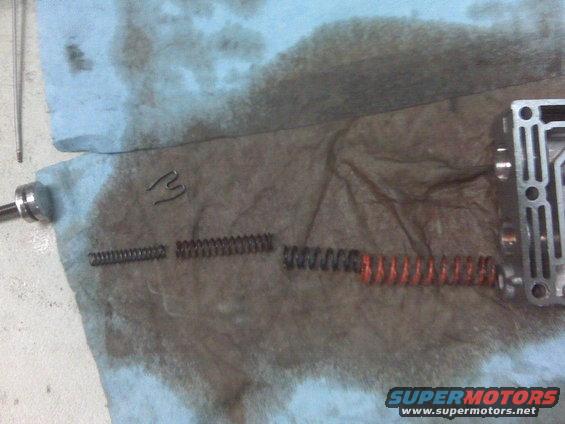
Next pull out the 3rd accumulator,toss the springs and install these springs, silver, orange, white, and orange, they all fit inside of eachother. u can also see the spring clip in this pic...
Next up there is some more stuff to pull out of the 2nd accumulator.. this pic shows what u pullout,

In this pic it shows u what u put back in, the far left piece is replaced, the spring just to the left is reused, and that clip goes back in, than u replace the other other springs with three orange springs and a silver one.

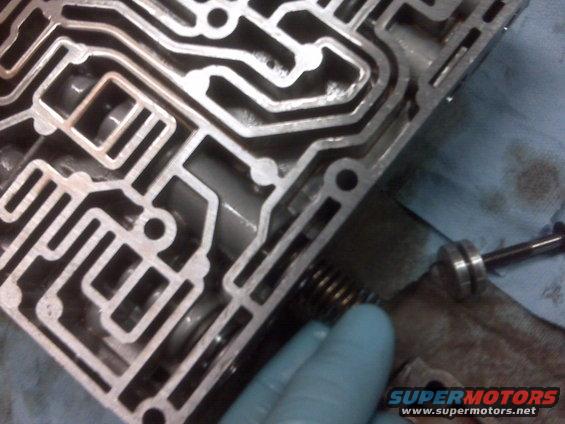
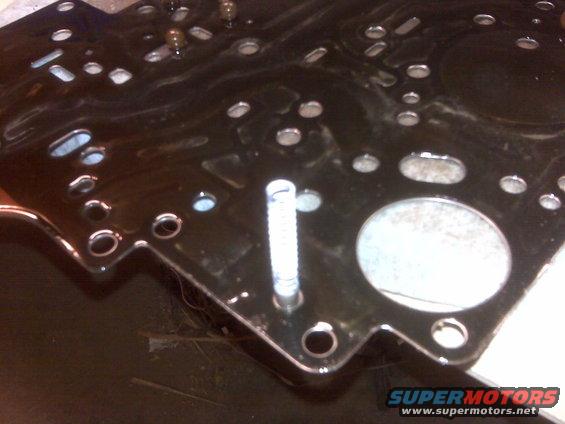
In the last part for this valve body is to add this spring into it.

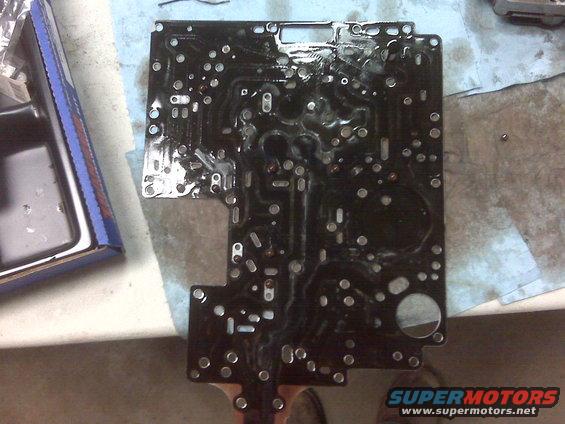
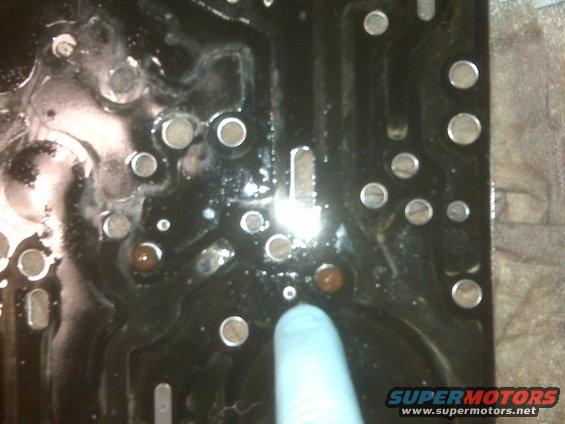
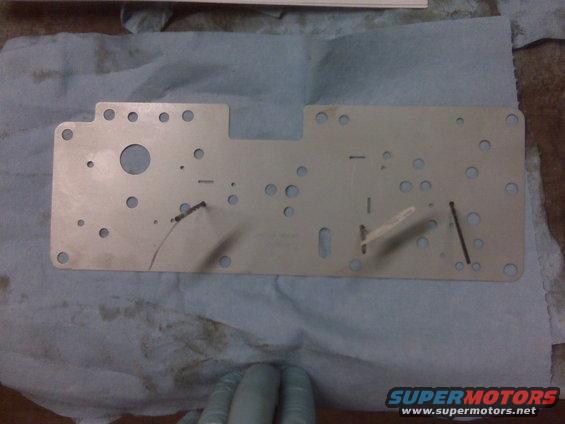
what i did next was pull the Solenoid pack, along with the separator plate. set the pack off to the side. U have to be VERY careful when u pull the plate, so u dont drop all the check *****.
U have to drill this hole out to .081
along with this one.
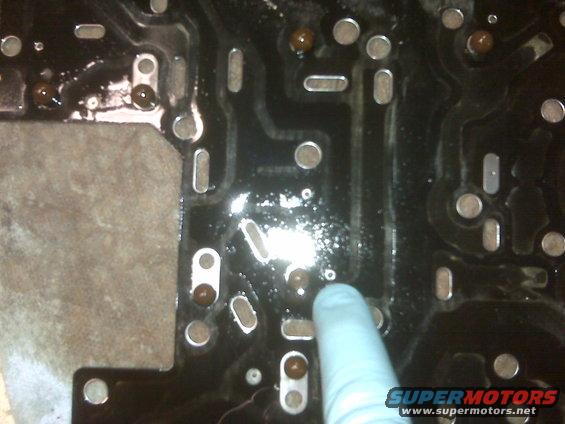
on mine the check ***** stayed in the original locations, but on some u will have to move them. there is a good pic in the instructions.
u also have to replace the EPC relief with a new supplied one.. Im pointing to the new one, its next to the old one
and here is where it goes.
Next up is the Solenoid pack.. If it looks like this, u will have some drilling to do... a 1/8 th inch bit is what u will need.
When u are done drilling it should look like this. 7 holes total, one where I have the little piece of wire stuck through it, so u can see where it is.
And the last piece to mod is the supplied Calibration plate. U have to drill out 3 holes.. I chose .125(1/8th inch) for the 2nd and 4th, and .112 for the 3rd. in the pics, i have drill bits stuck in the holes that need drilled, the far left one is 2nd than 3rd, and last on the right is the 4 th. That is the "a lot firmer" shift according to Transgo..
Than u install all that stuff back into the trans.. The bolts get snugged down to 80-100 inch pounds. Put the oil pan on and fill back up with fluid. I would suggest draining the converter too. there is a rubber plug on the bottom of the bell housing that u remove to access a drain plug, if u cant see the plug, just bump over the motor a bit at a time untell u can see it.. Than fill it back up, I started with 16 qts... start it up, shift it through the gears, let it warm up to operating temp, than check the level.. fill it to the full mark. Than take it out for a spin.. I noticed a big difference in the shifts. And thats about it.. I hope that helps u out if u decide to put in a shift kit too...
Next u have to pull the main valve body, and the accumulator valve body. there are alot of bolts(8mm head) and 2 nuts (10mm) on each one. Drop them down, and take them to the bench. Here they are.
Start with the main valve body..
I for got to take a pic of how to identify if u have a 2nd type a first type valvbody, but i have a 1st type valve body, so u flip it over, and u will see this.
there is a retainer in this spot
and u pull this stuff out...
and replace it with this stuff, but only if the new valve is LONGER than the original..(THIS MOD IS SO I CAN PUT IT INTO 1ST AT ANY SPEED AND HOLD IT TO ANY SPEED)
On this next valve I had issues gettin the "cap" out, but they are threaded, and low and behold, the bolts that hold the valve body in the trans, are the same thread size as the threads in the cap..
Than u put a PLAIN tight wound spring in there and put the cap back in, I just now realized, I forgot to take pics of how to remove the spring clips that hold that in.. it just pops out with a little pull with a small pick, just dont let it go flyin and loose it..
Next up is the Accumulator valve body. Look at this side, if there is a slot there like there is here, u flip it over, and move on, if not, u have to drill two holes there.
Pull out the 4th accumulator, notice the broken spring.. Its a common problem for them to break. toss the old springs and, install three orange springs. Missing pic for that, but its the same as a later pic...
Next pull out the 3rd accumulator,toss the springs and install these springs, silver, orange, white, and orange, they all fit inside of eachother. u can also see the spring clip in this pic...
Next up there is some more stuff to pull out of the 2nd accumulator.. this pic shows what u pullout,
In this pic it shows u what u put back in, the far left piece is replaced, the spring just to the left is reused, and that clip goes back in, than u replace the other other springs with three orange springs and a silver one.
In the last part for this valve body is to add this spring into it.
what i did next was pull the Solenoid pack, along with the separator plate. set the pack off to the side. U have to be VERY careful when u pull the plate, so u dont drop all the check *****.
U have to drill this hole out to .081
along with this one.
on mine the check ***** stayed in the original locations, but on some u will have to move them. there is a good pic in the instructions.
u also have to replace the EPC relief with a new supplied one.. Im pointing to the new one, its next to the old one
and here is where it goes.
Next up is the Solenoid pack.. If it looks like this, u will have some drilling to do... a 1/8 th inch bit is what u will need.
When u are done drilling it should look like this. 7 holes total, one where I have the little piece of wire stuck through it, so u can see where it is.
And the last piece to mod is the supplied Calibration plate. U have to drill out 3 holes.. I chose .125(1/8th inch) for the 2nd and 4th, and .112 for the 3rd. in the pics, i have drill bits stuck in the holes that need drilled, the far left one is 2nd than 3rd, and last on the right is the 4 th. That is the "a lot firmer" shift according to Transgo..
Than u install all that stuff back into the trans.. The bolts get snugged down to 80-100 inch pounds. Put the oil pan on and fill back up with fluid. I would suggest draining the converter too. there is a rubber plug on the bottom of the bell housing that u remove to access a drain plug, if u cant see the plug, just bump over the motor a bit at a time untell u can see it.. Than fill it back up, I started with 16 qts... start it up, shift it through the gears, let it warm up to operating temp, than check the level.. fill it to the full mark. Than take it out for a spin.. I noticed a big difference in the shifts. And thats about it.. I hope that helps u out if u decide to put in a shift kit too...
Laughing Gas
Joined: Jun 2007
Posts: 1,215
Likes: 1
From: Washington
Thanks for the post, I have a shift kit in my 78 with a c4, and would really like to do it to my 94, but im not sure it would be good at this point as it has 170k on it right now. Do you think it would be fine to do a shift kit at this point, or should i rebuild and do a shift kit then.
Thread Starter
|
FTE Chapter Leader
Joined: May 2006
Posts: 11,273
Likes: 100
From: North Dakota
I have 134,000 on mine right now. I put the kit in to make it last longer. The less slip between gears the better to a point anyways. Its really not all that hard, just more steps than with a C6 or C4. Personally I think it will make it last longer.

Thread
Thread Starter
Forum
Replies
Last Post
Evan_P
1987 - 1996 F150 & Larger F-Series Trucks
62
Apr 12, 2019 03:10 AM
AbandonedBronco
1978 - 1996 Big Bronco
17
Oct 27, 2015 07:58 PM
Sooper Camper
1973 - 1979 F-100 & Larger F-Series Trucks
7
Mar 30, 2014 11:58 PM


