


Replacement Steel
Tuned


Joined: Aug 2007
Posts: 458
Likes: 122
From: Maryland
John, here's a repair I did on a 1951 Triumph Saloon that looks like a similar repair and may save you from buying shrinker/stretchers if you don't need them elsewhere. (otherwise they may be a good purchase!)
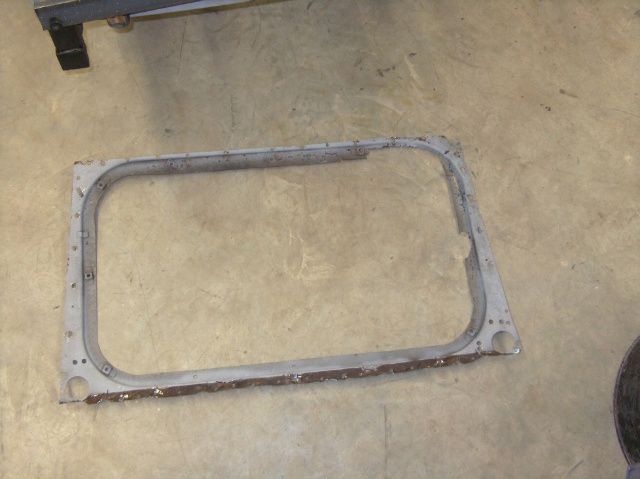
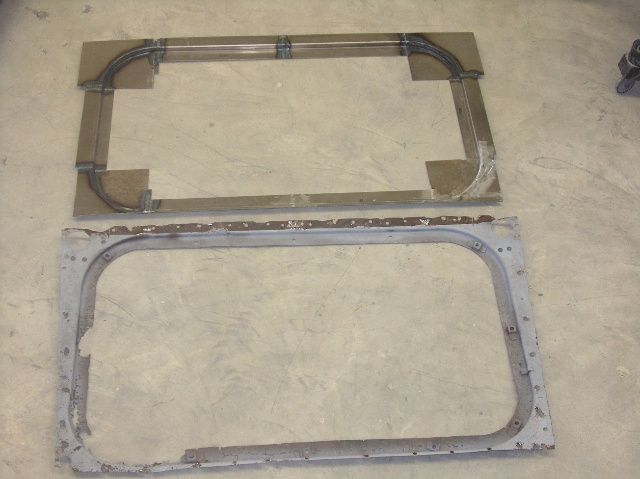
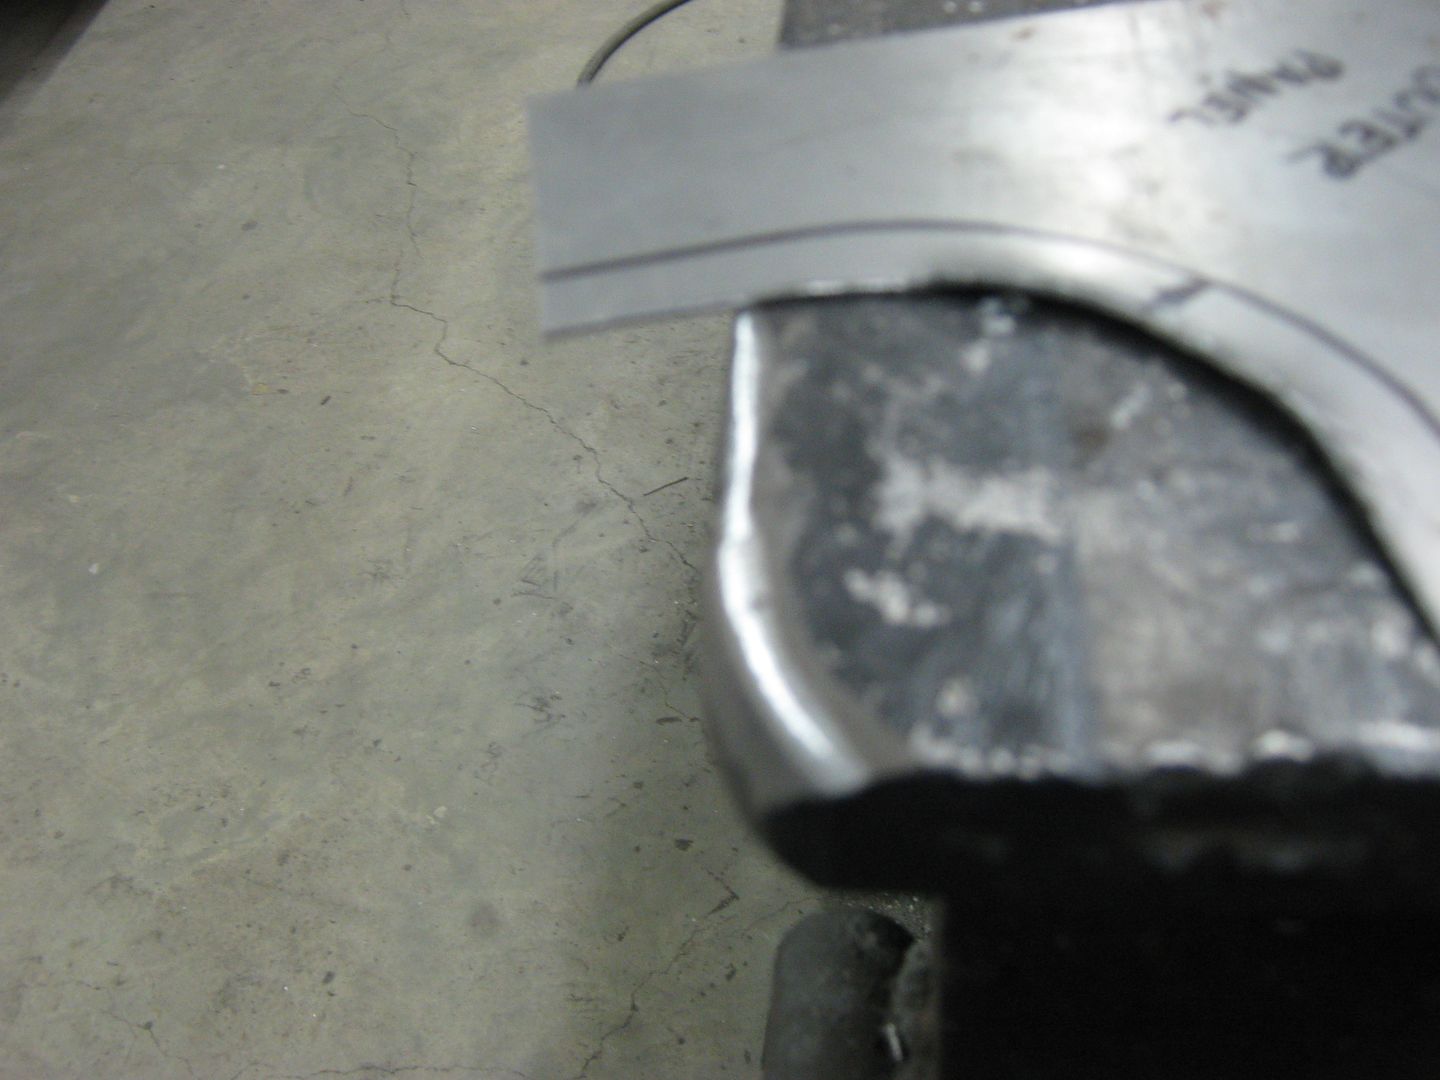
This is out of the trunk area of the car, and the gas tank is supported by this piece, in much the same fashion as the Mustang gas tank.
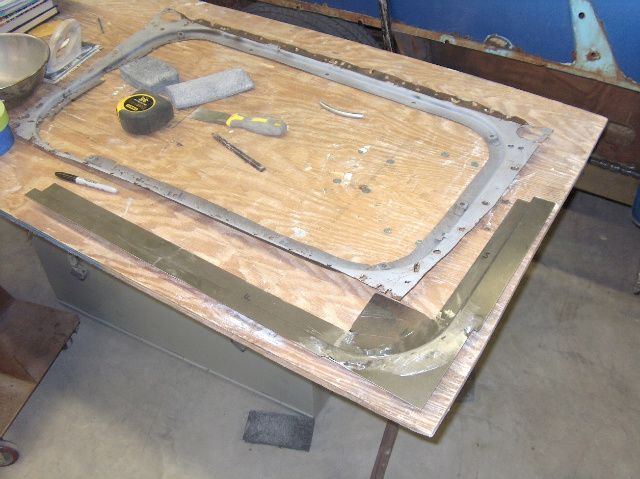
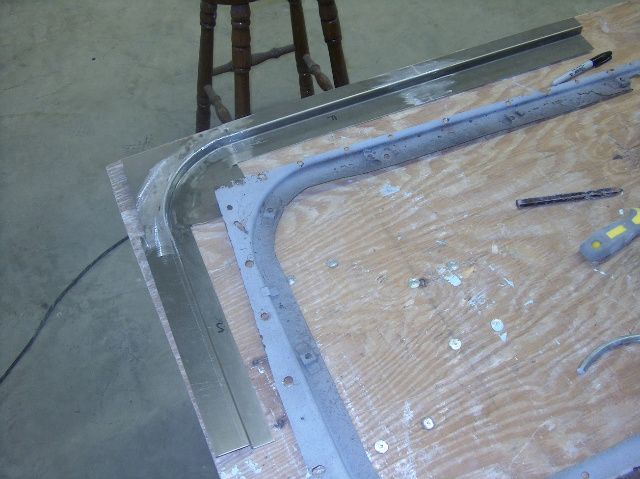
Here I've started the replacement, and as you can see the easy straight pieces were made separate from the corners
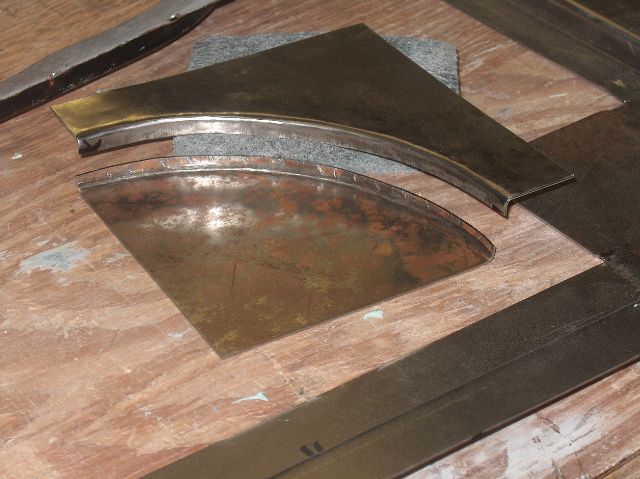
Here's the fabrication of the corners, made in two halves, these were hammerformed over the edge of my welding table. Forming the top piece has a tendency to bow the metal as the flange needs a bit of stretching. This is easily accomplished with a slightly crowned body hammer, striking the flange while it was resting against the welding table, and rolling it around to proceed where further stretching is needed. The lower piece was hammerformed over a solid piece of round steel stock, 2" dia I believe, that was clamped upright in a vise.
All the pieces welded together:
Trimming:
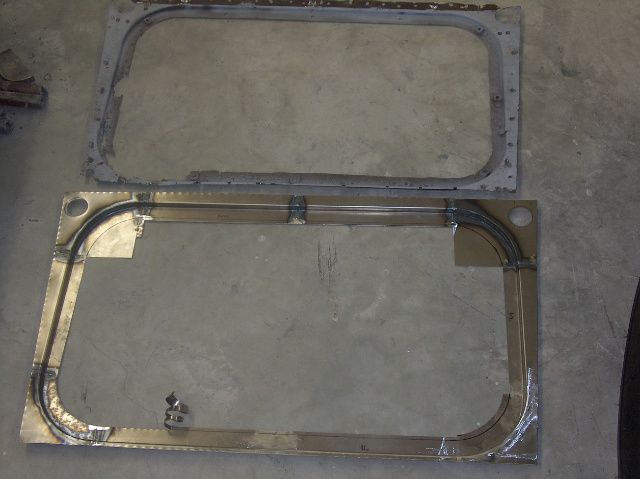
Welds dressed:

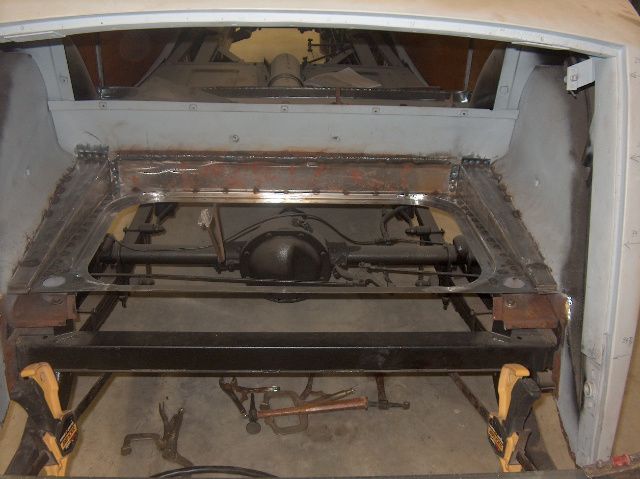
Installed:
A repair piece for your windshield opening could be formed in a very similar manner using nothing more than simple hand tools and your welder. Good luck on your repair and keep us posted on your progress!
This is out of the trunk area of the car, and the gas tank is supported by this piece, in much the same fashion as the Mustang gas tank.
Here I've started the replacement, and as you can see the easy straight pieces were made separate from the corners
Here's the fabrication of the corners, made in two halves, these were hammerformed over the edge of my welding table. Forming the top piece has a tendency to bow the metal as the flange needs a bit of stretching. This is easily accomplished with a slightly crowned body hammer, striking the flange while it was resting against the welding table, and rolling it around to proceed where further stretching is needed. The lower piece was hammerformed over a solid piece of round steel stock, 2" dia I believe, that was clamped upright in a vise.
All the pieces welded together:
Trimming:
Welds dressed:
Installed:
A repair piece for your windshield opening could be formed in a very similar manner using nothing more than simple hand tools and your welder. Good luck on your repair and keep us posted on your progress!
Hotshot


Joined: Jan 2001
Posts: 16,882
Likes: 3,126
From: SE Wisc. (the Rust Belt)
If you're not very good at metal forming the best bet would be to look around for a junk cab with that part in good condition. I'm sure some one would have this piece from a parts cab, place an ad in the classifieds. That section wouldn't cost much to UPS.
Tuned
Joined: Aug 2007
Posts: 458
Likes: 122
From: Maryland
John, it's been a few years since I did that job, and I didn't do very well explaining the forming of the corners, so I went out in the shop this evening and thought I'd do better this time around.
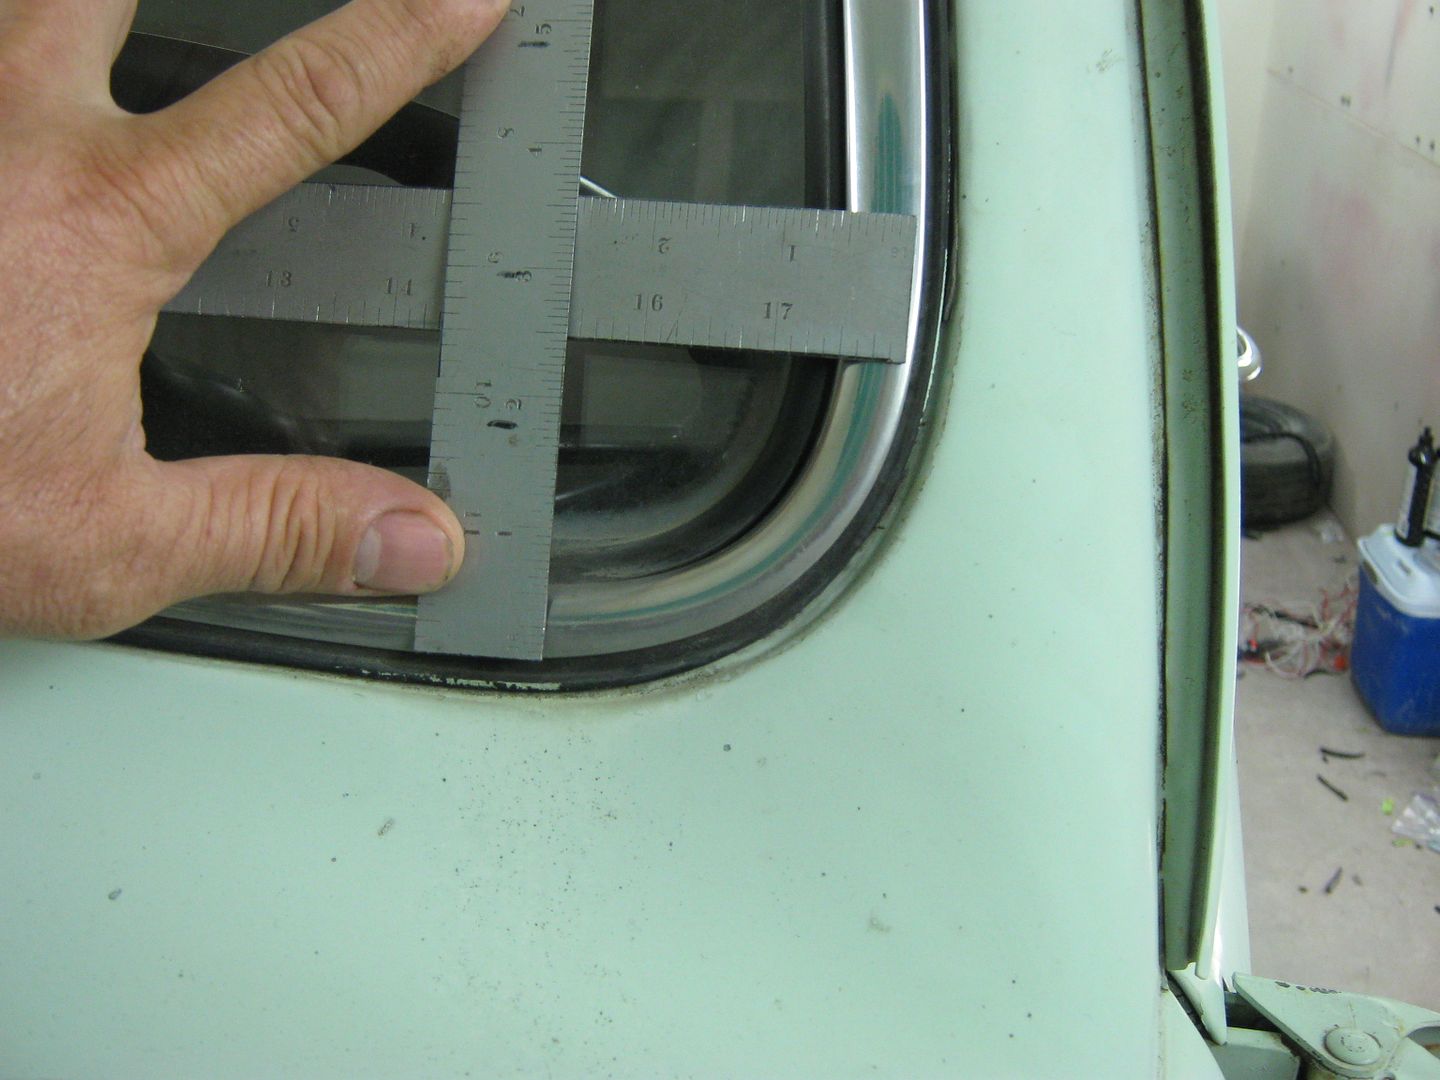
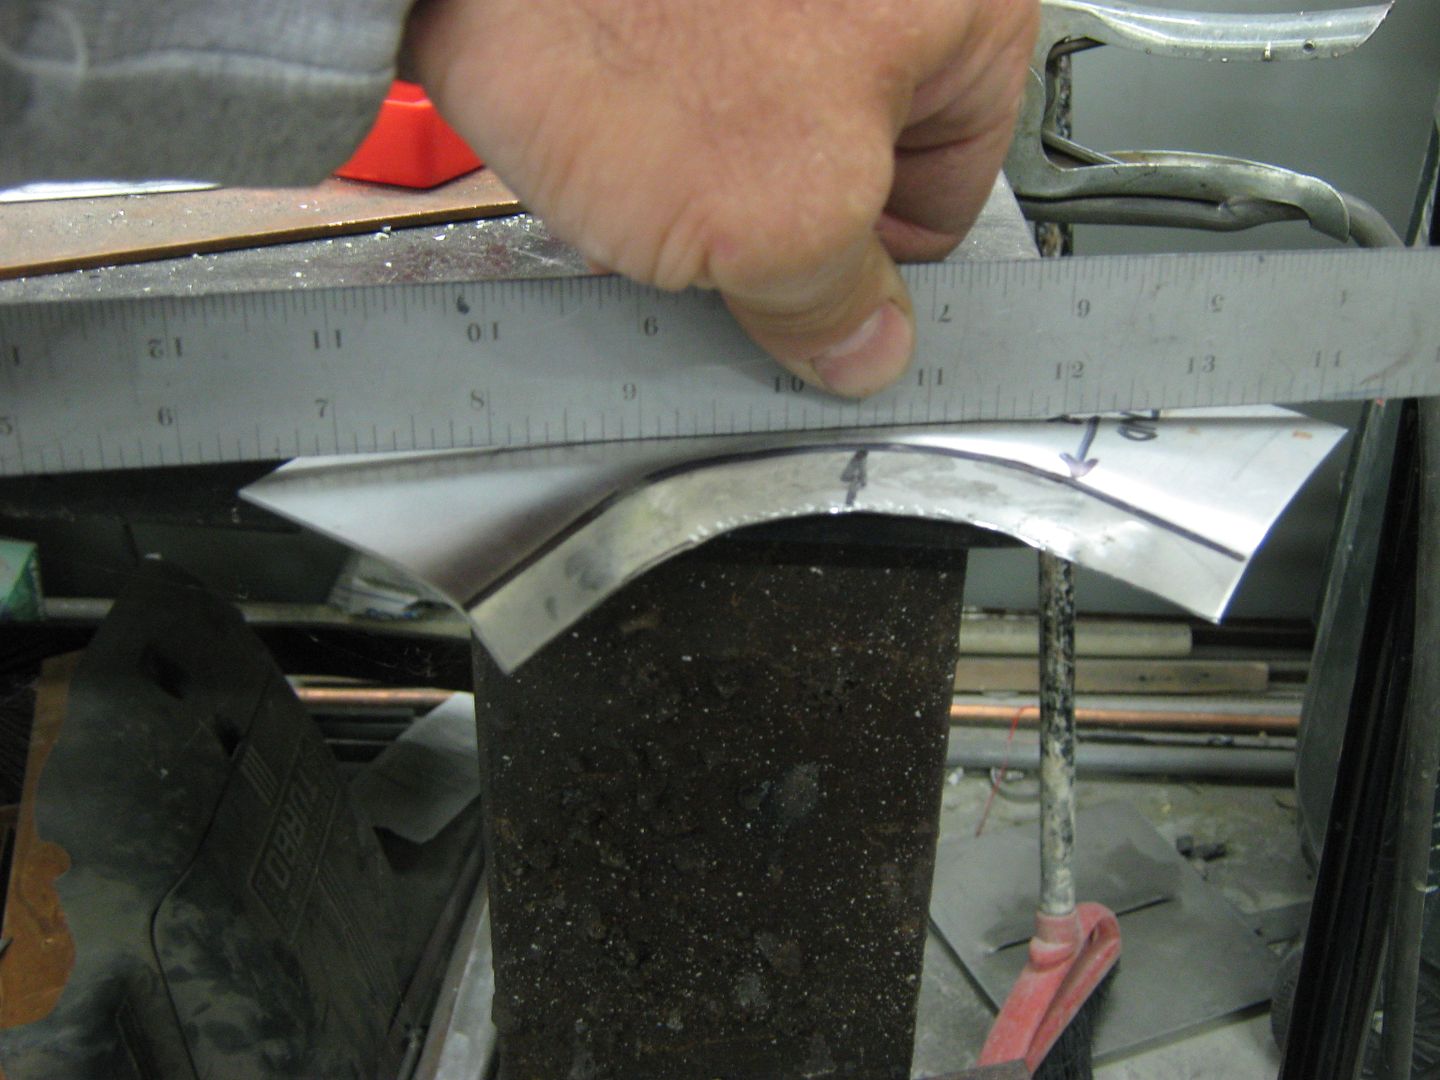
I just so happen to have a 52 sitting here, although my w/s is still intact, so I'm guessing at about a radius of 2.5"
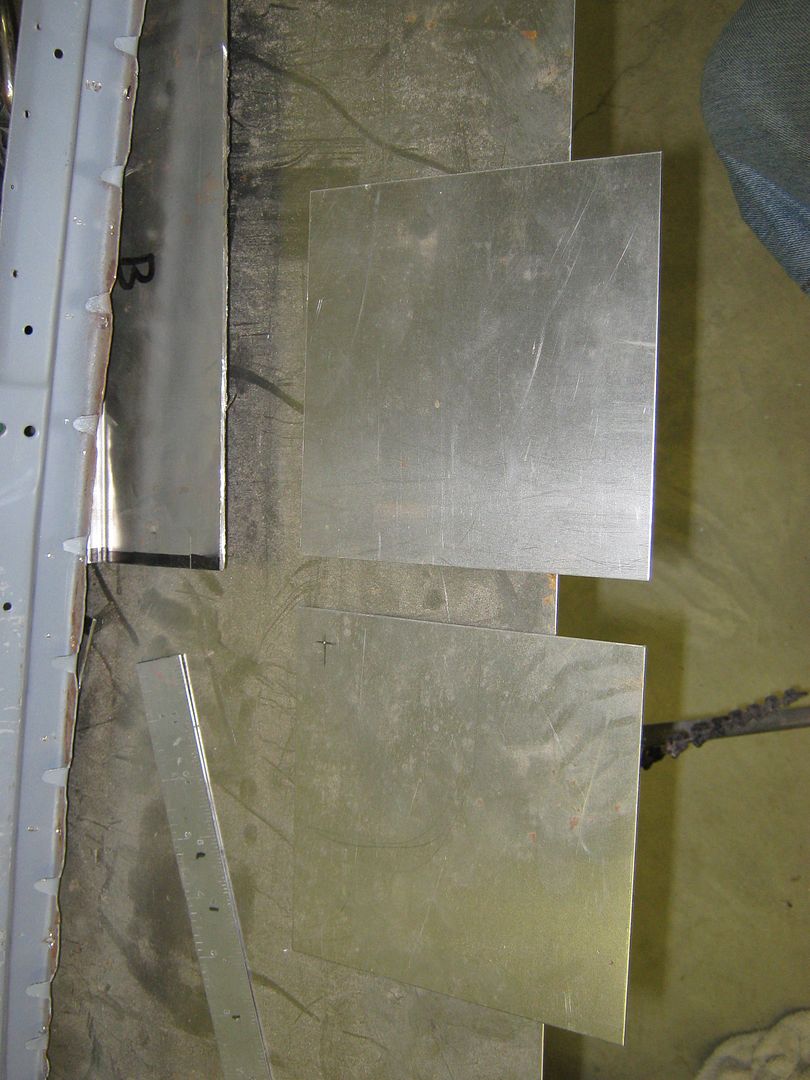
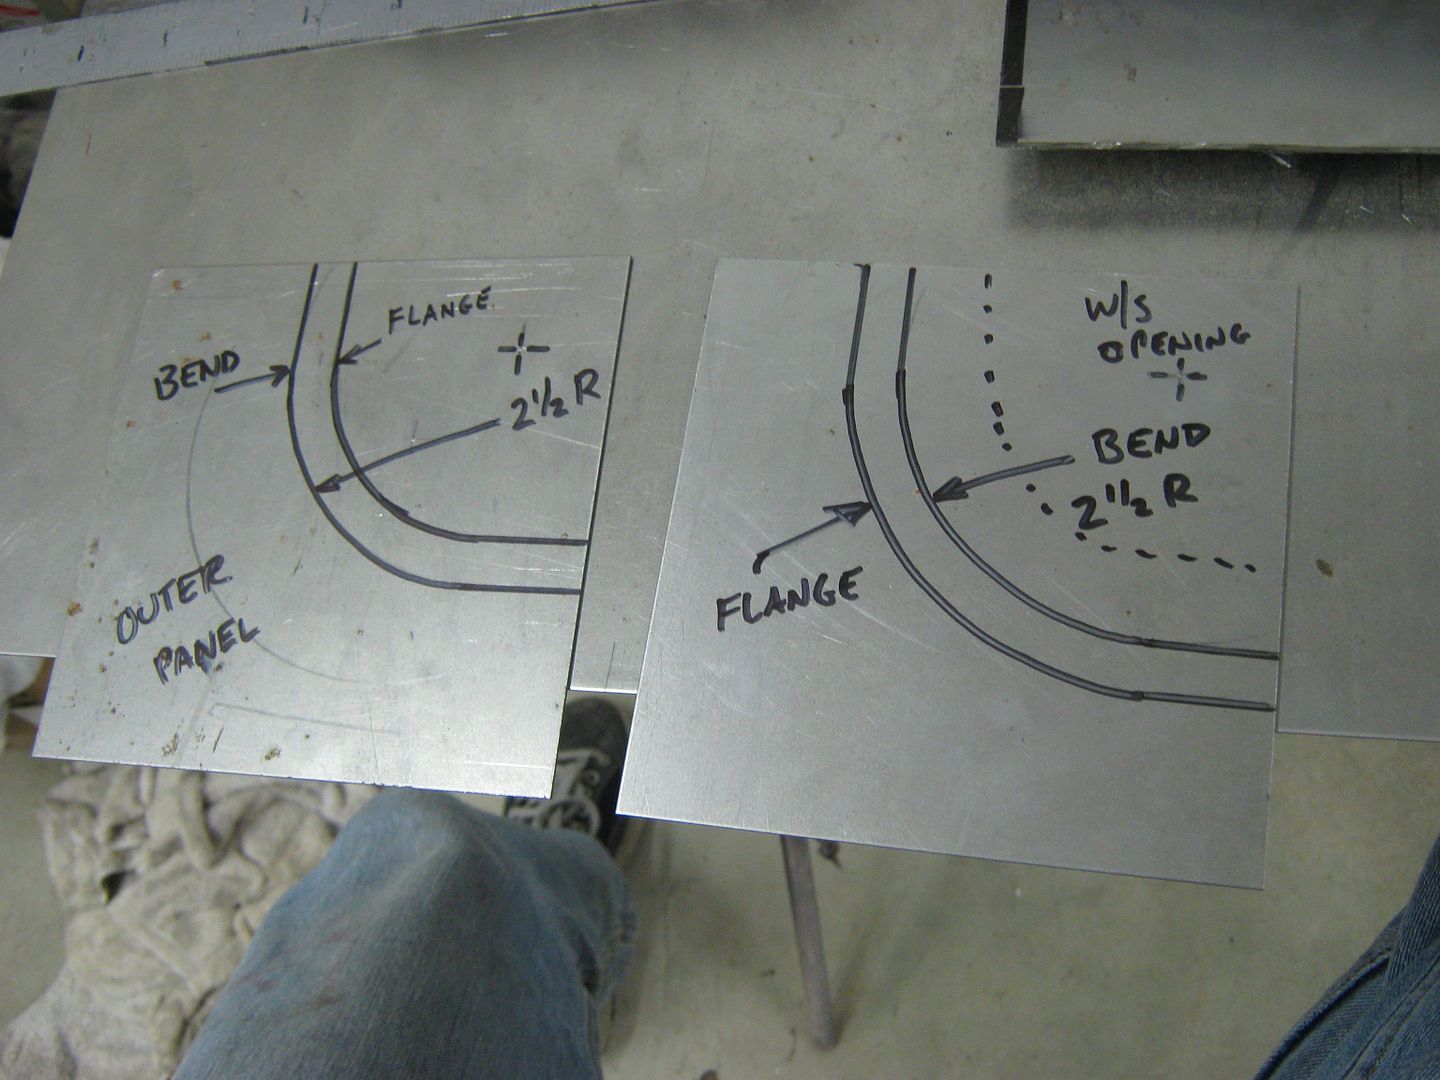
I'll use some 5-1/2" square pieces to make the inner and outer corners. This is 18 ga CRS. used a center punch to keep the compass point form slipping.
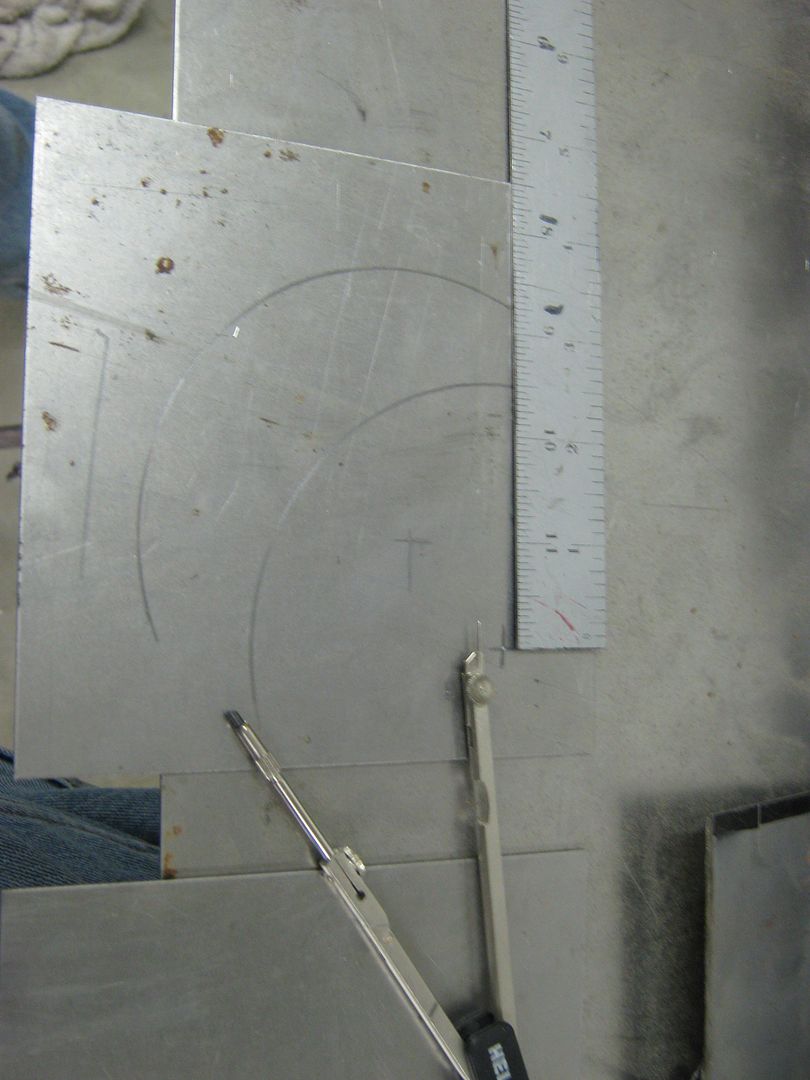
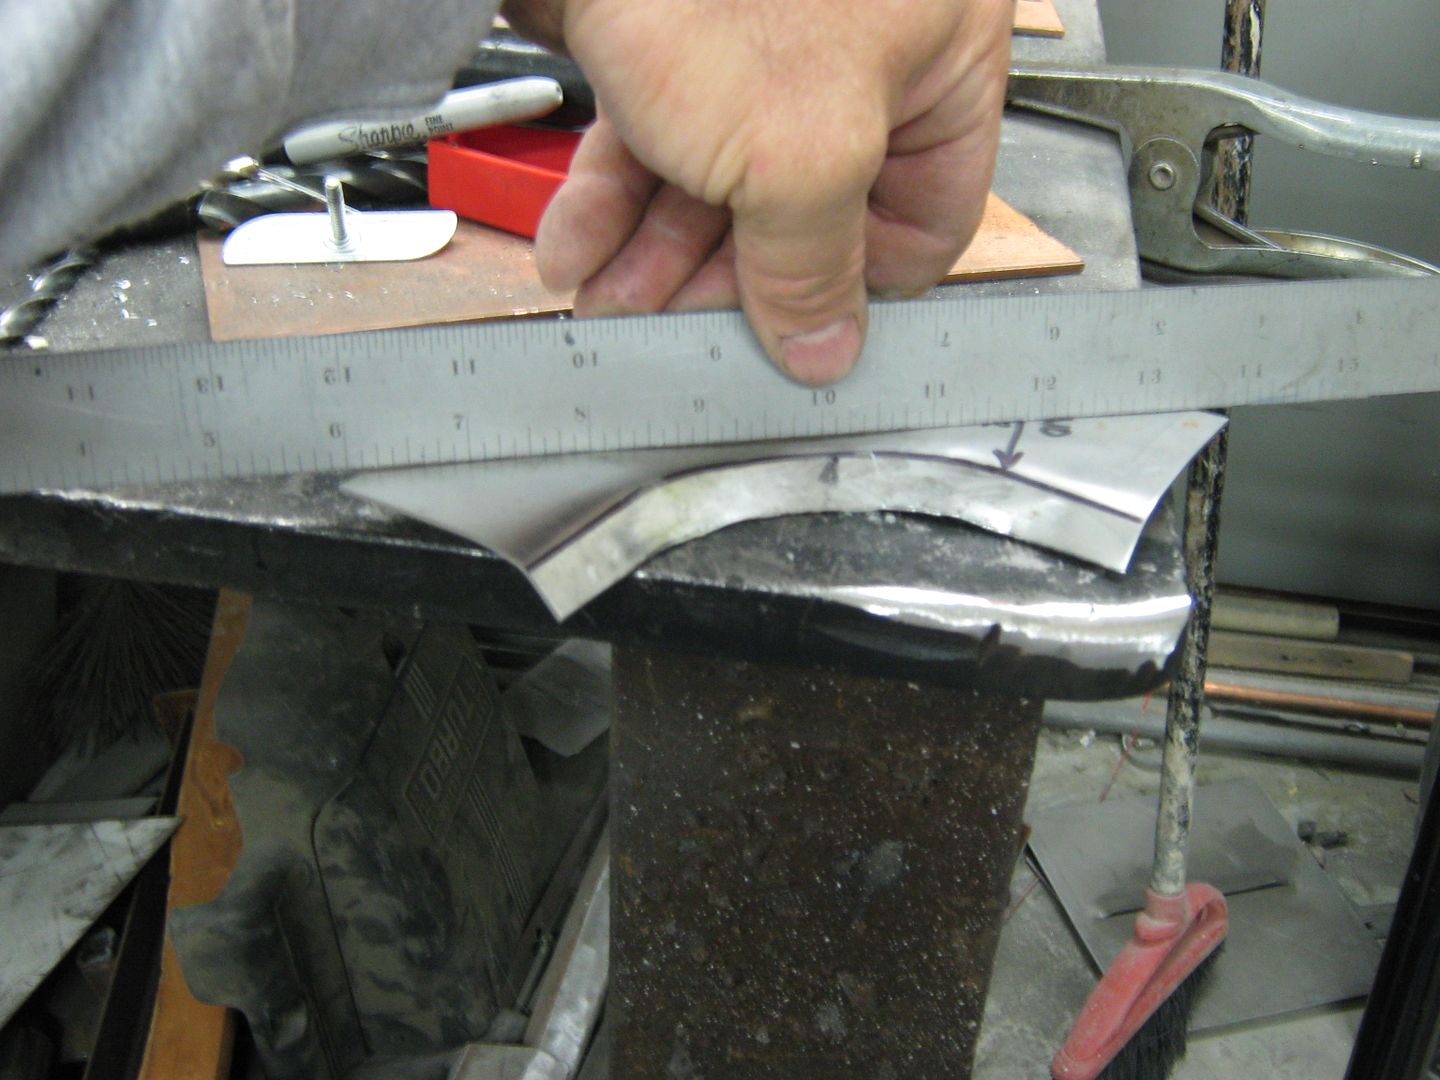
Now mark this out with a sharpie, we'll want to be able to see the mark for awhile
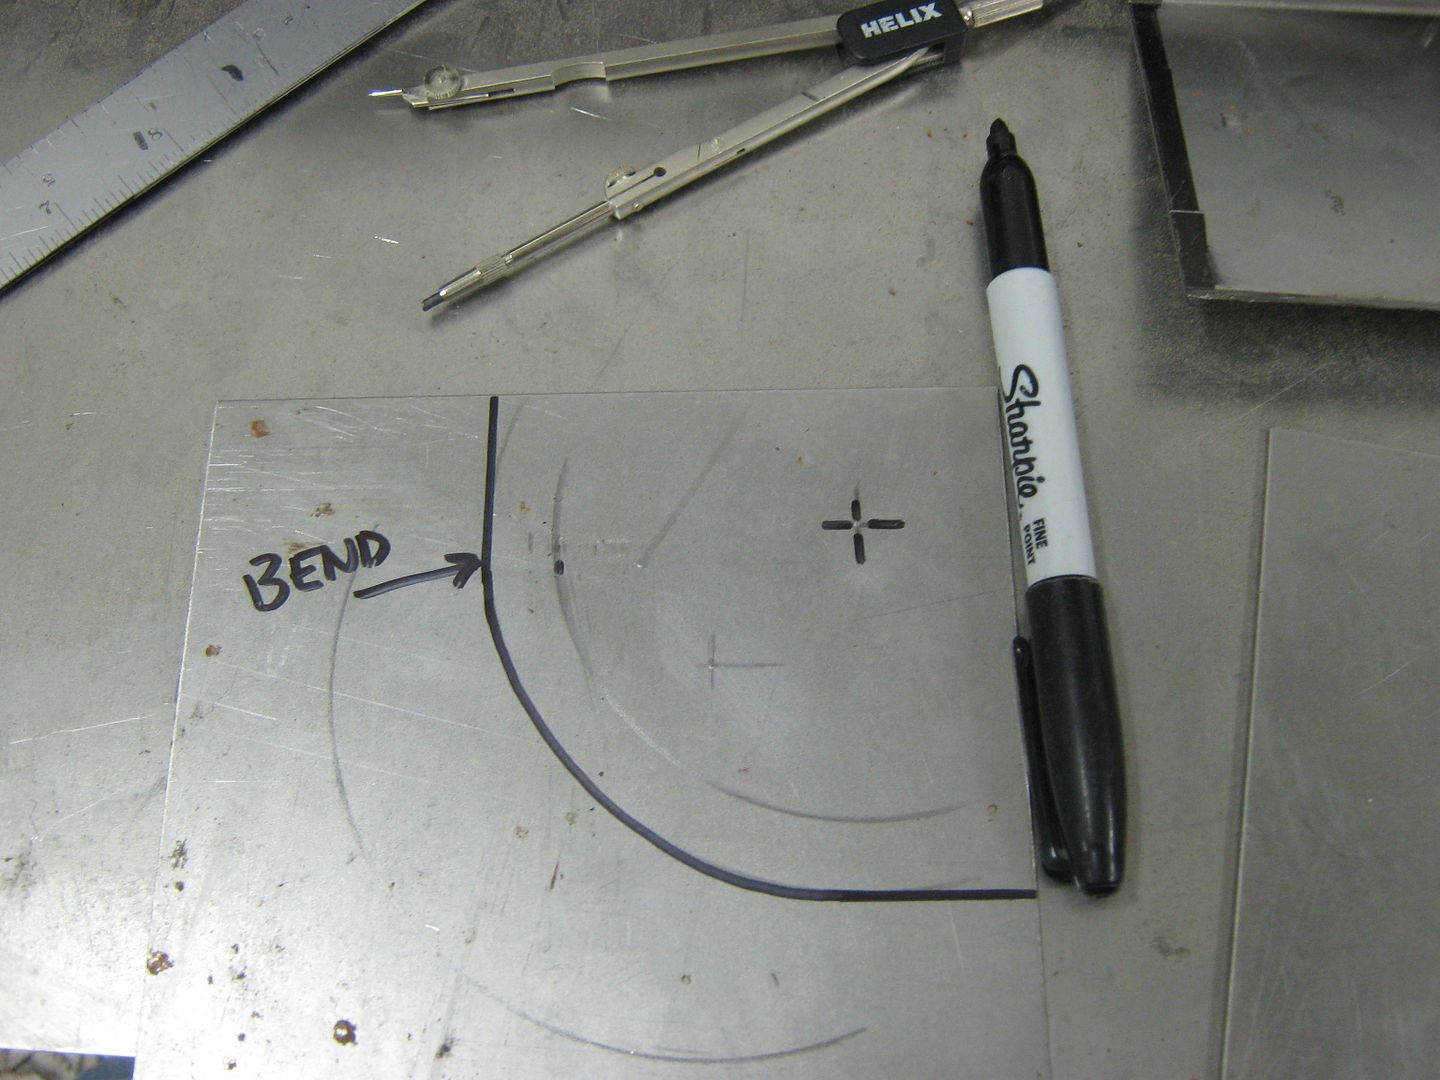
Now take the measurement of the depth of the windshield mounting flange. If it sets back from the outer edge say, 3/4", I'd make the flanges on each of these corner repairs 1/2" to allow some trimming.
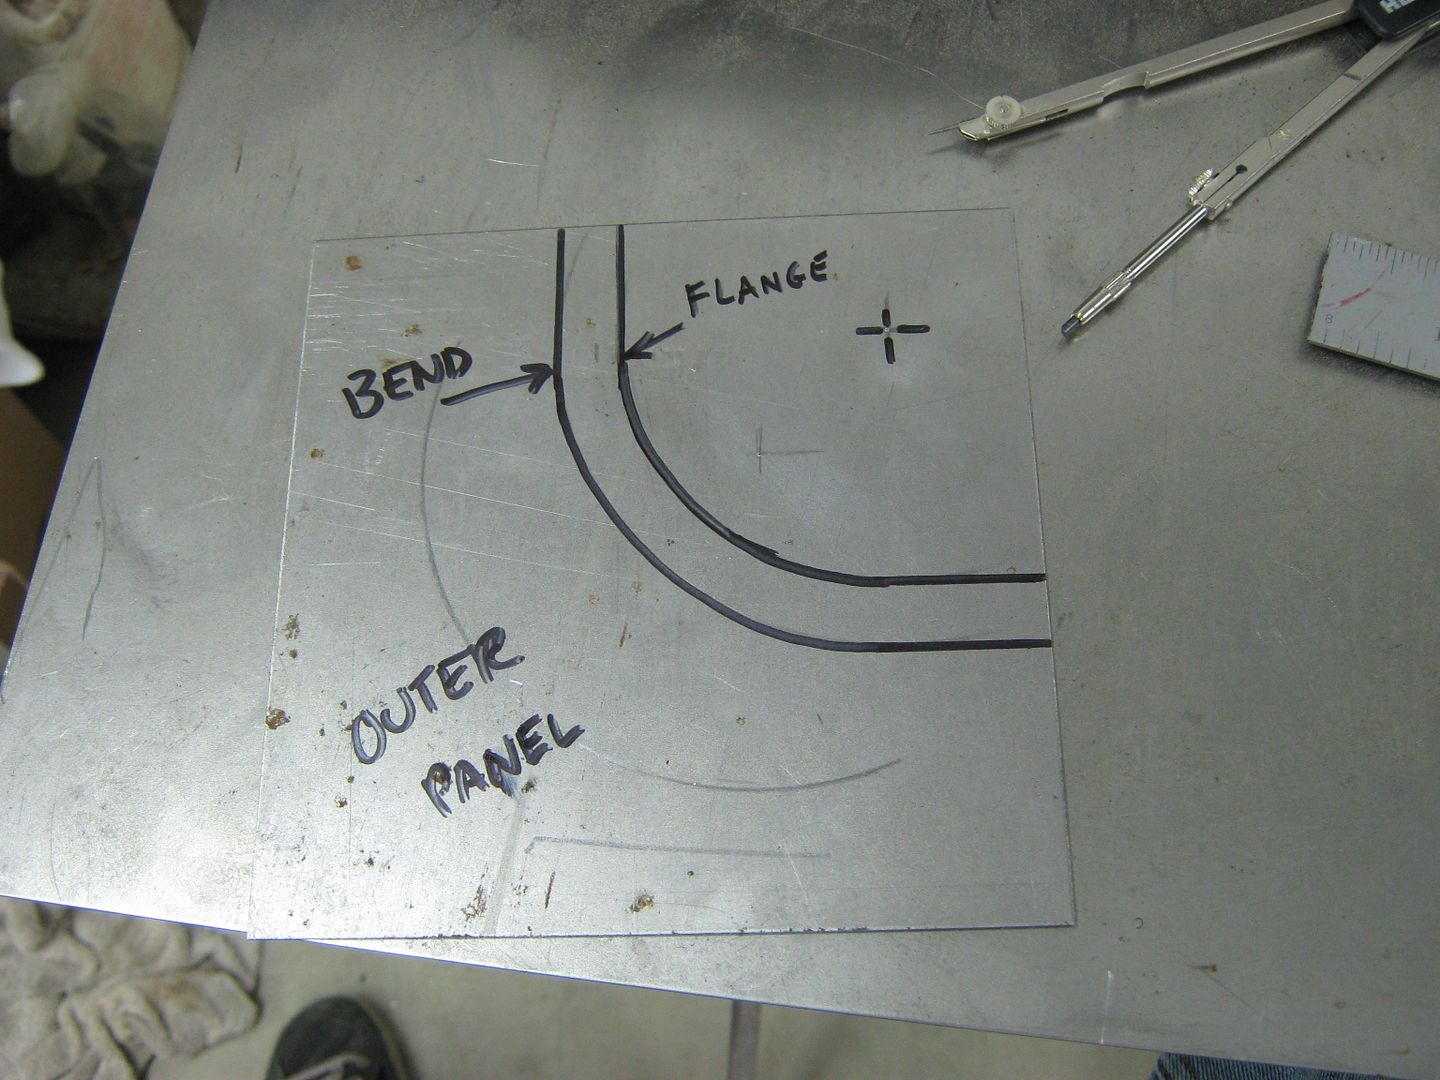
Now repeat for the other piece.
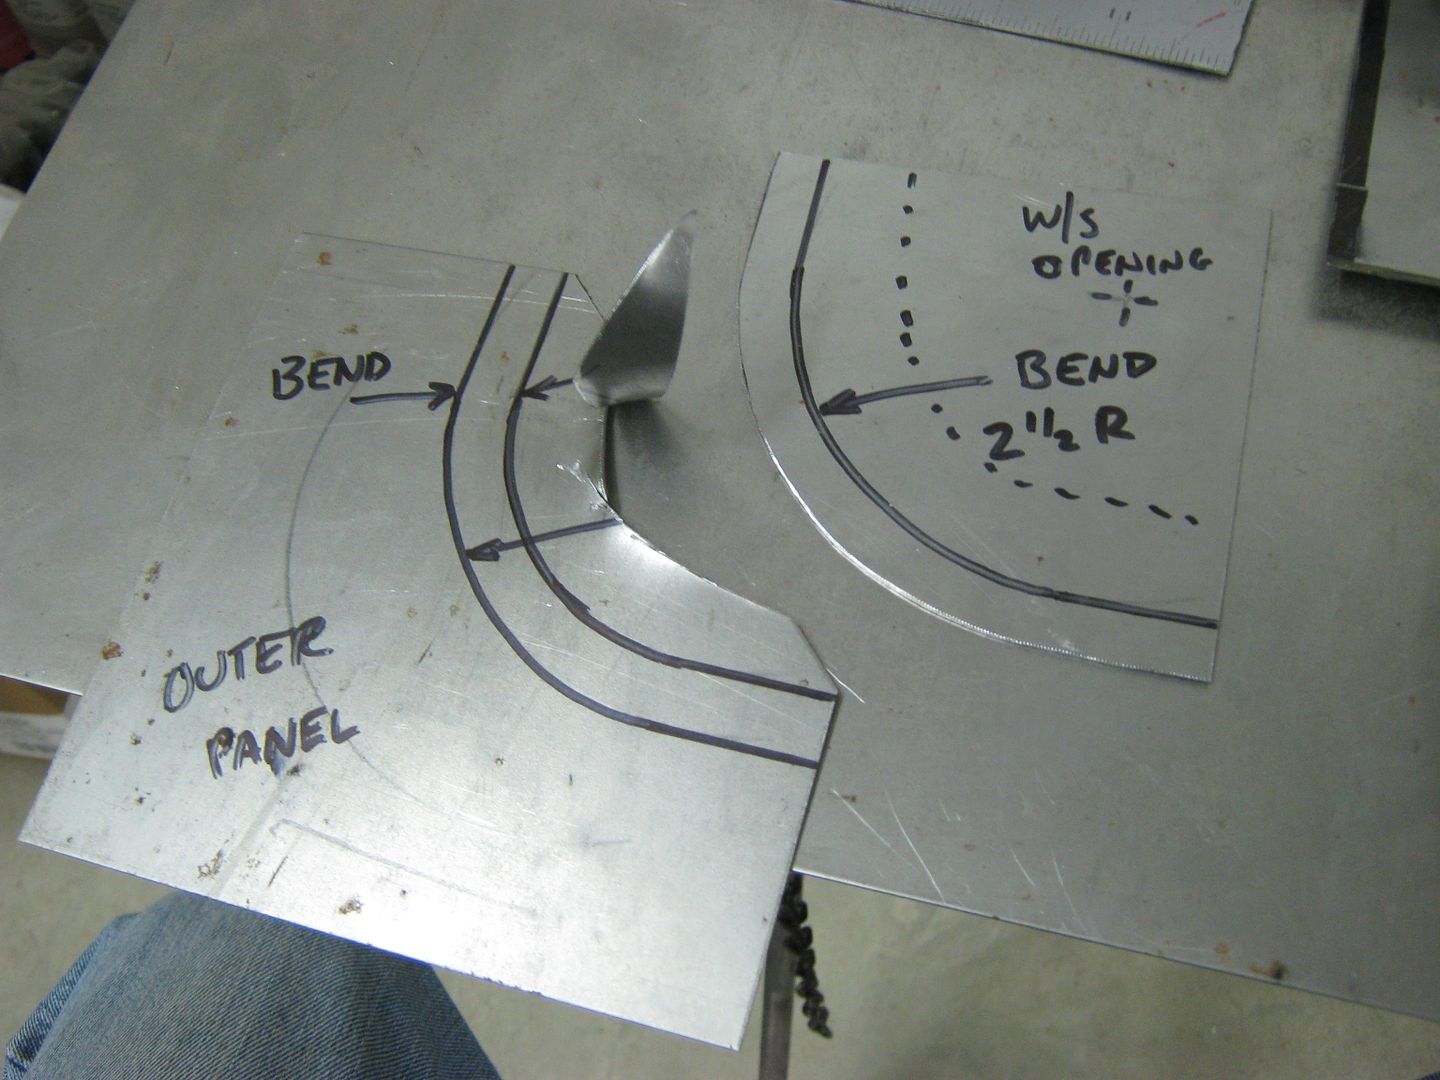
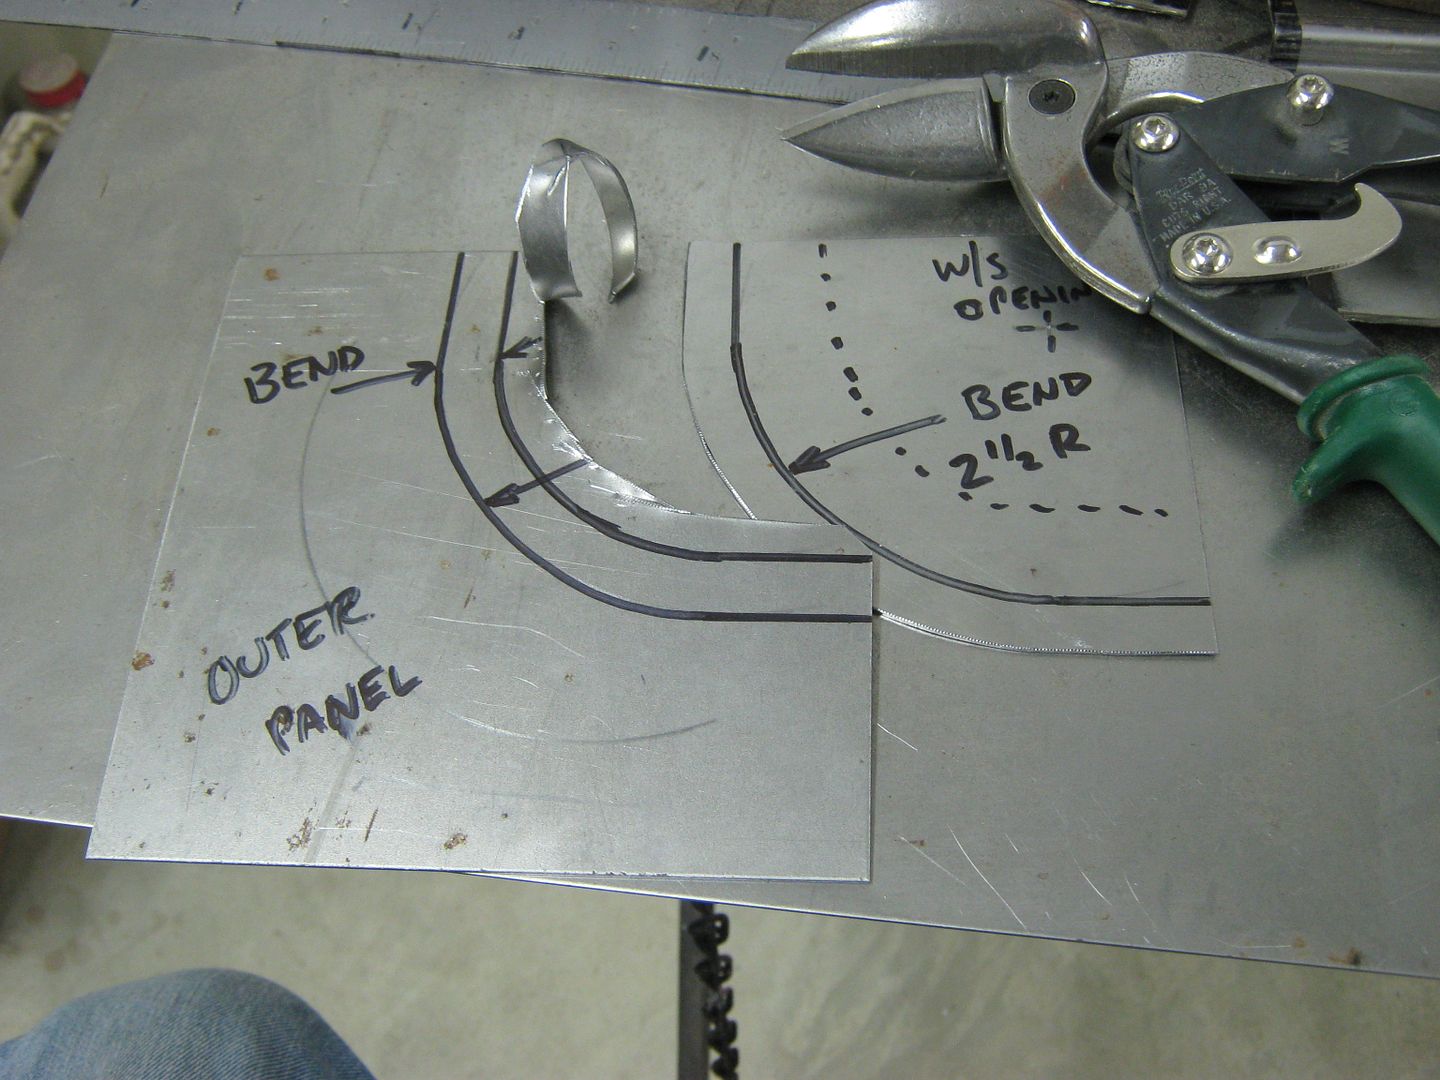
When trimming the excess of an inside corner with tin snips, you'll find multiple cuts will help you to get rid of the bulk so the final cut is pretty accurate.

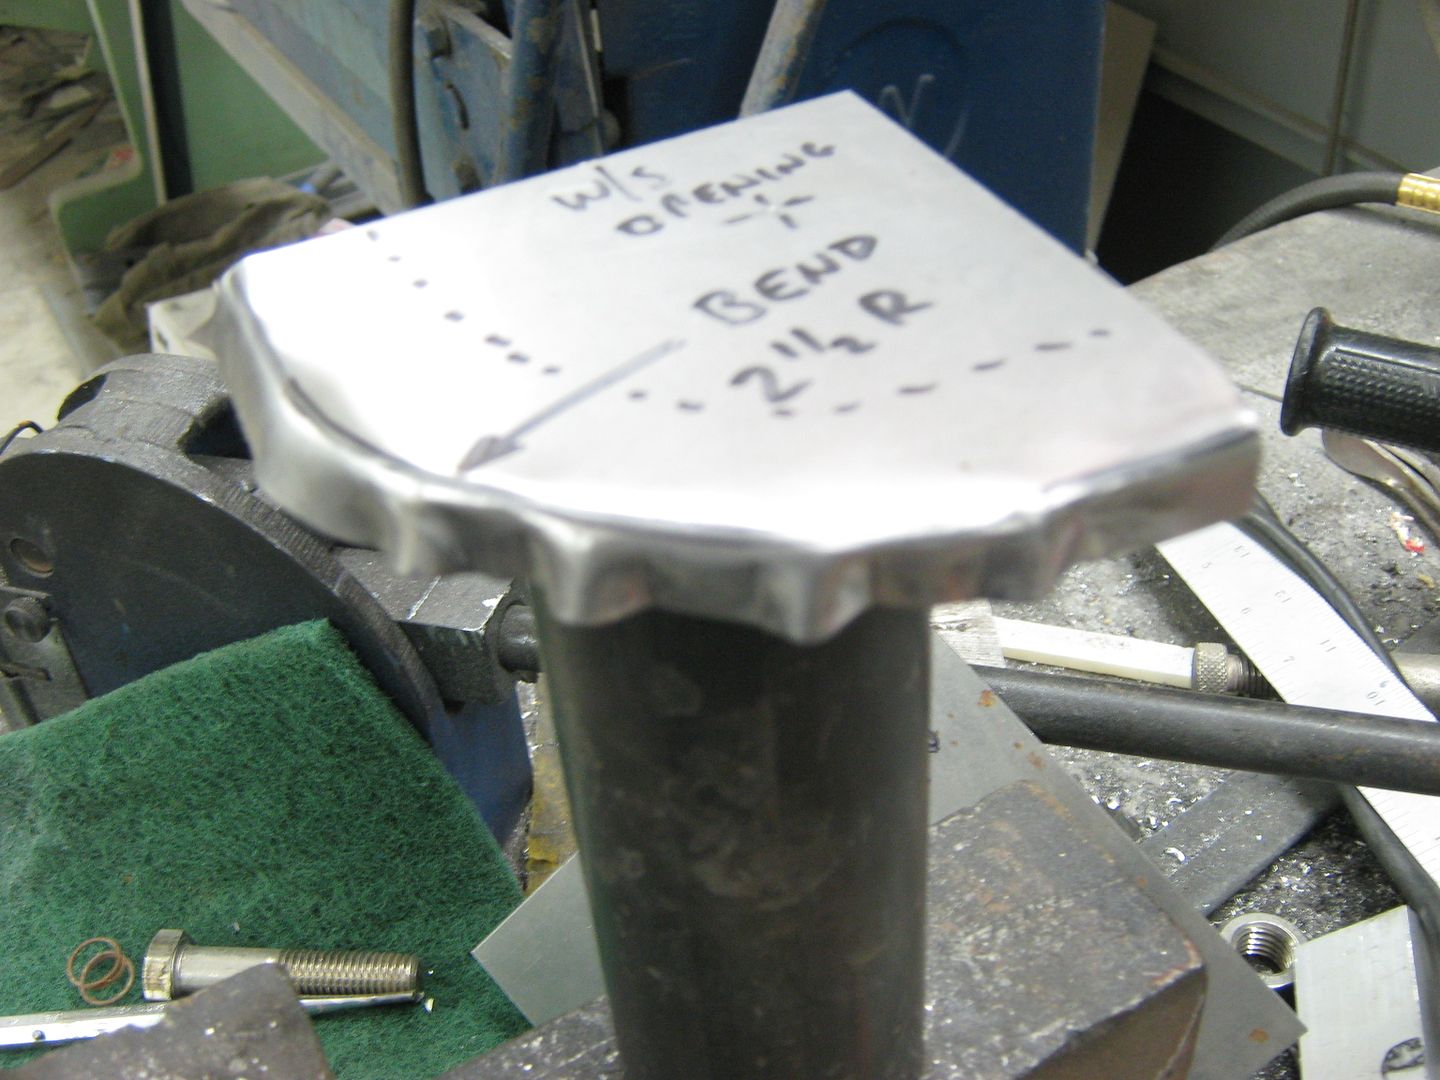
Here's my 2" dia hammerform I was speaking of before. As technical as this stuff is") you can use whatever is handy and works.
you can use whatever is handy and works.
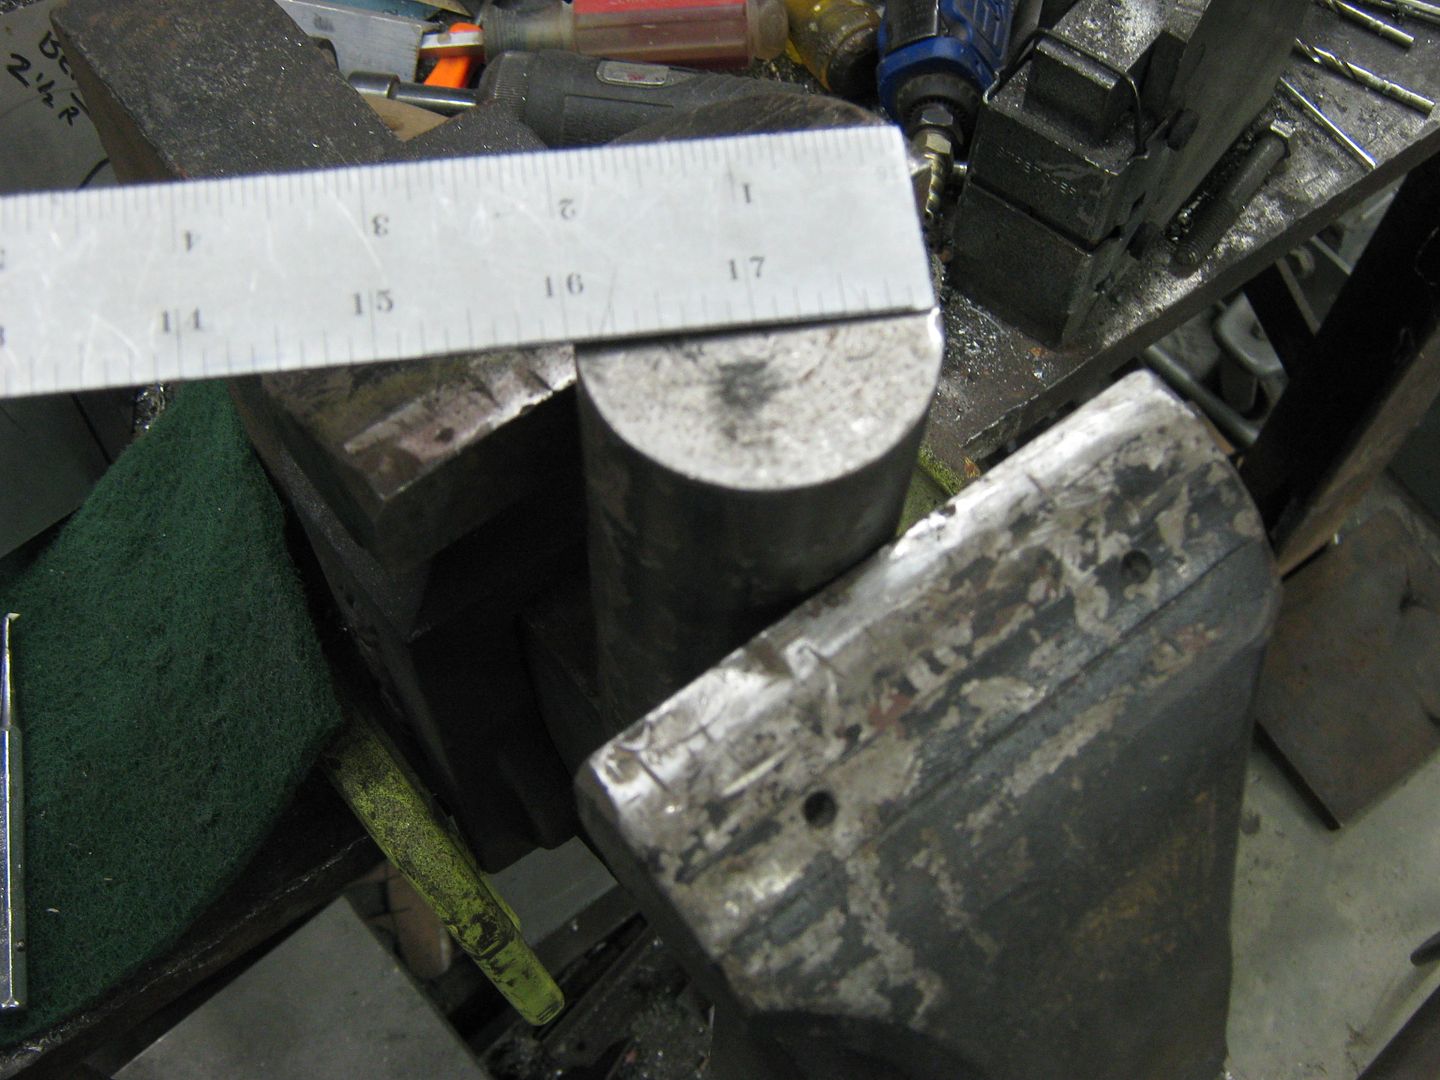
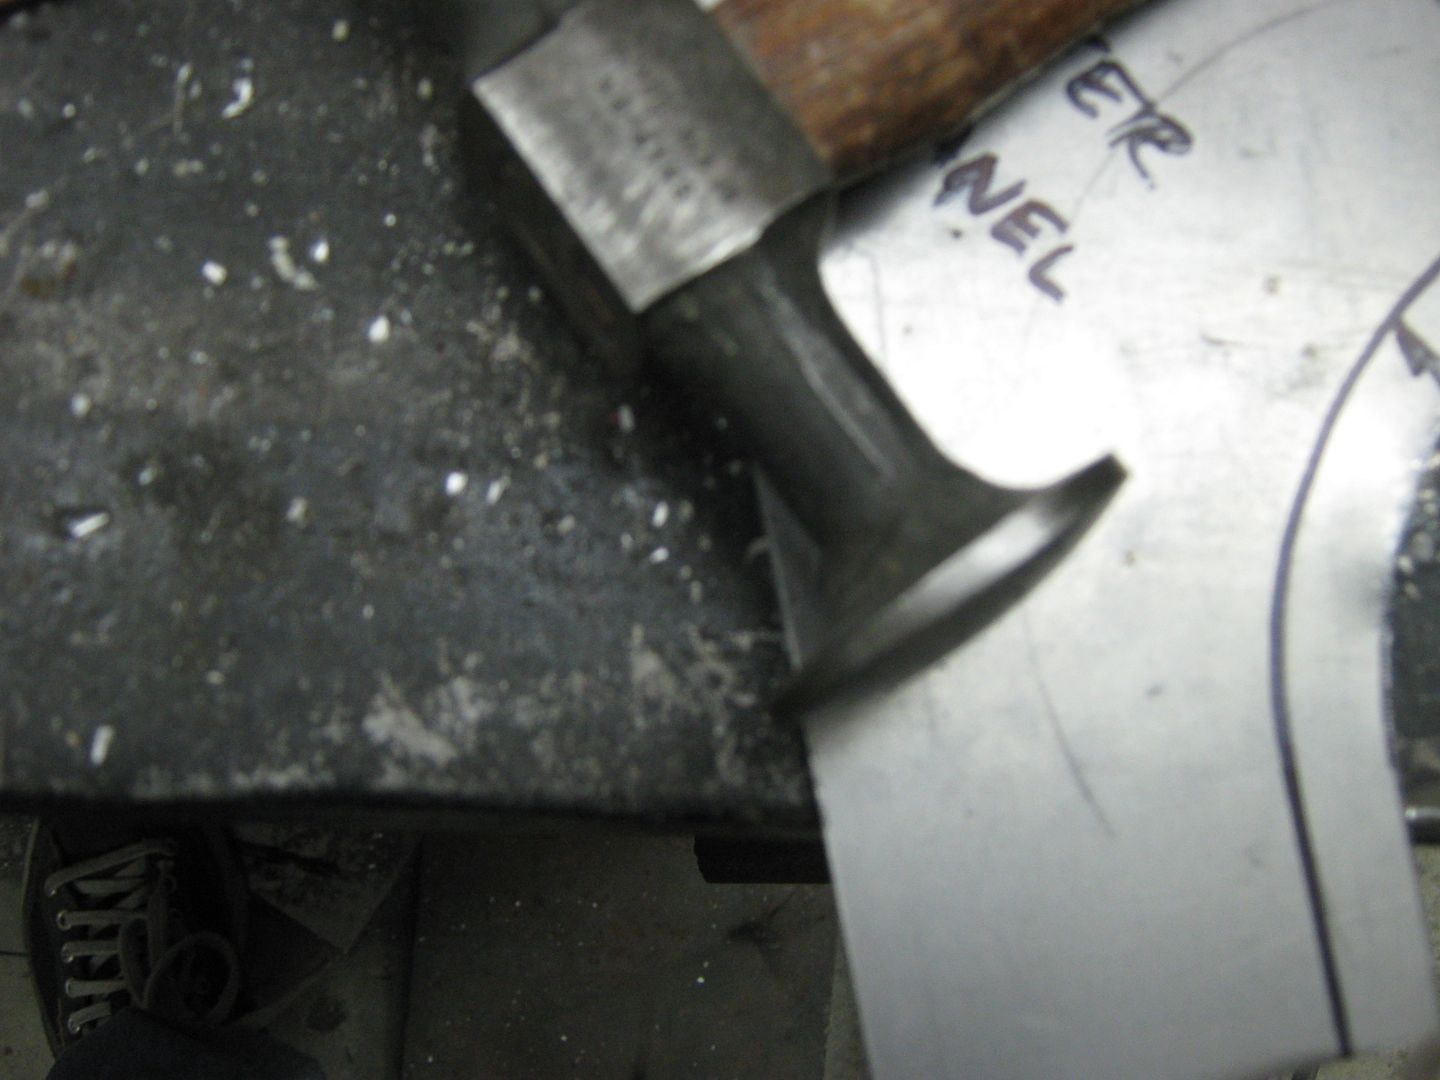
I keep the line up top where I can see what's going on. The first tap with the hammer will show if you are off from your bend line, as you can see. This will show where you are so you can readjust your placement with the next tap.
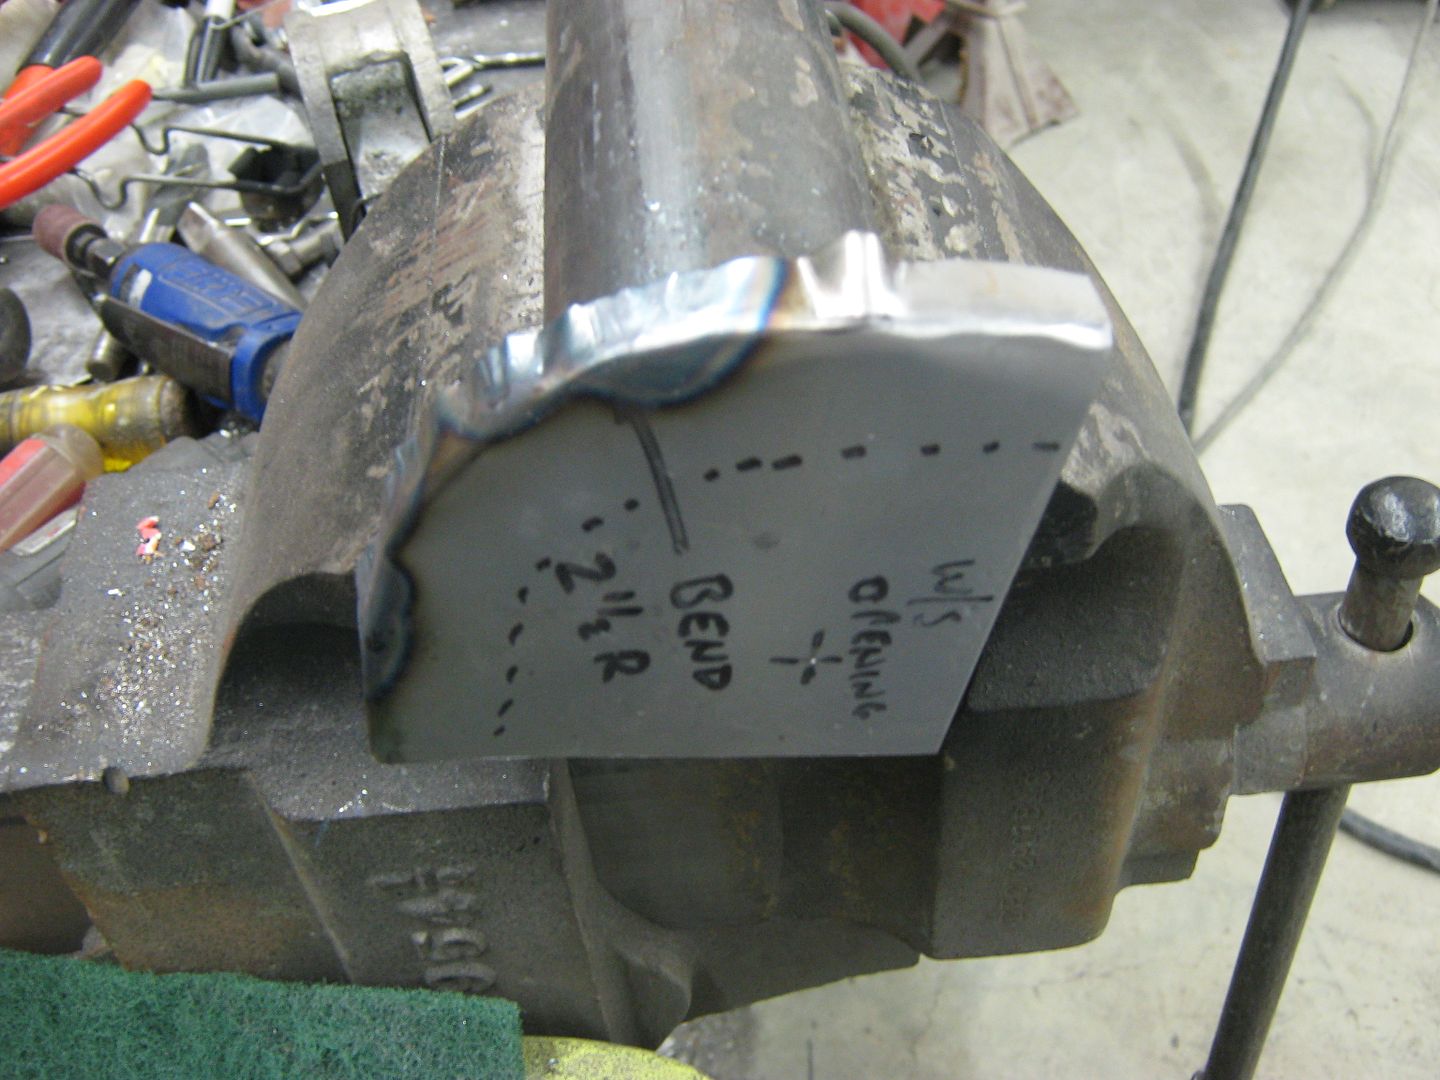
Looking at the above picture, you can see that the length of our bend line is shorter than the outer perimeter of the flange it is going to form. In essence, once you try to make a 90 degree bend, this excess metal will have a tendency to push the outer corners up.
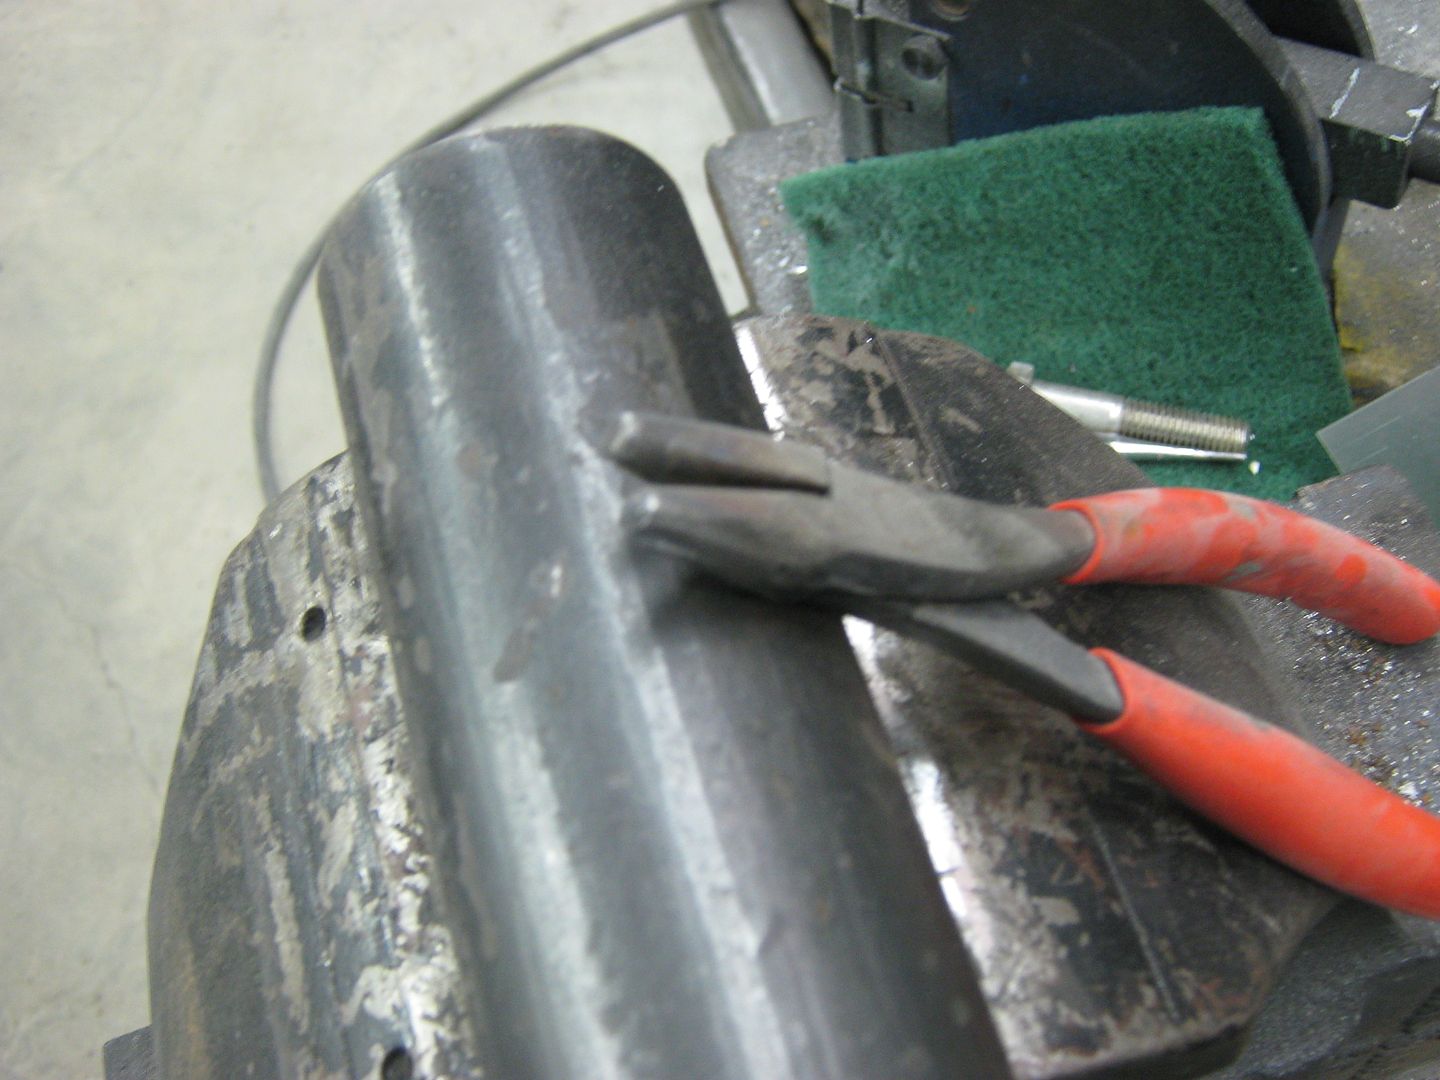
....so we'll need some shrinking here to bring things flat again. We'll need what's called a "tucking tool", and I have made one here out of a large pair of needle nose I never used for anything else. Please note that all sharp edges of the pliers have been rounded off to prevent cutting the metal.
After using the tool to make some "tucks", the object is to heat up the high spot of the tucks, place the two lower edges of the tucks so they are resting against your rounded "anvil", and using a flat hammer, tap the high spot back into itself (flatten it out) repeat as necessary until the panel flange is bent to the degree you want, and the panel is flat across.
If you're working by yourself, be sure to have a good, secure means to hold your heating device, like a BFG tire.

Much better than before, now for the outer piece. This has a slight radius, so I'll do some more grinding on the welding table to provide one:
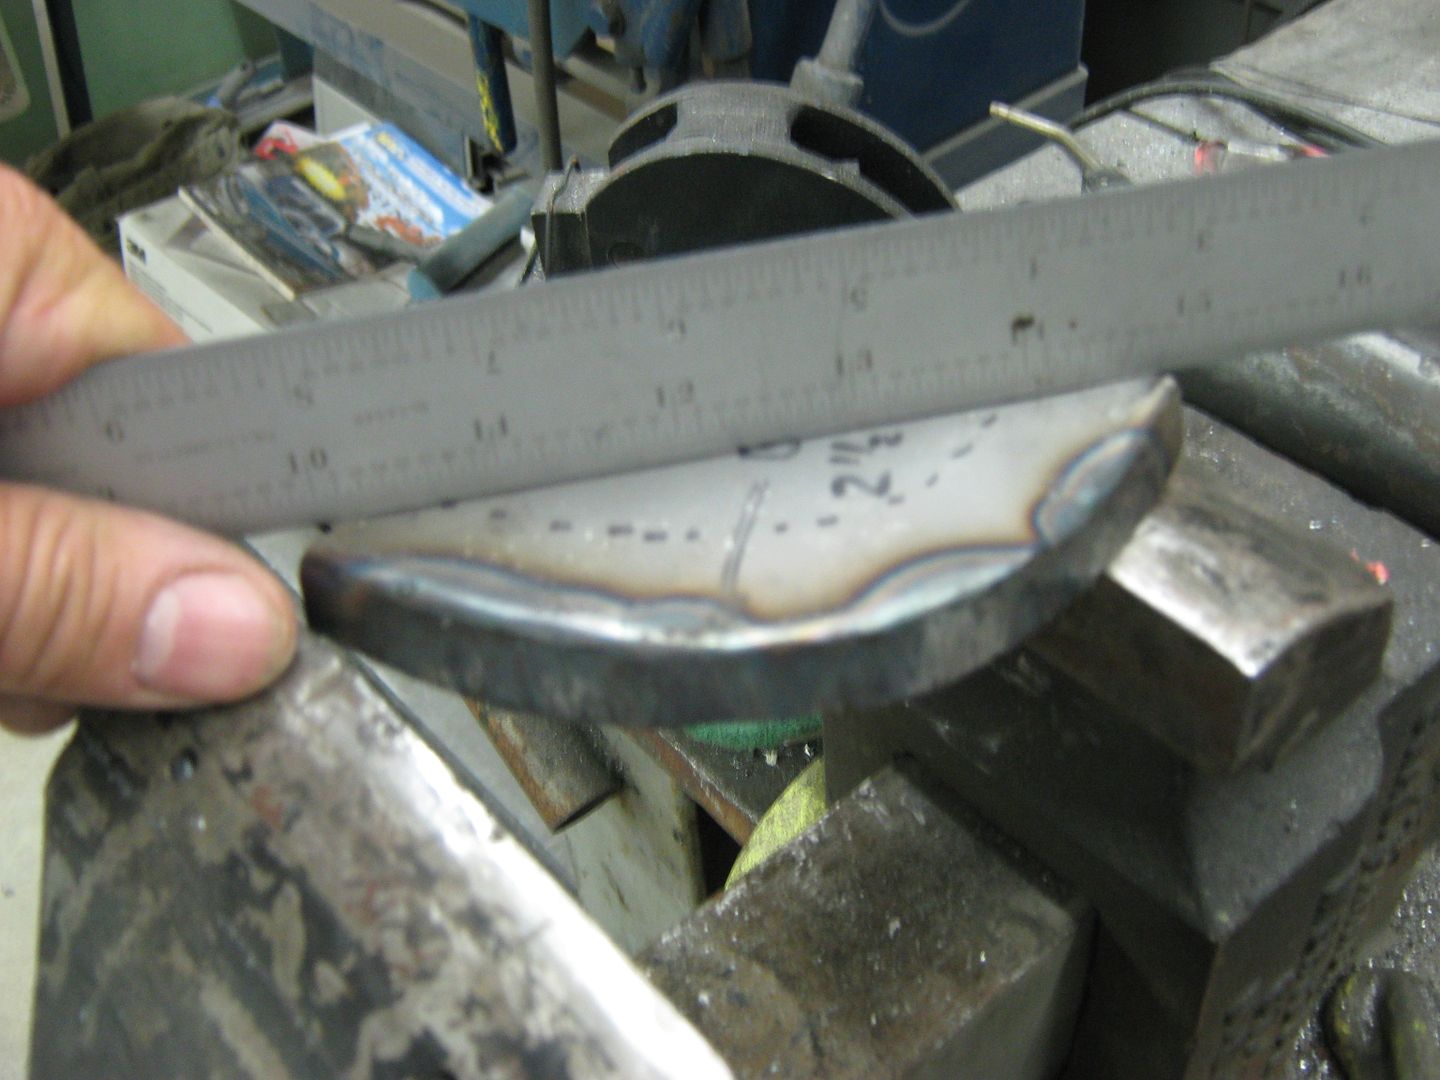
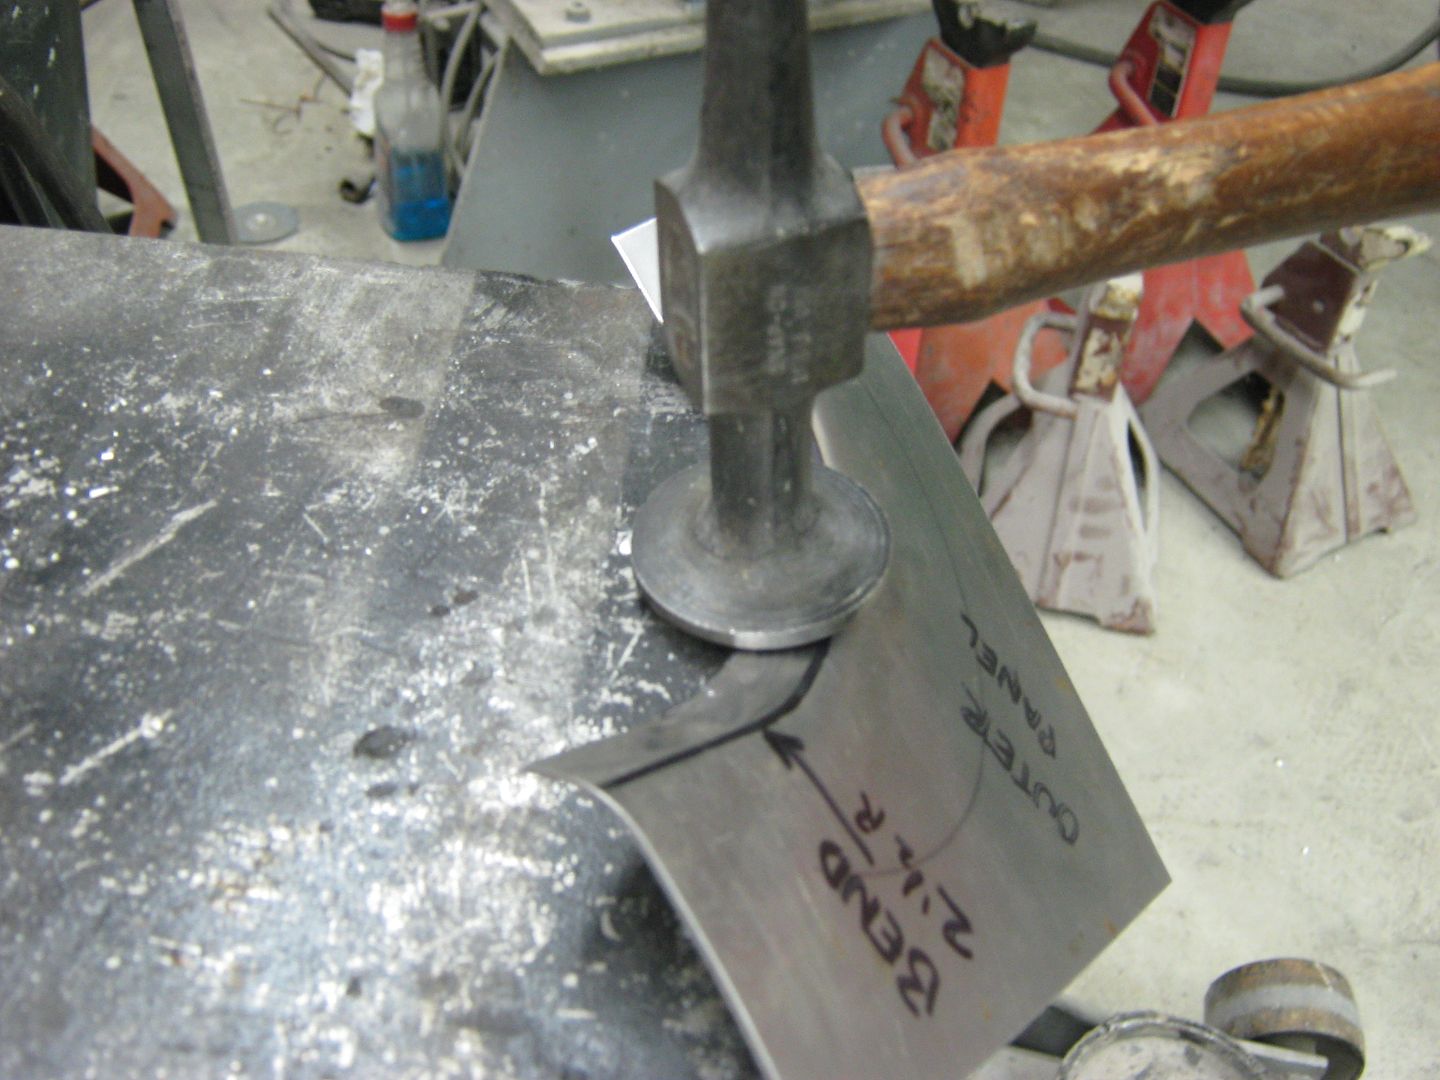
As before, the bend line is of different length than the outer flange perimeter. Here the outer dimension is shorter, so it will have a tendency to pull the panel downward as the bend occurs. To get rid of this issue, we will need to stretch the metal, and a slightly crowned hammer will help out.
Place the flange on a flat surface and using the hammer, work the area, especially the outer perimeter where it is shorter, this needs more stretching.
It doesn't take long to notice an improvement. Keep working as needed until you have the correct bend you're looking for.
Here I'll normally trim one flange to a nice straight cut, position the other so you have your correct offset, and scribe and trim the other. Weld together, Dress (grind) the welds, and install.

And there you have it.......
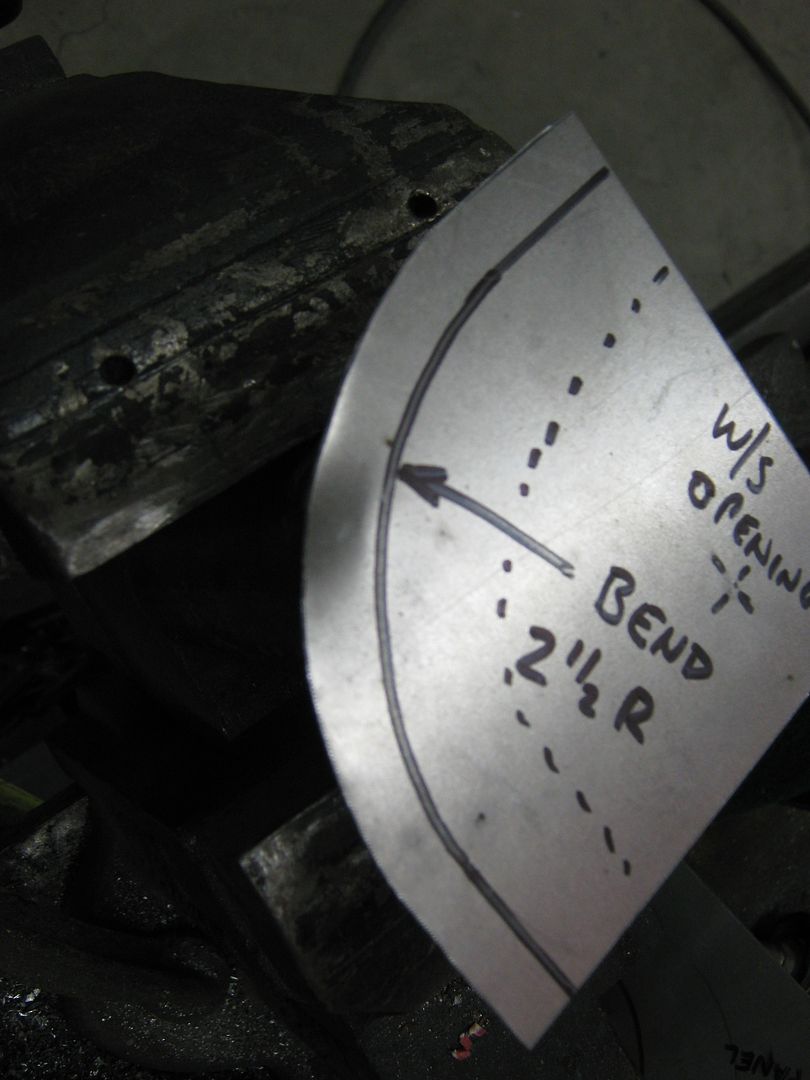
I just so happen to have a 52 sitting here, although my w/s is still intact, so I'm guessing at about a radius of 2.5"
I'll use some 5-1/2" square pieces to make the inner and outer corners. This is 18 ga CRS. used a center punch to keep the compass point form slipping.
Now mark this out with a sharpie, we'll want to be able to see the mark for awhile
Now take the measurement of the depth of the windshield mounting flange. If it sets back from the outer edge say, 3/4", I'd make the flanges on each of these corner repairs 1/2" to allow some trimming.
Now repeat for the other piece.
When trimming the excess of an inside corner with tin snips, you'll find multiple cuts will help you to get rid of the bulk so the final cut is pretty accurate.
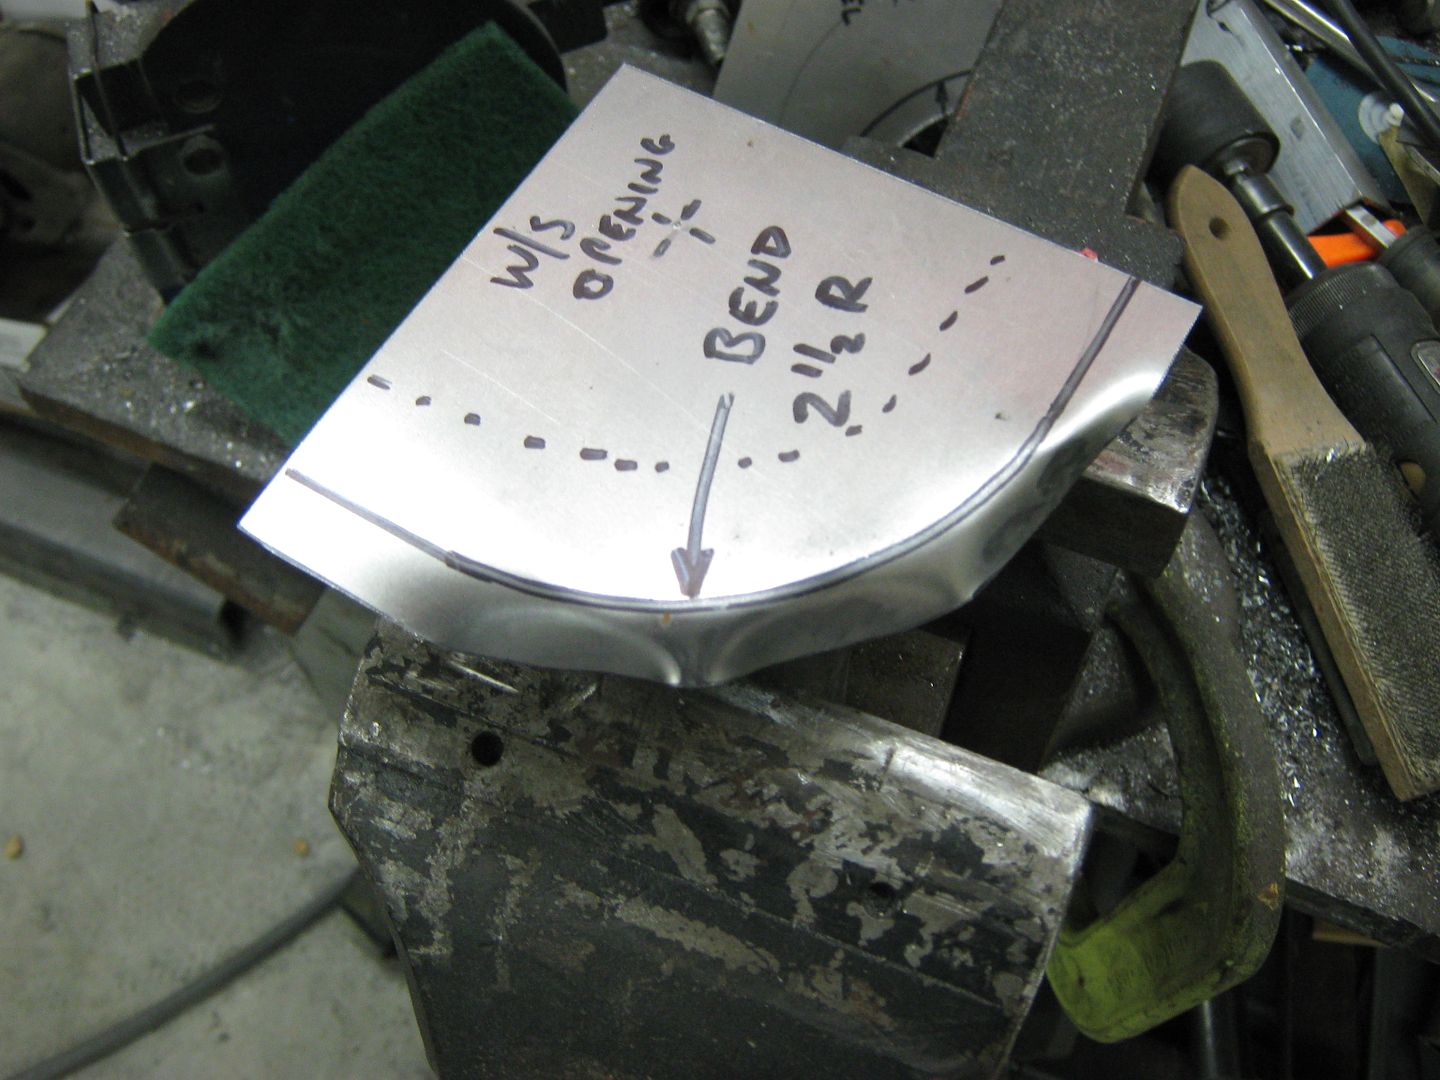
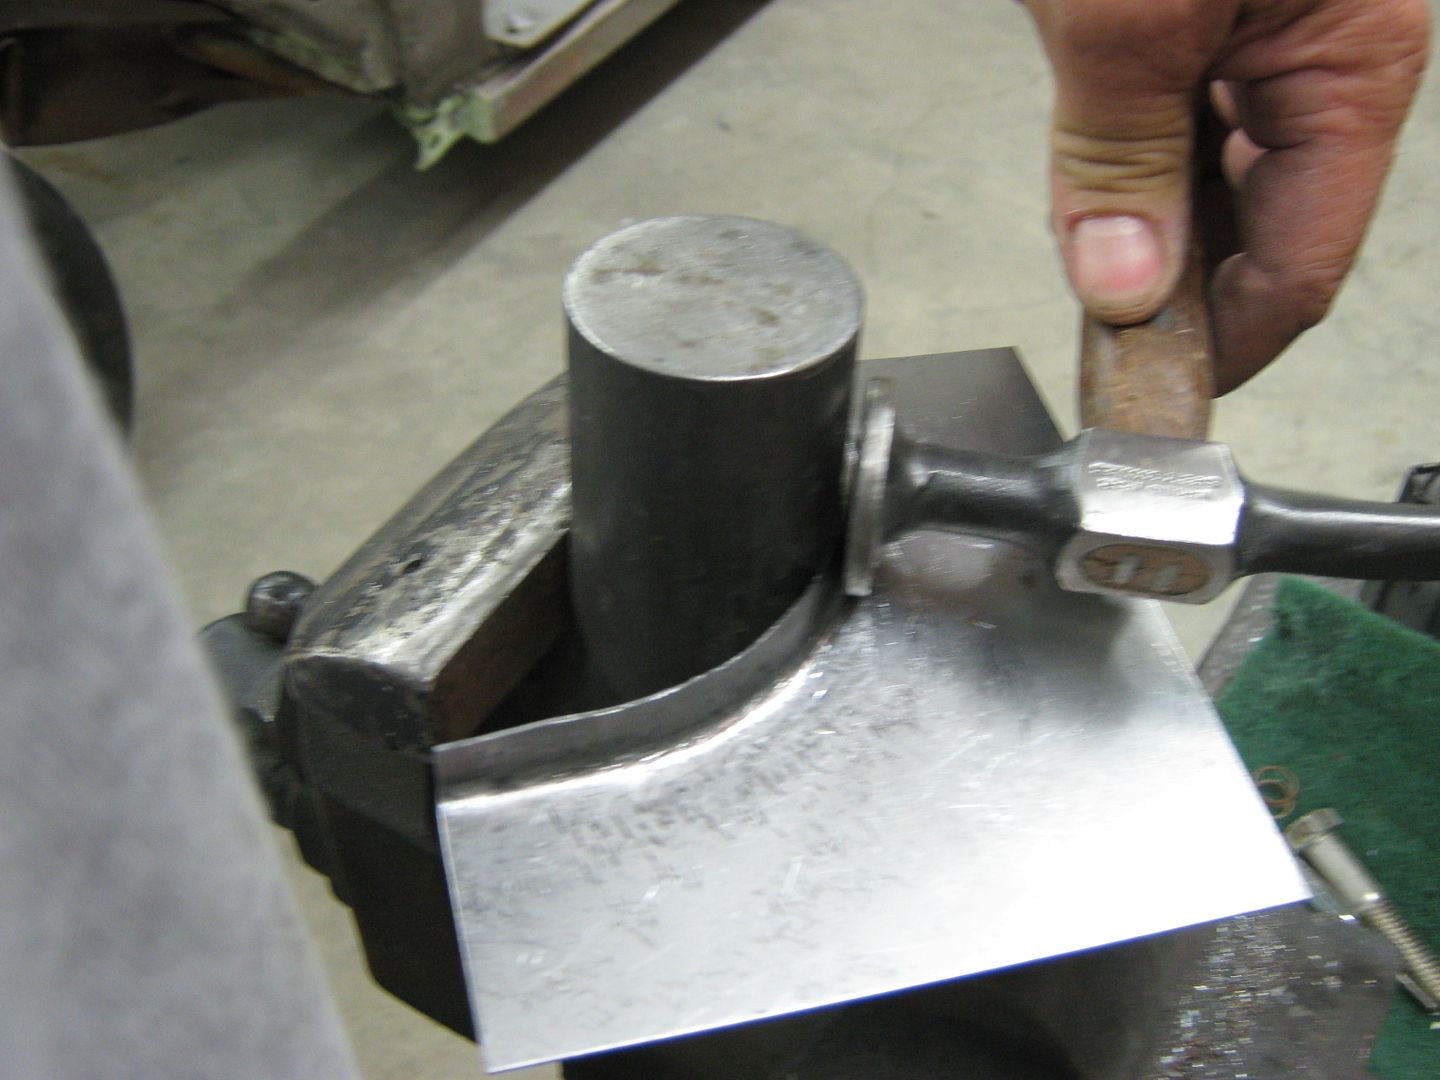
Here's my 2" dia hammerform I was speaking of before. As technical as this stuff is
you can use whatever is handy and works.I keep the line up top where I can see what's going on. The first tap with the hammer will show if you are off from your bend line, as you can see. This will show where you are so you can readjust your placement with the next tap.
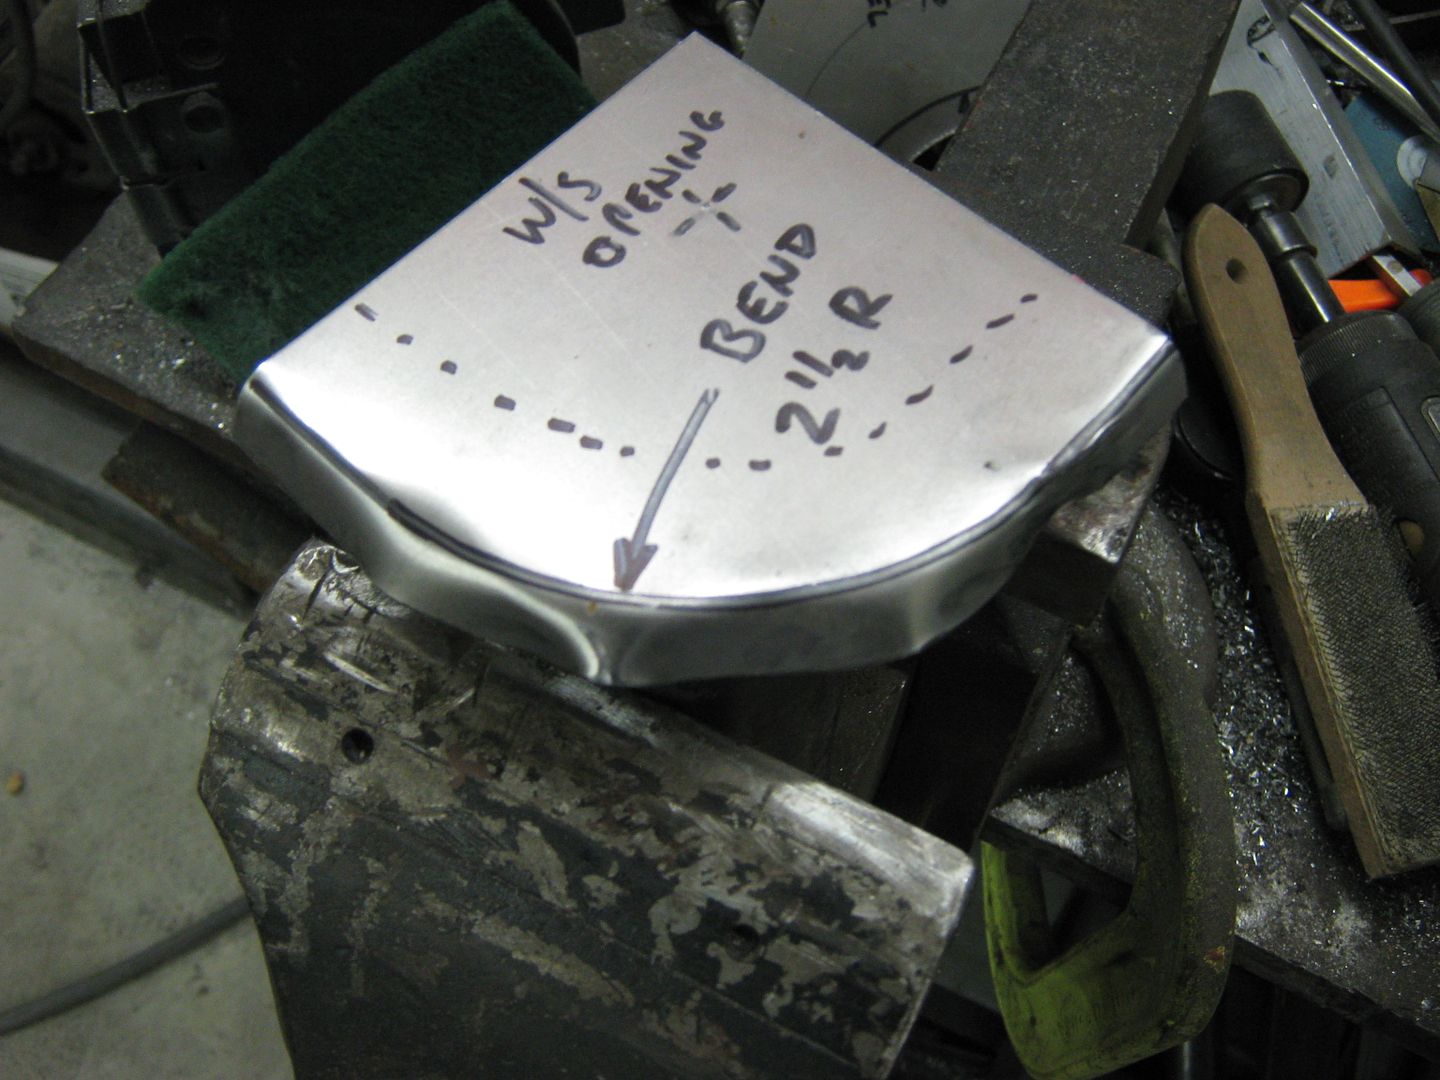
Looking at the above picture, you can see that the length of our bend line is shorter than the outer perimeter of the flange it is going to form. In essence, once you try to make a 90 degree bend, this excess metal will have a tendency to push the outer corners up.
....so we'll need some shrinking here to bring things flat again. We'll need what's called a "tucking tool", and I have made one here out of a large pair of needle nose I never used for anything else. Please note that all sharp edges of the pliers have been rounded off to prevent cutting the metal.
After using the tool to make some "tucks", the object is to heat up the high spot of the tucks, place the two lower edges of the tucks so they are resting against your rounded "anvil", and using a flat hammer, tap the high spot back into itself (flatten it out) repeat as necessary until the panel flange is bent to the degree you want, and the panel is flat across.
If you're working by yourself, be sure to have a good, secure means to hold your heating device, like a BFG tire.
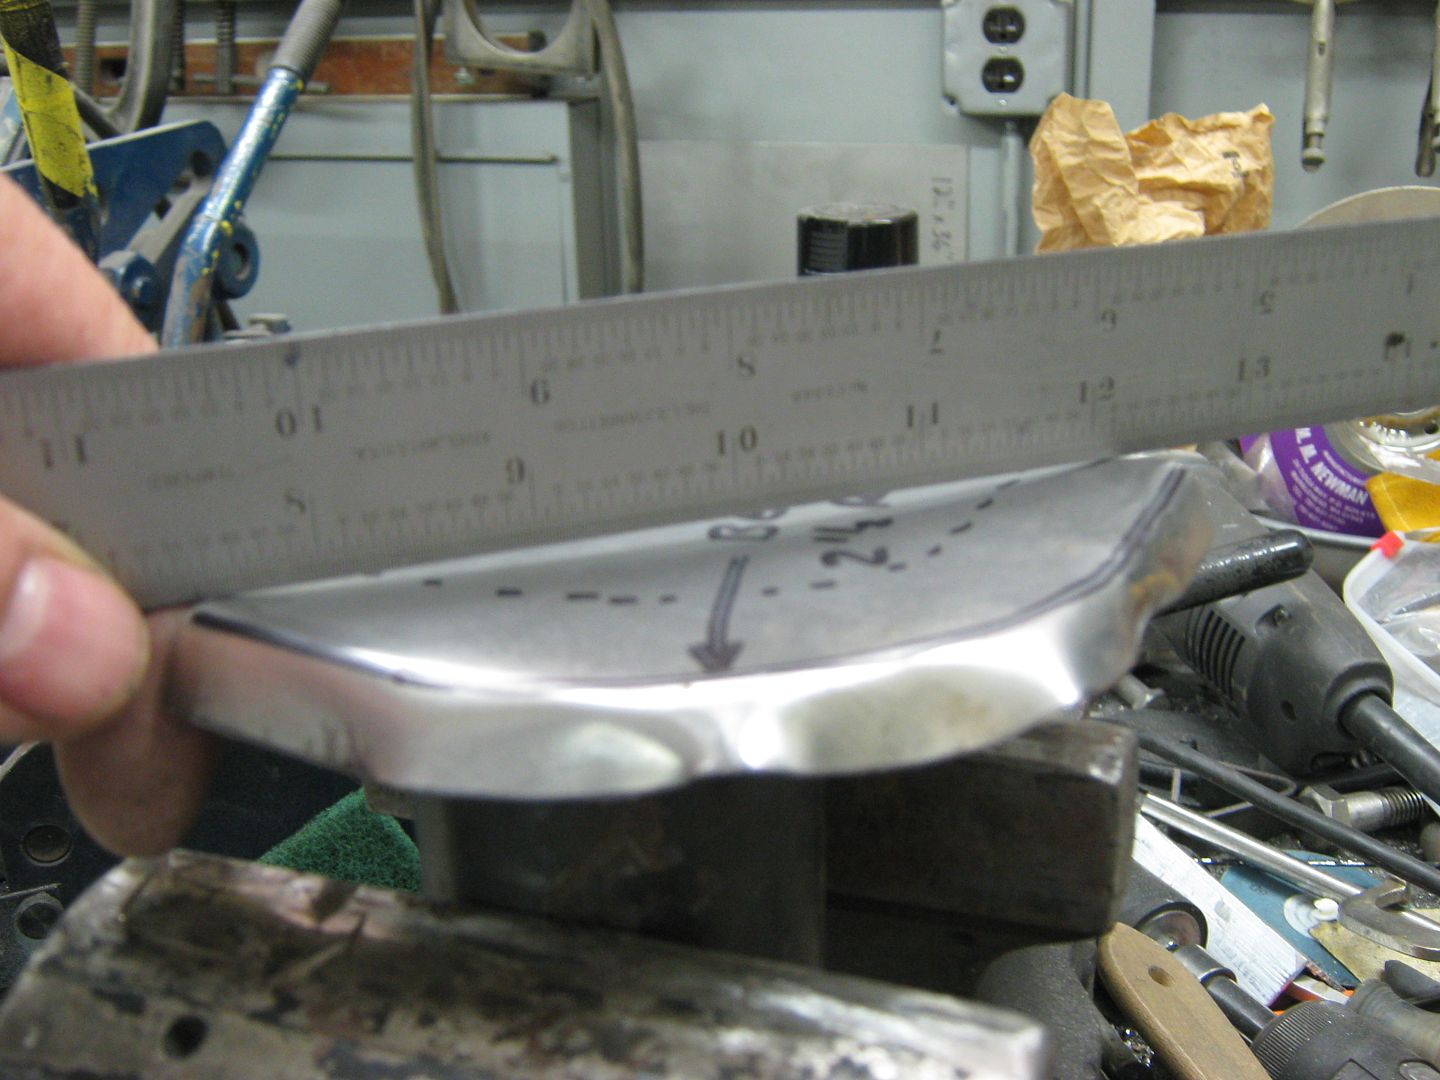
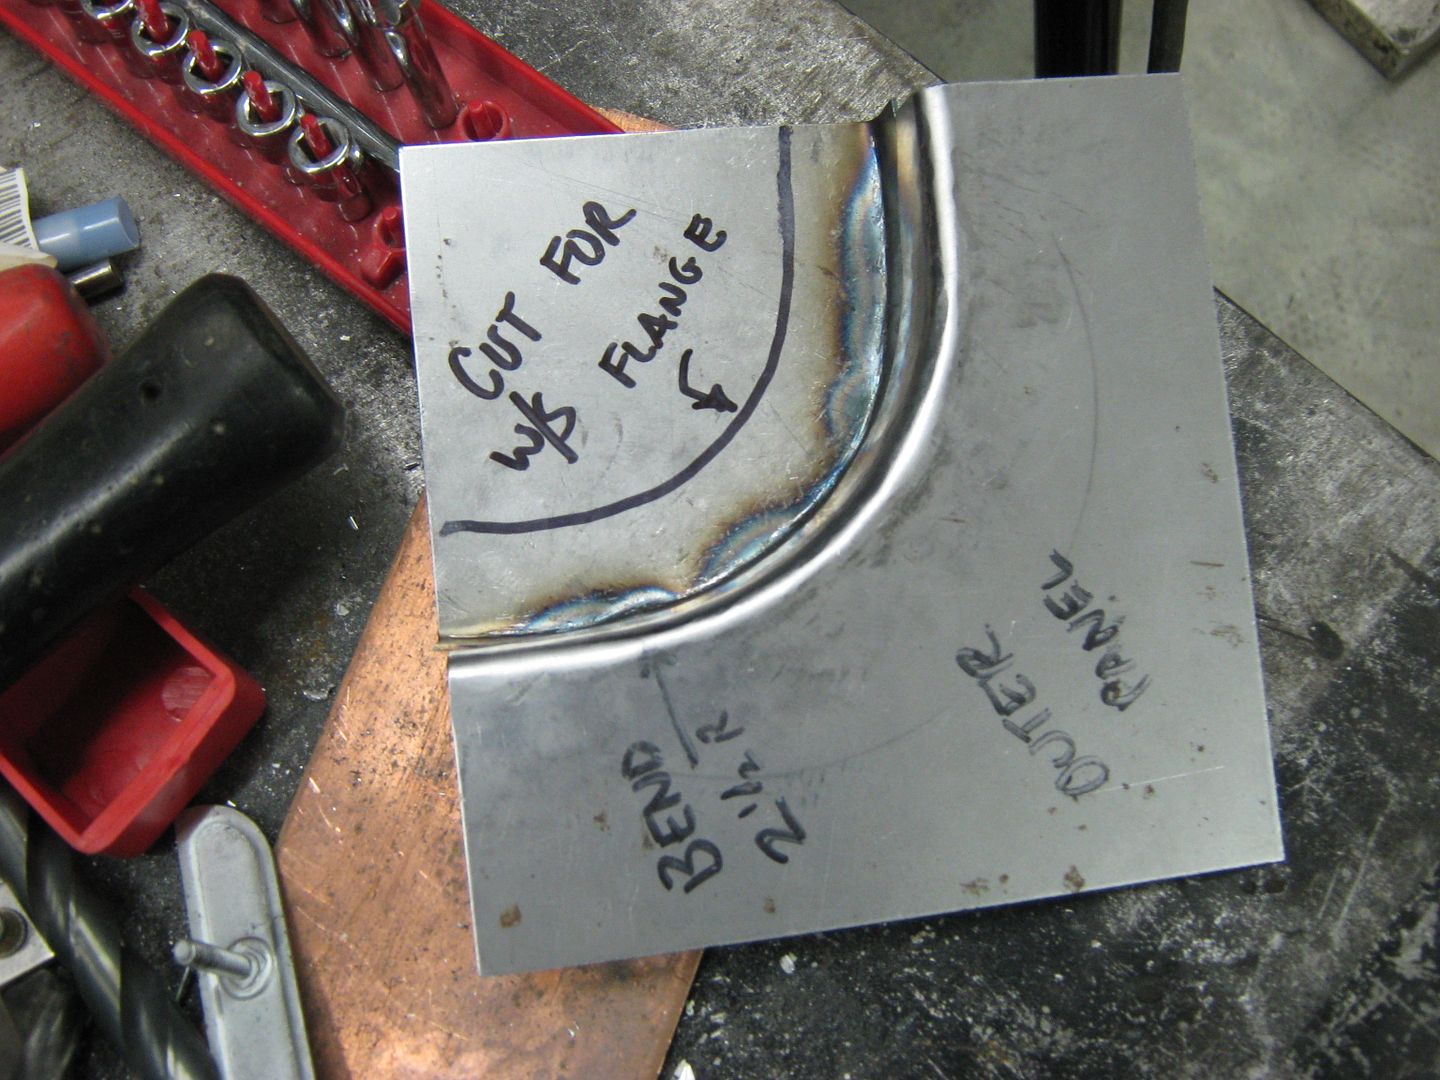
Much better than before, now for the outer piece. This has a slight radius, so I'll do some more grinding on the welding table to provide one:
As before, the bend line is of different length than the outer flange perimeter. Here the outer dimension is shorter, so it will have a tendency to pull the panel downward as the bend occurs. To get rid of this issue, we will need to stretch the metal, and a slightly crowned hammer will help out.
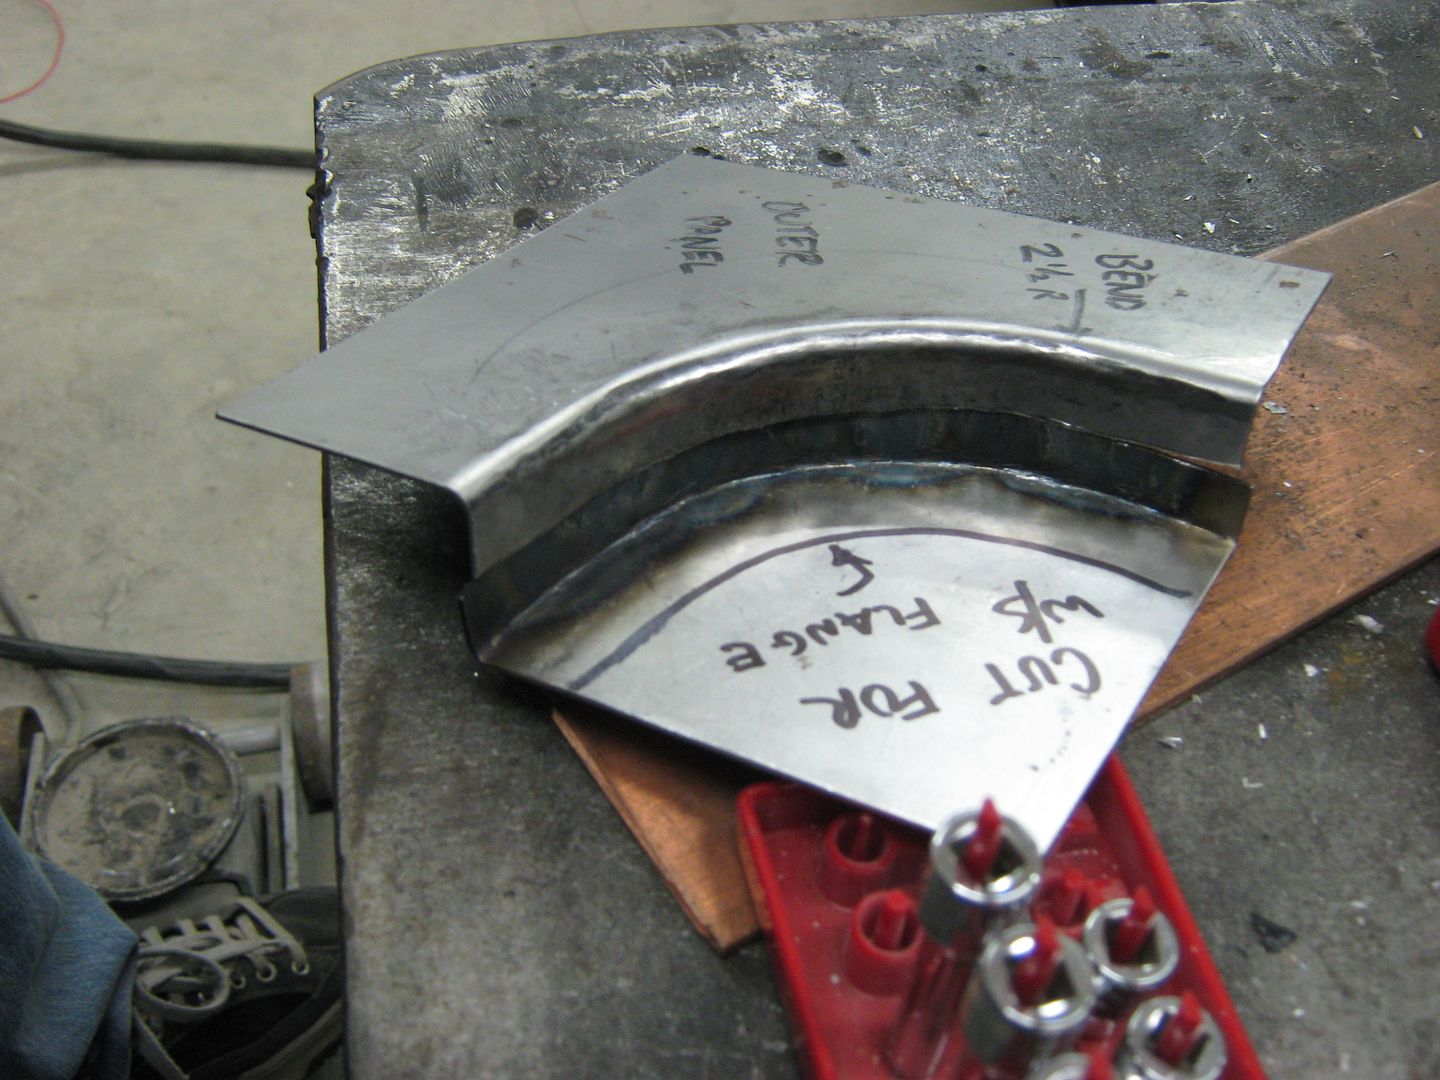
Place the flange on a flat surface and using the hammer, work the area, especially the outer perimeter where it is shorter, this needs more stretching.
It doesn't take long to notice an improvement. Keep working as needed until you have the correct bend you're looking for.
Here I'll normally trim one flange to a nice straight cut, position the other so you have your correct offset, and scribe and trim the other. Weld together, Dress (grind) the welds, and install.
And there you have it.......
Last edited by MP&C; Oct 27, 2009 at 09:02 PM. Reason: kant spel
Trending Topics
Hotshot
Joined: Jan 2001
Posts: 16,882
Likes: 3,126
From: SE Wisc. (the Rust Belt)
MP&C,
Not to take away from your metal forming talents, I personally would do pretty much the same as you but the area around the windshield is extremely hard to do correctly. Not only are you trying to repair the area but you also have to maintain a seal. I worked in the body repair business for a few years and the area around a windshield was the hardest part to repair. You have to make sure the shape is exact or you're going to have a difficult time making the window fit and accomplishing a good seal. This area is best left for using a replacement part. I personally might try fixing it myself but for some one without experience I would strongly suggest against doing it yourself.
Not to take away from your metal forming talents, I personally would do pretty much the same as you but the area around the windshield is extremely hard to do correctly. Not only are you trying to repair the area but you also have to maintain a seal. I worked in the body repair business for a few years and the area around a windshield was the hardest part to repair. You have to make sure the shape is exact or you're going to have a difficult time making the window fit and accomplishing a good seal. This area is best left for using a replacement part. I personally might try fixing it myself but for some one without experience I would strongly suggest against doing it yourself.
FTE Stories
Ford Trucks for Ford Truck Enthusiasts

10 Things Every Truck Owner NEEDS (2026 Edition)
Michael S. Palmer
Rezvani's Latest Post-Apocalyptic Monster Is a Ford F-150 Raptor Underneath
Verdad Gallardo
Top 10 Most Expensive Ford Trucks Ever Sold on Bring a Trailer
Joe Kucinski
2027 Ford Super Duty Buyer's Guide (Every Model, Engine, & Package)
Brett Foote
Top 10 Ford Truck Tragedies
Joe Kucinski
AEV FXL Super Duty - the Super Duty Raptor Ford Doesn't Make
Brett Foote
Lobo Vs Lobo: Proof the F-150 Lobo Should Be Even Lower!
Michael S. Palmer
Ford's 2001 Explorer Sportsman Concept Looks For a New Home
Verdad Gallardo
10 Best Ford Truck Engines We Miss the Most!
Joe Kucinski
Posting Guru
Joined: Jul 2006
Posts: 1,276
Likes: 0
From: Westminster,Md
Nice work-out! , You make it look too easy! This is exactly the kind of write-ups this and some of the other old truck forums need. With a few basic tools,some choice scraps of steel and some practice...and patience ,more of these old trucks can be saved from the scraper's..destined to be melted down into Yugo's or other household item that needs to be replaced after a couple of years.
I hope this gives some of our participants and wavering future metal bangers a boost! Thank's!
,more of these old trucks can be saved from the scraper's..destined to be melted down into Yugo's or other household item that needs to be replaced after a couple of years.I hope this gives some of our participants and wavering future metal bangers a boost! Thank's!
FTE fan
Joined: Dec 2006
Posts: 3,674
Likes: 11
From: paradise, northern calif.

What a nicely done educational thread, way out of my skill level, thank you all for sharing and showing your talents alot of people like myself beneft from it. John good luck with your prodject.

Post Fiend

Joined: Jun 2001
Posts: 7,493
Likes: 7
From: Erie, pa
Ya'll get out there and bend some metal - as you're doing it start to talk to it - the metal will talk back and tell you what it needs. Ya - well it ain't BS - bet'cha that even AX talks to the metal
FTE Legend
Joined: Oct 2005
Posts: 283,694
Likes: 8,276
From: northwestern Ontario
I bet we all talk to the metal as we're working on it but would be well advised not to but it into print,lol
Hotshot
Joined: Oct 2004
Posts: 15,882
Likes: 88
From: Durham NC
If you have some woodworking skills and a saber saw or jig saw, router or belt sander you can make a wooden hammerformTo make that job even easier and more accurate or make more complex shapes with rounded bends.
Accurately lay out the shape of the vertical portion on a piece of 3/4" Medium Density Fiberboard (MDF) so there is ~ 4" extra on all sides of the line Make the pattern 1 thickness of metal smaller than the finished piece.
Screw a second piece of fiberboard the same size as the first to the bottom of the first in the waste area away from the pattern line. Very carefully cut along the outside of the pattern line so when you remove the screws you have 4 pieces 2 each of the positive and negative shape that fit back together the sawblade thickness apart. If you need one or both the bends to have a radiused profile rather than square run a router with the correct sized radius around the appropriate edge of one of the pieces. The appropriate edge is the one you'll be bending the metal over. Like the previous example cut a piece of metal the same size as the MDF piece and trimmed just slightly long around the bend. Make a sandwich out of the two matching MDF pieces with the piece of metal in between extending the appropriate amount beyond the curve. Clamp the sandwich tightly together with as many clamps as you can put your hands on so the metal cannot slip while forming. Tap the metal down with a torpedo shaped plastic or wood mallet over the edge of the MDF starting in the center and working equally towards both ends. Don't try to bend it over all at once, but work it down slowly in stages of at least 6 times around. If you take your time it will bend over completely without ripples or bumps to deal with no matter if it is an inside or outside or even S curve bend. Unclamp and remove you finished piece. Use the matching two pieces of MDF to form the other 1/2 of the Z profile to a square or radius bend as needed.
Trim and weld together as above. MDF is inexpensive and easy to work with so you can refine your pattern should it not come out exactly right in size or radius of curve the first time in just a few minutes without feeling bad about throwing away the incorrect form. It is also tough enough to use to make several duplicate pieces if needed.
Check out this guy's use of wooden hammerforms in the metalworking ptI and ptII: metalworking