When you click on links to various merchants on this site and make a purchase, this can result in this site earning a commission. Affiliate programs and affiliations include, but are not limited to, the eBay Partner Network.
Sam, if the wires were to dump out here between the hinge bolts, would that suffice? Not having a door here, it's hard to see the obstacles that may exist
Also, do you have any pics of the A pillar inside the hinge hole? Does it use bolts inside also (like the 55 chevy's in the picture above) or just the two outside holes only?
exiting where you marked might be ok, its just inside the door shell.. there is no extra room on the door shell slot for a bulk of wires tho..
I don't have door pocket pics at the moment, but will post some later today. there are 3 bolts.. 2 on the wings and 1 in the center of the pocket.
Did somebody send out invites to a guinea pig dinner?
Sam, see any problem with a thin metal,3 sided cover welded to the 'inside' of the hinge..and following the curve of the hinge ,then into the pillar pocket? I envision the wires running'side-by-side in the tight area your speaking of, the real challenge comes when the door closes..which direction will the harness go then?? Ideas??
MP+C, my 55 is in epoxyprimer and this is the next job to be tackled before paint..the doors are also 'indexed' with the floating nut-plates inside the door 'locked into place,..taking the door on and off and getting it back in the exact same spot take less than 3min. Feel free to pm me if you want to see it,I'm in Westminster.
Did somebody send out invites to a guinea pig dinner?
Sam, see any problem with a thin metal,3 sided cover welded to the 'inside' of the hinge..and following the curve of the hinge ,then into the pillar pocket? I envision the wires running'side-by-side in the tight area your speaking of, the real challenge comes when the door closes..which direction will the harness go then?? Ideas??
MP+C, my 55 is in epoxyprimer and this is the next job to be tackled before paint..the doors are also 'indexed' with the floating nut-plates inside the door 'locked into place,..taking the door on and off and getting it back in the exact same spot take less than 3min. Feel free to pm me if you want to see it,I'm in Westminster.
dinner indeed.. the more the merrier..
no.. don't see a real problem with the thin shield type channel all the way across the hinge face. that was the design above somewhere, altho screwed on.. ( I could probably get away with that screw on design. only passing 4 wires.. ground, window up/down and door look .) polished stainless times 4. 2 real & 2 dummy to make the hinges match.
I would make the wires on the type MP&C has designed to come out on the body side of the hinge (inside edge) (Opposite of the one done for the chevy).
for the cover style, the wires should go to the interior side of the hinge. we will have to look at flexing in both cases..
This subject has got me a little fired-up..though I've got a couple different irons in the fire (who doesn't?) ,when I get home I'm going to hang some doors,get some lite on the subject and have another look....
This subject has got me a little fired-up..though I've got a couple different irons in the fire (who doesn't?) ,when I get home I'm going to hang some doors,get some lite on the subject and have another look....
I am very interested too.. I did the braided looms without swivel/slot.. and the passenger side is kinked and frayed.. must be redone. I have just ordered the braided looms with the swivel..
the guy that will be doing my interior for me called this morning, and my slot opens up on Monday (after a yr wait!).. so I gotta get going..
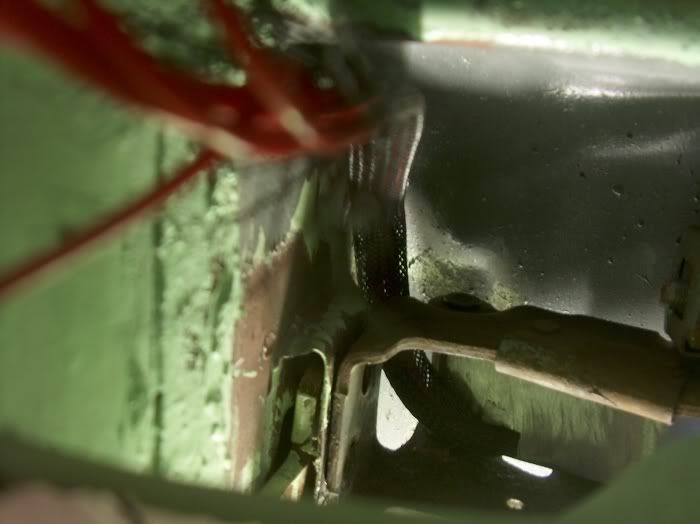
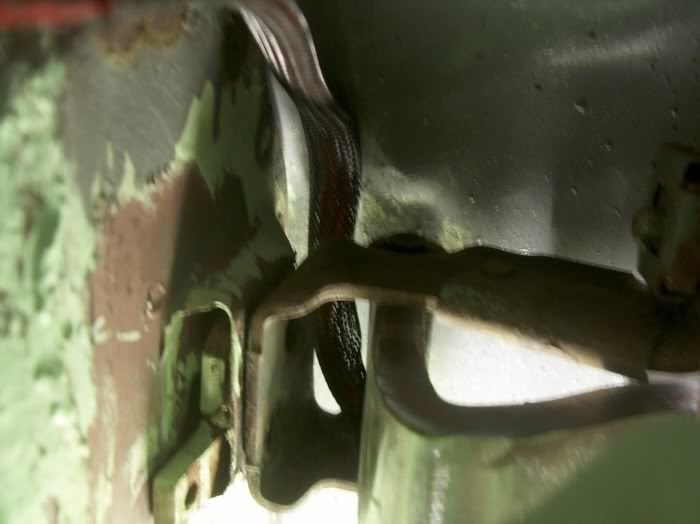
Here are some test runs I did with the harness when I was trying to figure how to run the wires. Again, these are on a Chevy, so it may take some fine tuning to find the optimum location to bring the wires out into the A pillar on the Effie.
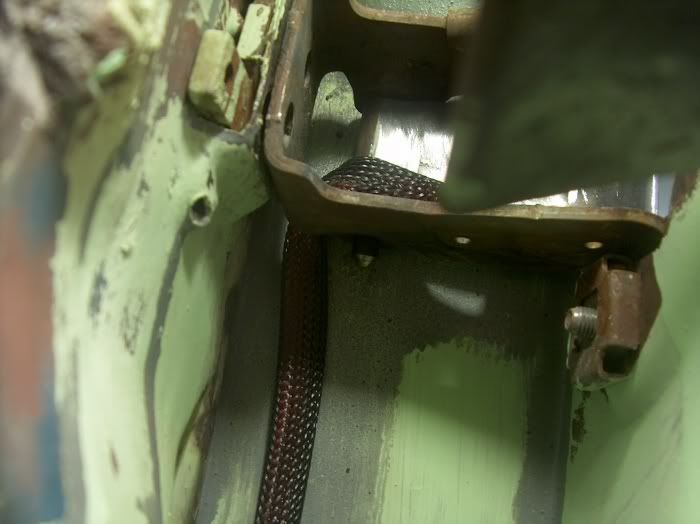
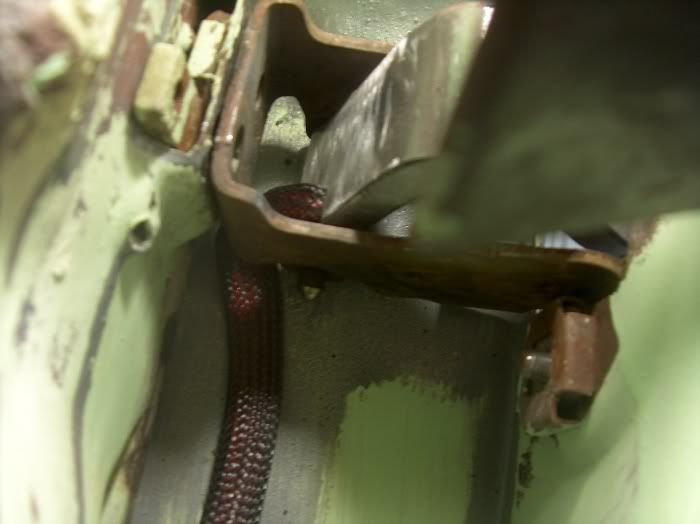
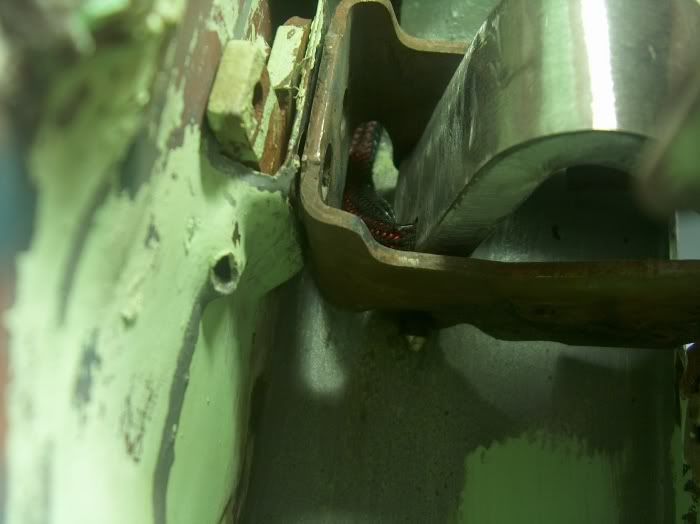
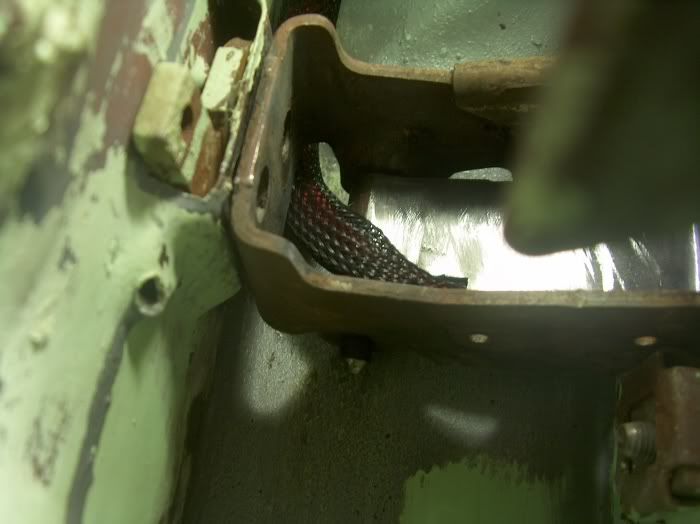
First off, the wires were bought out as close to the pivot point as possible, to eliminate as much travel in the harness as possible. I chose for them also to exit near the bottom of the hinge, so that the majority of the strength would remain at the top for supporting the door weight. As it played out, this also helps to provide more of a "service loop" in the bundle as you'll see in the next few pics.
The first test was to bring the wires in through the hinge and go straight down. First pic is door open, next closed. Although this wasn't too bad, it did cause for some tight spots and the chance for abrasion if the bundle wasn't secured "just so". Also, because of the tight radius in the drop, it did show signs of lateral twisting.
Although I didn't get pictures of it, as it didn't work well at all, a direct left turn out of the hinge caused binding and the bundle folding over on itself, which would have caused failure even quicker than the lateral twisting.
These next two show the wire bundle exiting and going up. Because the wires were carried along the bottom side of the hinge, this provided a more sweeping radius for the bundle, which makes it less susceptible to damage from twisting and bending. Door shown in open and closed positions.
View from up top of the same thing. This seemed to provide the best location.
Sam, I had also contemplated routing the bundle out the opposite side of the hinge where it exits at the pivot (toward the outside), but it appeared to be too tight for room, especially with the hinge open, and would have had the bundle rubbing against the outside of the cowl/A-pillar area. Where the truck is likely very different than this car, and that may prove to be a better location, it may take a bit of studying under the dash to find the optimum location prior to "making the cut ".
I too started with another set of wire looms. The first set I bought were much cheaper than what I ended up with. They were very flexible and kinked the second or third time I closed the door. I tried modification after modification and they just wouldn't work. So I went with the Electric-Life Swivel Style Billet Looms (more expensive) and immediately noticed a difference in the construction. These looms were lined with teflon and were well constructed. Here is a description I found on the internet:
<TABLE cellSpacing=3 cellPadding=3 width="100%" border=0><TBODY><TR><TD><TABLE cellSpacing=0 cellPadding=0 width="100%" border=0><TBODY><TR><TD vAlign=top align=left width="50%"><TABLE cellSpacing=2 cellPadding=2 width="100%" border=0><TBODY><TR><TD vAlign=center align=middle> </TD></TR></TBODY></TABLE></TD><TD width=1 bgColor=#cccccc></TD><TD vAlign=top><TABLE cellSpacing=2 cellPadding=1 width="100%" border=0><TBODY><TR><TD align=left>94202 NEW BILLET WIRE LOOMS DESIGNED FOR SUICIDE STYLE HINGES WITH SLIP-ON COLLARS. </TD></TR><TR><TD><HR style="COLOR: #cccccc" SIZE=1></TD></TR><TR><TD align=left>Product Code: 94202</TD></TR><TR><TD><HR style="COLOR: #cccccc" SIZE=1></TD></TR><TR></TR><TR><TD><HR style="COLOR: #cccccc" SIZE=1></TD></TR><TR><TD align=left><!--US$79.00-->Price: US $79
</TD><TR><TD><HR style="COLOR: #cccccc" SIZE=1></TD></TR><TR><TD align=left><FORM action=http://www.electric-life.com/shopaddtocart.asp method=post><TABLE cellSpacing=1 cellPadding=2 border=0><TBODY><TR><TD class=al></TD></TR><TR><TD class=ac><INPUT class=txtfield maxLength=3 size=2 value=1 name=quantity> </TD><TD class="ac vm"><INPUT class=imgbtn type=image src="http://www.electric-life.com/images/add-to-cart.jpg"></TD></TR><INPUT type=hidden value=1264 name=productid> </TBODY></TABLE></FORM></TD></TR><TR><TD><HR style="COLOR: #cccccc" SIZE=1></TD></TR><TR><TD align=left></TD></TR><TR><TD><HR style="COLOR: #cccccc" SIZE=1></TD></TR><TR><TD align=left></TD></TR></TBODY></TABLE></TD></TR></TBODY></TABLE></TD></TR><TR><TD align=left><HR style="COLOR: #cccccc" SIZE=1>
With the new Electric-Life Billet Wire Looms designed for suicide style hinges running wires from the door into the post has never been easier. No big lock nut, no big clumsy wrench, just a small billet collar and set screw. Designed with a spherically shaped ball socket and notched trim plate allowing the loom 110 degrees of travel. Insulated with a Teflon lining, the Billet Wire Looms provide RF insulation and waterproofing. Electric-Life's looms are the largest around utilizing a 1/2-inch opening.
High quality 5/8 inch braided steel line.
Teflon inner-liner adds strength and rigidity.
High quality speherically shaped ball socket.
5/16 internal diameter allows up to (8) 14ga. wire pass-through>
I used the stainless steel spring type on mine. Did have to trim the inner door structure for clearance as the spring slides in and out of the door versus the pillar. One trick I used to mark the holes is this. Decide where you will put the hole in the pillar. Drill that hole just big enough to fit a Sharpie in snugly. Then close the door and you should have your mark for the door hole. All of this assumes you have room to insert the Sharpie from the backside as I did on my 60.
I used the stainless steel spring type on mine. Did have to trim the inner door structure for clearance as the spring slides in and out of the door versus the pillar. One trick I used to mark the holes is this. Decide where you will put the hole in the pillar. Drill that hole just big enough to fit a Sharpie in snugly. Then close the door and you should have your mark for the door hole. All of this assumes you have room to insert the Sharpie from the backside as I did on my 60.
I used the step drill bit and 90 degree drill ($15 from HF on sale) drilled from inside the fender well, with the door closed.. once I got into the door, then it was centered.
This is an older thread but I ordered a power window kit and after looking at the plastic loom that came with it, I don't see any possible way this thing works.
Its got a huge diameter and is not very bendy at all. Just wondering if anyone has any better ideas that have worked well. Also, my doors are already on and were a son of a B$%#@ to get aligned so I am trying to figure out a way of getting the wires passed without removing the door buts seem hard with all the structural metal on the inside of the door so just wondering what is best if anyone has any updates on what they did that works would be great.
is a pain for sure.. those looms don't look right..
so, for drilling the hole.. like I said in my prior post (1 back), I used a step drill bit, and drilled from the body side (where the kick panel would be), towards the door, at least to get one step into the door.
then I used the electric life looms, that swivel. .
is a pain for sure.. those looms don't look right..
so, for drilling the hole.. like I said in my prior post (1 back), I used a step drill bit, and drilled from the body side (where the kick panel would be), towards the door, at least to get one step into the door.
then I used the electric life looms, that swivel. .
thanks, have you been happy with them still? i only have one wire, maybe two so i have been thinking about just running it along the bottom hinge but haven't decided for sure yet.
I used the electric life looms too like Sam did on both my trucks, I'd say they are the best on the market because of the swivel that eliminates the binding and kinking the others include. How I did my install was by first locating the center of the hole on the door post and drilling a 1/8" hole, then closed the door and drilling through that hole into the door so your holes line up. Then used the step drill bit to bring it to the proper sized hole for mounting..
thanks, have you been happy with them still? i only have one wire, maybe two so i have been thinking about just running it along the bottom hinge but haven't decided for sure yet.
Yes. Very happy. I had a different kind that kinked and fell apart in the first few weeks. These are almost 10 yrs old now without any problems









 </TD></TR></TBODY></TABLE></TD><TD width=1 bgColor=#cccccc>
 </TD><TD vAlign=top><TABLE cellSpacing=2 cellPadding=1 width="100%" border=0><TBODY><TR><TD align=left>94202 NEW BILLET WIRE LOOMS DESIGNED FOR SUICIDE STYLE HINGES WITH SLIP-ON COLLARS. </TD></TR><TR><TD><HR style="COLOR: #cccccc" SIZE=1></TD></TR><TR><TD align=left>Product Code: 94202</TD></TR><TR><TD><HR style="COLOR: #cccccc" SIZE=1></TD></TR><TR></TR><TR><TD><HR style="COLOR: #cccccc" SIZE=1></TD></TR><TR><TD align=left><!--US$79.00-->Price: US $79