

 Check out my shop projects in my signature to see more..

Working with Metal

Elder User
Joined: Feb 2013
Posts: 856
Likes: 3
From: Livonia, MI
Wow - great pics in this thread. Doing sheet metal work like that truly is an art form. I am a very beginner welder - took some welding classes about 30 years ago and have built several projects since. Things like a utility trailer, log splitter, etc. I have never used a MIG welder - only oxy-acetylene and a stick arc welder. I have 2 questions:
1) If grinding down the bead can be an issue, why not use a torch, and butt both pieces of sheet metal together (so they're touching) and not use any filler rod? In other words, just melt the two pieces of sheet metal together.
2) If the excessive heat can be a problem with warping the material, why not braze the two pieces together? As I recall, brazing doesn't require the heat that is produced with the MIG welder, and the braze material fills in any gaps very nicely. Maybe there is a problem getting paint to properly adheres to the brazing material when it's completely finished?
Tuned


Joined: Aug 2007
Posts: 459
Likes: 123
From: Maryland
Responses in blue
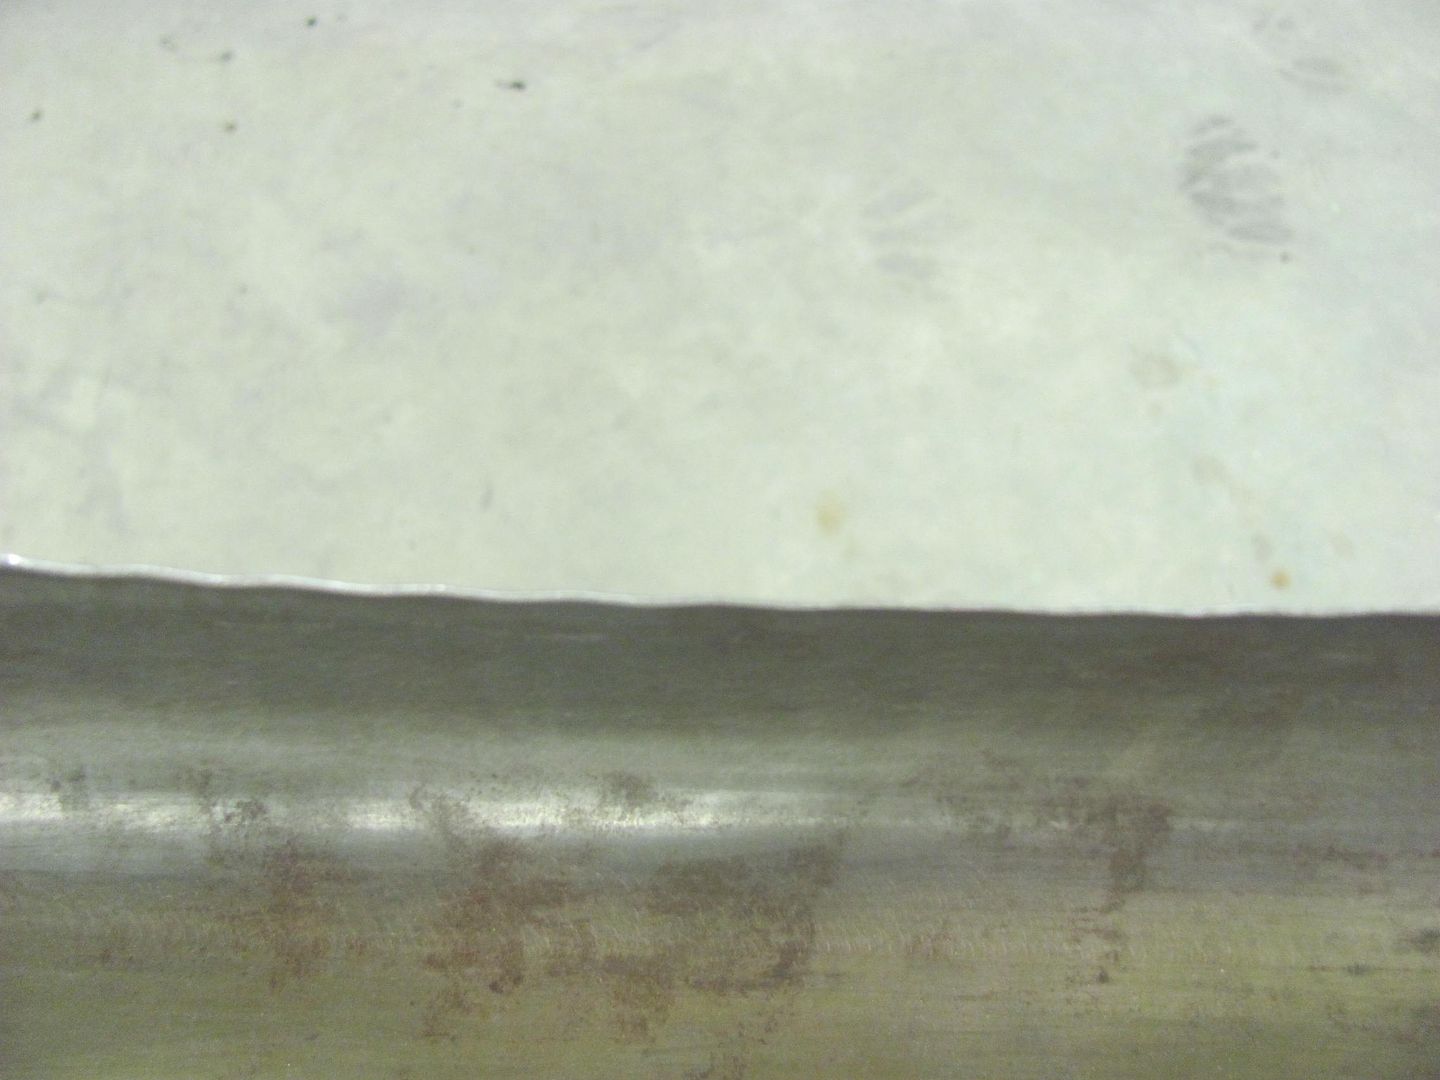
IMO the excessive heat is not neccessarily a factor keyed to the weld type. For example, the fusion weld I showed above has a respectable HAZ showing minimal heat. But someone using TIG or torch with filler rod, is now combining two processes; applying heat and applying filler. Someone not adept in performing these two processes together seamlessly will likely spend more time on the panel, applying more heat, for more damage as a result. Kinda like the walk, talk, and chewing gum. If the coordination isn't there, then perhaps the "point an shoot" of a MIG would be better suited to that person.
As far as the brazing process, the heat issue as per the above comments apply. Despite the lower heat temps needed, if someone is not skilled at applying the heat and filler, then any benefit of the lower temps used will be lost to sitting on the panel longer. As with any process, practice (on scraps) is key. Regarding the adhesion issue with brazing, I think there is less an issue with the brass as there is with the flux used in the process. Most adhesion issues can be attributed to flux contamination.
In the end, practice your methods using scraps the same thickness as your vehicle's panels, and once you are satisfied with the results (regardless of which process) then proceed to working on the vehicle.
Wow - great pics in this thread. Doing sheet metal work like that truly is an art form. I am a very beginner welder - took some welding classes about 30 years ago and have built several projects since. Things like a utility trailer, log splitter, etc. I have never used a MIG welder - only oxy-acetylene and a stick arc welder. I have 2 questions:
1) If grinding down the bead can be an issue, why not use a torch, and butt both pieces of sheet metal together (so they're touching) and not use any filler rod? In other words, just melt the two pieces of sheet metal together.
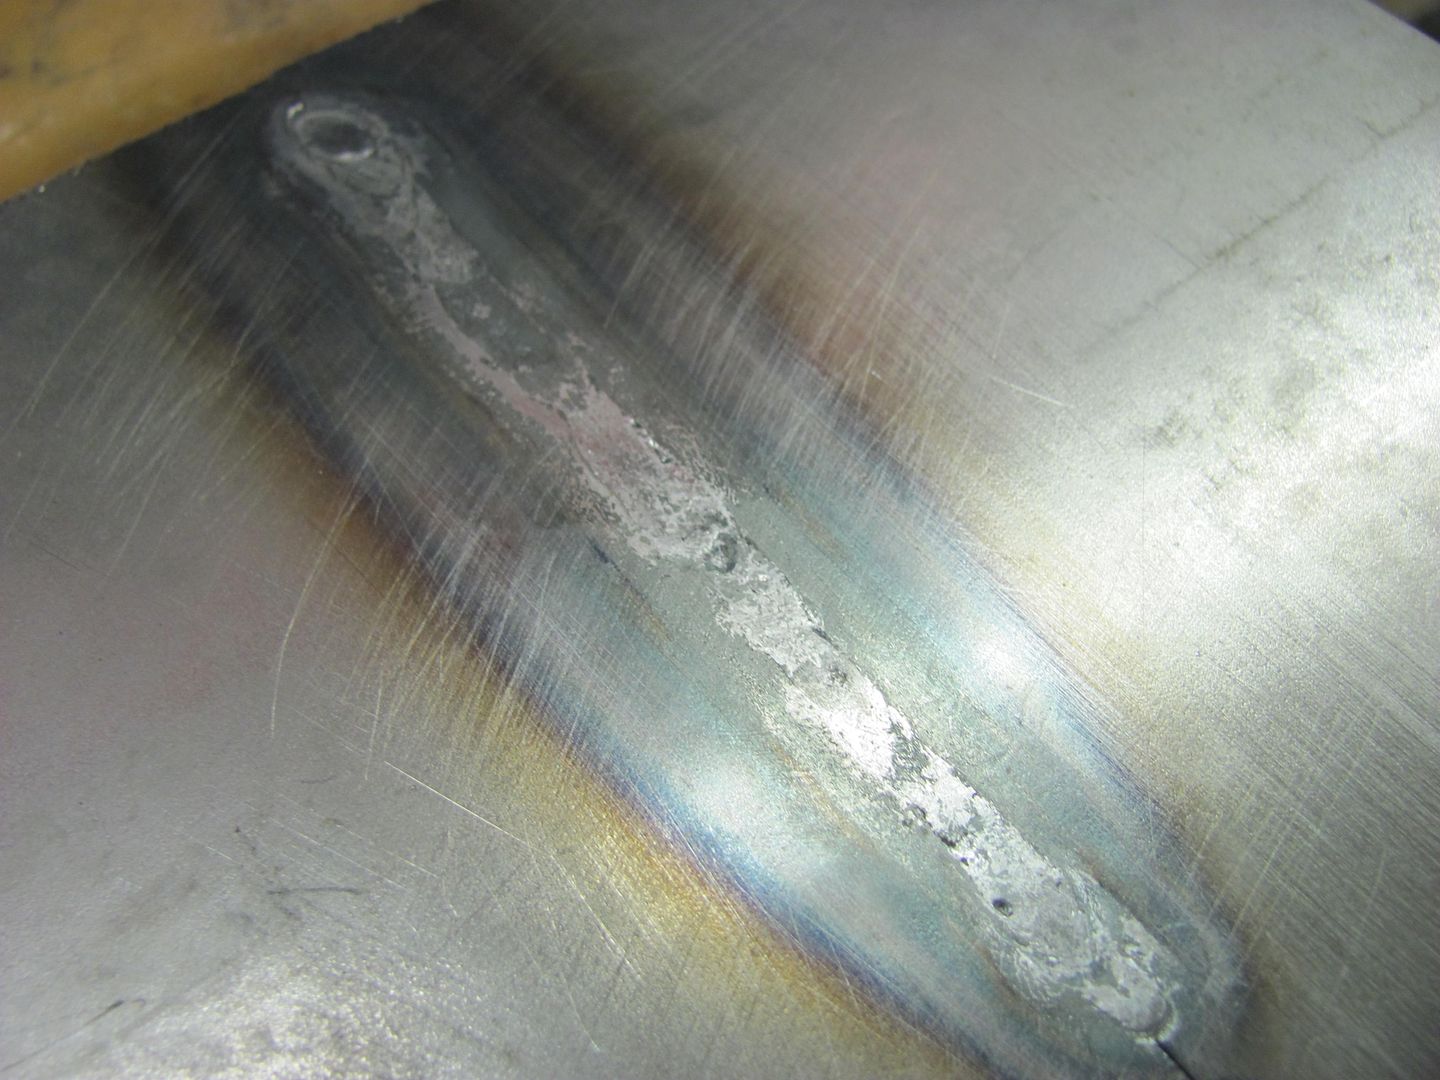
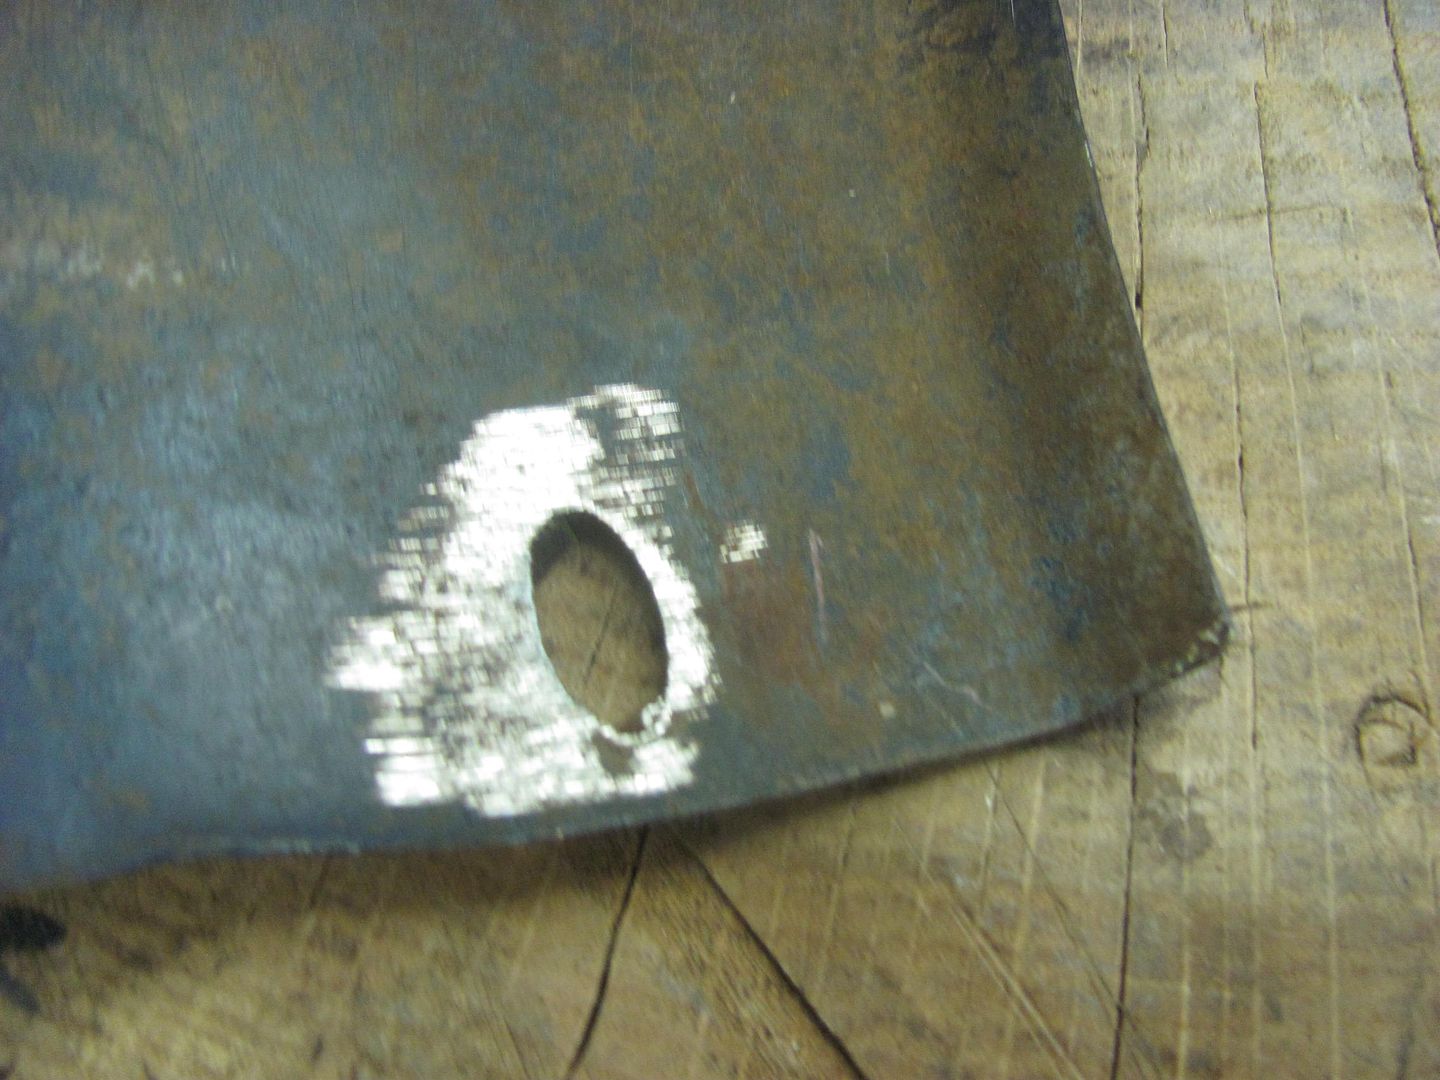
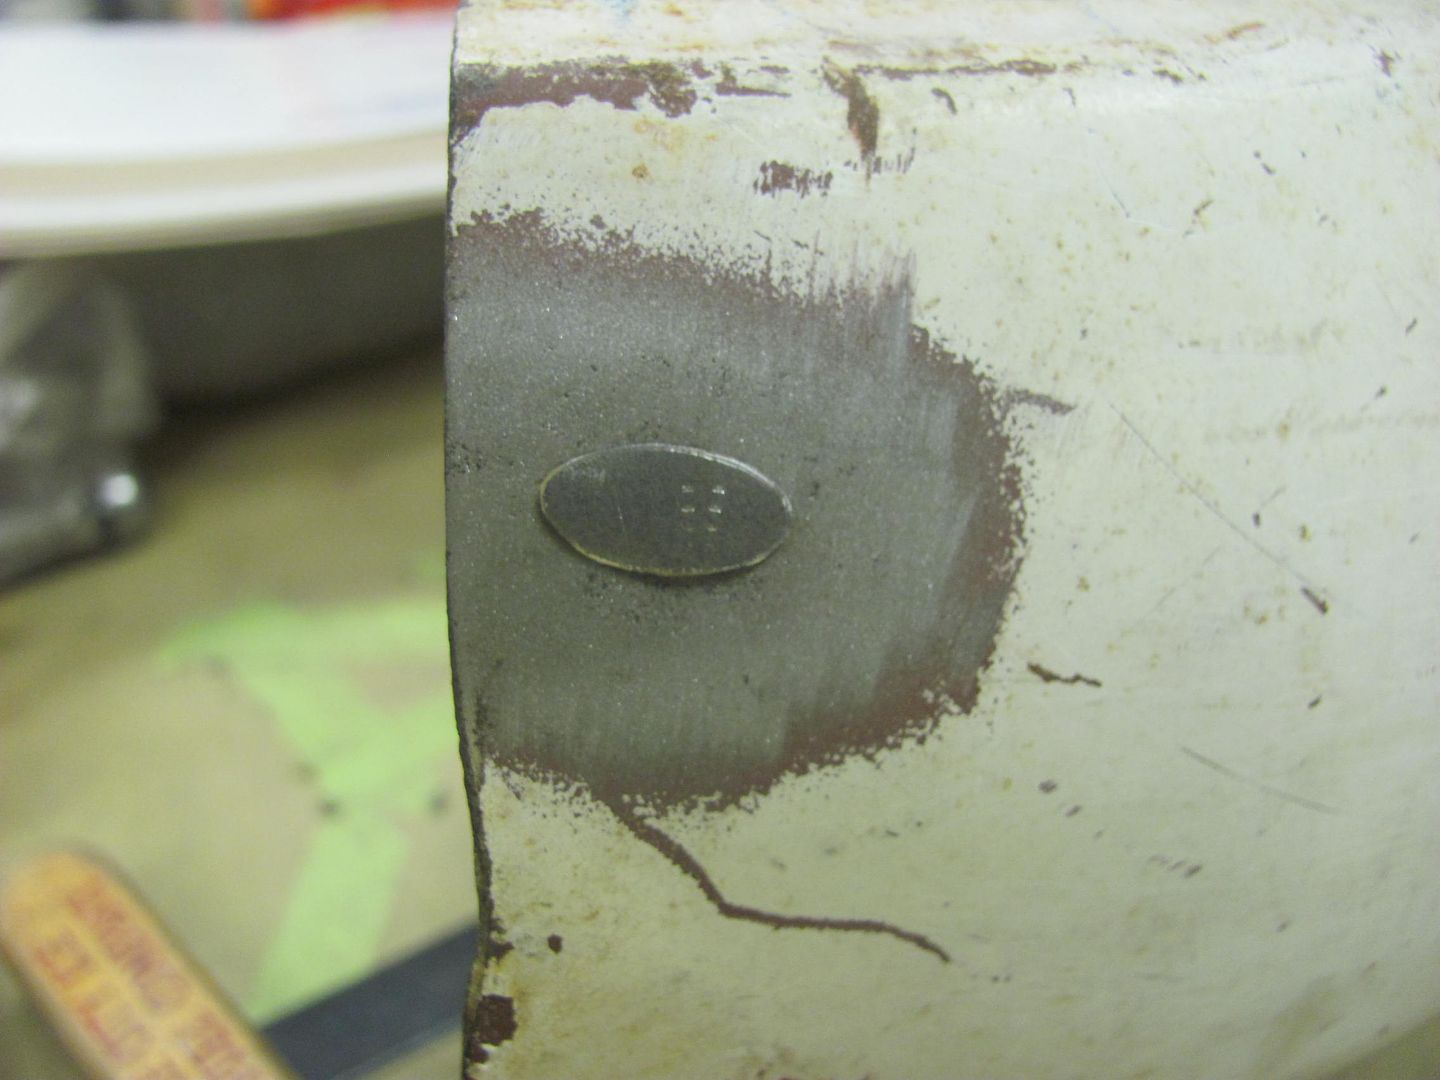
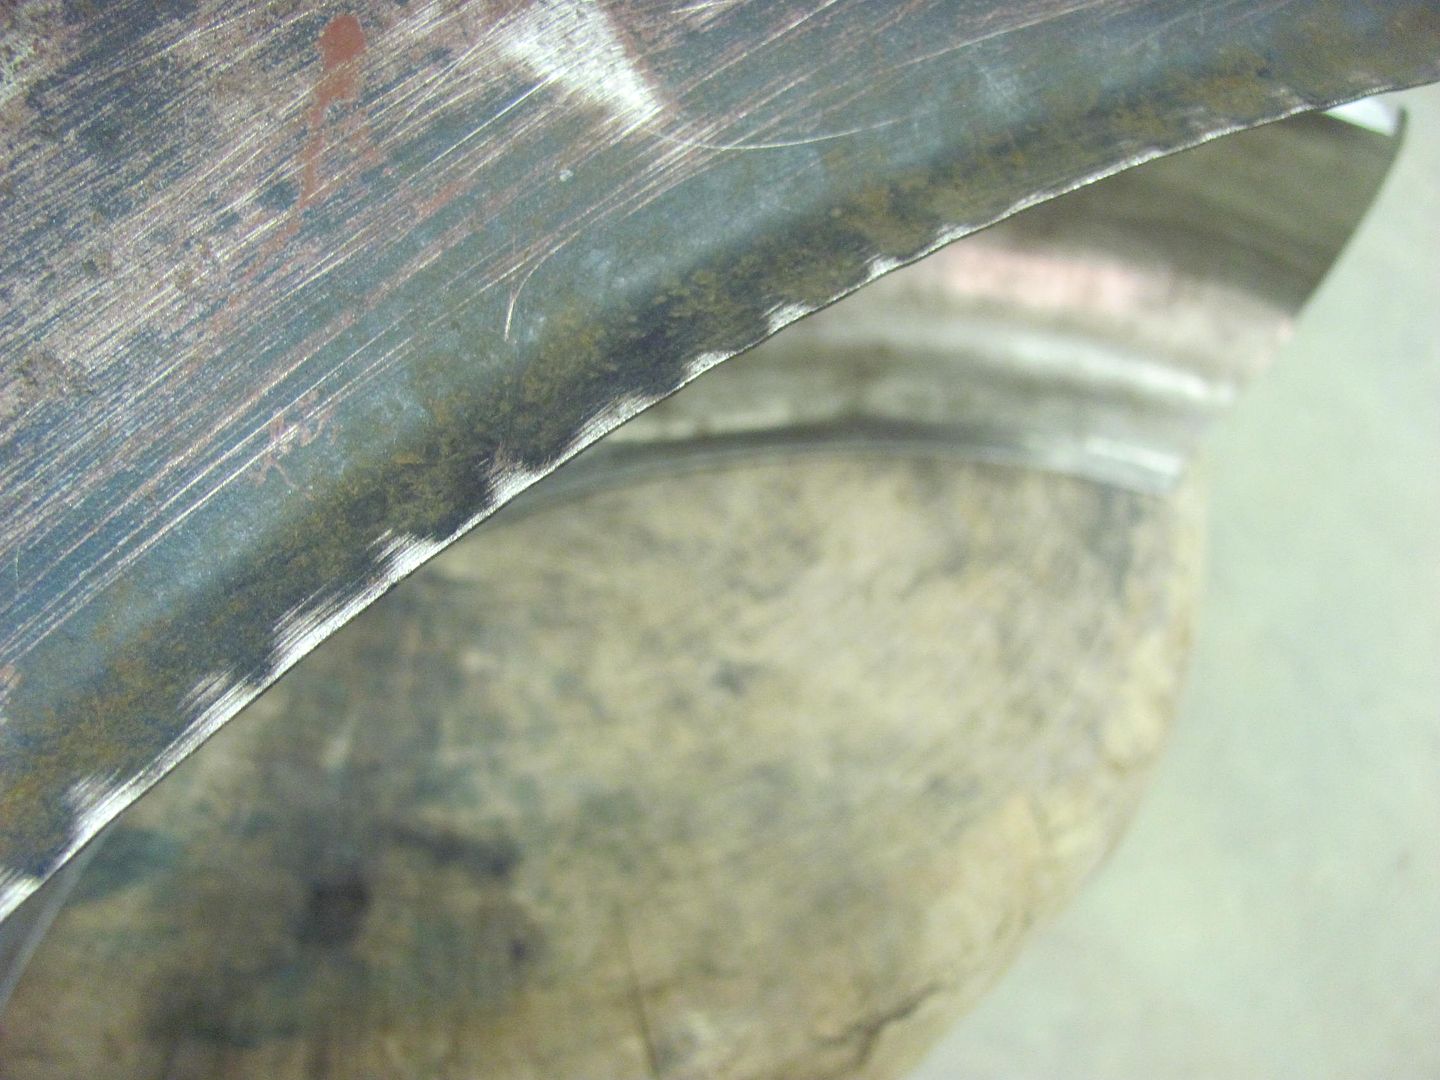
This is better known as fusion welding, and is possible with either the O/A torch or a TIG. Here is a sample I did in using the Tig...
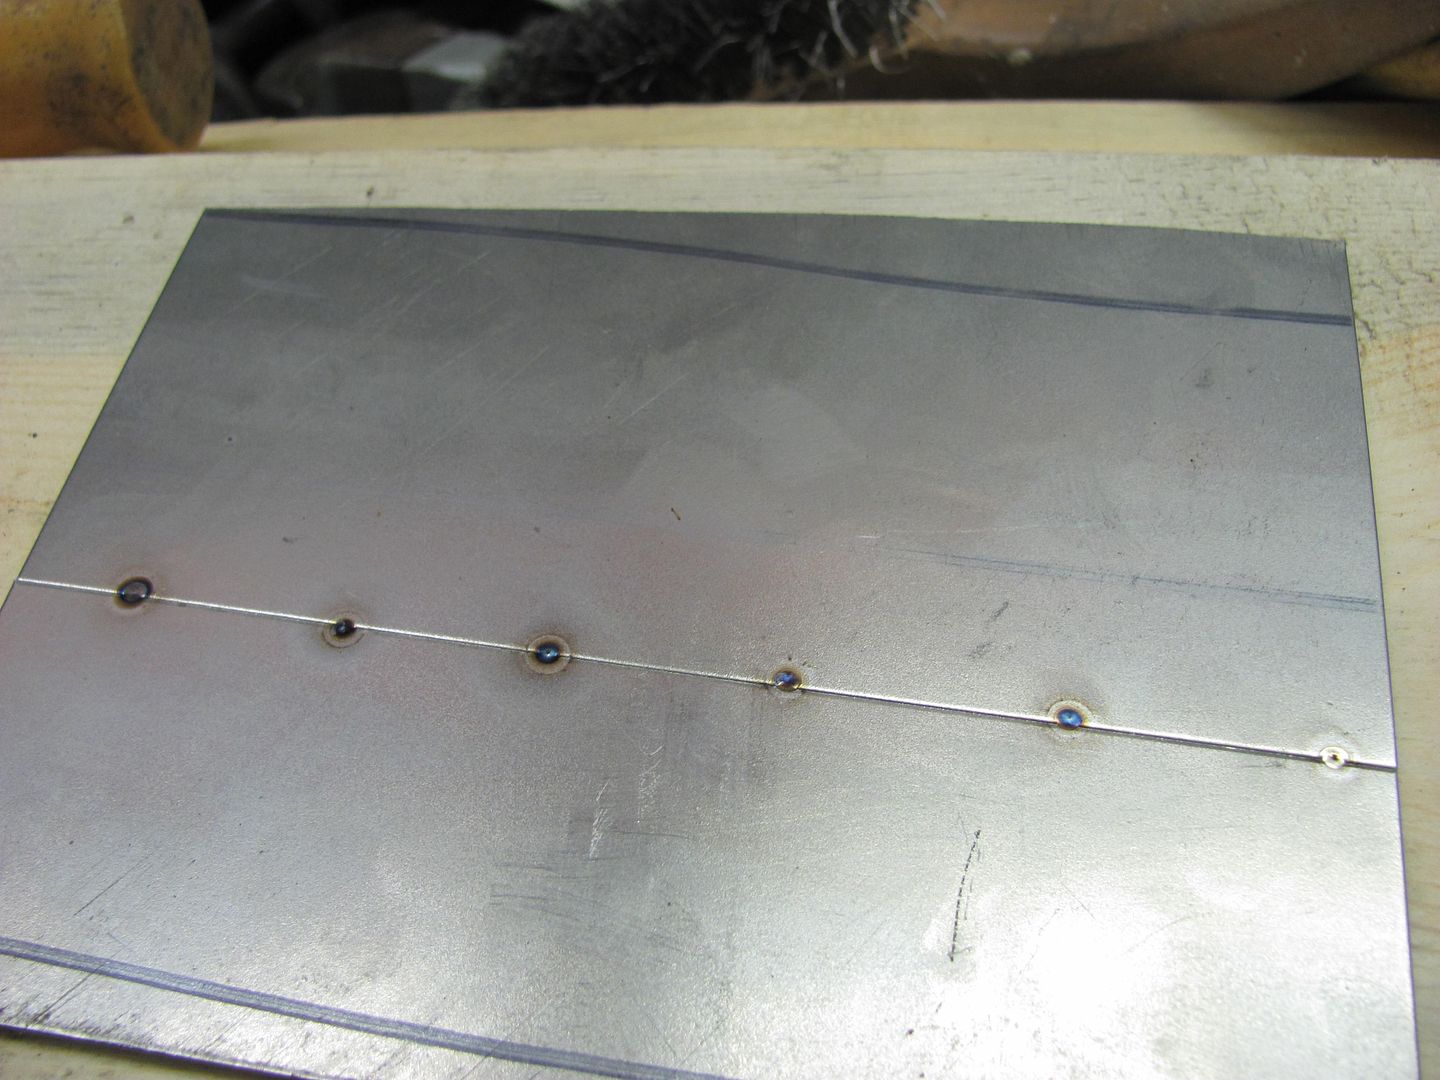
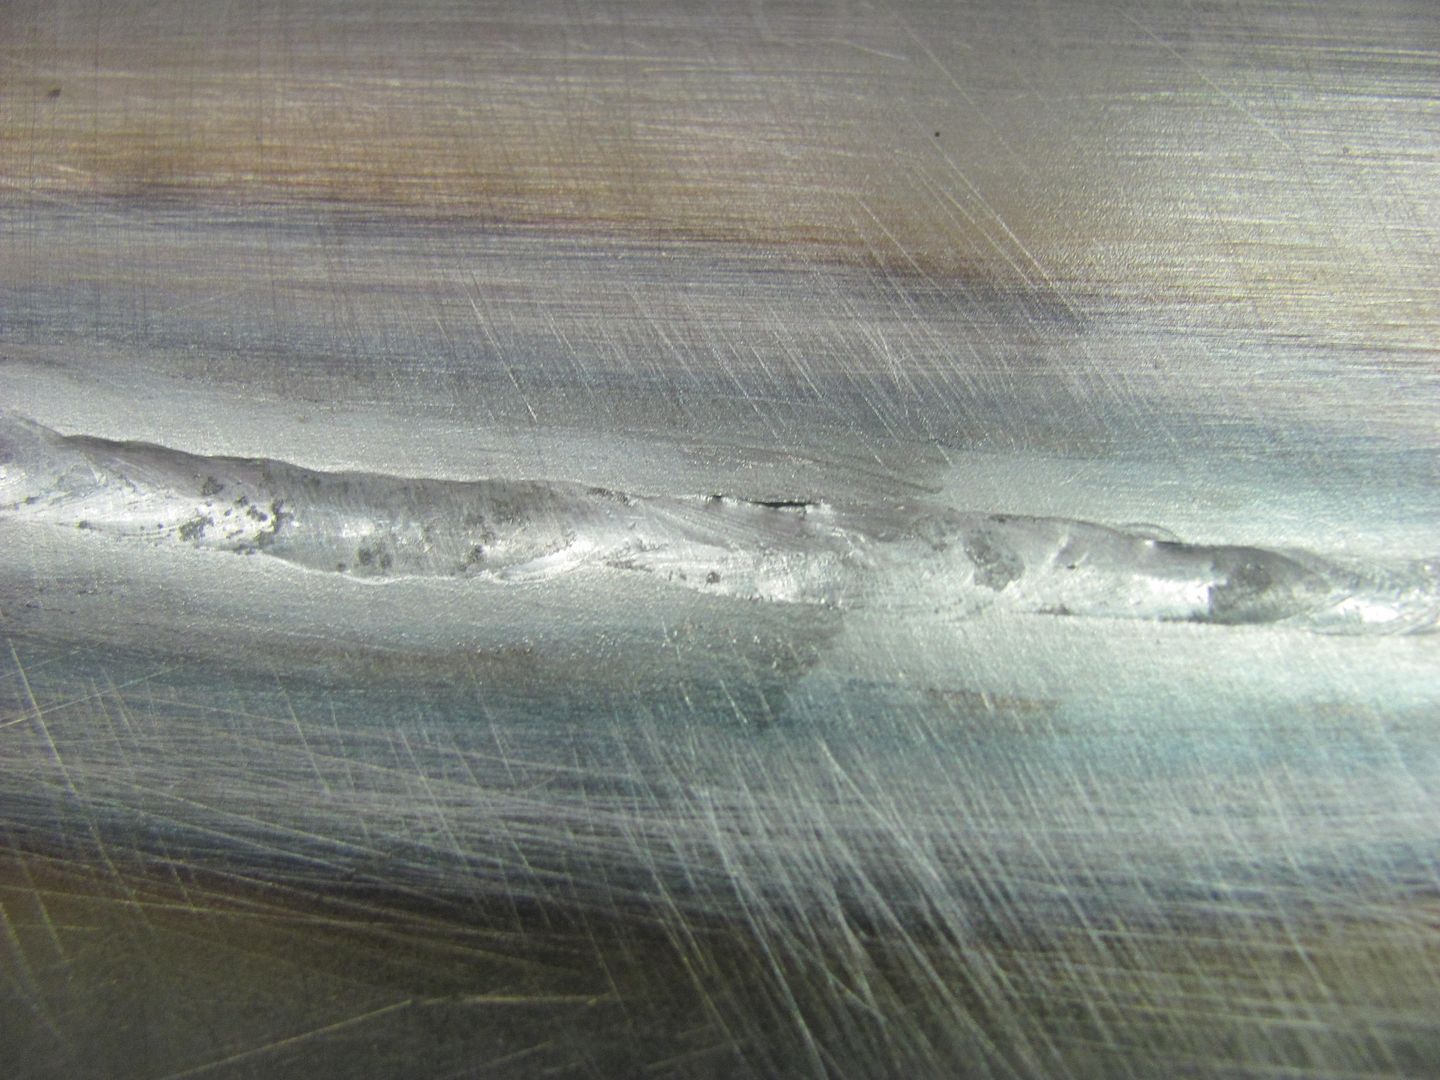
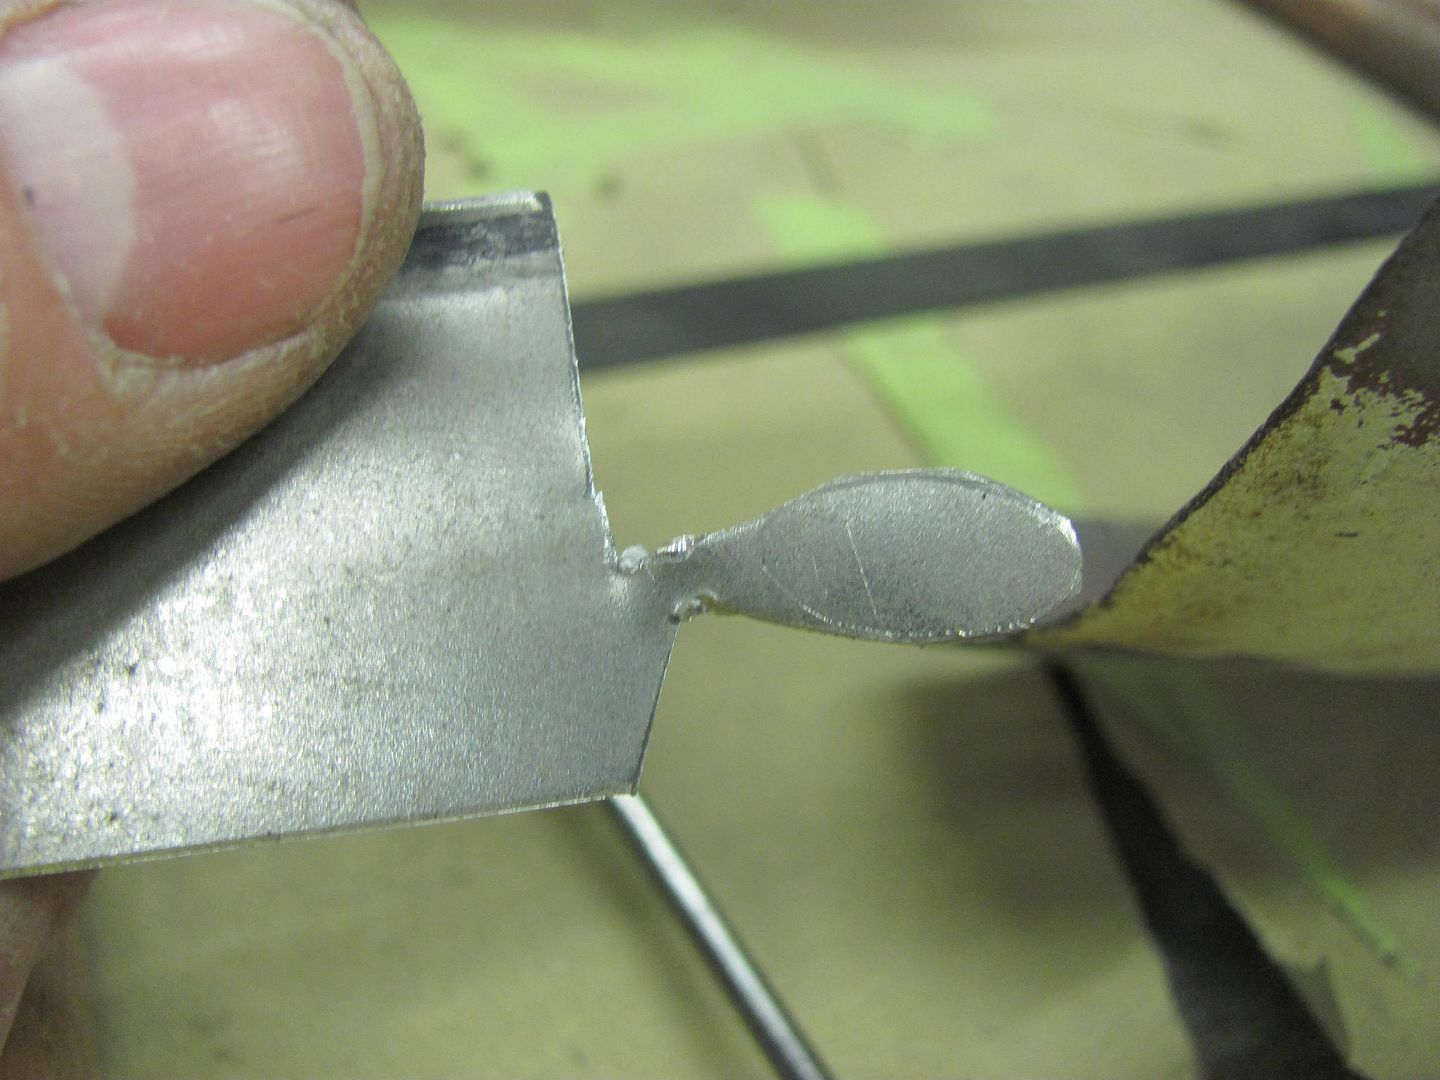
Note the lack of/minimal amount of HAZ around the tacks. This was accomplished by holding the electrode as close as you can without touching and using a quick zap. If held farther away from the panel, you see more blue HAZ surrounding the tack. Here is the fusion weld, no filler added.

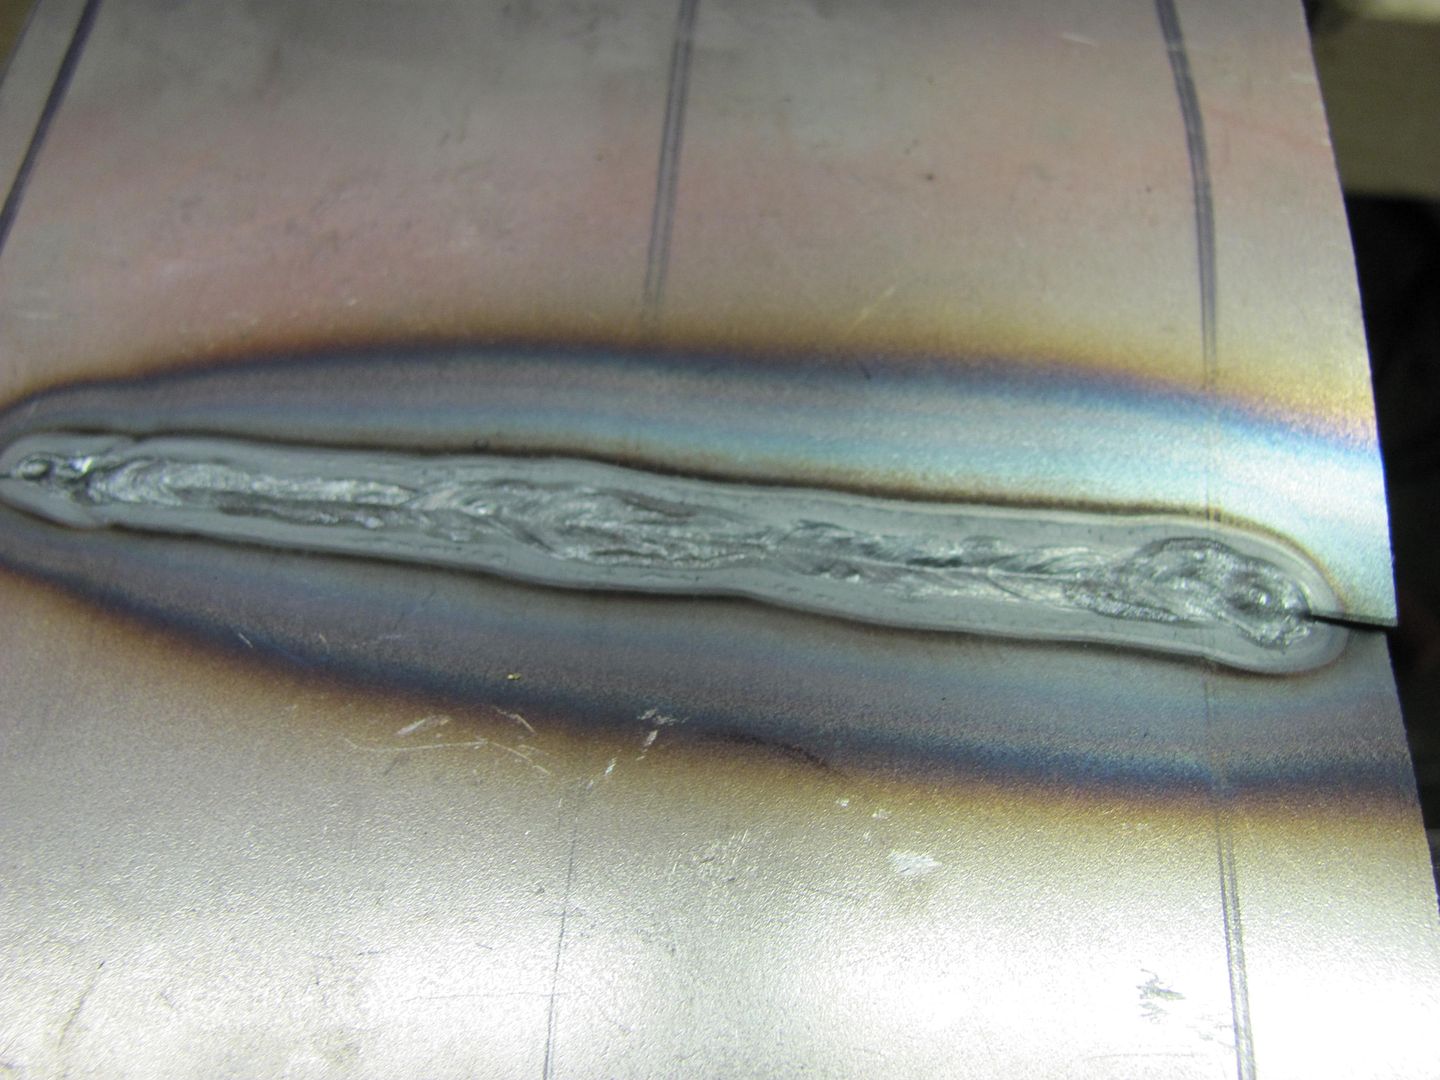
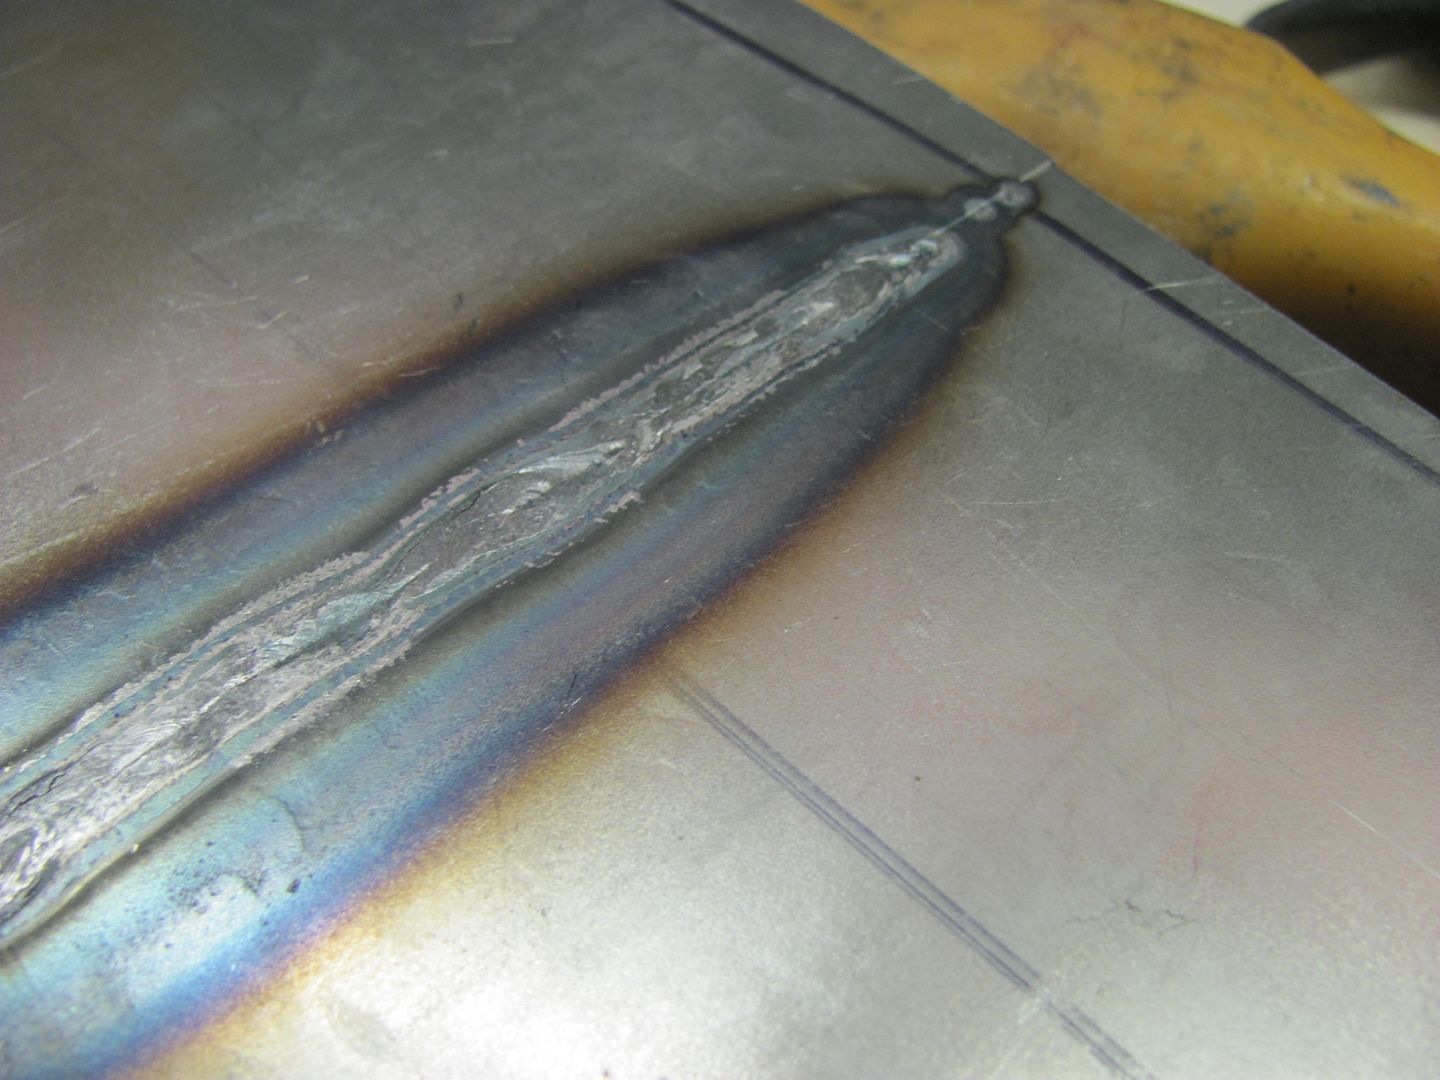
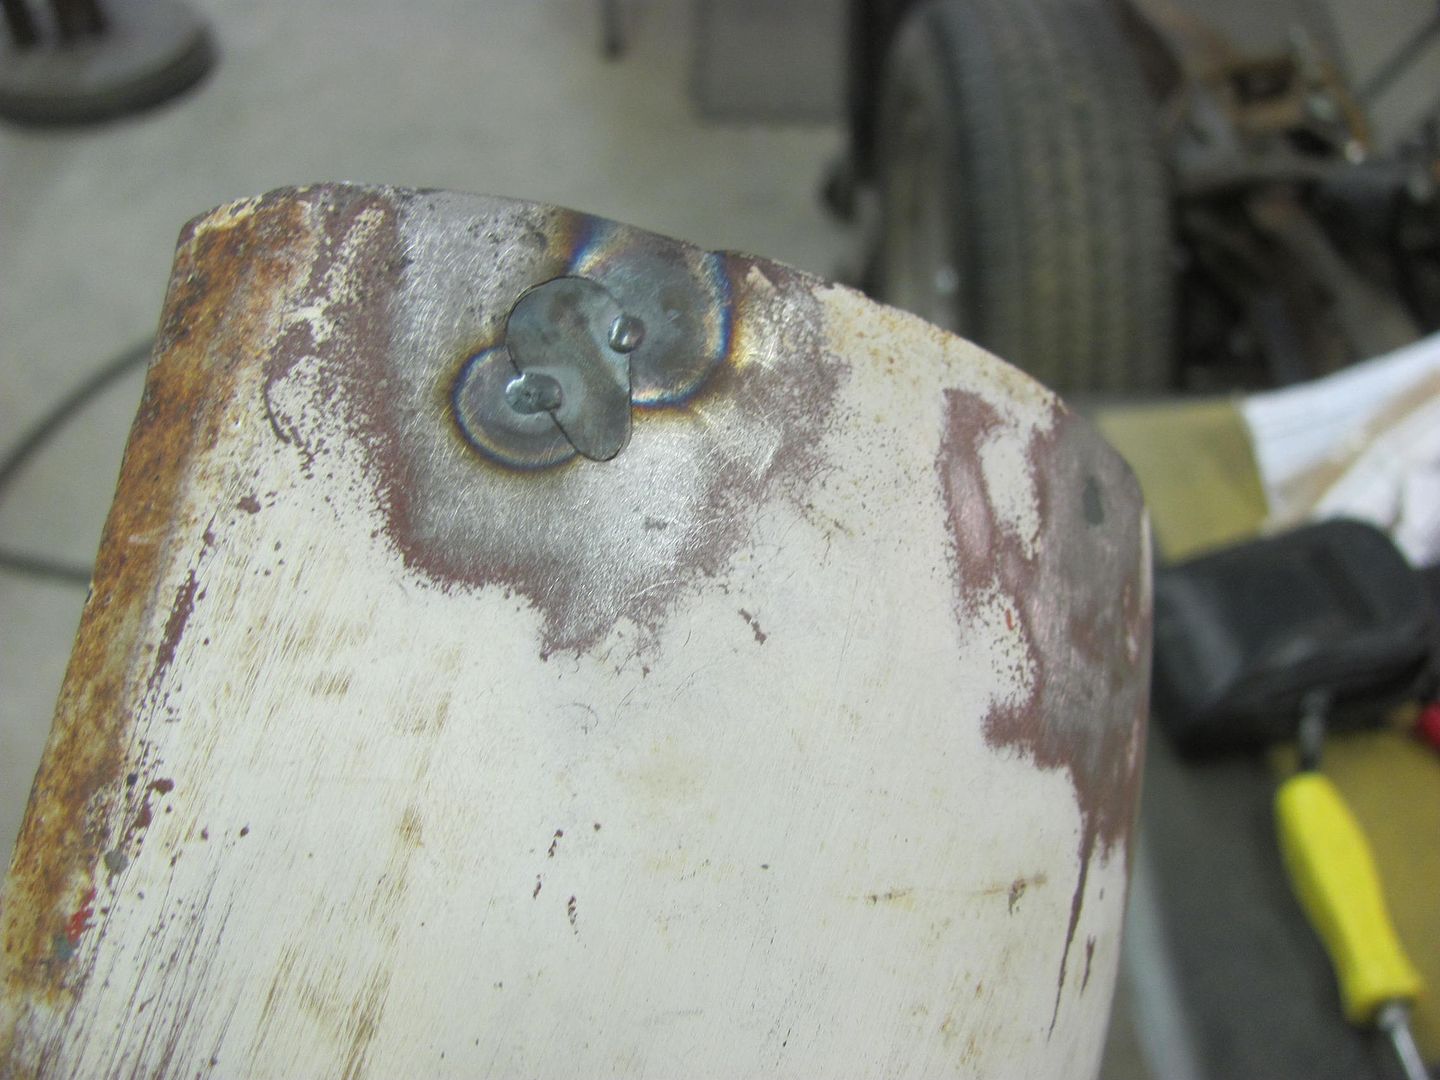
Back side.....
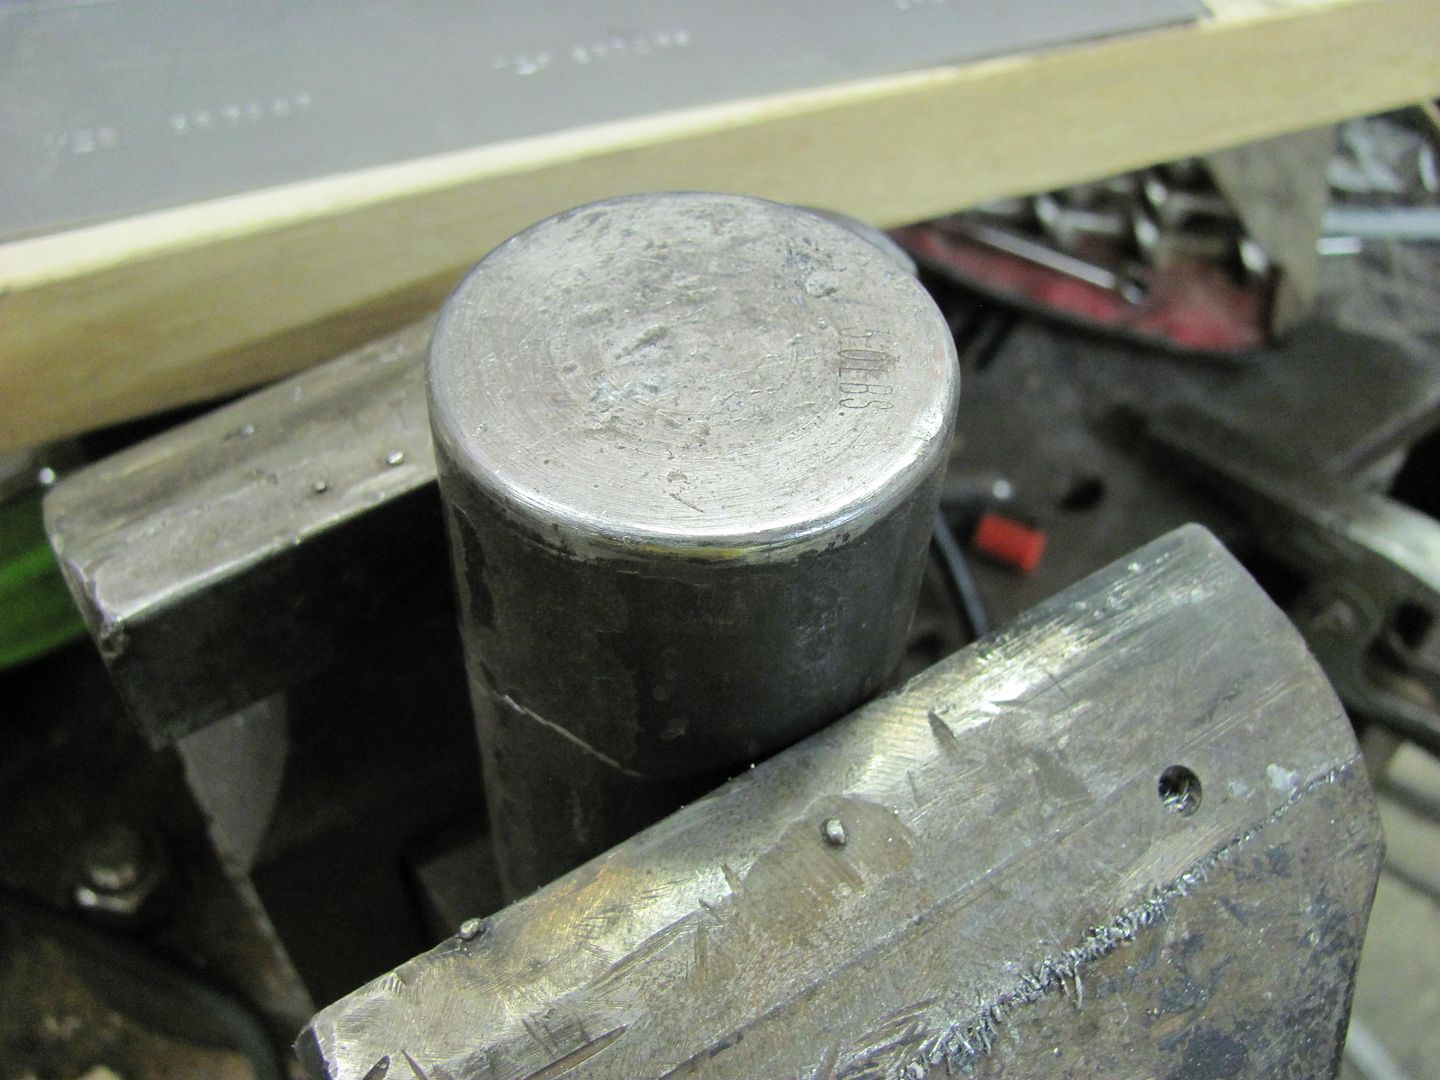
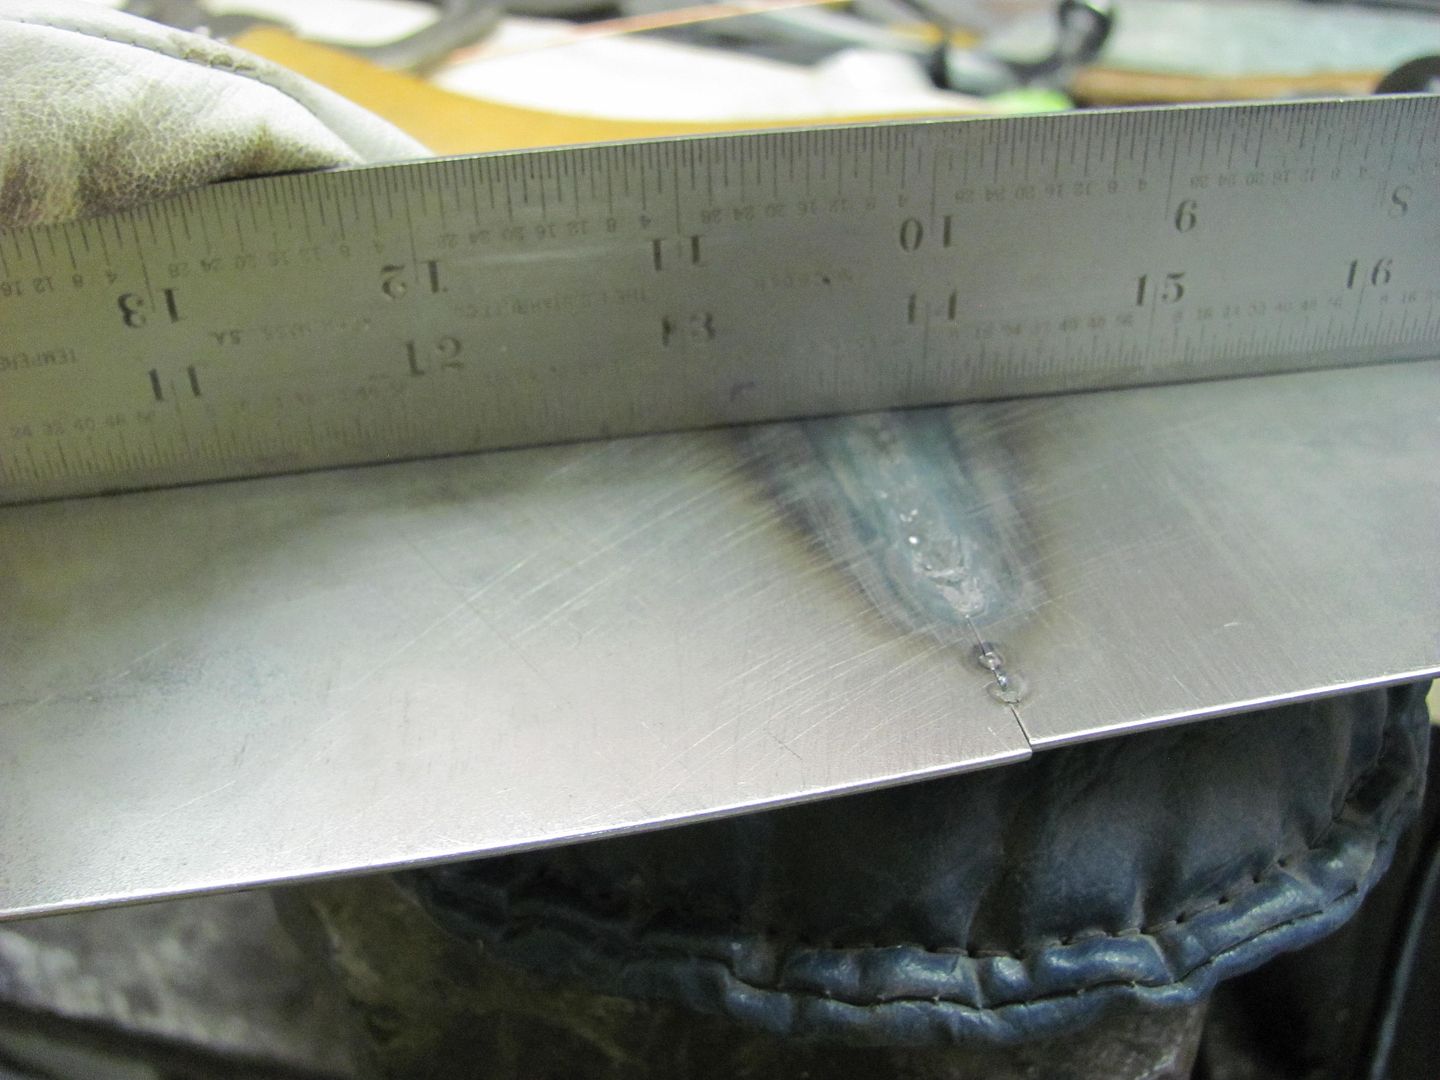
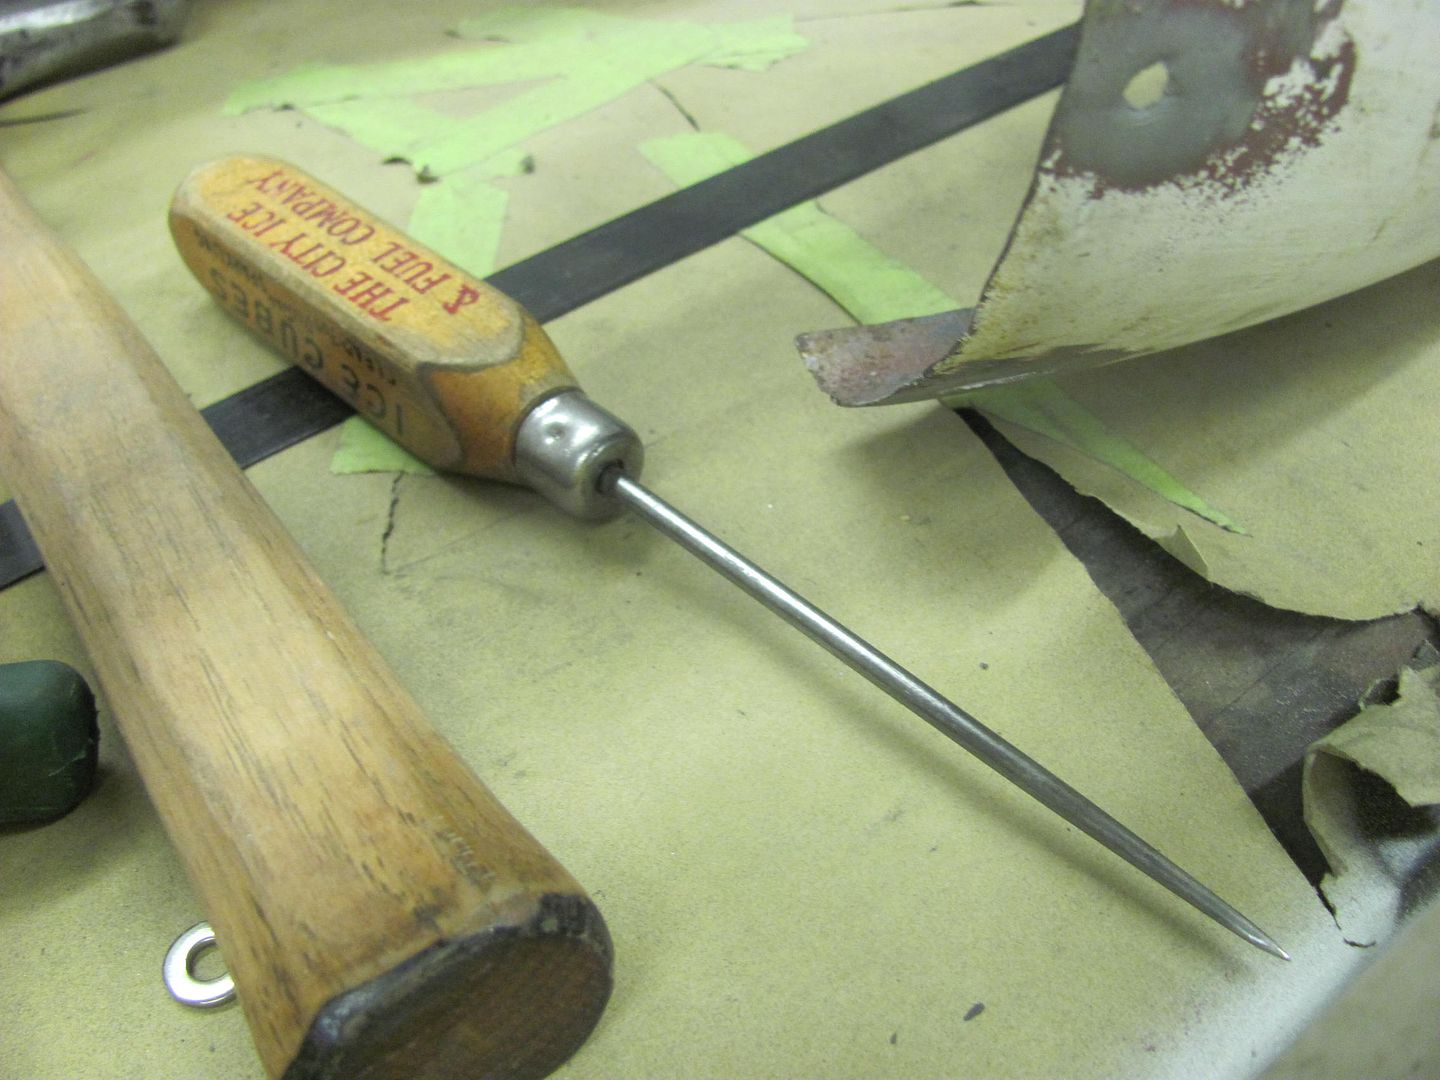
Then, using this anvil to planish out the weld and HAZ:
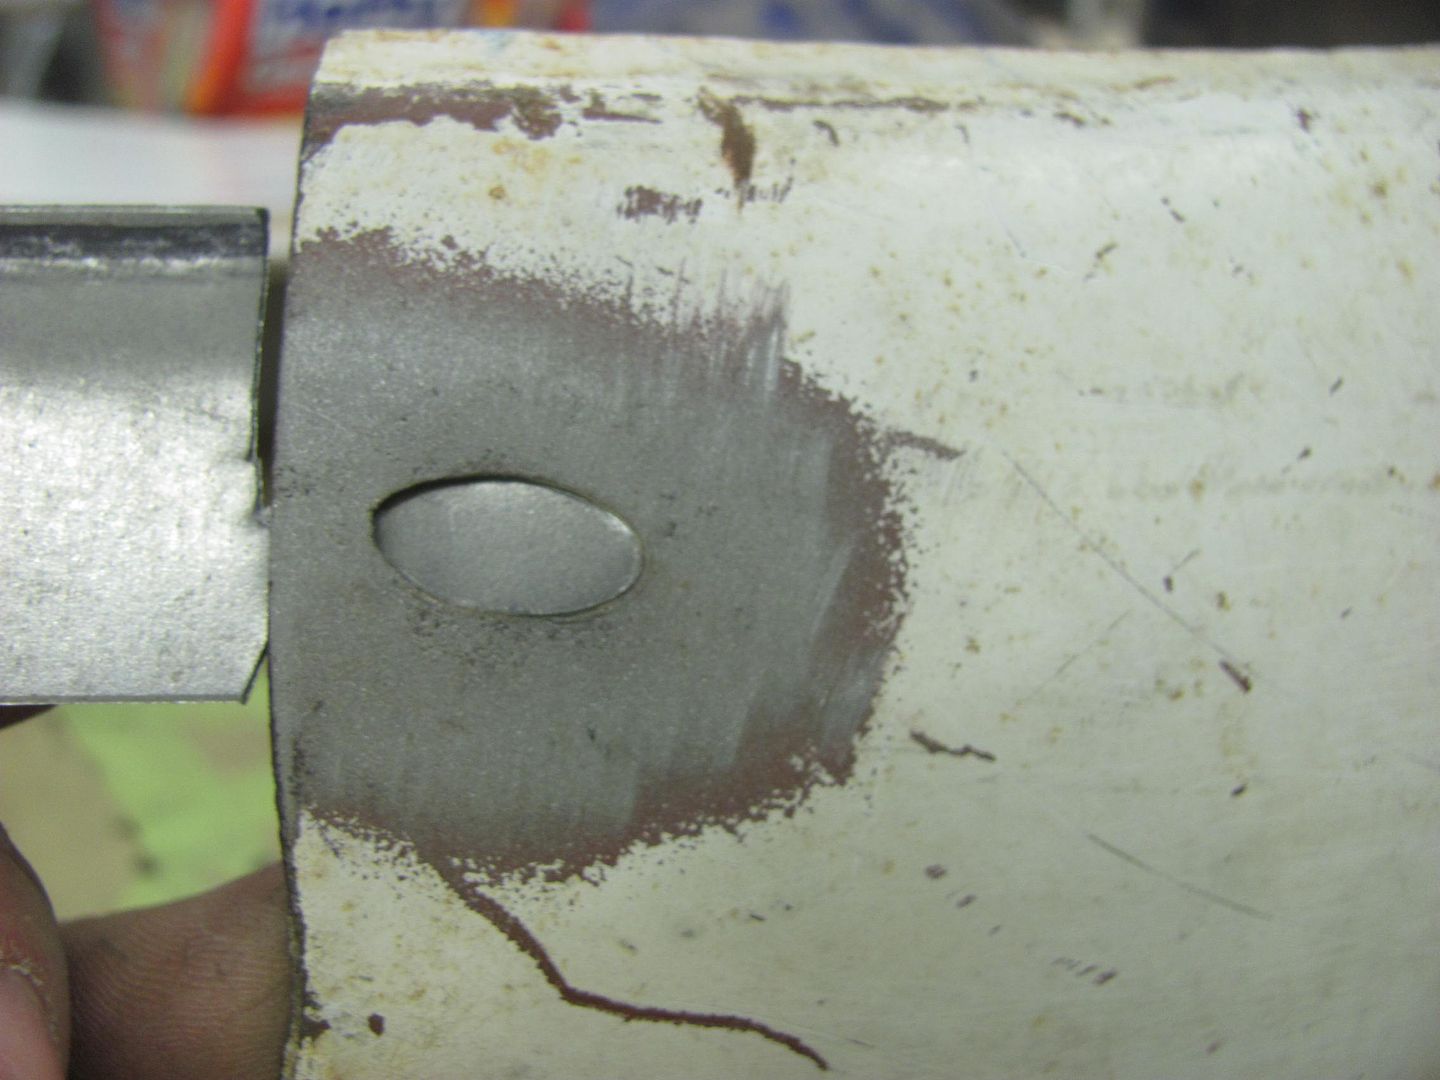
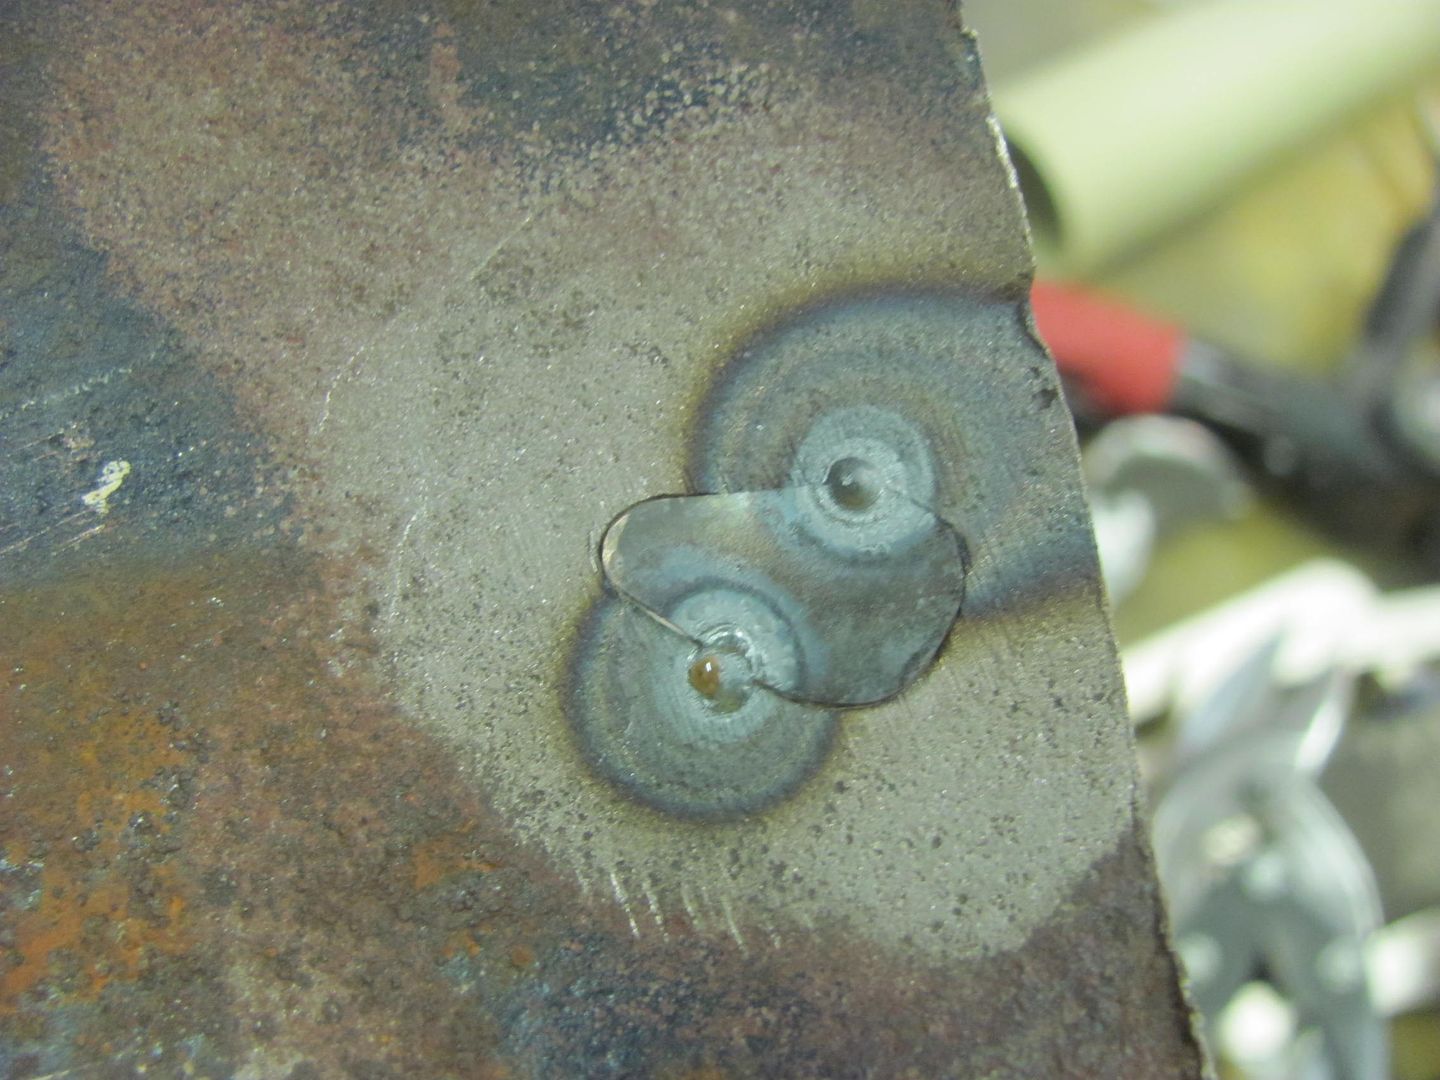
Results in this:
Front
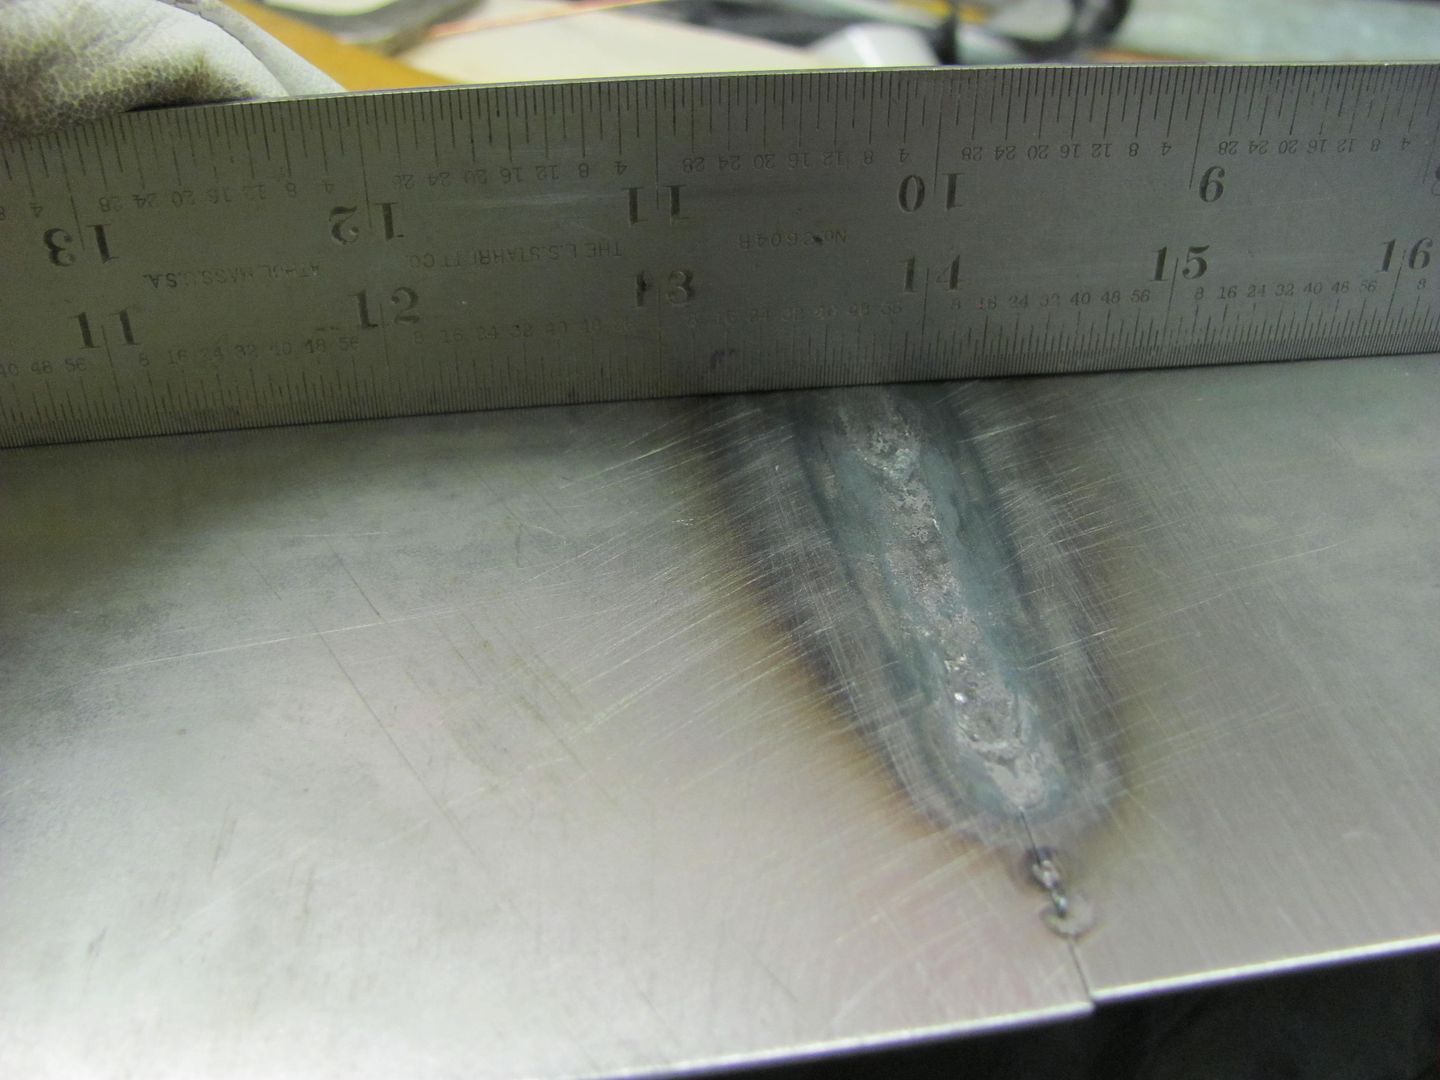
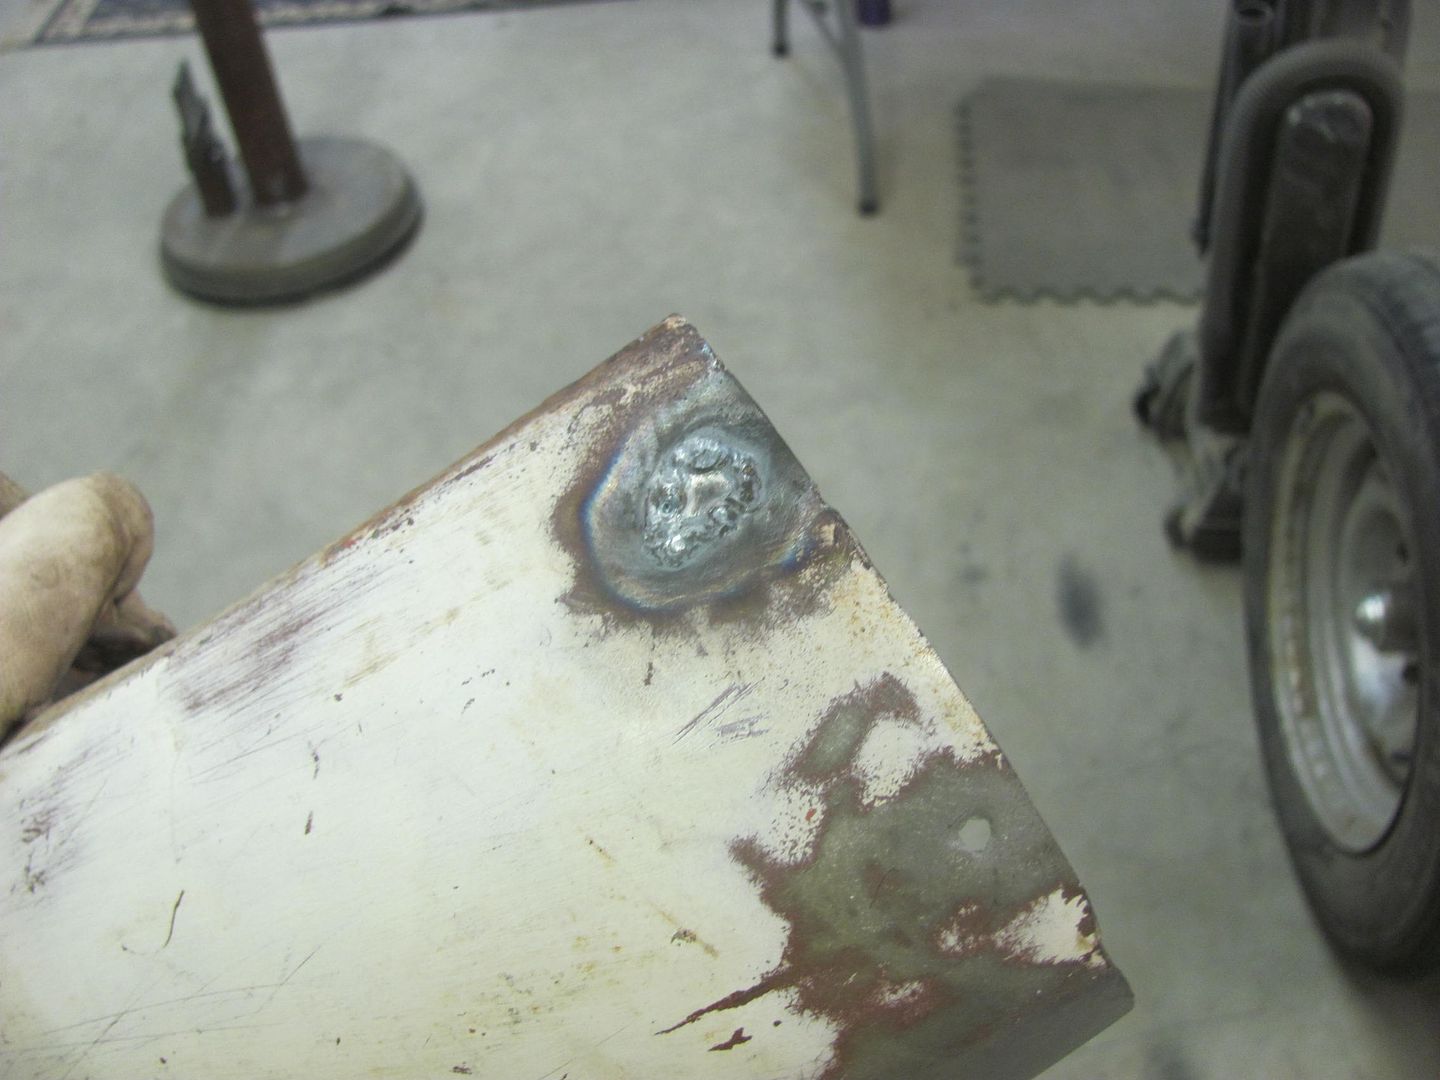
Back
Nice and flat, no grinding required (in this case)
This method requires having an absolute tight joint, so fitment will be more time consuming, but just imagine all the time just saved over dressing out a MIG weld...
2) If the excessive heat can be a problem with warping the material, why not braze the two pieces together? As I recall, brazing doesn't require the heat that is produced with the MIG welder, and the braze material fills in any gaps very nicely. Maybe there is a problem getting paint to properly adheres to the brazing material when it's completely finished?
1) If grinding down the bead can be an issue, why not use a torch, and butt both pieces of sheet metal together (so they're touching) and not use any filler rod? In other words, just melt the two pieces of sheet metal together.
This is better known as fusion welding, and is possible with either the O/A torch or a TIG. Here is a sample I did in using the Tig...
OK, you guys have been hearing me talk about fusion welding and since I was in the shop today I decided to show a sample of the TIG fusion welding. This takes me a bit out of my comfort zone, as I normally pick up the MIG, but here we go. Separate halves tacked together:
Note the lack of/minimal amount of HAZ around the tacks. This was accomplished by holding the electrode as close as you can without touching and using a quick zap. If held farther away from the panel, you see more blue HAZ surrounding the tack. Here is the fusion weld, no filler added.
Back side.....
Then, using this anvil to planish out the weld and HAZ:
Results in this:
Front
Back
Nice and flat, no grinding required (in this case)
This method requires having an absolute tight joint, so fitment will be more time consuming, but just imagine all the time just saved over dressing out a MIG weld...
2) If the excessive heat can be a problem with warping the material, why not braze the two pieces together? As I recall, brazing doesn't require the heat that is produced with the MIG welder, and the braze material fills in any gaps very nicely. Maybe there is a problem getting paint to properly adheres to the brazing material when it's completely finished?
As far as the brazing process, the heat issue as per the above comments apply. Despite the lower heat temps needed, if someone is not skilled at applying the heat and filler, then any benefit of the lower temps used will be lost to sitting on the panel longer. As with any process, practice (on scraps) is key. Regarding the adhesion issue with brazing, I think there is less an issue with the brass as there is with the flux used in the process. Most adhesion issues can be attributed to flux contamination.
In the end, practice your methods using scraps the same thickness as your vehicle's panels, and once you are satisfied with the results (regardless of which process) then proceed to working on the vehicle.
Elder User
Joined: Sep 2006
Posts: 741
Likes: 0
From: Katy(Houston), Texas
Great info and pics from a very skilled metal worker. I cant believe I haven't seen this sticky until today. I'm in the 48 - 56 forum and rarely venture out but glad I did today. I learned a few things and I'll be checking in for more so keep it coming. Thanks! 
Fleet Mechanic


Joined: Sep 2012
Posts: 1,609
Likes: 53
Right welder?
I have been reading a lot of these threads and am buying a Hobart 140. I am going to be doing sheet metal work with it. I am hoping to use the flux core to mig weld and not so much of the gas. I welded a bit in school but been away from it for a while. Am I buying the right tool to do this work? I know there will be a lot of trial and error. Thanks
Tuned
Joined: Aug 2007
Posts: 459
Likes: 123
From: Maryland
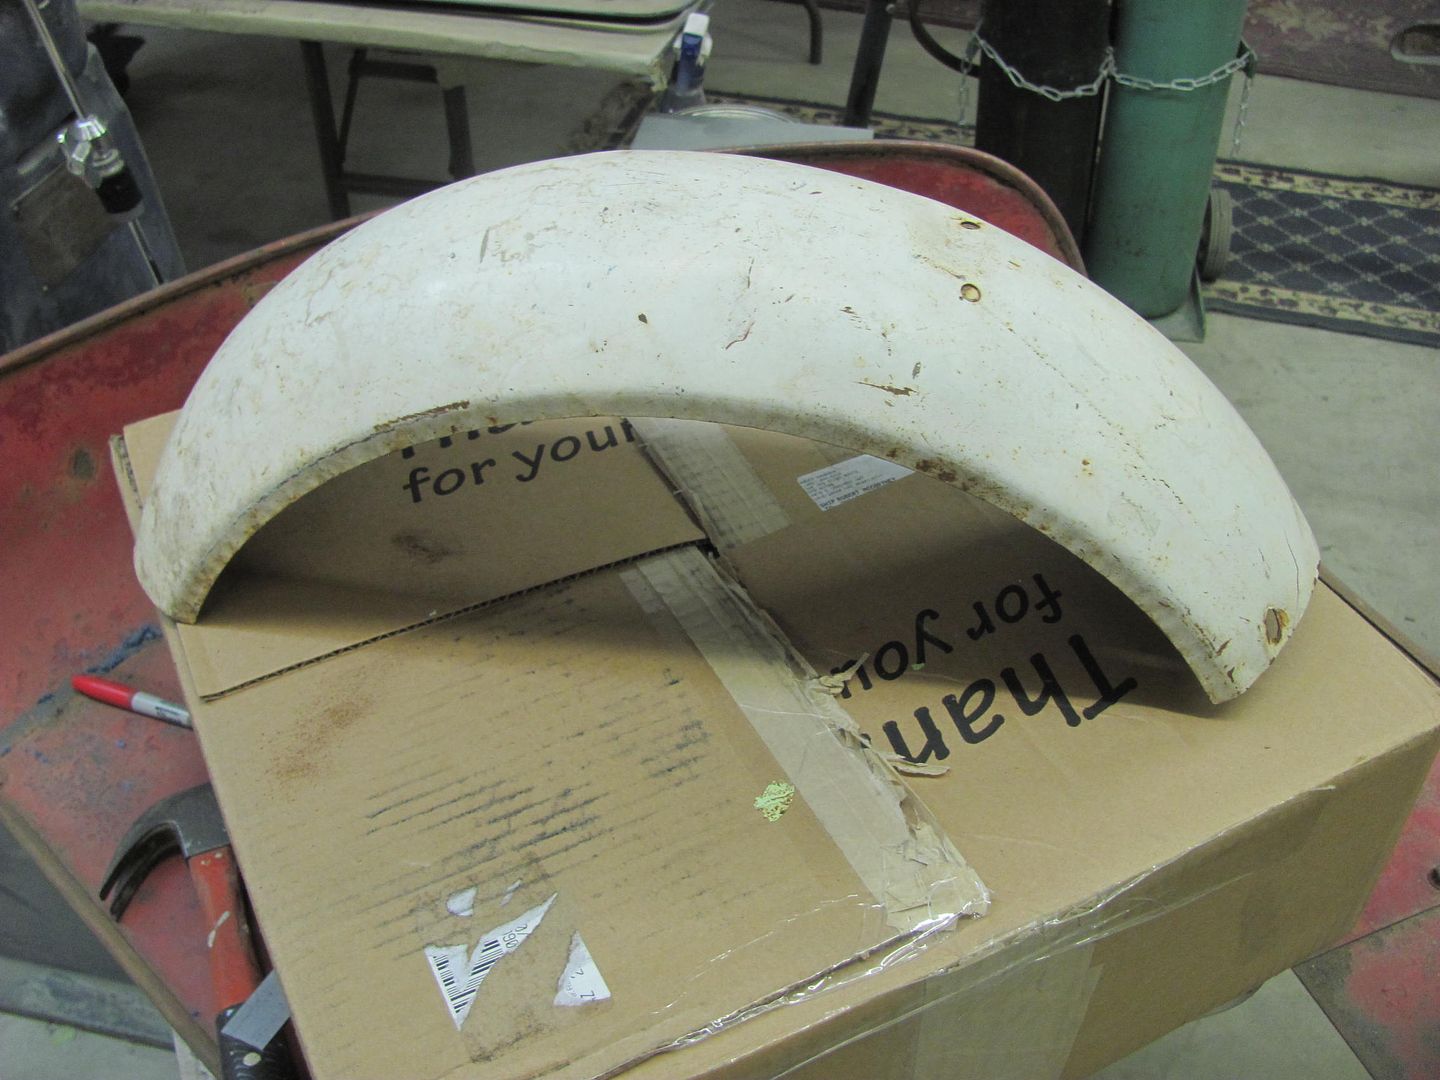
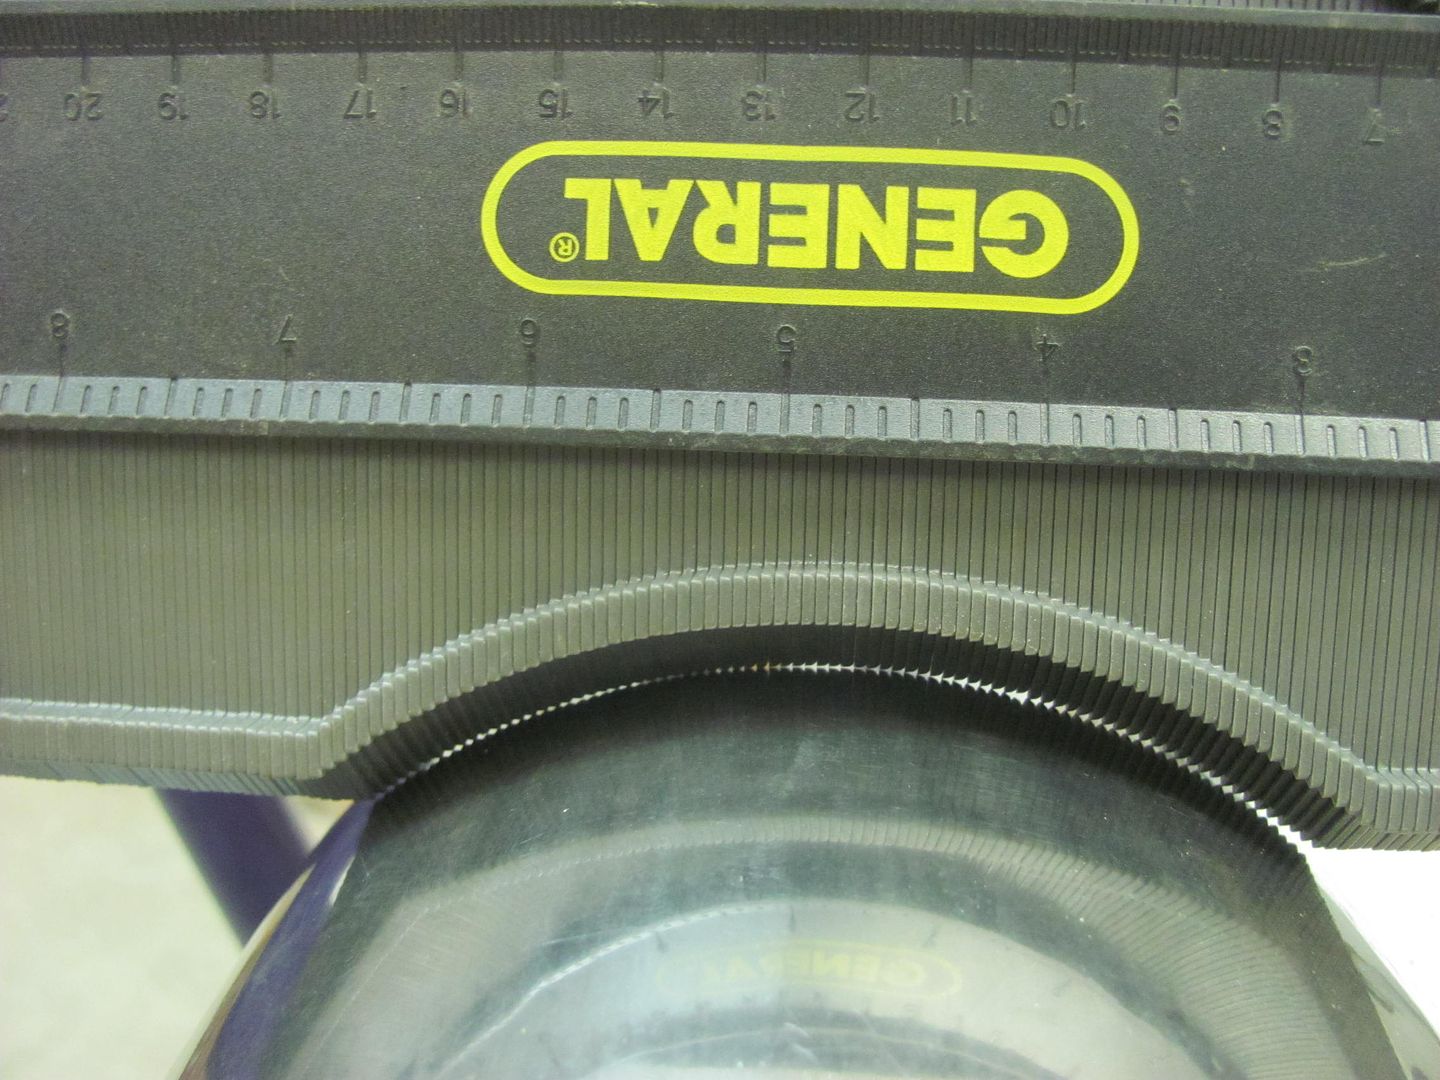
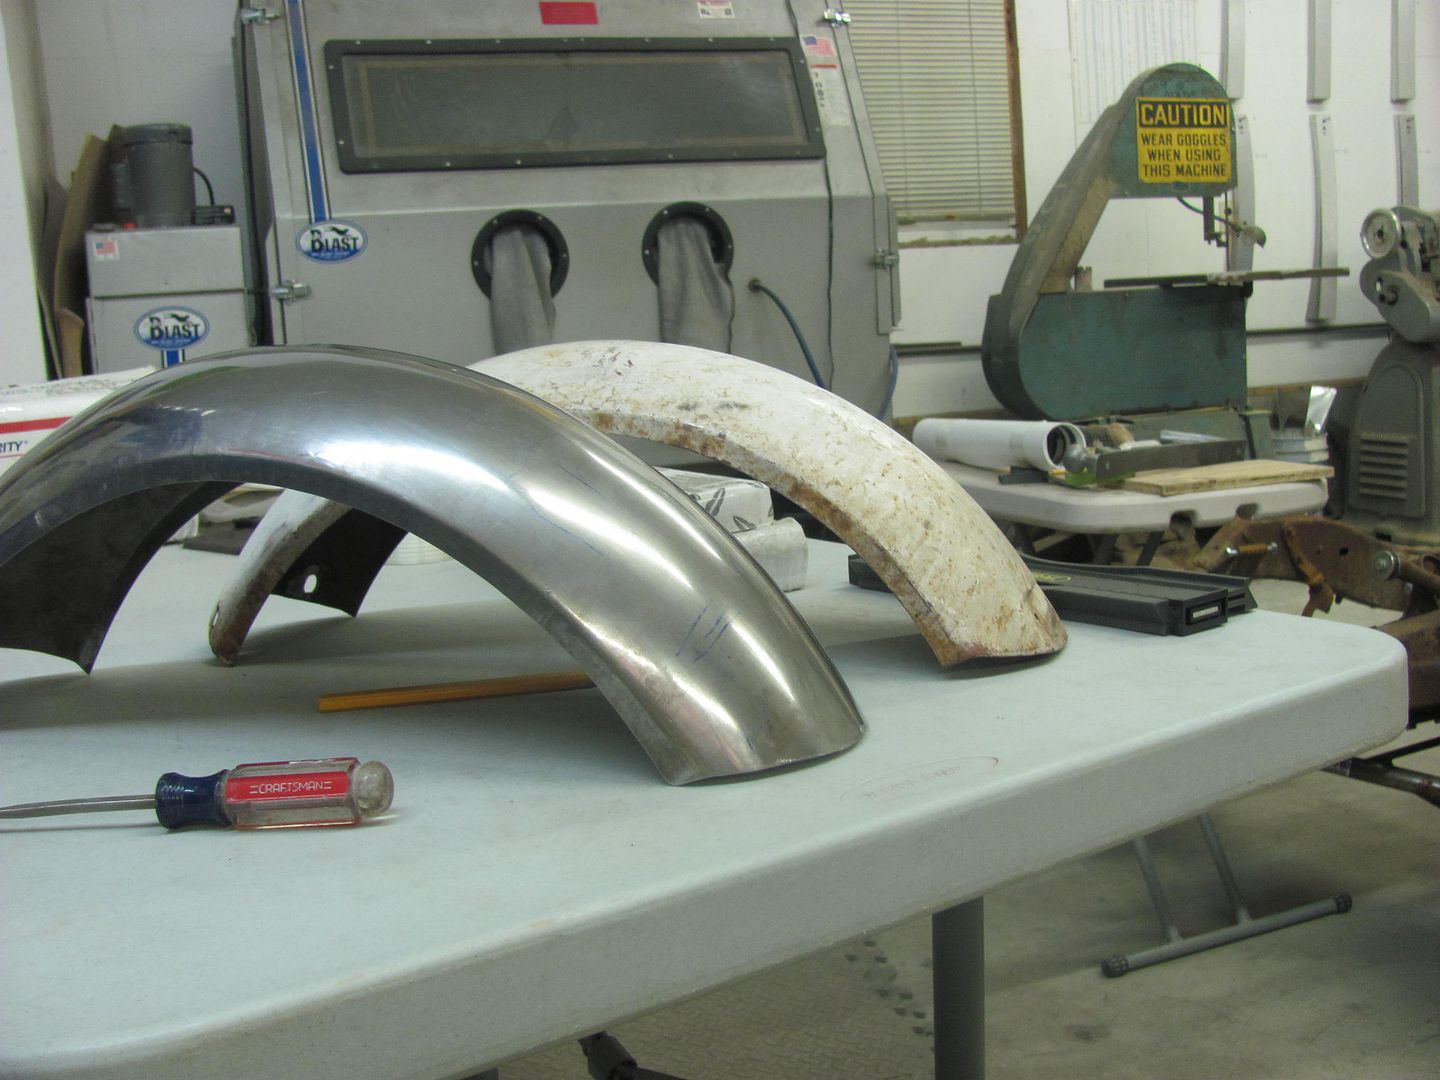
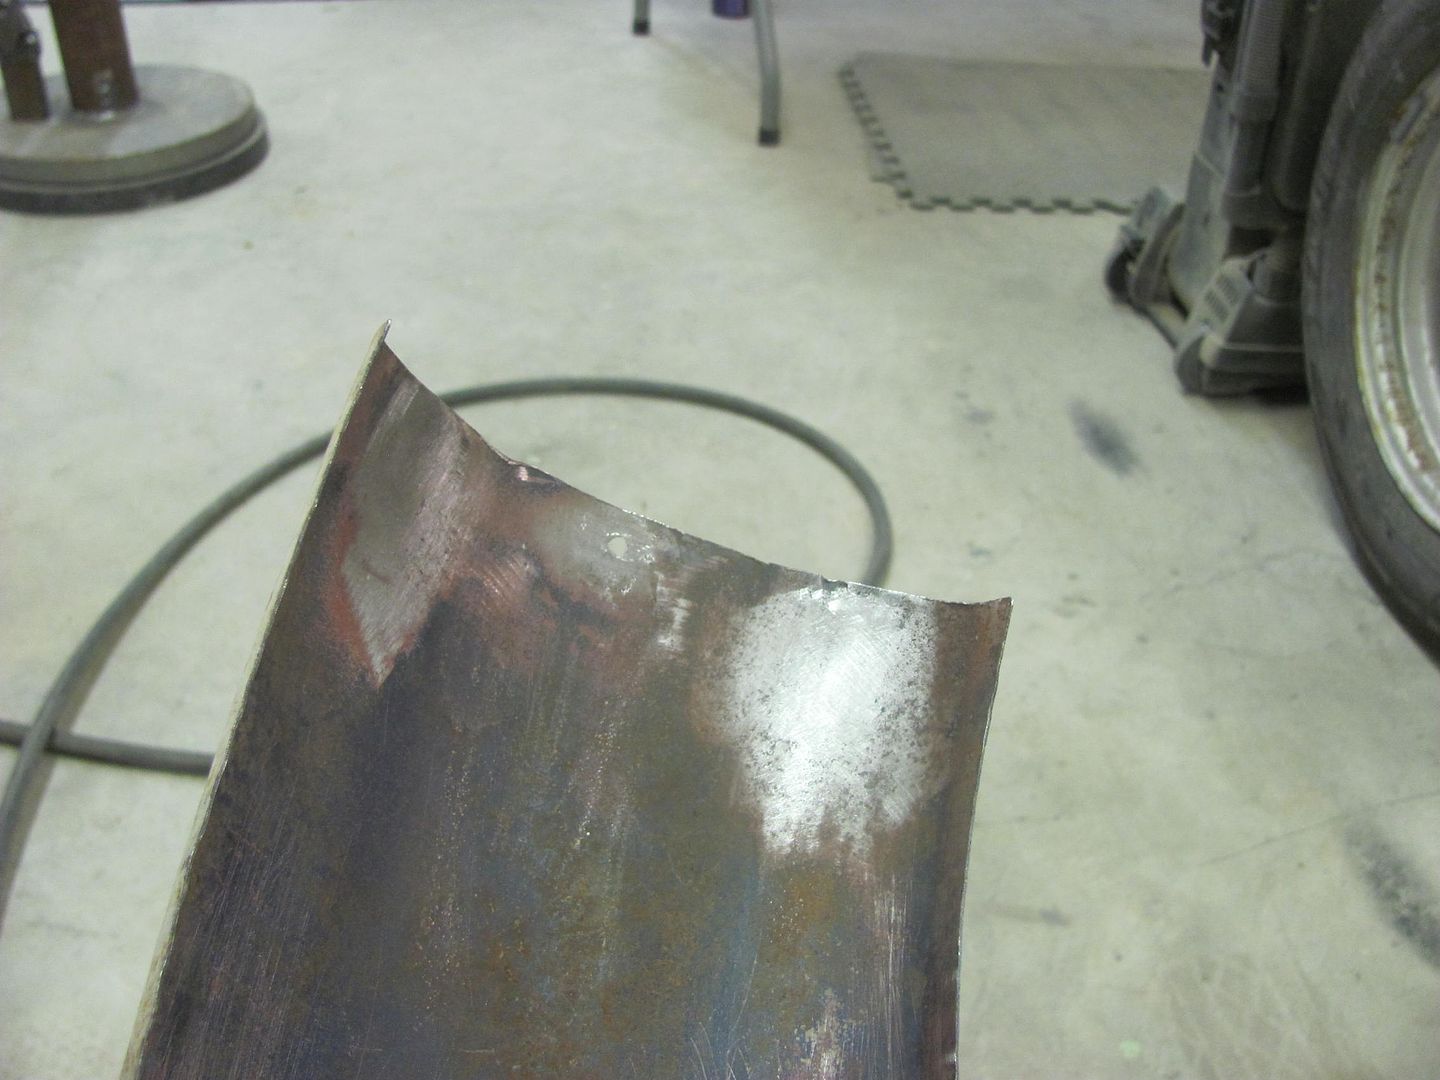
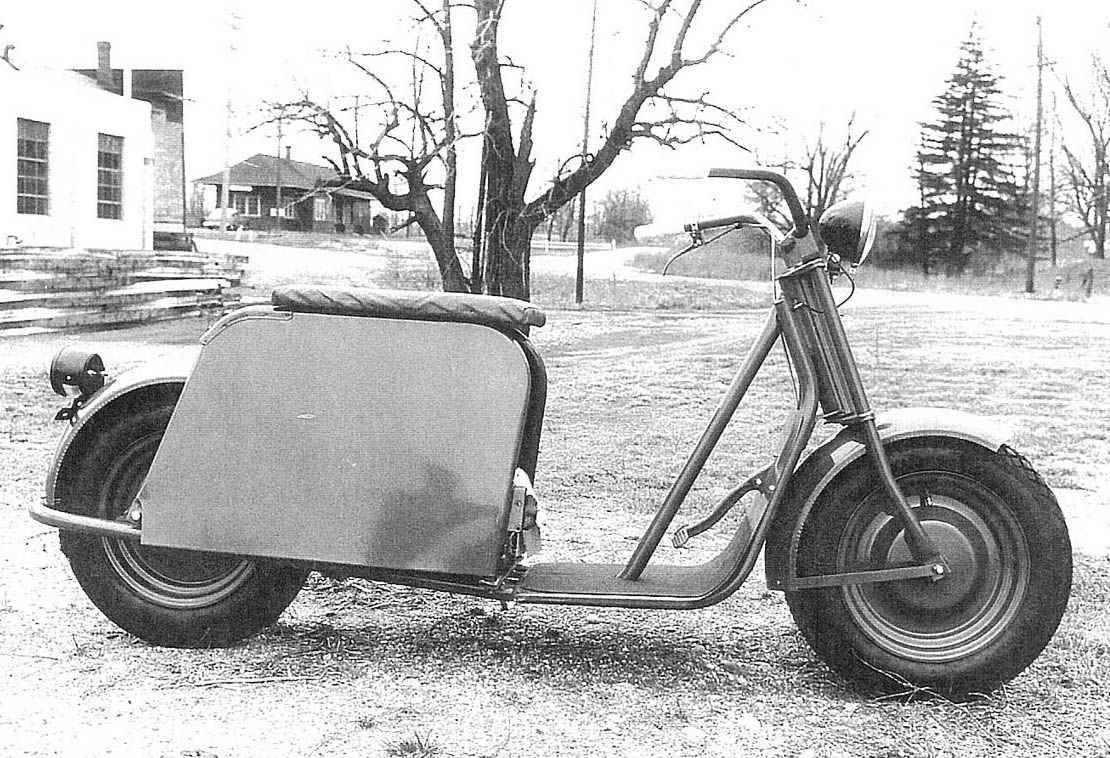
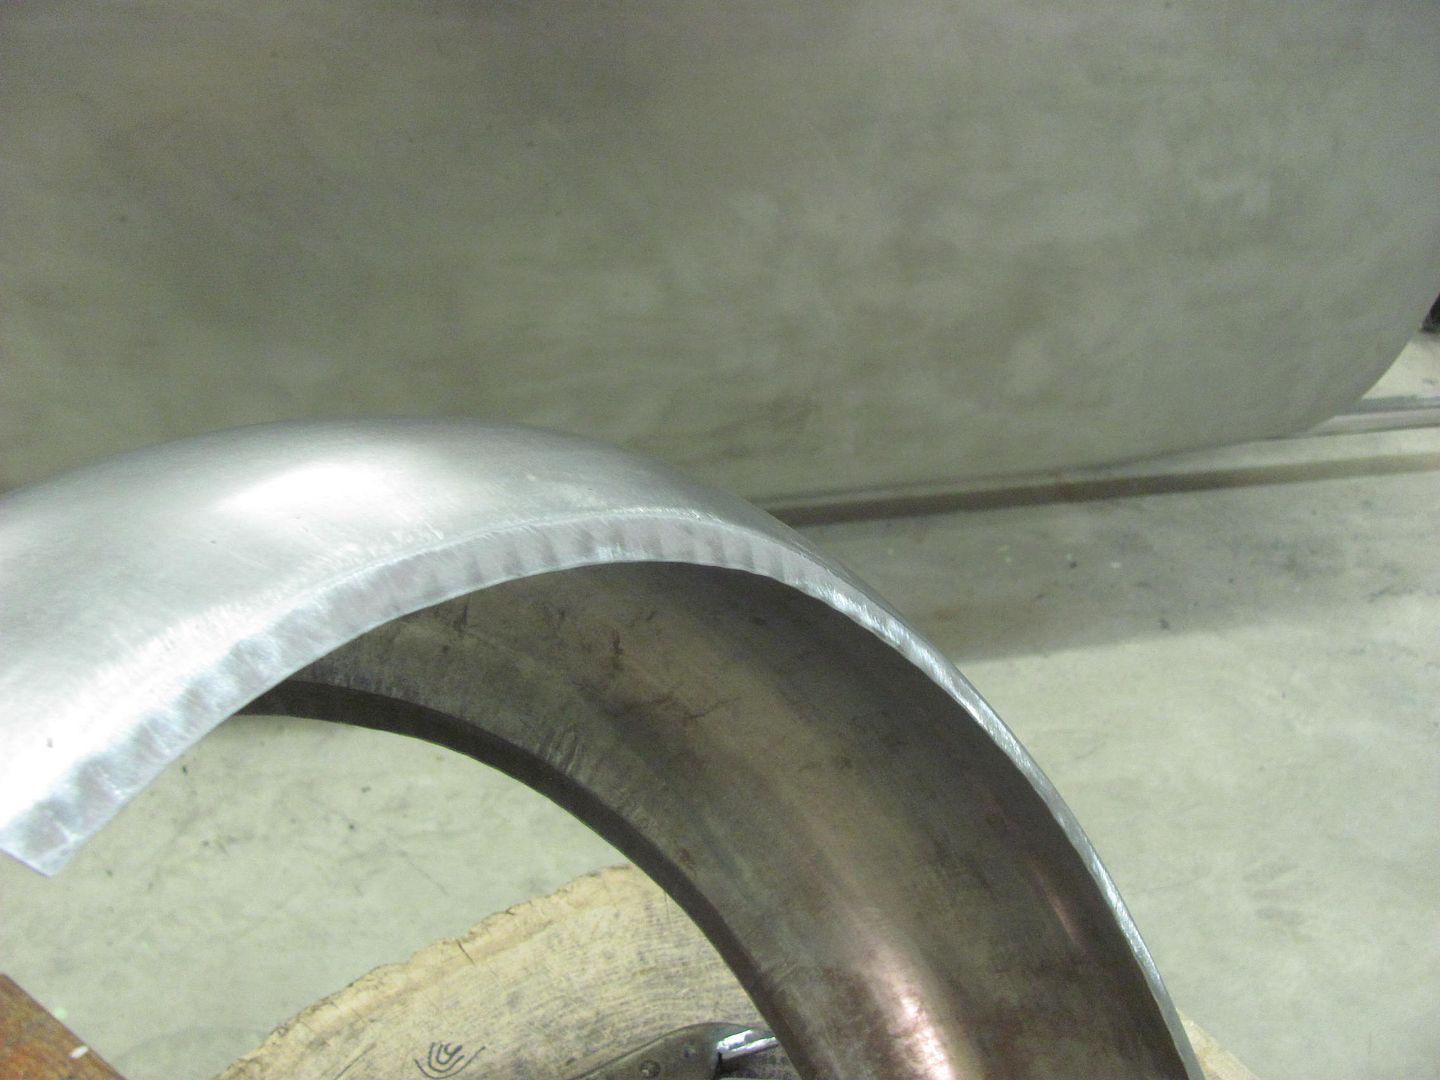
Needed to duplicate a scooter fender... 1954 Montgomery Wards. The front fender had gone missing over the years, and I was sent the rear fender as a sample..


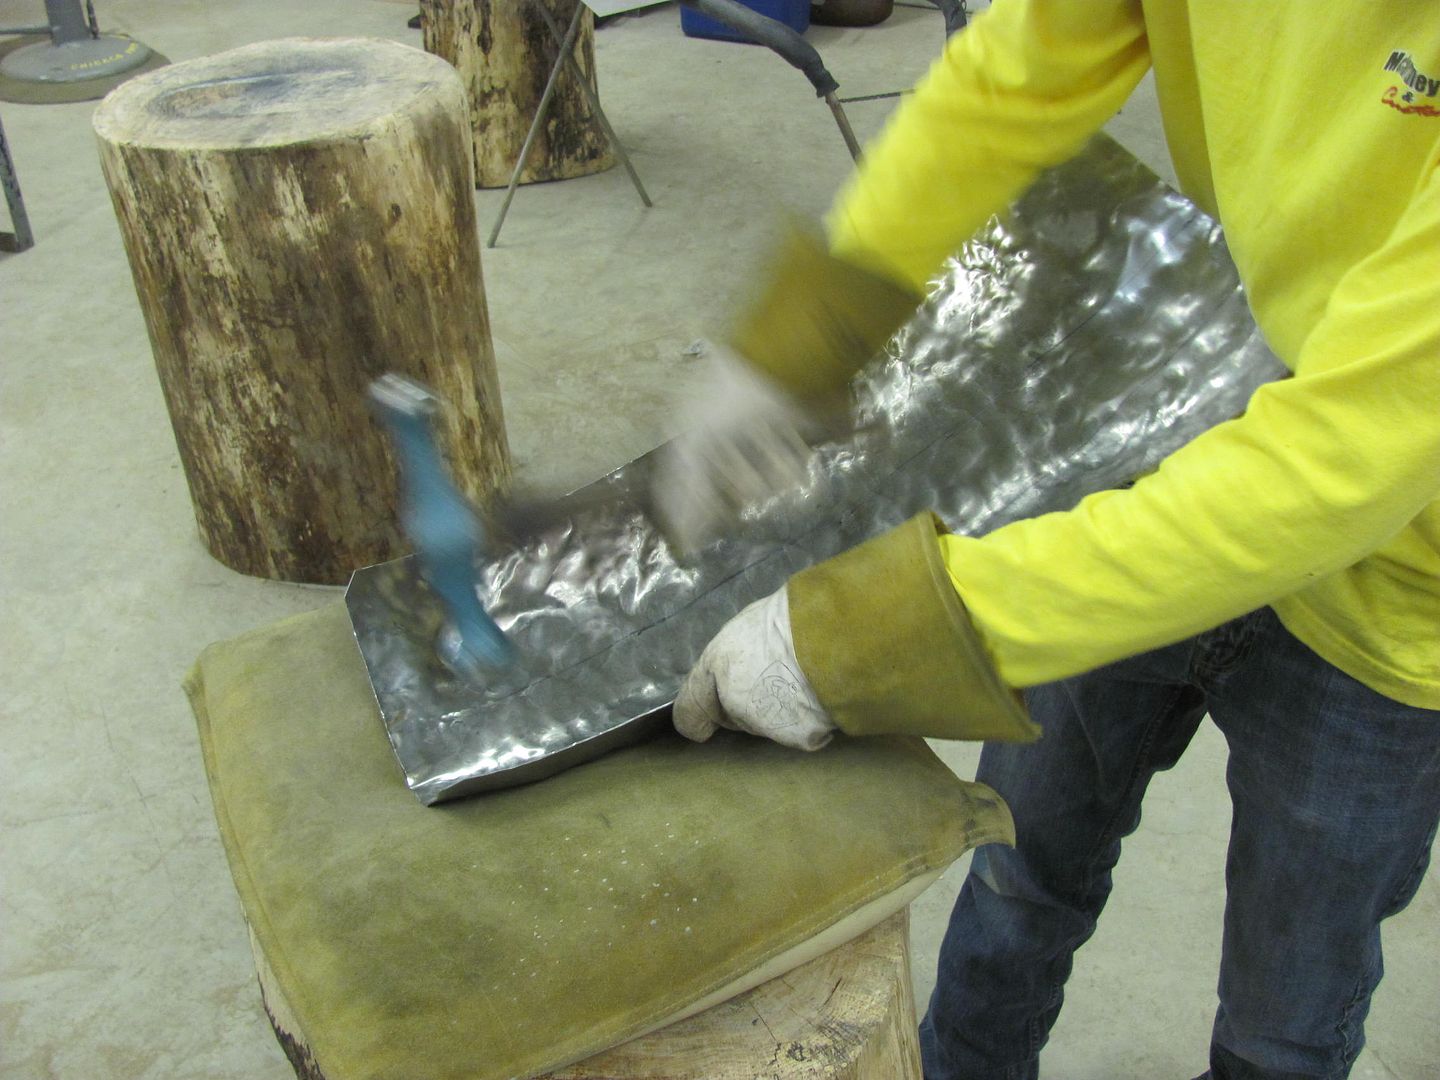
Tuck shrinking along the edges and blocking the center on a sand bag....
Some wheeling....
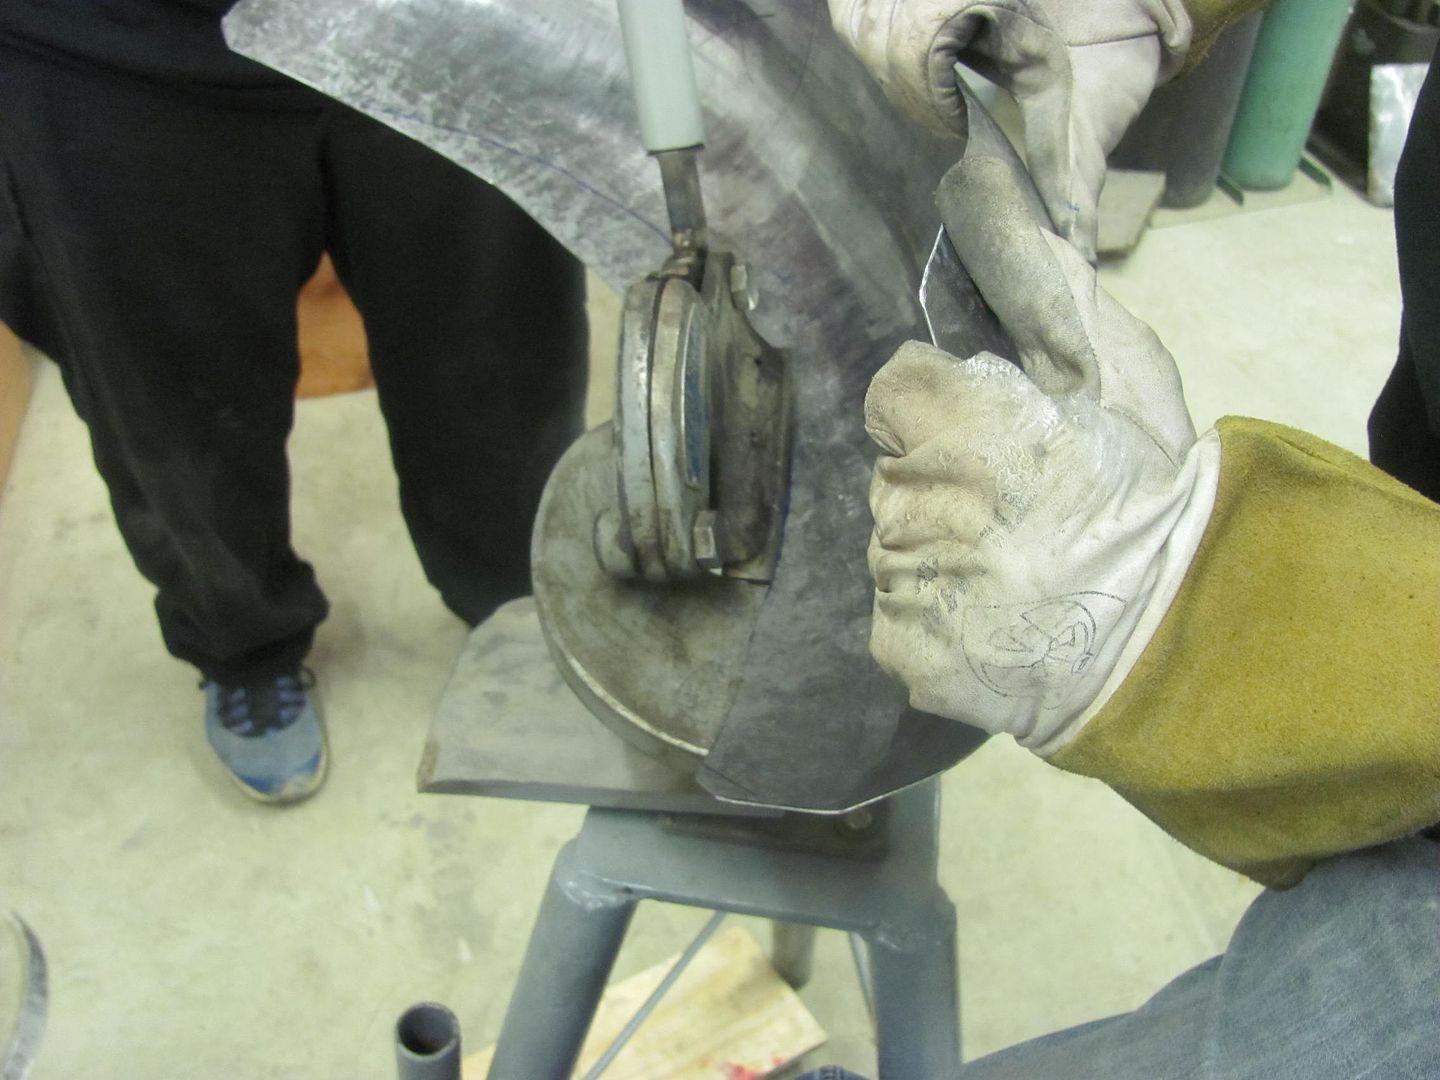
Trimming some of the excess on a Beverly...
More shrinking on a post dolly....
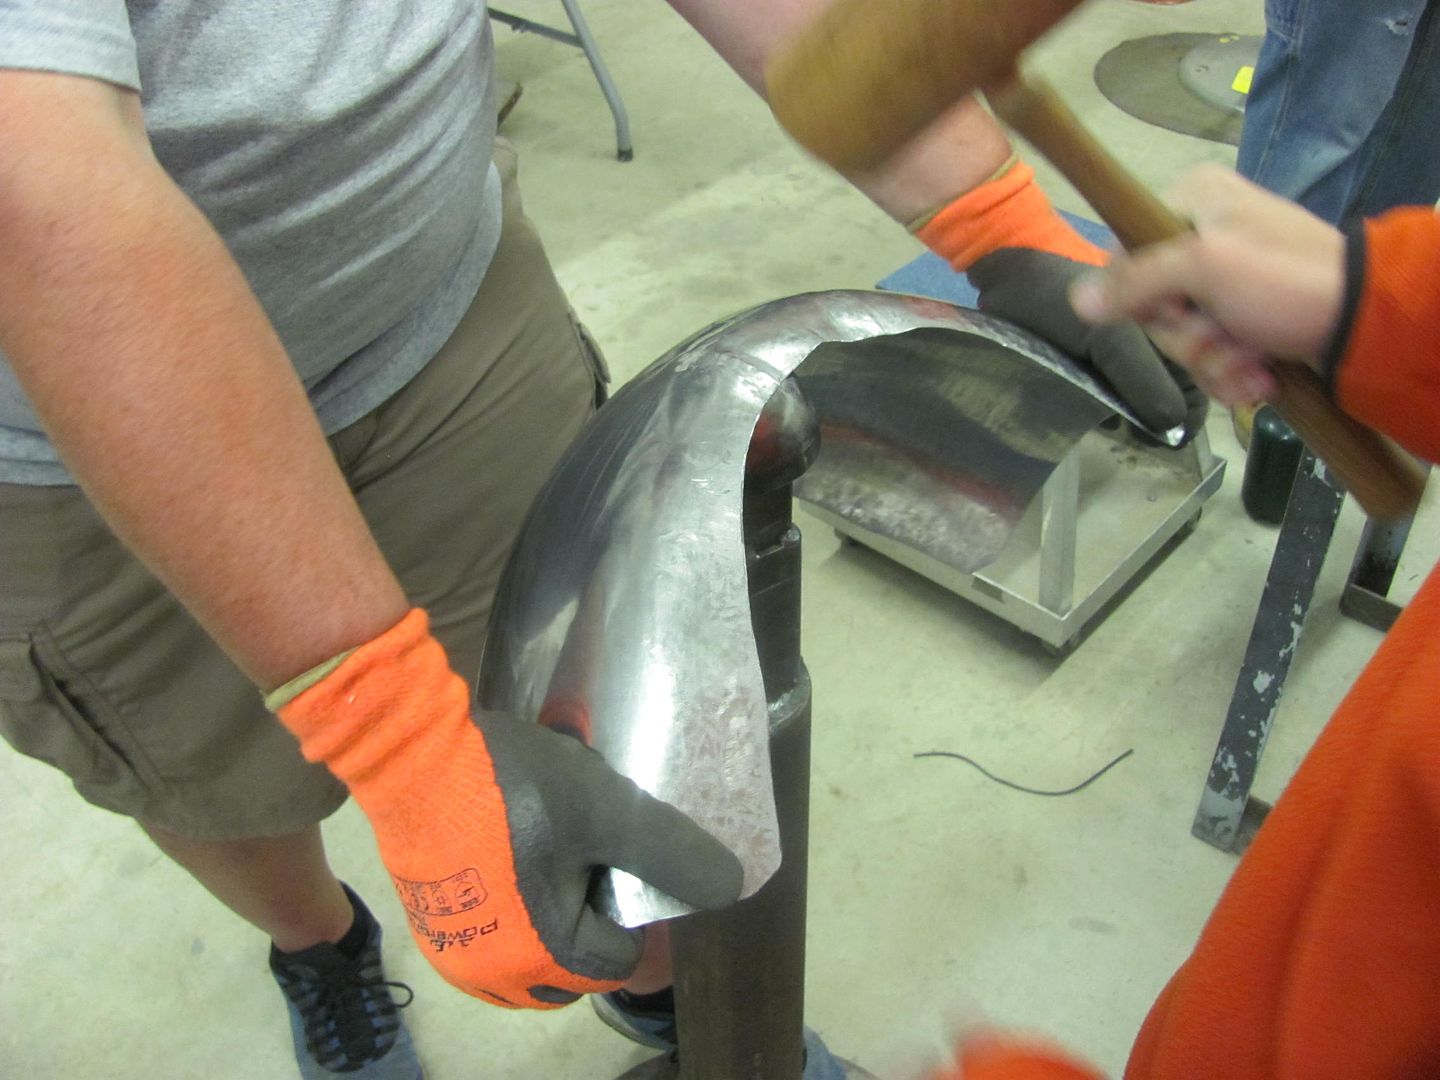
In the homestretch now...
Marked for trimming...

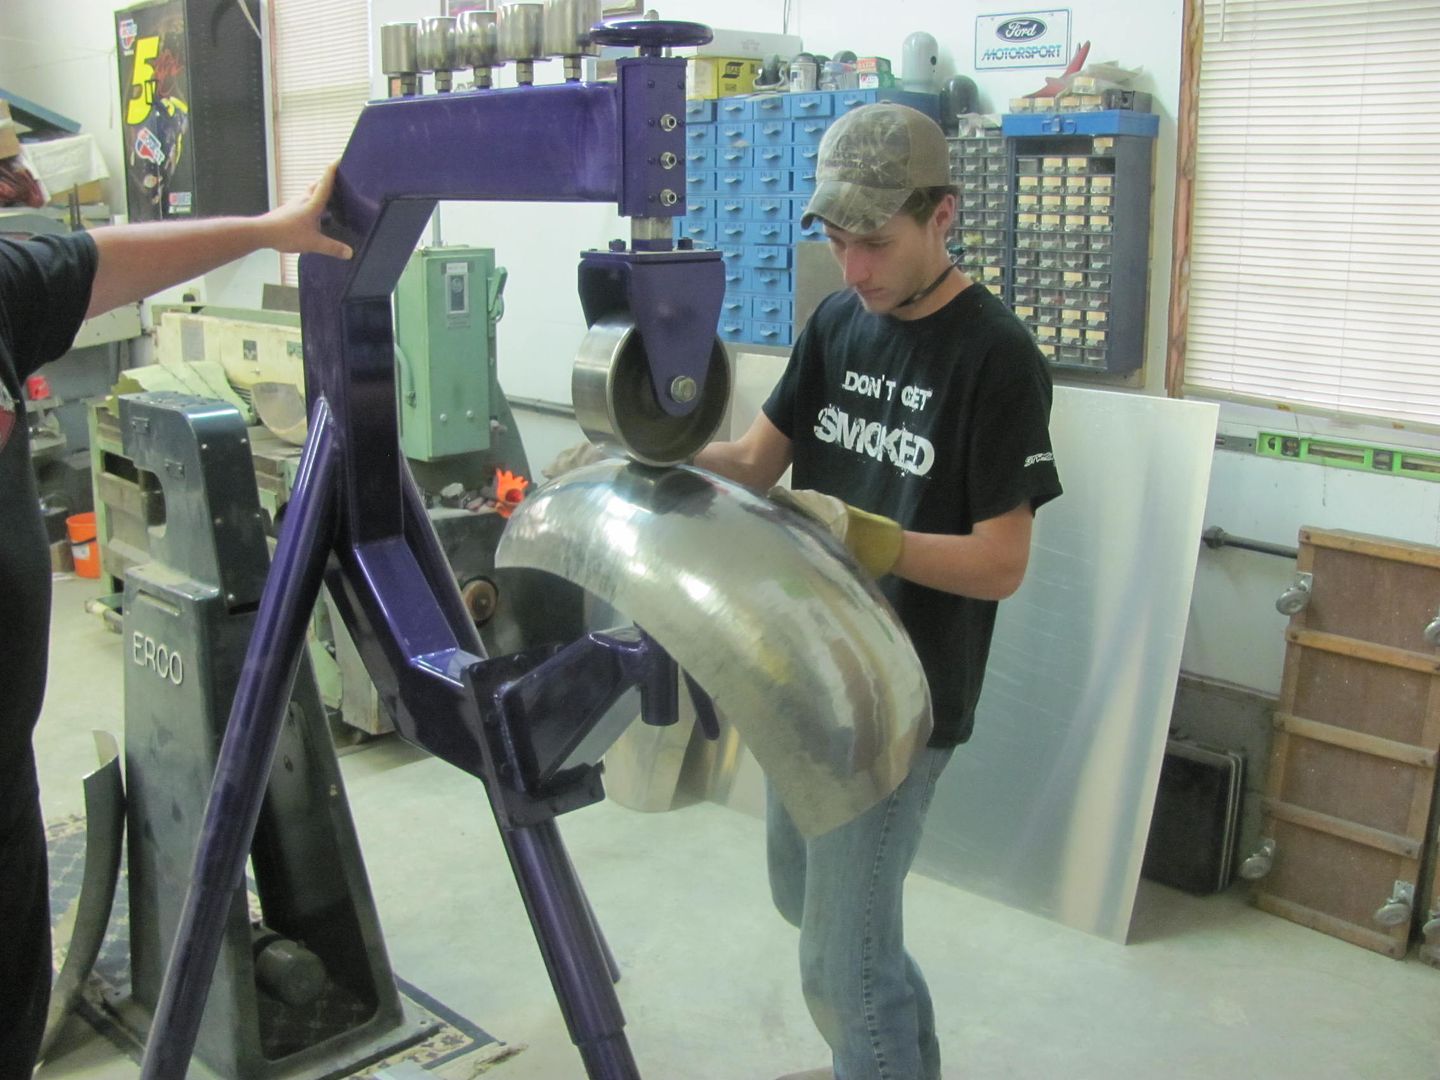
Tipping wheel to set the side flange....
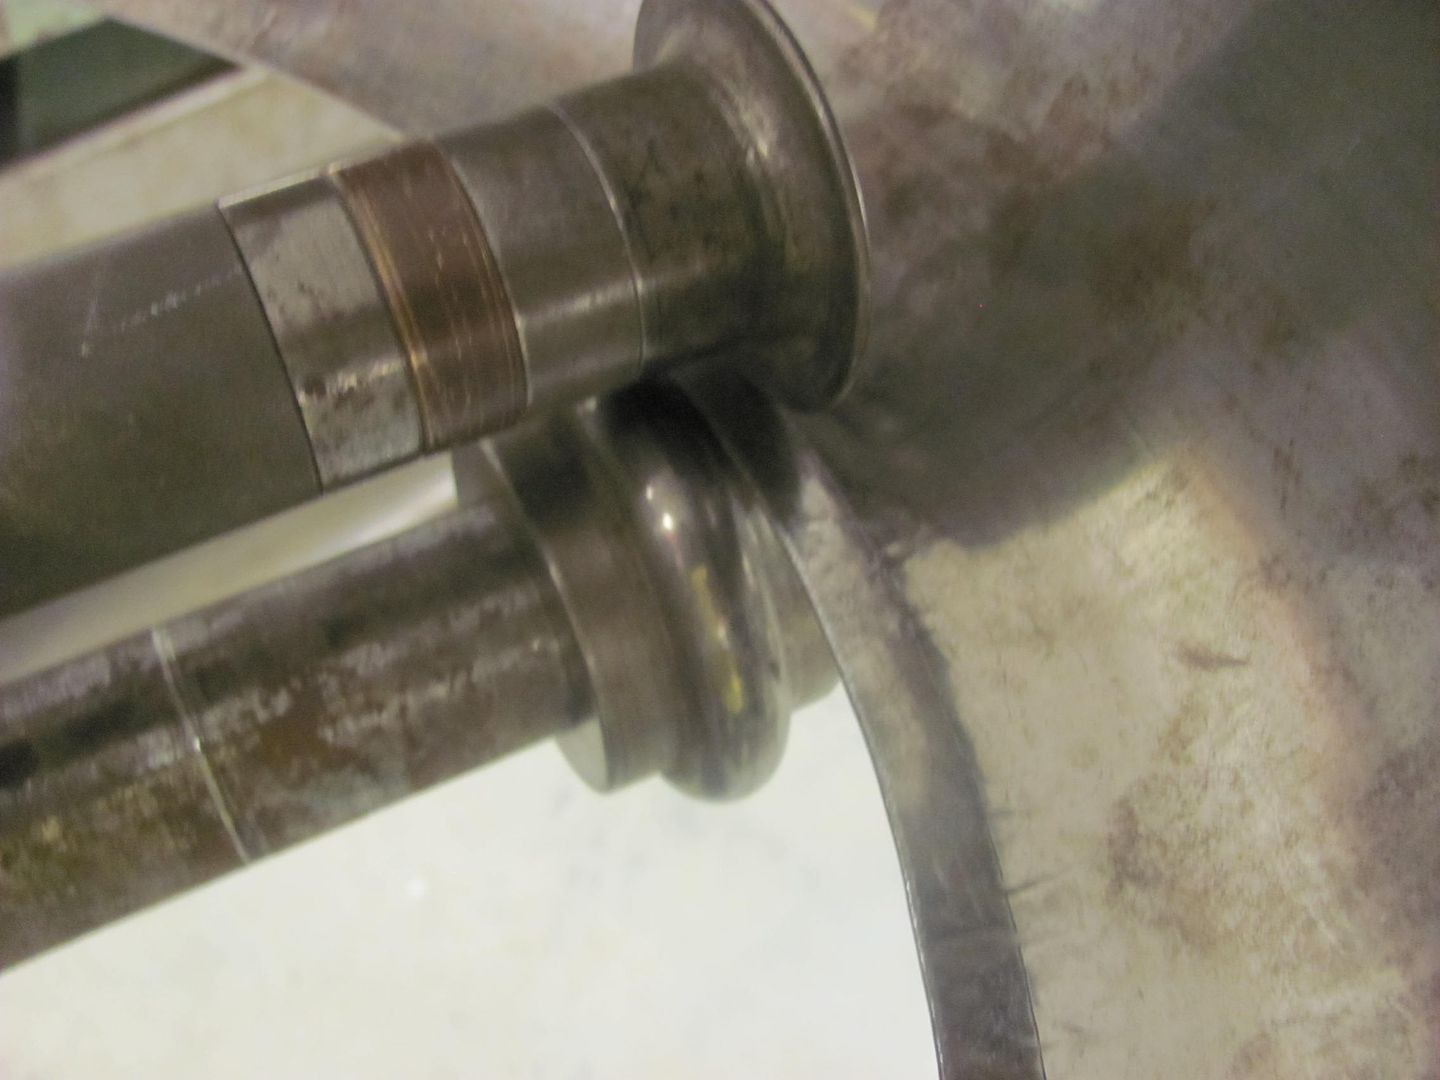
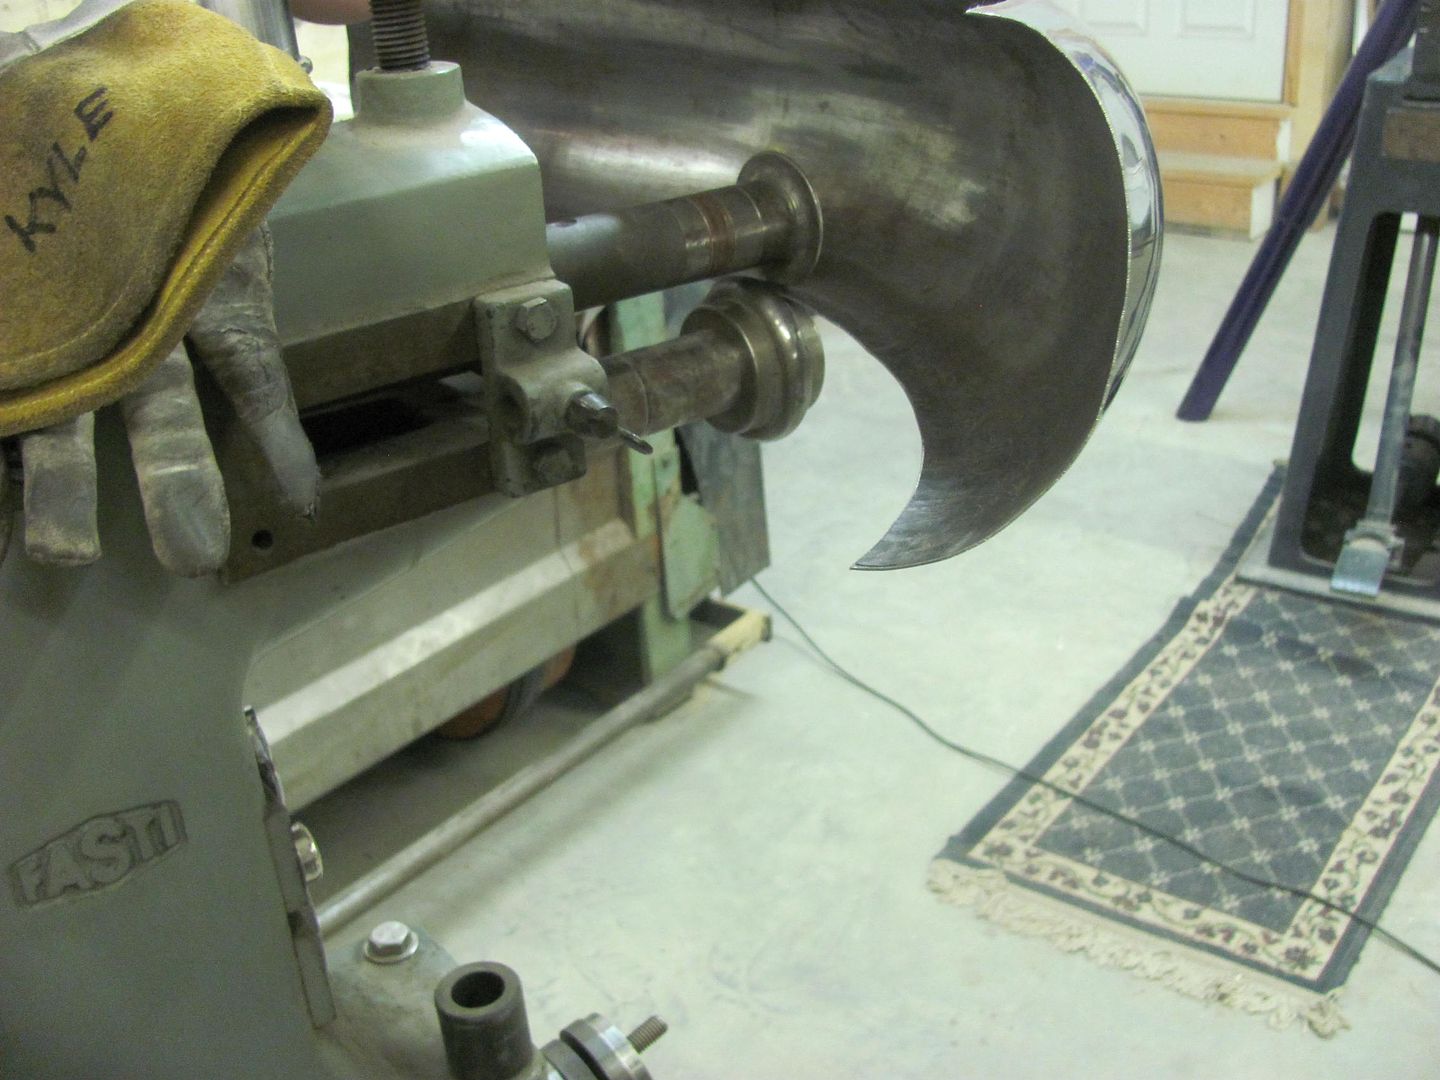
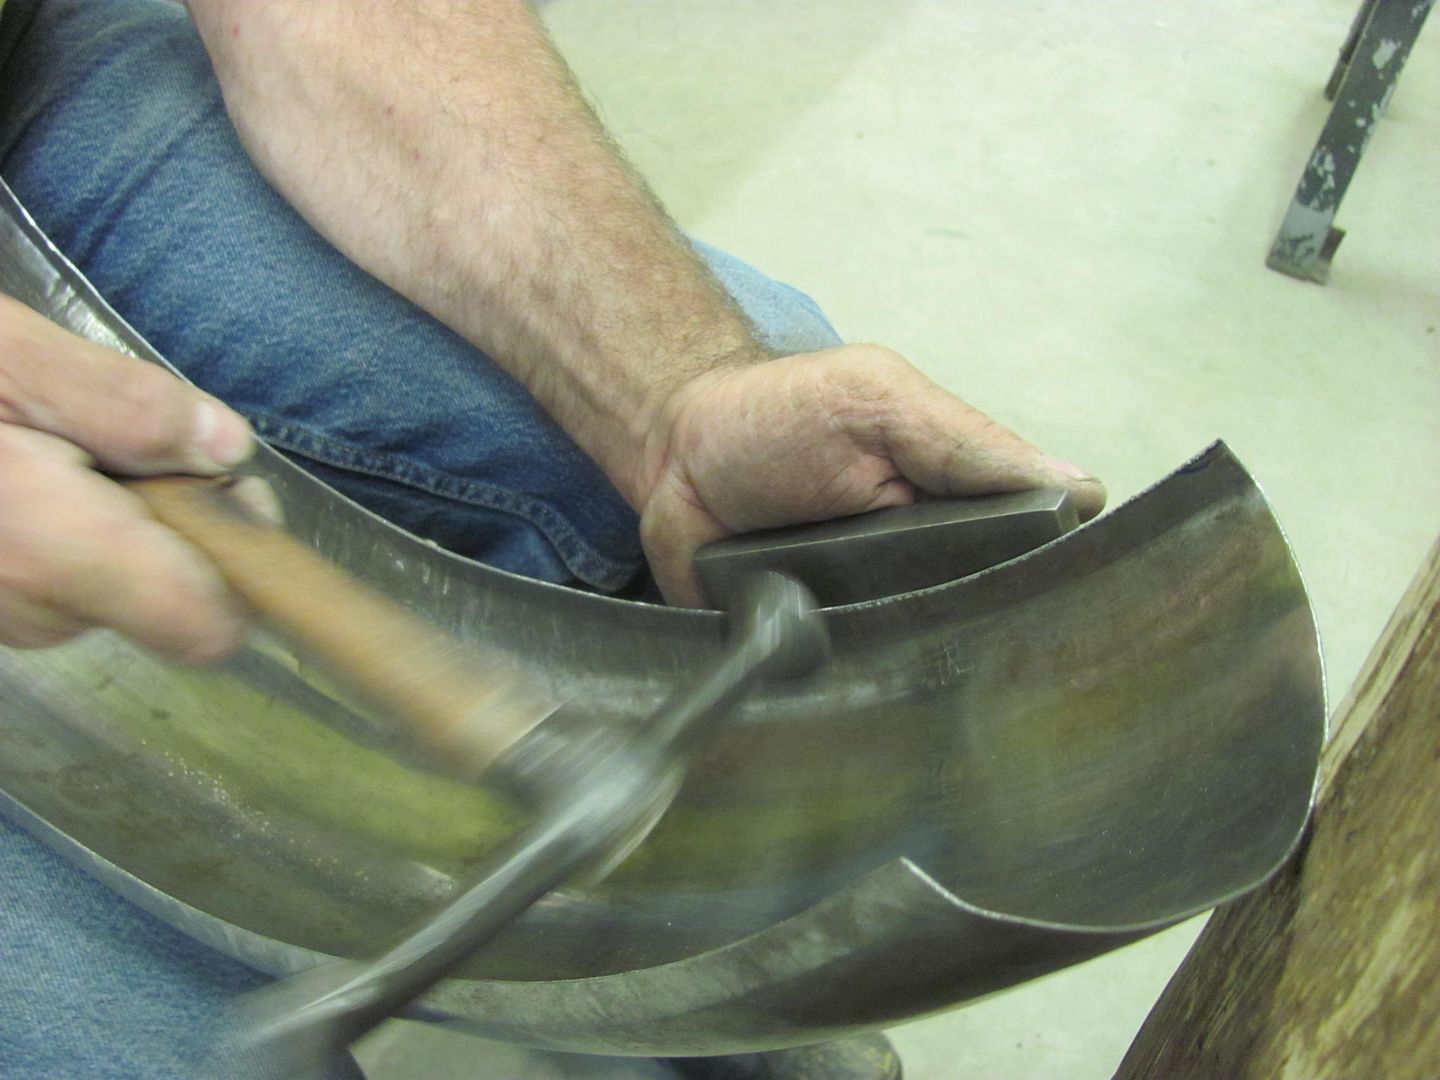
Profile comparison, front to rear...
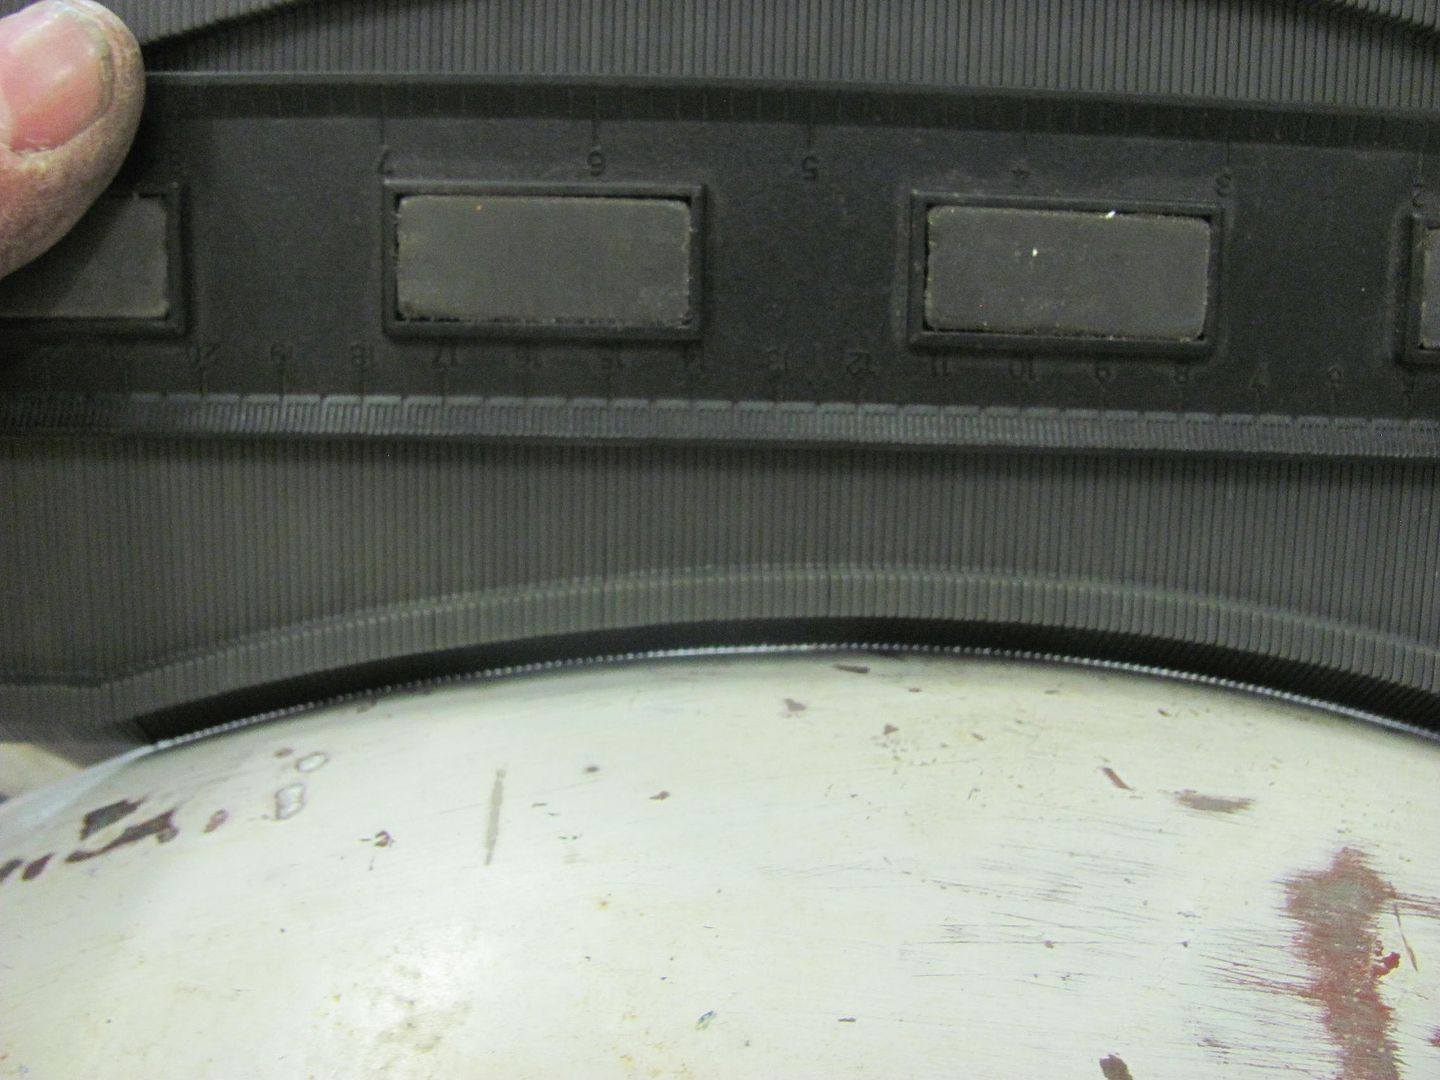
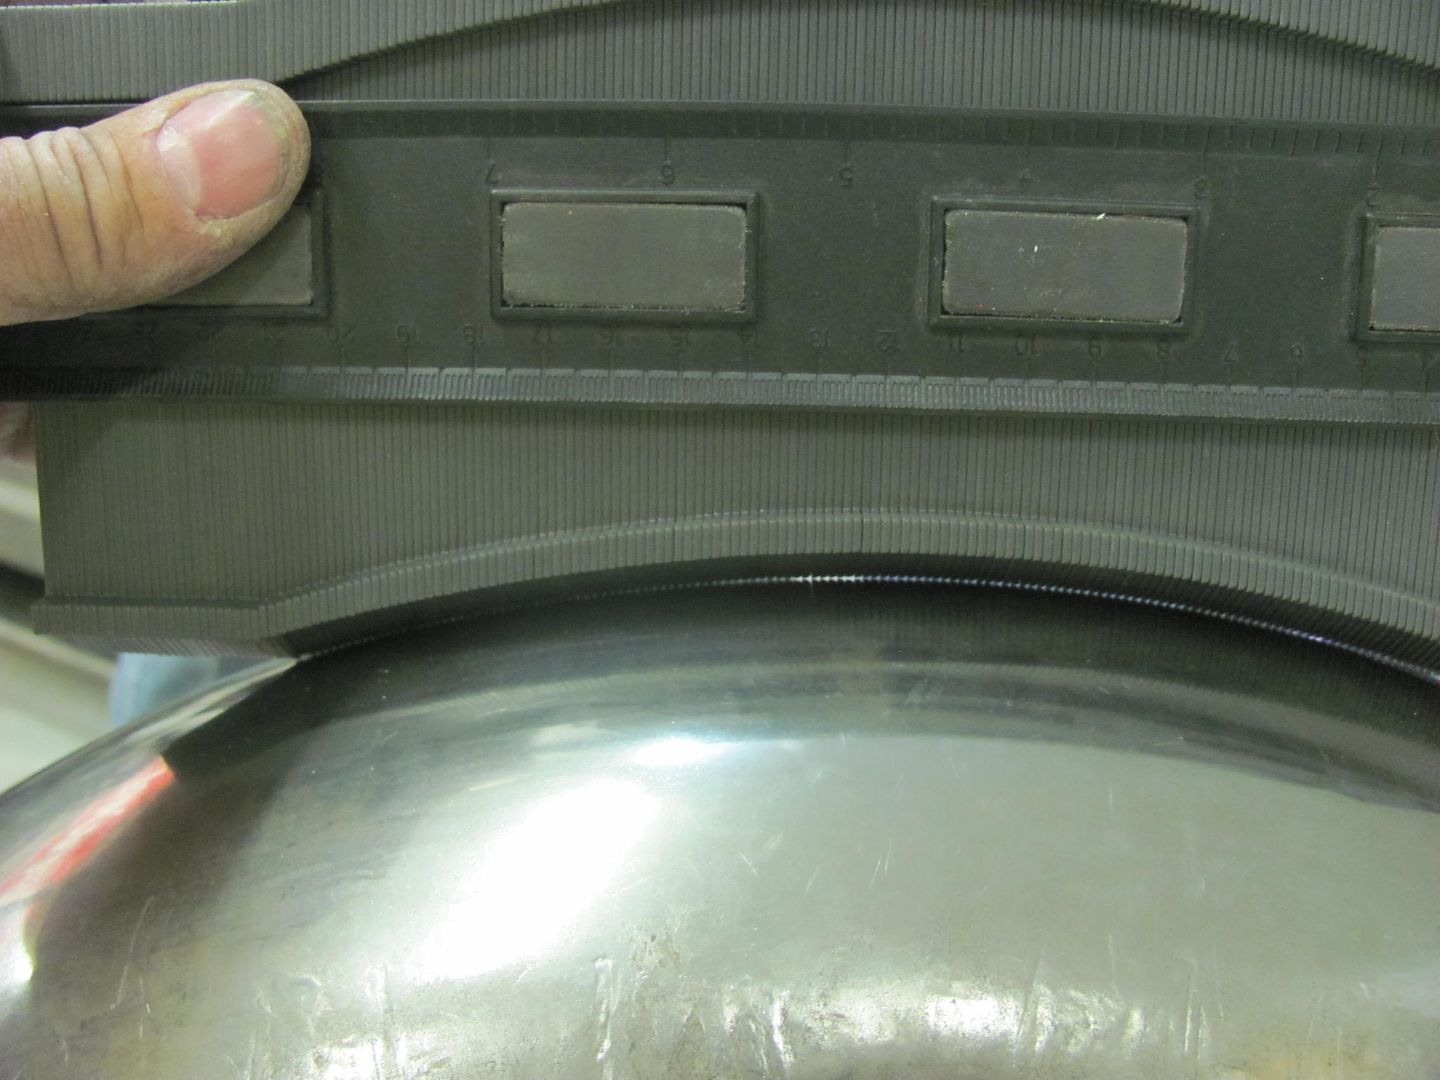
.....and side to side...

Tuck shrinking along the edges and blocking the center on a sand bag....
Some wheeling....
Trimming some of the excess on a Beverly...
More shrinking on a post dolly....
In the homestretch now...
Marked for trimming...
Tipping wheel to set the side flange....
Profile comparison, front to rear...
.....and side to side...
Tuned
Joined: Aug 2007
Posts: 459
Likes: 123
From: Maryland
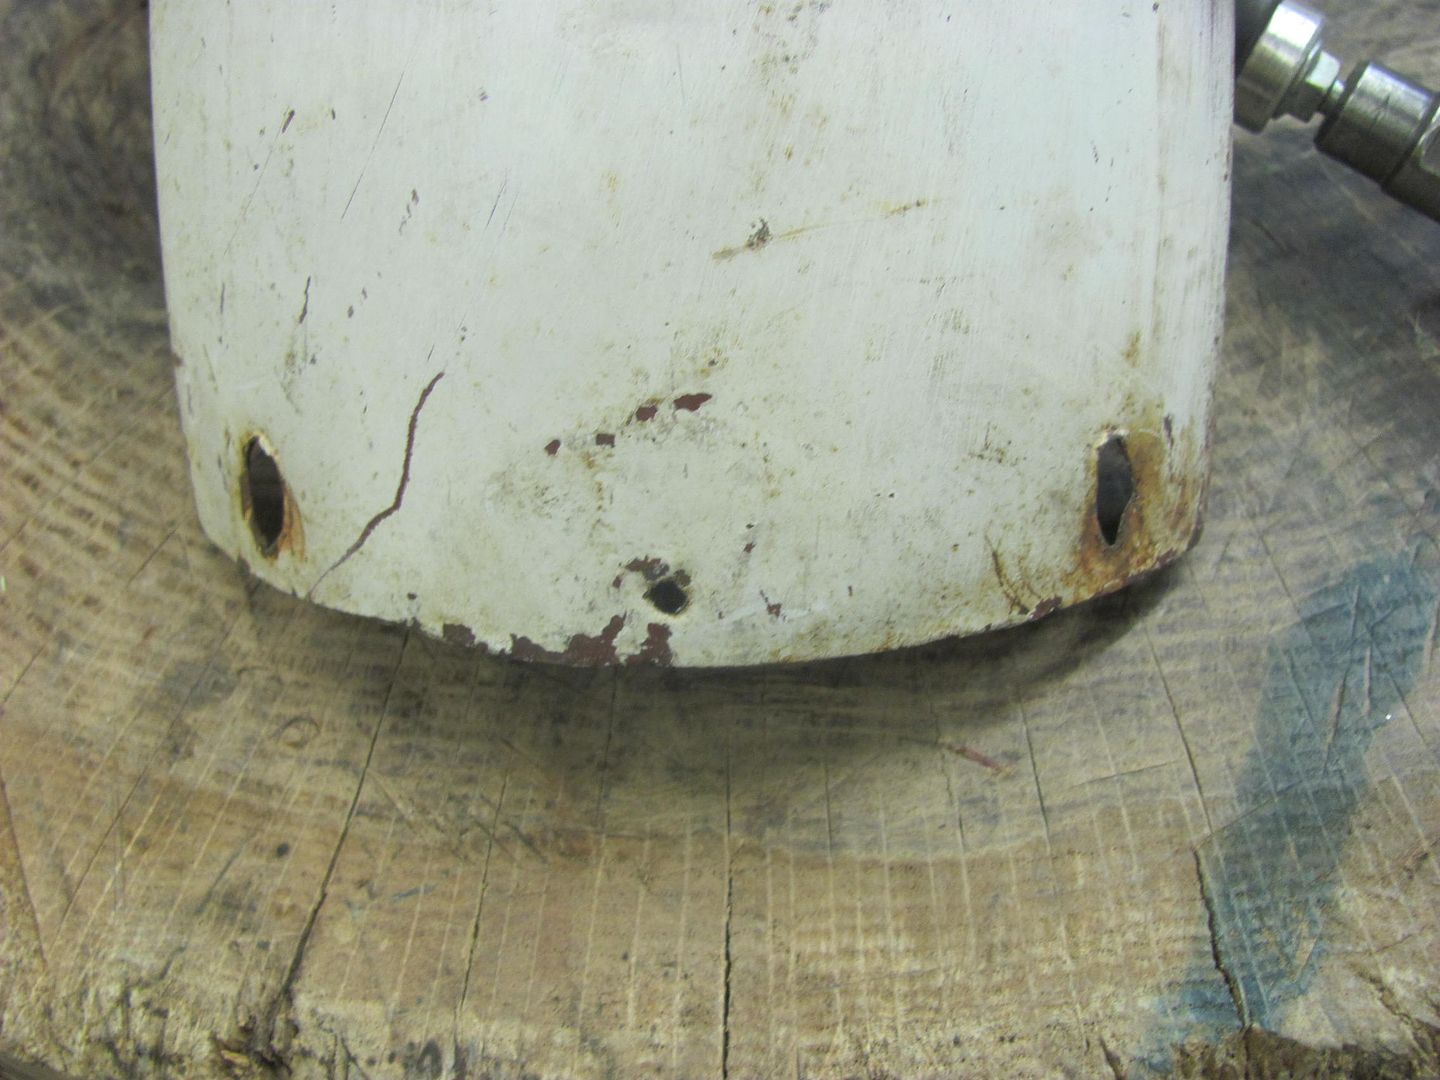
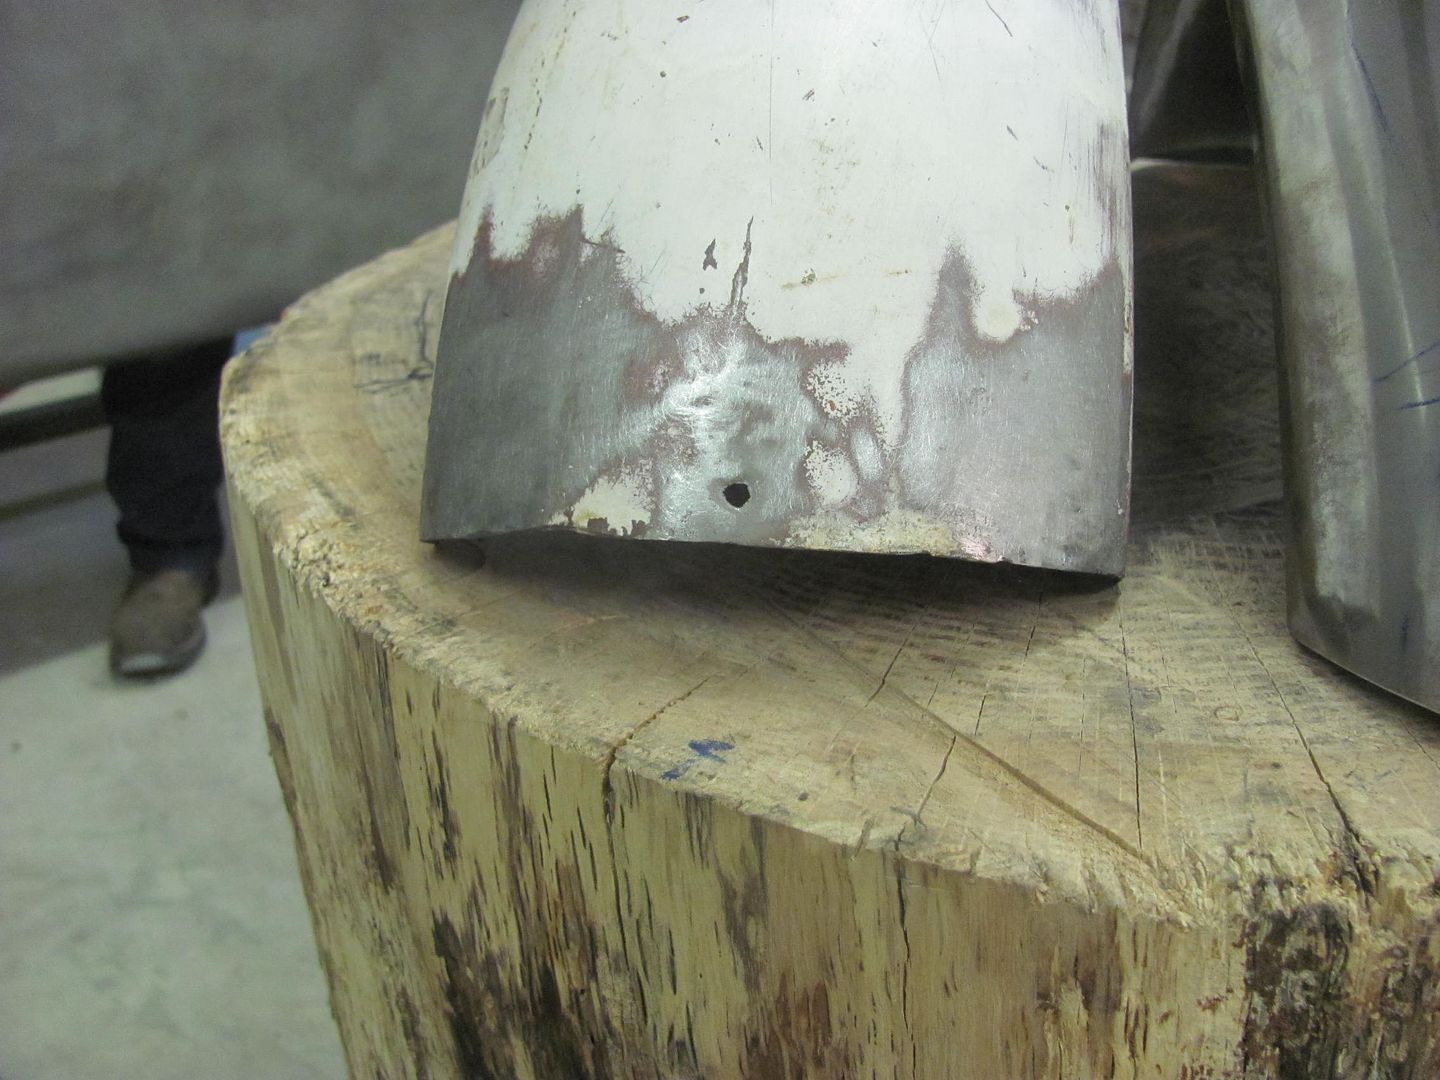
The original (rear) had been loose at some point as the fender mounting holes were nice and elongated from flopping around. So I'll get them filled in and Randy will need to match drill them to the frame..
Use the right tools for the job
After marking, when cutting out such a small piece I like to leave a "handle" until the very end..

....gives you something to hold onto while fine tuning the fit
Nice and snug....
Tacking in the filler piece...
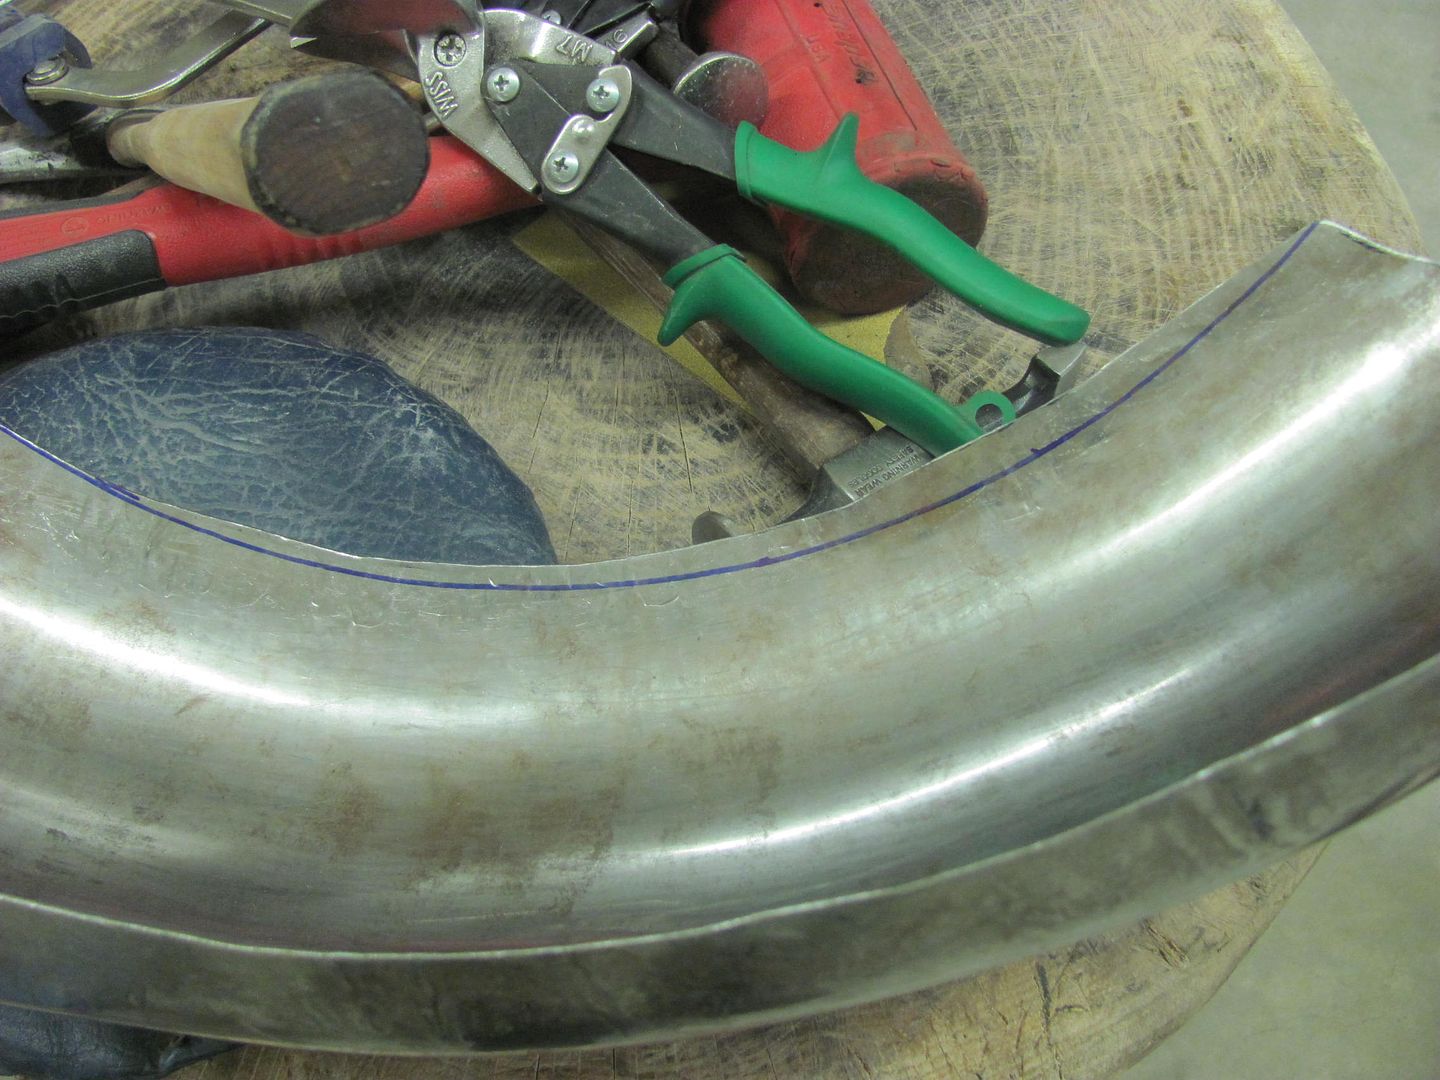
Next was to trim a nice radius on the front and back ends of the new front fender....
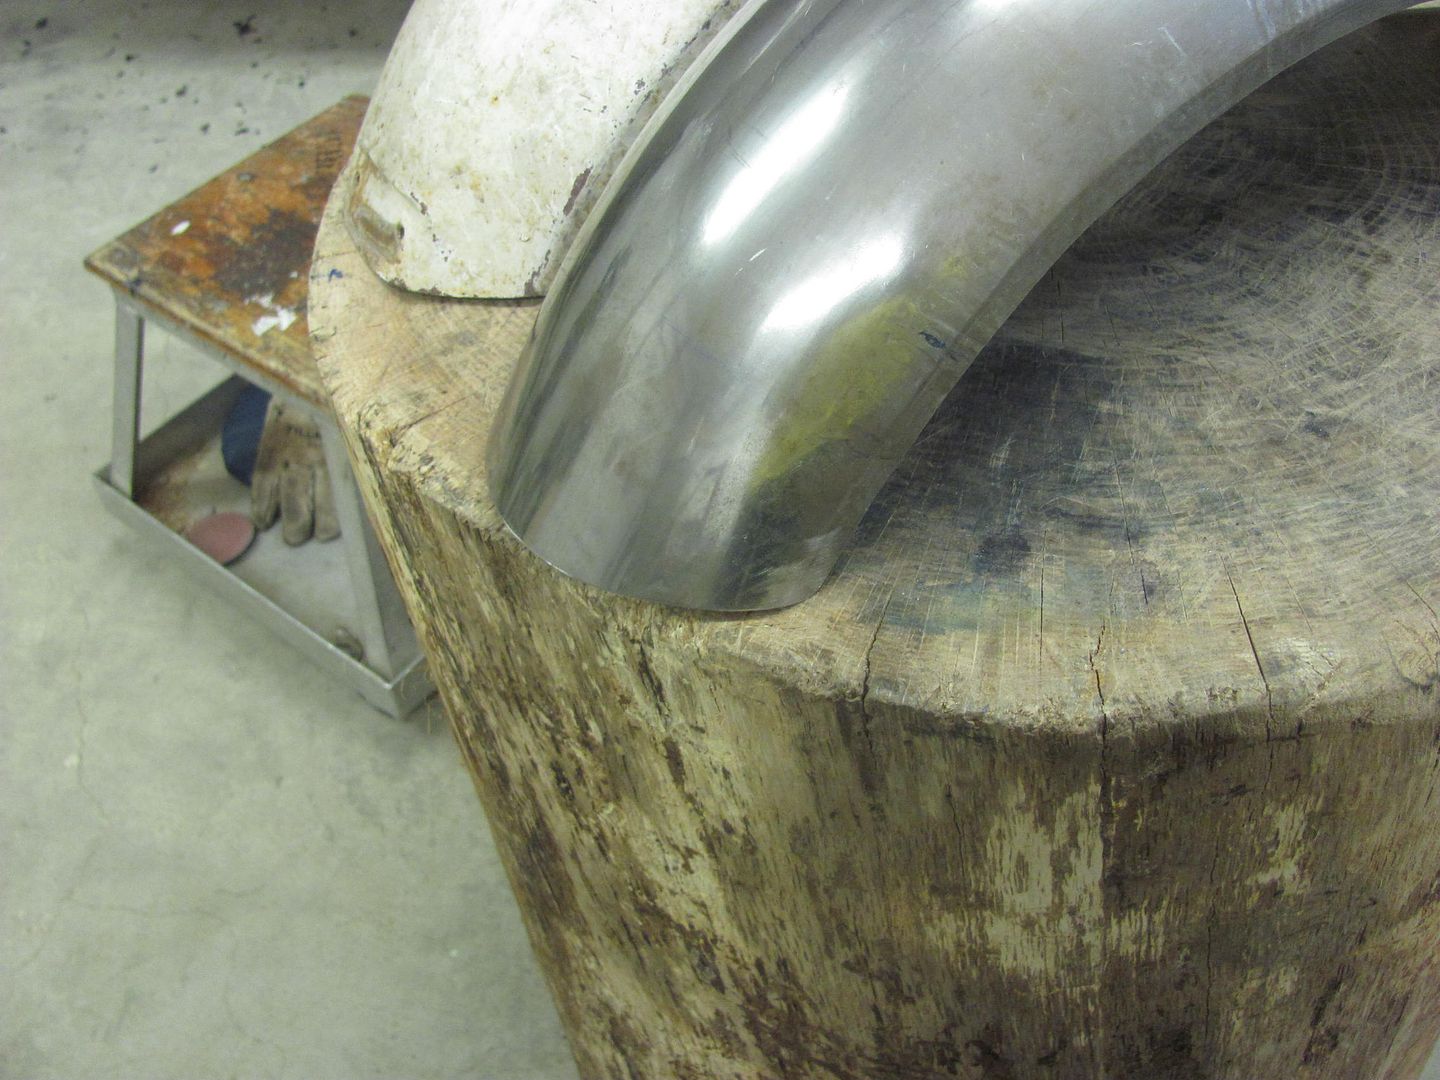
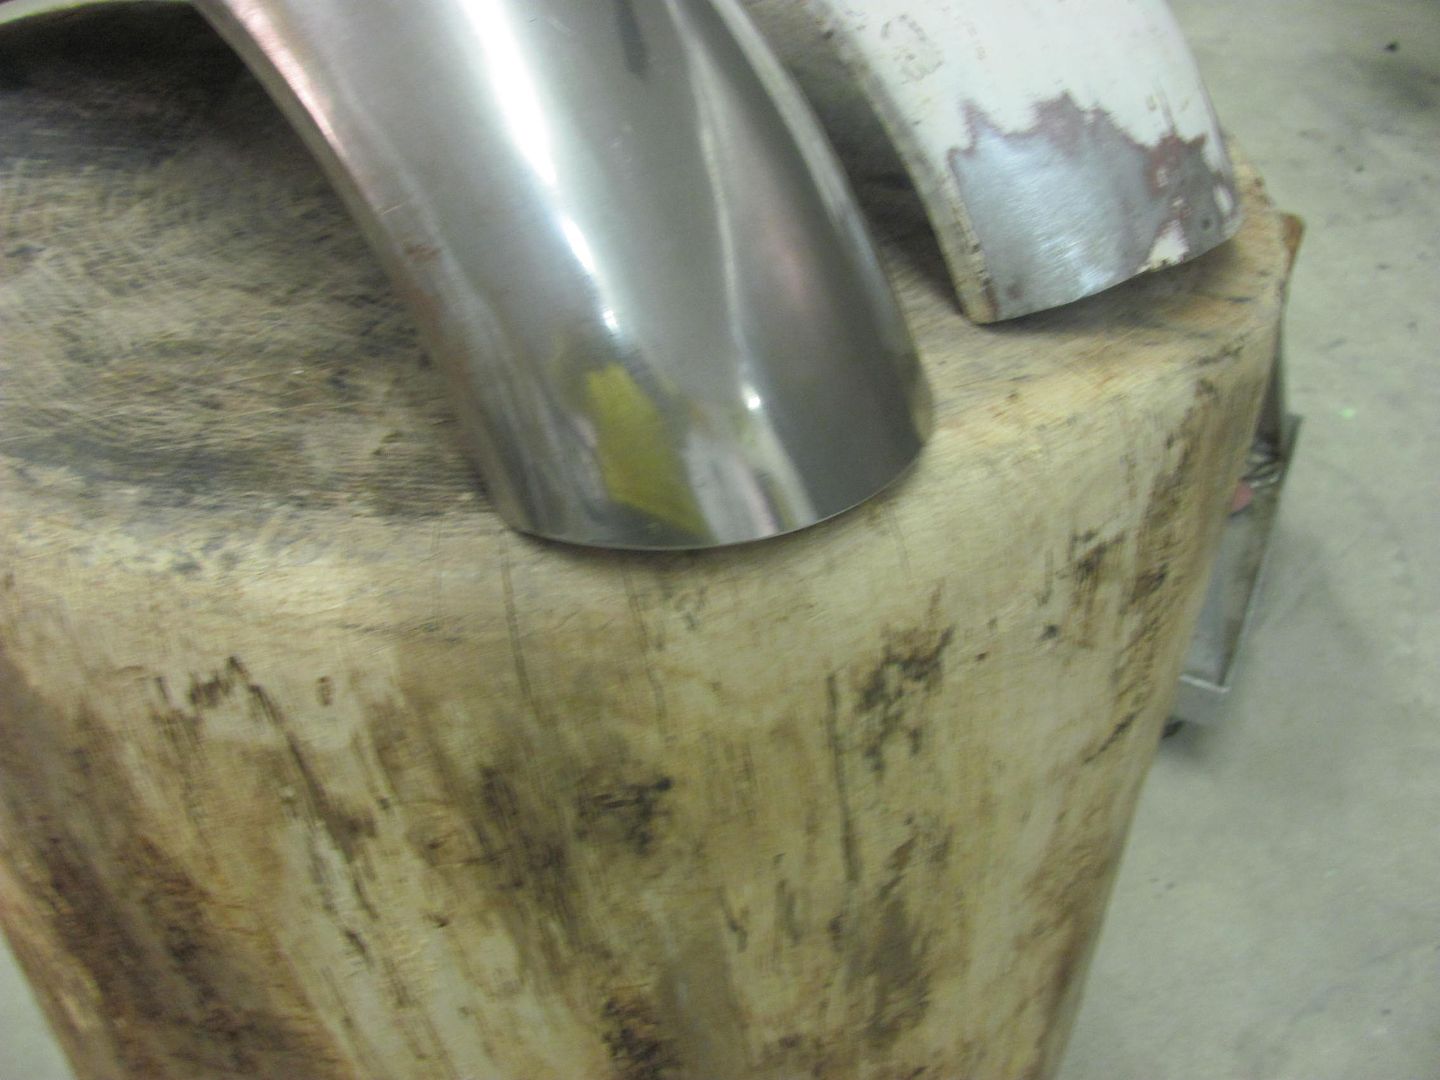
Last on the list, the forming process with the old fender left some "pie crust" edging, as seen here and in an original photo...
So we needed a special tool in order to duplicate this feature...

Spacing all marked out....
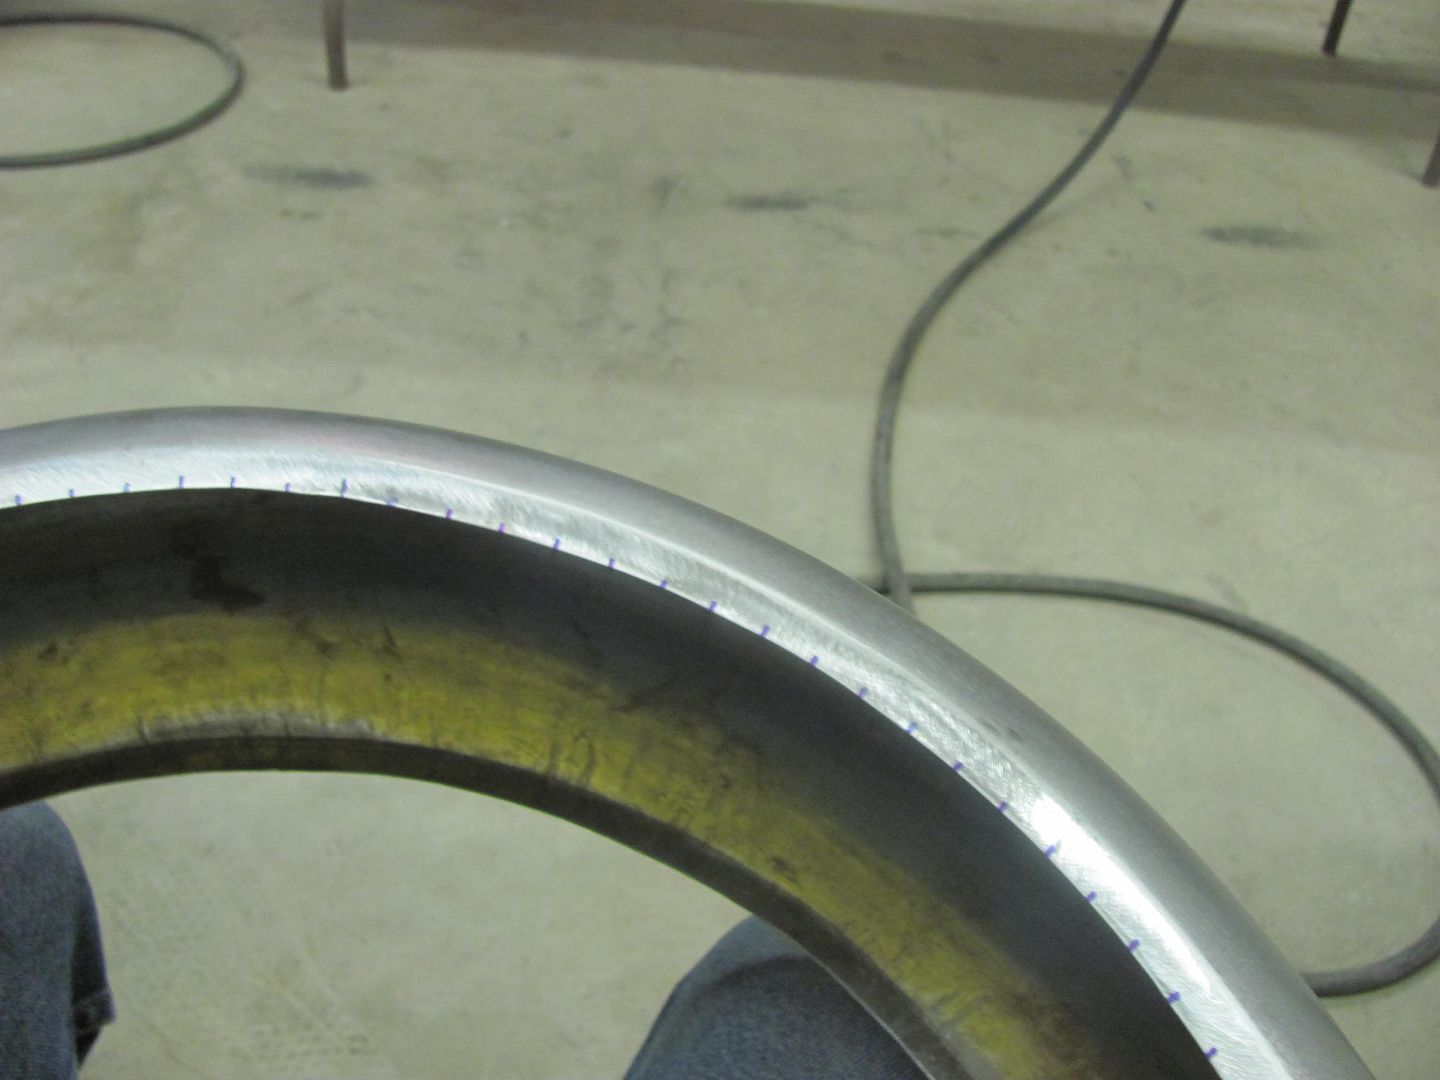
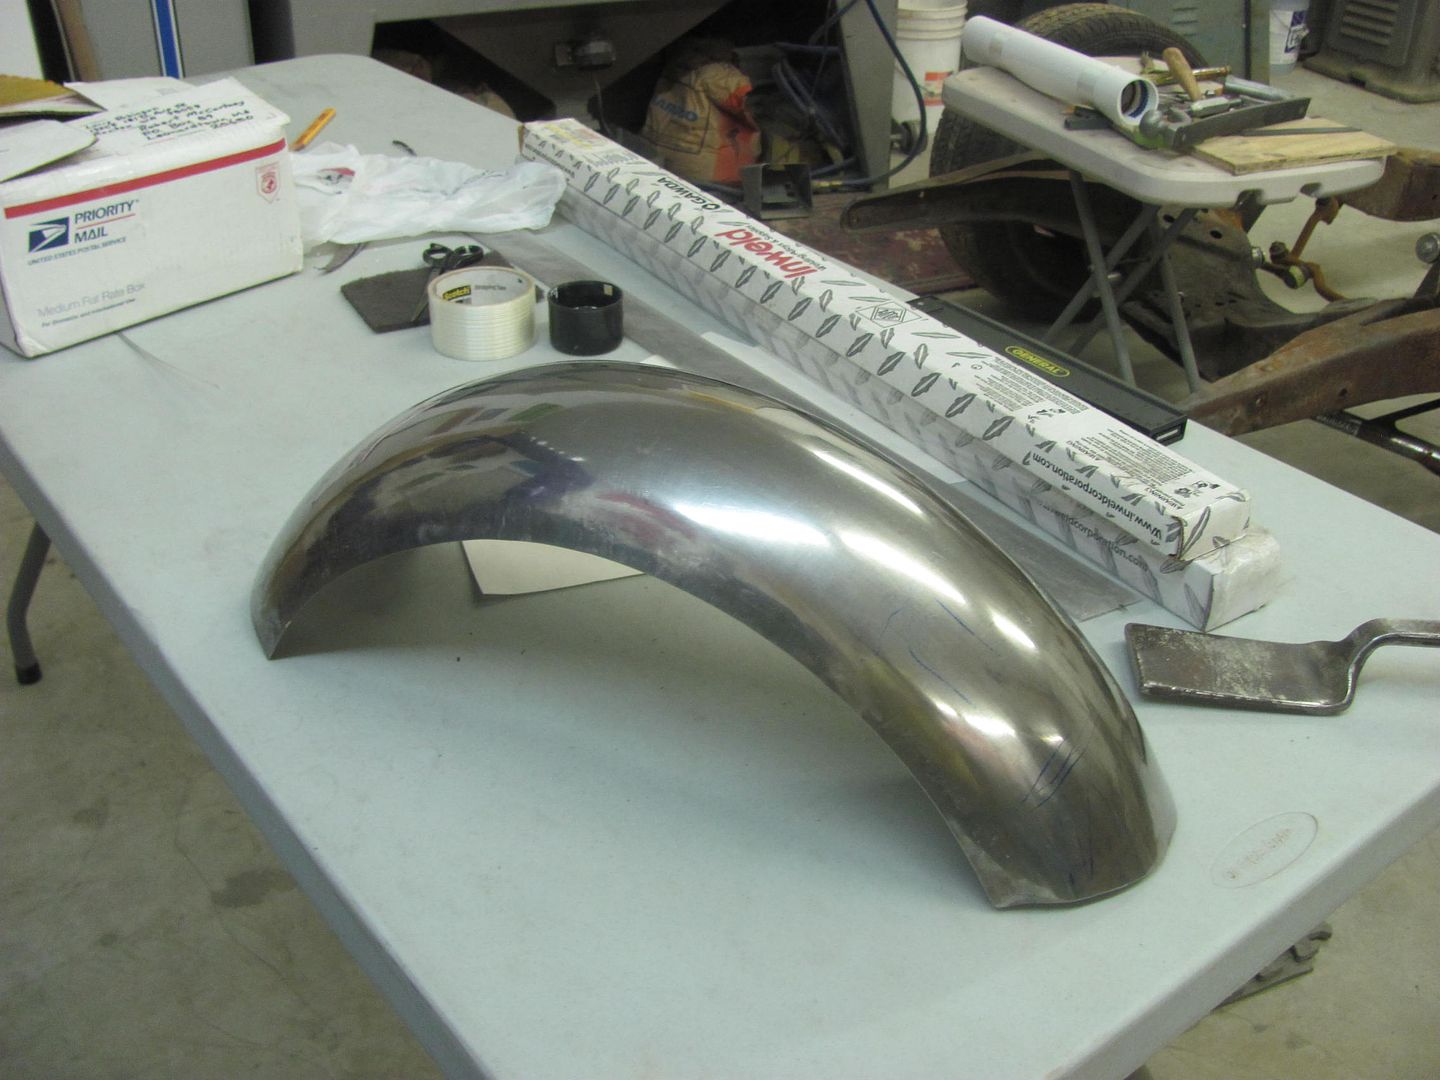
Finished edge...
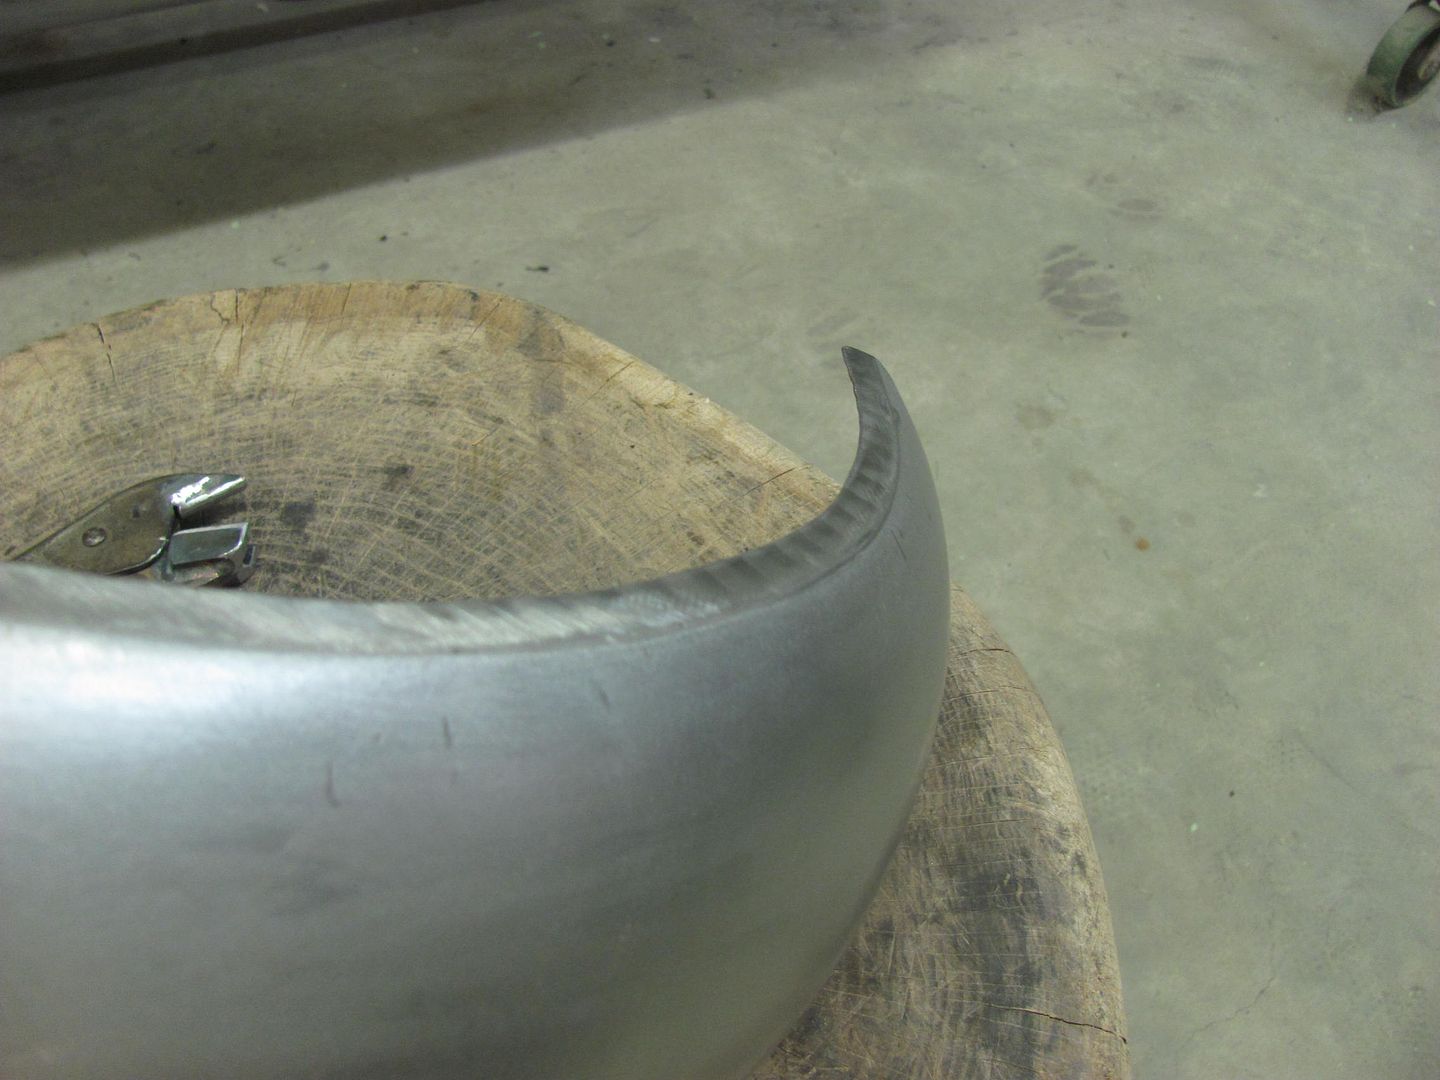
All ready for delivery!
Use the right tools for the job
After marking, when cutting out such a small piece I like to leave a "handle" until the very end..
....gives you something to hold onto while fine tuning the fit
Nice and snug....
Tacking in the filler piece...
Next was to trim a nice radius on the front and back ends of the new front fender....
Last on the list, the forming process with the old fender left some "pie crust" edging, as seen here and in an original photo...
So we needed a special tool in order to duplicate this feature...
Spacing all marked out....
Finished edge...
All ready for delivery!
Tuned
Joined: Aug 2007
Posts: 459
Likes: 123
From: Maryland
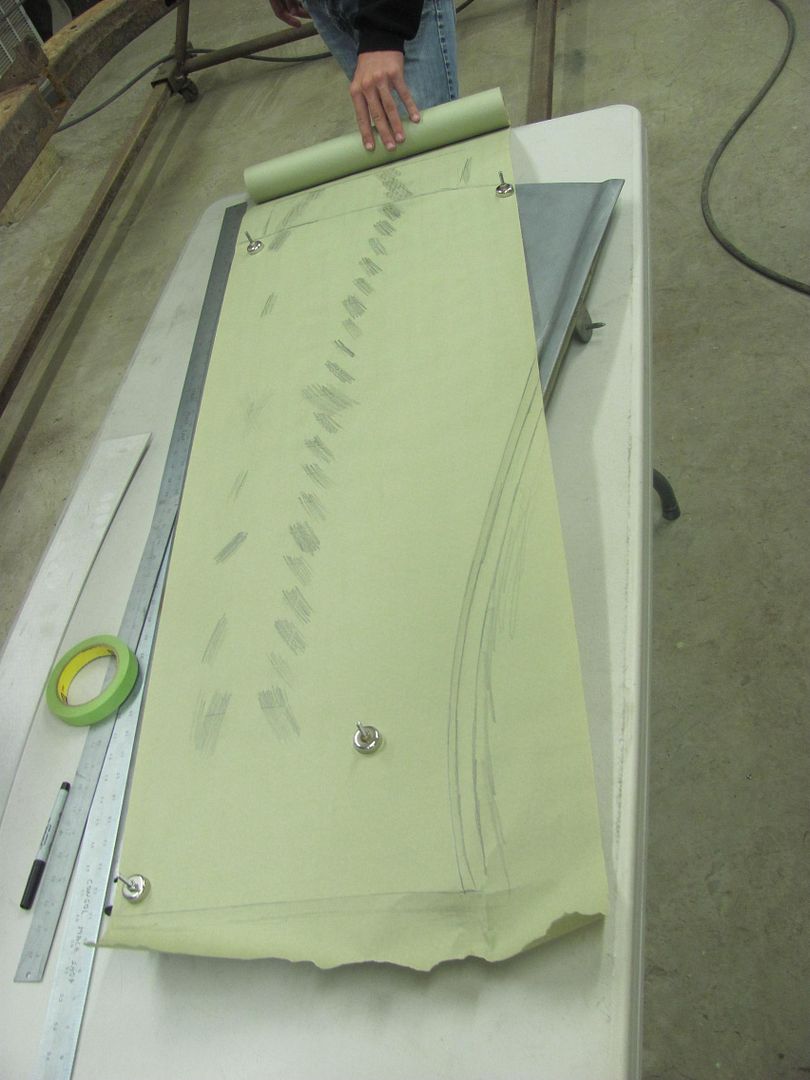
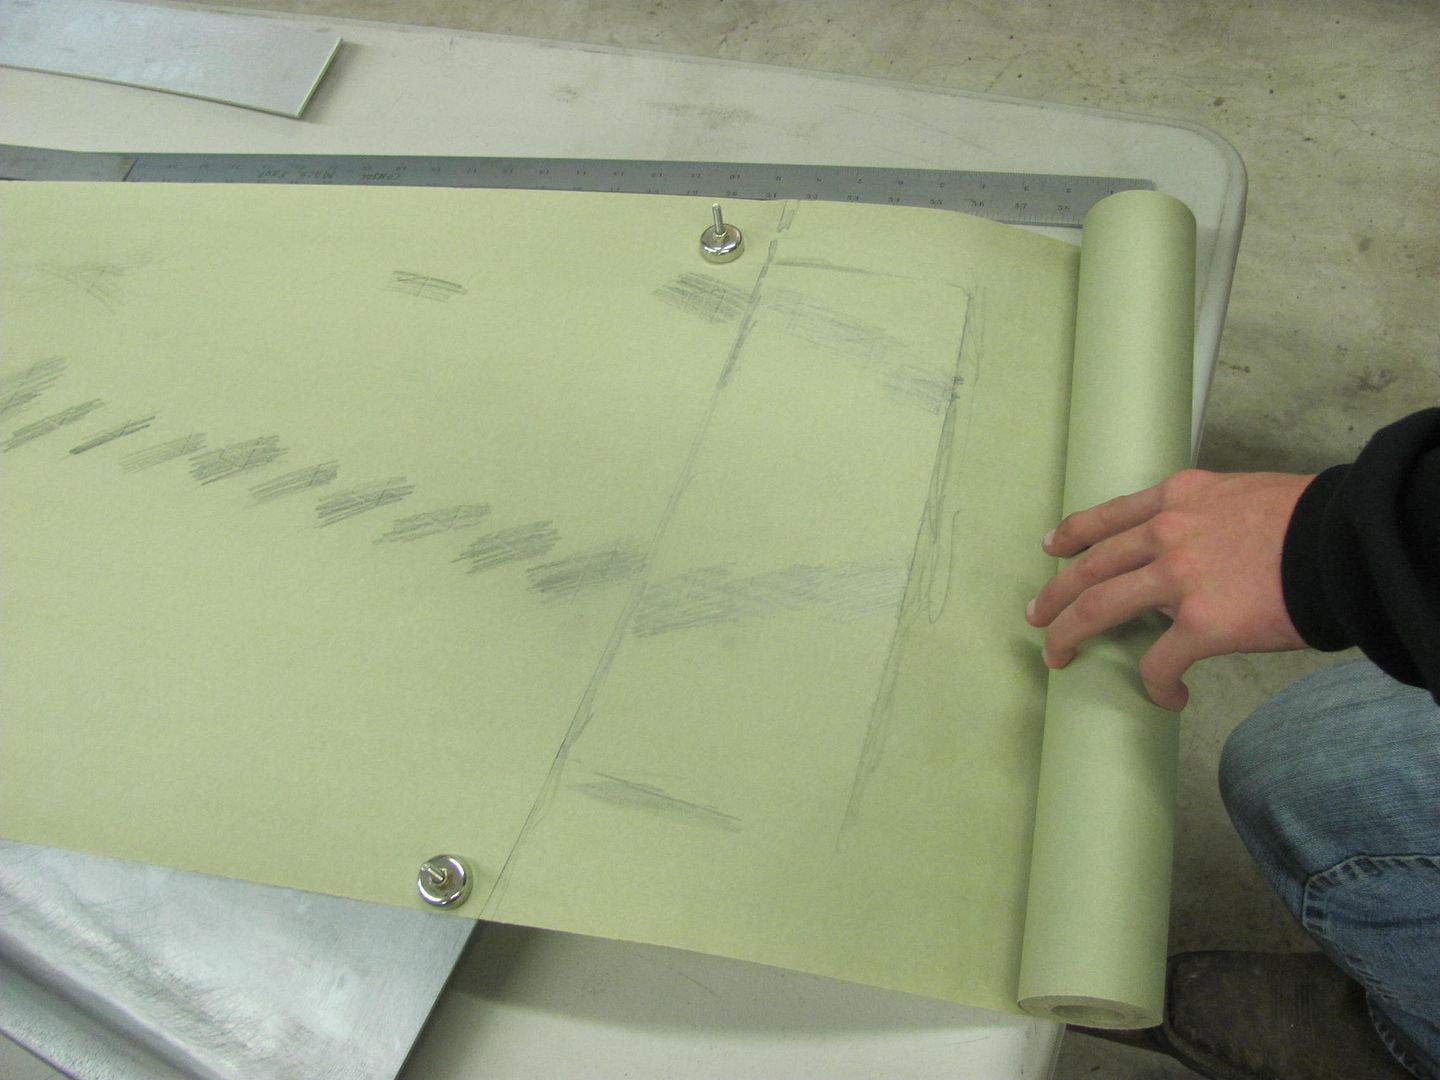
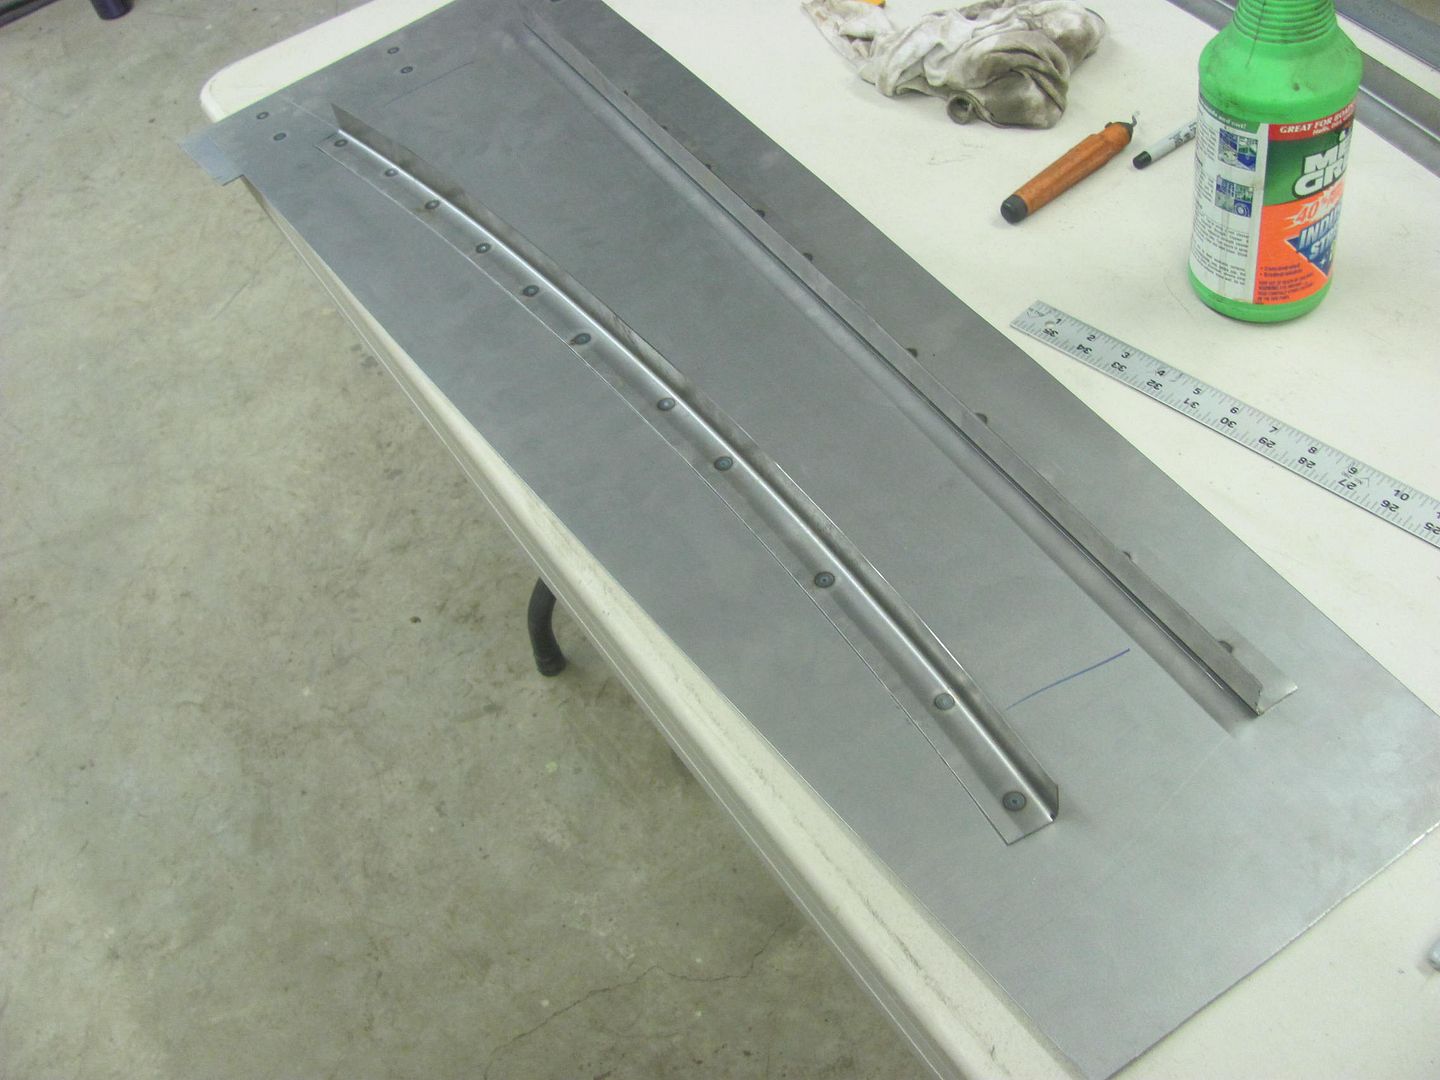
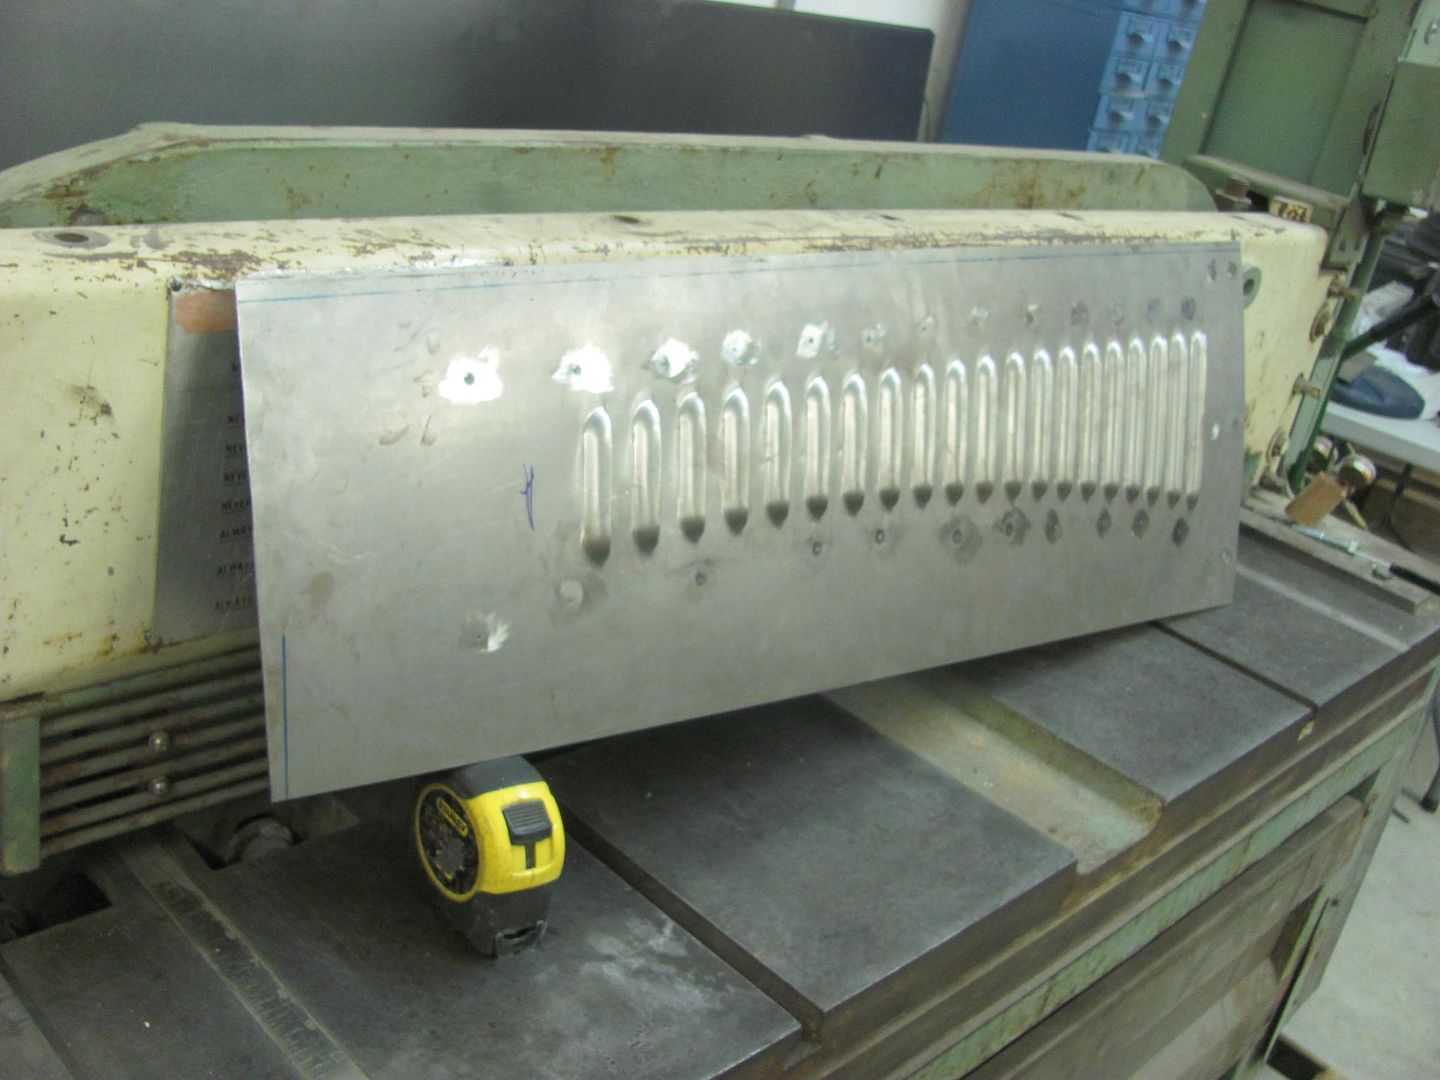
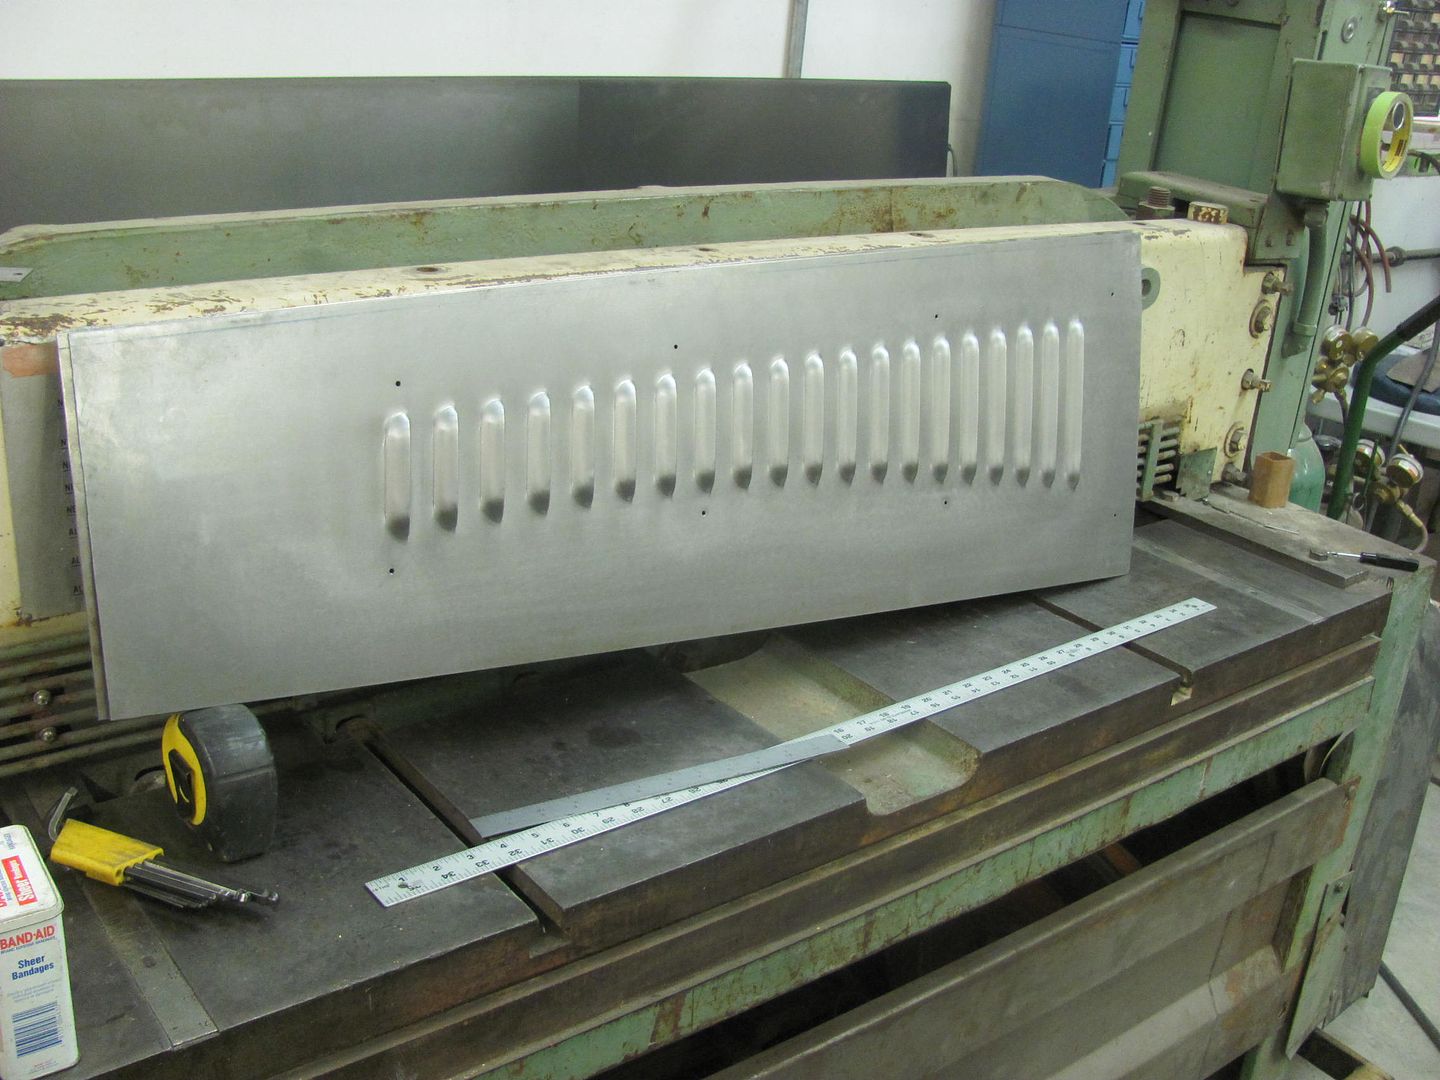
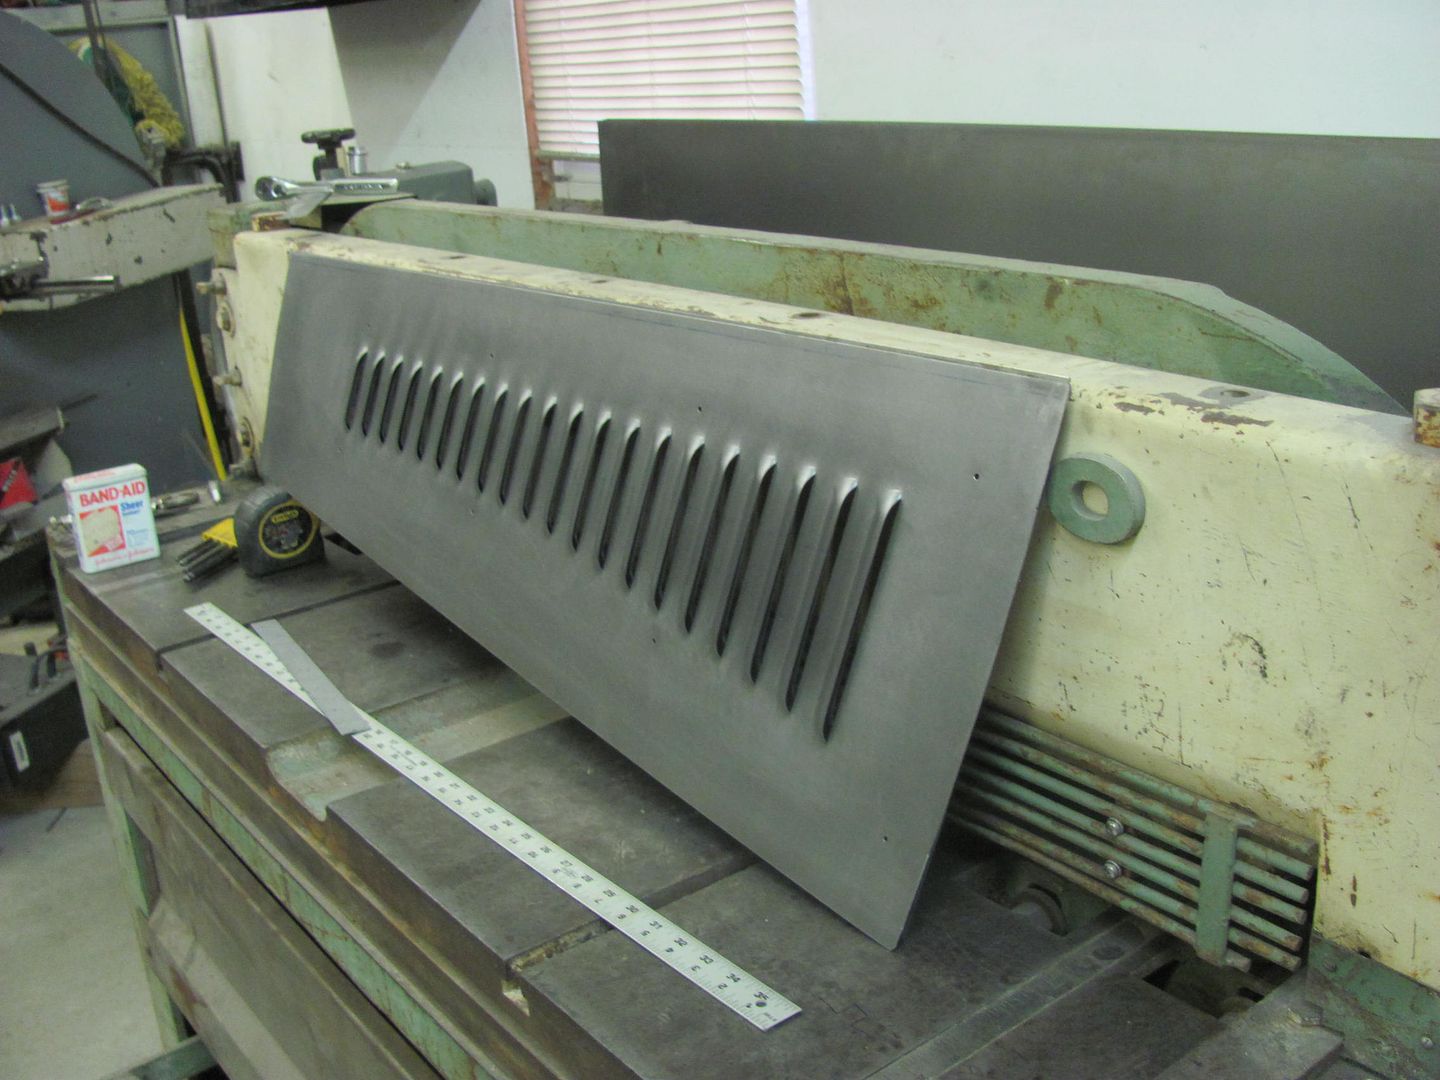
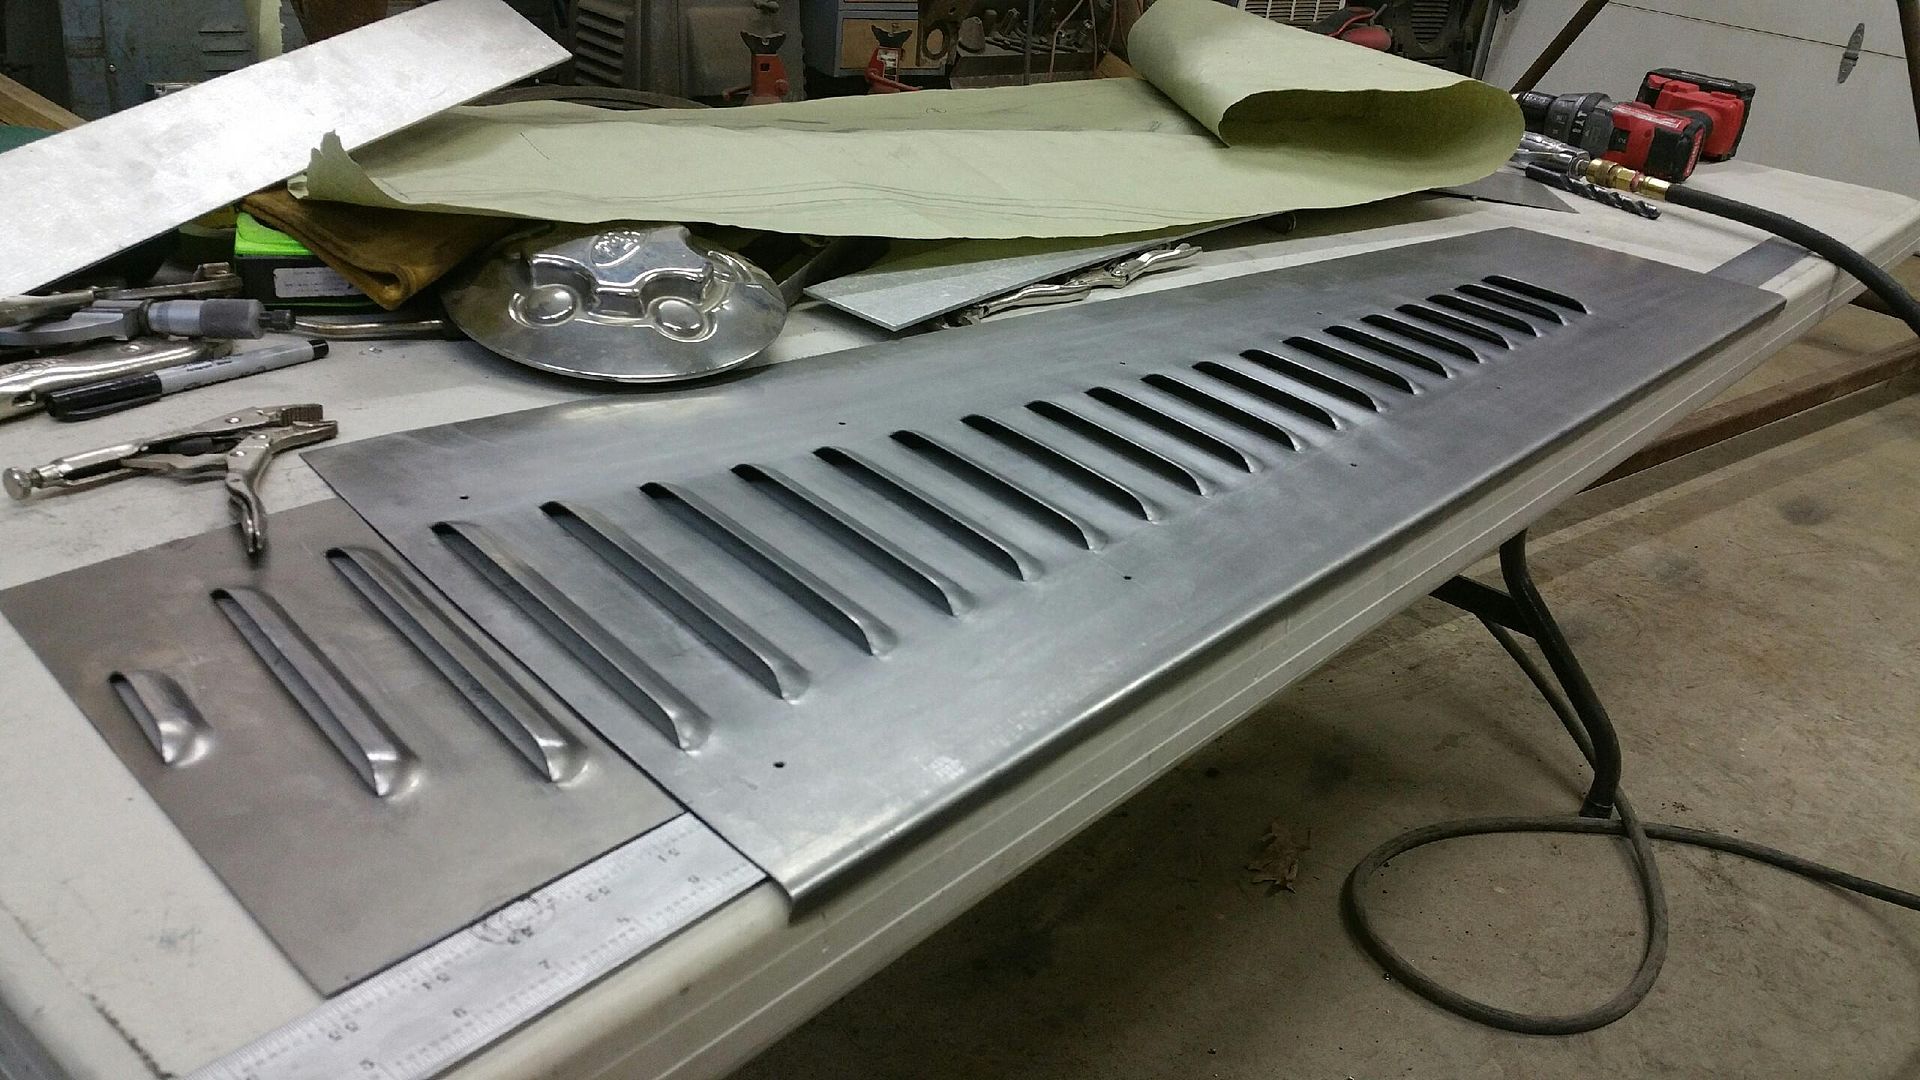
Had a vintage hood side show up at the shop last night, the owner wanted a couple different versions of louver samples made up that he could hold against the hood on the car to better visualize. One style he was looking at lends from an early Alfa Romeo that extends the louvers onto the cowl, as shown in the green tape..
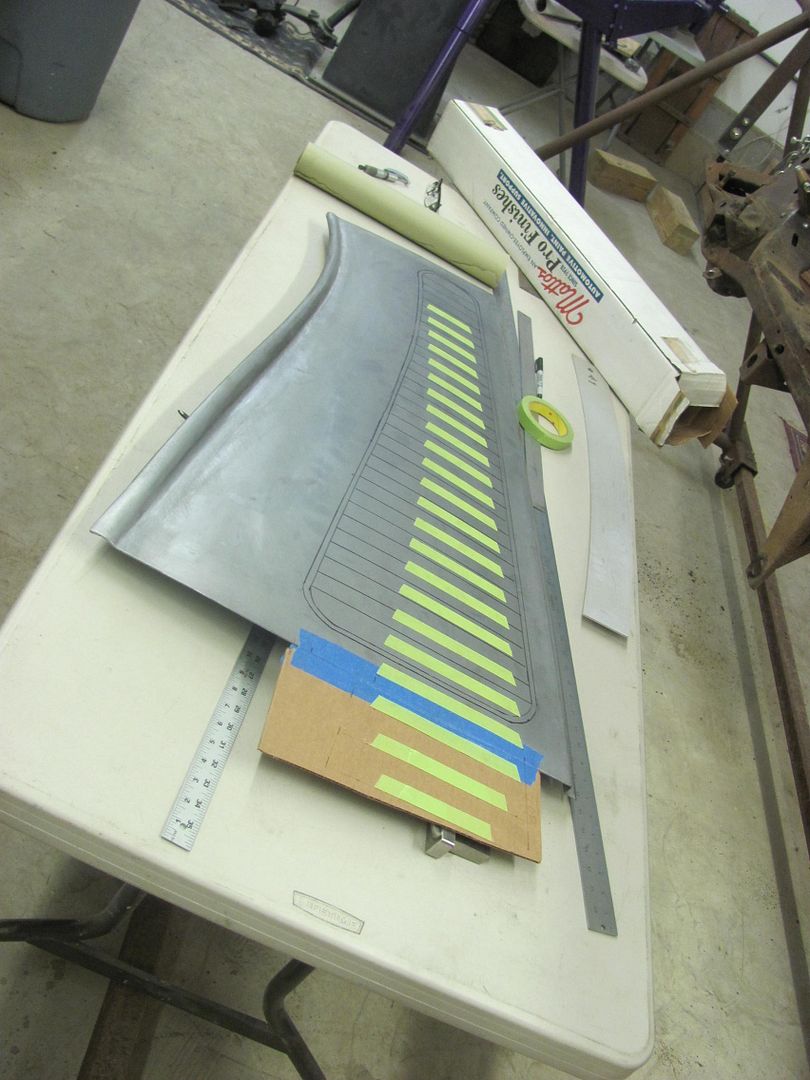
We took a paper pattern of the details so the hood side could go back with him to use as a pattern for the opposite side that still needs to be made.
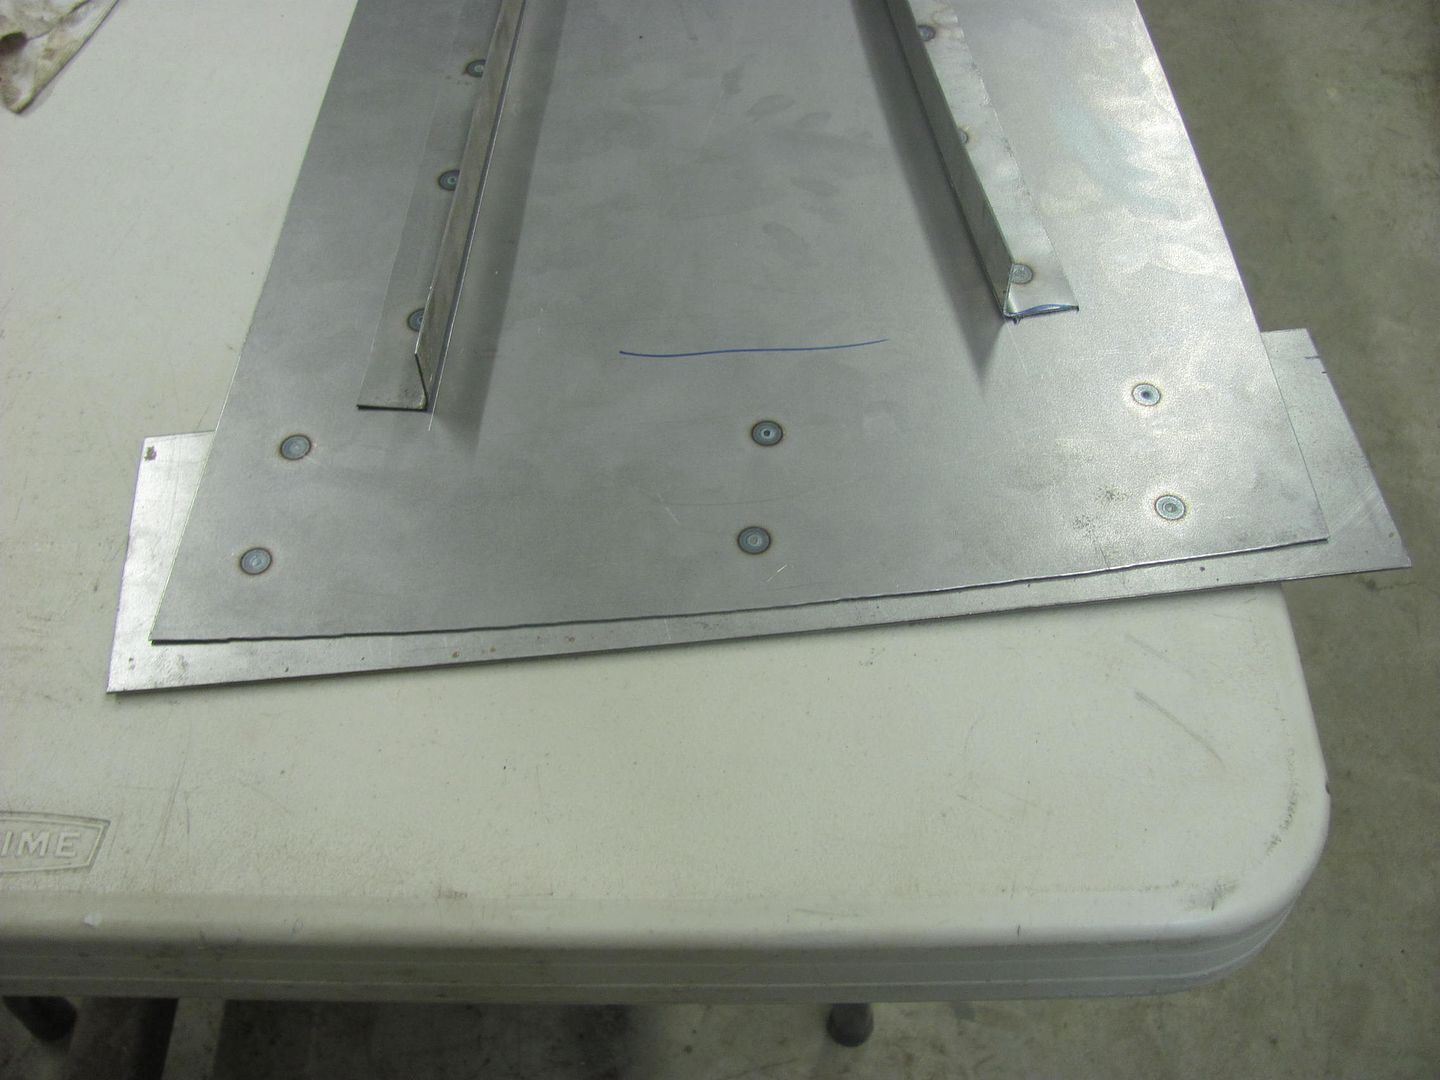
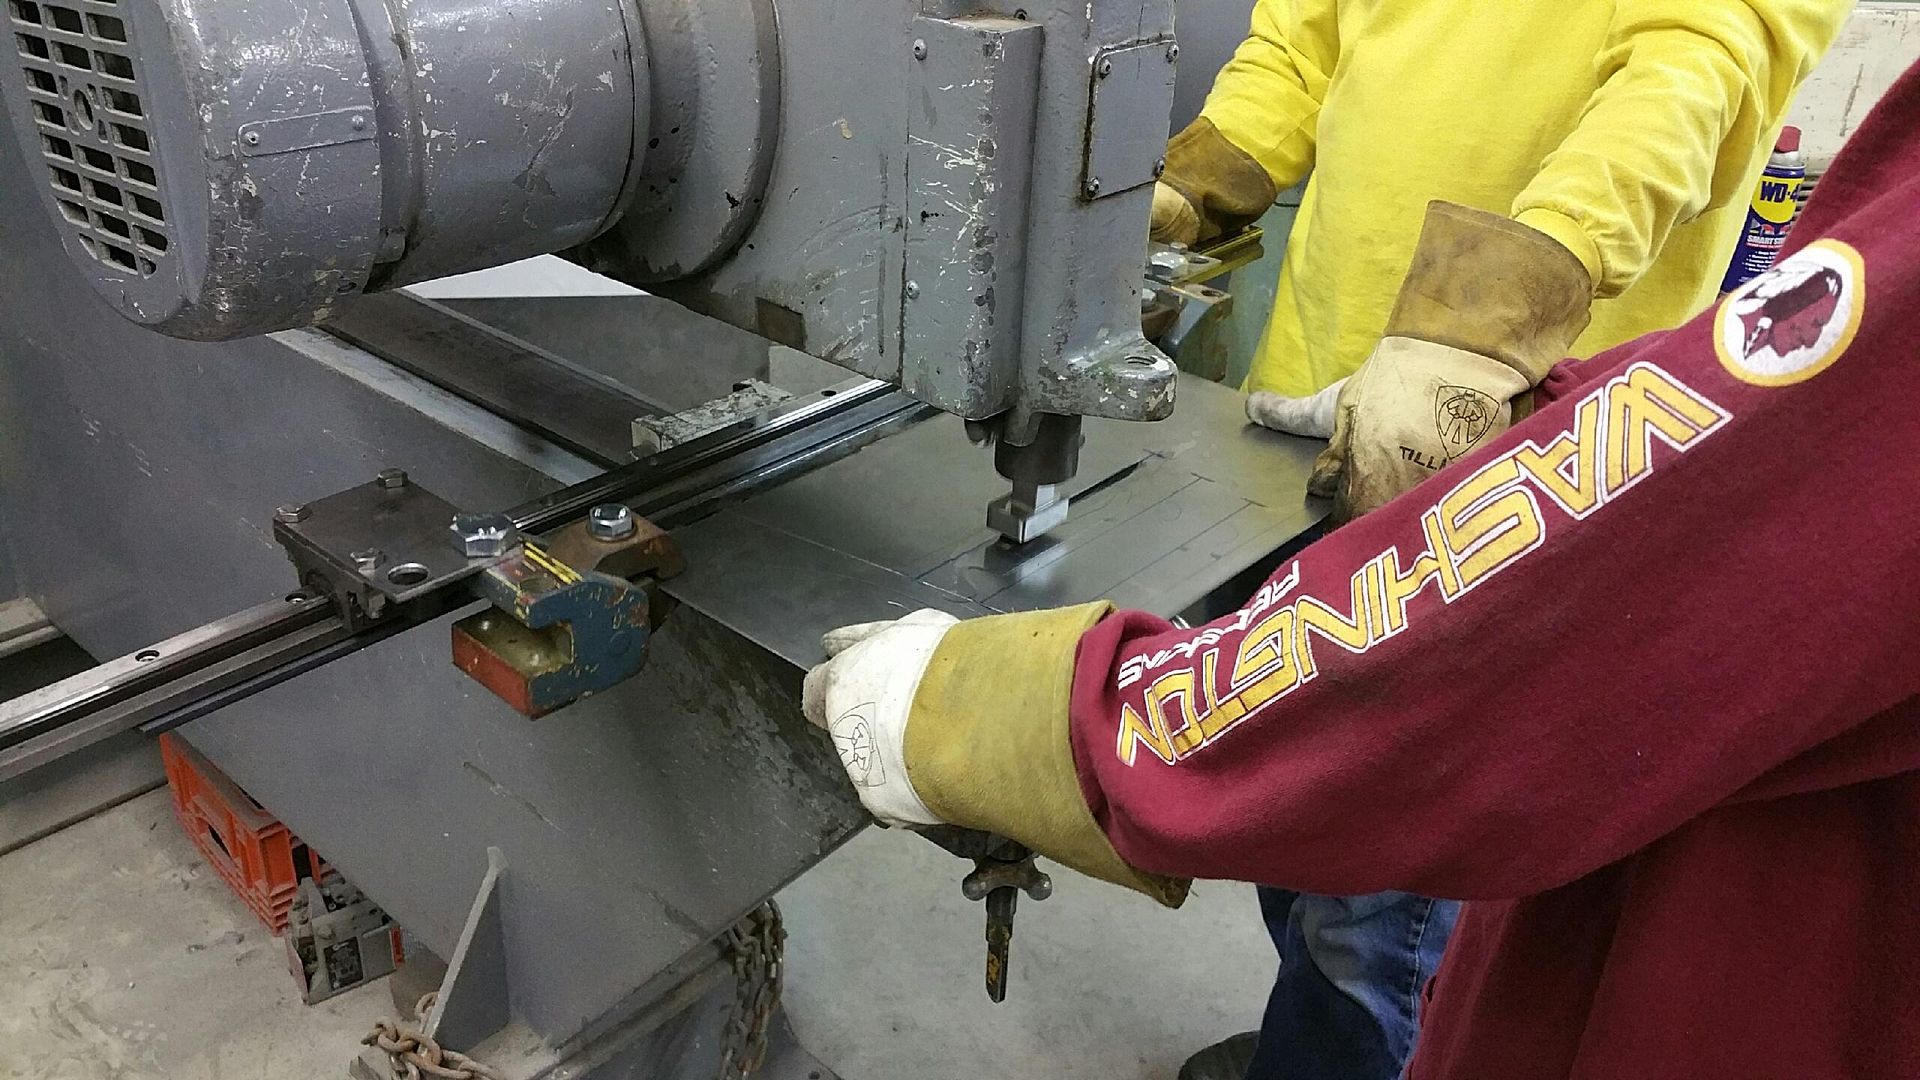
Spot welded on some "end stops" for the louver die.....
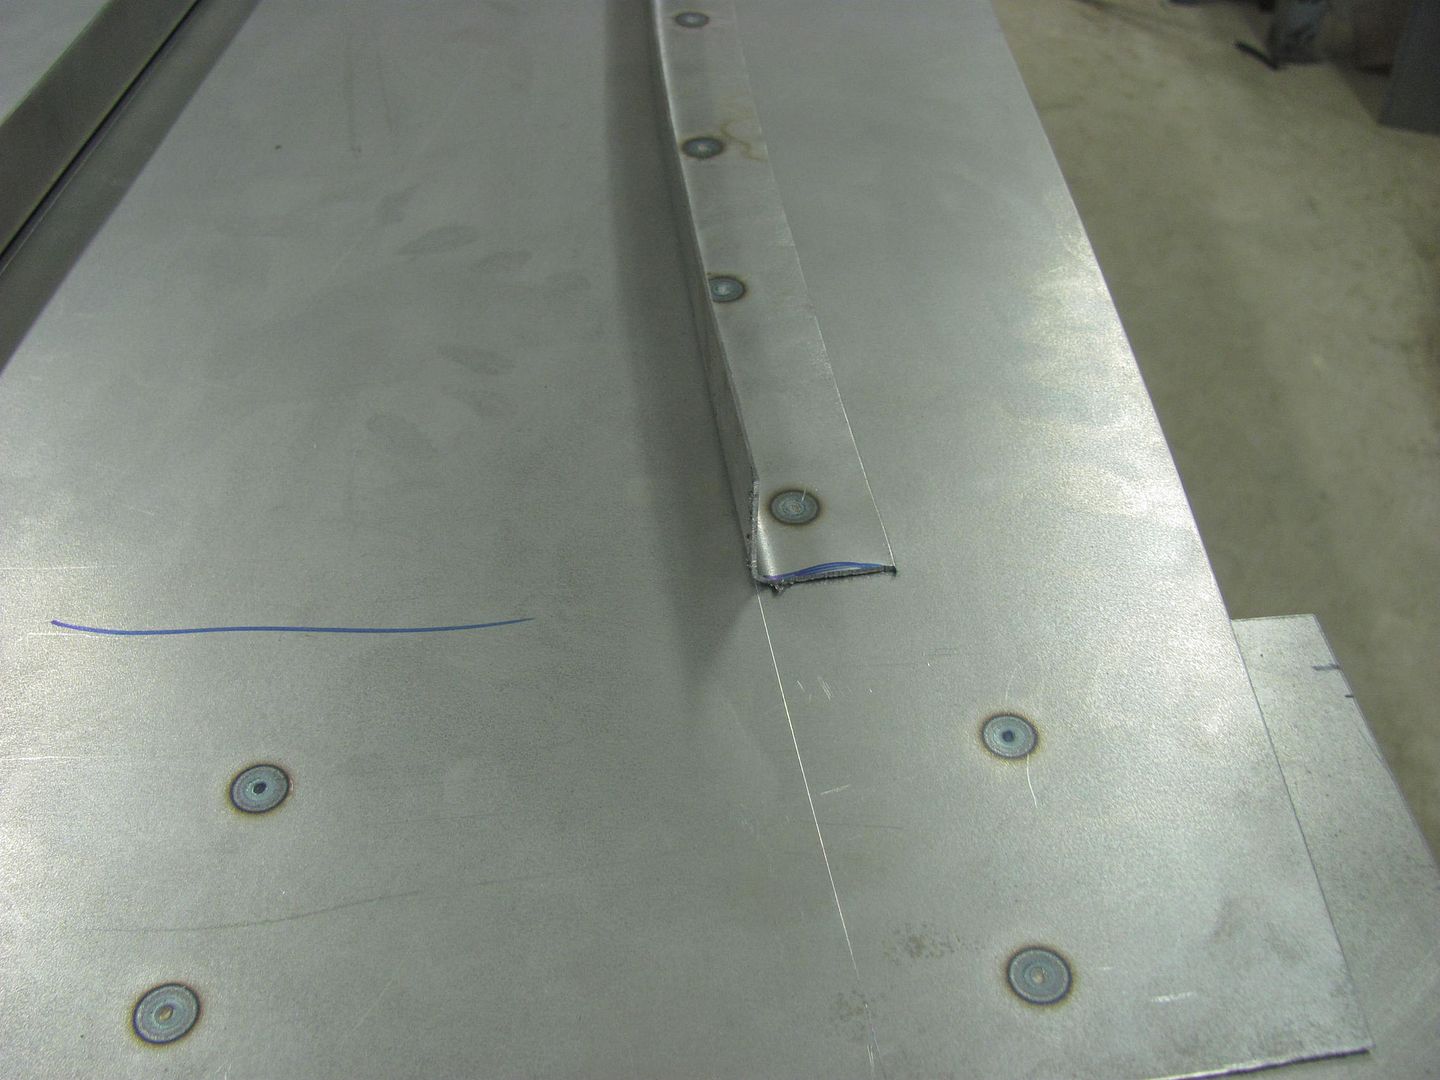
.....and a squared plate for the back gauge.
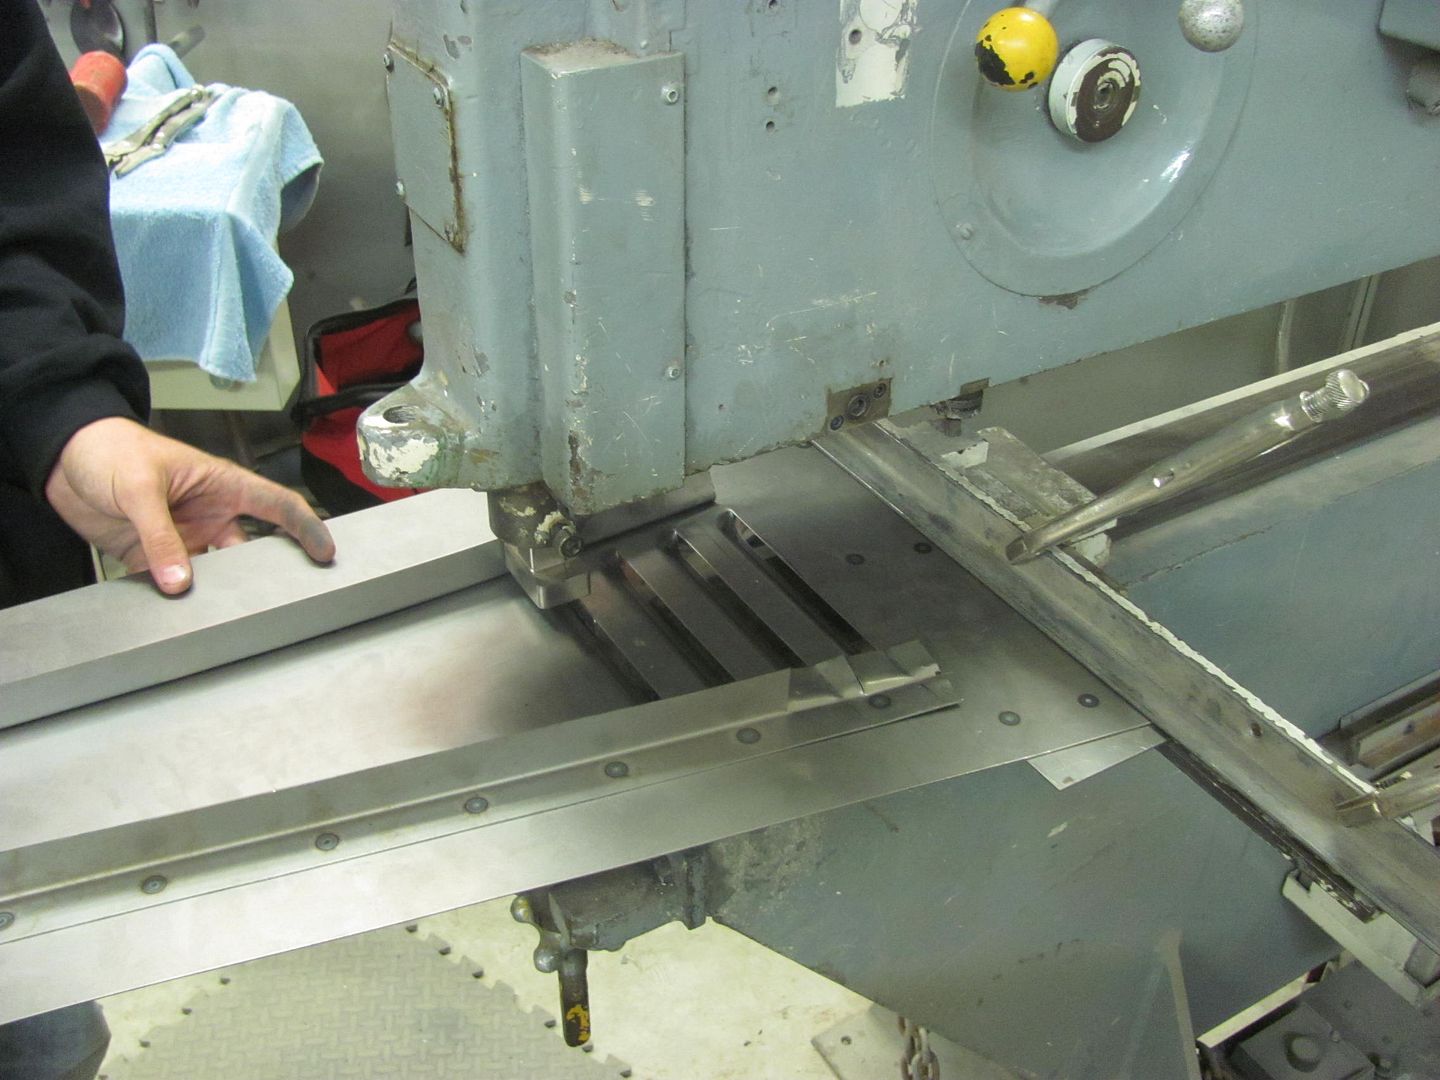
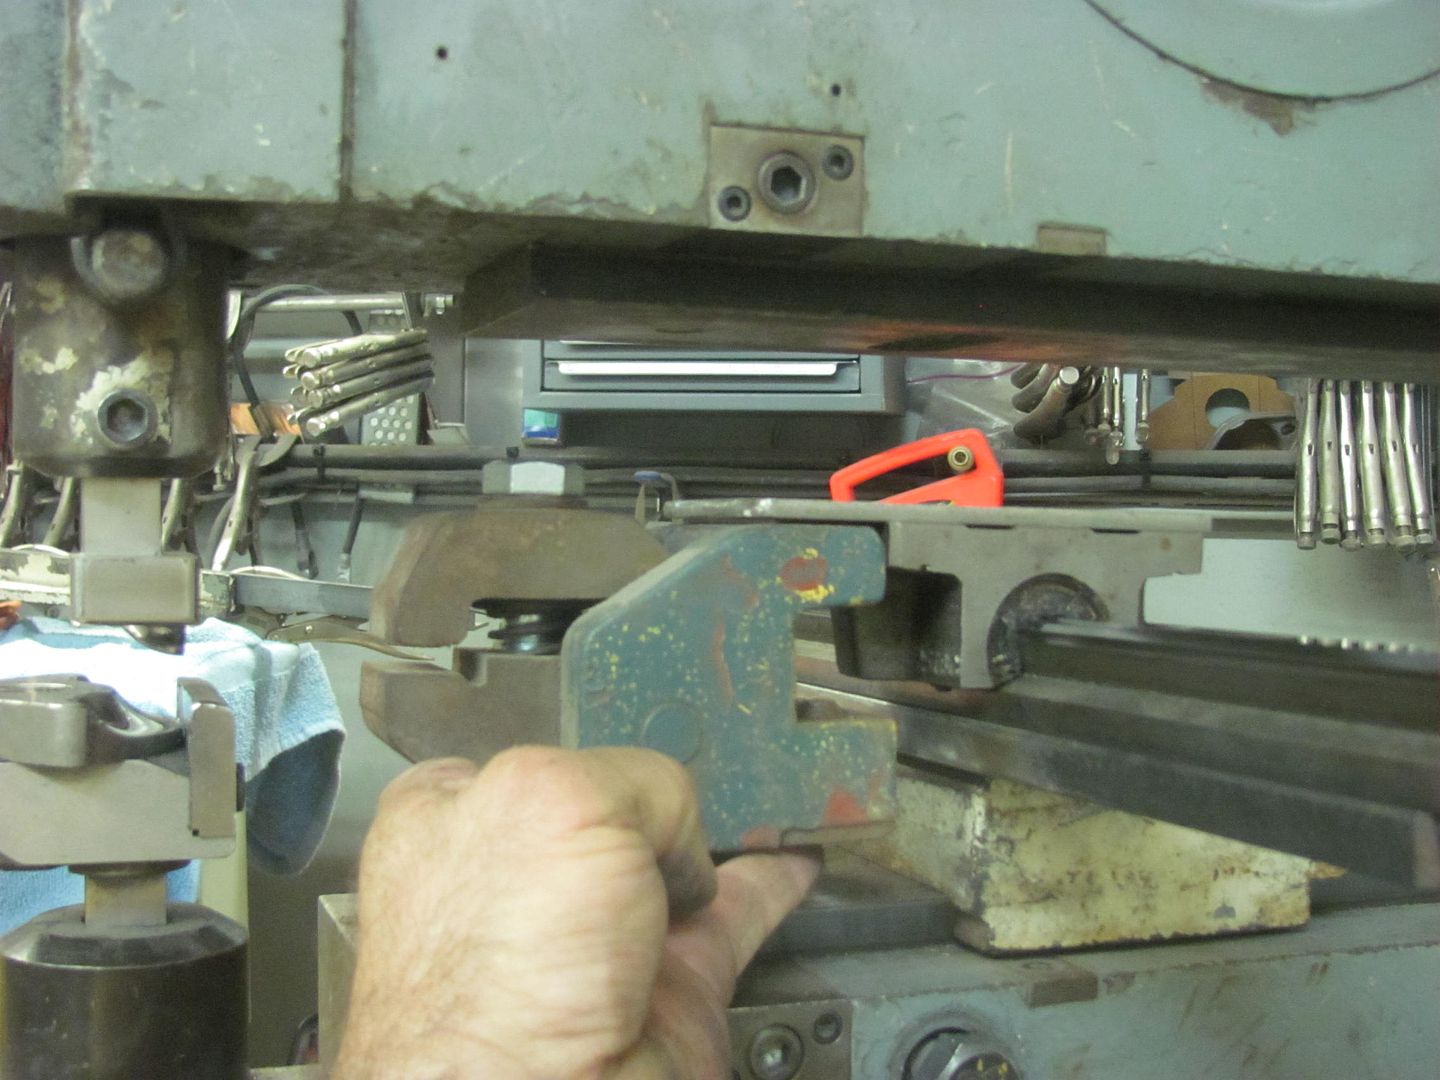
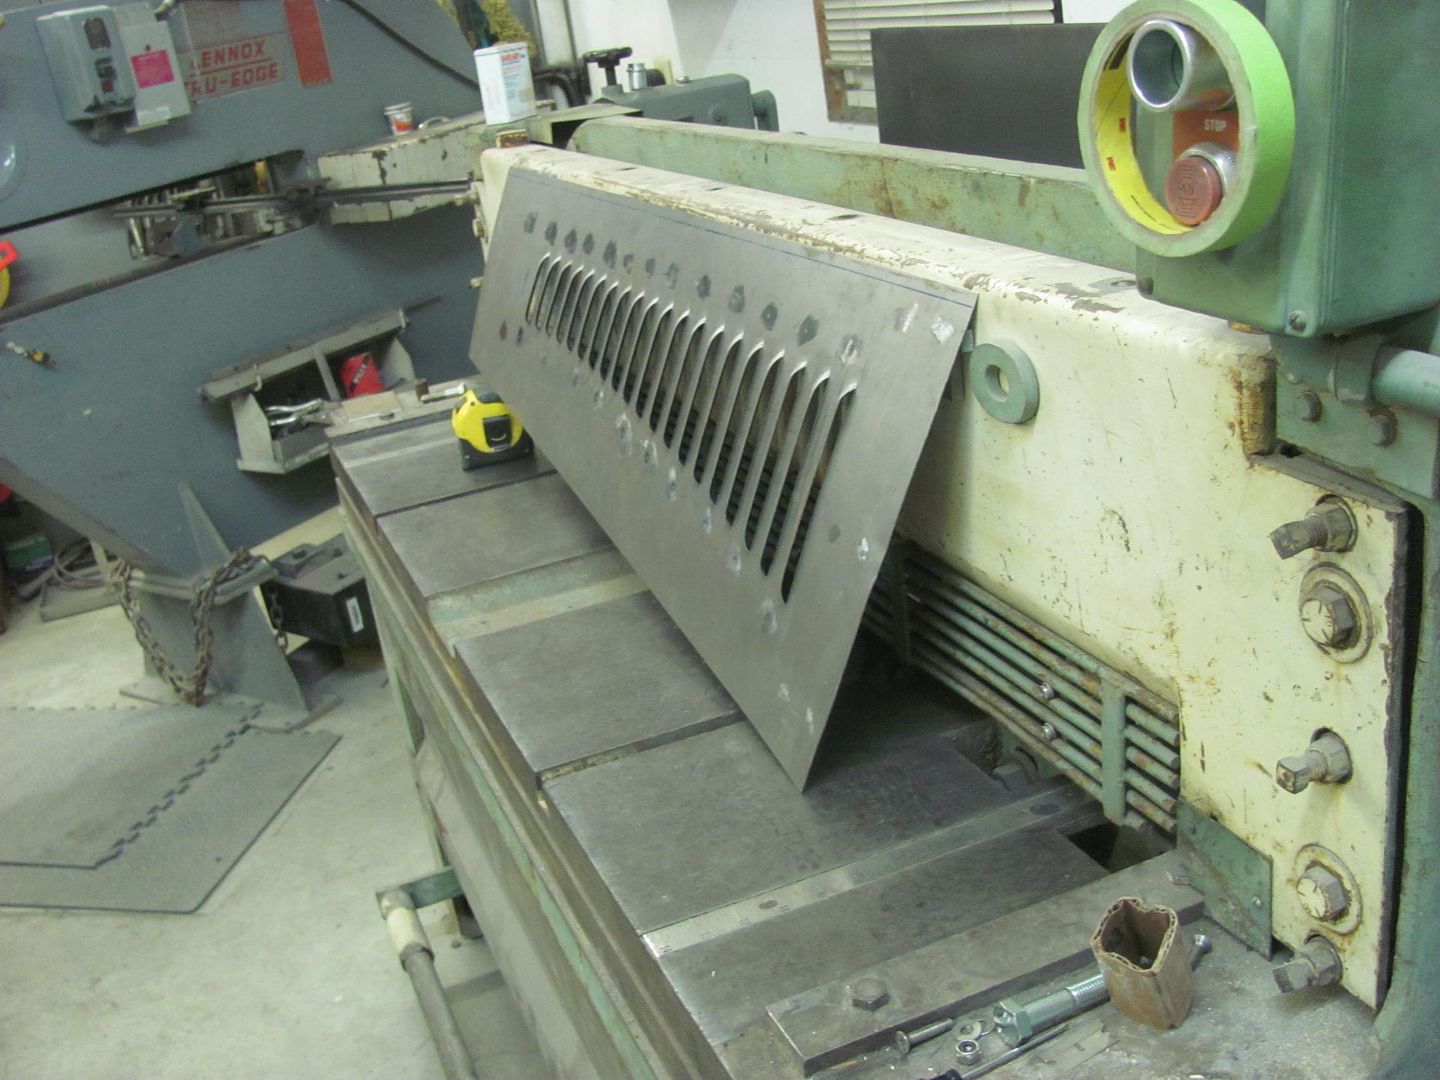
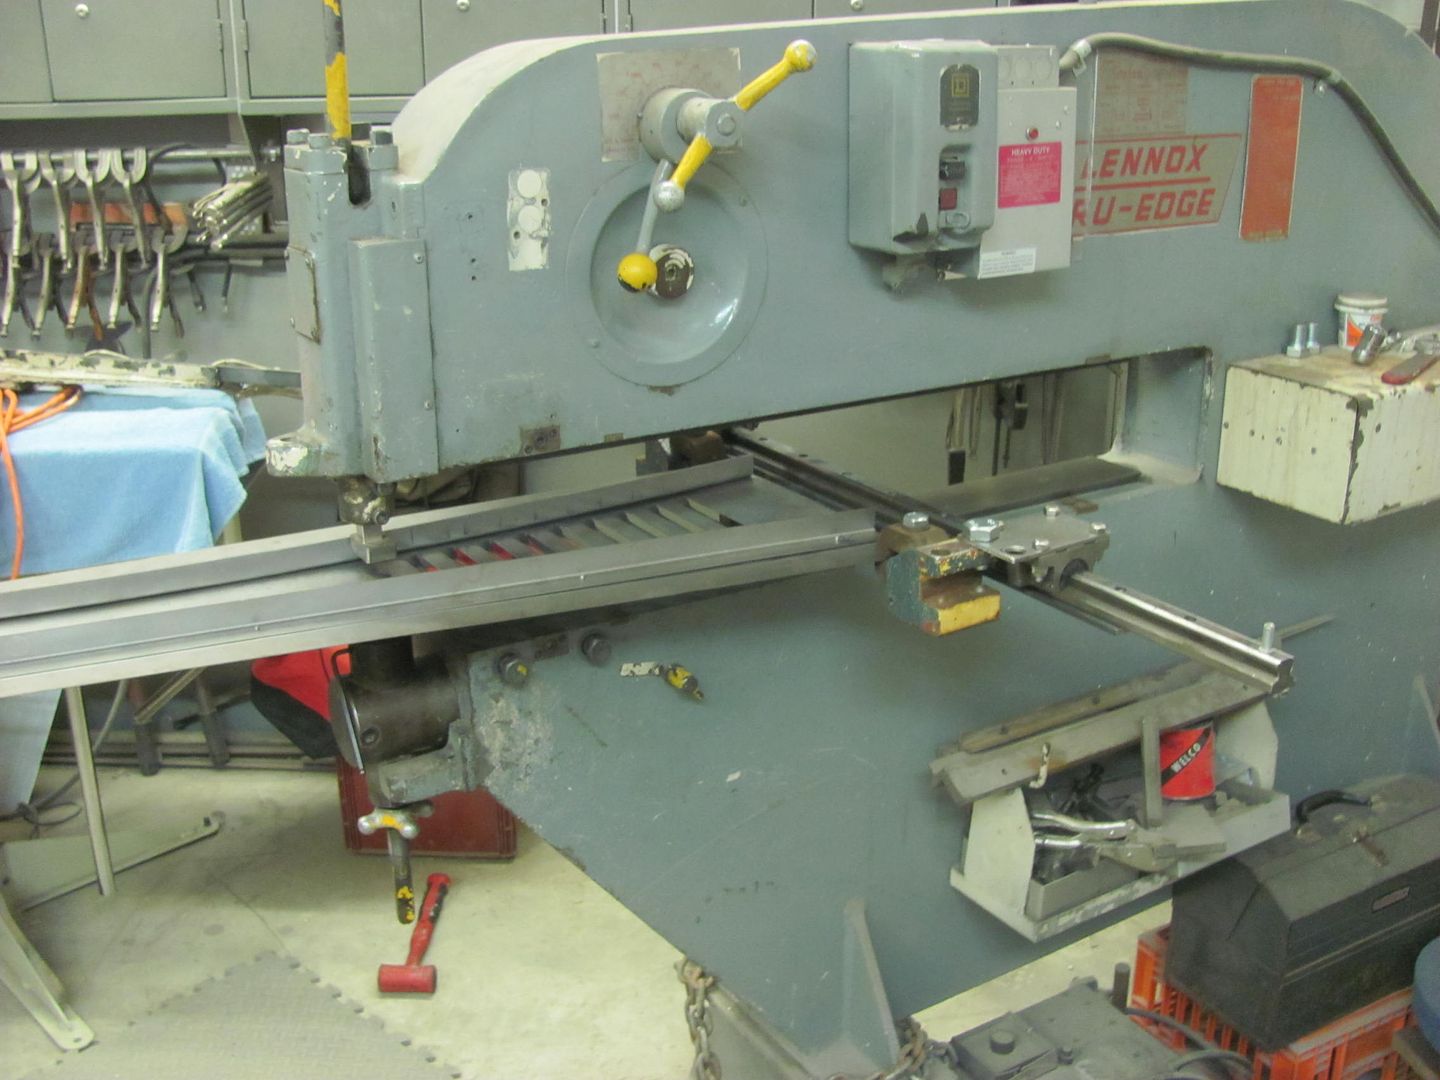
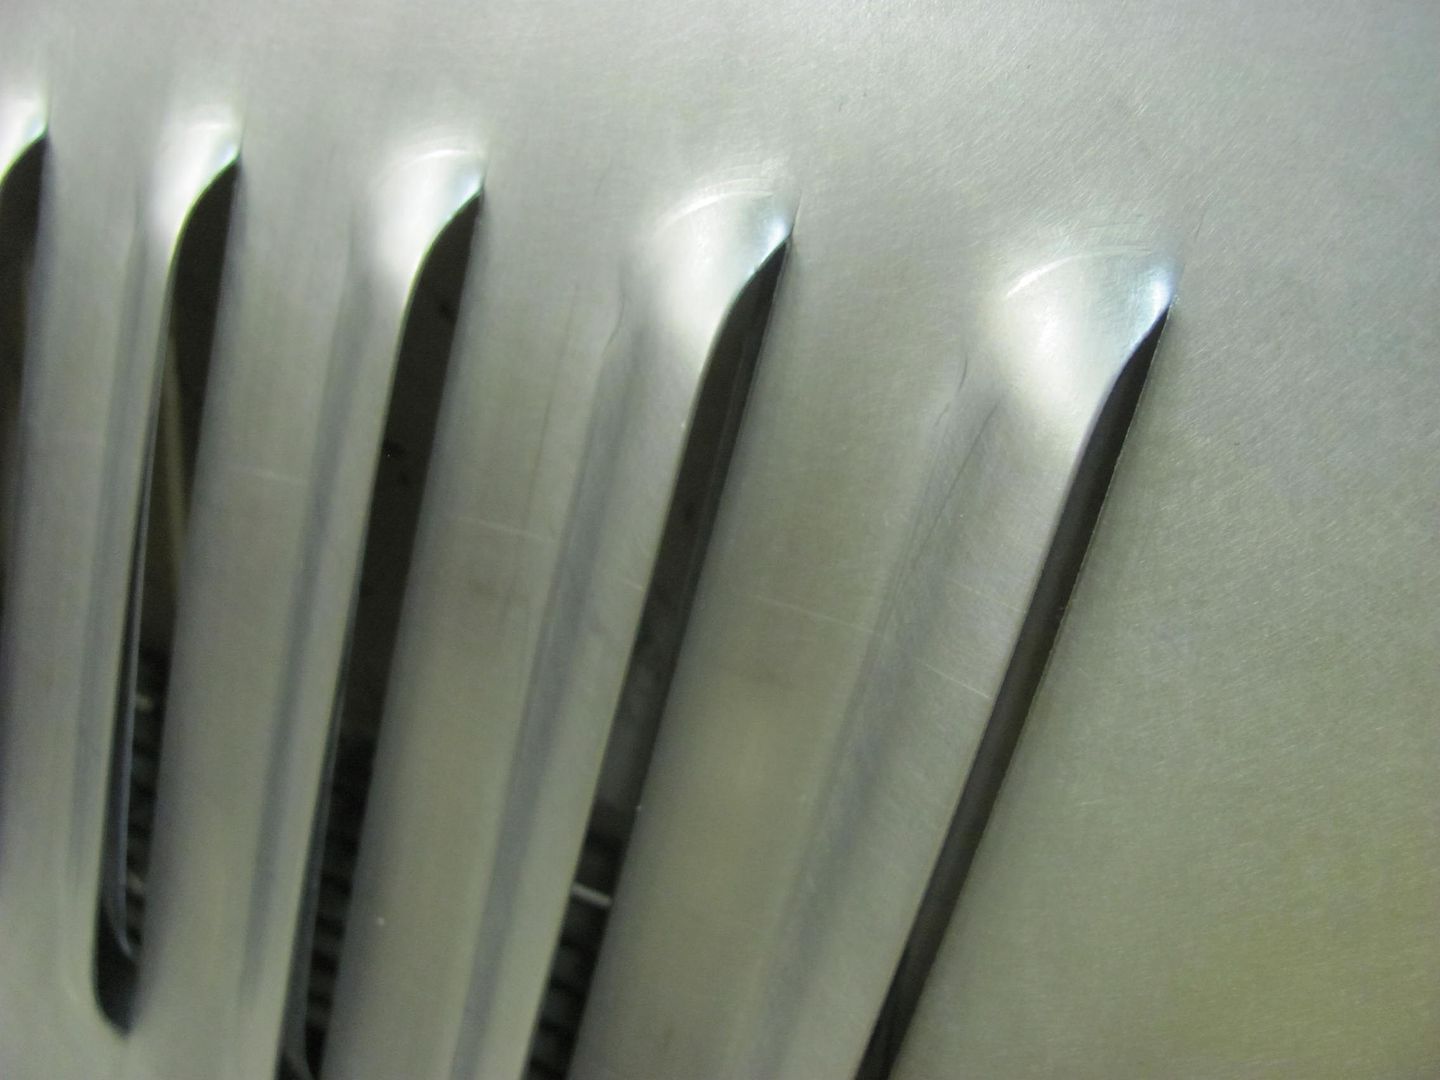
Louvers in the Lennox.....
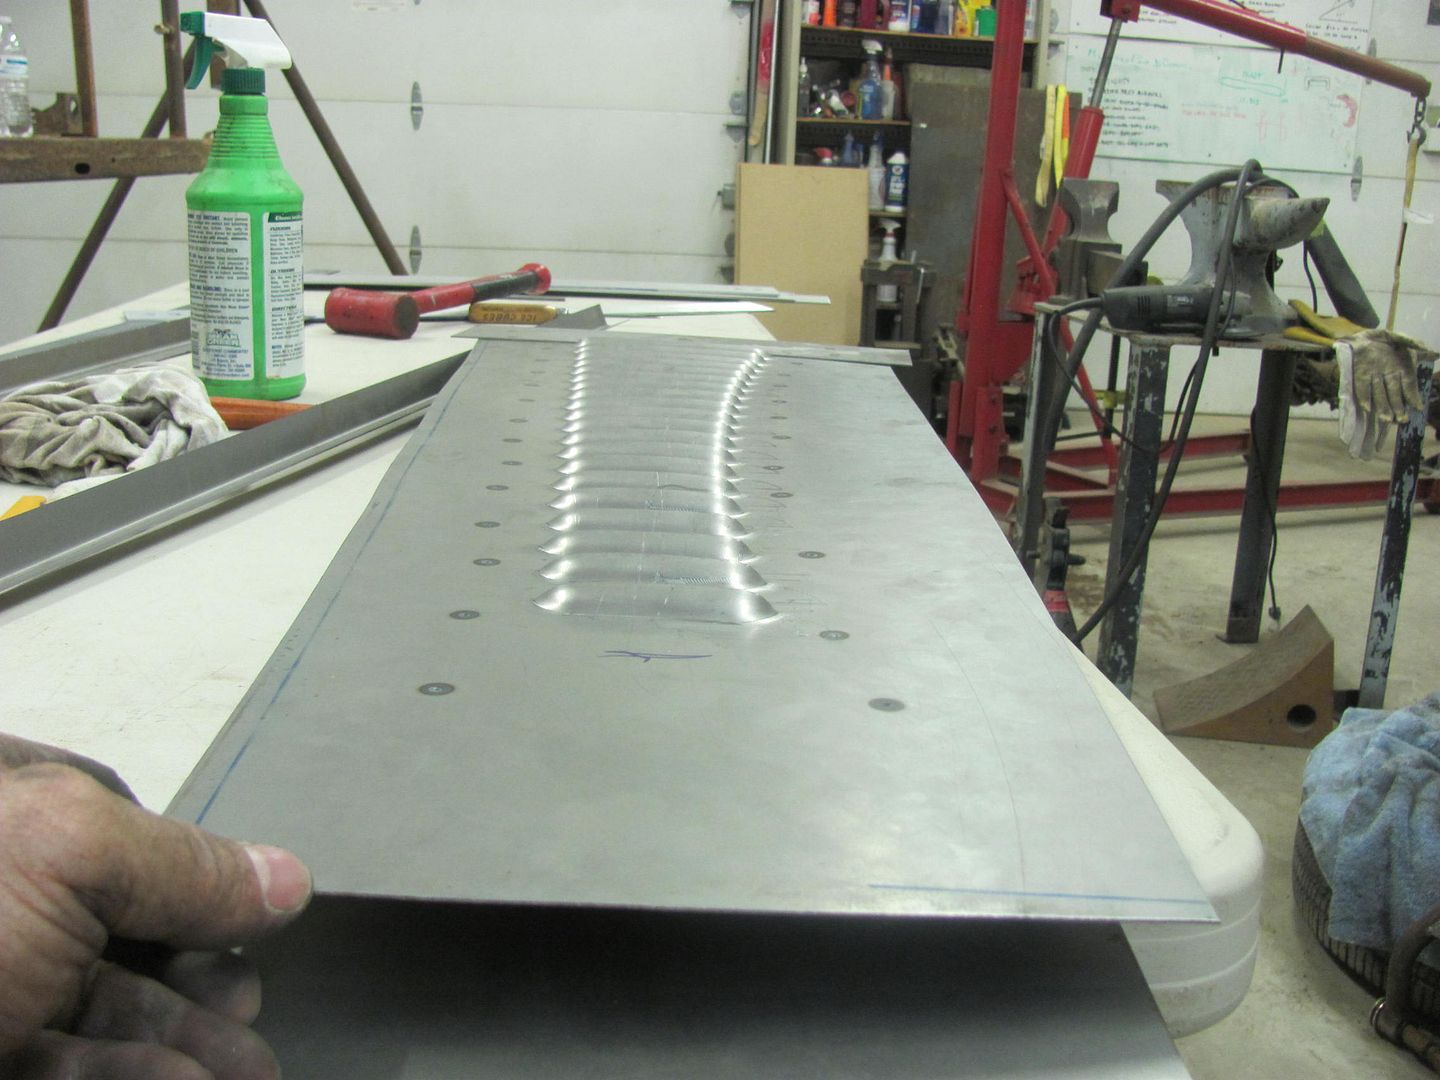
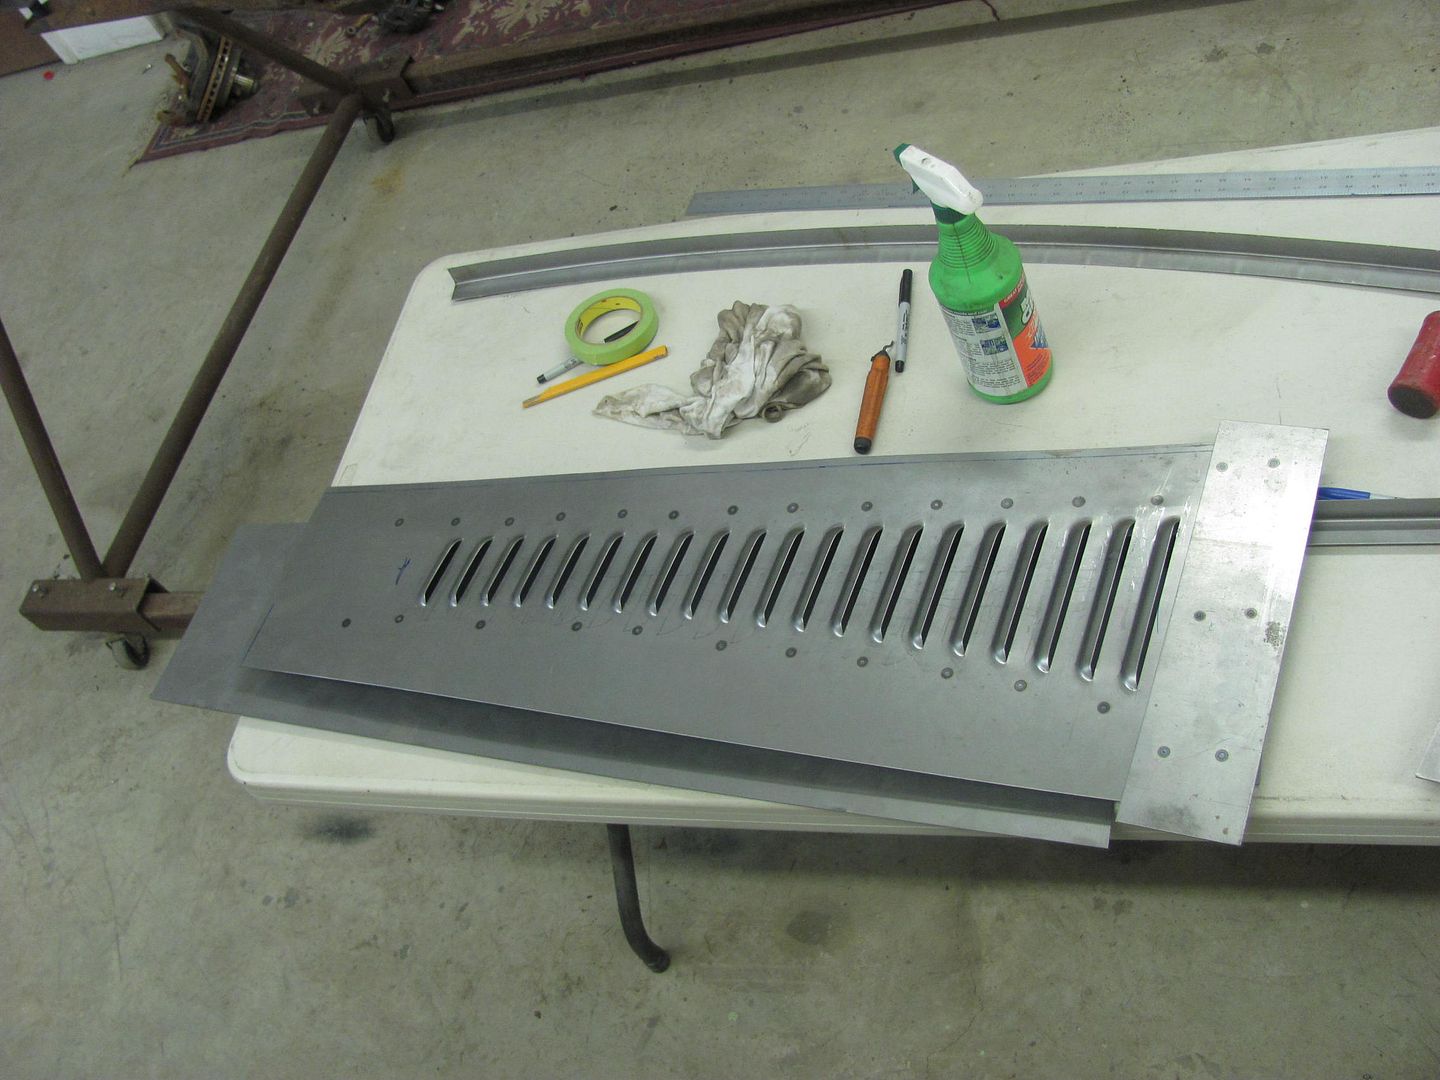
One sample down, one to go..
We took a paper pattern of the details so the hood side could go back with him to use as a pattern for the opposite side that still needs to be made.
Spot welded on some "end stops" for the louver die.....
.....and a squared plate for the back gauge.
Louvers in the Lennox.....
One sample down, one to go..
FTE Stories
Ford Trucks for Ford Truck Enthusiasts

Top 6 Best Deals Available on New Fords & Lincolns Right Now
Brett Foote
This Hennessey Takes the Expedition Tremor's Off-Roading Capability to the Next Level
Verdad Gallardo
Top 10 Fords at 2026 Carlisle Ford Nationals
Joe Kucinski
3 Best / 3 Worst Parts of Modern Ford Ownership
Brett Foote
10 Amazing Upgrades That Solve Common Ford Truck Owner Headaches
Pouria Savadkouei
Every 2026 Ford Engine Explained
Brett Foote
10 Ugly Ford Trucks That We Still Kinda Love
Joe Kucinski
10 Things Every Truck Owner NEEDS (2026 Edition)
Michael S. Palmer
Rezvani's Latest Post-Apocalyptic Monster Is a Ford F-150 Raptor Underneath
Verdad GallardoTuned
Joined: Aug 2007
Posts: 459
Likes: 123
From: Maryland
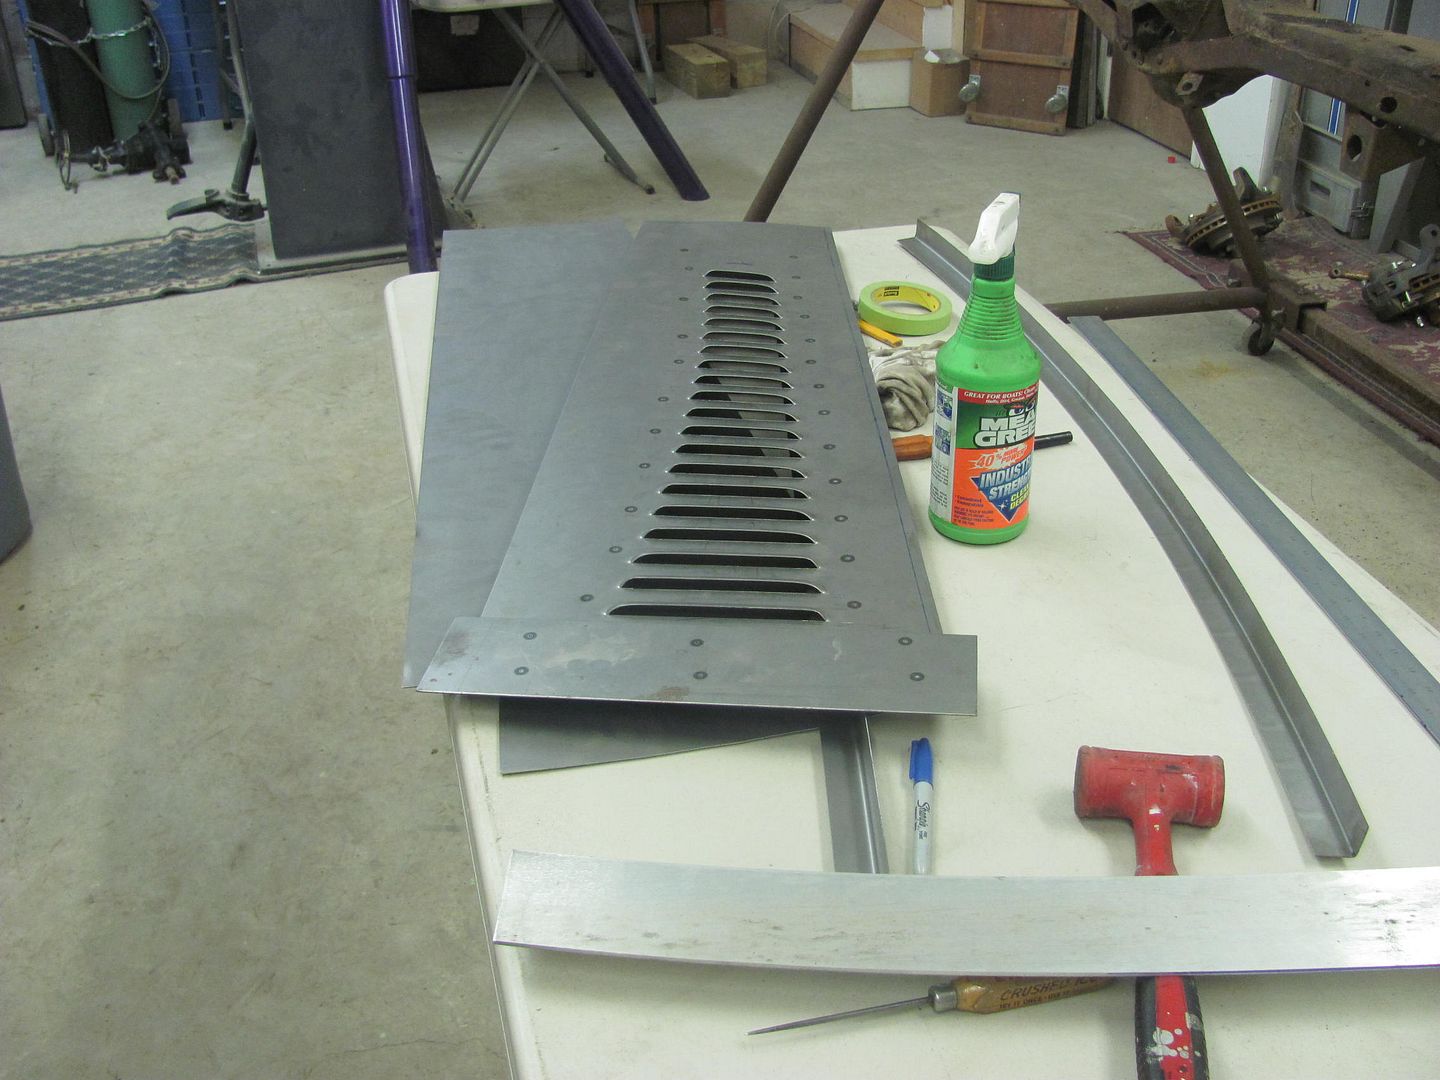
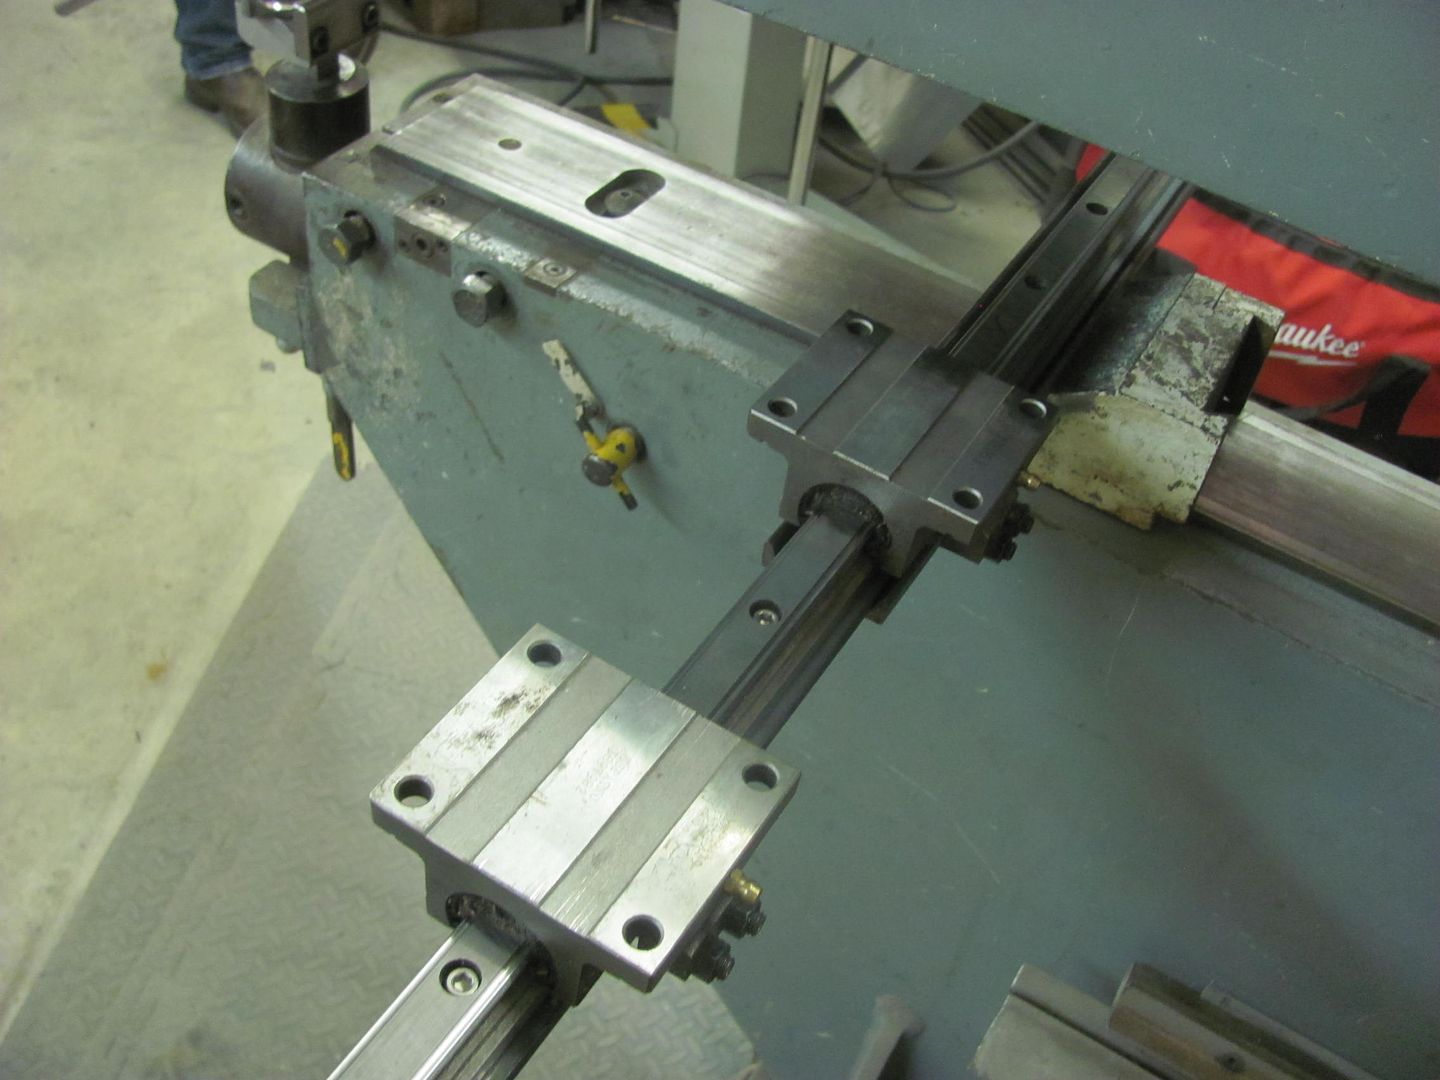
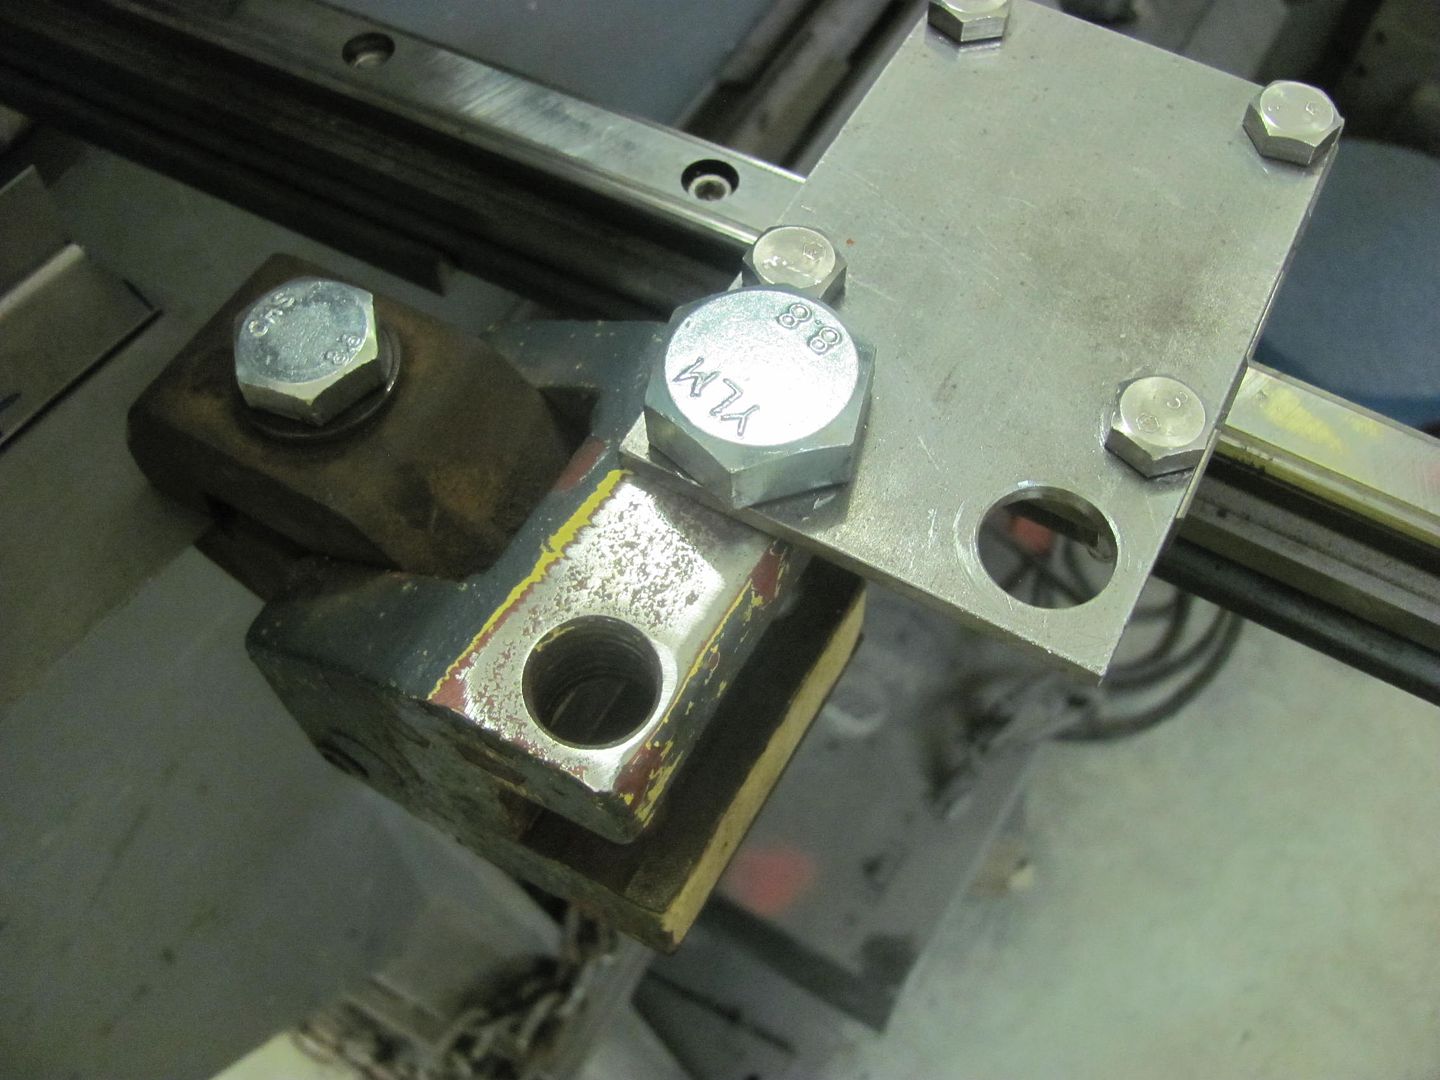
Well FedEx brought a CL delivery, got a matched pair of 48" linear rails. The two bearing blocks will have a material clamp bolted to each block, and used on one rail. We'll get a chance to try it out on the second louver sample. Where we had been manually holding the workpiece against the back stop, this should work better with a simple glide back and forth once clamped in place..
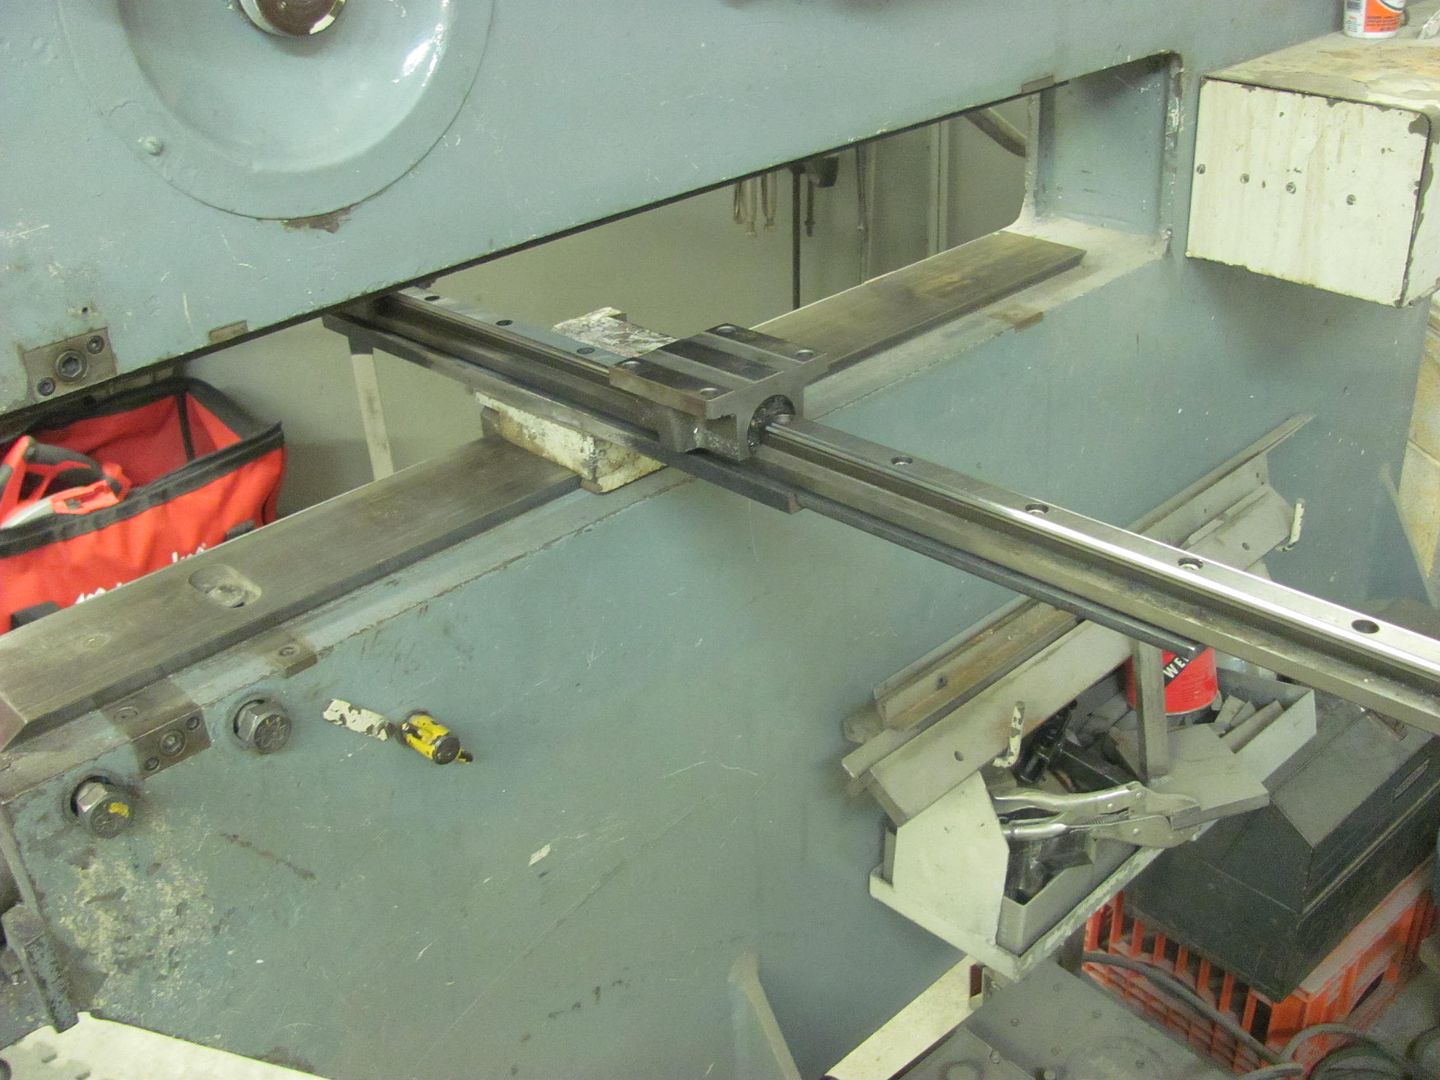
Removal of the spot welded guides from the louver panel wasn't too pretty. The good part about samples is we can see what works well and what doesn't. Here we can see that we won't use spot welds next time as it's too much clean up. I think we'll give some stainless rivets a shot ......
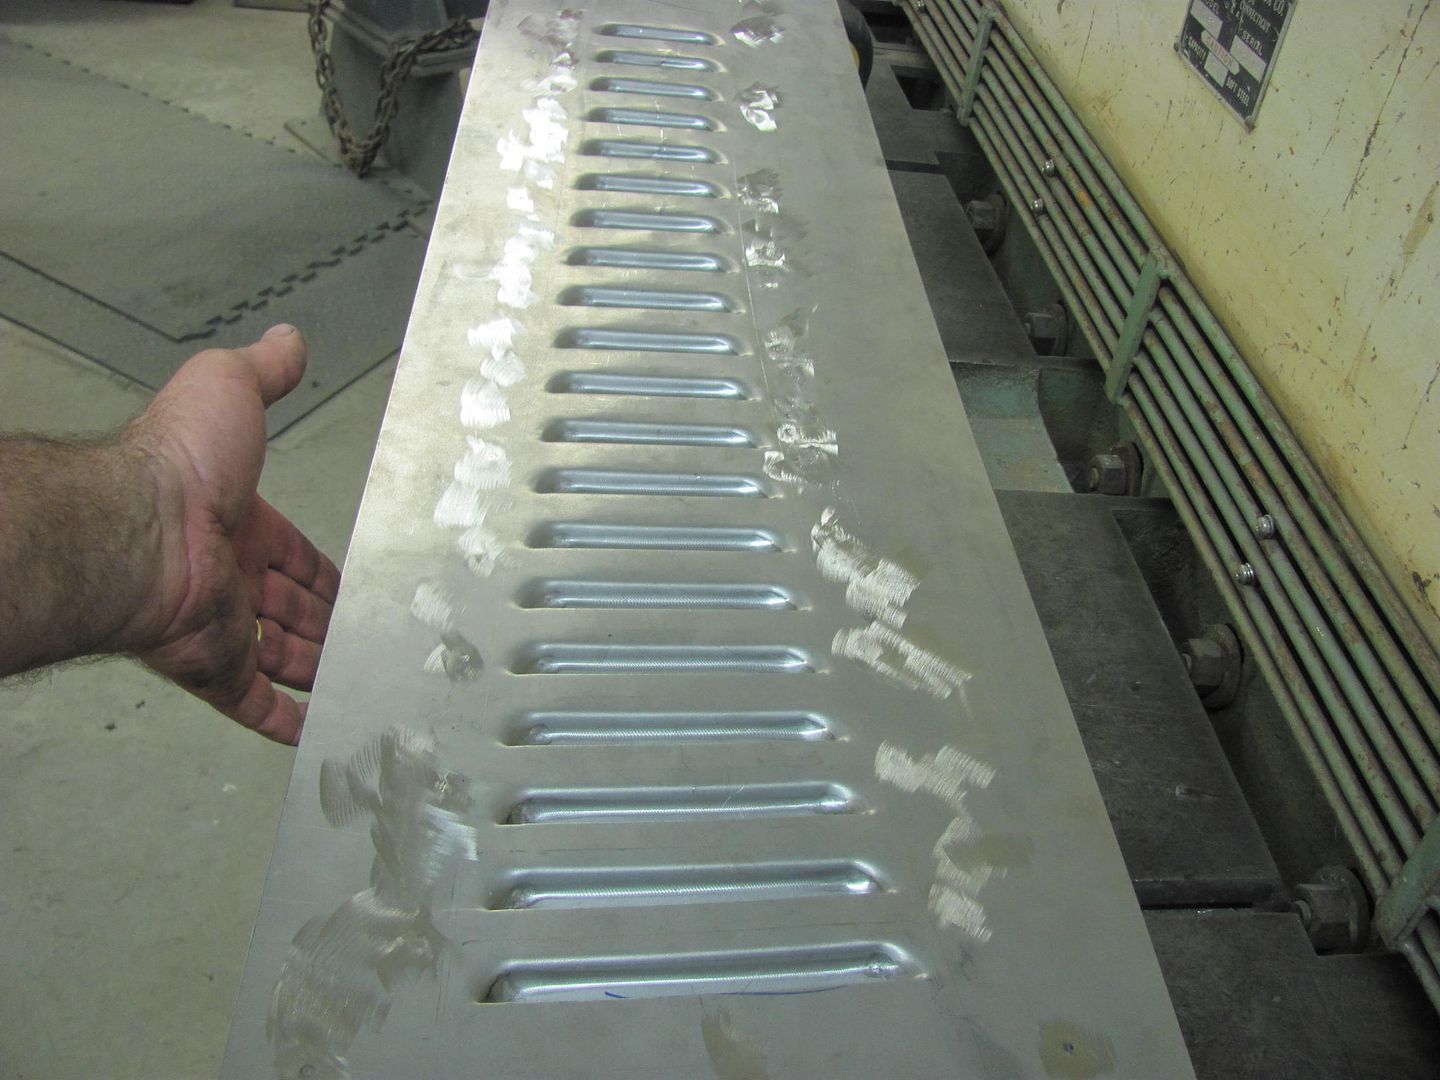
Removal of the spot welded guides from the louver panel wasn't too pretty. The good part about samples is we can see what works well and what doesn't. Here we can see that we won't use spot welds next time as it's too much clean up. I think we'll give some stainless rivets a shot ......
Tuned
Joined: Aug 2007
Posts: 459
Likes: 123
From: Maryland
The more I looked at our panel with the spot weld carnage, the more I disliked the result, so with new linear guides installed, we made all new samples using stainless pop rivets to hold the guides in place. This will leave a few 1/8" holes to fill, but should be much less issue than cleaning up after the spot welds...
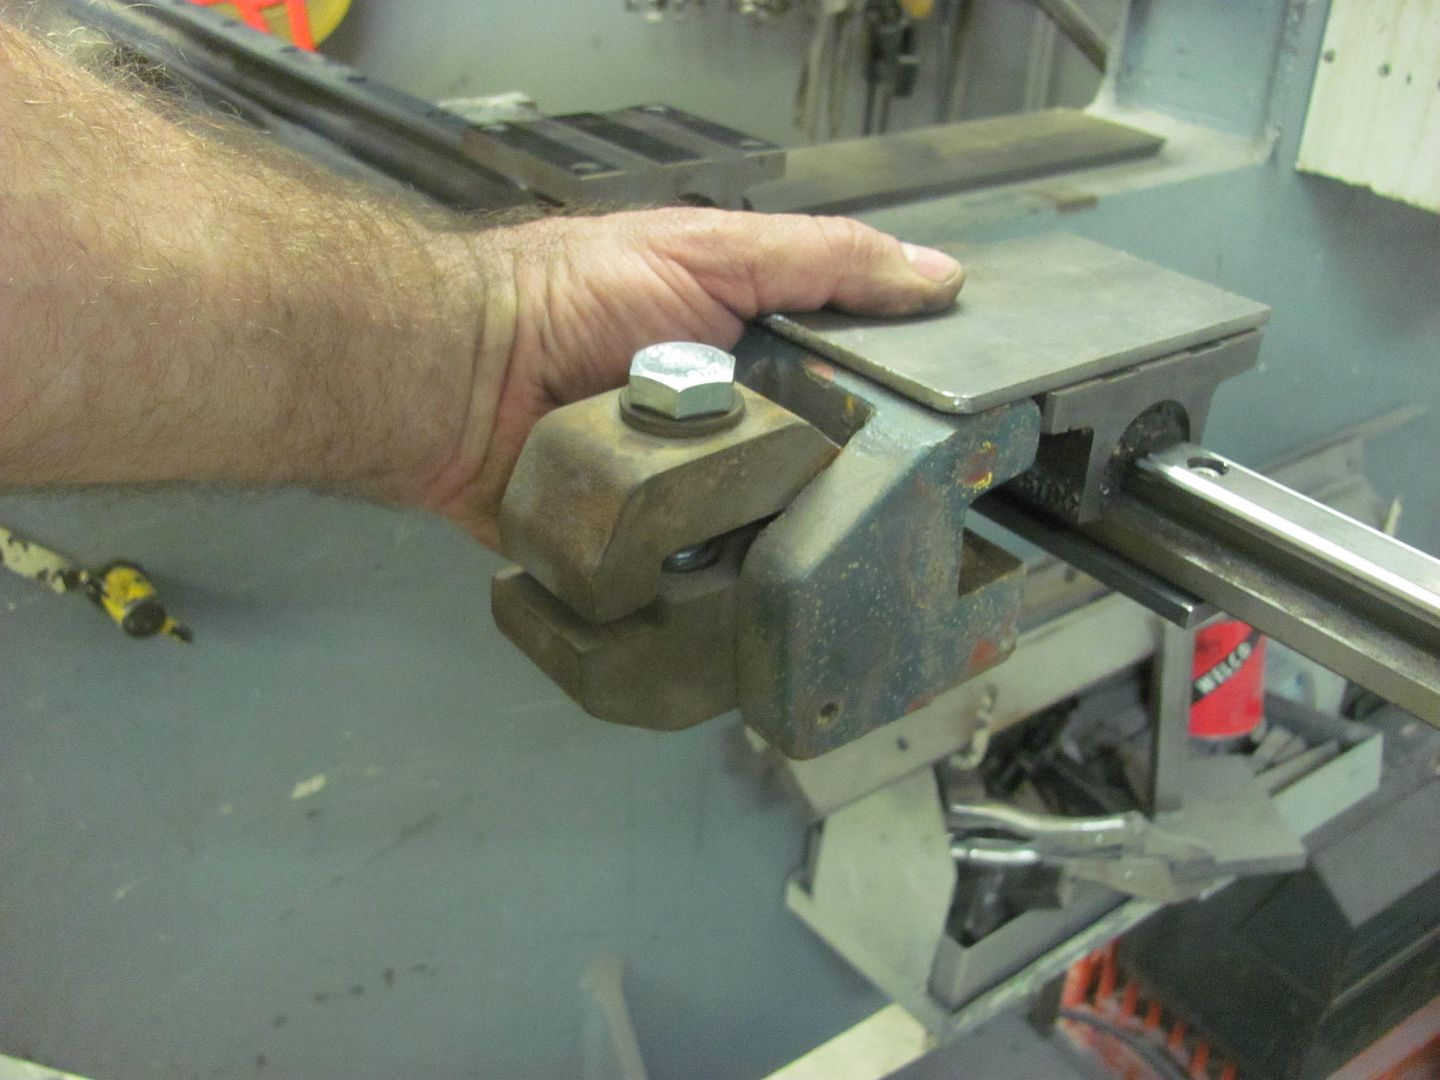
We needed just a bit more throat for this set of "lengthened" hood sides, so one bolt was removed from the material clamp and then rotated the clamp inward 90". This lets the panel pass through rather than bottom out in the clamp.
Guides riveted in place....
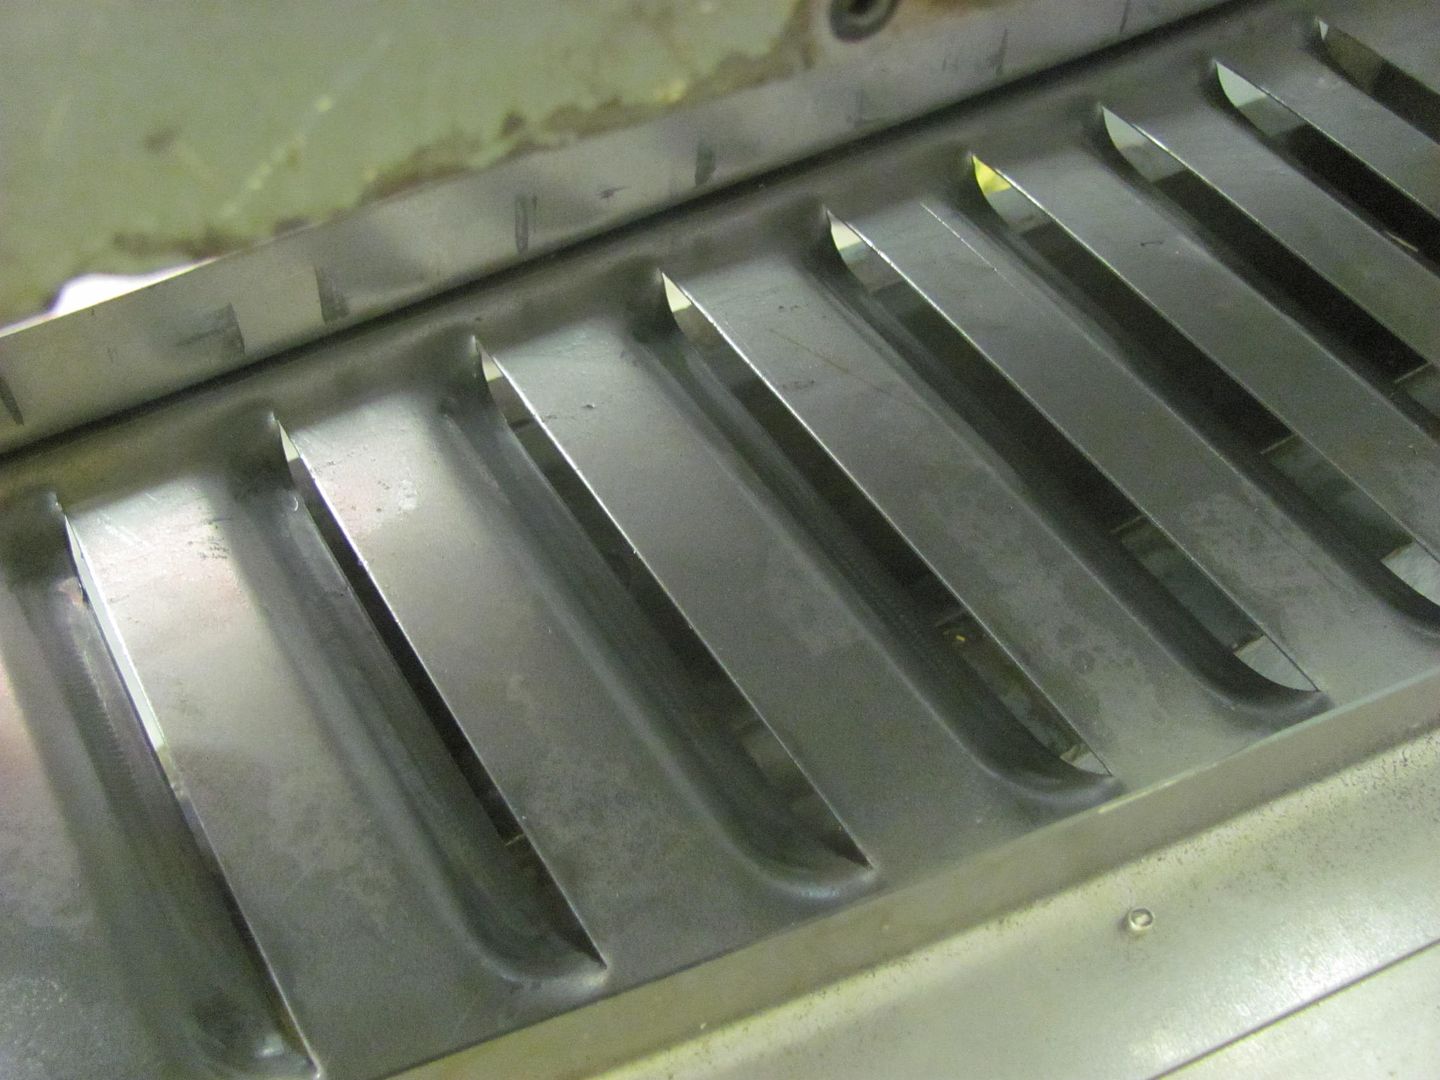
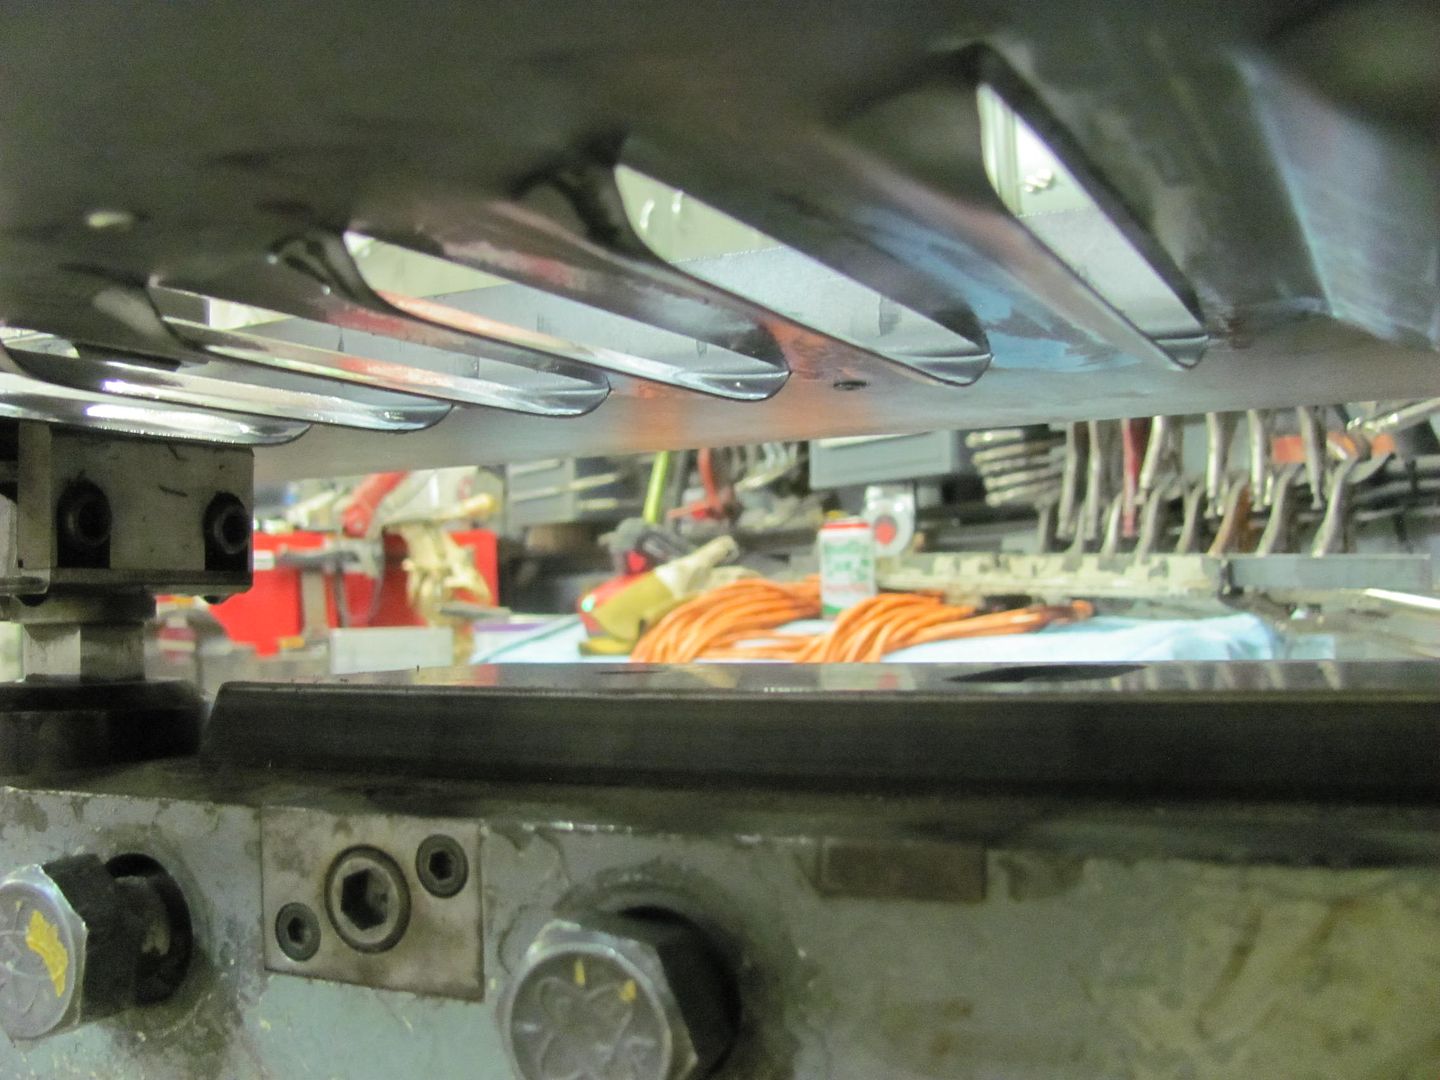
Here's the new version 1, much cleaner, less distortion, and we can re-use the guides...
The cowl piece was done without guides....
And version 2 with the cowl piece.....
Dave (the car owner) stopped by this afternoon and picked up the samples, and indicated he was being over-ruled by most parties on louvers extending past the hood and into the cowl, so likely that version won't be used...
We needed just a bit more throat for this set of "lengthened" hood sides, so one bolt was removed from the material clamp and then rotated the clamp inward 90". This lets the panel pass through rather than bottom out in the clamp.
Guides riveted in place....
Here's the new version 1, much cleaner, less distortion, and we can re-use the guides...
The cowl piece was done without guides....
And version 2 with the cowl piece.....
Dave (the car owner) stopped by this afternoon and picked up the samples, and indicated he was being over-ruled by most parties on louvers extending past the hood and into the cowl, so likely that version won't be used...

Thread
Thread Starter
Forum
Replies
Last Post
AXracer
1948 - 1956 F1, F100 & Larger F-Series Trucks
109
Aug 21, 2020 02:41 PM
underthebridgejim
1948 - 1956 F1, F100 & Larger F-Series Trucks
12
May 10, 2017 08:34 PM