


Working with Metal
Tuned


Joined: Aug 2007
Posts: 459
Likes: 123
From: Maryland
Jim, thanks for the practice offer, but I do have quite a list going right now...
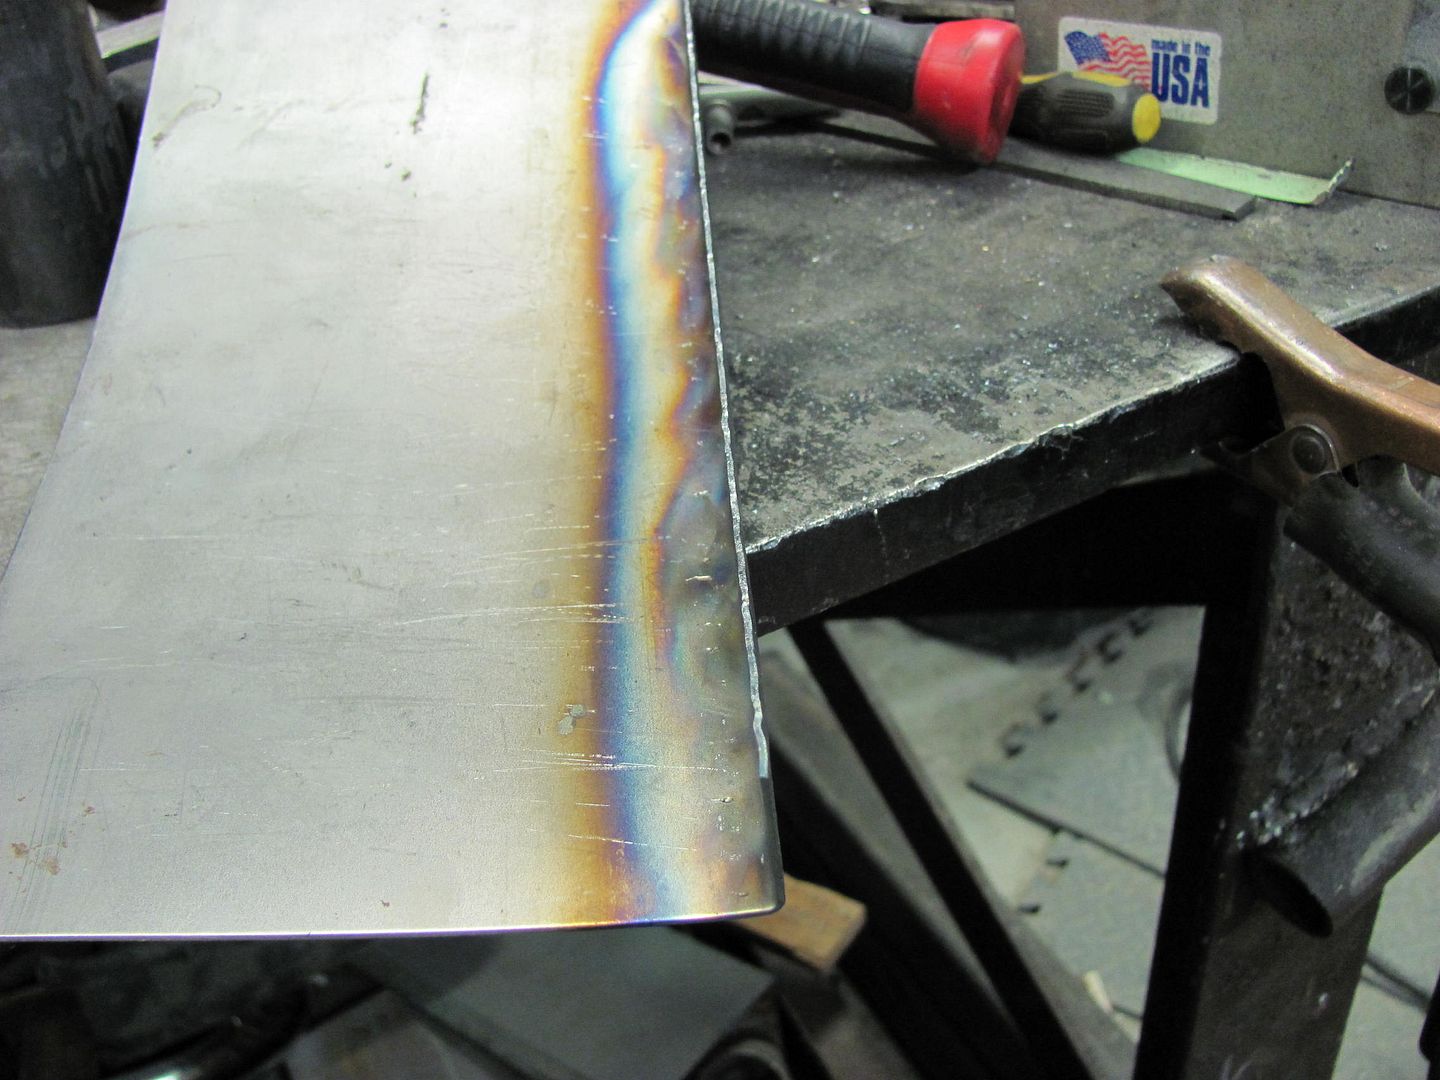
Welding sheet metal is a different animal than welding up something like thick steel angle in that the sheet metal is not as forgiving to excess heat. For example, if you were to start your weld bead with your mig welder set up properly for the gauge sheet metal you are using, and you were to actually do a weld pass you would see the start of the weld had little to no penetration due to the metal still being cold, as you progress the metal is heating up and you get better flowout on the bead and penetration of the weld, and if you go much further you will blow a hole. To combat this problem, as well as minimize heat buildup and deformation of the metal, most suggest using the tack weld process when using a MIG. I will typically set my machine up for the next highest setting than the metal I am welding, for example, if welding 18 ga, I will use the machine setting for 16 ga. When you weld the first tack, you should now see full weld penetration due to this higher setting (look at the backside, check for this when you first set up the machine). Now if we were doing a weld pass it would surely blow a hole from the excess heat, but because it is a single tack that chance is less likely. If you do tend to blow a hole using this process, before reducing heat, try turning up the wire feed speed a bit. (If you have adequate heat to perform the weld process and the wire feed is not providing enough filler material, somethings going to burn away, thus the blowout) Skip around to minimize heat, and planish the weld "dots" as you go to restore the metal shape (the weld process normally causes a slight shrink at the weld dot, planishing, in moderation, will stretch it back out again. As far as cab corners, if you need to planish here (or other tight spots), then I suggest you make a dolly to suit the application. I have a few dollies that are nothing more than a steel flat bar about 1/2" thick that have been heated and bent into all kinds of odd shapes, then ground down to the final shape.
Welding sheet metal is a different animal than welding up something like thick steel angle in that the sheet metal is not as forgiving to excess heat. For example, if you were to start your weld bead with your mig welder set up properly for the gauge sheet metal you are using, and you were to actually do a weld pass you would see the start of the weld had little to no penetration due to the metal still being cold, as you progress the metal is heating up and you get better flowout on the bead and penetration of the weld, and if you go much further you will blow a hole. To combat this problem, as well as minimize heat buildup and deformation of the metal, most suggest using the tack weld process when using a MIG. I will typically set my machine up for the next highest setting than the metal I am welding, for example, if welding 18 ga, I will use the machine setting for 16 ga. When you weld the first tack, you should now see full weld penetration due to this higher setting (look at the backside, check for this when you first set up the machine). Now if we were doing a weld pass it would surely blow a hole from the excess heat, but because it is a single tack that chance is less likely. If you do tend to blow a hole using this process, before reducing heat, try turning up the wire feed speed a bit. (If you have adequate heat to perform the weld process and the wire feed is not providing enough filler material, somethings going to burn away, thus the blowout) Skip around to minimize heat, and planish the weld "dots" as you go to restore the metal shape (the weld process normally causes a slight shrink at the weld dot, planishing, in moderation, will stretch it back out again. As far as cab corners, if you need to planish here (or other tight spots), then I suggest you make a dolly to suit the application. I have a few dollies that are nothing more than a steel flat bar about 1/2" thick that have been heated and bent into all kinds of odd shapes, then ground down to the final shape.
Tuned
Joined: Aug 2007
Posts: 459
Likes: 123
From: Maryland
Forming a radius by Shrinking Metal
I had posted this in the 48-60 forum, but someone suggested the paint and bodywork forum could also benefit from it, so here ya go!
For those that may need to form up some patch panels but don't have those shrinker/stretchers at your disposal, here's a how-to on tuck shrinking.
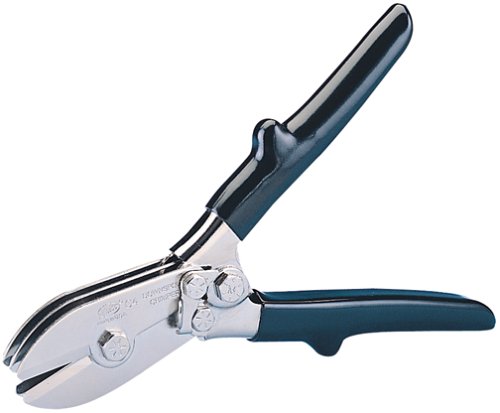
Here are some "tucking" pliers I made out of neccessity when forming up a replacement piece for rust repair, and I'll have to admit, their biggest flaw is not providing accurate, consistent tucks. Of course, the operator could also be flawed.....
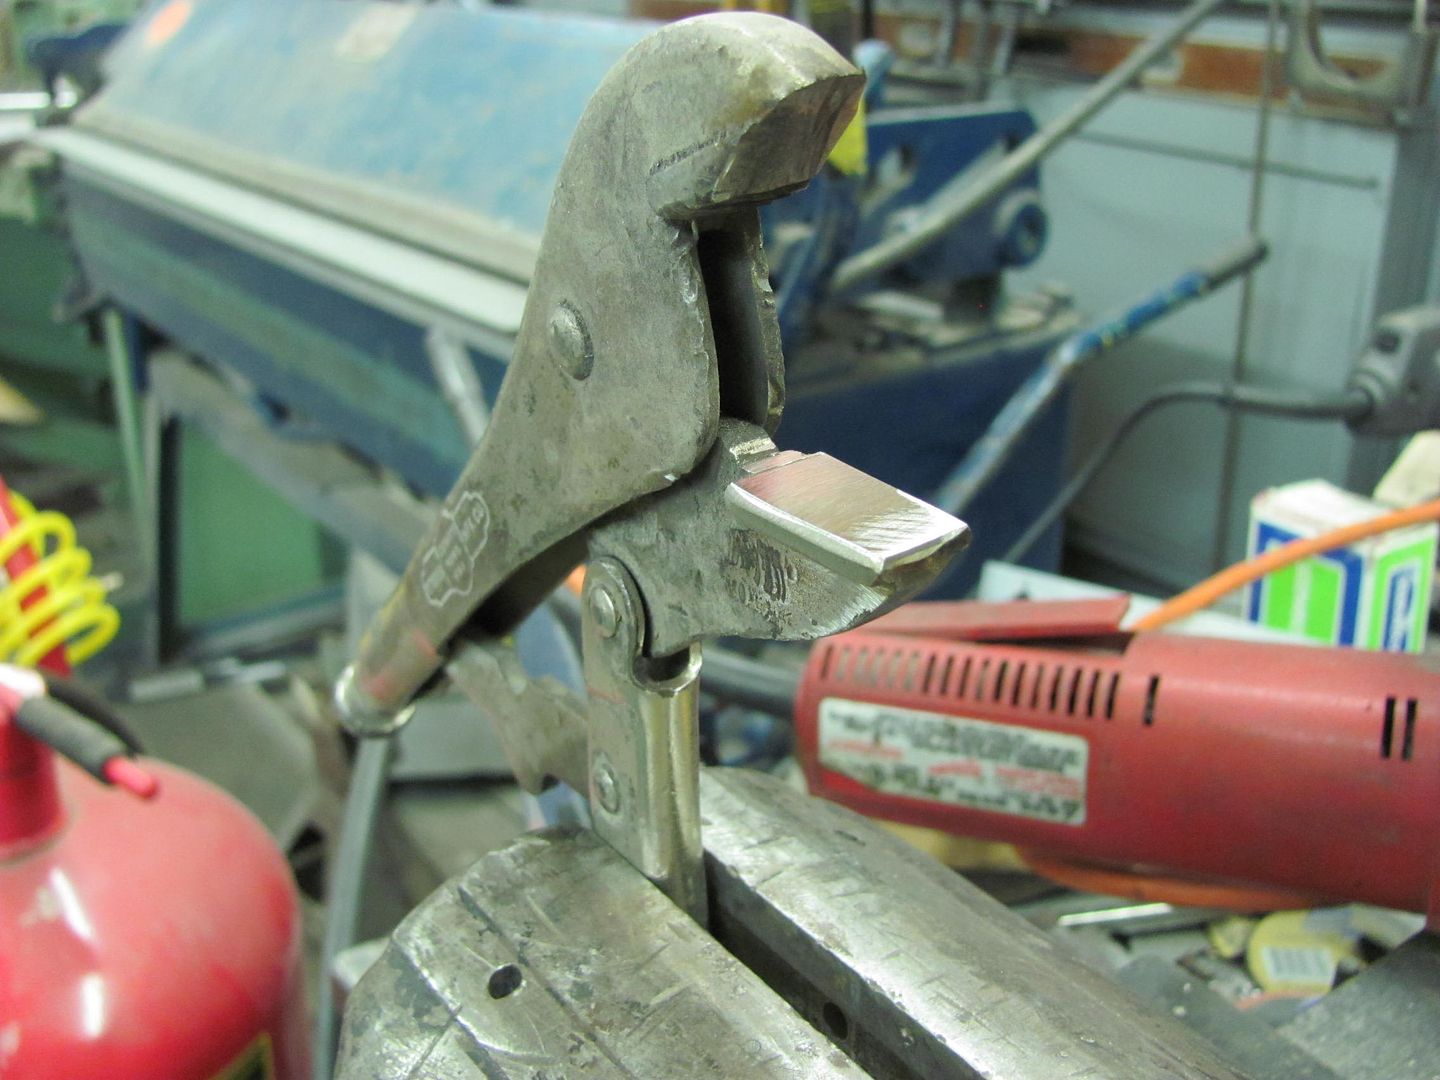
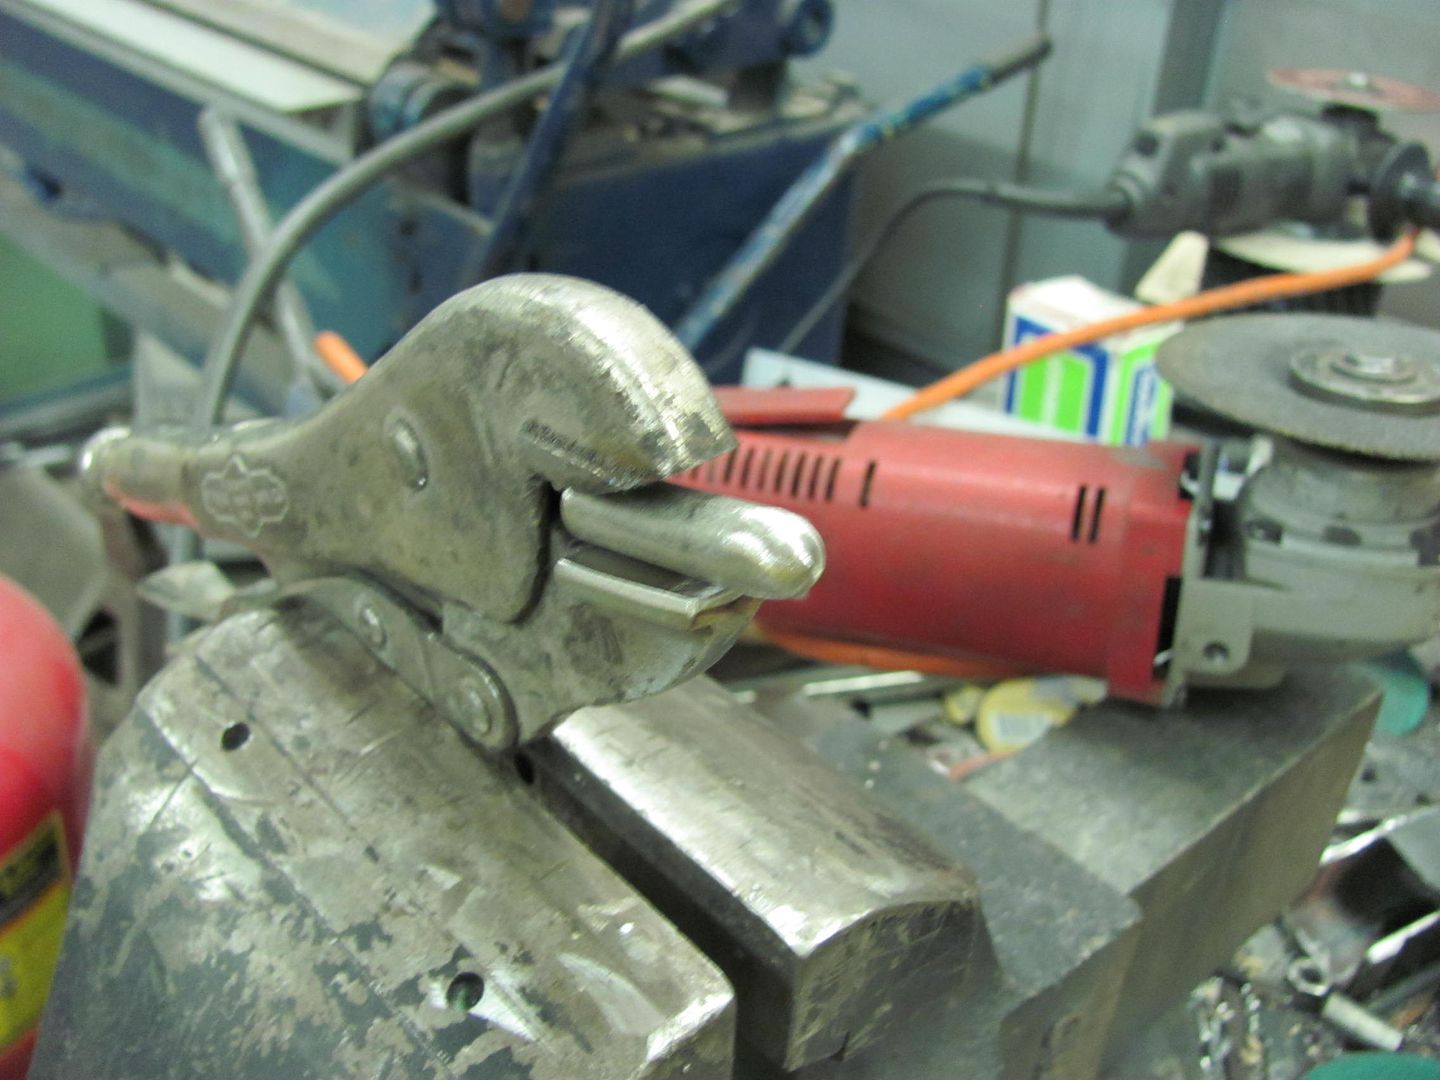
The more consistent the tucks, the more consistent the distance between them, in the end, the more consistent our radius will be. To improve on the tucks I'll start out by making a tool that will more accurately duplicate consistent tucks. We'll start off by finding a pair of vise grips suitable for the job, which in this case means the jaw serrations are starting to wear and round off. Finish what has started by removing the serrations to produce a nice flat jaw on the bottom, and cut the top jaw off at about 30 degrees from its original position.
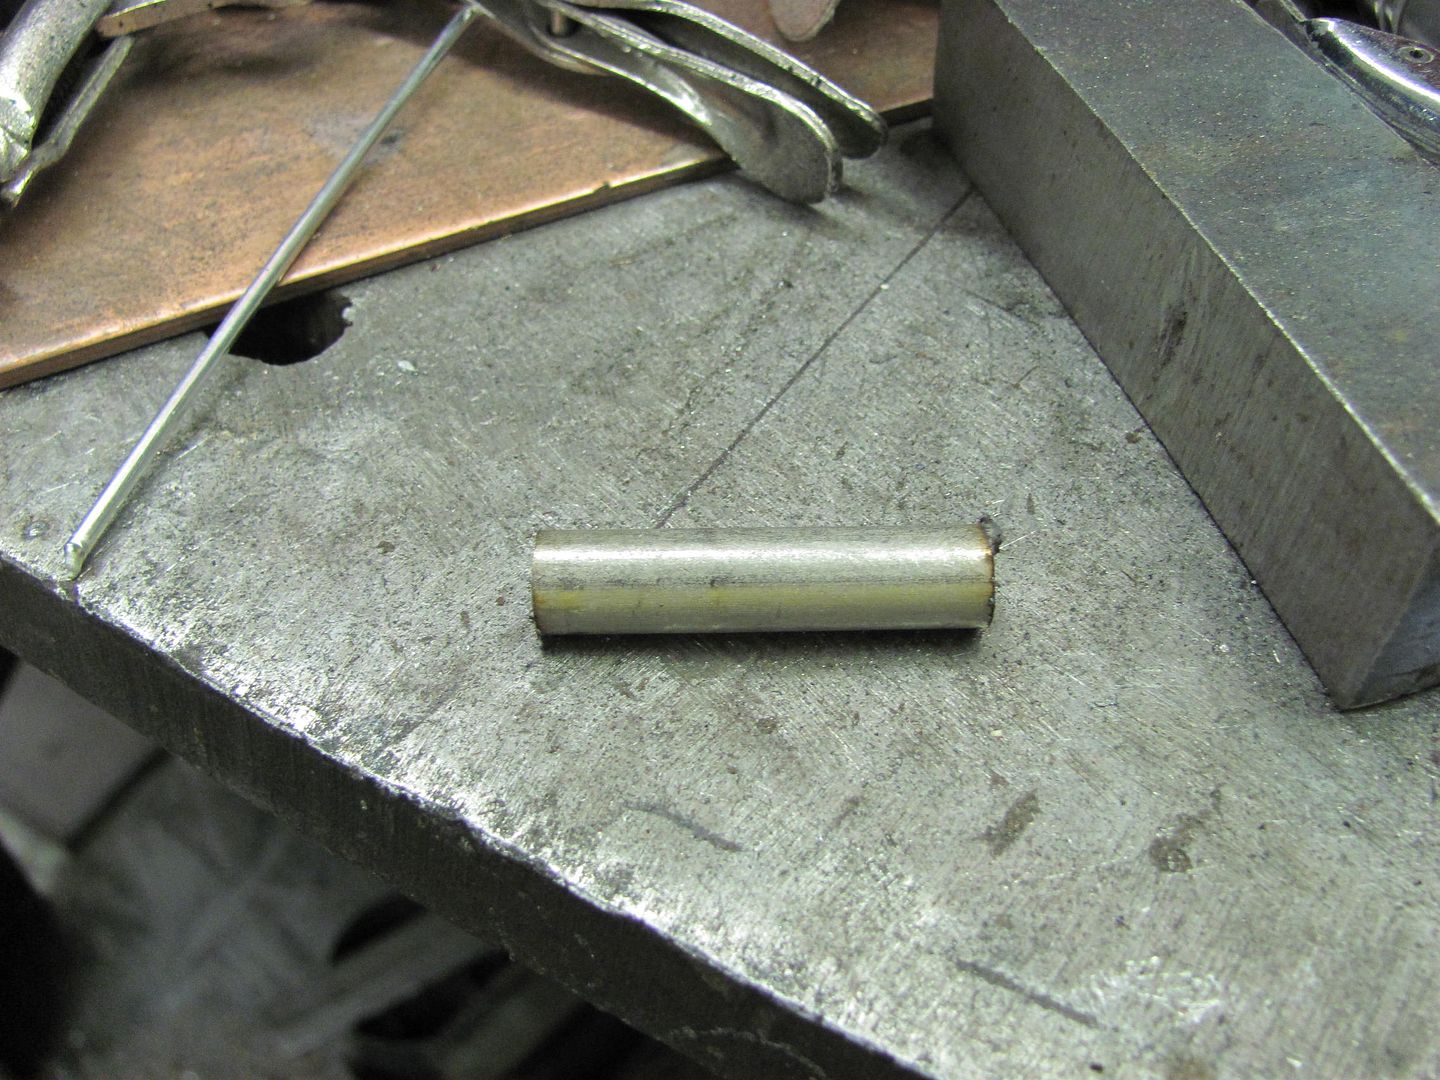
I had some extra long shouldered 3/8 bolts, perfect round stock for the job. Three of them were cut off to 1-1/2" length.
Now if someone doesn't have a fancy shrinker-stretcher machine likely means they don't have a lathe either. No sweat, use this economy model made by Dewalt...
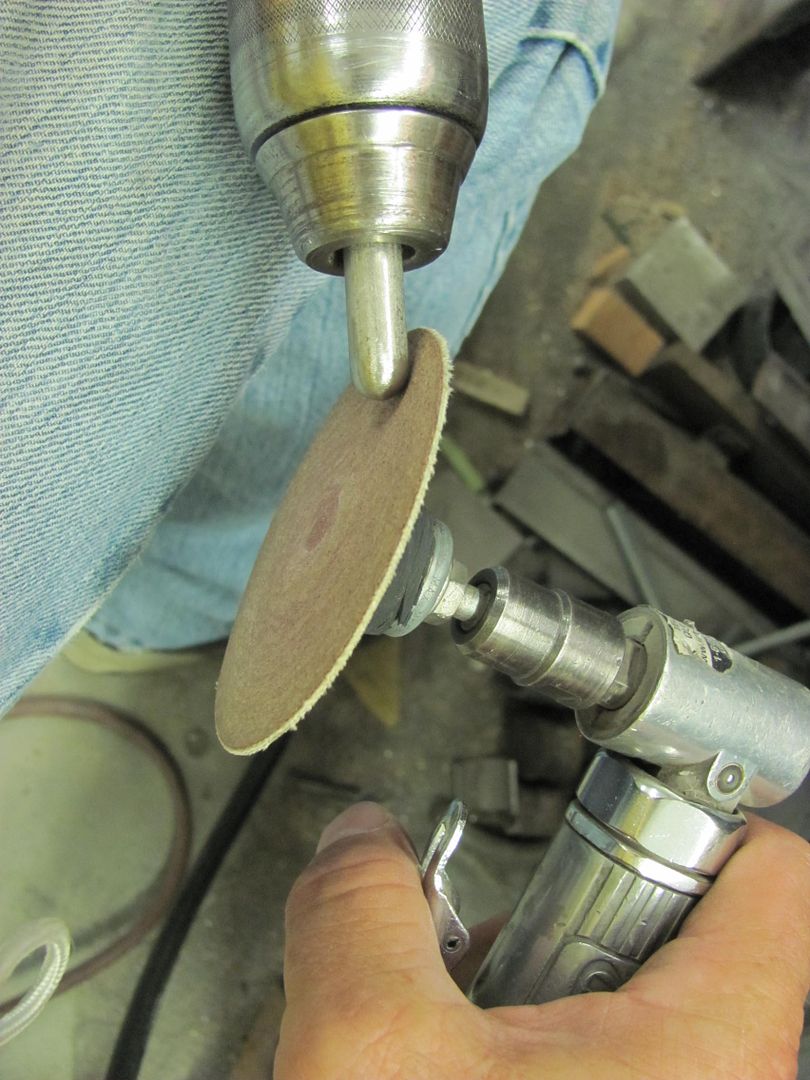
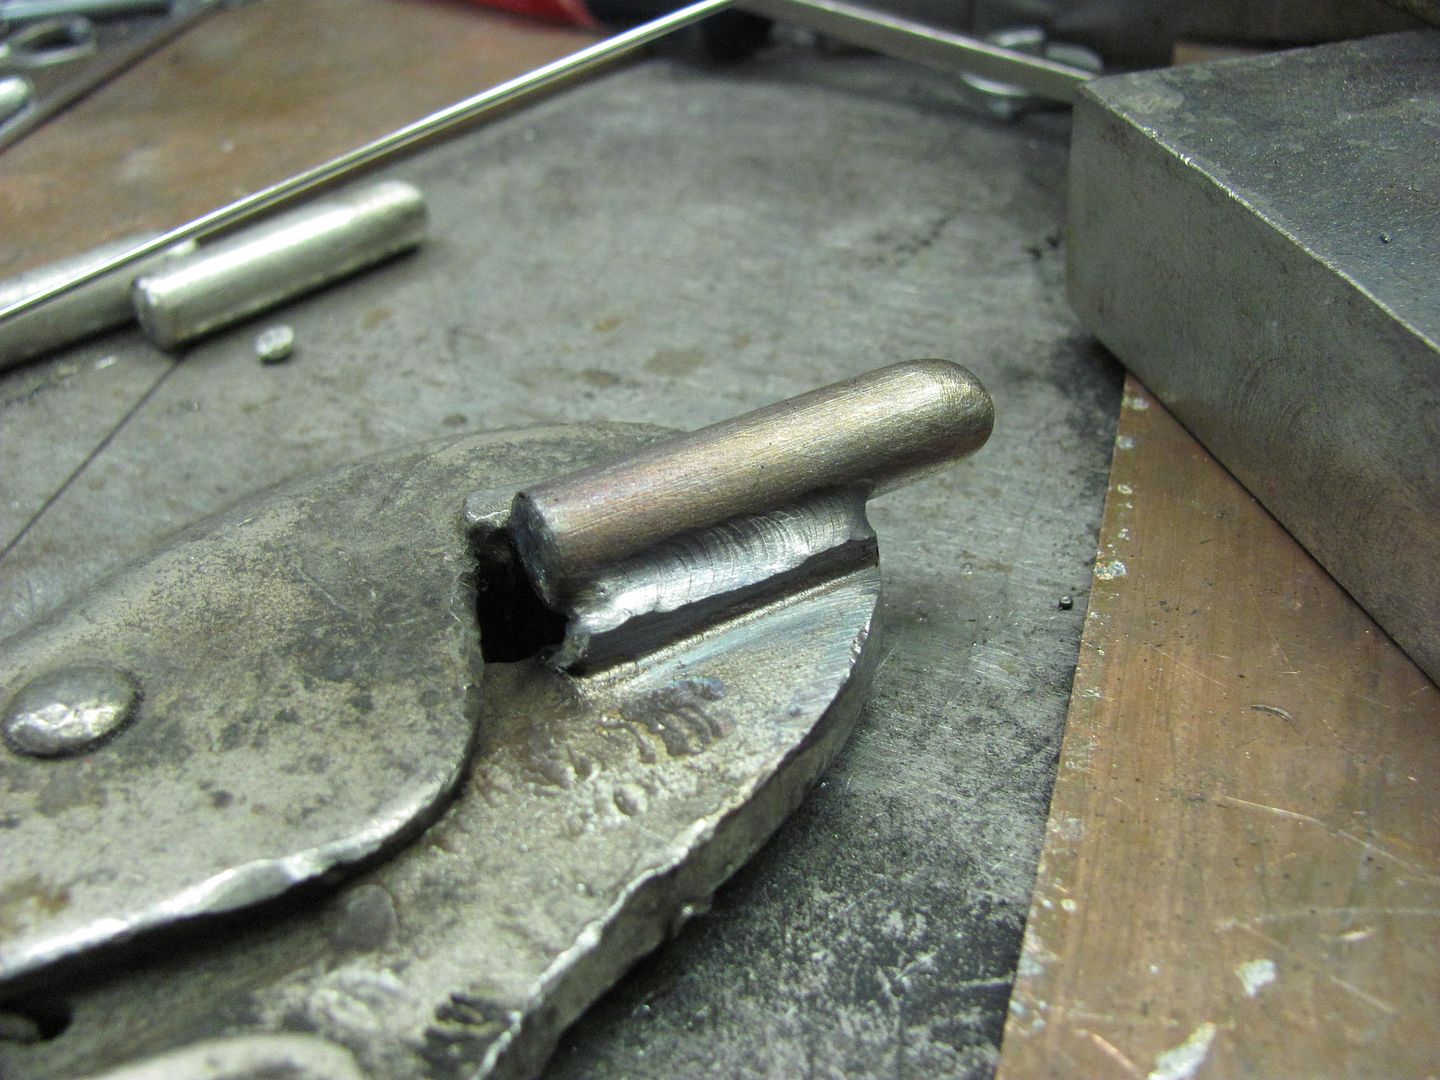
To set the spacing for the "fingers" the first is clamped in the vise grip jaw, centered.
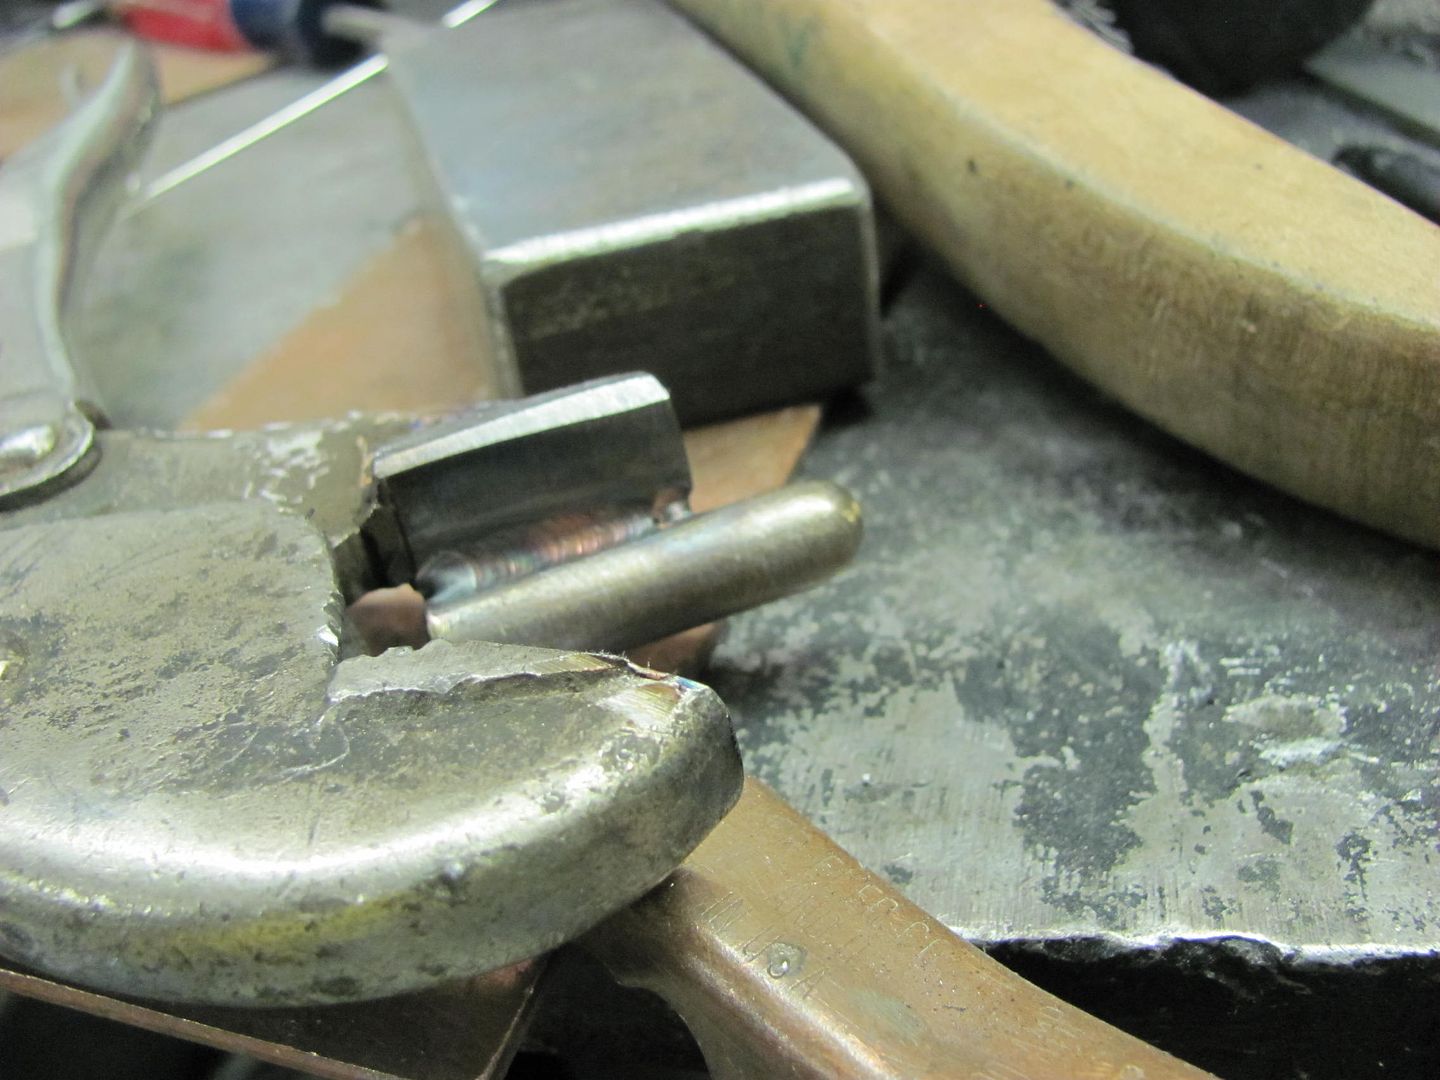
The outer is placed next to it and then welded down the outside, center finger removed, and then welded down inside.
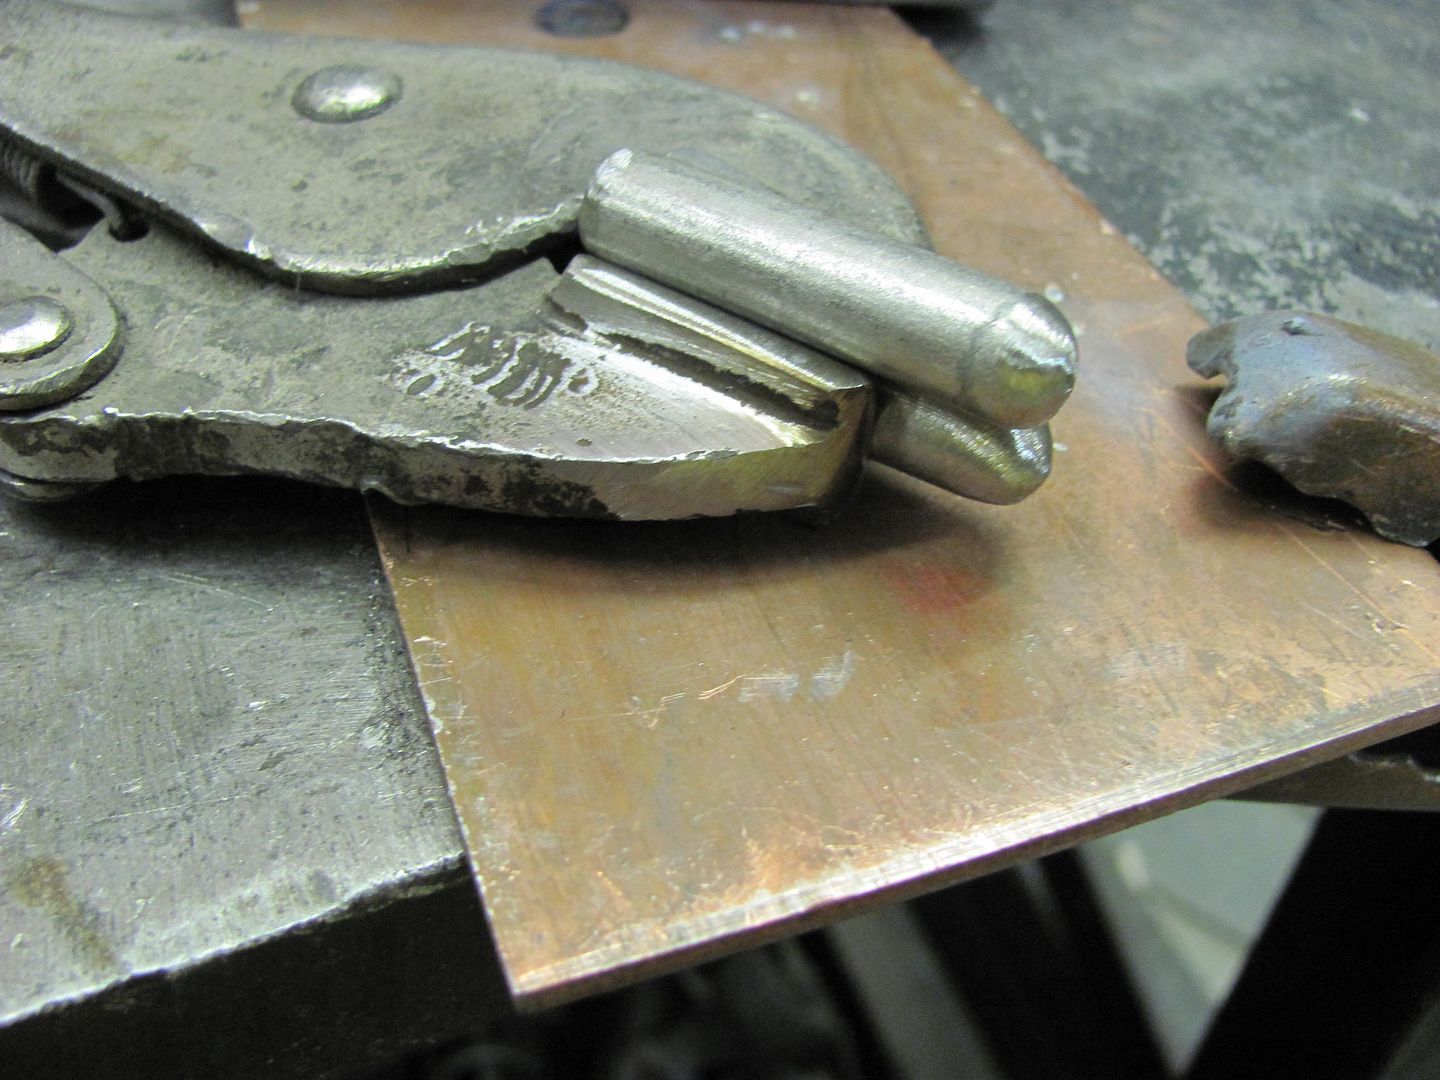
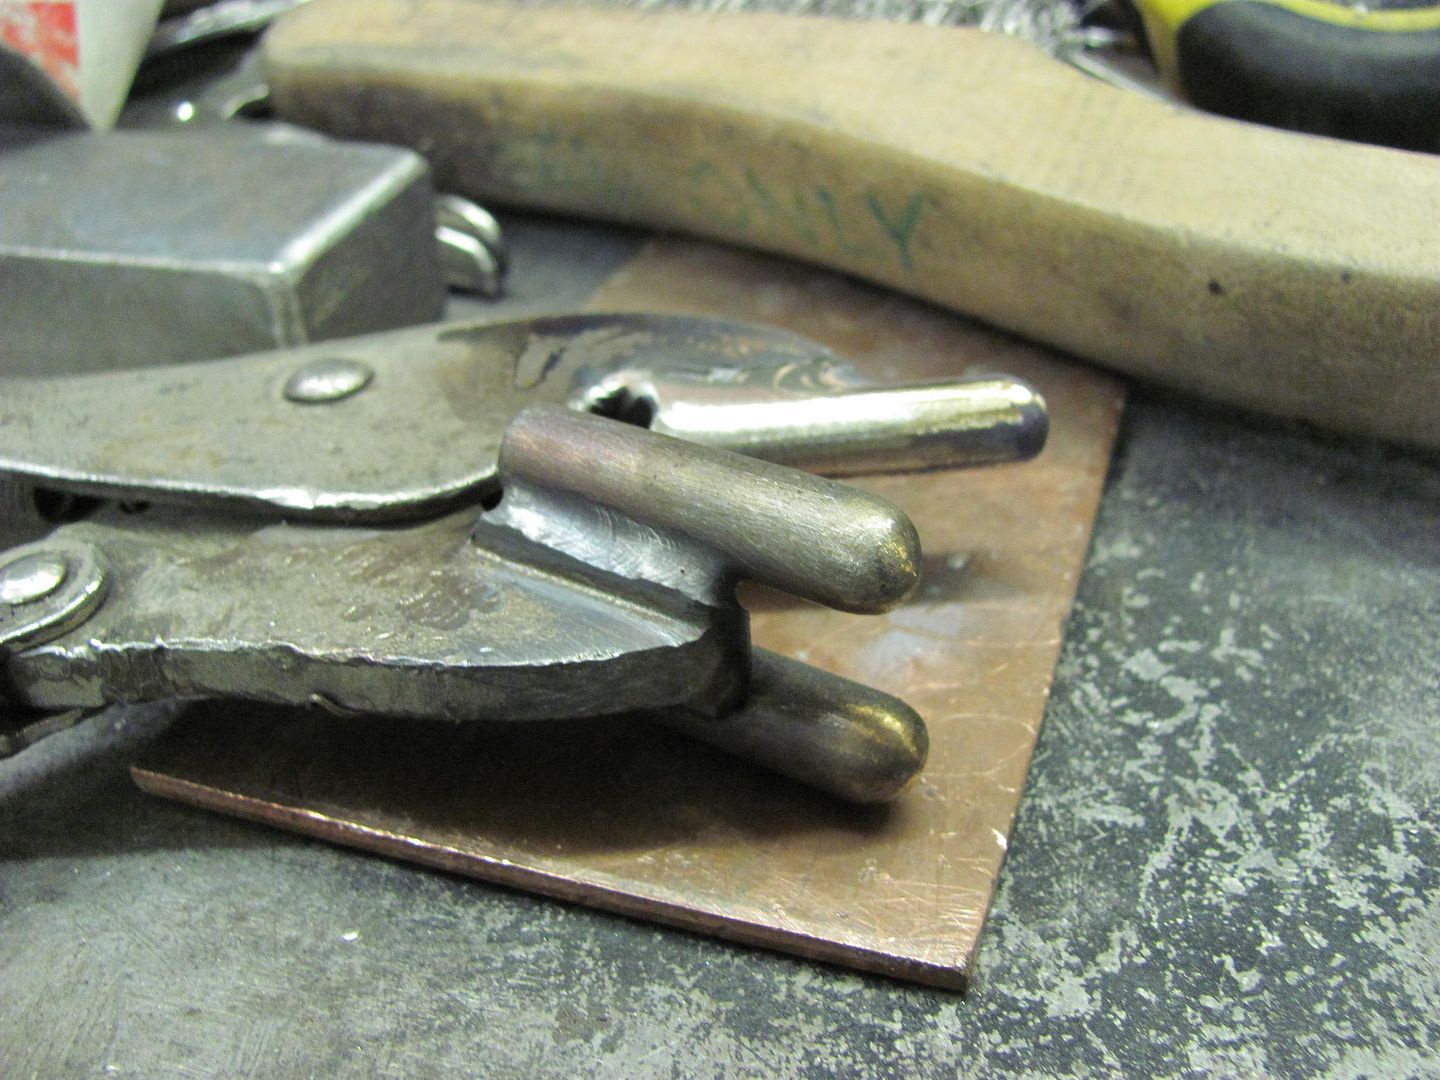
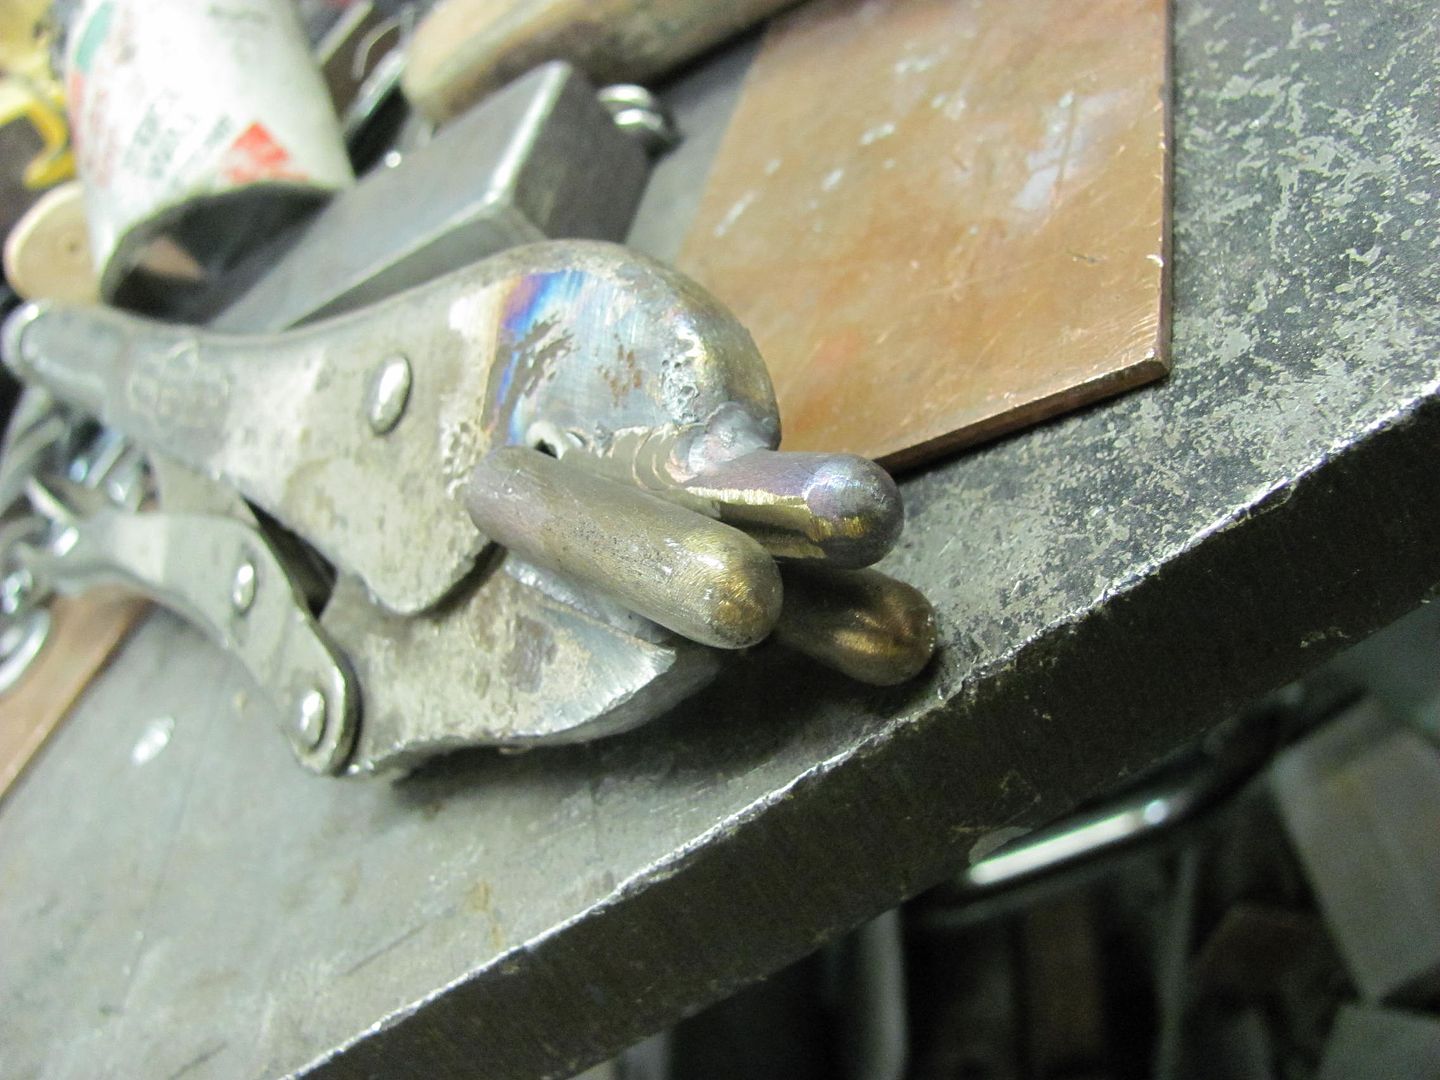
Repeat for opposite side, then weld center finger.
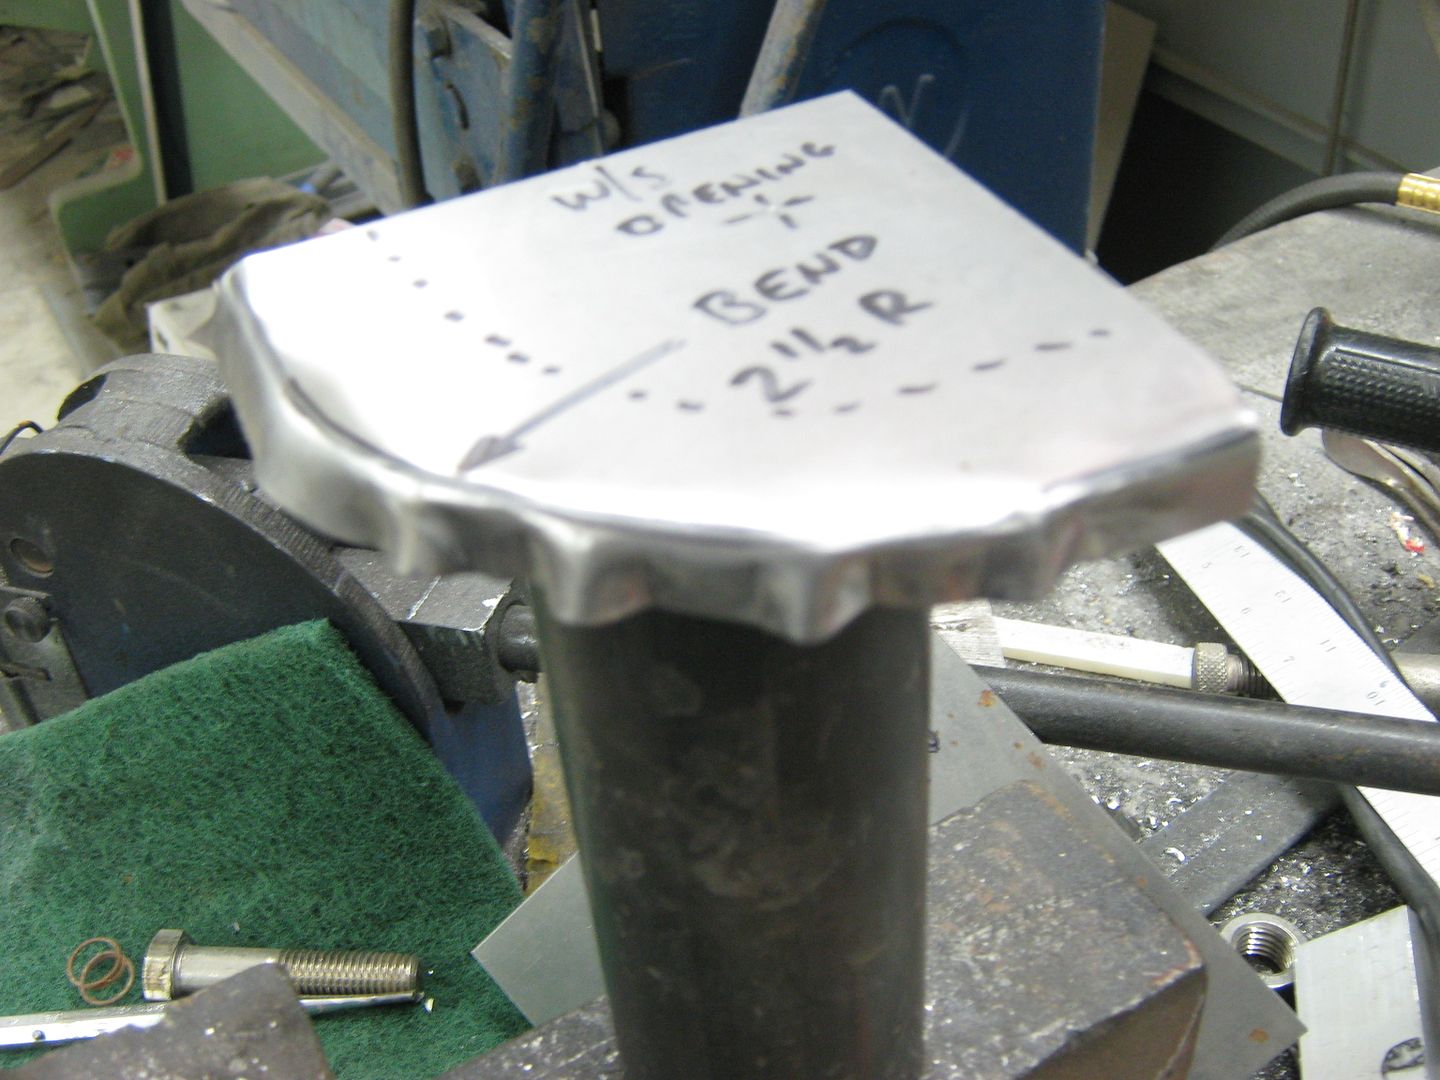
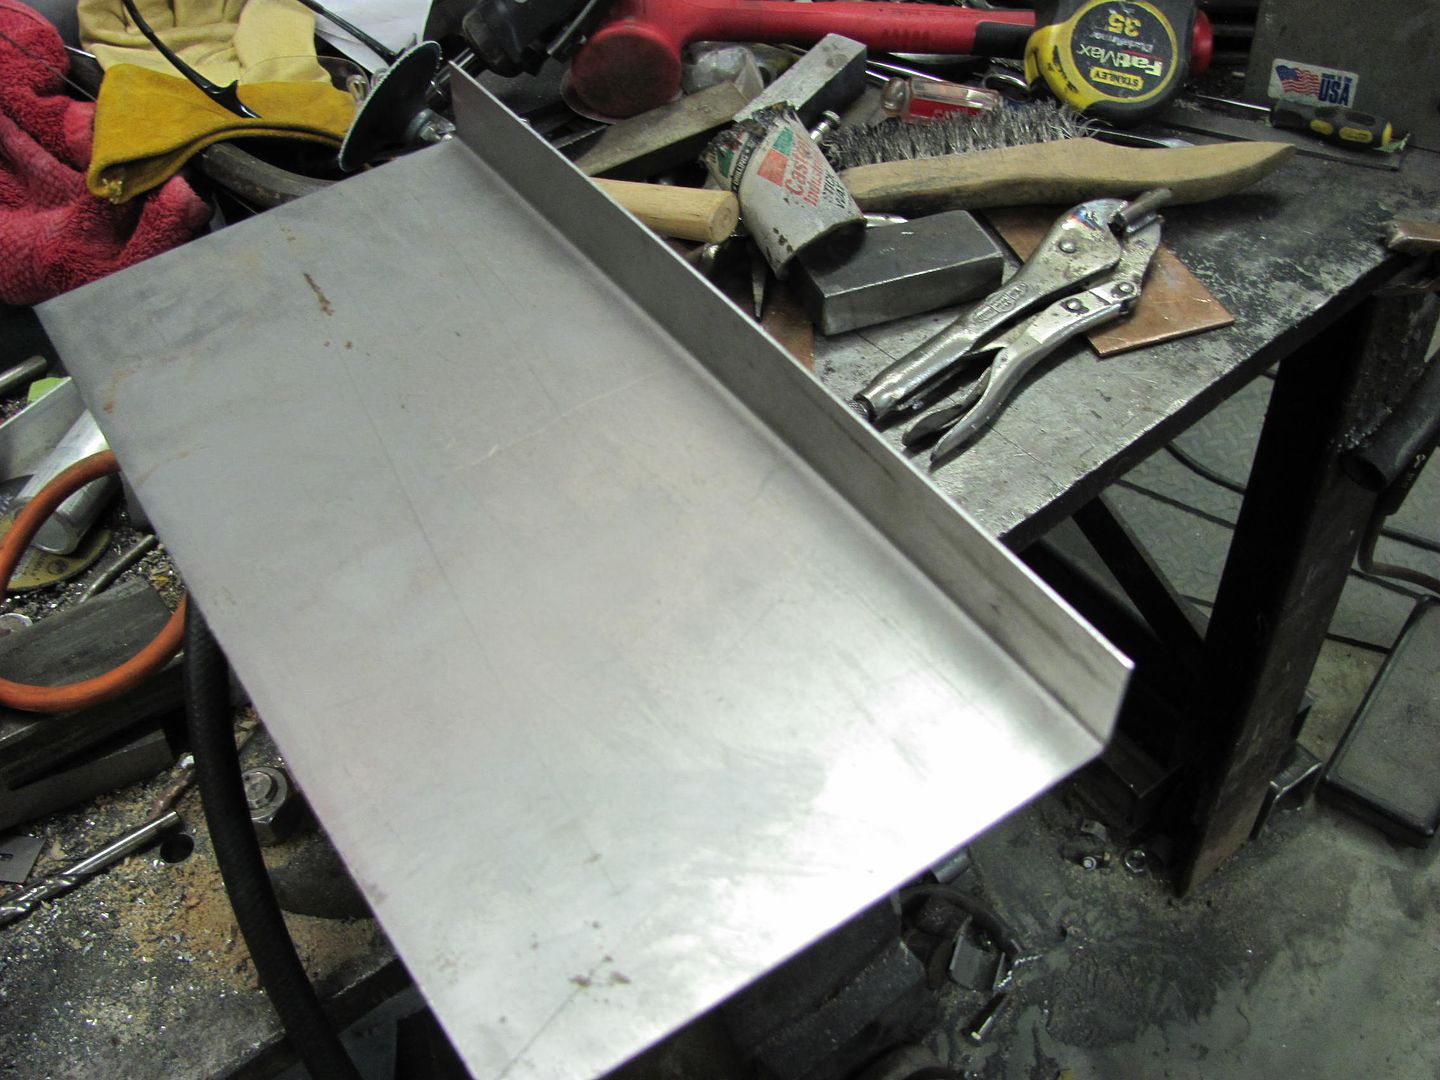
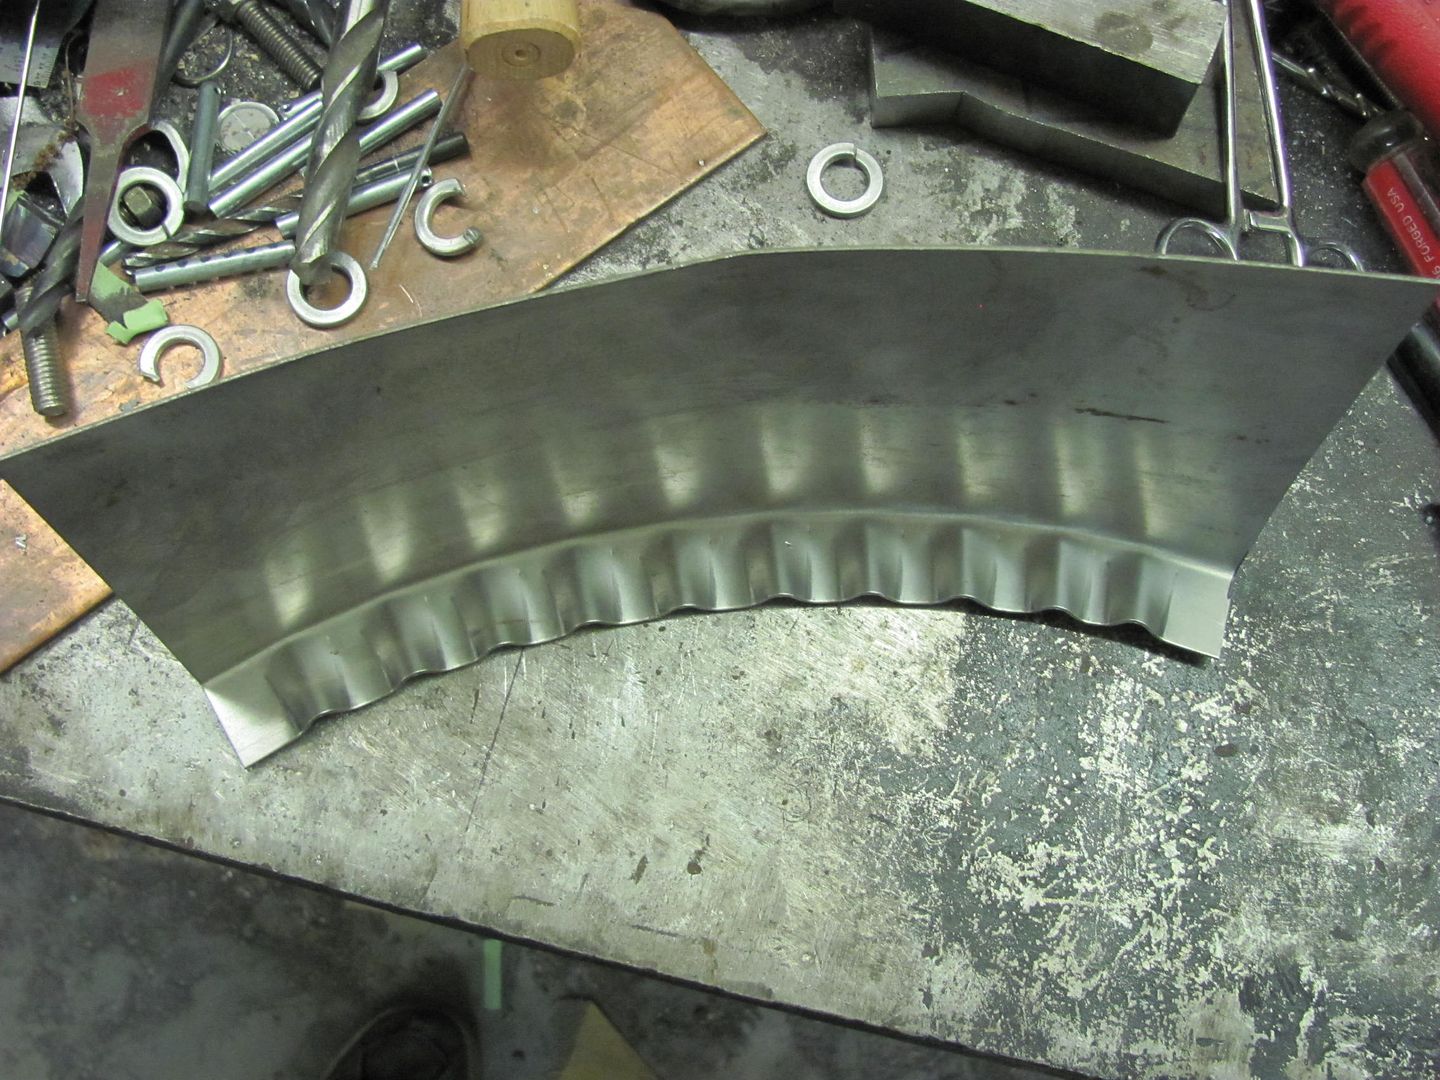
Our new patch panel is bent up with about a 1" flange. Reference marks are placed one inch apart...
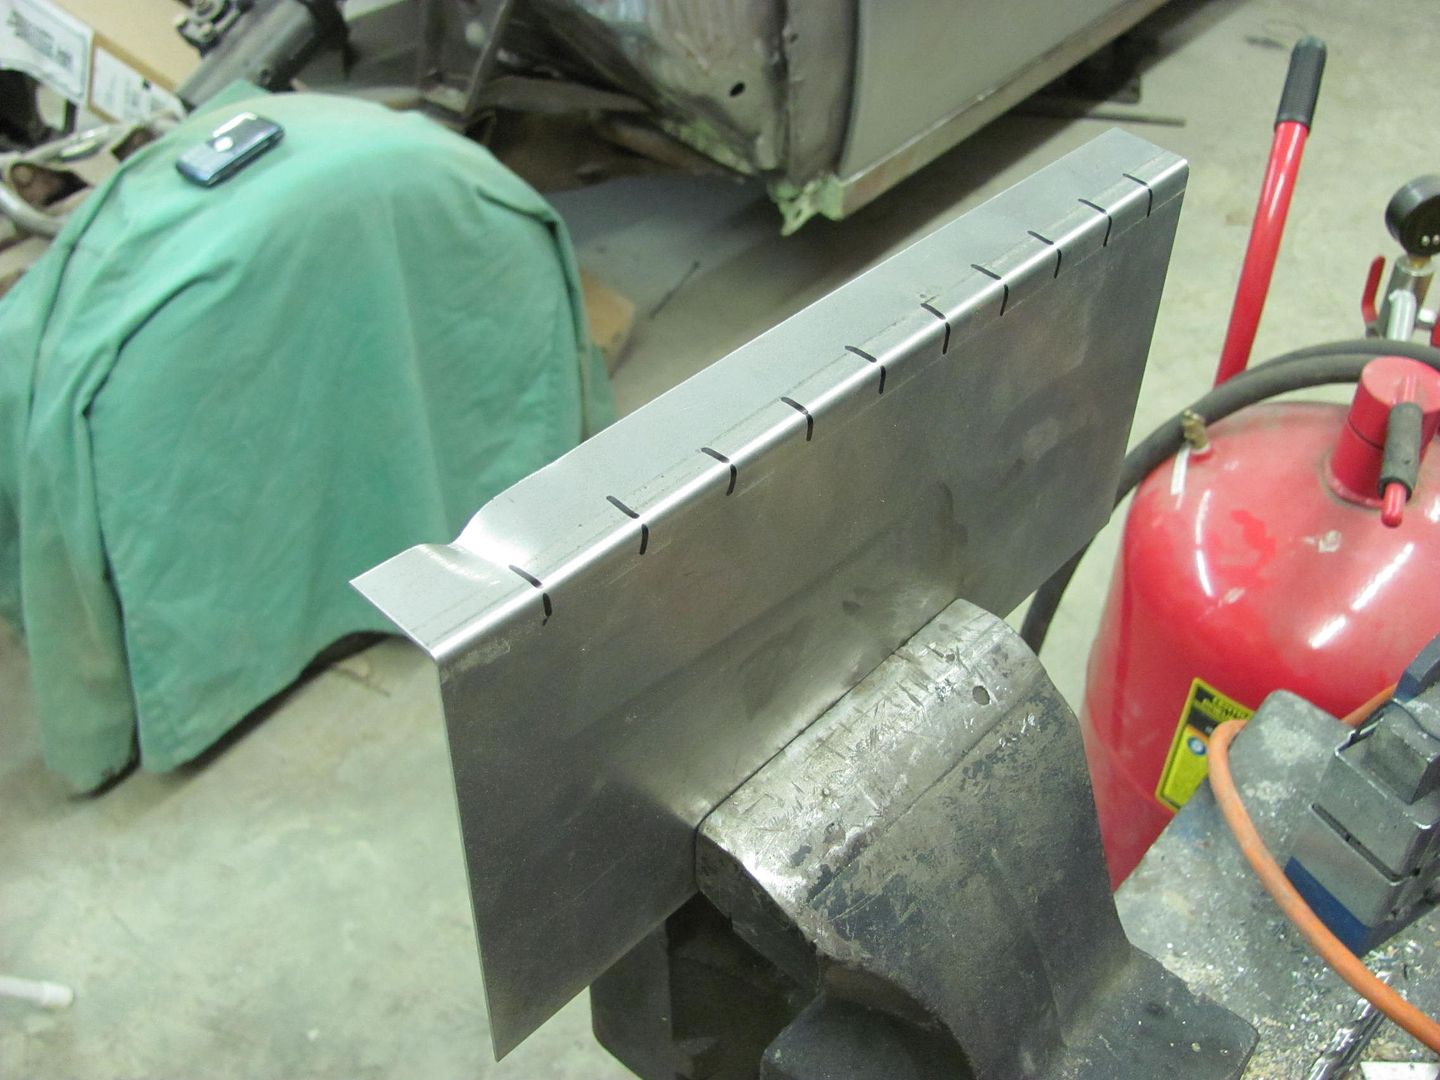
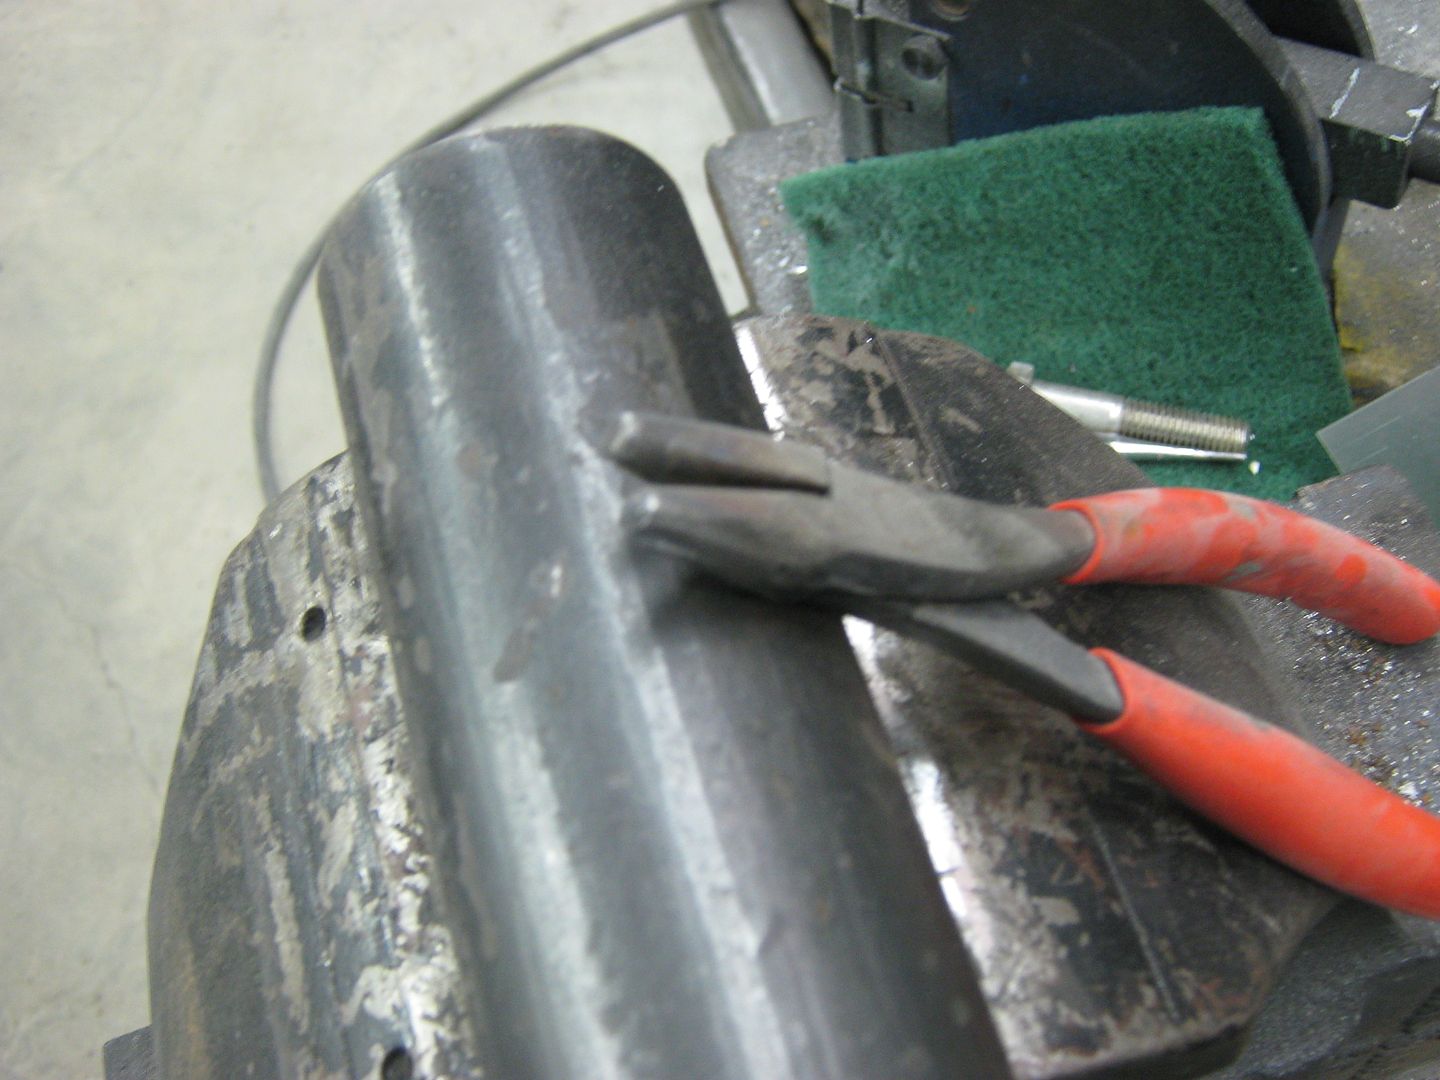
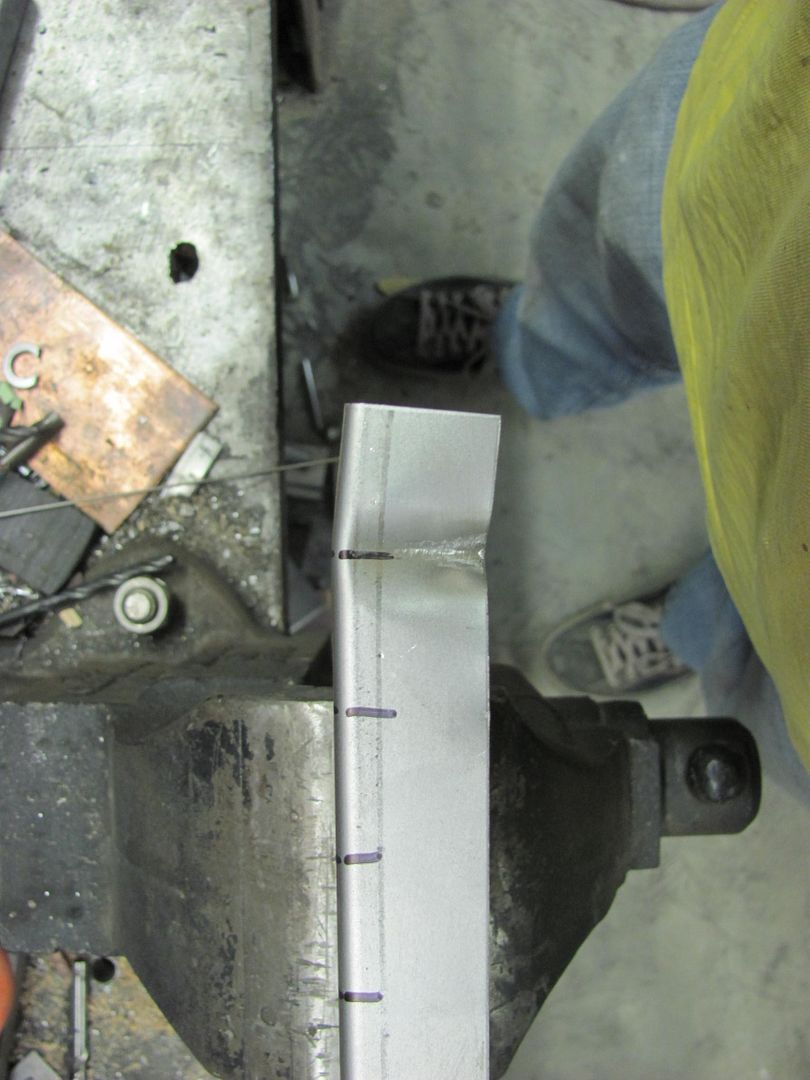
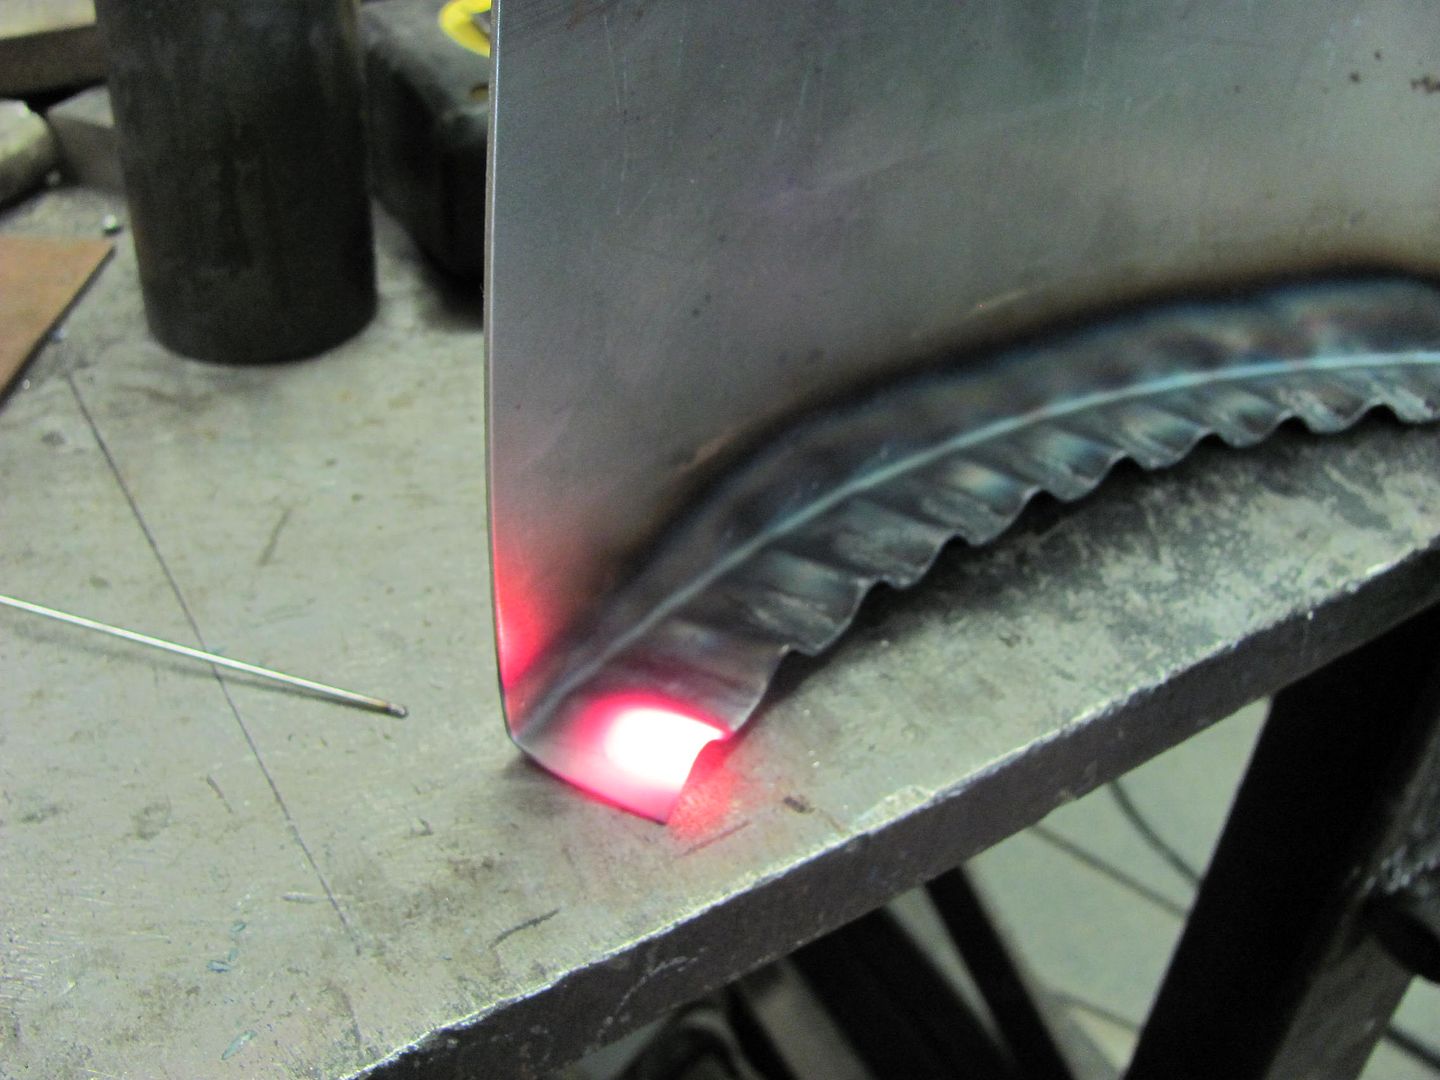
The first tuck shows how the radius starts to form. Slide the parallel fingers all the way against the bent panel and then squeeze the jaw closed. This will help to get the same depth of tuck each time.

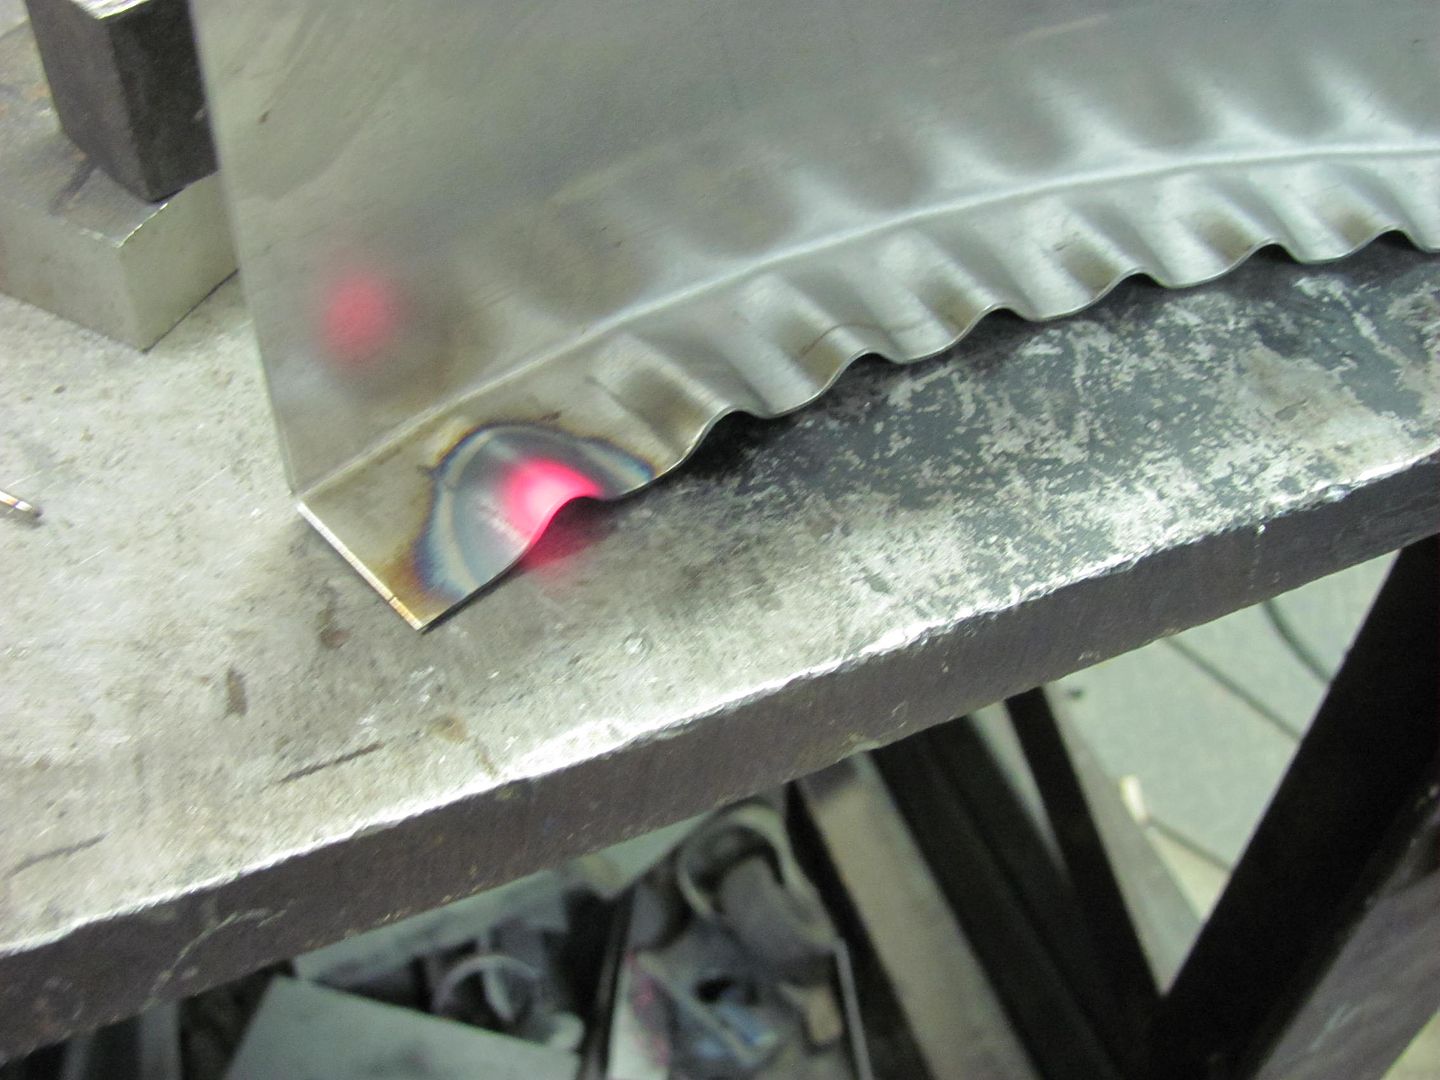
Where I used an O/A torch, you should also be able to accomplish similar results with a hand held propane torch. (use what you have that works)

Heat up the raised portion of the first tuck until it glows nicely, then use a low crown body hammer (or suitable substitute) to flatten the end of the tuck first (helps to lock it from opening again) and then flatten the rest of the tuck back into the flange. Repeat for the remaining tucks... This can also be done without heat, but personally I find the tucks flatten a bit easier when more malleable from the heat.
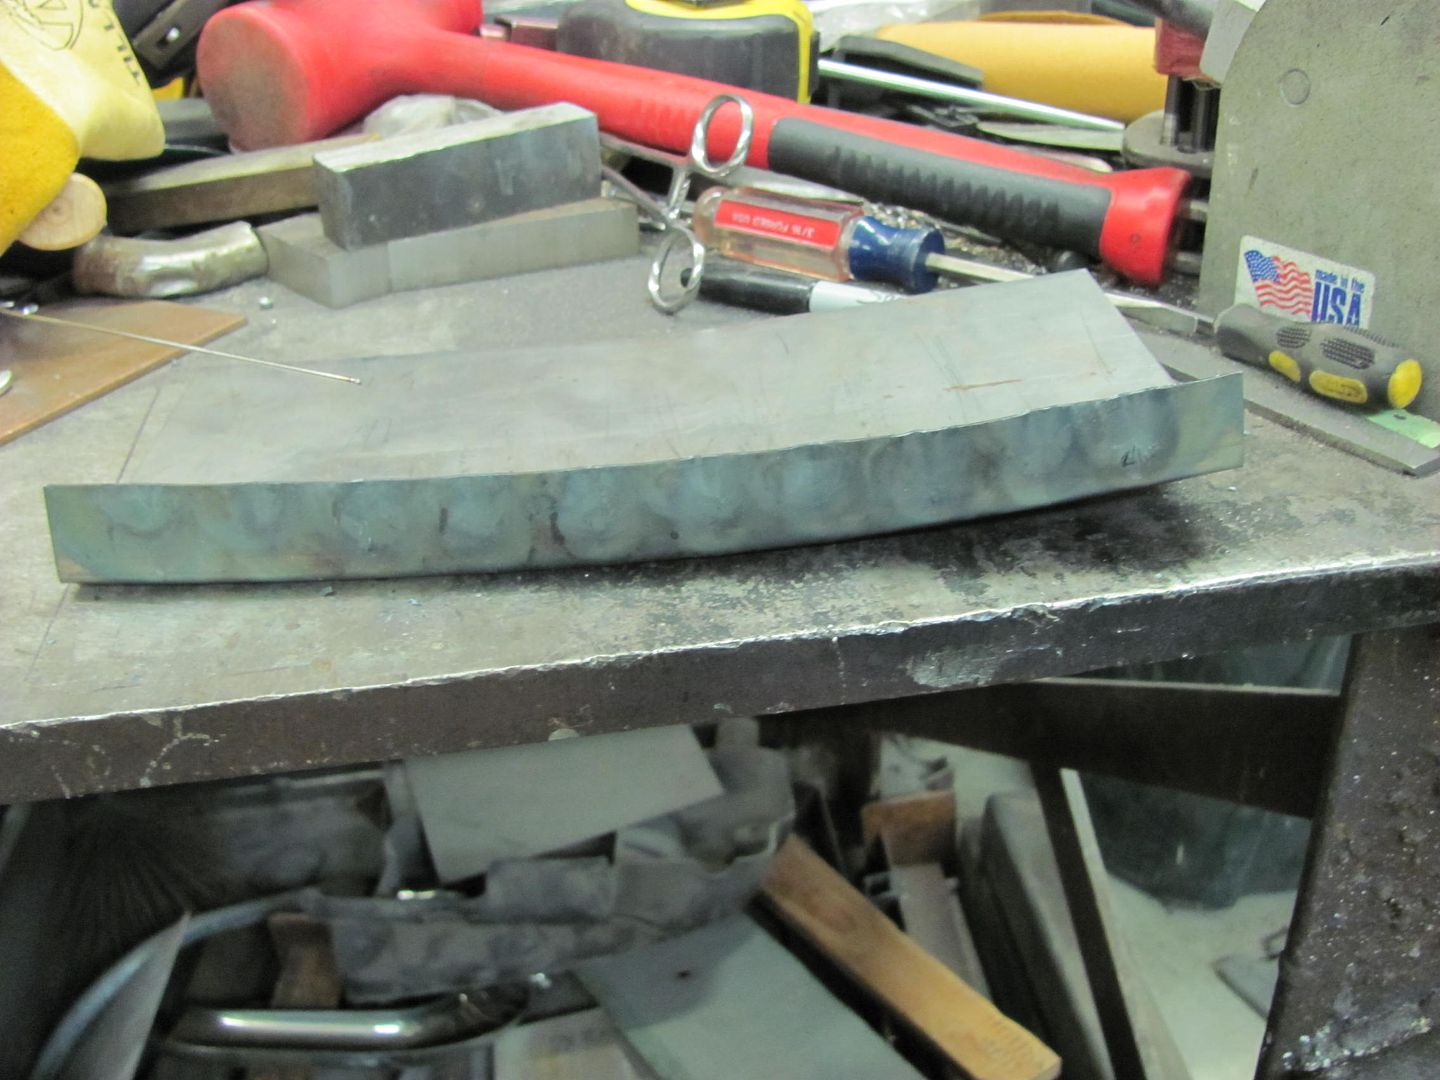
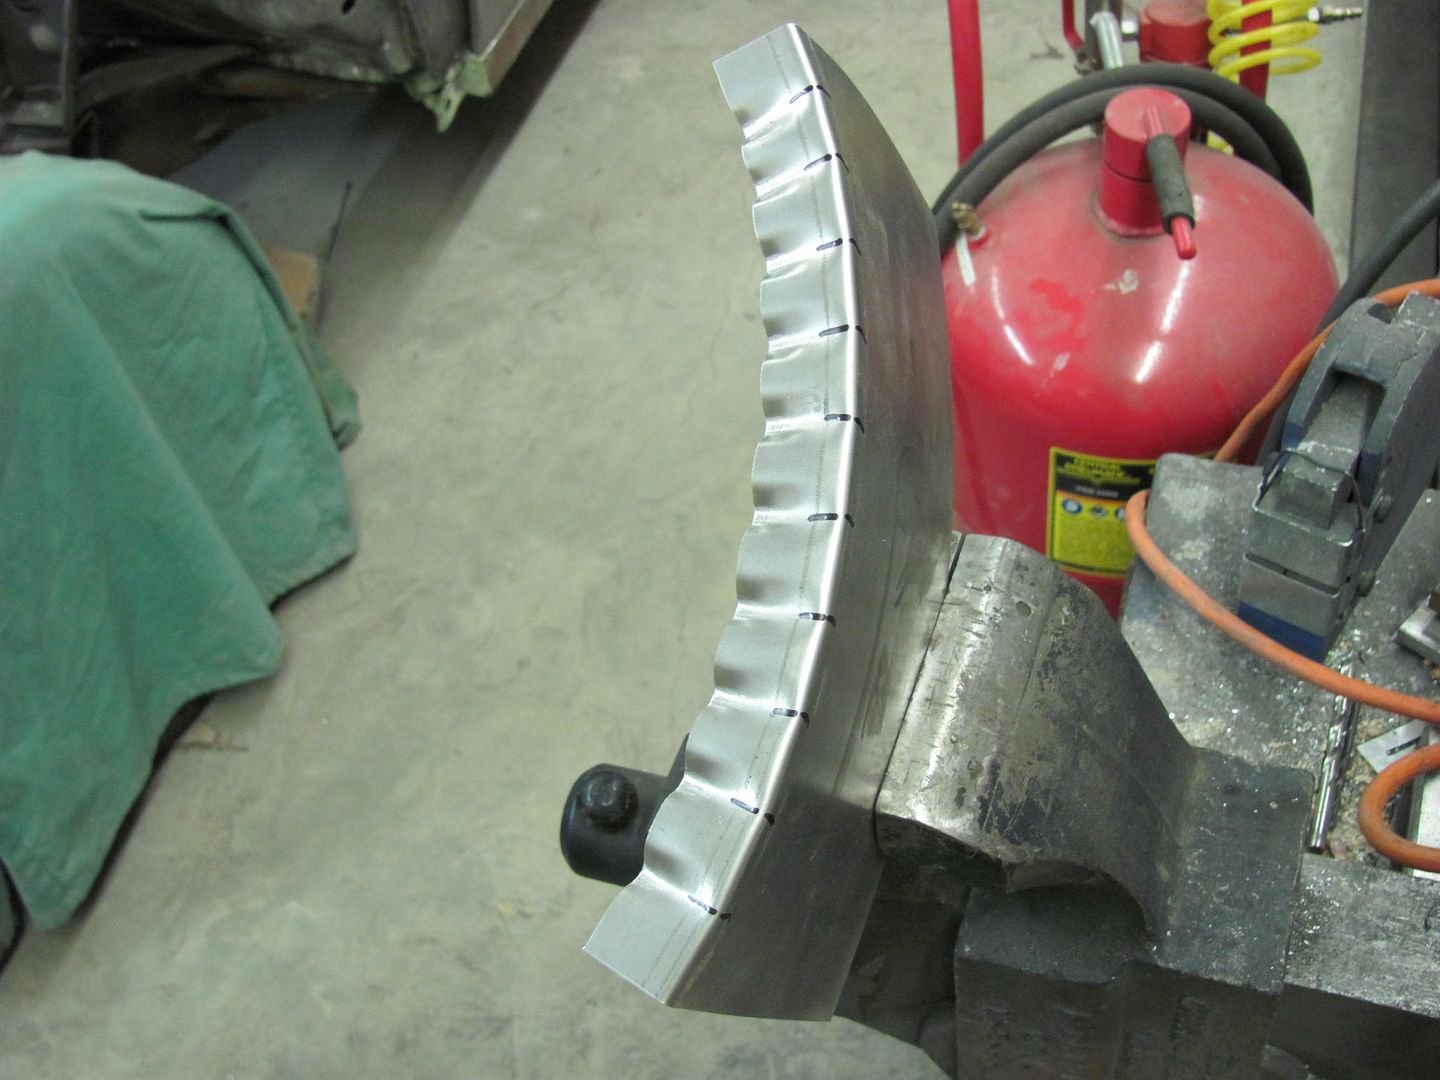
You can see we have a nice consistent radius, but likely it is not enough. Mark the next set of reference marks in between the first ones, just to stagger the shrink area to a new portion of the flange that has not been shrunk yet..

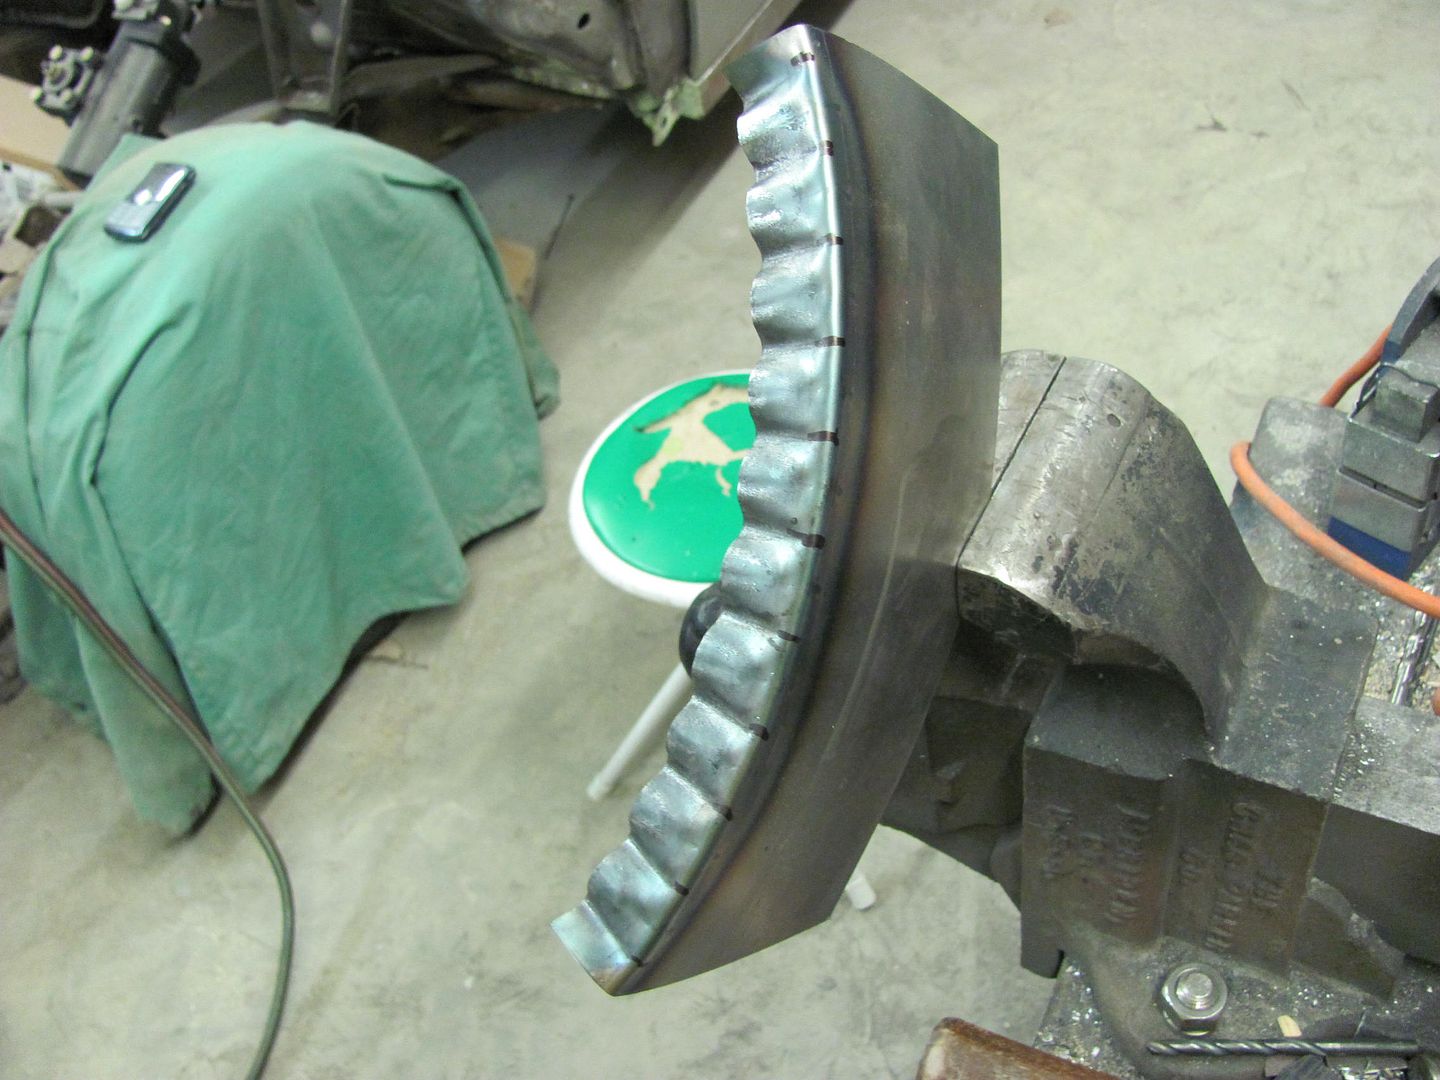
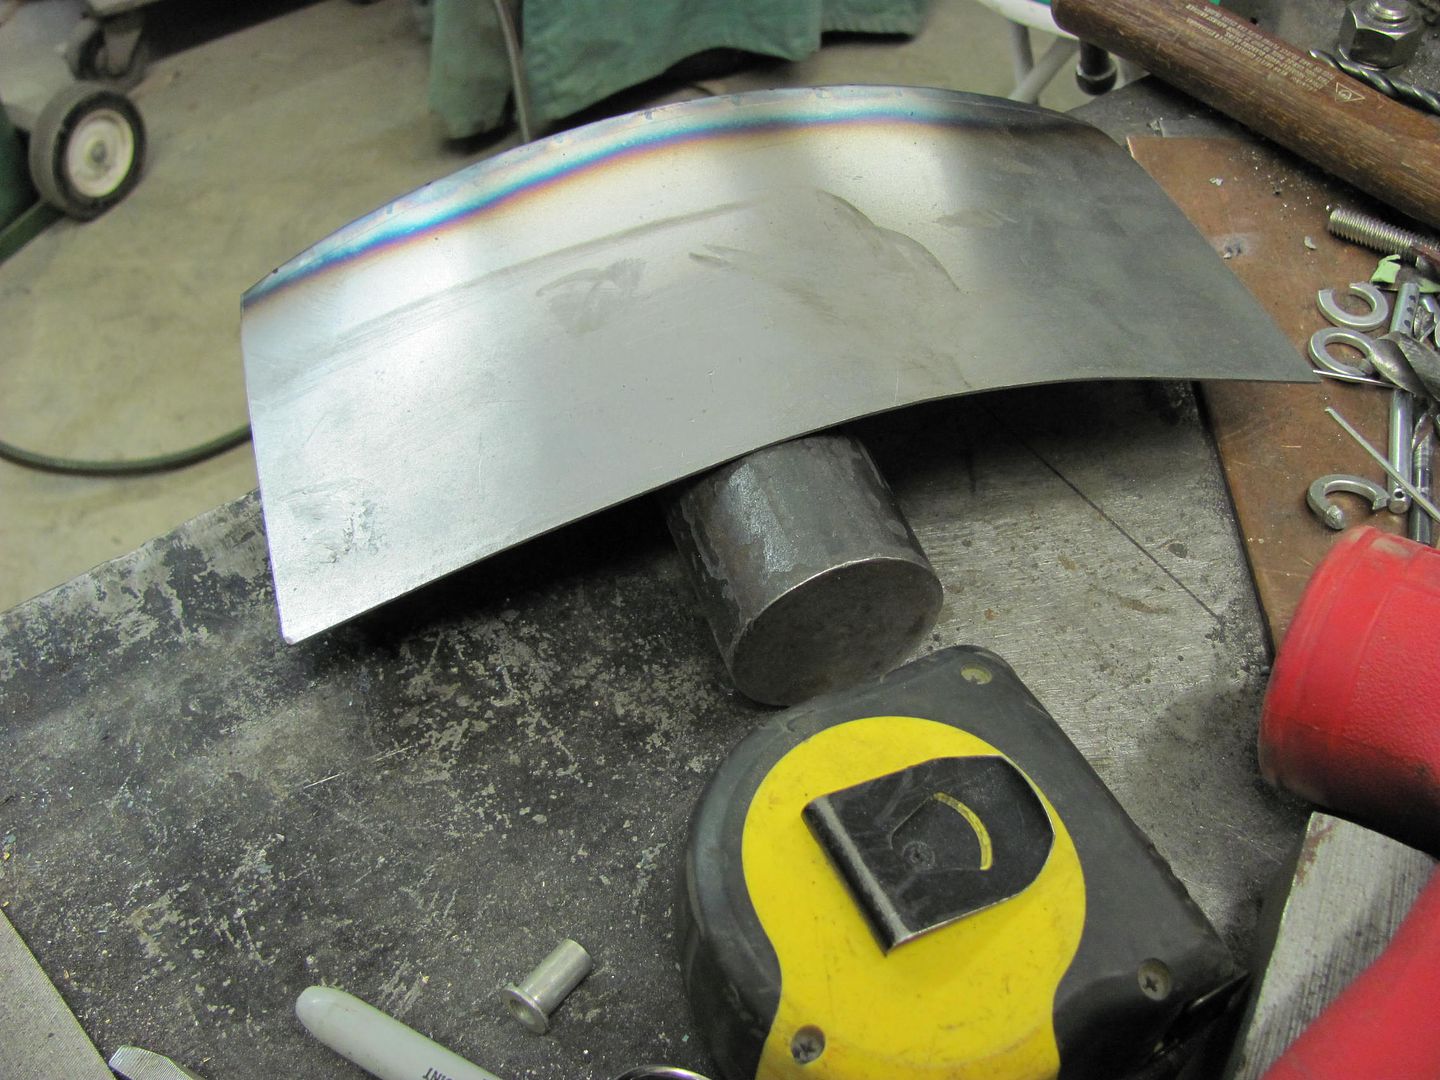
Where our flange is starting to form a radius, the outer edge has a tendency to remain flat. Rolling across a nice round piece of pipe while holding down gently on the edges will help (or whatever is handy....I will not be held liable for repurcussions from using stuff from your wife's kitchen..)
Repeat the process of heating and hammering the tucks....
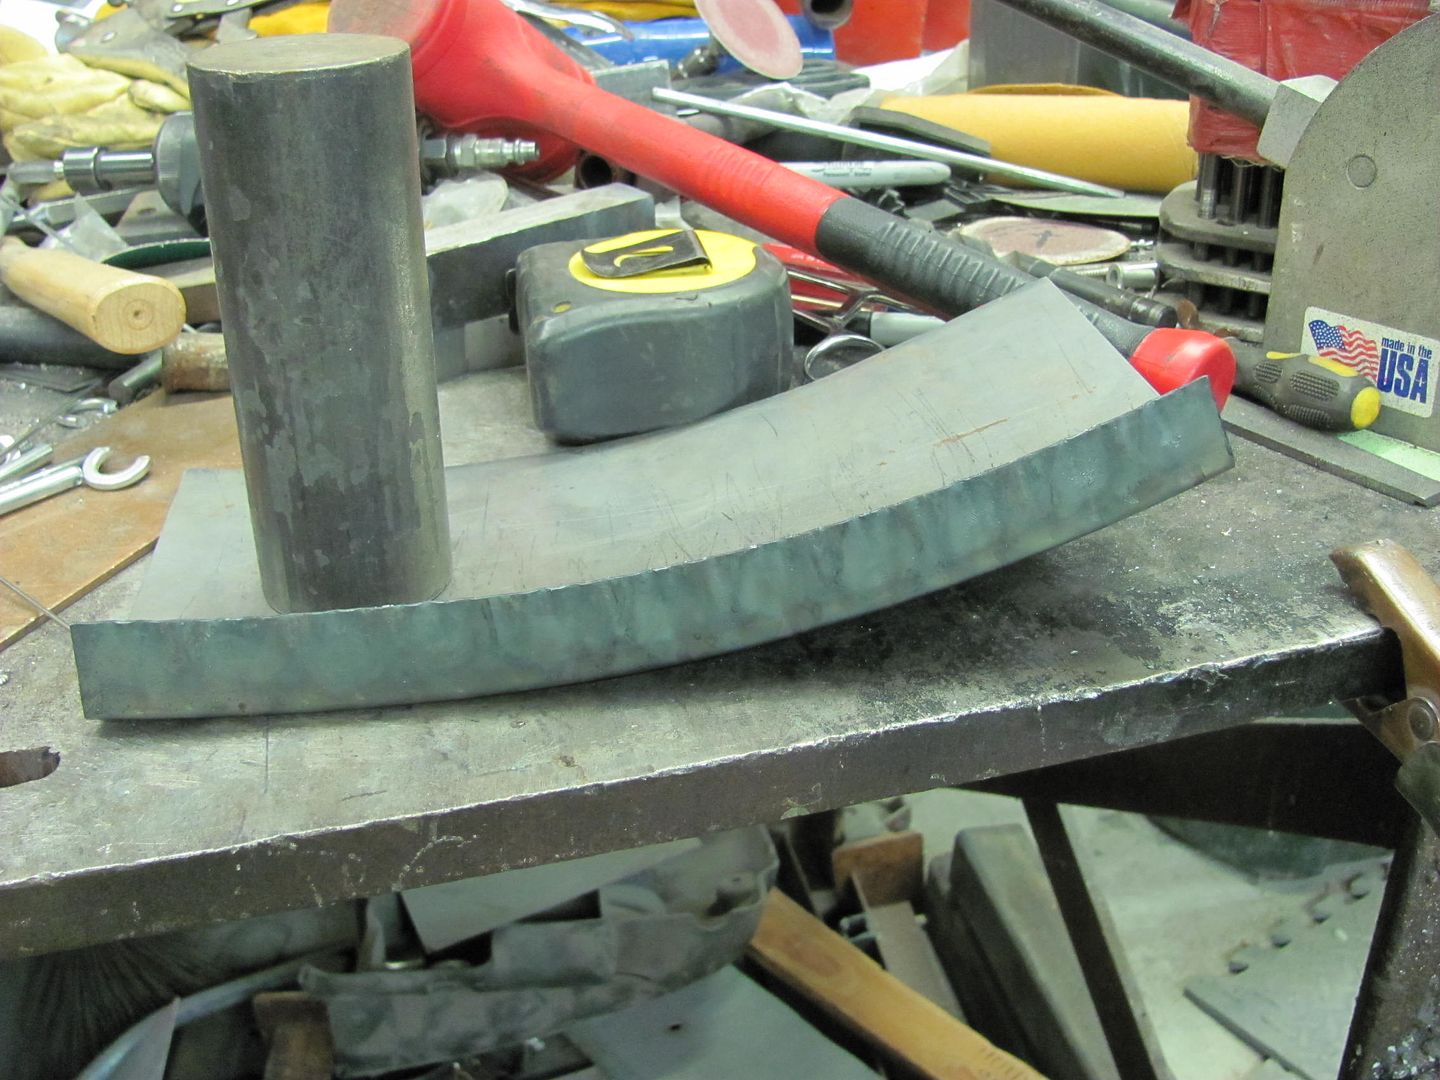
Depending on how wavy the flange gets, you may have to go past the radius you are looking for to allow for flattening the flange
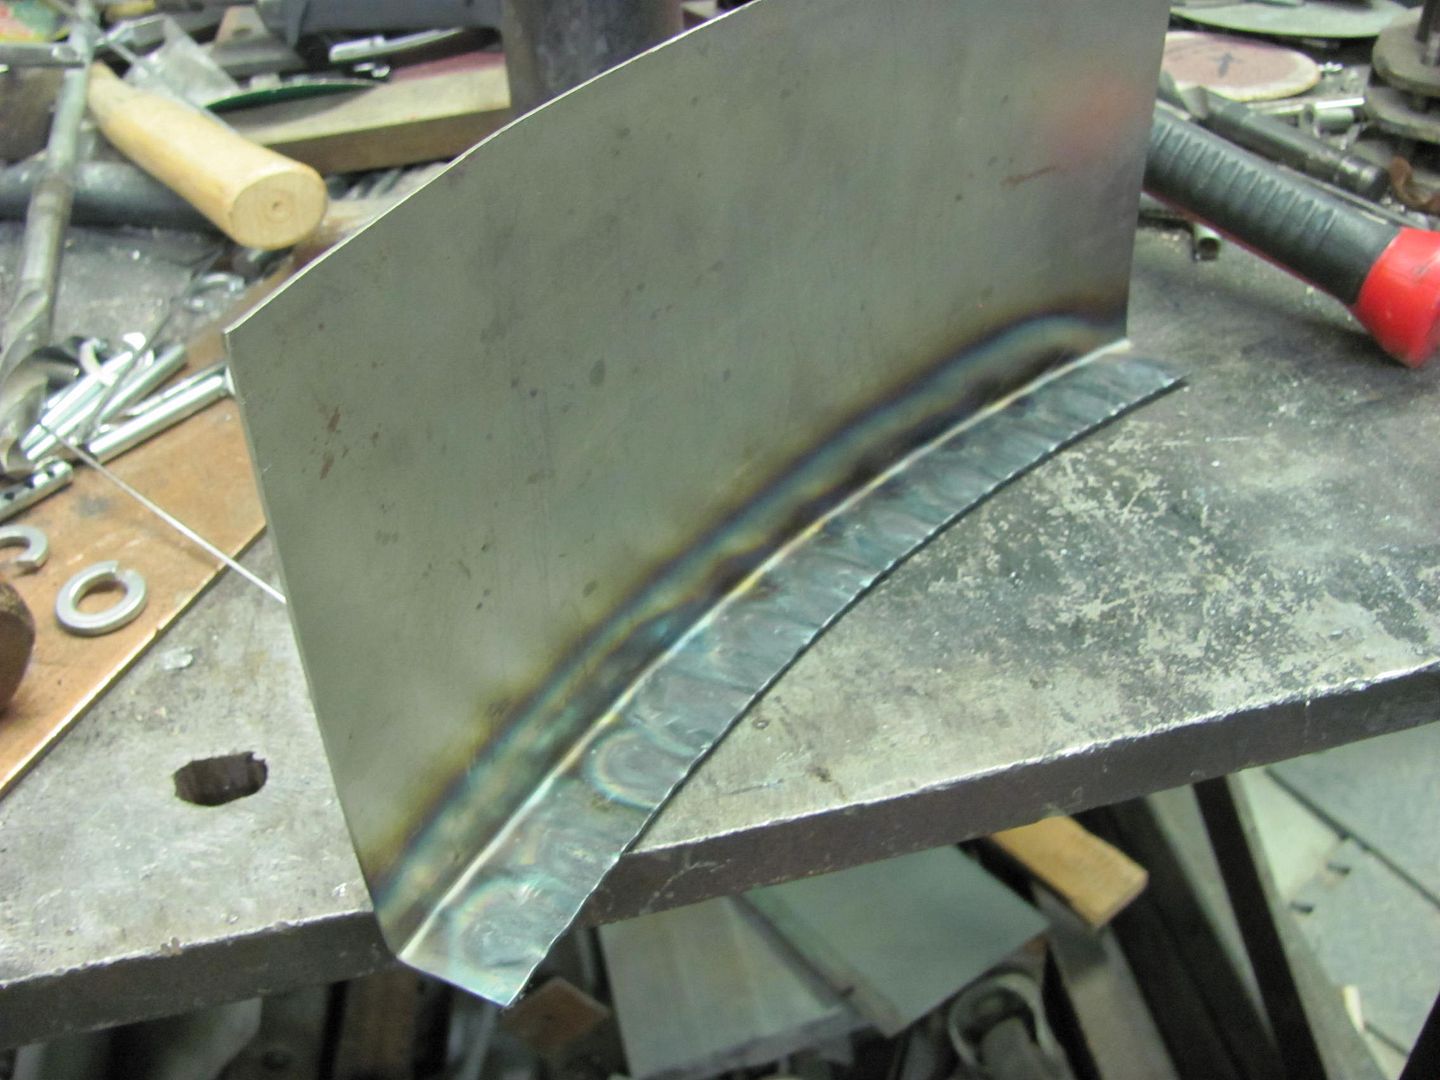
....and a comparison of the first and second, repeat as neccessary until you reach the radius you need.
For those that may need to form up some patch panels but don't have those shrinker/stretchers at your disposal, here's a how-to on tuck shrinking.
Here are some "tucking" pliers I made out of neccessity when forming up a replacement piece for rust repair, and I'll have to admit, their biggest flaw is not providing accurate, consistent tucks. Of course, the operator could also be flawed.....
The more consistent the tucks, the more consistent the distance between them, in the end, the more consistent our radius will be. To improve on the tucks I'll start out by making a tool that will more accurately duplicate consistent tucks. We'll start off by finding a pair of vise grips suitable for the job, which in this case means the jaw serrations are starting to wear and round off. Finish what has started by removing the serrations to produce a nice flat jaw on the bottom, and cut the top jaw off at about 30 degrees from its original position.
I had some extra long shouldered 3/8 bolts, perfect round stock for the job. Three of them were cut off to 1-1/2" length.
Now if someone doesn't have a fancy shrinker-stretcher machine likely means they don't have a lathe either. No sweat, use this economy model made by Dewalt...
To set the spacing for the "fingers" the first is clamped in the vise grip jaw, centered.
The outer is placed next to it and then welded down the outside, center finger removed, and then welded down inside.
Repeat for opposite side, then weld center finger.
Our new patch panel is bent up with about a 1" flange. Reference marks are placed one inch apart...
The first tuck shows how the radius starts to form. Slide the parallel fingers all the way against the bent panel and then squeeze the jaw closed. This will help to get the same depth of tuck each time.
Where I used an O/A torch, you should also be able to accomplish similar results with a hand held propane torch. (use what you have that works)
Heat up the raised portion of the first tuck until it glows nicely, then use a low crown body hammer (or suitable substitute) to flatten the end of the tuck first (helps to lock it from opening again) and then flatten the rest of the tuck back into the flange. Repeat for the remaining tucks... This can also be done without heat, but personally I find the tucks flatten a bit easier when more malleable from the heat.
You can see we have a nice consistent radius, but likely it is not enough. Mark the next set of reference marks in between the first ones, just to stagger the shrink area to a new portion of the flange that has not been shrunk yet..
Where our flange is starting to form a radius, the outer edge has a tendency to remain flat. Rolling across a nice round piece of pipe while holding down gently on the edges will help (or whatever is handy....I will not be held liable for repurcussions from using stuff from your wife's kitchen..)
Repeat the process of heating and hammering the tucks....
Depending on how wavy the flange gets, you may have to go past the radius you are looking for to allow for flattening the flange
....and a comparison of the first and second, repeat as neccessary until you reach the radius you need.
Cargo Master


Joined: Jan 2008
Posts: 2,219
Likes: 190
From: Colorado Springs
Well, I have an issue:
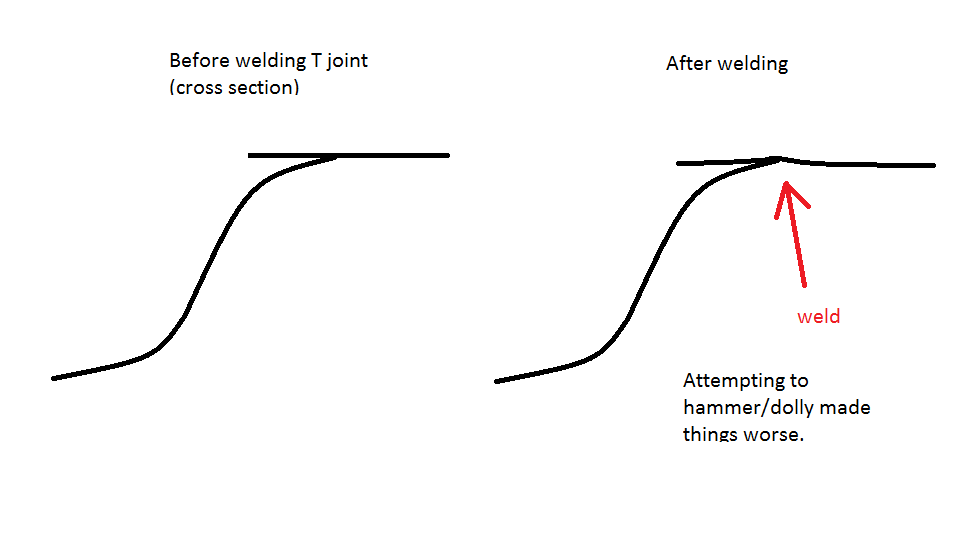
This is for the rear fenders I custom made, I welded it right to the side of the quarter panel, as I have seen it done this way before by professional customisers. What plan of attack should I take to rectify the low 3/16" deep valley at the joint? Start over with a butt joint, then hammer on dolly? Right above the fender there is the deep scalloped body line where the joint is, is it possible to hammer in a tight place like this? On the other side, am I better off simply tacking the other side on, then filling in the seam with filler, and not fully welding the seam?
This is for the rear fenders I custom made, I welded it right to the side of the quarter panel, as I have seen it done this way before by professional customisers. What plan of attack should I take to rectify the low 3/16" deep valley at the joint? Start over with a butt joint, then hammer on dolly? Right above the fender there is the deep scalloped body line where the joint is, is it possible to hammer in a tight place like this? On the other side, am I better off simply tacking the other side on, then filling in the seam with filler, and not fully welding the seam?
FTE Stories
Ford Trucks for Ford Truck Enthusiasts

Top 6 Best Deals Available on New Fords & Lincolns Right Now
Brett Foote
This Hennessey Takes the Expedition Tremor's Off-Roading Capability to the Next Level
Verdad Gallardo
Top 10 Fords at 2026 Carlisle Ford Nationals
Joe Kucinski
3 Best / 3 Worst Parts of Modern Ford Ownership
Brett Foote
10 Amazing Upgrades That Solve Common Ford Truck Owner Headaches
Pouria Savadkouei
Every 2026 Ford Engine Explained
Brett Foote
10 Ugly Ford Trucks That We Still Kinda Love
Joe Kucinski
10 Things Every Truck Owner NEEDS (2026 Edition)
Michael S. Palmer
Rezvani's Latest Post-Apocalyptic Monster Is a Ford F-150 Raptor Underneath
Verdad GallardoTuned
Joined: Aug 2007
Posts: 459
Likes: 123
From: Maryland
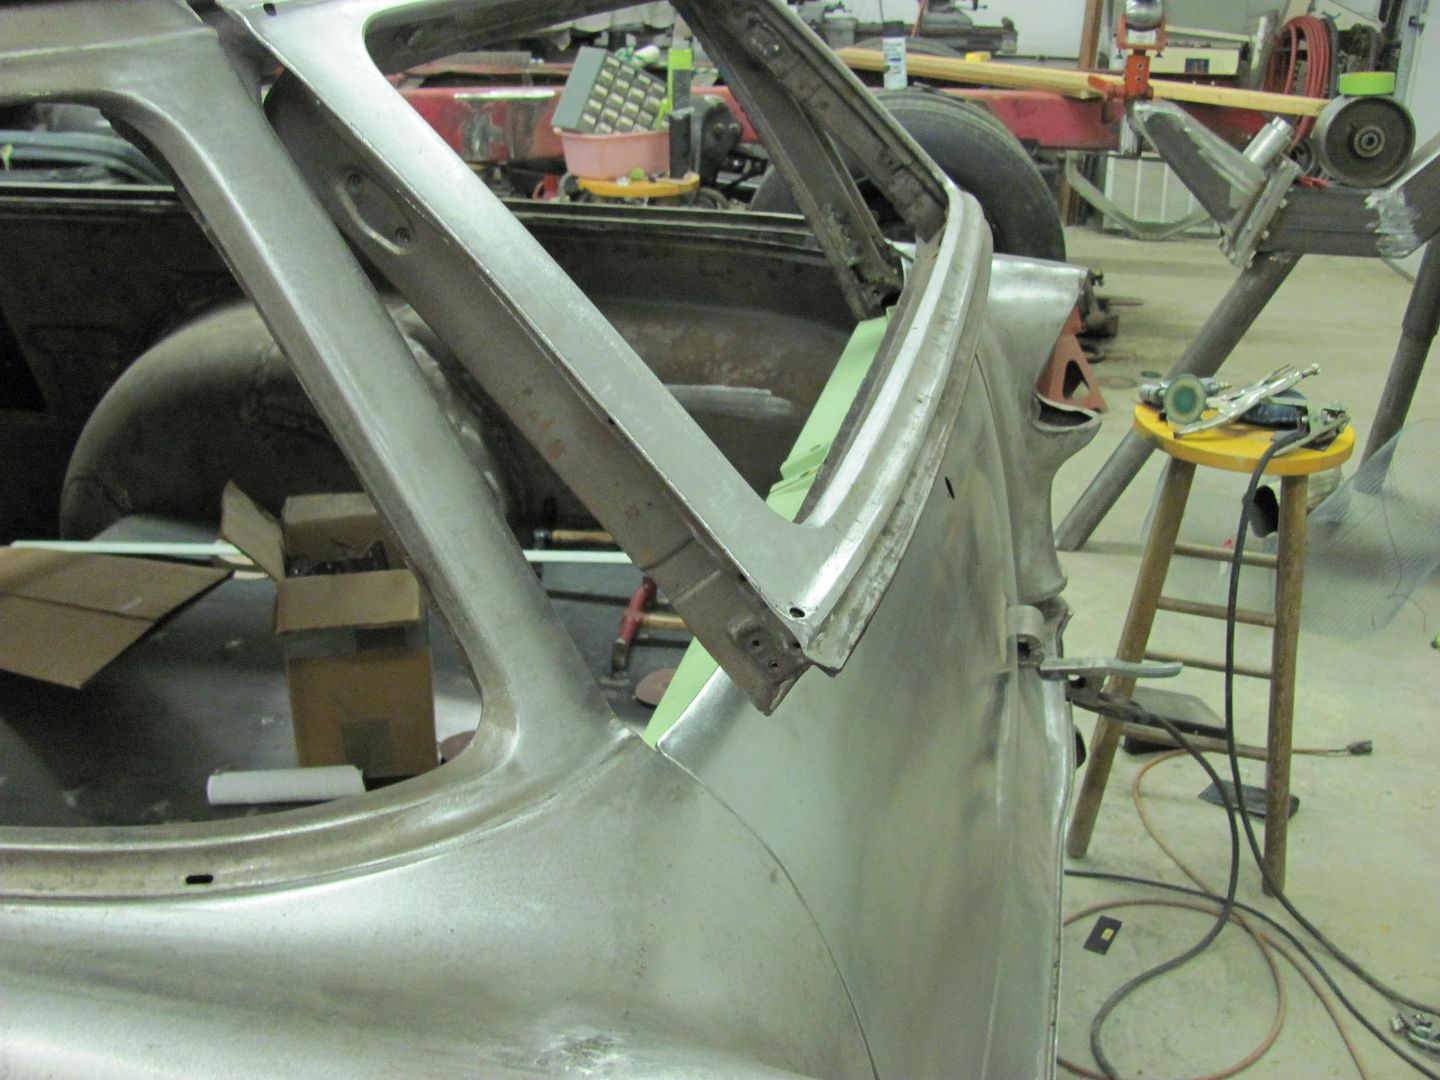
Looks like you are talking about the fender extensions added to the rear quarters in your avatar photo. Do you have a closer view of the area you welded? What welding process did you use, mig, tig, O/A?
My initial thoughts, once the shape of the outer part of the flare is shaped up is to cut out the lower portion of the quarter panel that will be hidden and butt weld the new to the old. By only attaching the outer part at this time, you should have full access for hammer and dolly work. Butt welding gives you one thickness of metal on either side of the weld, so any planishing efforts will yield better results toward straightening the panel than what you are presently seeing. After you're satisfied with the results, then add the inner panel.
My initial thoughts, once the shape of the outer part of the flare is shaped up is to cut out the lower portion of the quarter panel that will be hidden and butt weld the new to the old. By only attaching the outer part at this time, you should have full access for hammer and dolly work. Butt welding gives you one thickness of metal on either side of the weld, so any planishing efforts will yield better results toward straightening the panel than what you are presently seeing. After you're satisfied with the results, then add the inner panel.
Cargo Master
Joined: Jan 2008
Posts: 2,219
Likes: 190
From: Colorado Springs
I'll get some closer pics today. Yeah that confirms my thoughts. Right now theres body soldier on the bad area, i'm very annoyed by the results, which might look perfect to any one else. I still have the other side to do.
Thanks
Ryan
Oh, and I use MIG, and have read all of your previous posts in this thread.
Thanks
Ryan
Oh, and I use MIG, and have read all of your previous posts in this thread.
Senior User
Joined: May 2012
Posts: 244
Likes: 1
Some good info for sure. I to am a welder, by tade.
Some basics that might help the inexperienced.
1)metal will always "pull" towards the heat. So small tack welds is the key. And by pull toward the heat I mean whatever side you are welding on the steel will dishout a little. So small tacks, and take your time to not let the steel get too hot. Do not I repeat do not quench the weld with water or water soaked rag, that will cause more dishing. Let air cool.
2) when fabbing your new piece, make its a little larger than needed. And remove the excess once you are sure of the size you need. We all have heard measure twice cut once for good reason. Its a PITA to make the same part twice, and well costly.
3) the peening (hammer) of the tack while still hot goes a long way. So don't smacl the stuffn out of it, just a good sharp whack.
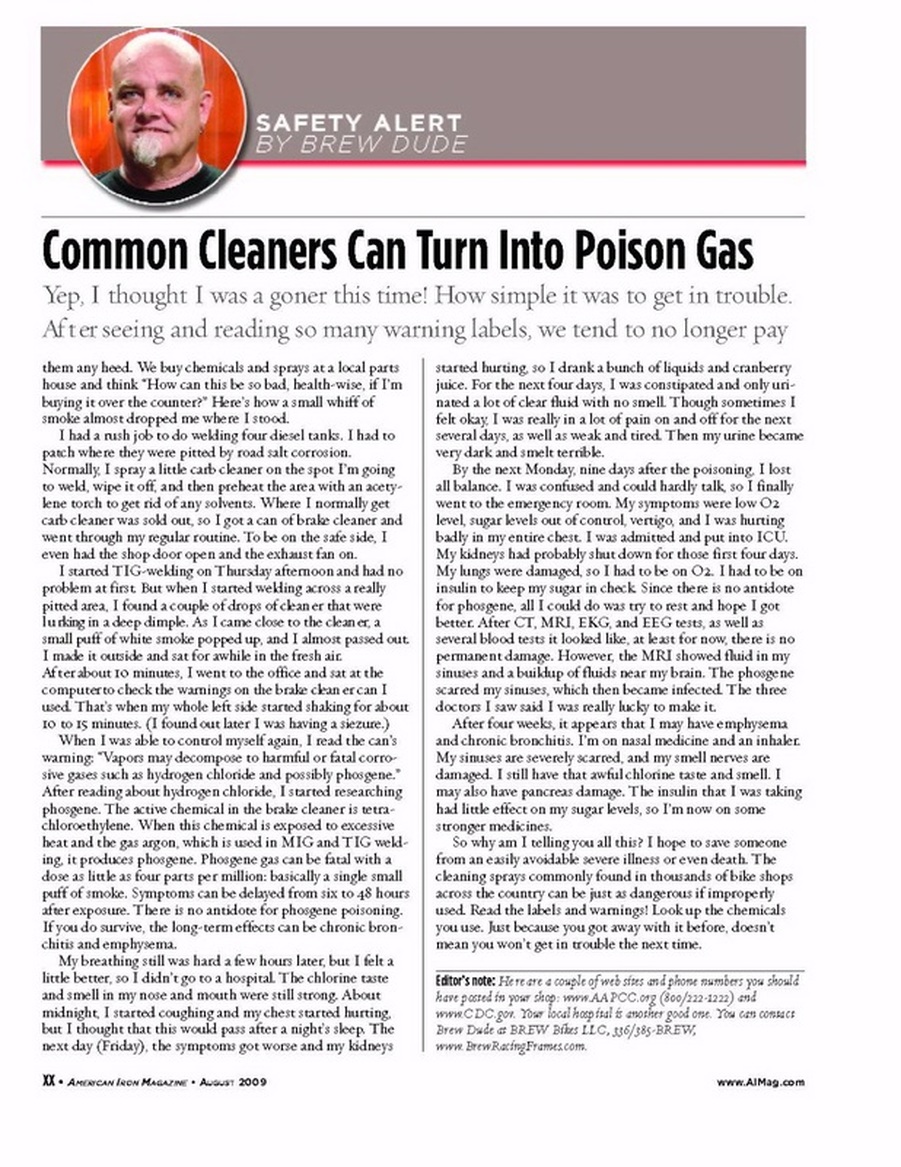
4) Ventilation and work area, always keep good clean area around where you weld. Atleast ten foot circle from the weld. Rags, clothes your wearing not frayed and ripped. Paper towls, containers of gas, solvents and well anything you want. Fire usually doesn't improve anything. Like brand new cam sitting next to ya gets weld spatter, D U N, done. And all welding causes fumes that are not good for you. Now weld on old steel with paint, primer, grease and oils. So always have a window open or a fan to give a cross flow, something. A little thought goes a long way.
Kind of on the same subject if using a MIG welder with a shielding gas all you really have to know here is the Argon mix (whatever your using) is heavier that the air we breath. So if your in a confiened space under the truck you could push your breathable air out.
Have fun and enjoy. I myself love to weld, yet to weld on my truck tho. But I have been welding since high school. And just about every welding process, except explosion welding.
Some basics that might help the inexperienced.
1)metal will always "pull" towards the heat. So small tack welds is the key. And by pull toward the heat I mean whatever side you are welding on the steel will dishout a little. So small tacks, and take your time to not let the steel get too hot. Do not I repeat do not quench the weld with water or water soaked rag, that will cause more dishing. Let air cool.
2) when fabbing your new piece, make its a little larger than needed. And remove the excess once you are sure of the size you need. We all have heard measure twice cut once for good reason. Its a PITA to make the same part twice, and well costly.
3) the peening (hammer) of the tack while still hot goes a long way. So don't smacl the stuffn out of it, just a good sharp whack.
4) Ventilation and work area, always keep good clean area around where you weld. Atleast ten foot circle from the weld. Rags, clothes your wearing not frayed and ripped. Paper towls, containers of gas, solvents and well anything you want. Fire usually doesn't improve anything. Like brand new cam sitting next to ya gets weld spatter, D U N, done. And all welding causes fumes that are not good for you. Now weld on old steel with paint, primer, grease and oils. So always have a window open or a fan to give a cross flow, something. A little thought goes a long way.
Kind of on the same subject if using a MIG welder with a shielding gas all you really have to know here is the Argon mix (whatever your using) is heavier that the air we breath. So if your in a confiened space under the truck you could push your breathable air out.
Have fun and enjoy. I myself love to weld, yet to weld on my truck tho. But I have been welding since high school. And just about every welding process, except explosion welding.
Tuned
Joined: Aug 2007
Posts: 459
Likes: 123
From: Maryland
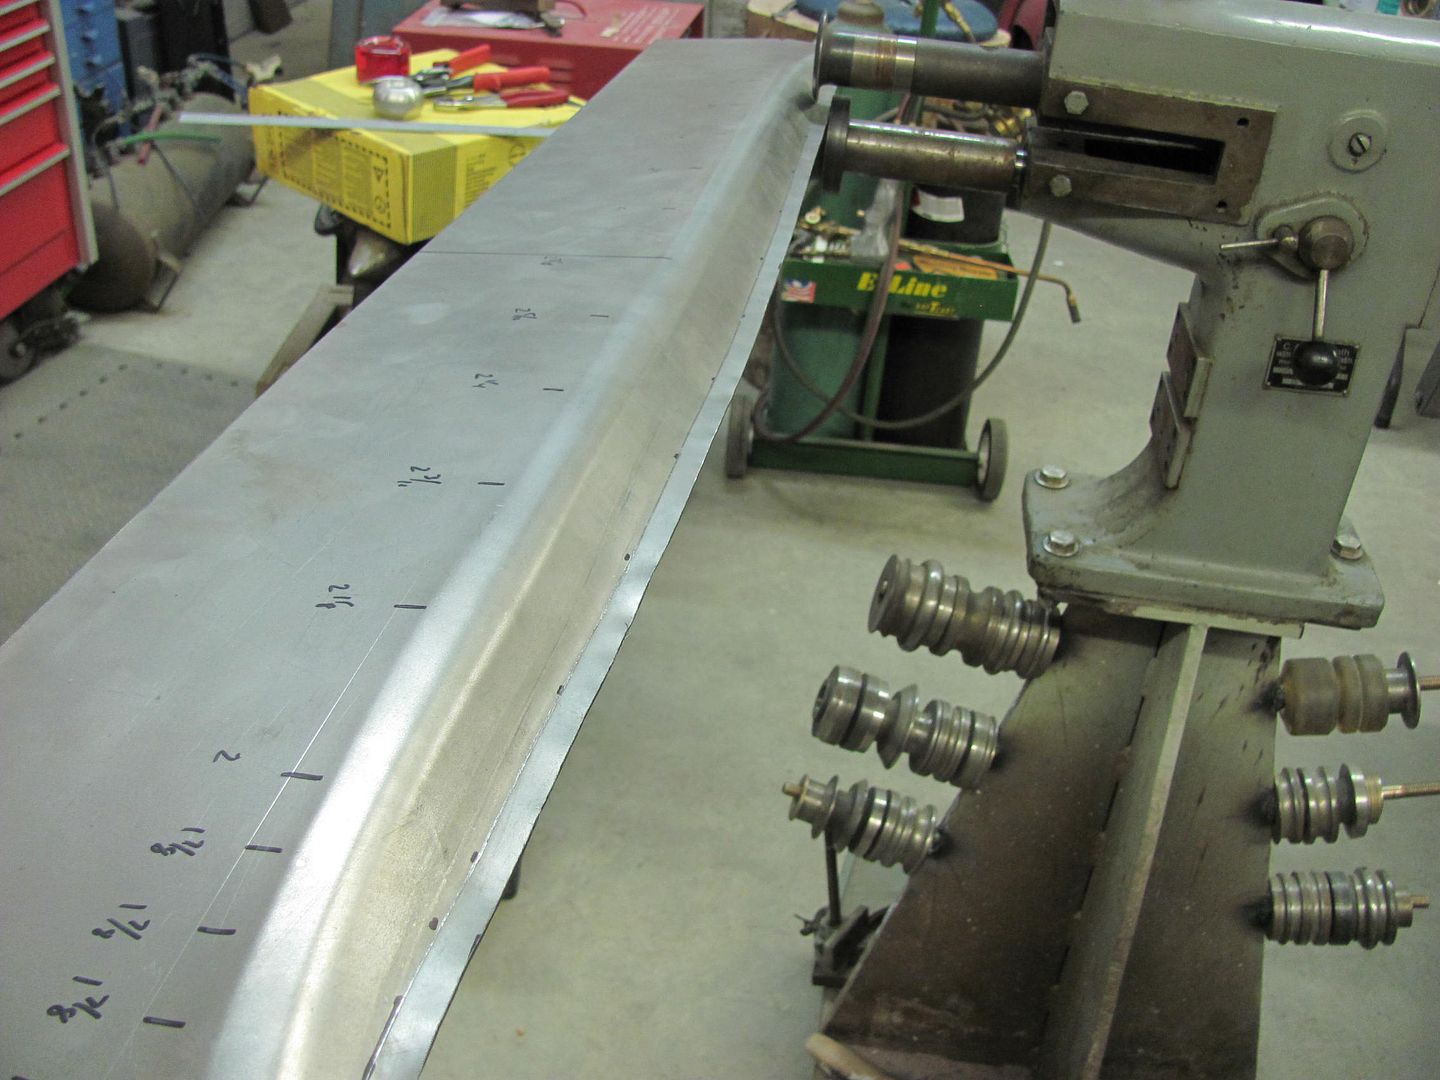
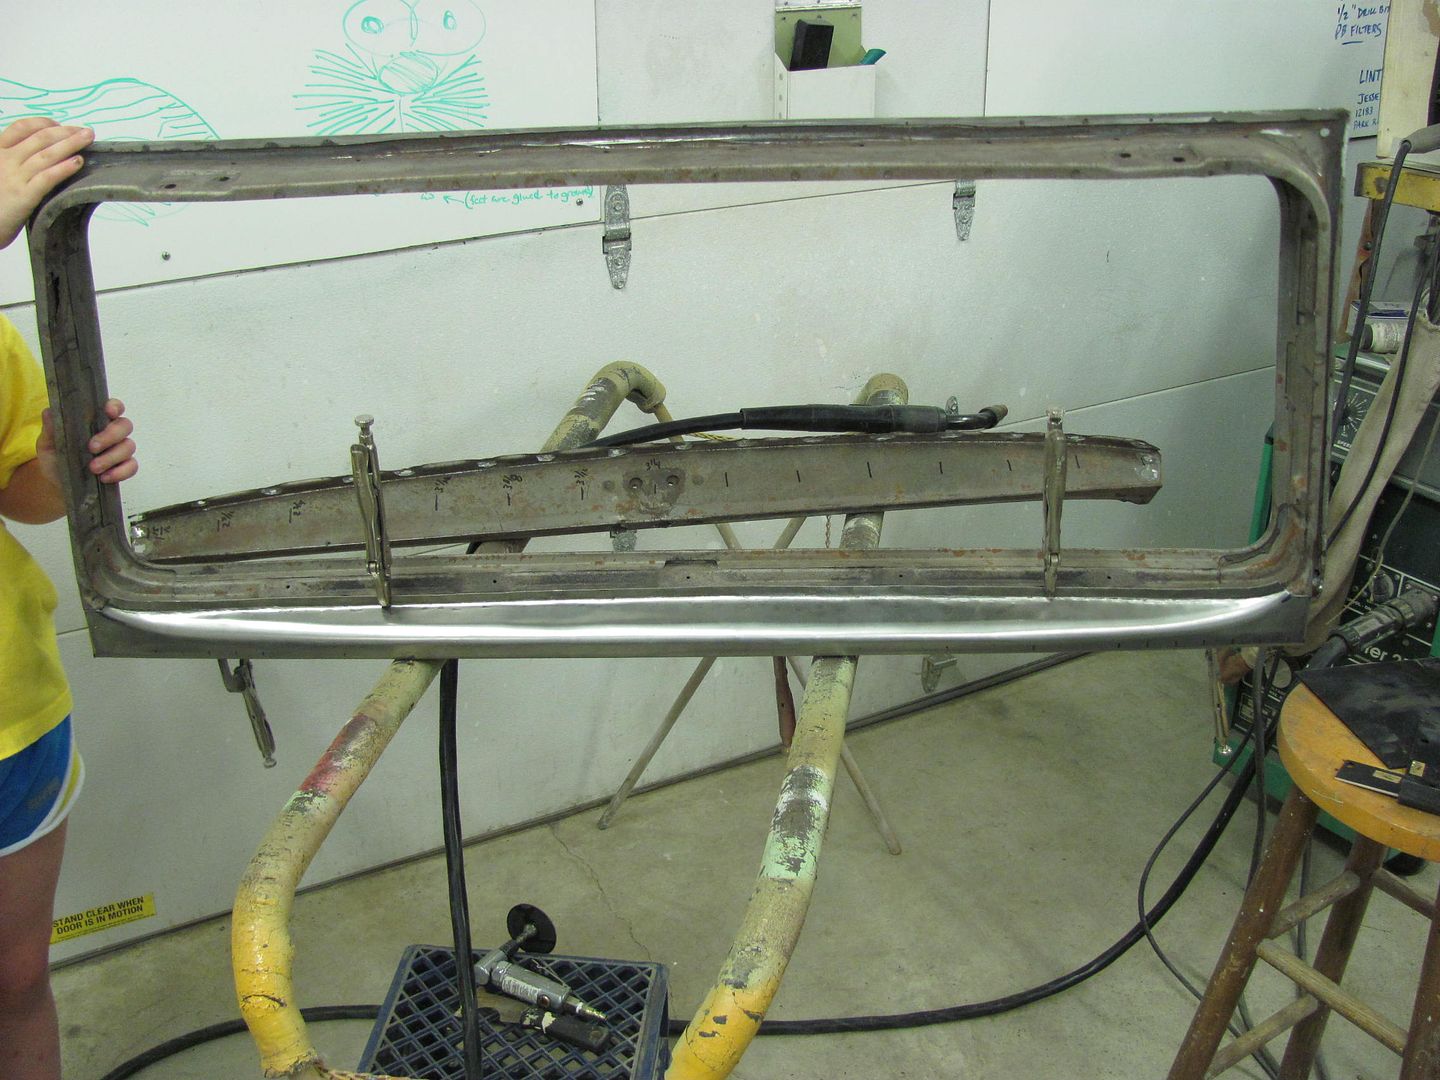
Just to show what's possible with a bead roller, here's a recent fabrication I did in the shop...
The upper tailgate on station wagons are prone to rust issues as water collects in the low areas...
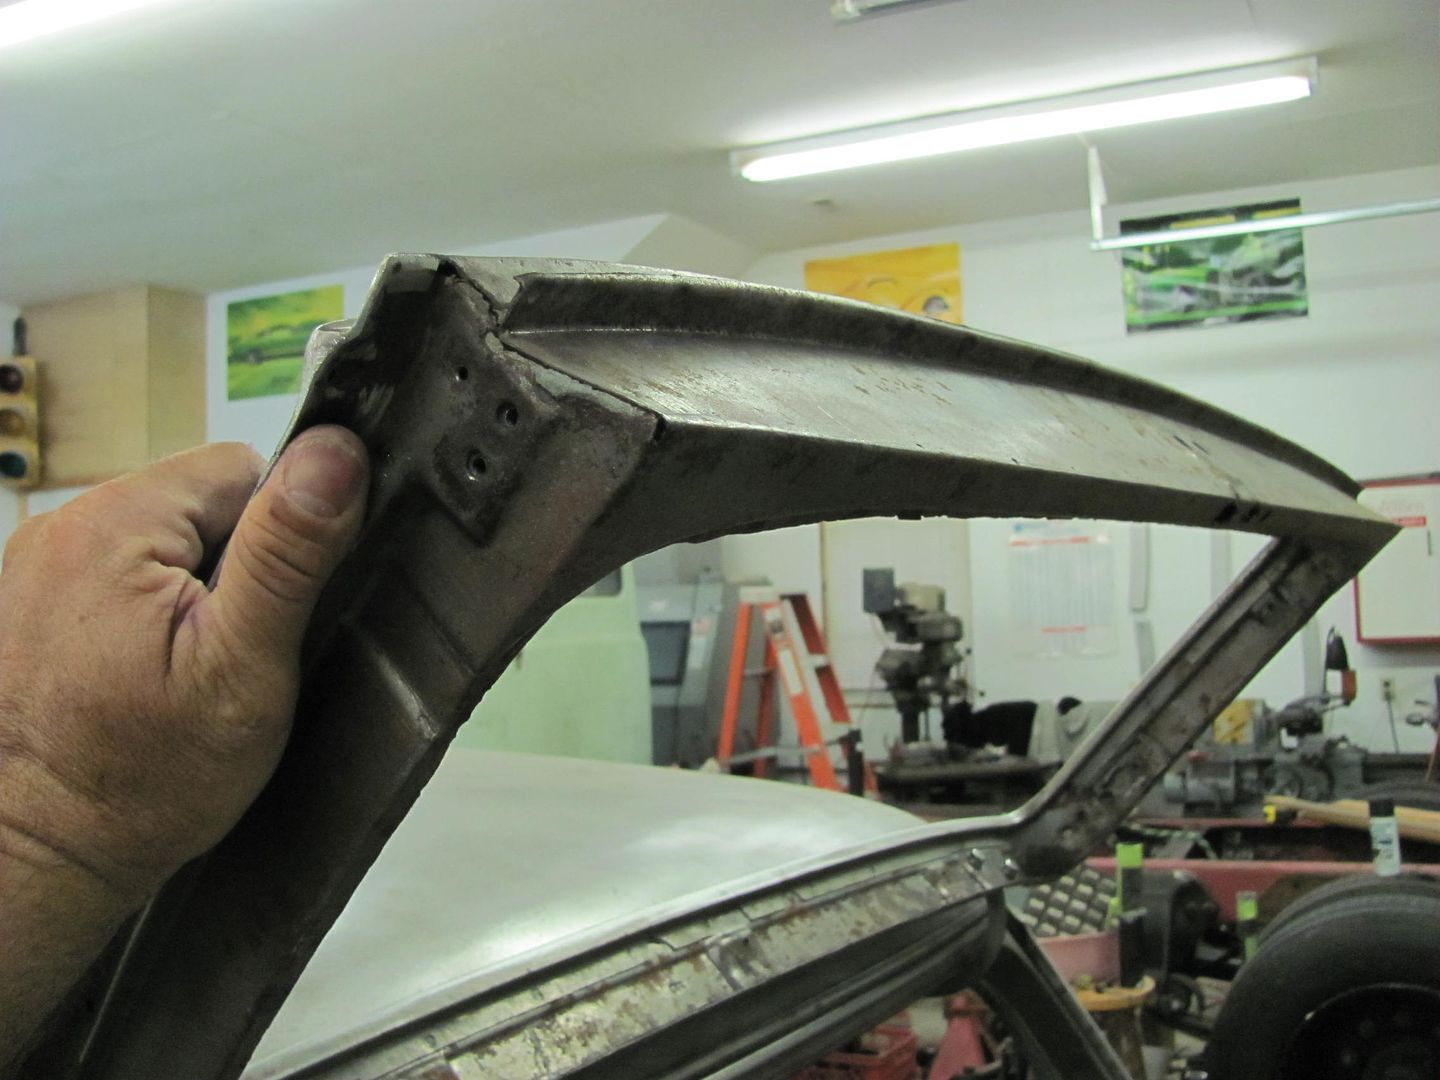
Took the upper gate off...
My tool of choice for removing spot welds is a 3" x 1/16 cutoff wheel. I also use the premium wheels made for stainless steel. It's worth the extra money when you don't have a brown cloud in the shop, like the el cheapo wheels leave, nothing but resin wearing away.
The upper layer of metal will start to turn blue when it gets thin and hot, letting you know you're getting close to the next layer. When you have a blue circle with shiny metal in the center, you are now in the second layer, grind around the blue a bit more and pry the layers apart..

With all the spot welds removed, here's what we find inside...

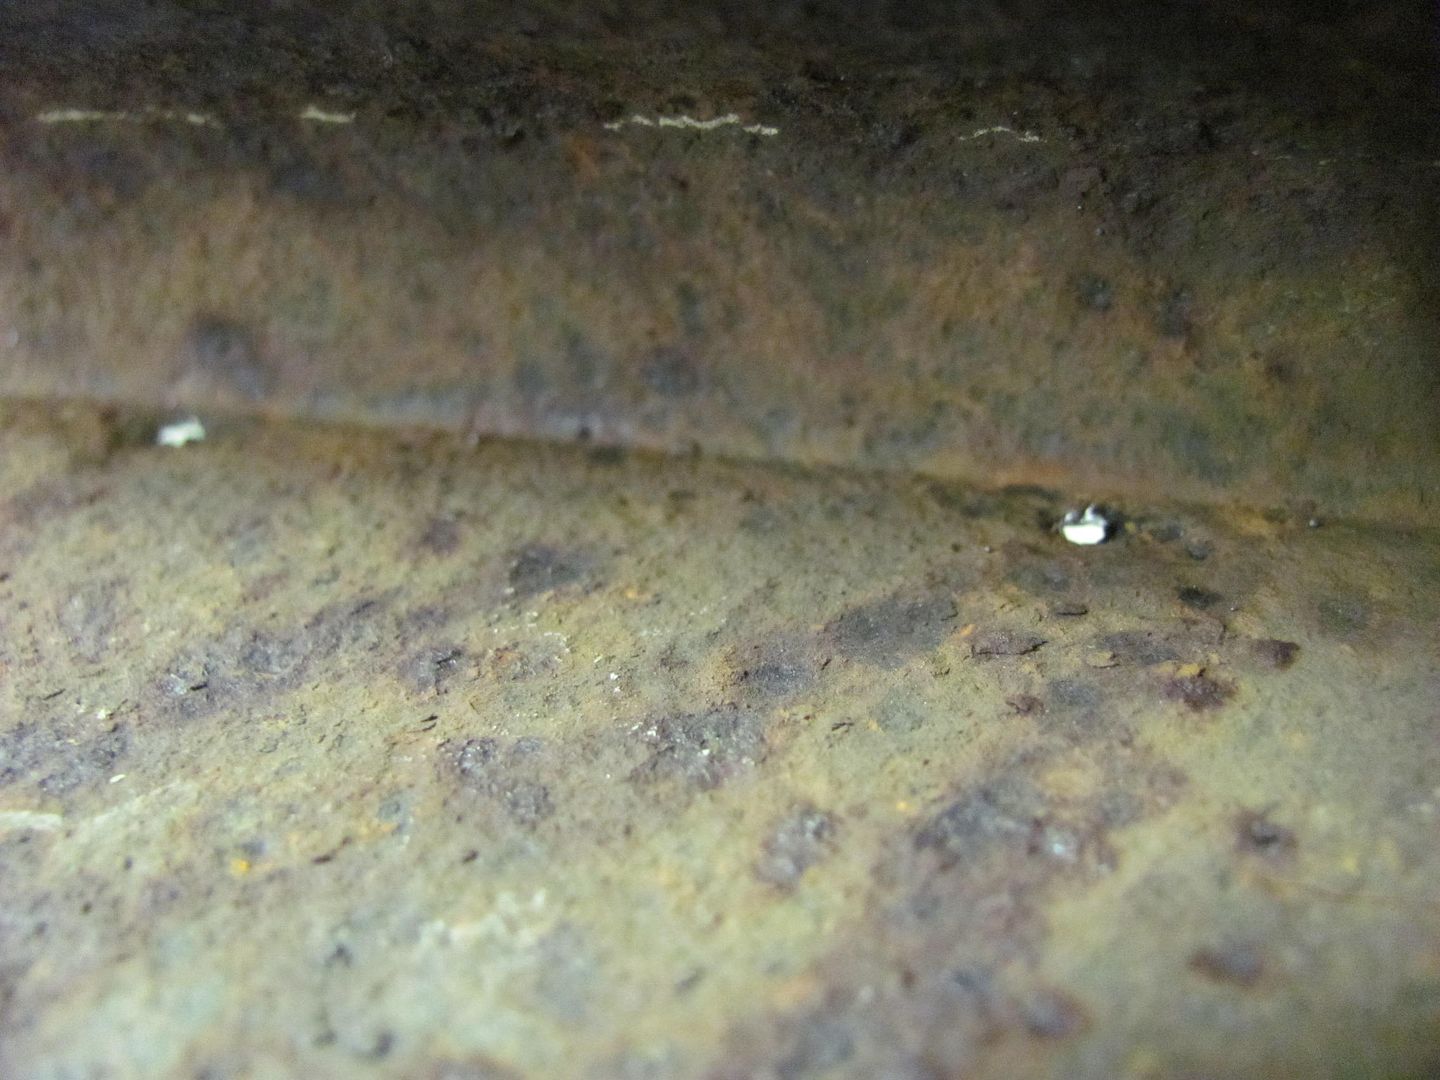
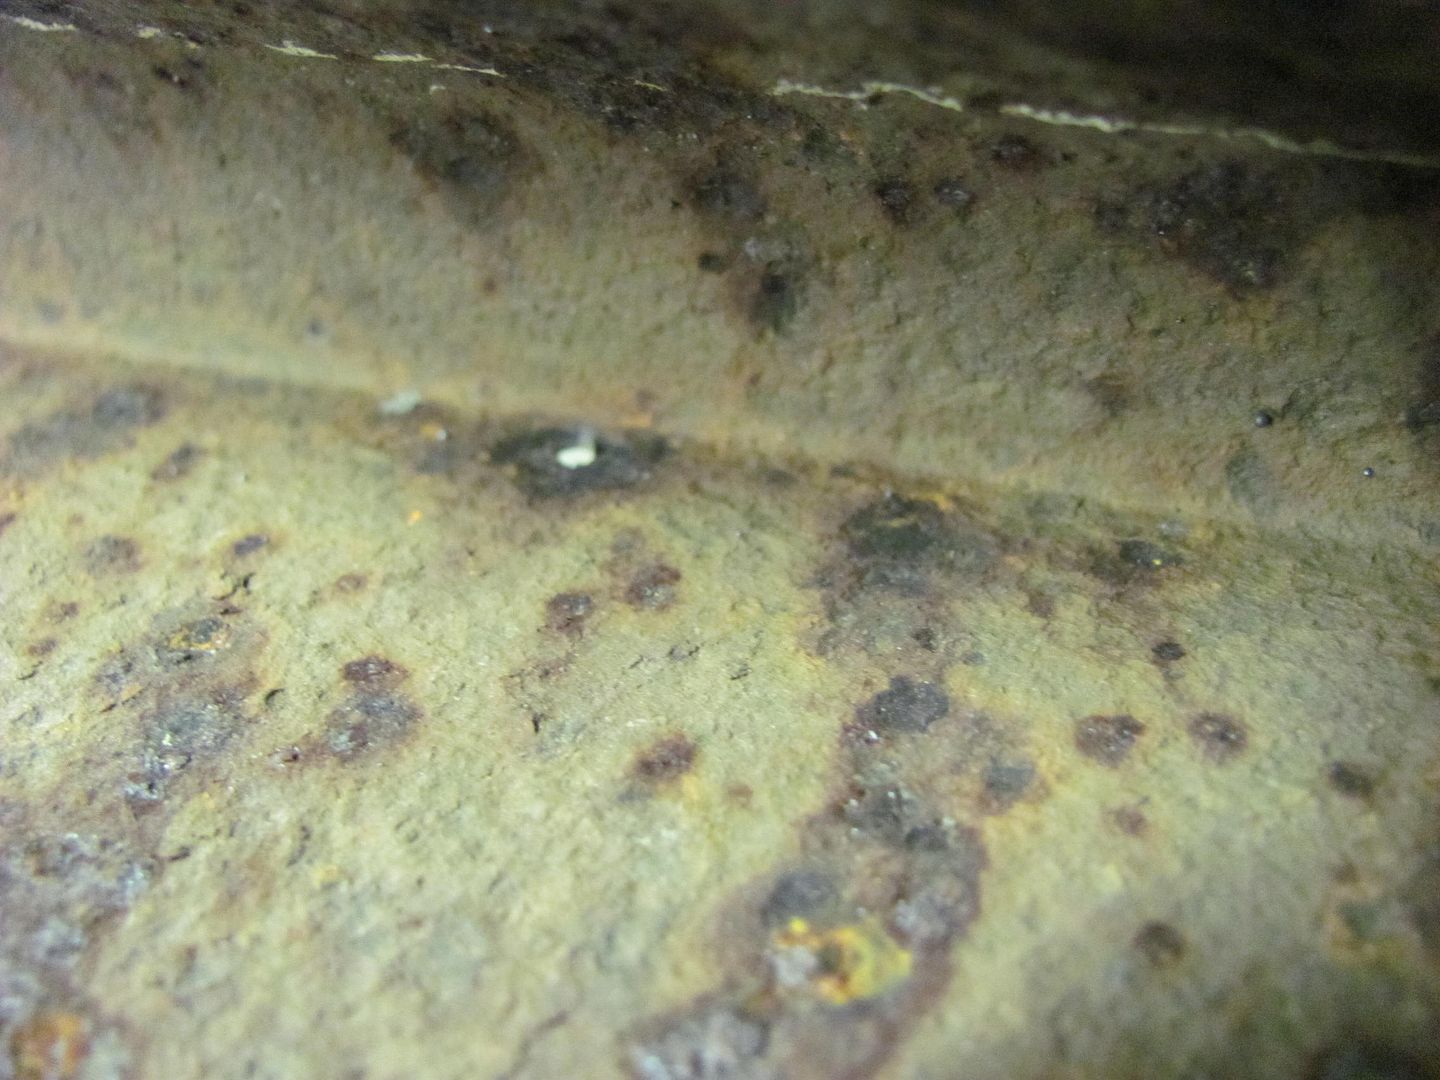
Note the deep pits. The big problem with just welding a hole closed is you don't know where the next pit is lurking, ready to break through your new paint.
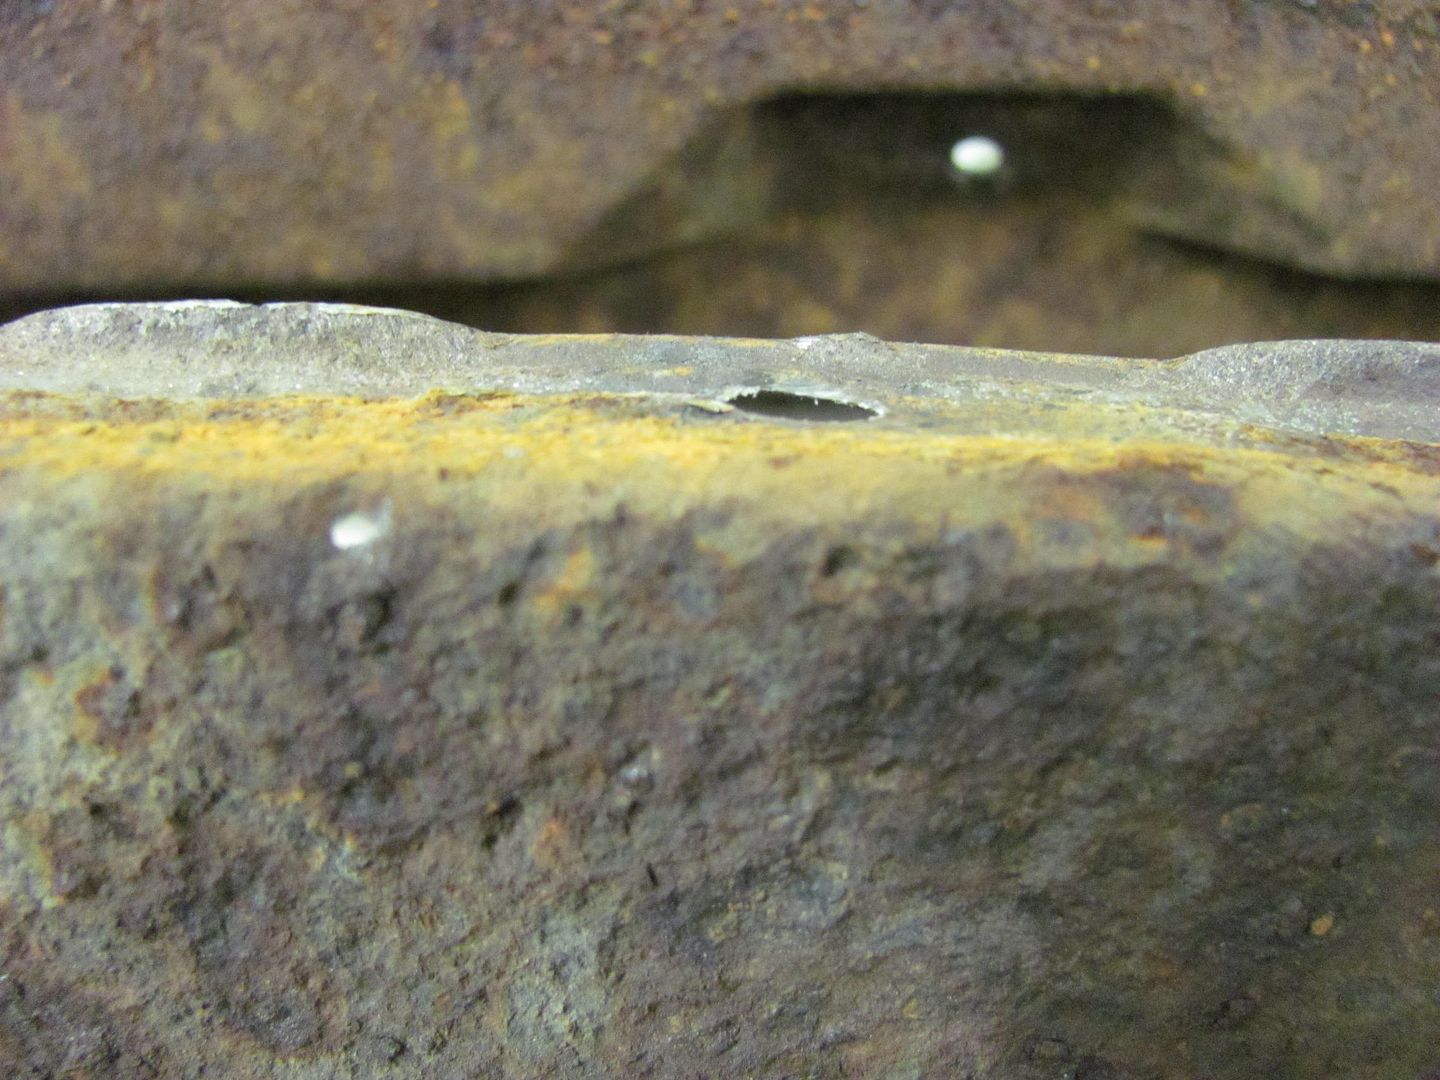
Funny, with all the rust and scale inside, then you find this area of bare steel nice and shiney..
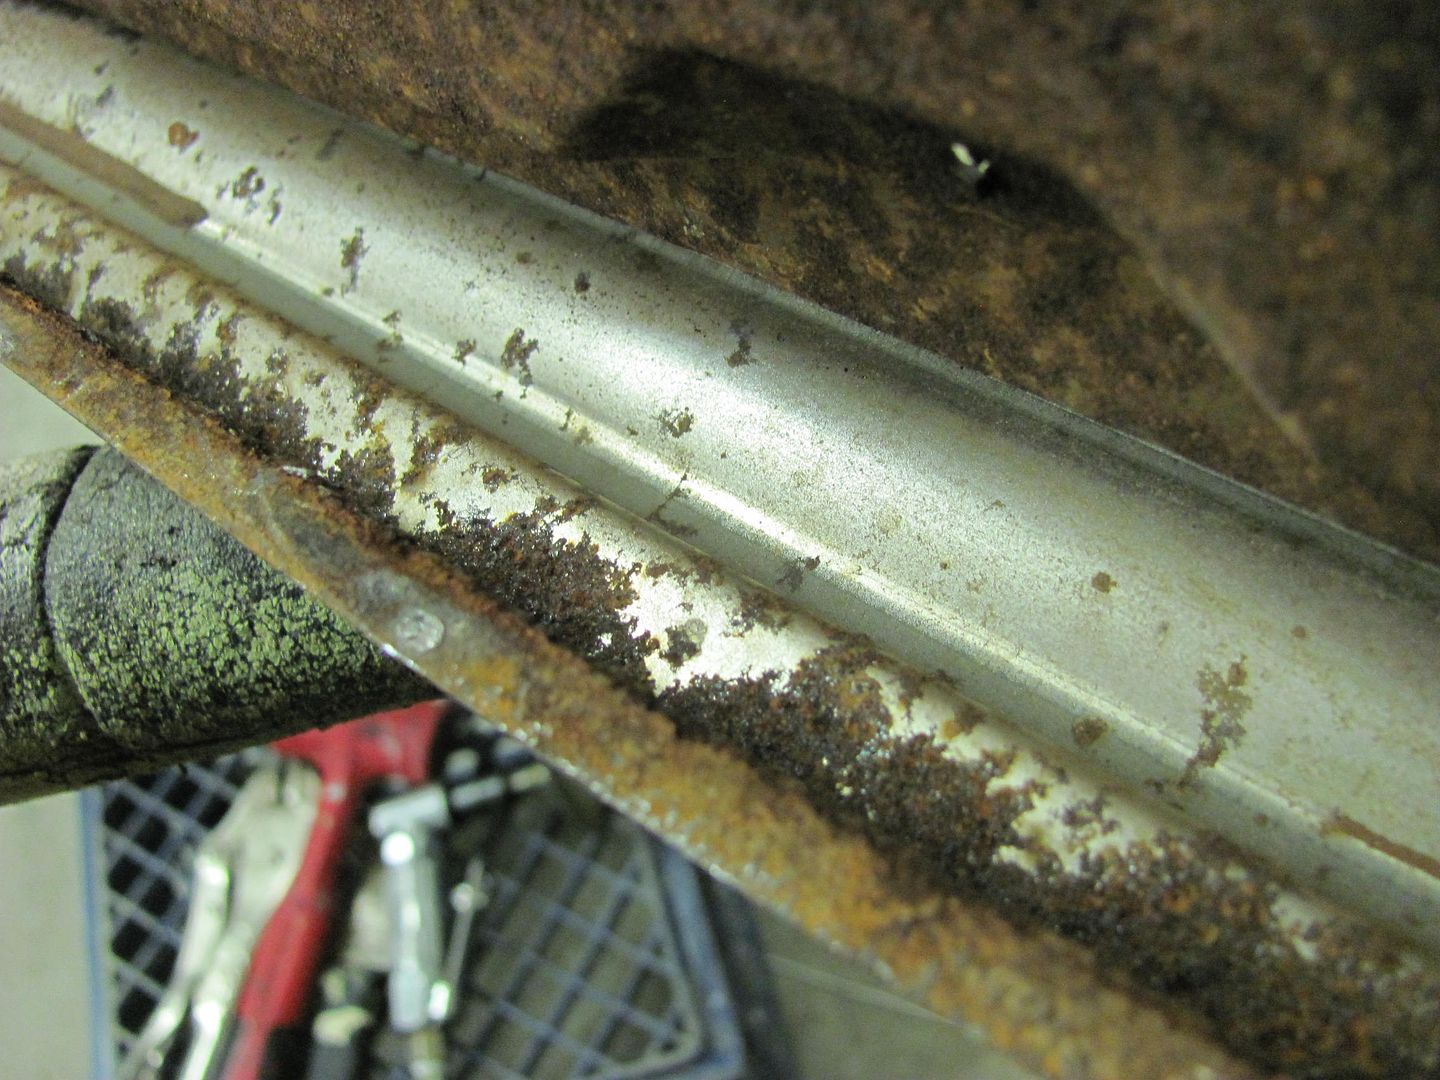
The inside will get media blasted to insure there is no more lurking issues and then epoxy primered before re-assembly.
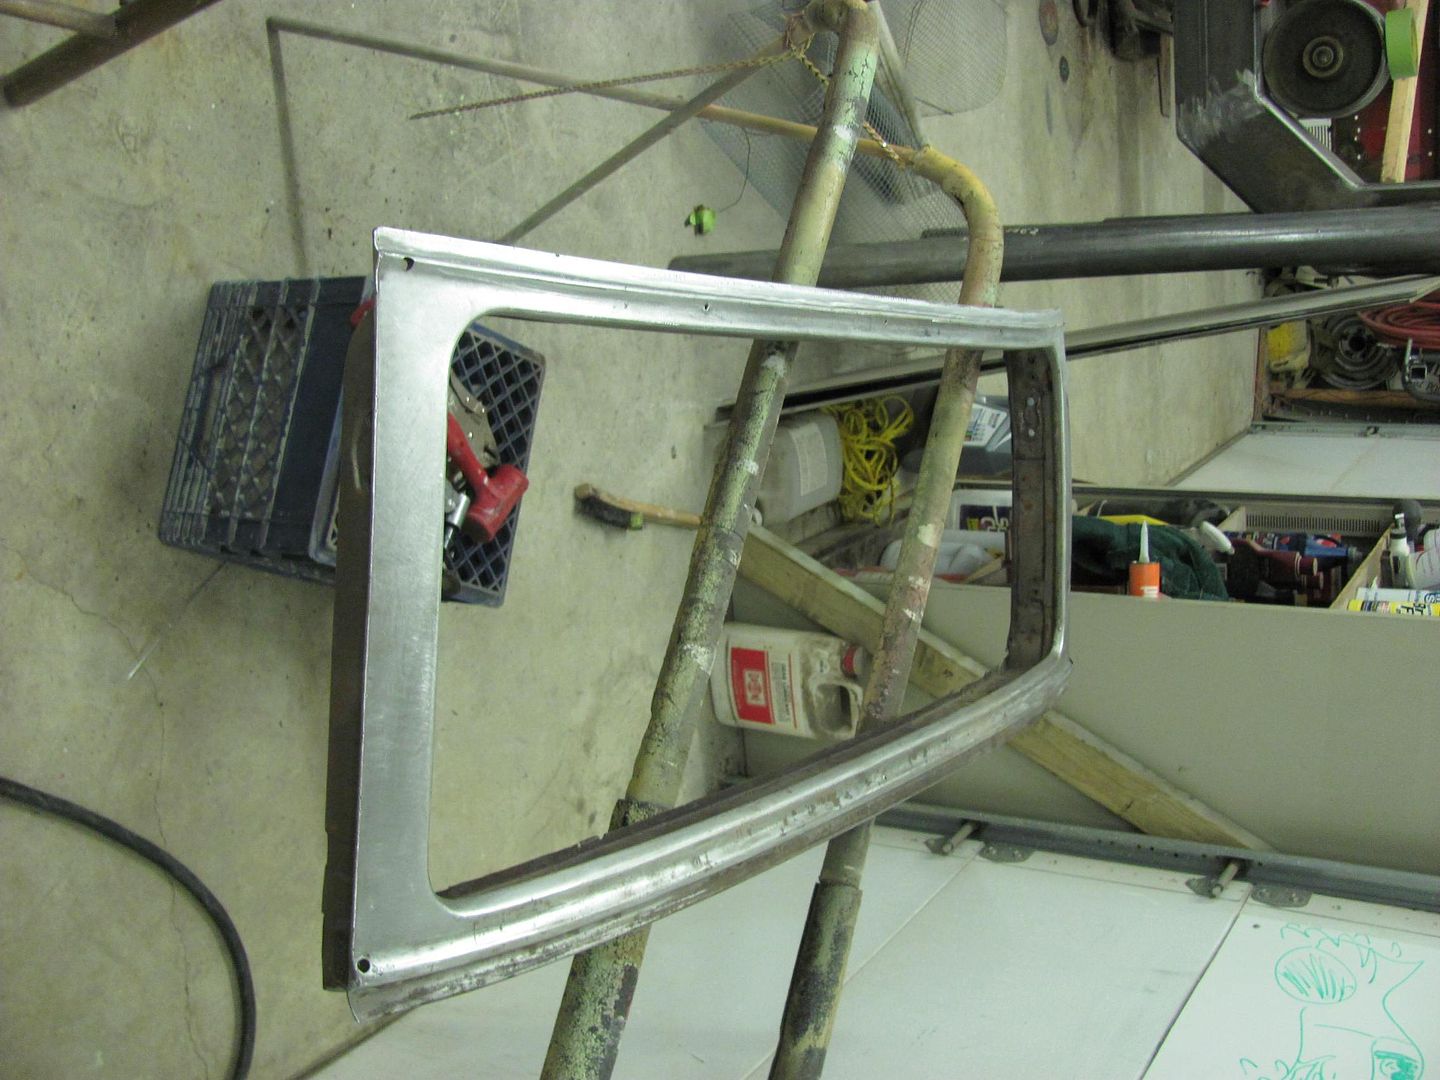
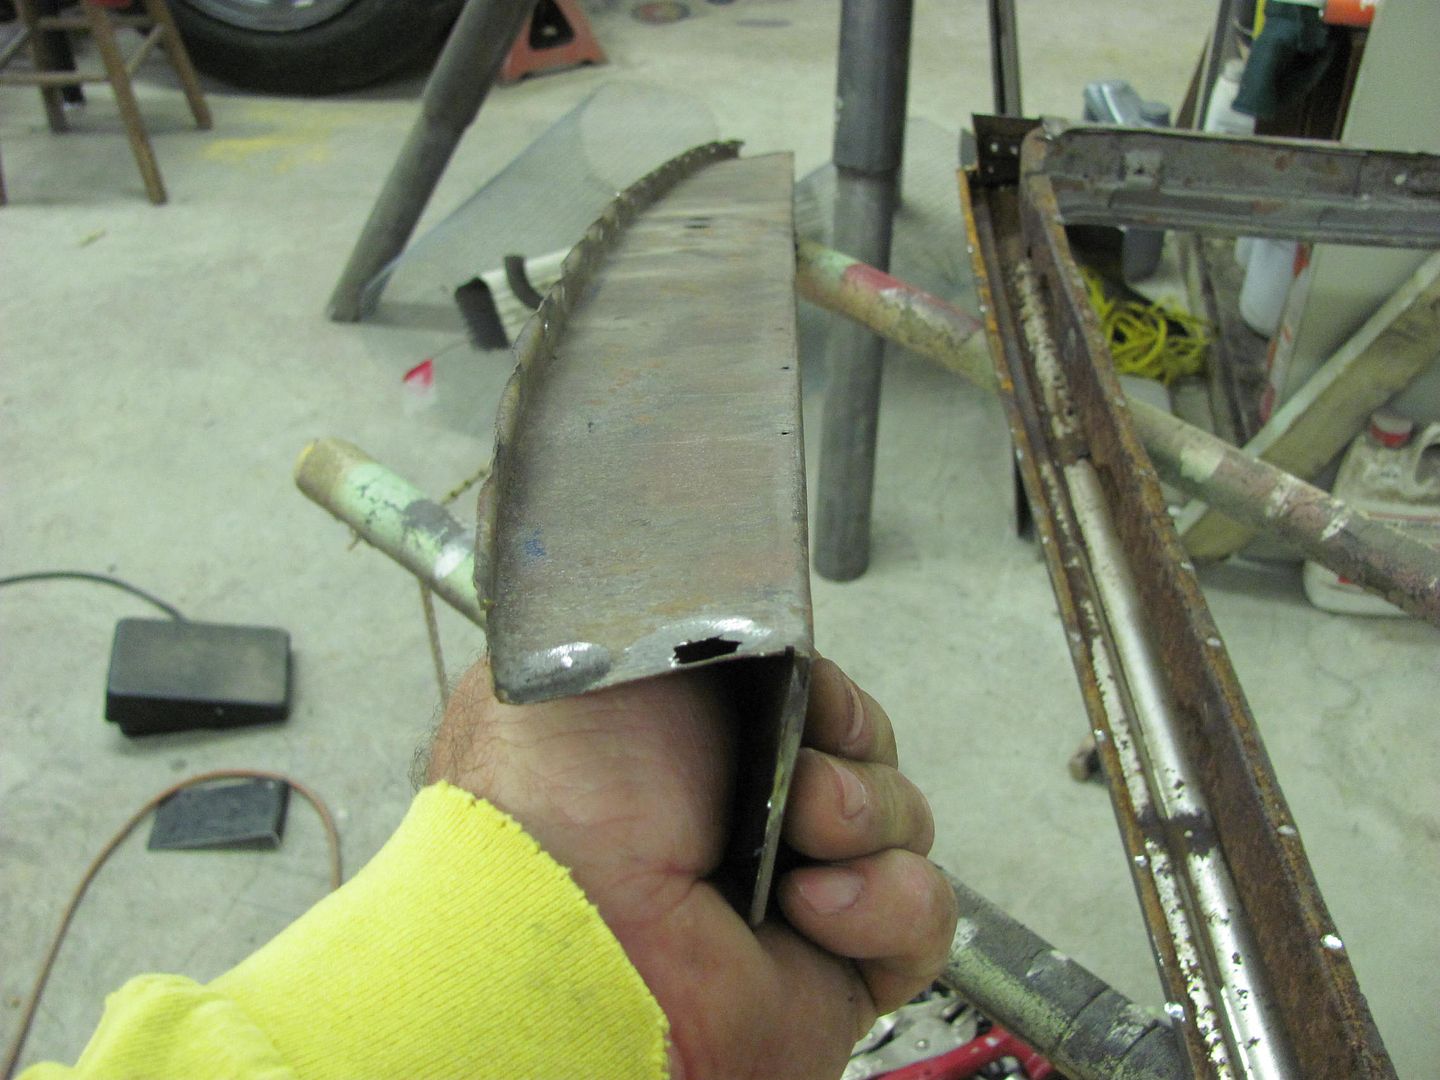
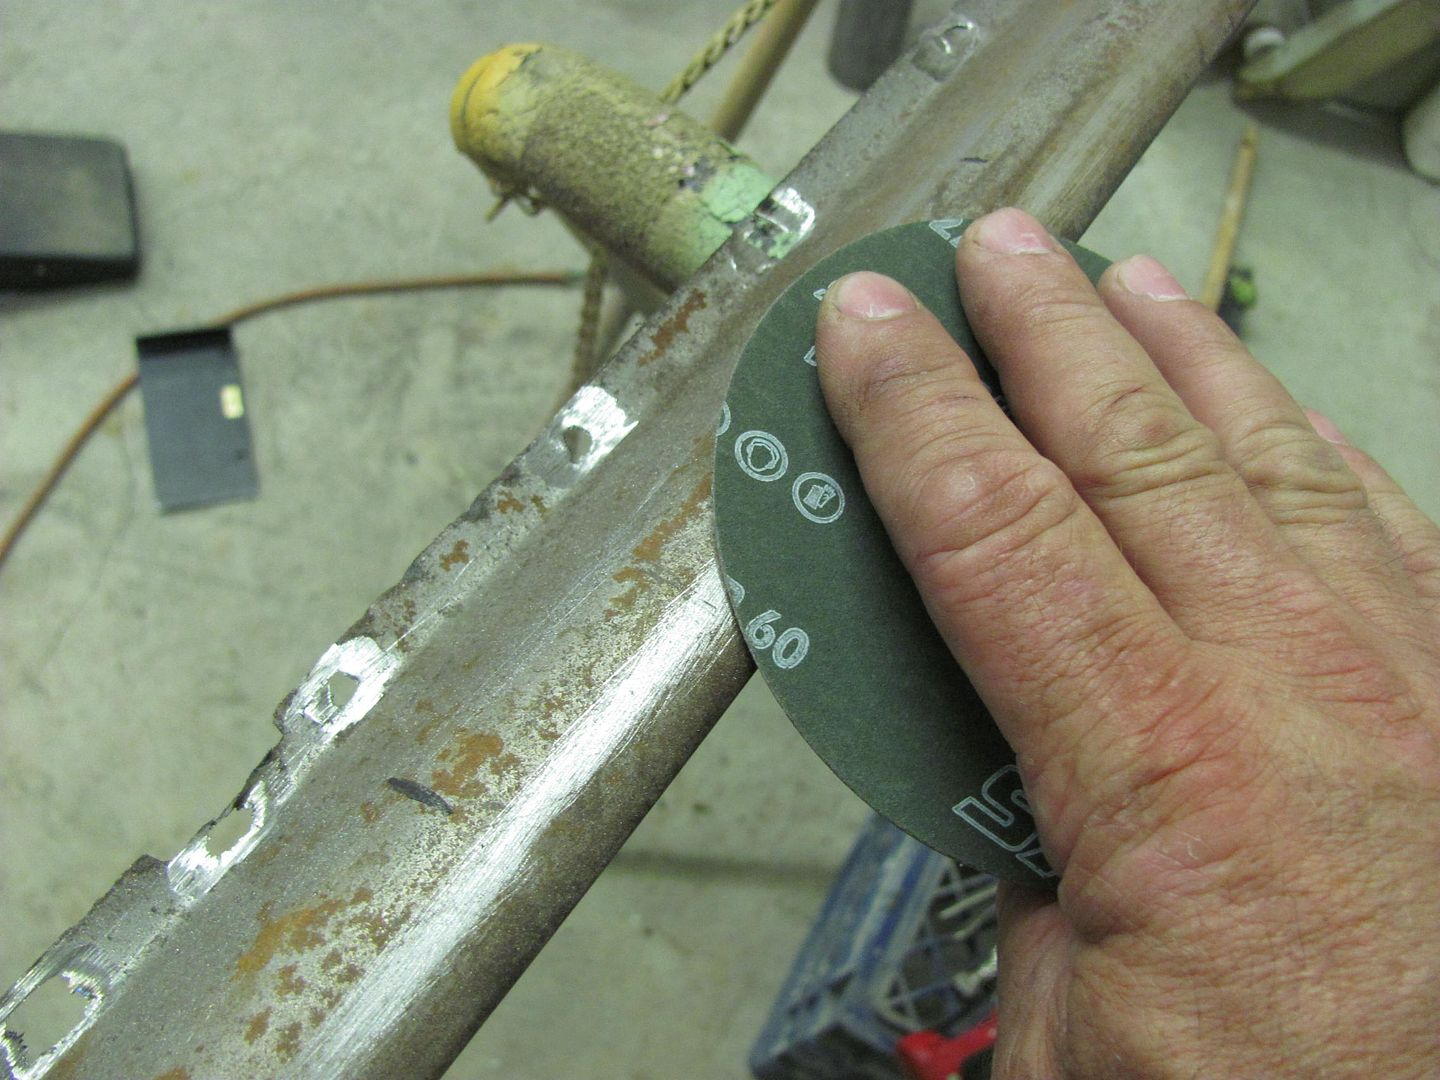
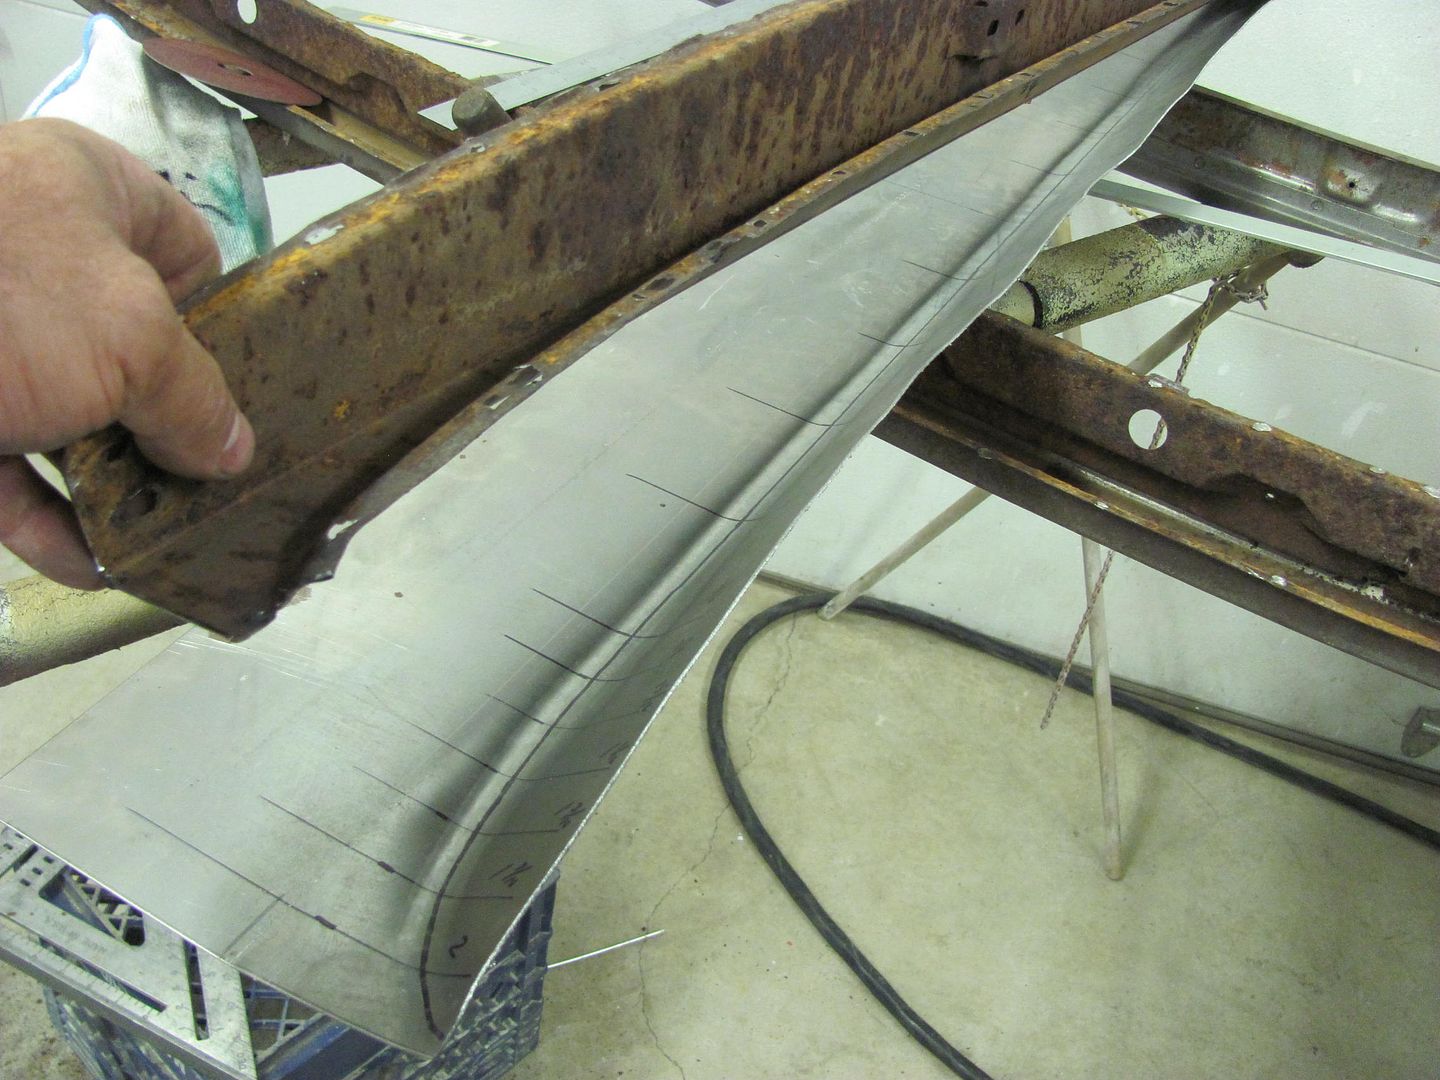
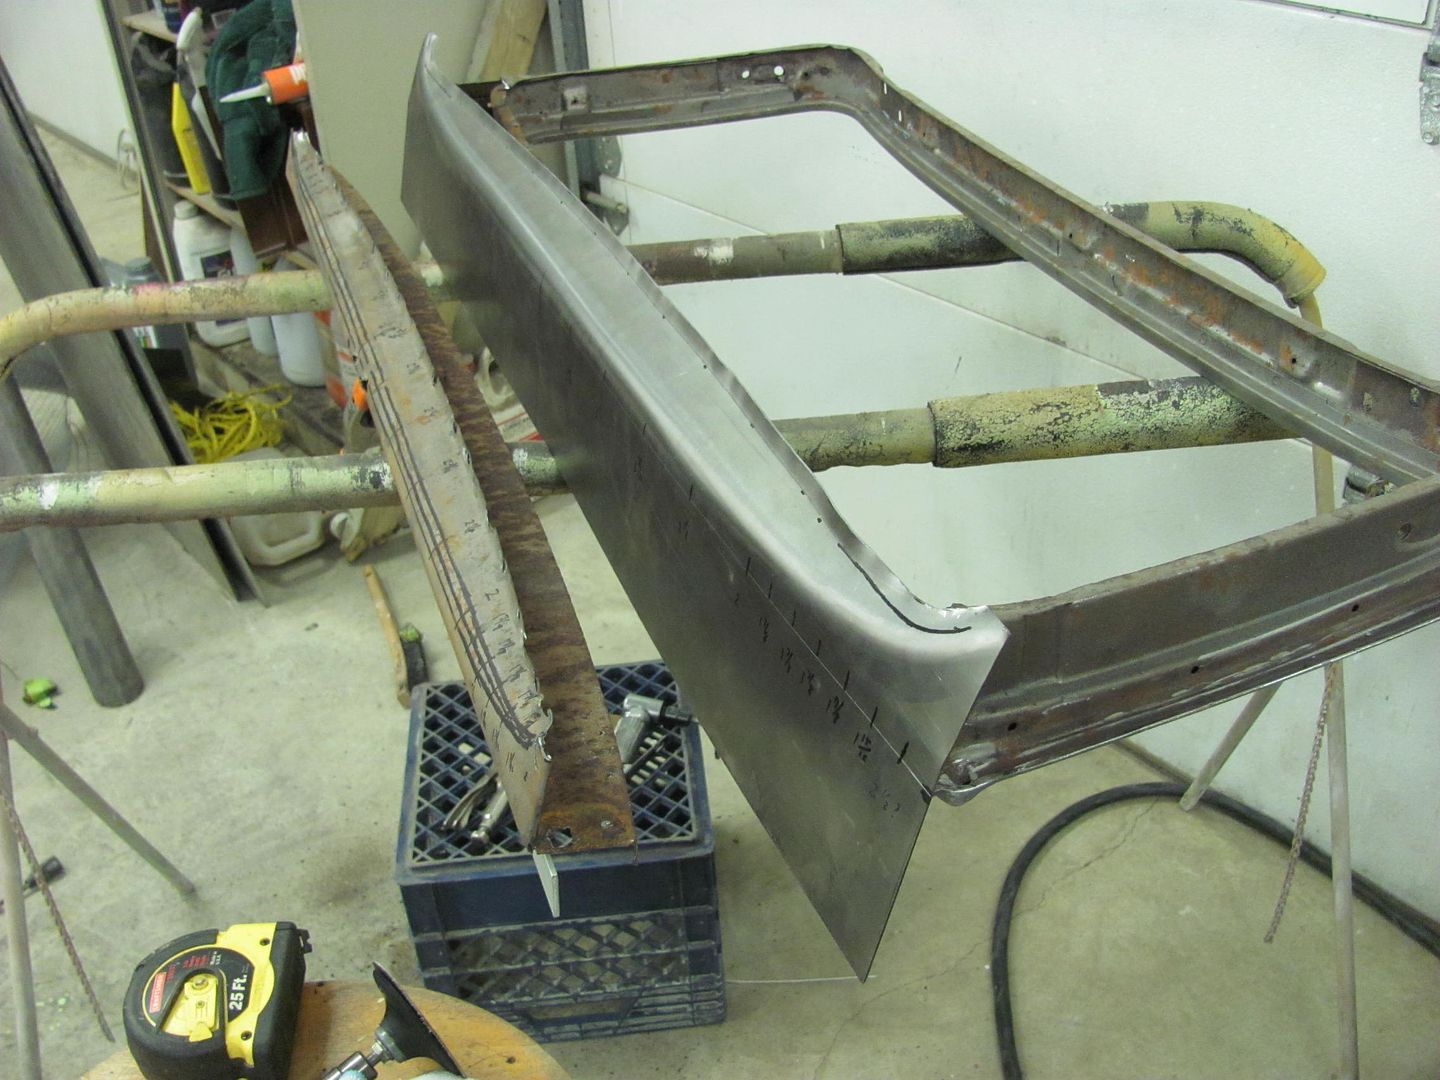
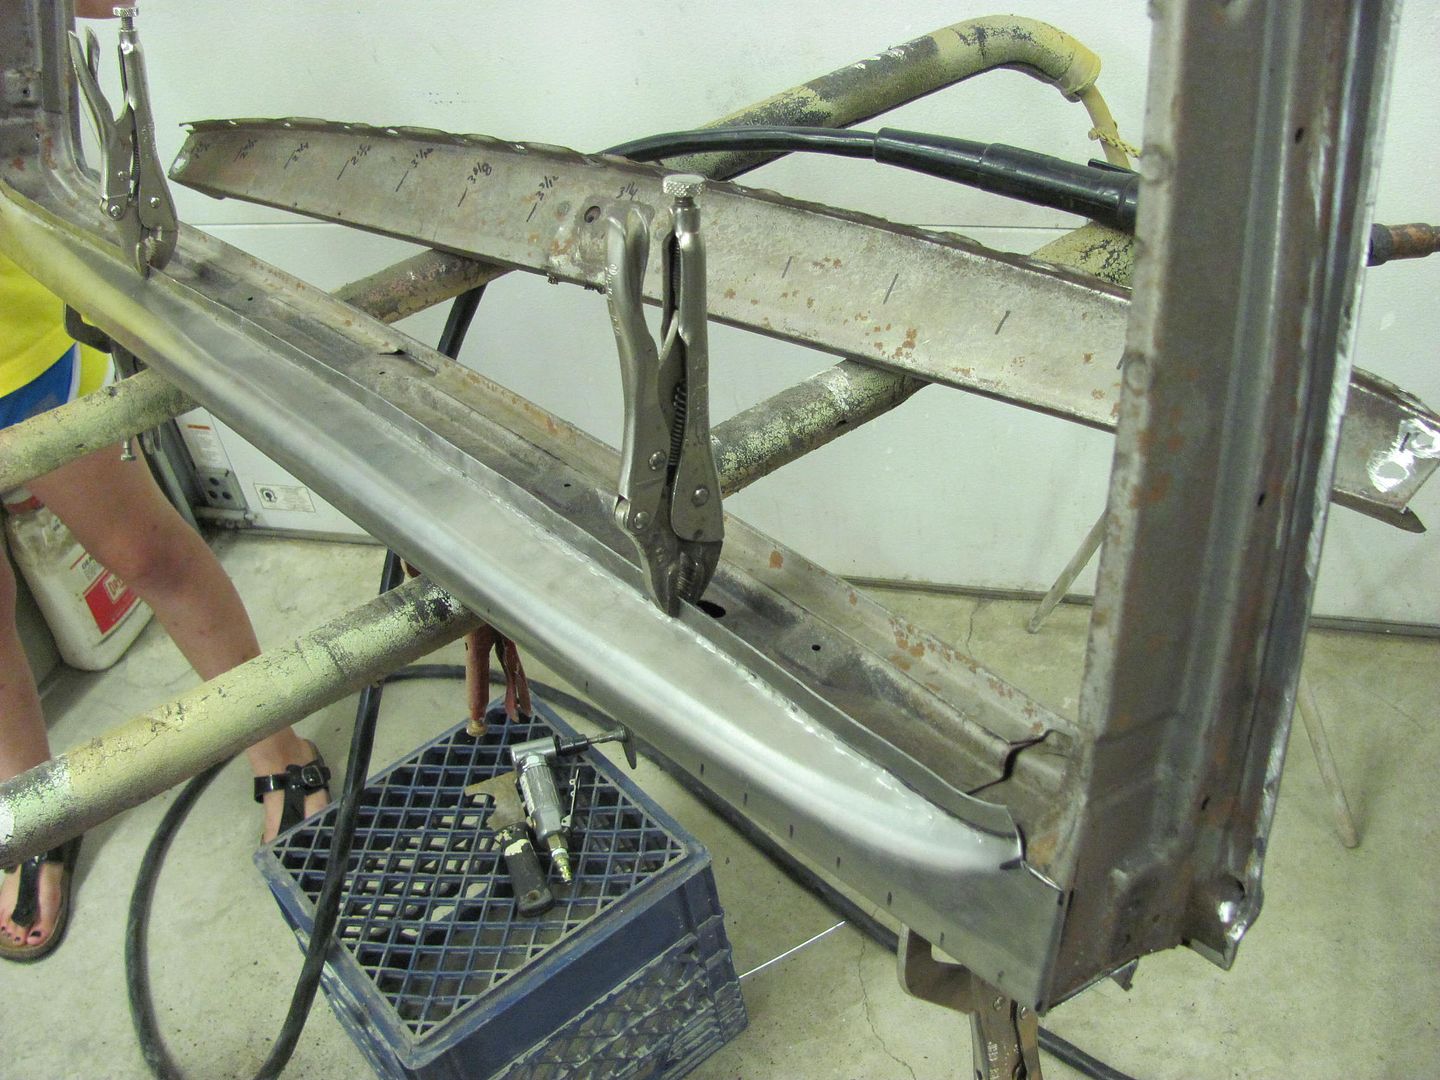
Here's a better look at the shape we'll need...

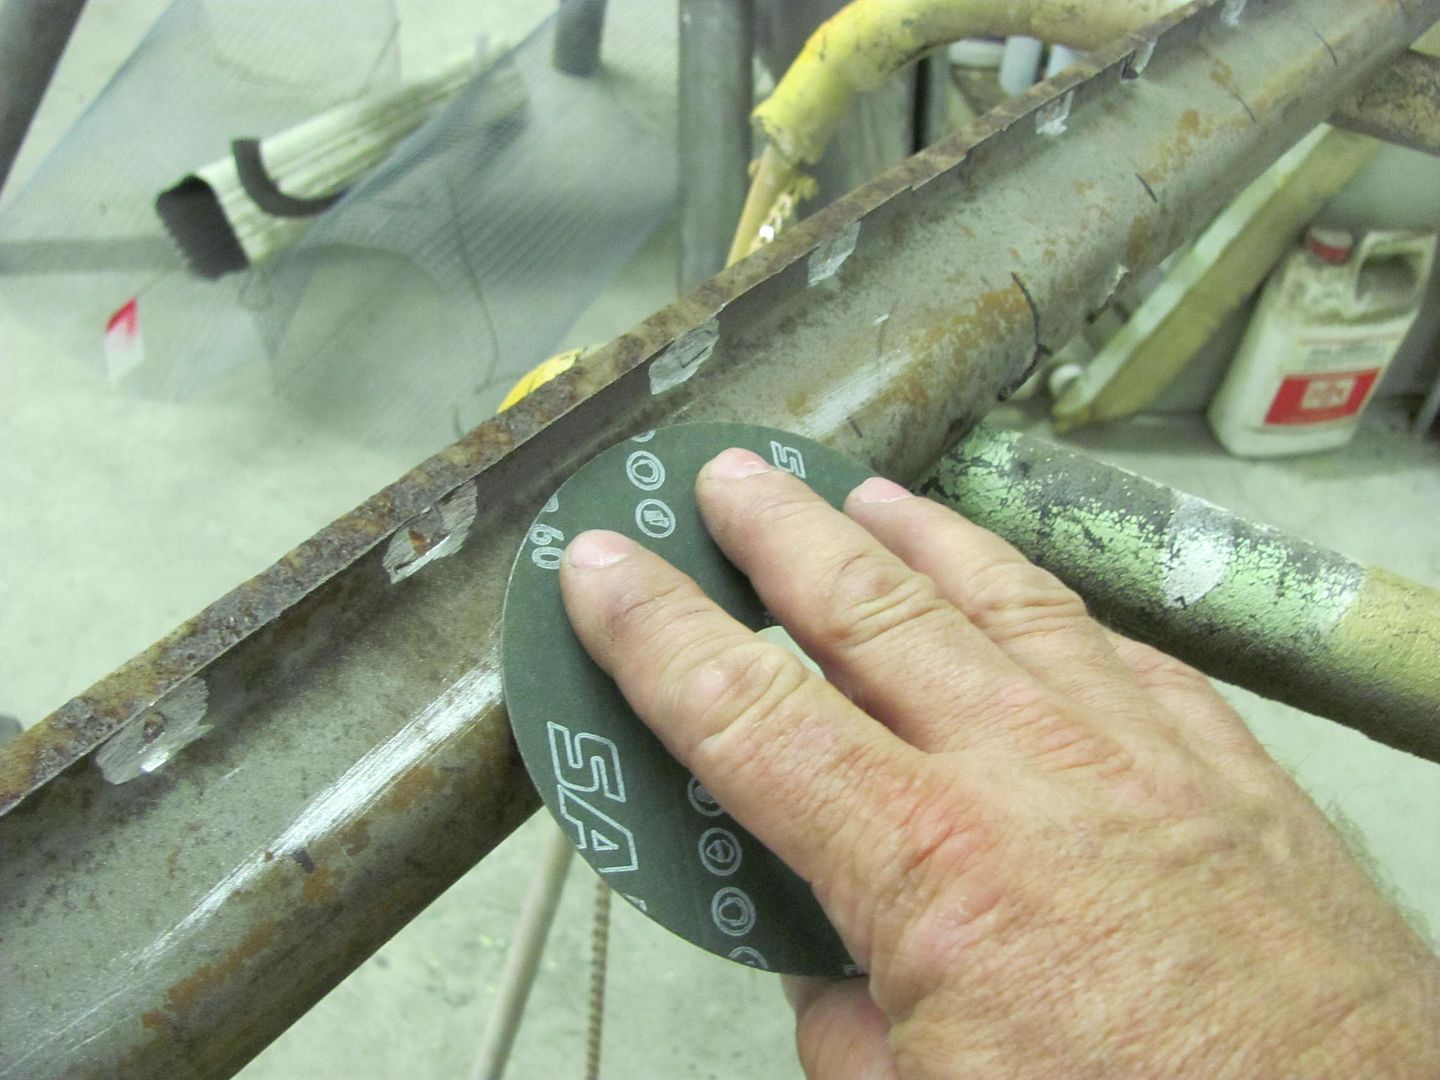
To start the layout on the new metal, I wanted to find the center of the radius along the window opening. By holding a sanding disc on the flats and scuffing, it showed the edges of the radius...
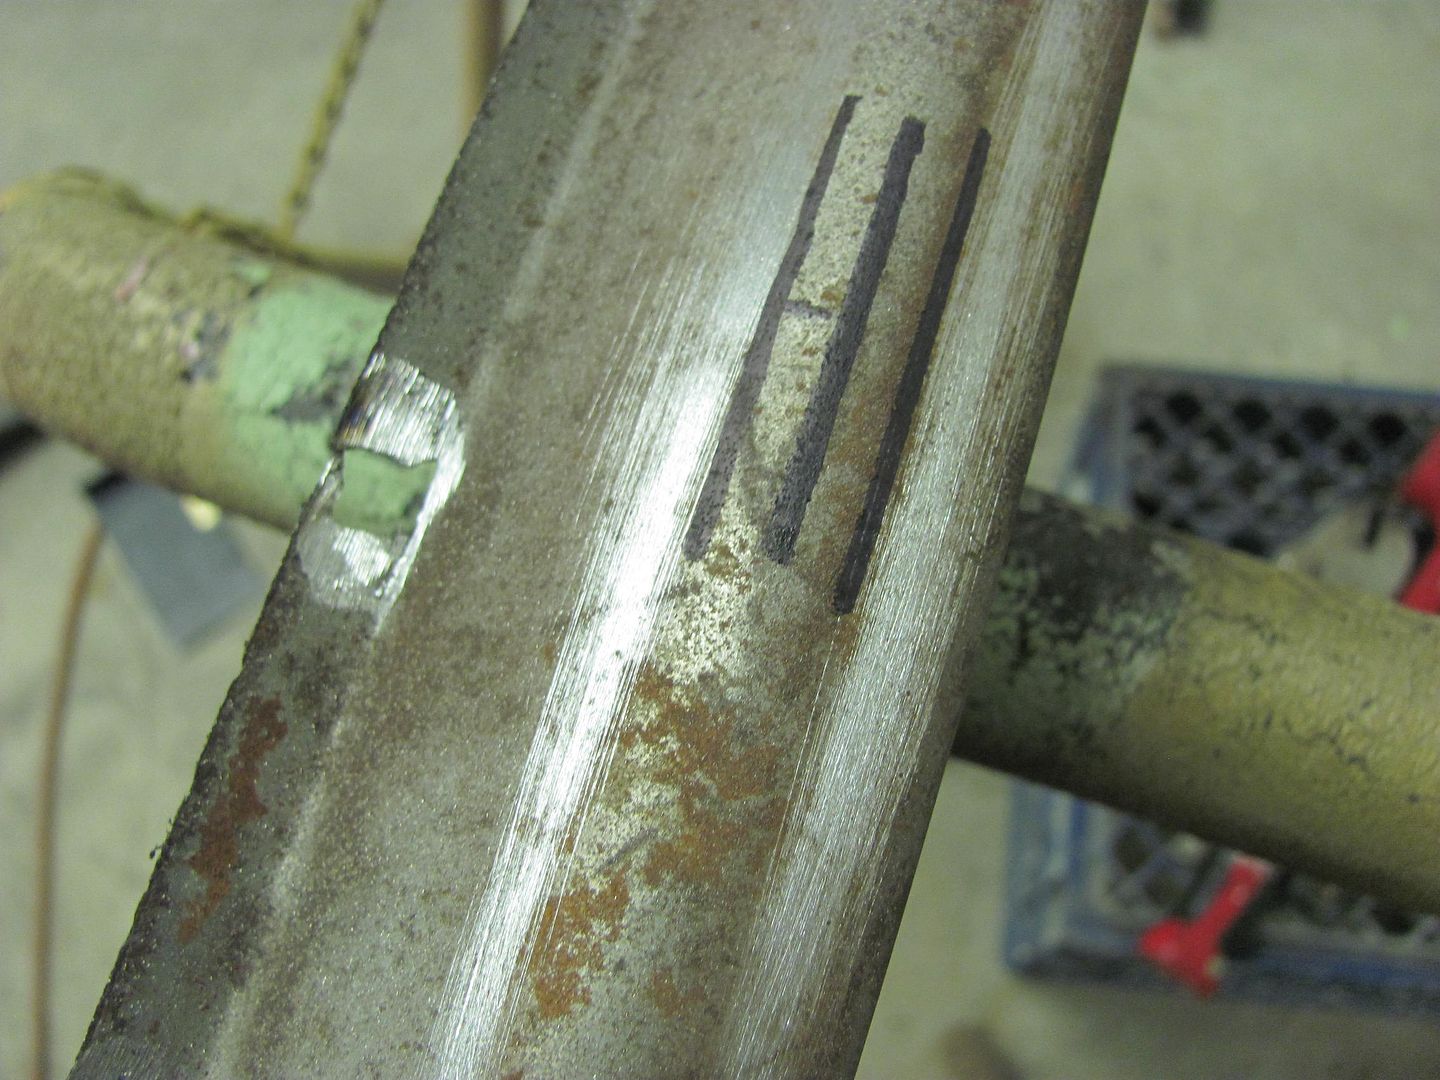
Then laid out a pattern to be able to measure from the bottom crease...
....and transposed it to the new sheet...
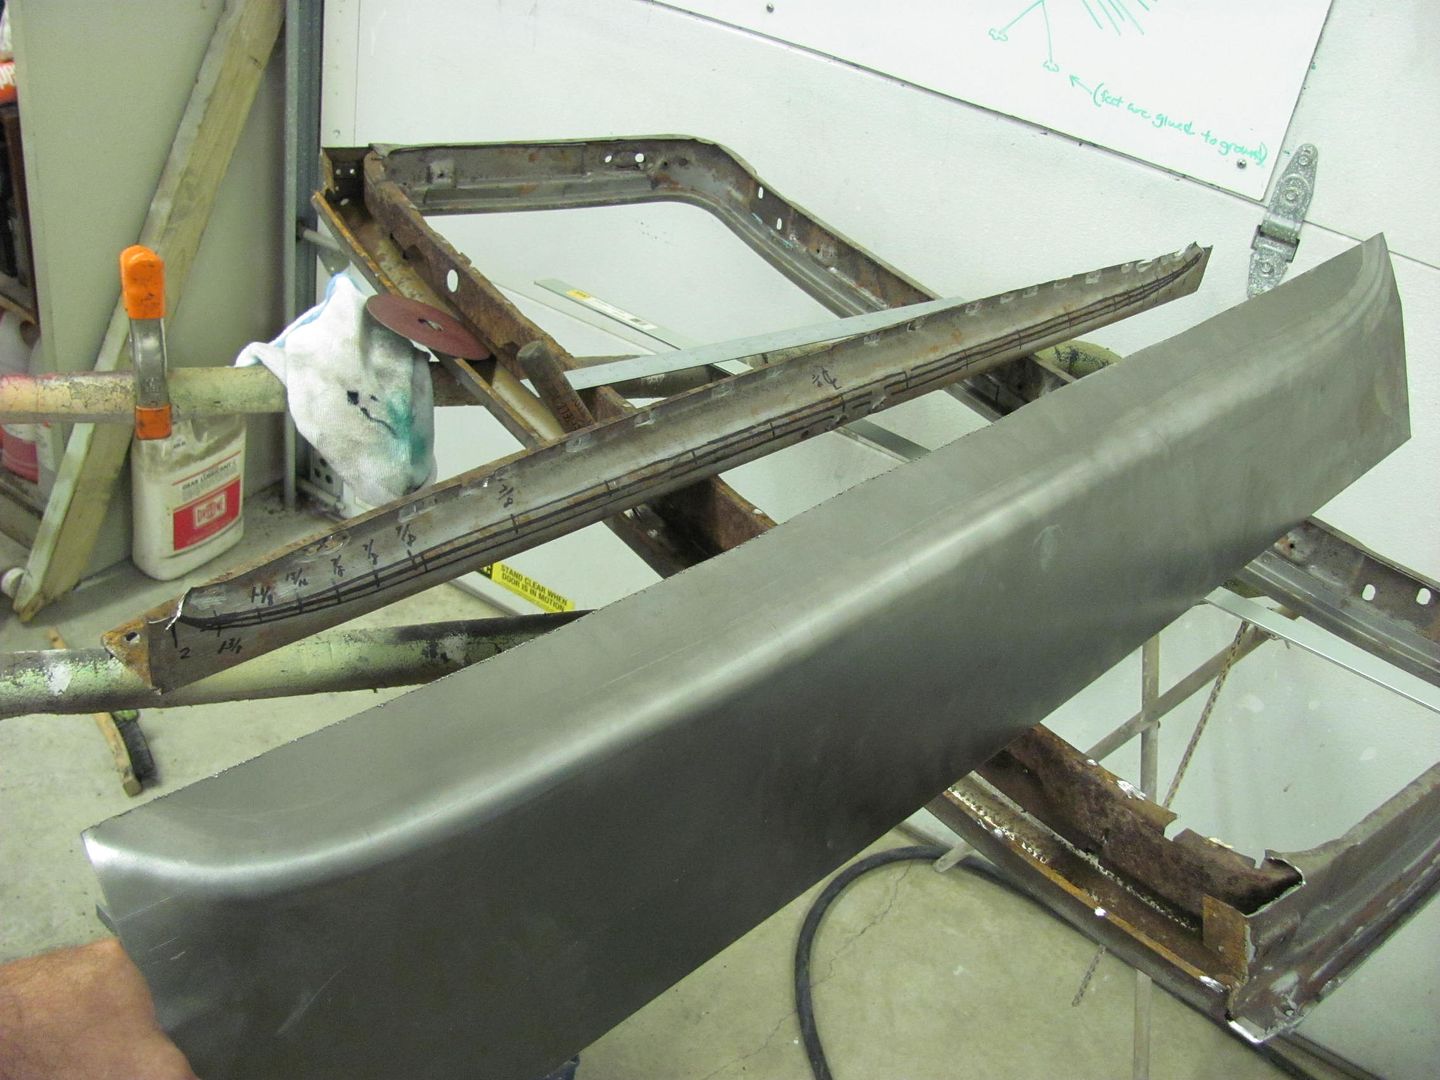
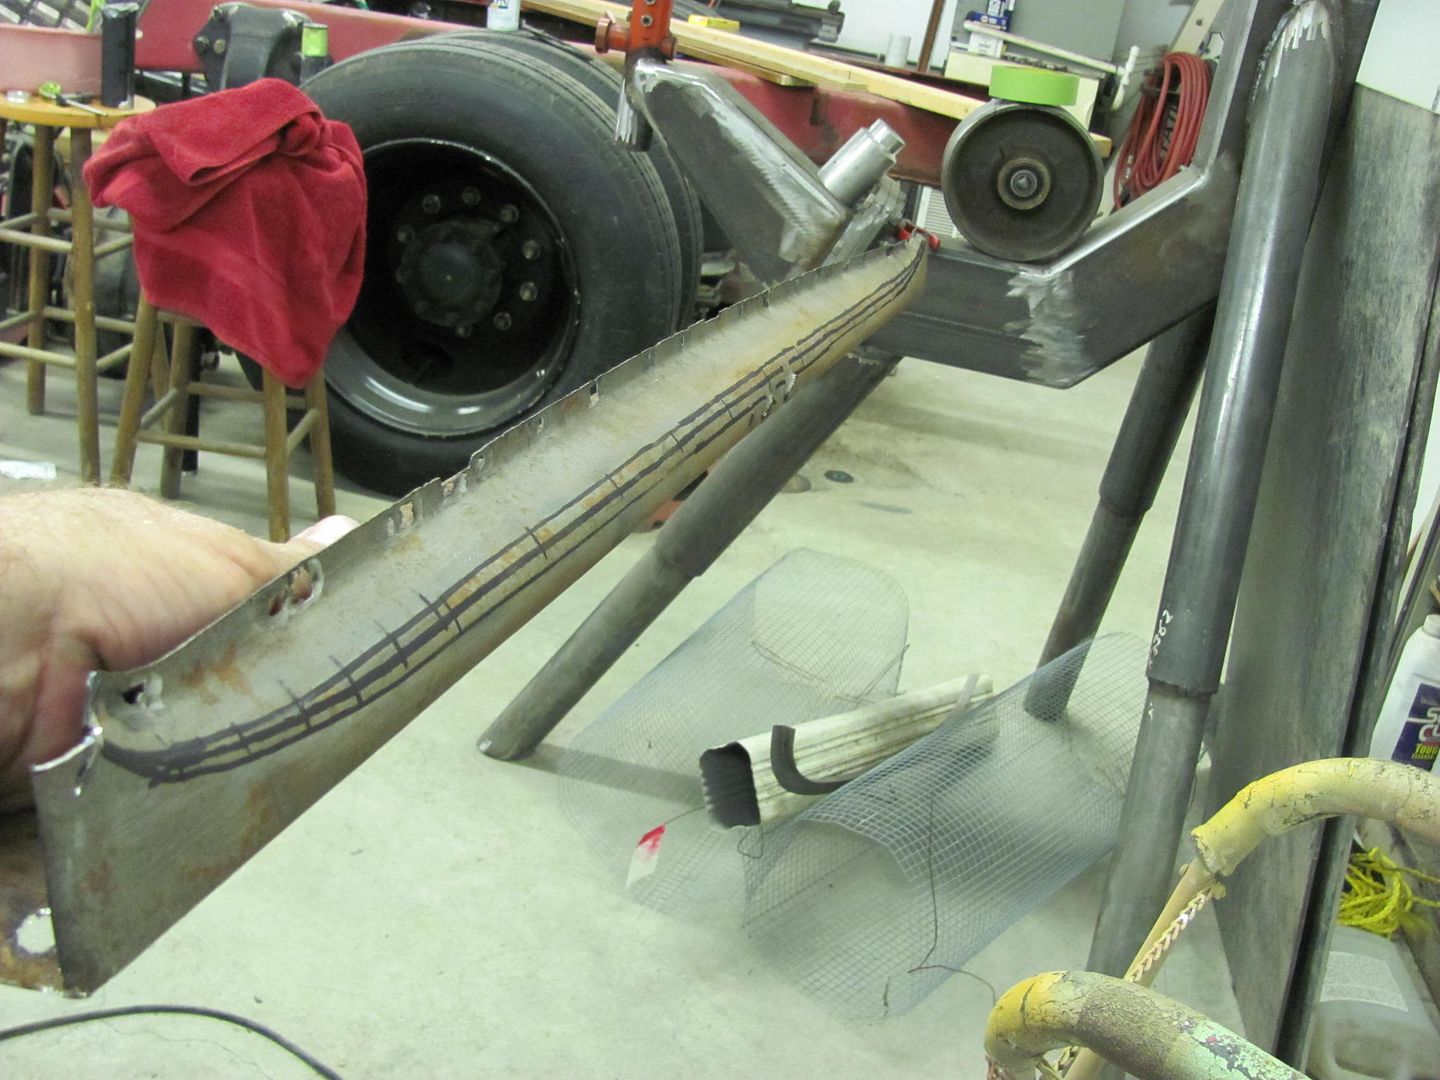
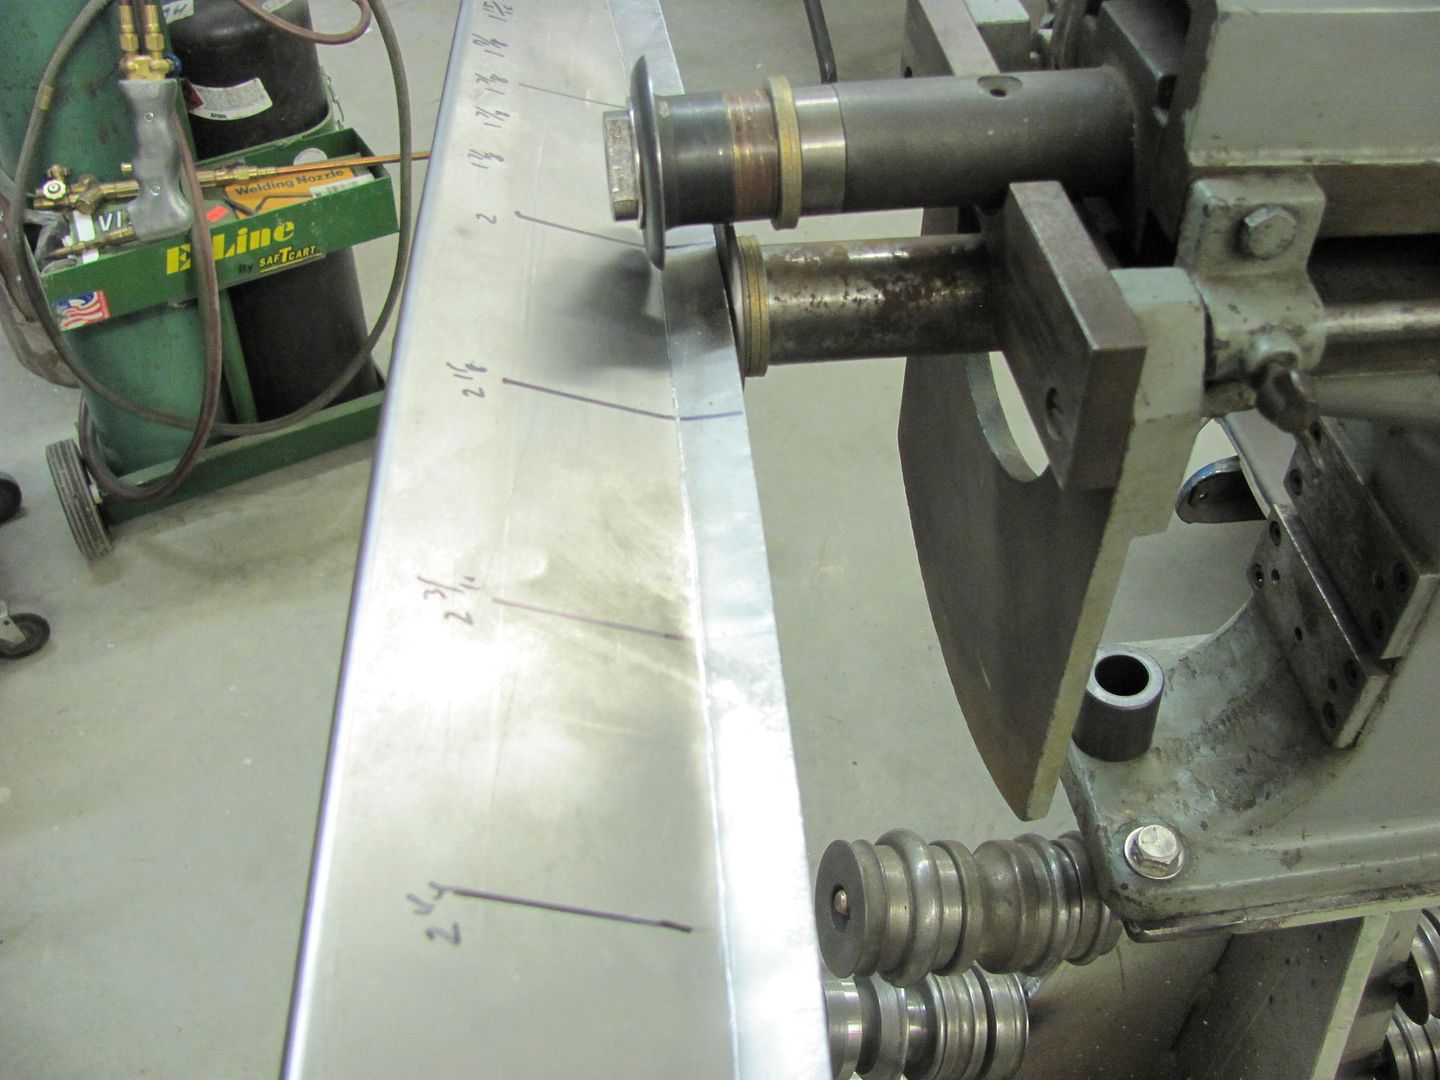
The top edge was trimmed to size and the tipping wheel used to fold over the welding flange...

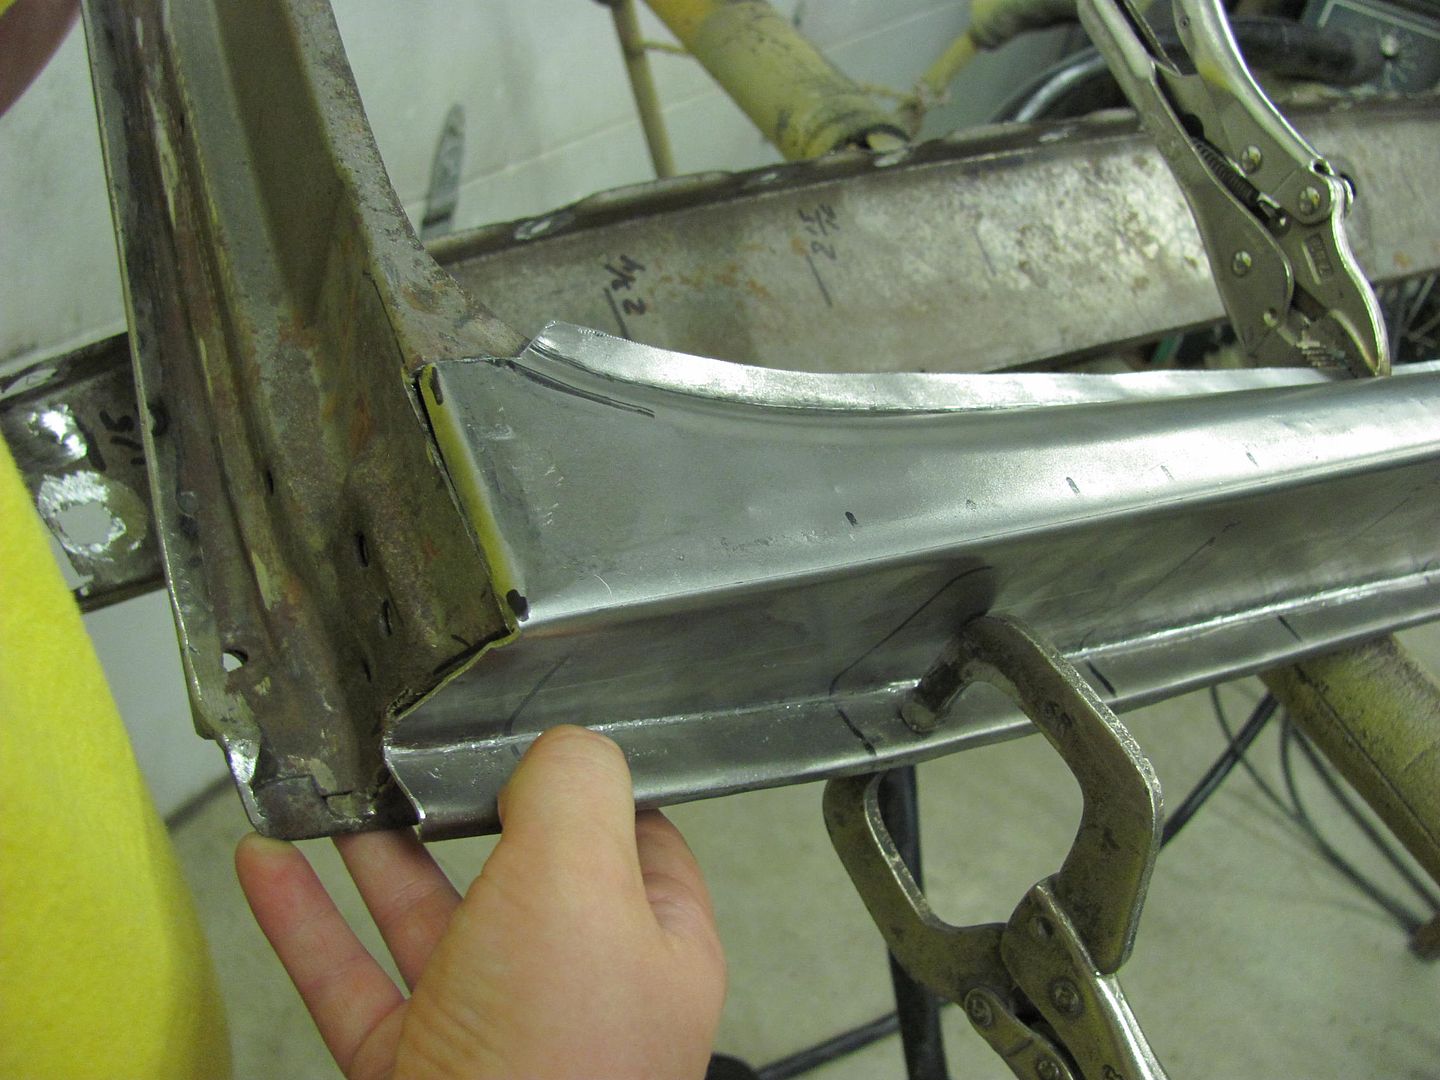
Comparison....
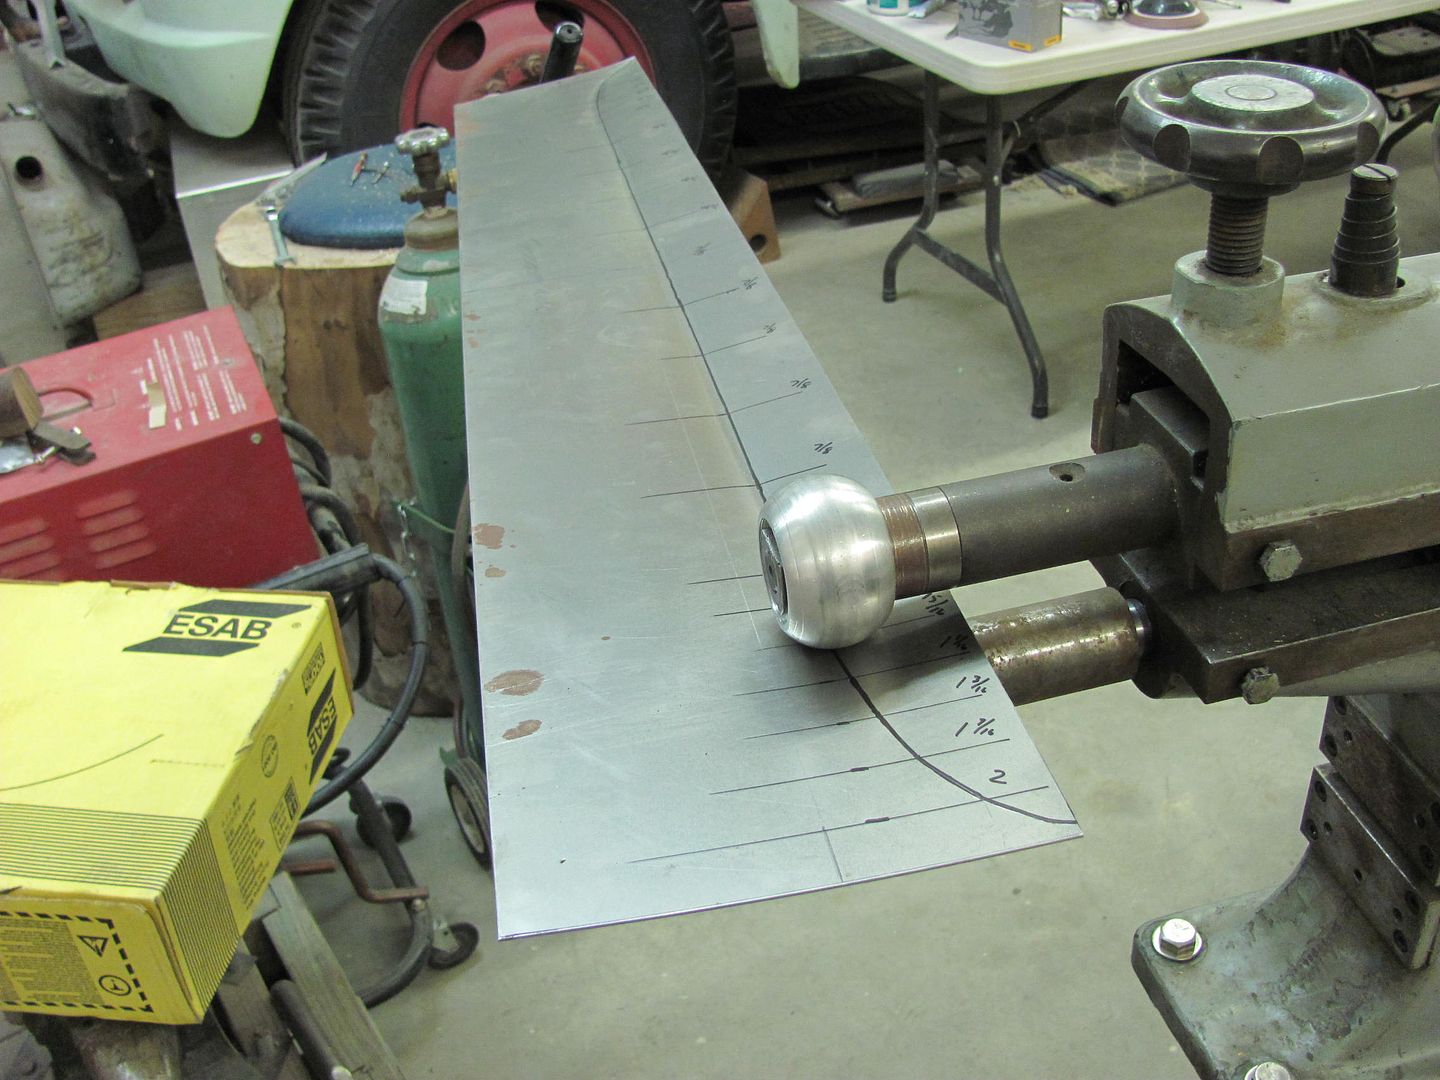
The bottom was marked with the tipping wheel and folded in the apron brake. Then trimmed to size, again using the tipping wheel to fold over the welding flange...
It's real close right now, just needs a bit of tweaking.

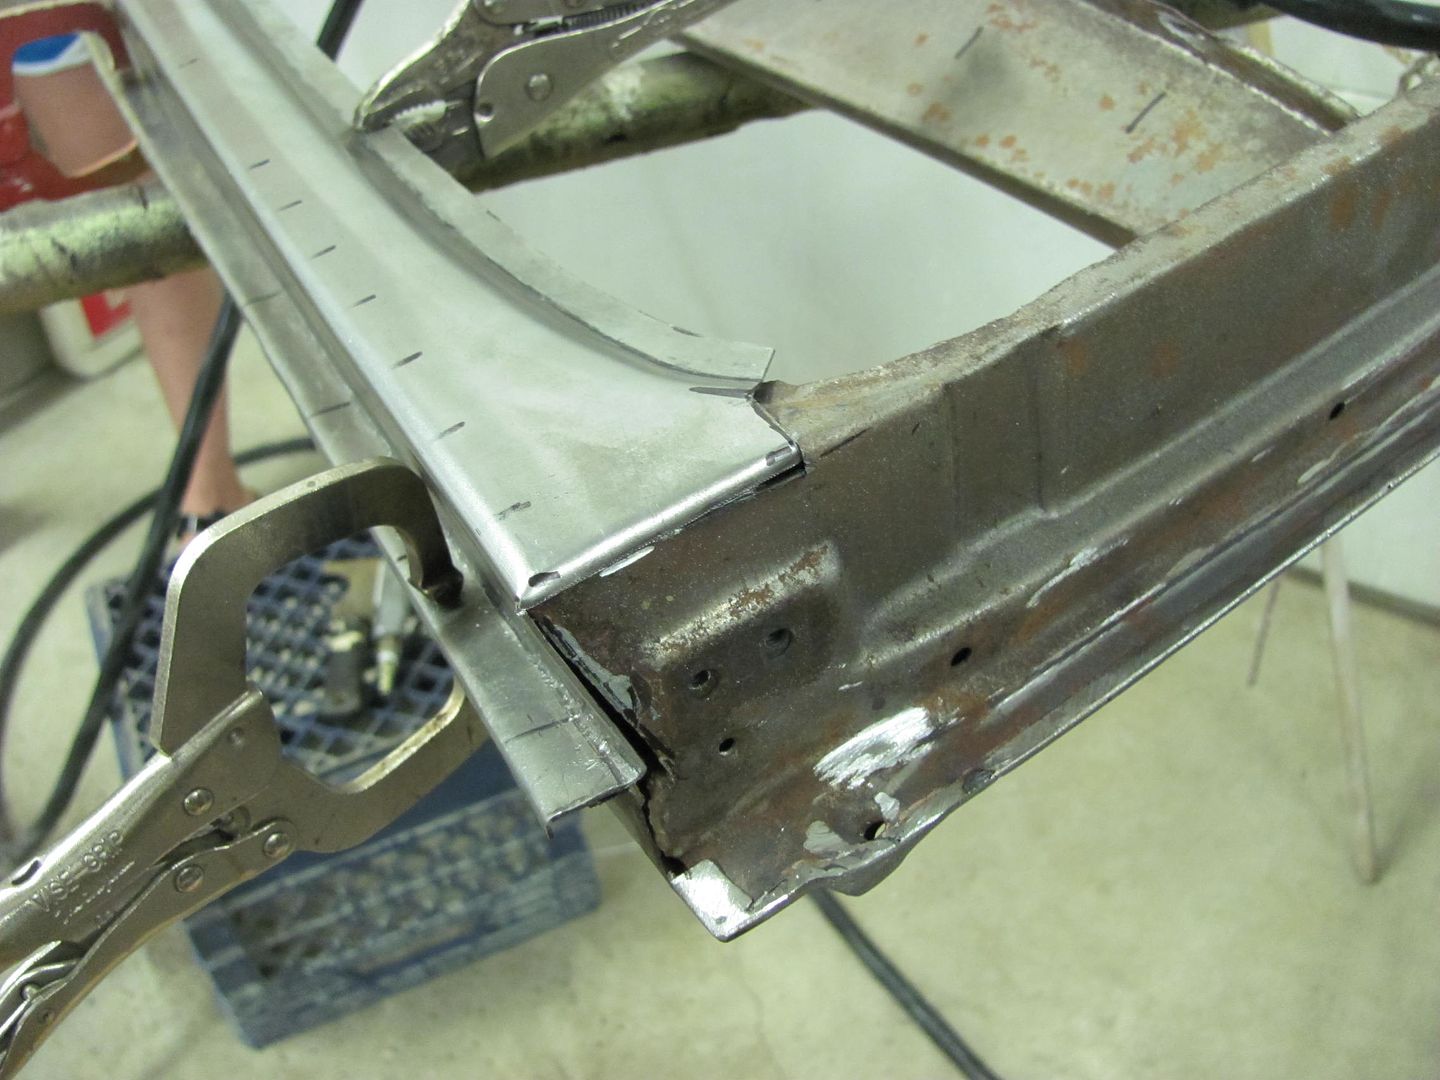

This was made using 18 ga, I think if I had the factory 19 ga metal it would have formed much easier..
The upper tailgate on station wagons are prone to rust issues as water collects in the low areas...
Took the upper gate off...
My tool of choice for removing spot welds is a 3" x 1/16 cutoff wheel. I also use the premium wheels made for stainless steel. It's worth the extra money when you don't have a brown cloud in the shop, like the el cheapo wheels leave, nothing but resin wearing away.
The upper layer of metal will start to turn blue when it gets thin and hot, letting you know you're getting close to the next layer. When you have a blue circle with shiny metal in the center, you are now in the second layer, grind around the blue a bit more and pry the layers apart..
With all the spot welds removed, here's what we find inside...
Note the deep pits. The big problem with just welding a hole closed is you don't know where the next pit is lurking, ready to break through your new paint.
Funny, with all the rust and scale inside, then you find this area of bare steel nice and shiney..
The inside will get media blasted to insure there is no more lurking issues and then epoxy primered before re-assembly.
Here's a better look at the shape we'll need...
To start the layout on the new metal, I wanted to find the center of the radius along the window opening. By holding a sanding disc on the flats and scuffing, it showed the edges of the radius...
Then laid out a pattern to be able to measure from the bottom crease...
....and transposed it to the new sheet...
The top edge was trimmed to size and the tipping wheel used to fold over the welding flange...
Comparison....
The bottom was marked with the tipping wheel and folded in the apron brake. Then trimmed to size, again using the tipping wheel to fold over the welding flange...
It's real close right now, just needs a bit of tweaking.
This was made using 18 ga, I think if I had the factory 19 ga metal it would have formed much easier..


