


93 computer module

Thread Starter
|
Mountain Pass

Joined: Feb 2003
Posts: 184
Likes: 0
93 computer module
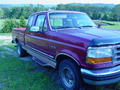
93 F150, 302,FI, auto, 2wd
When the battery is disconnected and reconnect is there a timeframe before you turn the ignition on to start the engine to reset the computer back correctly. Seems after I disconnected and reconnected the battery the engine is not idling as fast and believe the power loss effected the comupter module memory.
Also what is invovled to remove and replace the steering spindle top bushing?
Thanks
When the battery is disconnected and reconnect is there a timeframe before you turn the ignition on to start the engine to reset the computer back correctly. Seems after I disconnected and reconnected the battery the engine is not idling as fast and believe the power loss effected the comupter module memory.
Also what is invovled to remove and replace the steering spindle top bushing?
Thanks

Posting Guru
Joined: Mar 2002
Posts: 1,942
Likes: 3
From: Willamette Valley, Oregon
after disconnecting the battery, the computer (PCM) needs a series of drive cycles to learn driving strategies again. So until it has these drive cycles, the computer is in what is called learning strategies which could change the way the drivetrain drives and acts.
As for the spindle, someone with experience on that will post here soon.
As for the spindle, someone with experience on that will post here soon.

Post Fiend
Joined: Oct 2003
Posts: 6,214
Likes: 13
From: New Jersey
let the truck idle for a few minutes, rev it once in neutral, then take it for a ride to a highway and open it up and accelerate hard.
The computer has relearned enough that it will run fine going forward, fine tuning along the way.
It really doesn't take zillions of miles for the computer to relearn the hardware.
The top bearing in the steering column is removed like most bearings - a bearing puller. If it's really warn, it might even fall out. Mine did when I replaced it 2 years ago. I turned the column upside down and it fell out.
The computer has relearned enough that it will run fine going forward, fine tuning along the way.
It really doesn't take zillions of miles for the computer to relearn the hardware.
The top bearing in the steering column is removed like most bearings - a bearing puller. If it's really warn, it might even fall out. Mine did when I replaced it 2 years ago. I turned the column upside down and it fell out.
Thread Starter
|
Mountain Pass
Joined: Feb 2003
Posts: 184
Likes: 0
Originally Posted by frederic
let the truck idle for a few minutes, rev it once in neutral, then take it for a ride to a highway and open it up and accelerate hard.
The computer has relearned enough that it will run fine going forward, fine tuning along the way.
It really doesn't take zillions of miles for the computer to relearn the hardware.
The top bearing in the steering column is removed like most bearings - a bearing puller. If it's really warn, it might even fall out. Mine did when I replaced it 2 years ago. I turned the column upside down and it fell out.
The computer has relearned enough that it will run fine going forward, fine tuning along the way.
It really doesn't take zillions of miles for the computer to relearn the hardware.
The top bearing in the steering column is removed like most bearings - a bearing puller. If it's really warn, it might even fall out. Mine did when I replaced it 2 years ago. I turned the column upside down and it fell out.
Posting Guru
Joined: Mar 2002
Posts: 1,942
Likes: 3
From: Willamette Valley, Oregon
sounds like the upper ball joint. They are upper and lower on the knuckle assembly.
.................................................. .....upper balljoint
.................................................. .. /
this being the knuckle end------>[
.................................................. ...\
.................................................. .....lower balljoint
.................................................. .....upper balljoint
.................................................. .. /
this being the knuckle end------>[
.................................................. ...\
.................................................. .....lower balljoint
Last edited by Ponyracer; Oct 22, 2005 at 09:56 PM.
Fleet Owner


Joined: Aug 2005
Posts: 23,667
Likes: 301
From: Easton,Ks
Wheel Spindle, F-150, F-250, F-350 4x2
Removal
1. Raise the front of the vehicle and install safety stands.
2. Remove the wheel and tire assembly.
3. Remove the disc brake caliper (2B120) from the rotor and wire it out of the way.
4. Remove the dust cap, cotter pin, nut retainer, nut, washer, and front wheel bearing (1216).
5. Remove the rotor from the front wheel spindle (3105).
6. Remove bearing cone and roller (1201) and wheel hub grease seal (1190). Discard the seal.
7. Remove front disc brake rotor shield (2K004).
8. Disconnect the steering linkage from the integral front wheel spindle and spindle arm by removing the cotter pin and nut and then removing the front wheel spindle tie rod from the spindle arm with Tie Rod End Remover TOOL-3290-D or equivalent.
9. Remove the cotter pin and castellated nut from the lower ball joint stud.
10. Remove the nut from the axle clamp bolt and remove the bolt from the axle.
11. Remove the camber adjuster from the upper ball joint stud and axle beam. If required, use Ball Joint Removing Tool D81T-3010-B or equivalent to remove adjuster.
12. CAUTION: Do not use a pickle fork to separate the ball joint from the axle as this will damage the seal and the ball joint socket.
Strike the inside area of the axle as shown to pop lower ball joints loose from the axle beam.
13.Remove the front wheel spindle and ball joint from the axle.

Installation
1. Place the front wheel spindle and the ball joints into the axle.
2. Install lower ball joint stud nut and tighten to 113-153 N-m (83-112 lb-ft) and continue tightening the castellated nut until it lines up with the hole in the stud. Install the cotter pin.
3. NOTE: If camber adjustment is necessary, special adjusters must be installed.
Install the camber adjuster in the upper front wheel spindle over the upper ball joint stud. Align adjuster properly.
4. Install the clamp bolt and nut into the axle boss. Tighten the nut to 68-92 N-m (50-67 lb-ft).
5. Install the front disc brake rotor shield.
6. Pack the bearing cone and roller and front wheel bearing with a lithium-base grease, Premium Long-Life Grease XG-1-C or -K or equivalent meeting Ford specification ESA-M1C75-B. Use a bearing packer. If a bearing packer is unavailable, pack the bearing cone by hand working the grease through the cage behind the rollers.
7. Install the bearing cone and roller and wheel hub grease seal as described in this section.
8. Install the hub and rotor on the front wheel spindle.
9. Install the front wheel bearing, washer, and nut. Adjust bearing end play.
10. Install the nut retainer, cotter pin and dust cap.
11. Install the disc brake caliper.
12. Connect the steering linkage to the front wheel spindle. Tighten the nut to 76-104 N-m (56-76 lb-ft) and advance the nut as required for installation of the cotter pin.
13. Install the wheel and tire assembly.
14. Lower the vehicle.
15. Check, and if necessary, adjust the toe setting.
16. Check the brakes for proper operation.
Removal
1. Raise the front of the vehicle and install safety stands.
2. Remove the wheel and tire assembly.
3. Remove the disc brake caliper (2B120) from the rotor and wire it out of the way.
4. Remove the dust cap, cotter pin, nut retainer, nut, washer, and front wheel bearing (1216).
5. Remove the rotor from the front wheel spindle (3105).
6. Remove bearing cone and roller (1201) and wheel hub grease seal (1190). Discard the seal.
7. Remove front disc brake rotor shield (2K004).
8. Disconnect the steering linkage from the integral front wheel spindle and spindle arm by removing the cotter pin and nut and then removing the front wheel spindle tie rod from the spindle arm with Tie Rod End Remover TOOL-3290-D or equivalent.
9. Remove the cotter pin and castellated nut from the lower ball joint stud.
10. Remove the nut from the axle clamp bolt and remove the bolt from the axle.
11. Remove the camber adjuster from the upper ball joint stud and axle beam. If required, use Ball Joint Removing Tool D81T-3010-B or equivalent to remove adjuster.
12. CAUTION: Do not use a pickle fork to separate the ball joint from the axle as this will damage the seal and the ball joint socket.
Strike the inside area of the axle as shown to pop lower ball joints loose from the axle beam.
13.Remove the front wheel spindle and ball joint from the axle.
Installation
1. Place the front wheel spindle and the ball joints into the axle.
2. Install lower ball joint stud nut and tighten to 113-153 N-m (83-112 lb-ft) and continue tightening the castellated nut until it lines up with the hole in the stud. Install the cotter pin.
3. NOTE: If camber adjustment is necessary, special adjusters must be installed.
Install the camber adjuster in the upper front wheel spindle over the upper ball joint stud. Align adjuster properly.
4. Install the clamp bolt and nut into the axle boss. Tighten the nut to 68-92 N-m (50-67 lb-ft).
5. Install the front disc brake rotor shield.
6. Pack the bearing cone and roller and front wheel bearing with a lithium-base grease, Premium Long-Life Grease XG-1-C or -K or equivalent meeting Ford specification ESA-M1C75-B. Use a bearing packer. If a bearing packer is unavailable, pack the bearing cone by hand working the grease through the cage behind the rollers.
7. Install the bearing cone and roller and wheel hub grease seal as described in this section.
8. Install the hub and rotor on the front wheel spindle.
9. Install the front wheel bearing, washer, and nut. Adjust bearing end play.
10. Install the nut retainer, cotter pin and dust cap.
11. Install the disc brake caliper.
12. Connect the steering linkage to the front wheel spindle. Tighten the nut to 76-104 N-m (56-76 lb-ft) and advance the nut as required for installation of the cotter pin.
13. Install the wheel and tire assembly.
14. Lower the vehicle.
15. Check, and if necessary, adjust the toe setting.
16. Check the brakes for proper operation.
Last edited by subford; Oct 23, 2005 at 07:02 AM.
Fleet Owner
Joined: Aug 2005
Posts: 23,667
Likes: 301
From: Easton,Ks
Ball Joint, Upper and Lower, F-150
Removal
1. Remove the front wheel spindle (3105) and ball joint assembly from the axle.
2. NOTE: Lower ball joint must be removed first.
Install the front wheel spindle in a vise and remove the snap ring from the lower ball joint.
3. Remove the lower ball joint from the front wheel spindle. For F150 and Bronco, use U-Joint Tool T74P-4635-C and Receiver Cup D81T-3010-A5 or equivalent.
4. Turn the forcing screw clockwise until the ball joint is removed from the front wheel spindle.
5. CAUTION: Do not heat the ball joint or the front wheel spindle to aid in removal.
6. Assemble U-Joint Tool and cup on the upper ball joint, and turn forcing screw clockwise until ball joint is removed from the front wheel spindle.
Installation
1. NOTE: Upper ball joint must be installed into the front wheel spindle first.
NOTE: Individual ball joint tools are included in Ball Joint Adapter Set D81T-3010-A or equivalent.
CAUTION: Do not heat the ball joint or axle to aid in installation.
To install the upper ball joint, assemble C-Frame Assembly, Ball Joint Receiver Cup D81T-3010-A5 and Installation Cup D81T-3010-A1 and D81T-3010-A3 or equivalents inside cup D81T-3010-A4 or equivalent in position on the front wheel spindle.
2. Turn forcing screw clockwise until ball joint is seated.
3. To install the lower ball joint, assemble the C-frame in position on the front wheel spindle and repeat Step 1.
4. Install the snap ring onto the ball joint.
5. Install the spindle and ball joint assembly.
Removal
1. Remove the front wheel spindle (3105) and ball joint assembly from the axle.
2. NOTE: Lower ball joint must be removed first.
Install the front wheel spindle in a vise and remove the snap ring from the lower ball joint.
3. Remove the lower ball joint from the front wheel spindle. For F150 and Bronco, use U-Joint Tool T74P-4635-C and Receiver Cup D81T-3010-A5 or equivalent.
4. Turn the forcing screw clockwise until the ball joint is removed from the front wheel spindle.
5. CAUTION: Do not heat the ball joint or the front wheel spindle to aid in removal.
6. Assemble U-Joint Tool and cup on the upper ball joint, and turn forcing screw clockwise until ball joint is removed from the front wheel spindle.
Installation
1. NOTE: Upper ball joint must be installed into the front wheel spindle first.
NOTE: Individual ball joint tools are included in Ball Joint Adapter Set D81T-3010-A or equivalent.
CAUTION: Do not heat the ball joint or axle to aid in installation.
To install the upper ball joint, assemble C-Frame Assembly, Ball Joint Receiver Cup D81T-3010-A5 and Installation Cup D81T-3010-A1 and D81T-3010-A3 or equivalents inside cup D81T-3010-A4 or equivalent in position on the front wheel spindle.
2. Turn forcing screw clockwise until ball joint is seated.
3. To install the lower ball joint, assemble the C-frame in position on the front wheel spindle and repeat Step 1.
4. Install the snap ring onto the ball joint.
5. Install the spindle and ball joint assembly.
Trending Topics
Thread Starter
|
Mountain Pass
Joined: Feb 2003
Posts: 184
Likes: 0
FTE Stories
Ford Trucks for Ford Truck Enthusiasts

Top 10 Most Expensive Ford Trucks Ever Sold on Bring a Trailer
Joe Kucinski
2027 Ford Super Duty Buyer's Guide (Every Model, Engine, & Package)
Brett Foote
Top 10 Ford Truck Tragedies
Joe Kucinski
AEV FXL Super Duty - the Super Duty Raptor Ford Doesn't Make
Brett Foote
Lobo Vs Lobo: Proof the F-150 Lobo Should Be Even Lower!
Michael S. Palmer
Ford's 2001 Explorer Sportsman Concept Looks For a New Home
Verdad Gallardo
10 Best Ford Truck Engines We Miss the Most!
Joe Kucinski
2026 Shelby F-150 Off-Road: Better Than a Raptor R?
Brett Foote

