


Interior Cootie Bobbin PICs

Thread Starter
|
Post Fiend


Joined: Feb 2001
Posts: 6,328
Likes: 124
From: Iowa
Interior Cootie Bobbin PICs
Here's my back wall. Fabbed with 1/8 tempered hardboard, 20 guage sheetmetal corners and a little fiberglass for the speaker pods. Could be done seamless with fabric if you do not require access to audio components. I covered with matching carpet which would be difficult to do seamless.

Corner, note I have carpet seam for panel removal as I require access

Corners prior to fiberglass

More interior creations later.
Corner, note I have carpet seam for panel removal as I require access
Corners prior to fiberglass
More interior creations later.
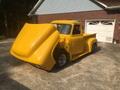
old and in the way

Joined: Jul 1997
Posts: 5,928
Likes: 1,055
From: Lovely Hueytown Alabama

Hey D ?????
I thought you had all the innards finished.... rod doors panels ??? you're not doing a John Boy redu are you
guess that volare stuff on the second shelf up must be redu - o- active or sumthin ???
skins look great.... when I'm ready I'll get your patterns for the backboards... you do have patterns don't you ???
later
John (cool, but still neckid on the insides)
I thought you had all the innards finished.... rod doors panels ??? you're not doing a John Boy redu are you
guess that volare stuff on the second shelf up must be redu - o- active or sumthin ???
skins look great.... when I'm ready I'll get your patterns for the backboards... you do have patterns don't you ???
later
John
(cool, but still neckid on the insides)
Trending Topics

Postmaster
Joined: Mar 2000
Posts: 3,730
Likes: 13
From: Waynesville, OH
Originally Posted by himmelberg
It may be hard, Ferg, but the only way to get that lowrider look he's after. h

Did I miss the "cootie bobbin'" reference while I was away, or is my remembery failing me?
FTE Stories
Ford Trucks for Ford Truck Enthusiasts

Top 6 Best Deals Available on New Fords & Lincolns Right Now
Brett Foote
This Hennessey Takes the Expedition Tremor's Off-Roading Capability to the Next Level
Verdad Gallardo
Top 10 Fords at 2026 Carlisle Ford Nationals
Joe Kucinski
3 Best / 3 Worst Parts of Modern Ford Ownership
Brett Foote
10 Amazing Upgrades That Solve Common Ford Truck Owner Headaches
Pouria Savadkouei
Every 2026 Ford Engine Explained
Brett Foote
10 Ugly Ford Trucks That We Still Kinda Love
Joe Kucinski
10 Things Every Truck Owner NEEDS (2026 Edition)
Michael S. Palmer
Rezvani's Latest Post-Apocalyptic Monster Is a Ford F-150 Raptor Underneath
Verdad Gallardo
Senior User
Joined: Apr 2002
Posts: 414
Likes: 0
From: Austin, TX
Great looking job Dewayne. Like the way it's laid out.
Tim
PS--I think I am going to have a real nice piece of oak left over from my bedwood if you want to upgrade that seat. Let me know and I send along.
Tim
PS--I think I am going to have a real nice piece of oak left over from my bedwood if you want to upgrade that seat. Let me know and I send along.

Posting Guru
Joined: Apr 2002
Posts: 2,244
Likes: 1
George,
Funk & Wagnall - "Cootie Bob" - Adverb/verb used describing low budget/home built construction techniques prevelant in the U.S. midwest (i.e. Iowa) usually involving copious amounts of a peculiar liquid known as Farm All Red.
e.g. I sho nuff painted her ma self. Yep, Farm All Red. Ain't she purdy!

Funk & Wagnall - "Cootie Bob" - Adverb/verb used describing low budget/home built construction techniques prevelant in the U.S. midwest (i.e. Iowa) usually involving copious amounts of a peculiar liquid known as Farm All Red.
e.g. I sho nuff painted her ma self. Yep, Farm All Red. Ain't she purdy!
Thread Starter
|
Post Fiend
Joined: Feb 2001
Posts: 6,328
Likes: 124
From: Iowa
Oops, forgot a few details.
George
Cootie Bobbin is a term of endearment coined by Bigwin56 towards us rodder types. He might add to this definition if he stops by. It would be "One who does things not in accordance with Henry, often using stuff he's got laying around". Or something like that.
John,
You don't believe me. although I've told you many times, my truck was far from finished when I hit the road the first time. I got my truck kinda sorta on the road and intended to double back for a few details. I ended up doubling back reeeaaaal bad.
Jet Jock
No it isn't Rod Doors, I said Cootie Bob. The entire back wall is Homebrew/Home Depot stuff. Nothing from any Effie shop. $20 invested not counting carpet. I can't afford much custom interior either.
Wise ***** O Plenty
The hard seat would be the footprint for my subwoofers. They are so state of the art they don't even exist yet. (Seriously, should be manufactured in a couple weeks). I got the production specs so I can build correct dimension box. Me and George gonna rattle some glass TN
Sad story about the seat. Condensed version. Took my seat to a local shop with great reputation 2 years ago. Something went very wrong. Went to pick it up. They are packing up and moving. My seat looks a little overstuffed. They try to double price from bid. I tell them seat will look nice very on their porch at their new home in TX. Get my seat back for $50 over bid ($375). Try to install it 6 months later. Waaaaaay too big. The scoundrels live by Himmelberg by this time. I take it to another shop last month. Find out he won a category at Supernats last year. (Somebodies custom 57 F100) He's real good, but he still can't fix my seat. Clown used non-auto padding and it's too soft. Fabric sewn to a non-standard shape. Starting to look like my living room couch. He can start over withnew fabric won't it will probably not match. That sucks. He said he would make some attempt to downsize it for now. I bring my truck and my wallet to his shop next winter, we work some leather into the scheme and use the pleats from my seat which are good by some miracle.
George
Cootie Bobbin is a term of endearment coined by Bigwin56 towards us rodder types. He might add to this definition if he stops by. It would be "One who does things not in accordance with Henry, often using stuff he's got laying around". Or something like that.
John,
You don't believe me. although I've told you many times, my truck was far from finished when I hit the road the first time. I got my truck kinda sorta on the road and intended to double back for a few details. I ended up doubling back reeeaaaal bad.
Jet Jock
No it isn't Rod Doors, I said Cootie Bob. The entire back wall is Homebrew/Home Depot stuff. Nothing from any Effie shop. $20 invested not counting carpet. I can't afford much custom interior either.
Wise ***** O Plenty
The hard seat would be the footprint for my subwoofers. They are so state of the art they don't even exist yet. (Seriously, should be manufactured in a couple weeks). I got the production specs so I can build correct dimension box. Me and George gonna rattle some glass TN
Sad story about the seat. Condensed version. Took my seat to a local shop with great reputation 2 years ago. Something went very wrong. Went to pick it up. They are packing up and moving. My seat looks a little overstuffed. They try to double price from bid. I tell them seat will look nice very on their porch at their new home in TX. Get my seat back for $50 over bid ($375). Try to install it 6 months later. Waaaaaay too big. The scoundrels live by Himmelberg by this time. I take it to another shop last month. Find out he won a category at Supernats last year. (Somebodies custom 57 F100) He's real good, but he still can't fix my seat. Clown used non-auto padding and it's too soft. Fabric sewn to a non-standard shape. Starting to look like my living room couch. He can start over withnew fabric won't it will probably not match. That sucks. He said he would make some attempt to downsize it for now. I bring my truck and my wallet to his shop next winter, we work some leather into the scheme and use the pleats from my seat which are good by some miracle.
Last edited by fatfenders; Jan 17, 2005 at 07:41 PM.
Thread Starter
|
Post Fiend
Joined: Feb 2001
Posts: 6,328
Likes: 124
From: Iowa
More “bobbin” by Armstrong floor covering. Home flooring edging almost being used for it’s intended purpose. Heres a shot with the carpet up. The wide black is Velcro, the thin black on edge is Home Depot clearance rack. Four bucks. Looks good, last for year.

Here it is down. Tell me that doesn’t look tight.

Here it is down. Tell me that doesn’t look tight.
Thread Starter
|
Post Fiend
Joined: Feb 2001
Posts: 6,328
Likes: 124
From: Iowa
Madathlon
Yes, the backwall took sometime for sure, though it would be fairly easy to duplicate if you had starting measurements. The Rod doors backwall is a good buy if you don't need something stout for audio. I fabbed from scratch because it was necessary for my needs.
Here are my custom kicks. My front speakers needed something far more sturdy than stock style cardboard. These are ¼” tempered hardboard. Used glass to contour around the stupid bump by the front cab mount reinforcing plate. Edging by Armstrong again. Ceramic tile style this time. It is aluminum. They fit much better than stock, but a little extra padding was necessary under the carpet for a tight fit at the kick bottom. These PICs look lame on the web. I can email better if anyone wants to copy anything.

Kicks are sound deadened on the back to add density with Peel and Seal from Lowes so they won’t rattle. Only necessary for real high perf speakers. The amber area at the bottom is glass. Black strip is velcro. I use one screw to mount. But don't put the screw where I did. I had a blonde moment when I almost nailed my fancy No Limit aluminum tilt hood plates with the drill. Guess it's not double walled there.

Yes, the backwall took sometime for sure, though it would be fairly easy to duplicate if you had starting measurements. The Rod doors backwall is a good buy if you don't need something stout for audio. I fabbed from scratch because it was necessary for my needs.
Here are my custom kicks. My front speakers needed something far more sturdy than stock style cardboard. These are ¼” tempered hardboard. Used glass to contour around the stupid bump by the front cab mount reinforcing plate. Edging by Armstrong again. Ceramic tile style this time. It is aluminum. They fit much better than stock, but a little extra padding was necessary under the carpet for a tight fit at the kick bottom. These PICs look lame on the web. I can email better if anyone wants to copy anything.
Kicks are sound deadened on the back to add density with Peel and Seal from Lowes so they won’t rattle. Only necessary for real high perf speakers. The amber area at the bottom is glass. Black strip is velcro. I use one screw to mount. But don't put the screw where I did. I had a blonde moment when I almost nailed my fancy No Limit aluminum tilt hood plates with the drill. Guess it's not double walled there.
Last edited by fatfenders; Jan 17, 2005 at 07:39 PM.