When you click on links to various merchants on this site and make a purchase, this can result in this site earning a commission. Affiliate programs and affiliations include, but are not limited to, the eBay Partner Network.
I love my Excursion (I don't dare shorten that to Ex in this context), but the road noise has been grating on me and it's only getting worse. The droning on the highway from the engine, tires, rattling, etc is all just too much. I can't have conversations with my kids when they are in the front seat and definitely not when they are in the 3rd row. So when I got too many cracks in my windshield to ignore it I started looking for non-factory options because I know the newer cars all have acoustic glass. Well I found it for the Ex, at https://www.ford-trucks.com/forums/1...t-upgrade.html I'm still looking for ways to get acoustic glass for all of the others, haven't found anything yet.
Once I started down the windshield route all bets were off. I spent weeks researching everything...came up with a basic but effective plan. I'm stripping the interior completely and putting down a layer of Kilmat (80mil foil backed butyl rubber) across everything. I'm going so far as to put it on the inside of the outer door skin, the outside of the inner door skin and, possibly, the inside of the inner door skin... All the way across the roof, the wheel wells, as far up the firewall as I can get without disassembly, inside the rear doors, all of the pillars - the full Monty. I've got 234 sqft of the stuff and I'm going to use every bit of it.
Next goes on a layer of Siless liner 157mil (4mm) which is closed cell foam. Same as the Kilmat, it's going over everything and in all of the holes. I'm also going to be using this extensively on the rear AC components. Ford "tried" to deaden the AC with a couple of strips of the worst quality foam I've ever seen....it's worse quality than the foam in your weedeater's carburetor. I've got 252 sqft of this.
Lastly, I got 200sqft of Soundsulate's 1lb mass loaded vinyl. It came in 4'x25' rolls and it's 1/8" thick. I caution you ahead of time if you do this - it is heavy. I heard someone in my yard (this is Texas....I had questions) only to find that it was some poor 5 foot 100lb woman from Amazon trying to drag it to the porch. She said it was 109lbs and I think that was a lowball. This is where things get tricky. I'm going to lay a single layer across the floor and then test fit the carpet back in. If I've still got room, I'm adding more. I found some stupid strong industrial strength spray adhesive in the barn and I'm going to try to get it into the walls as well. Not sure how well this is going to go, but it's worth a shot if it's all broken down this far. For the hat trick, I'm going to attempt to cut smaller pieces and attach it to the roof as well. There's probably no way I'll be able to get 1 large piece between each cross member to stick due to weight, but maybe small pieces will? We're gonna find out.
I also picked up some small rolls of closed cell foam from Soundshield to wrap or isolate things that I can't get big foam pads into.
This stuff is posted everywhere...why am I posting this? I hate not being able to know numbers. I wanted to find what was best, most effective, least expensive, total square footage, trouble areas, etc. but I couldn't find anything that fit the bill. So I'm doing it myself and chucking everything out there for anyone else to peruse for one stop shopping. Why did I choose the products I did? It seems like the most effective based off of weeks of research on testing, reviews, etc. There ARE better products out there than Kilmat - 100%. The issue is that they are priced commensurately for marginal gains. In all of the research, Kilmat is consistently near the top in effectiveness and near the bottom on cost. With the butyl rubber, it mostly comes down to the chemical makeup of the butyl which I won't bore you with, but for the creme-de-la-creme, the cost is simply not realistic for the amounts needed on the Excursion. I chose Siless for the same reason - best bang for the buck. The important part is ensuring you get closed-cell foam as opposed to open-cell because it does not soak up moisture. With the MLV, it doesn't really matter what you get....all MLV is MLV and there's basically no deviation from one company to the next.
I am putting all 3 products together because that is the most effective way at reducing noise. Butyl goes right to the metal, duh everyone's done it. You CAN go straight to the MLV, but it's not recommended. You really need to have an isolating material between the foil back of the butyl and the MLV. Closed-cell foam is perfect for this because it's also a good sound damper. With the butyl you kill panel resonance. Essentially, the bigger and flatter the panel, the more noise you get. If you see a panel with a bunch of curves in it, it has less resonance/noise because it's harder for metal to vibrate through the curves because they are stronger than the surrounding flat metal. Allegedly, you only need around 25% coverage to kill 90% of resonance, but this has been irritating me for so long that I'm doing 100% coverage, including over the factory stuff. The foam is supposed to be really good at canceling out wind type noises which seems odd to me because it's all going inside of panels and doors...we'll see. The biggest bang for your buck when it comes to the actual decibel reduction is the MLV. It is thick and it is heavy, which makes it pretty darn good for stopping noise. The more you put down, the bigger the reduction.
By the end of this you will know without question exactly how much of each you actually need, how much you can actual FIT/SQUEEEEEZE in without making anything bulge out further than you did at prom, and most importantly, how much of a reduction you can get. On the actual decibel reduction, I couldn't justify buying a standalone meter for this singular project so I just downloaded a bunch of metering apps on my phone. No it's not perfect and I'm sure someone will complain, but the importance is the consistency. I'm using the same 3 apps at the beginning and the end for consistency. Right now my average on the highway is 80db. It peaks much higher.
Another thing I have to fix sound wise is coming from the front end. Some ******** decided to run by and lock in my hubs without me knowing. Apparently they've been locked in for a while... 99% sure my locker is fried and the hubs refuse to unlock so they're probably smoked too....
***UPDATED FROM THE END***
100% coverage with Kilmat to the outer skin, outside of the inner skin and inside of the inner skin. Used a total of 11 boxes (18sqft each) @ $34.99/box = $384.89.
100% coverage with Siless foam to the outer skin, outside of the inner skin and inside of the inner skin, plus stuff all cavities possible, wrapping the rear AC, etc. Used 6.5 boxes (36sqft each) @ $57.95/box = $405.65.
100% floor coverage with MLV plus the rear doors as a test, used just under a full 4'x25' roll. 1 roll = $235.
Used 1 can of Soundshield's Wrapit foam tape on various wires and rattle pieces. 1 can has 2 individual rolls of tape, $29.99.
Used 1 can of brake cleaner, 25% bottle of alcohol, 1/4 roll of paper towels and 3 or 4 shop rags.
Used 1 can of 3M industrial spray adhesive. I already threw it away so I can't get the name, but it's basically the strongest stuff they make.
I did 100% coverage with Kilmat, you only need to apply it to ~25% of the panels, right in the center, to get to 80% reduction in panel resonance. I was only doing this once and you can't take this stuff off and reapply so I went full bore....not all that needed, but more helps.
You cannot add more than 1 layer of Kilmat and 1 layer of foam to the roof, there is not enough room to add anything else up there period. As it is, it's a very tight fit.
You cannot add more than 1 layer of Kilmat, 1 layer of foam and 1 layer of MLV to the floor (assuming you keep the factory carpet padding attached to the carpet) because there isn't anymore room. As it stands, I had to make relief cuts to the carpet near the doors because I could not get all of the sill trim plates to go back through the original holes in the carpet. All 3 fit, but only barely. It is not noticeable, just something to account for as I had planned to add MLV until I ran out of room, I just ran out of room a lot sooner than anticipated.
On the walls and doors there is a LOT of room. I only have 1 later of Kilmat and foam on the walls and doors, had I known exactly what could get away with at the end of this install, I probably would have gotten 2 extra boxes and doubled up the foam in the doors and 3rd row walls. The foam is an amazing insulator and REALLY kills noise that's not related to panel resonance. I cart around a lot of kids in the back and they agree that it's amazing and for the minimal effort to put a second layer down would have been the way to go.
Depending on how the MLV holds up inside of the rear doors, I MIGHT be willing to pull the wall trim and door panels back off to add it with spray adhesive. If/when I do that I'll also do some sort of a spray on liner to the bottom of the cab and I'll hopefully have found something to do the hood with. I'll post updates when I do as well as any extra reduction in noise. When I finally get around to replacing my rear main seal, I'll do the engine side of the firewall as well.
End result was a reduction of 14db based off of the 3 different sound measuring apps I downloaded on my phone. They all gave different readings at the beginning and end, but they all had a 14db difference. The results are crazy good. Since decibels are logarithmic, a reduction in 10db equates to cutting the perceived noise in half - I got another 4db on top of that! I used to have to yell to the 3rd row at highway speeds and now I can do it at a very low conversational tone. I can whisper to the other front seat at 85mph and be heard perfectly. This is also on new all terrain tires 285/75R16 Falken Wildpeaks on the front and Cooper Discovers on the rear. It's not at Bentley levels of quiet, but it's better than something right off the dealership lot. Stop waiting around, putting it off, waiting for cheaper prices, whatever the excuse is. You will NOT be disappointed.
She has officially been gutted! The little wire is just the backup camera but is about 20 feet too long....I didn't do it!
Tear down notes:
*You need to find an 18mm wrench, not a socket, in order to remove the middle seats. Some engineer at Ford was wearing full on clown shoes when he designed those seats... You CAN make it work as I did by using a 19mm wrench and torqueing it at an angle, but it's not recommended because you'll chew up bolt heads.
*Removing all door panels only requires removing two 7mm bolts behind the reflector and under the button controls.
*You cannot remove the headliner, without damaging it, without taking down the front A-pillars. However, you cannot fully remove the pillars unless you start taking off stuff for the dash. I refused.
*Upon inspection, I would highly recommend that everyone replace their overhead bulbs with LEDs. When I pulled mine everything around them was heat scorched and discolored. Looked like a straight up fire hazard. I'm going to replace them the next time I'm out to the store. Yes, it looked that bad.
*While everything is out, pre-plan to get your hands on some kind of a carpet cleaner/steamer/shampooer. I have the newest Ex around at 17 years old and it desperately needs TLC....and dog hair removal - it's everywhere, even behind the vapor shield on the doors which I don't understand.
*Special note - don't do this if you THINK you are a clean person....reality will sorely disappoint you.
Rear AC - note janky foam.
Here is the first of previous owner's "attempt" at killing noise....
And the second....but only under the accelerator? Other bits are Firestone air bag controller, trailer brake controller and the part of the brains from the previous owner's head unit that I hate. It's an Alpine, but it's literally the worst model with the worst reviews and is incapable of pairing to my phone and only has physical connections for Apple products.
Overhead console and media center. Tell me that thing doesn't vibrate....
I'll take some more pictures once I get this thing cleaned out and ready for install. On the cleaning route, you are supposed to use 90% or higher alcohol to prep the surface for the butyl. What I figured out is that they want you to fully clean and degrease everything for proper adhesion. The reason they say 90% alcohol is because it evaporates without leaving a residue and due to it's vapor pressure it does so 4x faster than water and even faster at higher temperatures. So really, you can get away with using brake cleaner due to it having the same effect, but even faster. Be careful using it though, it's not exactly great on paint, plastic or rubber...
Tear down took about 3.5 hours and I only made it about halfway through cleaning in another 2ish hours. I'm taking the opportunity to get all of the gunk out while I can.
I am only doing the floor first so that I can at least get the driver's seat back in to scoot around when I need to. Then I'm getting the roof done, then the rear fully finished and working forward with the doors coming last.
I should have pointed out in the last post just in case someone DOESN'T want to F up royally. In the pics you'll notice that there are some black rubber looking ovals on the floor. Do NOT cover those up....
Thank you so much.
I have Tinnitus which is bad enough, I hear noises in my head roaring like a freight train, 24/7
I rate Wind noise as the worst thing that bothers me, it is so loud that if there are vibrations in the truck, I can't hear them.
I bought two boxes of Killmat, damn is that crap heavy! and Expensive.
When it arrived, I changed my mind as to how far I was willing to go using that every where.
As for measuring sound levels, your cellphone is good enough.... you have done good job here, but I would like a list of product links if that is not too much trouble?
Sitting still, the truck is nice and quiet , but once those damn All Terrain tires meet pavement, kiss that goodbye ..... I am going to get a set of Michelin LTX street treads come spring, and yes, that is damned expensive, but I can't handle that thrumming sound from the tires.
I'm 30 miles north of Tulsa, OK.... are you near enough to me that we can help each other?
EDIT: just looked at your Profile:2 Letter State/Province (use "--" for outside USA/MD
Thank you so much.
I have Tinnitus which is bad enough, I hear noises in my head roaring like a freight train, 24/7
I rate Wind noise as the worst thing that bothers me, it is so loud that if there are vibrations in the truck, I can't hear them.
I bought two boxes of Killmat, damn is that crap heavy! and Expensive.
When it arrived, I changed my mind as to how far I was willing to go using that every where.
As for measuring sound levels, your cellphone is good enough.... you have done good job here, but I would like a list of product links if that is not too much trouble?
Sitting still, the truck is nice and quiet , but once those damn All Terrain tires meet pavement, kiss that goodbye ..... I am going to get a set of Michelin LTX street treads come spring, and yes, that is damned expensive, but I can't handle that thrumming sound from the tires.
I'm 30 miles north of Tulsa, OK.... are you near enough to me that we can help each other?
EDIT: just looked at your Profile:2 Letter State/Province (use "--" for outside USA/MD
That is not a casual 15 minute drive
I also have extremely bad tinnitus...retired Marine here - the things we put our bodies through or everyone else really comes back to bite you. If you are wanting to kill the wind noise, the closed cell foam is supposed to be the best bet. However, if you are going to tear everything down like I did then it only makes sense to put down the butyl first because you can't really redo it.
I'm also on all terrains, but I'm keeping them lol. I'm just trying to make them more bearable.
I could use the help, but I'm an hour east of Austin so...that's not exactly within wrench chucking distance! I'll change my profile at some point when I'm done sweating, but I moved out of MD about 3 months ago.
I've been hampered by some pretty bad migraines so it's been slow progress. I also had a bit of an issue...I started this and then just heard Thanos rolling through my head.
So I started laying down the floor and thought to myself, if the panels resonate and that's why I'm putting kilmat down, why am I not putting it on all the panels? So I did... I did the roof and floor per normal, but on the walls I applied it to the inside of the outer skin, then on the outside of the inner skin, then on the inside of the inner skin. Overkill I'm sure, but I don't play on pulling any of this back apart to add more. Once and done. On the roofline, where all of the holes are at the edge and alone the top part of the rear window area I got it on all 3 as well as far as I could fit my fat hands. I also pulled off the vapor barriers on the rear doors and got the kilmat down and started putting down the foam just so I could test slam it - HUGE difference! I've got foam on the outer skin and the outer inner skin. I'm going to put the 3rd layer of foam on the backside of the panels when I put them back on. Tomorrow I'm going to see how well I can get away with the MLV in the rear doors, there's a lot of negative space in there. So far I've only gone through 4.5 boxes of kilmat
Some key takeaways need to be noted here....wear some old pants. I wore shorts for about 20 minutes until I started getting the butyl all over my knees and shins and the stuff is rough to get off. If you're hairy like me then you want to seriously avoid this....I gave up and used brake cleaner on my legs! I put jeans on but I didn't put on the worst pair I have and now these pants are completely trashed. If I was to guide someone else through this I would tell them to work from the top down ONLY. That will greatly minimize the rubber to your clothes. I'm also not completely sure it's worth the effort of jamming the butyl into all of the areas that I've done...it's overkill for sure, but the time sink is also pretty major. After 4 hours of cleaning, I have about 6 hours of just getting the kilmat on for the rear area only. I stopped when I did the back pillar of the middle doors and where the floor drops to the middle. Due to the tight spaces I had to work with a lot of small pieces and it was really annoying as well. You could probably get away with just putting down pieces over the larger areas although I would suggest hitting the wheel wells 100%. I'm putting down the foam everywhere I put the butyl as well, but it's way easier to work with so again, bang for your buck although I'm sure there will be some gains over the full coverage that I'm doing. I test fit the rear deck carpet over the kilmat and snapped in the trim - lots of room still available. Also make sure that you cut out all of the holes for the panel on everything... I put down a few pieces of the kilmat before I remembered that I didn't cut out the holes and had to go back and poke with a knife to find them. Doing this over bolts is super easy - line up the mat, smash it down, pick up and cut around the marks.
Side note, I do have some foamy stuff to wrap wires with where needed, but thus far there's killmat underneath pretty much all of the wires. This should prevent even earth shattering base from rattling it... I guess the wires in the doors and the plastic clips on the that snap everything in are going to get the foam tape.
I got the full wall behind the AC as well as the backside of the AC. After I bolt it back in I'll finish doing the outside. I just had a small strip left over so I put it on the plastic part of the blower, but that's not where it's needed. I'm going to place a bit of it on the metal part of the blower itself. The rest of it should just get the foam.
Inside of the driver's side wheel well.
Talk about crazy, this is the INSIDE of the middle door's rear pillar. It goes up as far as I could reach as well.
Inside the rear doors. Tough to get hands in, but I got the ENTIRE inside space with kilmat and foam, minus the latch post area because it was just too difficult to reach. I also missed out on the last ~5" near the edge of the bottom because I didn't want to get anywhere near the drain hole by mistake.
That is a LOT of work.
my knees won't last that long anymore.
I have two boxes of Killmat, just have not decided where to start.
my truck does not have one square inch of sound proofing, the rear doors don't even have the plastic panels anymore.
it used to be a fire truck, and they literally stripped everything they did not need.
wish I had just waited for a nicer rig, but I went low buck instead.
That is a LOT of work.
my knees won't last that long anymore.
I have two boxes of Killmat, just have not decided where to start.
my truck does not have one square inch of sound proofing, the rear doors don't even have the plastic panels anymore.
it used to be a fire truck, and they literally stripped everything they did not need.
wish I had just waited for a nicer rig, but I went low buck instead.
at least the running gear is all in top shape.
At least you have the running gear...I have to drop mine off at the shop in the morning which kills this whole project for a bit. Pretty sure I mentioned it earlier but some ****** locked in my front hubs without me knowing. So now I have to get (at a minimum) a new locker, hubs and ujoints on the front. Pretty pissed about the ordeal. My money is on some green energy hippie that saw my diesel running when I was fueling up on the interstate.
*Greater update*
I did not make too much progress today with everything else going on. Septic problems, clogged drain pipe out of the kitchen and then a minor electrical fire in the barn because some looney toon decided to run too many overhead lights into a single switch box. I decided to just bolt in my drivers seat and work from the back to the front today. The rear deck is about 60% done top to bottom. The kilmat is completed, I'm a little over halfway done laying down the foam exactly as I did the kilmat and I even tested the MLV on the rear doors. Granted, I'm using some pretty legit spray adhesive, but it is holding in the vertical panels pretty solid! Definitely going to put it on all of the walls on the rear deck and maybe the roof as another test. I've also noted that with the kilmat and the foam on the roof, space is running thin... I have to test fit the headliner before I try to add the MLV but it MIGHT fit. All of the contours in the headliner are tough to account for. When I get the truck back from the shop I'm going to finish the rear and move forward and things should be MUCH faster. There's not a lot of tiny holes to work with in the front half, but the back is just chock full of them - and I'm filling them all! Also, the foam is WAY easier to lay down than the kilmat....
I know you won't find the moron who ruined your front hubs, but I would gladly help you hold him with his arms behind his back, while you learned how to use a Bullwhip on him.
Have a question for the greater audience if anyone actually knows this from experience. Obviously I'm lining the roof but it has occurred to me that I should probably pay pretty close attention to the overall clearance due to the air ducts. There's no actual duct work, just molded sections in the headliner. Does anyone know exactly how much clearance there is? Ie the height from the headliner to the bare roof? I'd measure it myself but it's out getting new hubs and everything else for the next couple of days. Considering the potential clearance issue, if you've done this before, will applying the same amount of material to the cross braces be enough to compensate by pushing the liner down? I've tried googling and searching everywhere I can think of but I can't find anything, anywhere that actually describes dimensions or even shows pictures of the molded vent pathing...super annoying. I just don't want to loose air pressure out of the ducts because I jammed too much foam up there....kids have to stay happy or those long trips get really REALLY long.
back 50 years ago, I used to install radio antennas in the roof,
in fact my truck has six of those antenna mounts on it - ex Fire Department truck.
anyway, the liner is close, but flexes enough to allow wire harnesses w/o trouble.
how much can you add to the thickness?
no more than about 1/2 inch and that is at the center, not in the curved areas when it bends down.
Well that's my problem....I'm not sure. The butyl is 80mil and the foam is 157mil which is about .237 inches, but I've already started putting it on the cross braces as well which should push the headliner down. However, when I put the headliner pushpins in, obviously the foam on the cross braces will compress but not the stuff in the middle. That's why I was wondering about the overall depth of the ac channel that's molded in the headliner. If you're saying that it's about 1/2 an inch, I think I might be ok. I'm just going to be really pissed if I have to pull the headliner and remove foam. The adhesive on that stuff is a one shot deal - I tried to pickup and move a piece and it just stuck and ripped. Once you apply any pressure that's more than a friggin feather, that's where it's staying. At least it's given me confidence that it should hold up long term!
Speaking of staying in place, before I dropped it off at the shop to get fixed I hit the pasture and bounced it around pretty hard. The MLV that I spray adhesived to the inside of the barn doors held perfectly so I'm pretty confident that I'll be able to use it on the walls and doors going forward. I think I MIGHT still try to add a little bit to the roof, but only between the braces where the ac ISN'T run.
This Hennessey Takes the Expedition Tremor's Off-Roading Capability to the Next Level
Slideshow: The VelociRaptor Expedition gains a lift, upgraded suspension, Brembo brakes, and trail-ready equipment while retaining the stock 440-horsepower EcoBoost V6.
Rezvani's Latest Post-Apocalyptic Monster Is a Ford F-150 Raptor Underneath
Slideshow: Called the Fortress, the 850-horsepower pickup combines Raptor underpinnings with military-inspired features, survival equipment, and a starting price of $285,000.




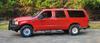


 , but once those damn All Terrain tires meet pavement, kiss that goodbye
  ..... I am going to get a set of Michelin LTX street treads come spring, and yes, that is damned expensive, but I can't handle that thrumming sound from the tires.