When you click on links to various merchants on this site and make a purchase, this can result in this site earning a commission. Affiliate programs and affiliations include, but are not limited to, the eBay Partner Network.
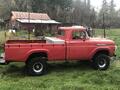
My engine has had a significant exhaust leak (blew out the right manifold gasket a long time ago) and it's been getting steadily worse. Now it's too loud to ignore. So, I pulled both the outer and inner fender today (which REALLY improves access to the manifold bolts)... sure enough, the rust was worse than it appeared. It's nearly as bad as the left but in slightly different areas. At least I already have a new cab mount, lower cowl, and lower door jamb on hand, since CC sells them in pairs The part of the floor that needs replacing isn't ribbed, so I can just use sheet metal for that.
Rot in the lower cowl, A-pillar and floor/cab mount:
The forward flange of the cab mount is half gone, although the mount itself is sound. I think I'll just cut out the floor with the mount, and replace it as I did on the other side.
Once again, the rust is worse than it appeared when I removed the lower part of the cowl panel and the curved jamb piece... the cab mount had some small rust holes clear through it. So I cut out the floor with the mount attached. It's looking really wide-open down there. A bottle jack is holding up that cab corner for now.
The new right mount looks exactly like the new left mount and doesn't quite match the old right one. Waiting to hear back from Rick as to whether that's ok or if I was somehow sent two left ones... but it won't need too much massaging to make it fit. Maybe that's the way it's supposed to be?
Four hours of cutting, grinding, welding and seam sealer later, the inside and front walls of the A-pillar are back together. I still need to remake the little bracket that holds the hinge dual nut, prime and paint. Then I can start fitting the lower cowl panel and the lower door jamb
Inside wall of A-pillar Wall of A-pillar seen from the inside Wall of A-pillar from the front after seam sealer Inside view after seam sealer
Wow Dr Charles you are dedicated, talented, stubborn-- all things that make for a good craftsman, I am impressed. My truck is similar in damage, but yours is more of challenge. Glad to follow your post it is inspirational. I pulled out on my cab floor repair to reevaluate the floors and watching your work helps my confidence. A deeply rusted intertwined area that is structural takes real talent and tenacity, great job.
Thanks for the compliments. I am definitely stubborn But would like to be a better welder.
Fortunately that area is not highly loaded or critical structurally like a frame or suspension mounts, it's only carrying a quarter of the cab weight + passengers.
And without patch panels from Carolina Classics it would be impossible for me - I couldn't replicate that door jamb or lower cowl with just hammers and wood blocks!
I made another mounting bracket from 18 ga. sheet metal, welded that on, primered and painted the area with Rustoleum Rusty Metal primer and Stop Rust paint:
Then I cut and fit the lower cowl piece. The left one was easy - this one was a bear to line up. I finally figured out I'd bent the pinch weld to the firewall while banging away during disassembly... still needed a lot of grinding and hammering. Close enough. I drilled for 5/16" plug welds in the factory spot weld locations, or at least near them. I started more short/tack welds along the butt seam at the top - and ran out of MIG wire! Time for a run to the welding store (or Ace Hardware, if they have .030 wire)...
Finished welding the lower cowl piece, ground the blobs down some, started fitting up the lower door jamb panel and hit an unexpected snag...
The inside edge of the curved piece is nearly 1/4" away from the vertical wall to which it's supposed to connect. I did omit one of the .050" thick sheets, figuring it was strong enough and that small gap could be overcome. But I can't figure out what's out of position. The step and its curve leading up to the straight wall is original. The upper part of the jamb panel lines up with the original jamb.
The old piece that I cut off is similarly "out". I think something must have moved a little while that cab corner is supported by a bottle jack (or maybe it was under stress due to rusted-out cab mount and floor, and it moved when I cut it loose). But I'm stuck now, with everything welded in.
As long as I can get the door aligned and it will close properly, I can always add a narrow strip to fill the gap. I don't like the space that will exist under there, and inevitably collect wet dirt. What to do...
I think I found the issue. On the left, that gap still exists - but on the inside of the wall (where the floor meets it). There was some kind of seam sealer filling it, and a lip welded from the pan to the wall. Here is a pic from earlier in the thread, (from 4/26/21). Note that the ribs on the section of new floor pan are lined up perfectly with the original floor, but the gap is there. (I covered it with an L-shaped piece of sheet metal welded over it).
So now I'm committed to the gap being on the curved jamb side instead of inside the cabin. I guess it's time to cover it with a long thin strip, if I can weld that in without destroying it!
Thanks Seam sealer and paint can hide a lot of ugly bodywork...
I'm still thinking about that gap. My theory doesn't work, because the step & sill, vertical wall and that part of the floor are all original. And the outside flange of the jamb curve is seated firmly against the sill.
I'll patch it together somehow, it's not a concours restoration and nobody will notice
Looks like I overthought things, as I sometimes do...
I lowered the bottle jack to approximately the cab-level position, and whacked the inside of the step/wall with a 2 lb hammer. Surprisingly, it moved right over, so I welded the lower jamb in position. Stitch weld along the edge where the gap used to be, and spot plug welds in the factory locations. Also butt-welded the top edges of the new piece to the old, and smoothed it with grinder & burr.
Now I have to wait for the sealer to dry so I can prime and paint the visible part (Holly Green of course)
Note to self: It is advisable to let seam sealer cure before welding near it. Also, a hollow A-pillar makes an excellent chimney. Ask how I know (Just blowing on it extinguished the flame - but I do have a fire extinguisher handy too).
Looking Good Dr Charles. So that is the seam sealer you are using. I have never tried that type and over a large area, but I like it. That whole area would get a lot of water around here. I like how you tied in the floors old and new. I was going with the flat farmer look, but I think you swayed to do a better job. I have been concentrating on the bed and that should take me awhile to just cleanup for patching and primmer.
Rezvani's Latest Post-Apocalytic Monster Is a Ford F-150 Raptor Underneath
Slideshow: Called the Fortress, the 850-horsepower pickup combines Raptor underpinnings with military-inspired features, survival equipment, and a starting price of $285,000.





 The part of the floor that needs replacing isn't ribbed, so I can just use sheet metal for that.


 But would like to be a better welder.









 (Just blowing on it extinguished the flame - but I do have a fire extinguisher handy too).