When you click on links to various merchants on this site and make a purchase, this can result in this site earning a commission. Affiliate programs and affiliations include, but are not limited to, the eBay Partner Network.
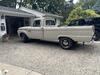
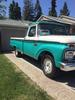
Picked up my 65 250 at the end of August. Straight and rust free truck from AZ. Stock with a 352, grimy and dirty but ran ok. Decided to get the block rebuilt and muscled up a bit...8k price tag sent me in a different direction! Picked up a 390 Long Block from S&J Engines in Tacoma, WA. From there I chose the rest of the needed parts to complete the build! Heading back to the engine shop on Monday so I thought I would post before and after pics of the engine bay prior to install.
Here is a shot during rebuild. Not the best shot but it shows progress. The long block included an upgraded cam and ported and polished heads. I used Edelbrock RPM Performance intake with a Holly 4 barrel and Dougs Headers. Engine is going back in this week!
Thanks! First I removed everything from the engine bay including the wiring. I also removed the upper grill, main grill, the stone deflector and all the lights. To clean I used a variety of products depending upon the severity of the grease and grime! I used Por-15 Cleaner and Degreaser, Simple Green, brake cleaner and oven cleaner. The areas near the rear main seal and trans were the worst as I had a long time leak and it made for a tougher clean up. Those areas also needed scraping. After I removed all the grease and dirt I then removed any rusted/bad paint areas by sanding and or grinding the areas till relatively smooth and rust free. Prior to painting I went over everything again with Eastwood’s Paint Prep spray to make sure everything was as clean as possible.
For paint I used the following;
Engine Bay-Rustoleum Rusty Metal Primer and Semi Gloss Engine Enamel.
Firewall-Spray Max 2K in the original color code “T” for 65, Navajo Beige.
Trans-Rustoleum Cast Coat Aluminum Engine Enamel
Steering Box-Rustoleum High Performance Enamel Dark Machine Gray.
I used self etching primer for any engine parts that I reused and stripped from my 352.
I was originally planning on using all Eastwood Paints, but decided that I couldn’t see spending $15 for a can of spray paint. I did however pop for two cans of Eastwood’s Alumi Blast for my valve covers and grill because after reading a bunch of reviews I decided it was exactly what I was looking for.
feel free to ask anything...it was really a fun learning experience!
Thanks to you both! I will grab some worm clamps. ND, I realize colors are incorrect for year. When 352 couldn't get rebuilt for a decent price I decided to go the 390 route. At that point I figured well the truck 390s where all blue so I went with it, plus I knew I wanted to dress up the engine a bit from stock!
Question about radiator hose clamps. Does anyone know what type of clamp came on the hoses back in 65? I really don’t care for the modern clamps.
They were split band A-15 clamps, so called because when they first came out they had A-15 stamped on them which indicated the size. I don't know when they stopped stamping them, but the NOS clamps I found were not stamped with anything (at least that I can see and since they're already installed it's possible I just can't see the stamping). They are thicker than the reproductions and fit the large radiator hoses better also. I had trouble getting the reproductions to make a good seal, possibly because they barely fit the large diameter.
All the smaller hose clamps (heater hoses, PCV hose, brake booster) were corbin clamps (Bill's "squeeze") that were installed at final assembly. The 2 clamps on the water bypass hose on the 352 were installed at the engine assembly plant prior to paint and were the tower style. You might not notice it on a '65 painted black, but on a '66 painted blue it's obvious.
This Hennessey Takes the Expedition Tremor's Off-Roading Capability to the Next Level
Slideshow: The VelociRaptor Expedition gains a lift, upgraded suspension, Brembo brakes, and trail-ready equipment while retaining the stock 440-horsepower EcoBoost V6.
Rezvani's Latest Post-Apocalyptic Monster Is a Ford F-150 Raptor Underneath
Slideshow: Called the Fortress, the 850-horsepower pickup combines Raptor underpinnings with military-inspired features, survival equipment, and a starting price of $285,000.