When you click on links to various merchants on this site and make a purchase, this can result in this site earning a commission. Affiliate programs and affiliations include, but are not limited to, the eBay Partner Network.
Hey guys, still not much to report yet. I took the waterpump off and started replacing some hoses but I haven't had time tof install the new pump yet. One thing is for sure, my old pump was definitely on its last leg. Im hoping to get the new pump installed this week. Thanks for being patient with me. Hope you'll have a nice Christmas.
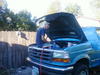
OK, it's been a long month but I'm finally back at it. Sorry for the long breaks between posts but it's been a very stressful time for me lately. Anyway, I started the task of replacing my water pump last night. I removed the shroud, and fan assembly, as well as a few bracket bolts but before attempting to remove the remaining studs and bolts I decided to hit them with some "sea foam" "deep creep". After reading some of your suggestions I thought it would be best to let " deep creep" work it's magic over night. One question, should I use heat on them? If all goes well I will have the new pump installed by this time tomorrow morning and hopefully we will either have a solution to my my original overheating problem or at least be able to eliminate the water pump as the cause. Thanks again for hanging with me and being patient. I will post pics of the job tonight. It's been so long that I forgot to mention that i did install a new pump a few weeks back but it was immediately defective. I used semi permanent thread sealer on the studs so this is why im wondering if heat should be applied.
Thank you
Last edited by Jameson DeVeau; Jan 11, 2017 at 09:23 AM.
Reason: Forgot to add important detail
Thank you for your reply. I borrowed the thread locker from my neighbor but I couldn't get in touch with him last night to find out what type it was. He said he uses it on bracket bolts so I took his advise. I'll definitely find out tonight though. The first time I took the pump off I did have one break which I used EZ OUTs for and no issues. As for the defective pump, it had a small crack that i couldnt see until it waz pressurized. Im going a little slower this time around, taking care of some small things while I have everything off. (Wires, hoses, sensors, ect.) Also painting everything again. Wantec to add that my original pumps bearings were completely shot. I could spin it like a top. Ill attach some pics and update you in the morning.
Thank You
Last edited by Jameson DeVeau; Jan 12, 2017 at 12:43 PM.
Reason: Add pictures
Got to the bolts last night, snapped #7 and rounded "2 (facing truck going clockwise). #13456 were mo problem. I shouldn't have used the origunal bolts the first time around but hindsight, oh well. Tonight I'll tackle the challenge but any suggestions would be awesome. Thank you
Tonight (this morning) I finally removed the timing cover. All I can say is heat is the answer. Hopefully tomorrow I will pull the remaining stud and prep everything for the new pump. If anyone is still reading this thread I would love some tips. I definitely learned a few things since the first time around. I'll attach some picks of the stud that I pulled.
Thank You
Could you take a photo of the temp sending unit and gauge? To me it does sound like a electrical issue, possible bad ground from engine to chassis.
I had used a electrical temp gauge once and ran into exact issues you are having. I went to a mechanical vapor bulb temp gauge and had no more funny temp readings(factory gauge still showed the issue, was a grounding issue after all)
2X on changing out the timing set AND front seal. Your that far along, best to do it.
I use "never seize" to put the water pump bolts back in, heck I use never seize on all bolts and nuts! Sure nice to take apart years later!
Thank you to all of you who have remained witb me over the past few months. I know I've been a bit flaky but life's been a bit hectic. Thank you for your response. I will take and post pictures of the sending unit tonight. I spend yesterday cleaning the gasket surfaces and touching up a few odds and ends while I'm in this deep. I'll get back to you all shortly.
Thank You
Yes it's crazy but I finally got everything back together. Lifes been crazy but I'm firing it up in the morning. I forgot to mention that my temp gauge is an aftermarket "real" gauge that runs from the block directly to the dash so the reading is definitely accurate. At this point I've replaced everything other than the radiator and if it continues overheating it will be replaced tomorrow. I'll let you know how things go.
Thank You
Thank you all again for sticking with me. It's been quite a journey more importantly a learning experience. I will be home in couple hours and will give you a full update.
Thank You
Rezvani's Latest Post-Apocalytic Monster Is a Ford F-150 Raptor Underneath
Slideshow: Called the Fortress, the 850-horsepower pickup combines Raptor underpinnings with military-inspired features, survival equipment, and a starting price of $285,000.