When you click on links to various merchants on this site and make a purchase, this can result in this site earning a commission. Affiliate programs and affiliations include, but are not limited to, the eBay Partner Network.
So I cut open my coolant filter and this is what it looked like. And a shot inside the coolant bottle. I am thinking oil cooler leak? Any other thoughts?
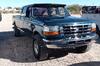
This on a 7.3 2002 Excursion with 155k on it.
What does the degas bottle look like? Are you losing oil? Are you using a red in color ELC? If not, does the transmission also have passages in the radiator on the 2002?
Here is the degas bottle. I think the cap did not release pressure properly and the bottle expanded (you can see in the one pic of the inside how it tore). I can't believe it did not explode. I have a new bottle installed and new cap. I am using red coolant -Fleetrite from the international dealer. As for losing oil, hard to tell as I have a small leak at the HPOP (gasket) currently.
That's what mine looked like when the oil cooler failed, but I was running Evans coolant with a hole drilled in the radiator cap so I never has coolant pressure. The only reason I mention that is if the oil cooler failed and you have a pressureized cooling system when you shut down the truck and oil pressure drops to zero you may get/should get coolant in the oil.
Oil and Transmission fluid appear fine. Granted I just did the tranny filter change and flush (by removing the return line) about 2 weeks ago. Need to do an oil change and will send out a sample to Blackstone labs (I do that every once and a while)
I would wonder what the radiator looks like inside. I would send the fuilds out for testing for sure. Coolant in the oil ruins bearing, specially crank bearing.
I would wonder what the radiator looks like inside. I would send the fuilds out for testing for sure. Coolant in the oil ruins bearing, specially crank bearing.
I agree. I wish I could really determine where the oil into coolant leak is. I will do the oil cooler seals - because I am sure I would have to eventually. And then go from there.
So I got the report back from blackstone labs - and it is a great report ?!?!??!
So - I wonder why my oil is so perfect and my coolant looks like crap? Obviously the oil pressure is higher than coolant, so I assume oil is getting into the coolant, but at shut down I would think that coolant would flow back to the oil.... (no expert here)
Yes do the oil cooler, I had a oil cooler leak oil in coolant and no coolant in oil. Flush the system. Remove the radiator and flush it. I used simply green. My oil in my coolant looked like oil, it was black. Yours looks more like fuel.
Of course my truck had the 7.3 idi Turbo diesel, different engine but same oil cooler. It is hard to get all the oil out, I had to flush, fill, drive, flush, etc. that's why I had to remove the radiator at the end. I got lucky and the oil did not damage any seals, but the idi's are simple
If you're going to flush the system. I found this.... I don't know where. But, I transposed it.
It may be something you may wish to consider doing. Otherwise, just ignore.
TMW
FLUSH – COOLING SYSTEM CONTAMINATED BY OIL/DIESEL PROCEEDURE
1. FOMOCO has a procedure to perform both Flush and Fill on both the 6.0L and 7.3L because either is a HEUI, the potential for contamination to occur is present. And, the older, maintenance lacking, vehicles are even more prone.
2. FOMOCO affirms that a "Flush / Fill five to six times using Simple Green and having the Engine at operating temperature throughout the process is recommended.” This is very time consuming. And, if Diesel were allow to remain in the system for an extended period, changing all Rubber Parts in the Colling System is recommended.
3. TOOLS:
* 3/4" wrench for drain plug
* 8mm socket with ratchet and extension for thermostat housing bolts
* 1/4" Square Socket for block plugs
* Pliers for hose clamps
* Torque wrench to re-torque thermostat housing bolts
* Emery cloth to clean thermostat housing and hose connections
* Bucket and suitable catch containers. * A Baby Pool works very well to capture the depleted coolant for disposal.
* Funnel
* 4 gallons of anti-freeze concentrate (do not use 50/50 pre-mixed coolant) for final fill. A Heavy-Duty Extended Life Coolant (HD ELC) for all SN: 940614 and up may be used, But is not required.
*If not already charged [Anti-Freeze/Coolant], two Pints of SCA DC9 in addition to everything else listed.
* 8 Gallons of Distilled Water for final flush prior to Anti-Freeze Fill. Or, An RV Filter which removes particles, chlorine, and minerals attached to a Garden Hose works very well. Walmart / RV Service Centers / etc. Cost about $20
* Parts you "may" wish to exchange:
* Thermostat (OEM Part #F6TZ-8575-EA) Many run a 203*F like the T444 uses).
* Thermostat Housing (OEM Part# F81Z-8592-AA) ((Small Tube Black Silicone))
* Upper Radiator Hose that goes around serpentine belt (OEM Part# F81Z-8260-CA)
** Lower Radiator Hose (OEM Part# YC32-8286-CE)
** Engine Coolant Overflow Hose OEM: (F81Z-8075-AA) (Hose on bottom of 8A080 to Lower Radiator Tank)
** Degas Bottle Cap (OEM Part# F6DZ-8100-A)
* New Coolant Filter (if you've added one)
* Heater Hoses which look to be in disrepair (Master Quick Disconnect Tool).
** I do urge the replacement of all the lower hoses as a minimum as they tend to degrade the fastest (sediment rests there).
*** New Cap, Hoses, Degas Bottle, Etc. are installed LAST, prior to final fill with Anti-Freeze ***
-------------------------------------------------------------------------
The guidance is left up to the "individual service center to originate or create as a process and to follow the procedure [individual service center] uses".
The Oil/Diesel needs to be changed at its molecular level in order for it to become suspended in the system and be evacuated.
Simple Green - 2 Gallon. Or, A box of "Low sudsing Dishwasher Detergent"
Mix 1 Cup to 1 Gallon of Water. The Low Sudsing Dishwasher Detergent should be mixed with Water in a suitable container and added as a very thin past to the system each time. DO NOT just pour it into the Degas Bottle!
Flush four to five times. Or, until all the oil is removed. Each time allowing the engine to run for one-hour each flush. If you choose to drive, remember, Water will overheat the 7.L and especially the 6.0L
Removing the Heater Hose at the Water Pump and running the engine while at the same time filling the Degas Bottle will assist with removal as Oil/Diesel are Lighter than Water and will float to the top while the water is in motion.
-------------------------------------------------------------------------
Here is the process I personally use and have had no problems.
PROCEEDURE:
1. Remove Degas Bottle Cap (slowly - may be under pressure)
2. Use 3/4" wrench to loosen radiator drain valve (bottom left-hand driver’s side).
3. Remove all Lower Connection at the Radiator and allow to drain in suitable containers for an hour or until there is no more remaining. Expect at least a 5-gallons.
4. Remove lower radiator hoses (at radiator) and drain any sediment and/or coolant from radiator and hose into container for an hour or until there is no more remaining. Expect at least a 5-gallons.
5. Remove driver’s side block plug with 1/4" socket wrench driver, and drain coolant into suitable container.
6. Remove passenger’s side block plug with 1/4" socket wrench driver, and drain coolant into suitable container. This is best done without an extension on the wrench, working under the truck from the top rear side of starter - no need to remove starter.
7. Re-install both block plugs finger-tight.
8. Re-install lower radiator hose temporarily.
9. Close radiator drain valve.
10. Remove thermostat housing and thermostat.
11. Re-install thermostat housing without thermostat, using old gasket (it’s ok if it leaks a little while flushing and running engine).
12. Remove heater hose at passenger’s side coming off the engine (just below intercooler tube).
13. Install that heater hose to one end of a 5/8" flush "T".
14. Install 1 1/2 foot of 5/8" hose to other end of flush "T".
15. Install the remaining end of the 5/8" hose to fitting where the original hose was removed from the engine. (You could permanently install the flushing "T" in the heater hose if desired. The heater hose removed in this procedure is the one consistent with what you’ll find on the flush "T" directions. However, you could install the "T" on either heater hose)
16. Install garden hose onto flush "T", noting the direction of one way valve.
17. Turn in-cab heater valve all the way to "hot".
18. Turn garden hose on until clear water (no green tint) runs (backflush’s) out of top of degas bottle. This will take several minutes.
19. With hose still on, start and run engine for a couple of minutes, again until water coming out of degas bottle is clear (no green tint). Minor water leaks and spray from fan are normal.
20. Turn engine off. Turn garden hose off.
21. Drain radiator at drain valve, remove both block plugs, and remove lower radiator hose.
** Repeat 18 - 21 five, six, or more times if necessary **
21. Remove flushing "T", the extra 5/8" hose, and reinstall the original heater hose back onto engine.
22. Close radiator drain valve, reinstall and finger-tighten both block plugs, reinstall lower radiator hose (permanently).
22. Fill system with distilled water until the degas bottle is full.
23. Run engine a couple of minutes.
24. Drain radiator at drain valve, remove both block plugs.
25. Close radiator drain, reinstall and finger-tighten both block plugs.
26. Again, fill degas bottle with distilled water.
27. Run engine a couple of minutes.
28. Drain radiator at drain valve, remove both block plugs.
29. Close radiator drain valve permanently. Do not over-tighten.
30. Install both block plugs and tighten permanently and firmly. Sealant can be used on the plugs sparingly, but it is not necessary.
31. Install thermostat and new thermostat gasket. If reusing the thermostat housing, use emery cloth to clean any rust/corrosion before installing.
32. Carefully torque the thermostat housing bolts to a maximum 15 ft.-lbs. Do not over-tighten.
33. Add 4 gallons of anti-freeze concentrate to the degas bottle.
34. If using SCA, add it to cooling system per SCA manufacturer’s instructions (usually 2-4 pints). The only way to know is to test the system in a few days after driving.
35. Add distilled water to finish filling the system until the degas bottle indicates between min/max.
36. Replace degas bottle cap.
37. Turn in-cab heater valve all the way to "hot". This will help you determine if the thermostat is operating or if there is air left in the system.
38. Run engine (or drive truck for faster heating), until thermostat opens and hot air is felt through heater in cab. Periodically check coolant level adding distilled water as necessary. If heater does not get hot (or stay hot), it may be necessary to rev engine or purge air from the cooling system.
39. Add distilled water until level equalizes (min/max mark) in degas bottle (this may take several days). Another option is to use a negative atmosphere device to fill the system (Use test strip to test and add SCA if applicable).