When you click on links to various merchants on this site and make a purchase, this can result in this site earning a commission. Affiliate programs and affiliations include, but are not limited to, the eBay Partner Network.
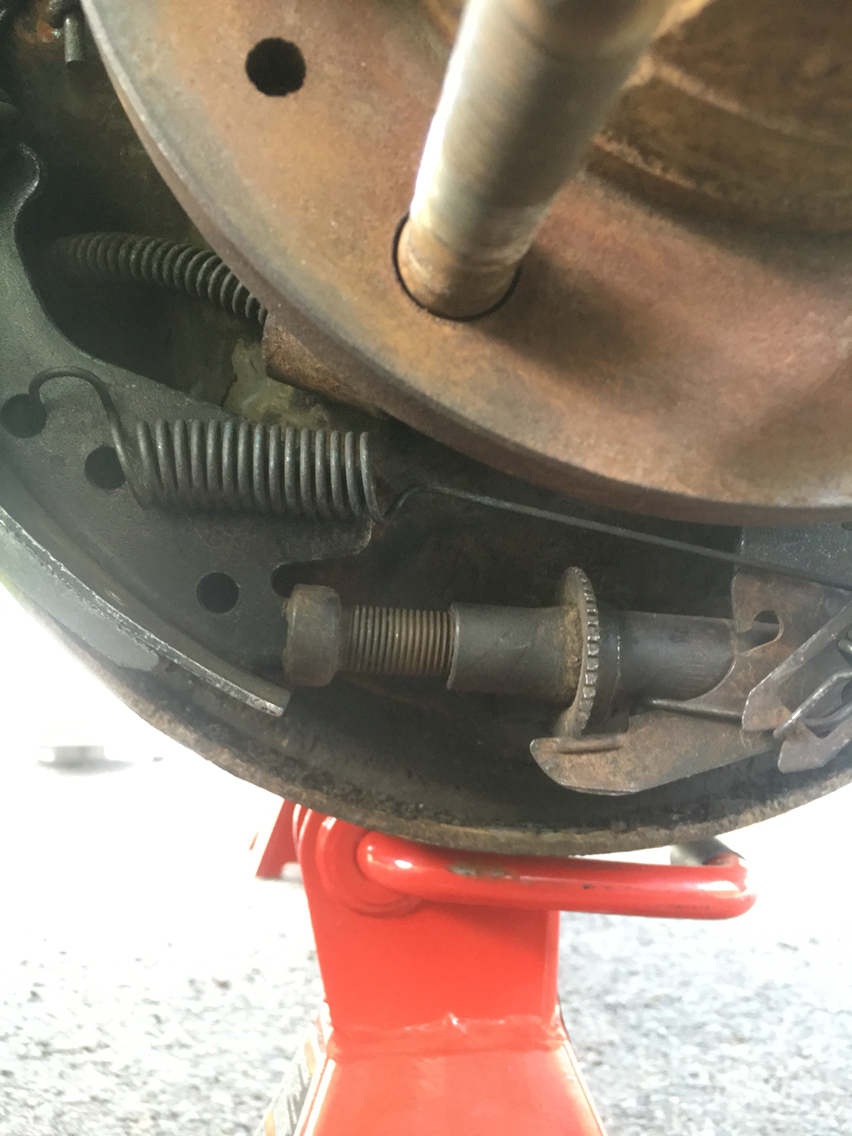
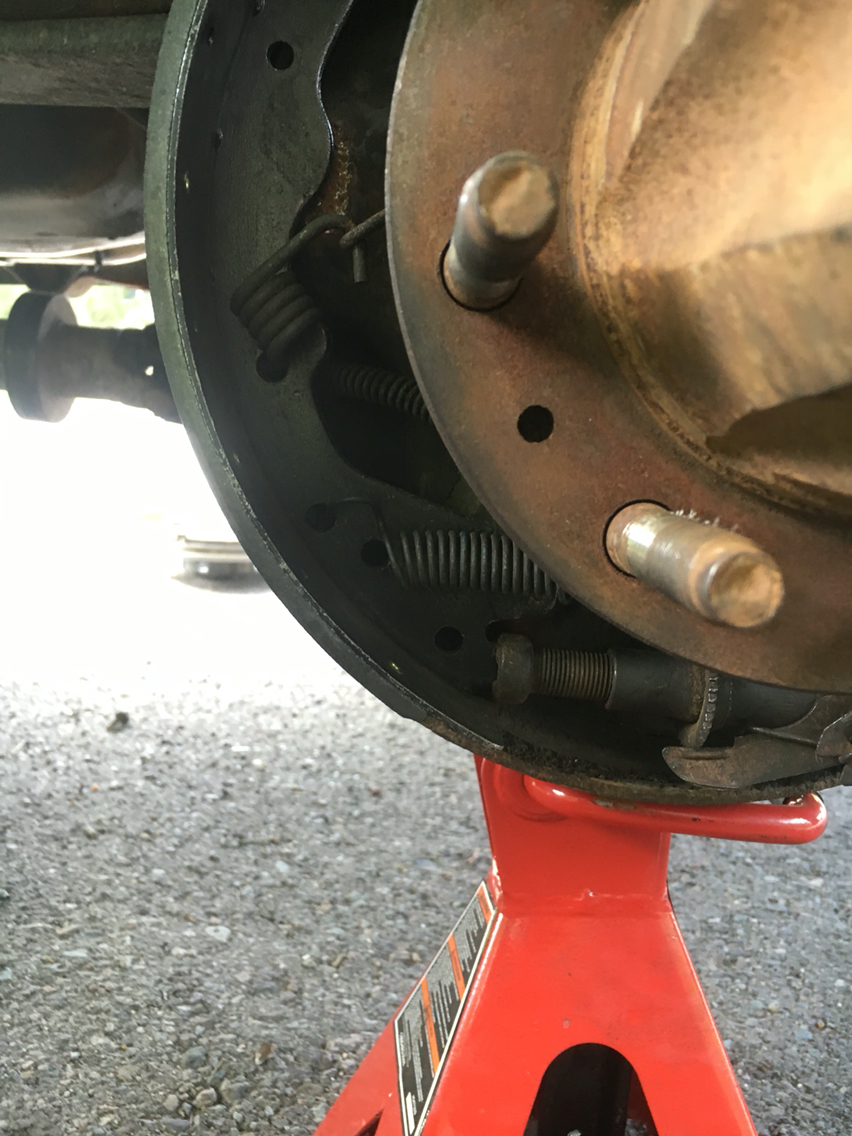
Hey boys, I went ahead and set about on the task of replacing my rear brake shoes today as they were getting worn. I went and bought new shoes and new drums and got to work...my god are there a lot of springs in there. No wonder every shop wanted at least $500 to replace both brakes. Took me 4 hours just to do one side and I'm not even sure I did it right...I was hoping you guys could tell me if I did:
Is it normal that I would have to bleed the lines now?
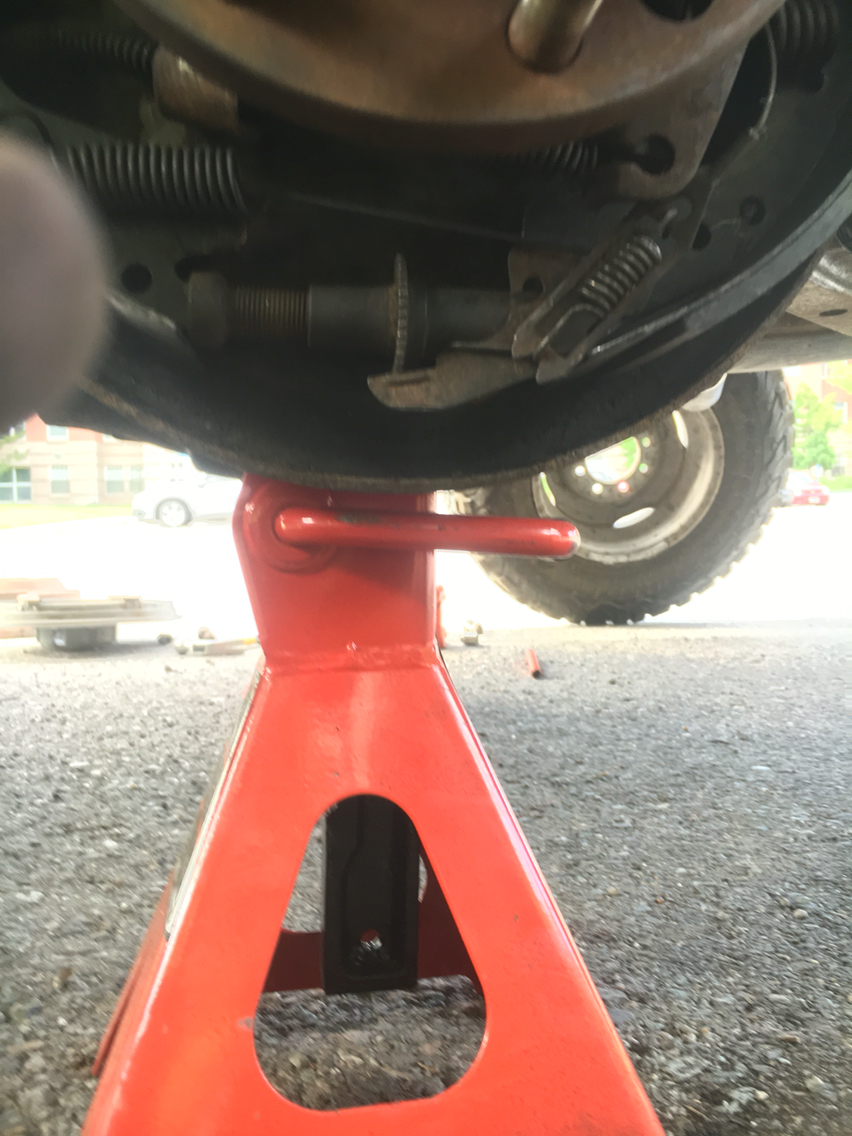
the adjuster cable is not installed correctly, and that bottom brake shoe spring doesn't look like it is in the right hole either. if you haven't opened a brake line you should NOT have to bleed.
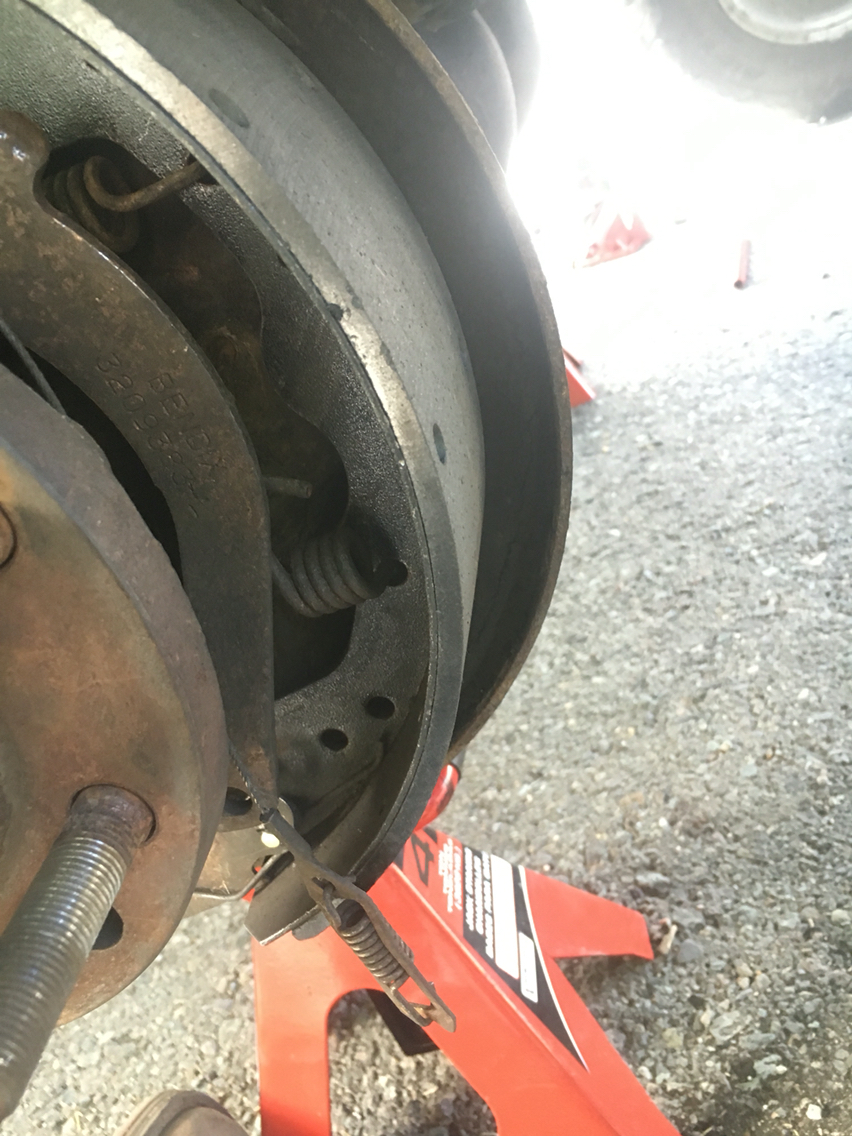
little cable going from top to self adjuster is not right . should be over a half moon piece on i believe rear shoe not hanging loose . best to take both drums of at same time but only take one side apart at a time so have other for reference .
the adjuster cable is not installed correctly, and that bottom brake shoe spring doesn't look like it is in the right hole either. if you haven't opened a brake line you should NOT have to bleed.
The adjuster cable was getting torn anyway. What exactly does it do?
Also, both of the wheel cylinder Pistons came out. Would that let air in?
hopefully you still haven't touched the other side, so you can refer to it for correct installation.
Originally Posted by douglpr42
little cable going from top to self adjuster is not right . should be over a half moon piece on i believe rear shoe not hanging loose . best to take both drums of at same time but only take one side apart at a time so have other for reference .
Yup, I haven't done the other side yet though it's not much help as the entire thing is covered in an unknown substance so thick that it's near impossible to see anything through.
that unknown substance is possibly gear oil from the rear end seeping out ... may need to replace the seal. wash it down with solvent so you can see.
yes, if the pistons popped out then air could enter.
joey2fords is correct, you have the adjuster cable not installed, it doesn't appear to have the Cable Guide for it.
You have the lower spring not properly installed.
Also, you should pull the Adjuster out, Clean the threads, Apply a little white lithium grease to the entire threaded part and each end that fit into the caps ... And ensure it turns easily!
the adjuster cable is, theoretically, there to adjust your rear drums whenever you drive in reverse. in real life, they seem to never work. I did notice that it was frayed, I would replace it.
the adjuster cable is, theoretically, there to adjust your rear drums whenever you drive in reverse. in real life, they seem to never work. I did notice that it was frayed, I would replace it.
I guess a trip to O'reillys is in order then
Originally Posted by Festus Hagen
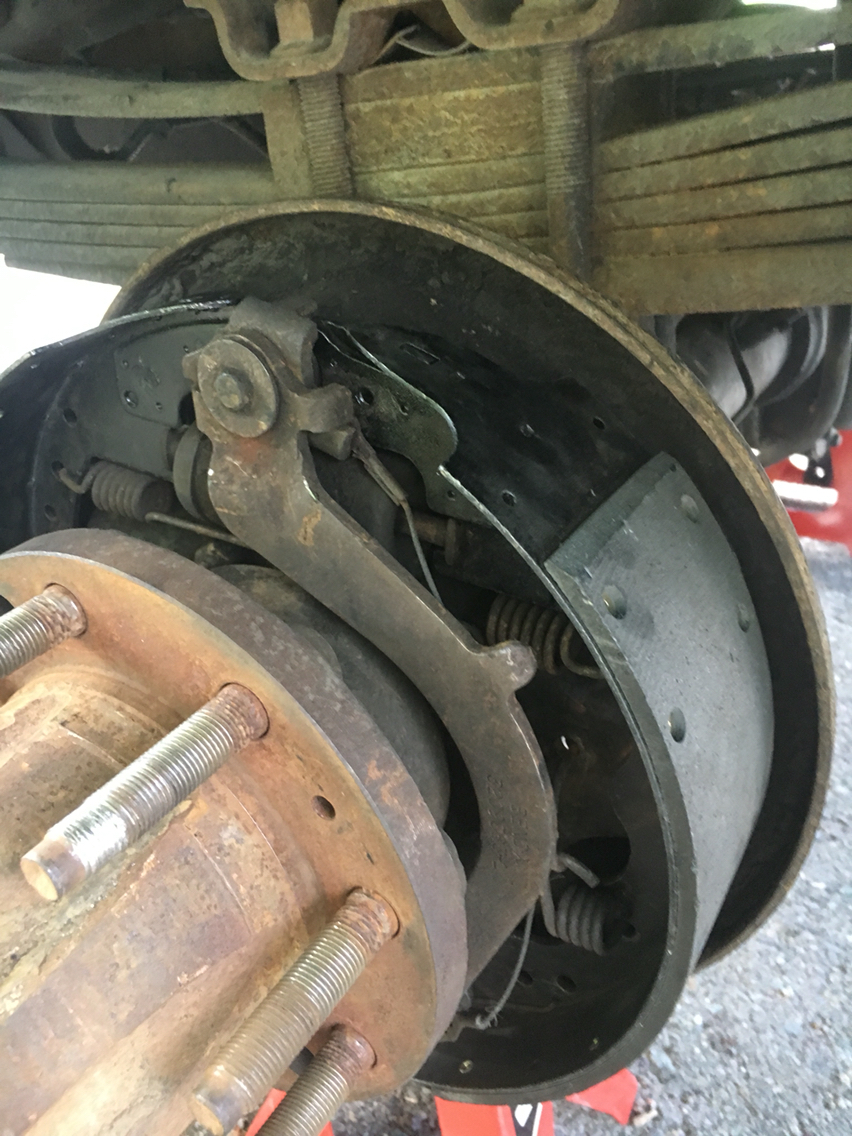
Here ...
joey2fords is correct, you have the adjuster cable not installed, it doesn't appear to have the Cable Guide for it.
You have the lower spring not properly installed.
Also, you should pull the Adjuster out, Clean the threads, Apply a little white lithium grease to the entire threaded part and each end that fit into the caps ... And ensure it turns easily!
If you look at that post with the picture, there is a red t in the word adjuster, if you look at the picture right above that red t at the very bottom edge of the picture you'll see a notch in the first metal part ... That is where the lower end of the Adjuster cable spring connects. That is the Adjuster Lever.
You can just barely see it ...
Basically in operation, when you back up and apply the brakes, the shoes expand, tightening the adjuster cable pulling the adjuster lever up thus turns the adjuster wheel ... There is a little more to it but that's enough to grab a basic understanding.
O-yea, I keep forgetting ... DON'T let the pistons pop out when you do the other side ...
They make low cost brake spring tools that make life much easier.
When you put it all back together (after cleaning and lubing the Adjuster) leave the adjuster all the way in, slip the drum on to ensure it goes over the shoes, pull it off and run the adjuster out until the drum just goes on but doesn't drag on the shoes ... It takes a couple times to center the shoes, a little tight then back it off a little.
-Enjoy
fh : )_~
Thank you so much for that diagram! I spent an hour on google looking for one similar.
Also, I did buy a brake spring tool and I can't imagine trying to do it by hand or with a screwdriver.
New drums have oil or grease as preservative. To get them clean - clean - means lots of HOT soapy water and a brush. Rinse well and Dry thoroughly. If scalding hot water is used they won't rust because the steel will dry right away.
Then use clean shop towels and brake cleaner or Naptha (best non residue) and wipe down the drum surfaces so the metal pores are absolutely clear of any factory oil or grease, fingerprints etc, this is often neglected or overlooked.
This prevents any contamination of the brake lining. Wear a clean pair of disposable rubber gloves when installing the drums. PITA, but the idea here is to keep grease and dirt and fingerprints off the lining, that will cause hot spots and glazing. This will aid in a good break-in or bedding in. Ditto on cleaning the adjusters. Soak them in solvent, wire brush threads, dry thoroughly till they turn smoothly. Then lube with anti-sieze or high temp grease. Remember the brakes get HOT and exposed to road grime and salt. It's worth getting everything back according to Hoyle just so you get an understanding of how everything is supposed to work.
Honestly I'd look at replacing the wheel cylinders too, definitely the brake hose and all the springs. When it comes to brakes it's like peeling an onion. You'll be rewarded when completed with good brakes (priceless) and most likely better than any $500 store bought service, because you refuse to cut corners.

 07-05-2016, 09:12 PM