When you click on links to various merchants on this site and make a purchase, this can result in this site earning a commission. Affiliate programs and affiliations include, but are not limited to, the eBay Partner Network.
hi , don't mean to sound stupid but is there a way of adjusting the hood ? its been an ongoing problem for a long time before I got it due to wear and chaffing marks on side edge to bonnet ..oops sorry hood ...uk based haha ...but when I drive along and hit bumps undulations in road surface the ..hood lifts by about an inch on the back edge by the firewall on both sides ? couldn't see any elongated bolt holes on the sprung hinges ?
regards Sean
I also have a 53 f100, and I also have been dealing with getting the hood to fit well. Here are a few things that I have learned about the stock hinge mechanism. First, the single spring works to keep the hood open and to snug the back corners down when closed. The spring actually provides its greatest force when the hood is closed. That is: the farther down in the closed position the two hinge arms are, the greater the force that is trying to snug the hood down against the cowl. So, while this sounds counter intuitive, if you raise the hinges up, you actually give the arms more room to swing down, and that translates into greater force pulling the rear of the hood down. But, when the hinge arms swing down more, they also move the hood a bit towards the cab. So, if you like the alignment of the hood and fenders and cowl, but are trying to get the hood to stay closed at the back, then you should not only raise the hinge up a bit, but also move it slightly forward. And very important: the pivot points must be well greased and the arms should move easily. If it looks like the bolted end of the hinge arm is touching the inside of the hood when it is moving into the closed position, try backing up the hinge/hood bolts a turn or two. If you do this, and it helps, wire the two bolts together so they cannot tighten or loosen (the bolts have holes for this purpose.) I have noticed that making even a small change on one side makes things work quite differently on the other side. So, do only one side at a time. And, in small steps. That way you will know exactly what kind of difference any adjustment made. On my own hinges, when I got them to a point where they were actually starting to work well, I drilled two little holes through the hinge side and through the cab where they mount against the side of the cowl. That way, I had some sort of record of where I could put them back into a known position and then try something else. I have come to admire the ingenuity of his hinge design, but I have spent way too many hours on my own hood getting it to close nicely.
As far as I can tell, all attention at the beginning should go toward aligning the back edge of the hood with the cowl. This alignment is not just seeing that the space is even, but also that it sits well in height relative to the top curve of the cowl. This is all a whole lot easier said than done, because, as I mentioned in my first response to this post, an adjustment up and down may impact the evenness of the gap. With regard to the side /side at the fenders: if all alignment issues between the hood and the cab look like they have have been satisfactorily dealt with, then I think that this is done at the fenders themselves. It may even mean that the radiator support has to be adjusted sideways a bit. And then there is the hood latch. When it is properly located, it can actually pull the hood forward slightly, push it back slightly, or move the hood side to side slightly. Moving the hood latch can correct some alignment problems. It appears to me that a properly aligned hood in its closed position should, ideally, be sitting on the four rubber bumpers that attach to the top of the fender, the two front rubber bumpers close to the nose of the hood should be in contact with the metal at the front of the fender, and the back of the hood should be sitting on the cowl lacing.
What I have learned is that the whole process of aligning is like trying to find the one correct answer to a problem that has many, many variables. I do not know enough about aligning one of these hoods to give someone clear step by step directions that would result in a perfect fit. But, I have been struggling to get a good fit on my own, and I am slowly making progress. I am at a point with my own where I will be loosening up the front fenders to try and move them to a better position with respect to the side alignment with the hood. I'll take a stab at moving my front fenders a bit today and see how things go.
I wish I knew enough to say something authoritatively about the support rods on the underside of the hood and from the cab to the hood front locking panel. I do know that the rods that are part of the hood can correct some up/down alignment issues at the either side of the nose of the hood. If the radiator support won't move at the bottom where it mounts to the frame, then the fender move may tilt the radiator support a bit to one side. If so, then I will have to adjust the hood nose using the support rods. I have observed that even small adjustments (one full turn of the nut) in these rods can make a visually noticeable difference in alignment.
I would love to see the definitive guide to hood hinges and proper alignment. Axracer compiled great step by step instructions for an assembly sequence for all the front sheet metal, but I do not recall any details about hood hinge adjustment.
I am interested in knowing if assembling and aligning everything with the hood on, but without the springs in the hinges might be a way to deal with all this stuff. As anyone who has tried to do this work knows, many adjustments just cannot be made with the hood attached to spring-loaded hinges, as the force of the spring limits the kind of adjusting that can be done. For example: it may be that adjusting the rotated angle of a hinge plate could correct an alignment issue. Rotating the plate could leave the top hinge arm pivot hole in exactly the same place relative to the cowl, but move the position of the pivot hole in bottom arm. My guess is that aligning all the parts with all the rubber bumpers and cowl lacing but without springs in the hinges or installed latching mechanism might result in the hinge plates moving to the exact position that they should be in for the hood to open, close and align properly. Unfortunately, it is almost impossible to access all the hinge mounting bolts if the inner fenders are in (which they should be) and an engine installed. There's just no room to get in there and tighten the hinge bolts.
Lastly, if anyone has come up with a way that a person can do all this work by themselves, I'd like to hear about it. Before I painted my truck, I could use bungy cords from the ceiling to hold the hood in an open position while I disconnected the pivot bolts and moved the hinge plate one way or another. Now, with new paint, I want to avoid the scratches that the bungy hooks might inflict. My system now is to prop the hood open with a scrap piece of 2" polystyrene foam wedged between the hood nose and the hood locking panel, stuff a thick towel between the hood and the cowl, and undo everything to make an adjustment. The corner of the hood sits on the towel while I do all this. All the while, I pray that the wedged piece of foam doesn't slip out and make the hood fall.
Sorry for such a long winded post. To paraphrase mark Twain: if I'd had more time, I could have written a shorter post.
Thanks. I'm bookmarking this page for when I come to do it. My hood was aligned quite well before I took it off but needed 3 people to open and close it! Also had to grind one of the bolts out because the welded nut had parted company with the plate. Looks like it will be a PITA to sort that out too.
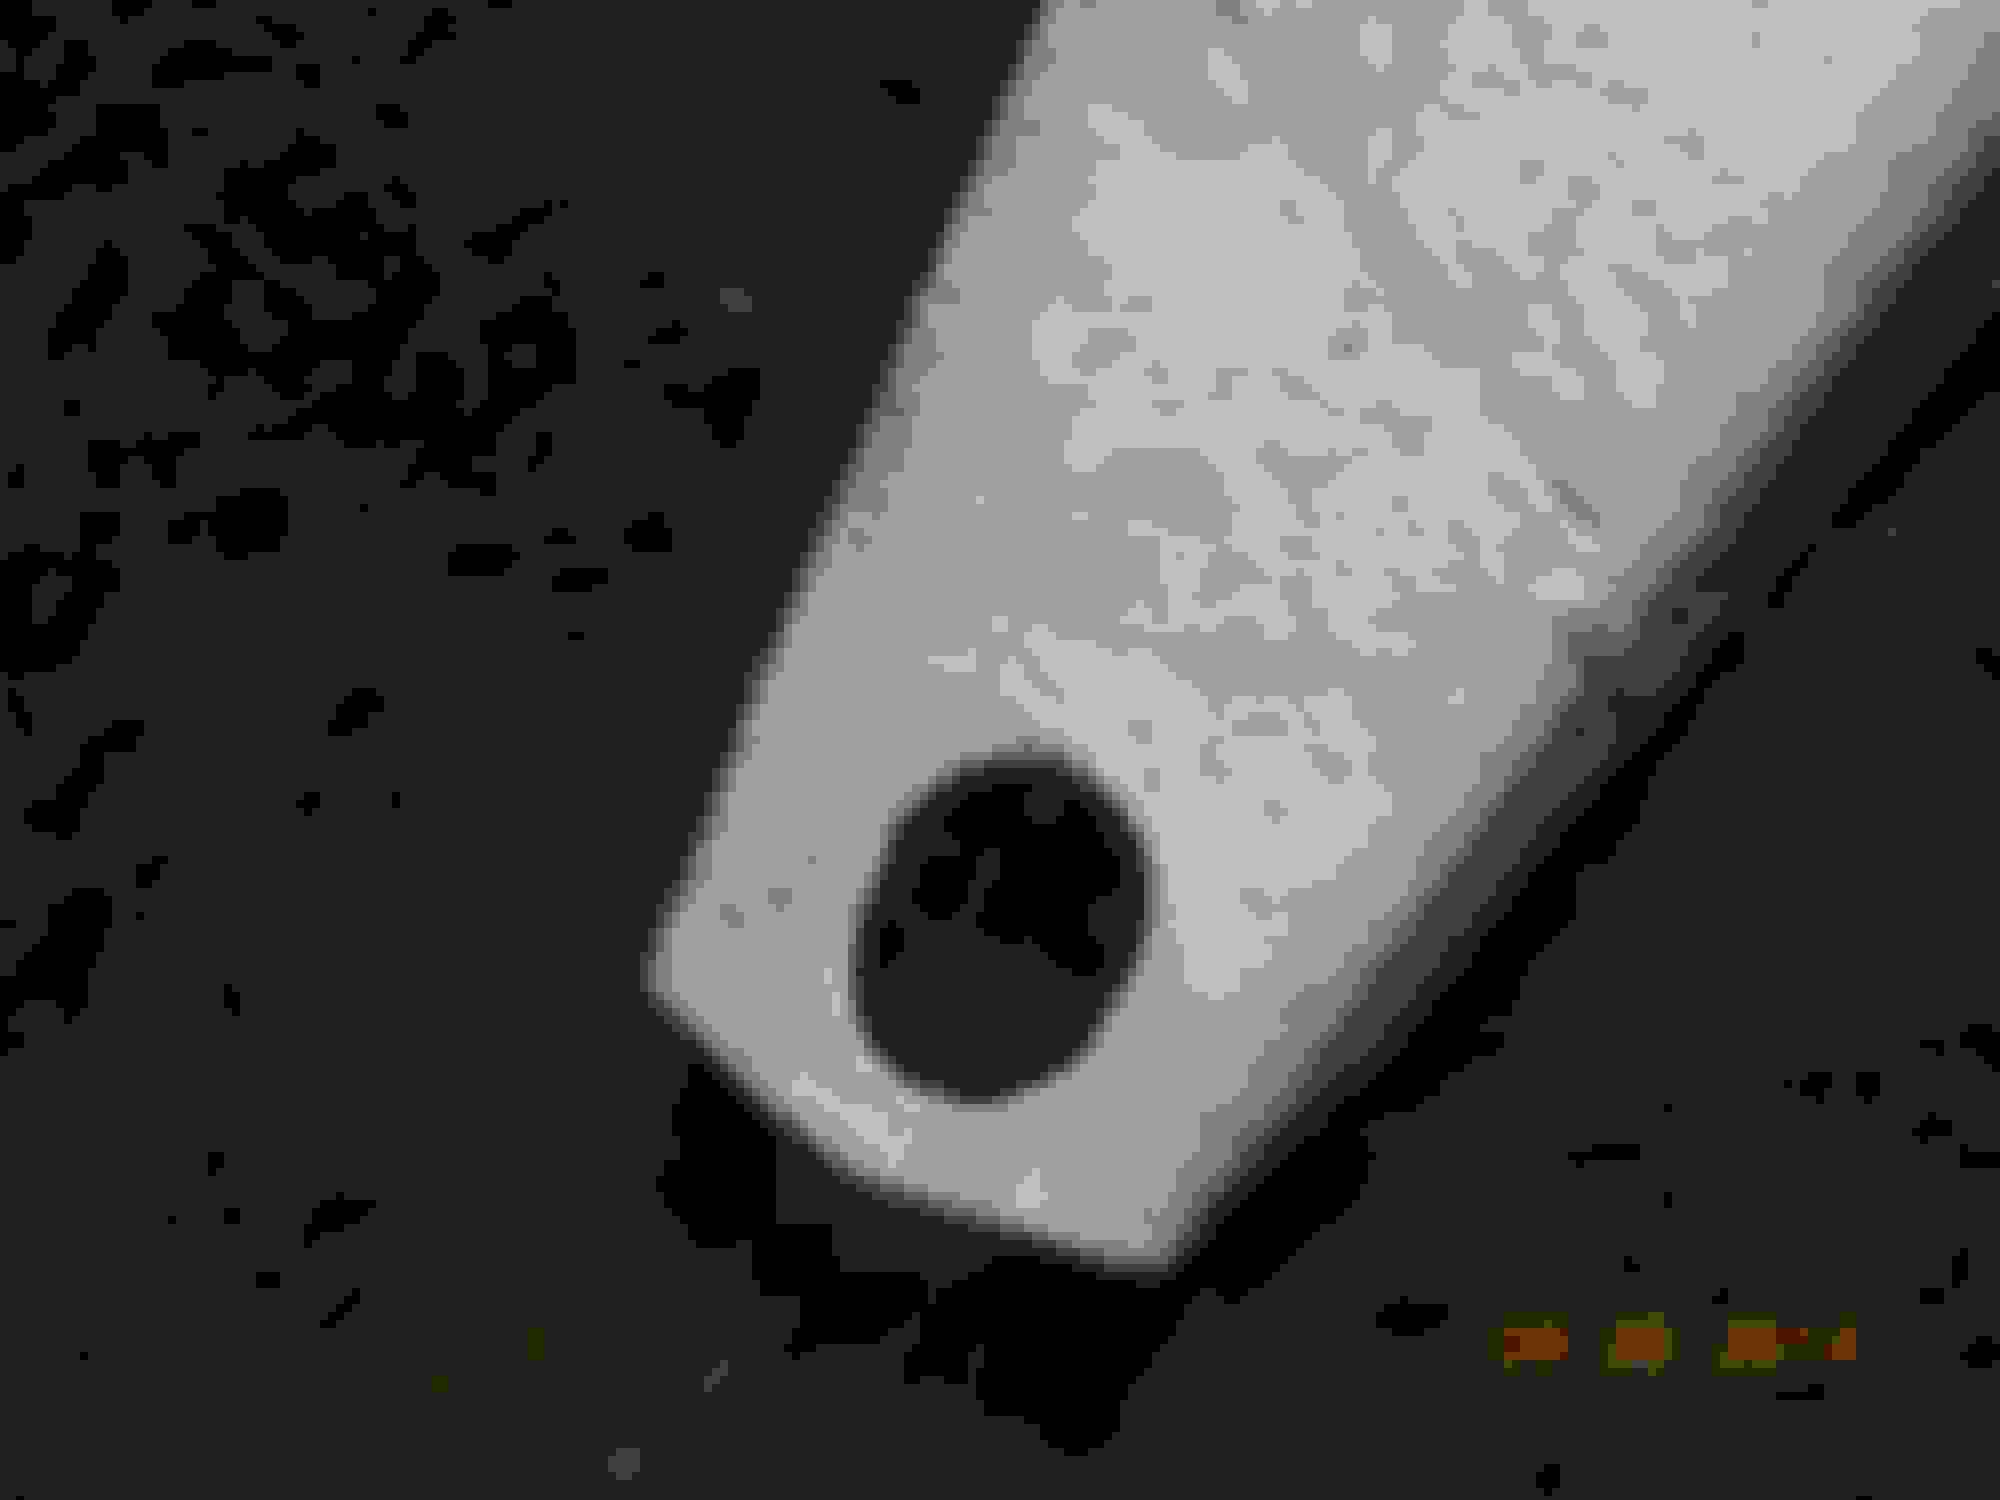
First you need to start with the thing that the hood mount to, the body. Make sure that your body mounts are all in good shape and that your frame holes have not been wallowed out over the years.
Wallowed out
Should look like this
Since the hood is so long and the front is attached through the front structure to the frame any movement in the cab is amplified. Hood closing efforts can be impacted also.
This Hennessey Takes the Expedition Tremor's Off-Roading Capability to the Next Level
Slideshow: The VelociRaptor Expedition gains a lift, upgraded suspension, Brembo brakes, and trail-ready equipment while retaining the stock 440-horsepower EcoBoost V6.
Rezvani's Latest Post-Apocalyptic Monster Is a Ford F-150 Raptor Underneath
Slideshow: Called the Fortress, the 850-horsepower pickup combines Raptor underpinnings with military-inspired features, survival equipment, and a starting price of $285,000.