Engine Rebuild Part 2

#392
 02-27-2017, 07:19 PM

The course threaded end went into the block, but the top of the stud was fine threaded.
#393
02-28-2017, 08:37 AM
Fleet Mechanic
Don't worry about torqueing the stud itself into the block.
Run a bottoming tap into all the deck bolt holes to clean up all the threads.
Screw in the studs - most studs now have an Allen socket in the end. Just tighten them snuggly hand tight. If you try to torque them to 85 ft-lb you will likely strip the Allen hex. A little Locktite will insure they stay in place when removing the nuts in the future.
Torque the nuts as directed.
#394
02-28-2017, 11:12 AM
 Although, I didn't use locktite.
#395
02-28-2017, 12:22 PM

The stock head bolts can be reused also. The ones that have to be replaced are engines that use Torque to Yield head bolts. You can usually tell an engine has this TTY head bolts by the torque requirements. They will usually be something like torque to this ft/lb, then this ft/lb and then go an additional 90 degrees.
It's a good idea to replace head bolts on the 300 but it's not always required.
It's a good idea to replace head bolts on the 300 but it's not always required.
#396
02-28-2017, 12:42 PM
Elder User
#397
03-04-2017, 02:40 PM
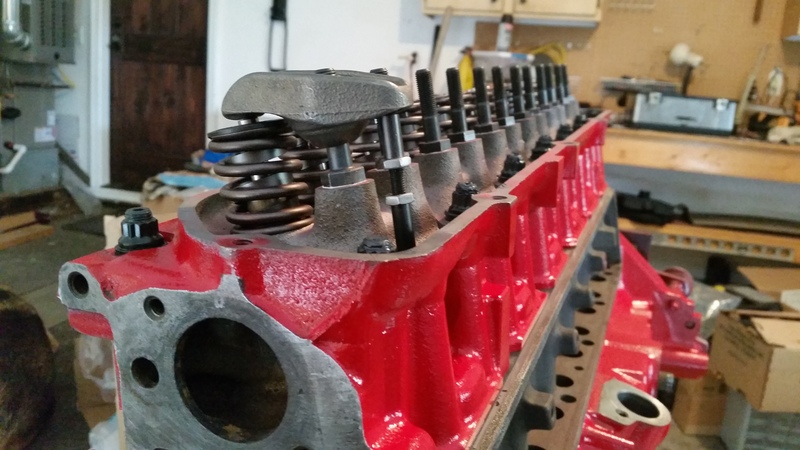
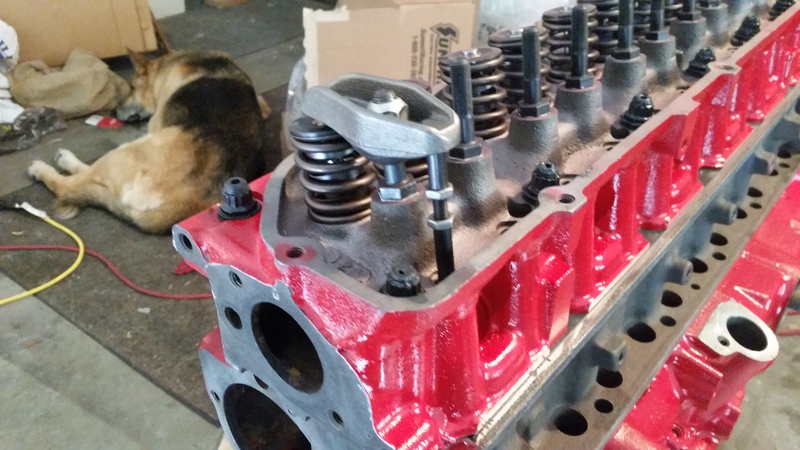
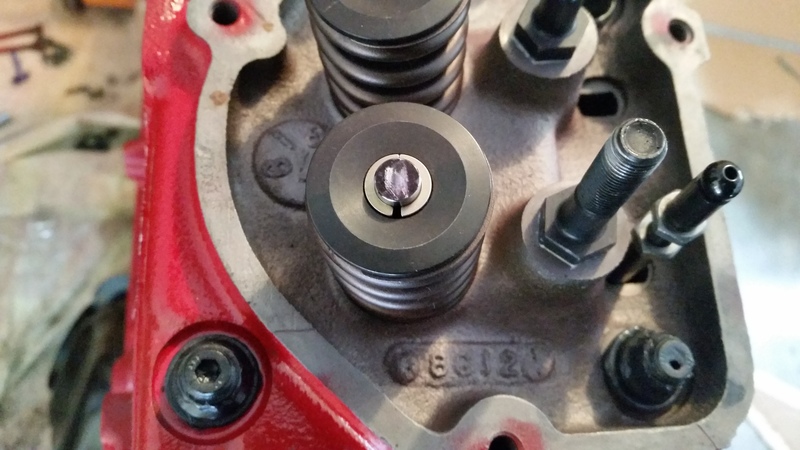
Measured for pushrod length today. I was hoping for a standard size (they sell them locally in 0.060" undersize), but they ended up needing to be around 10.055" in length, which is around 0.080" shorter. A bit more than I was expecting, but that's what seemed to make it happy.
Covered the valve stem tip with marker and then installed a solid lifter I borrowed from my machinist, and then the rocker arm assembly. Tightened until it just barely turned by hand, and then gave the engine a few rotations (first time I've spun it, it was fun).
Again... ignore the color.
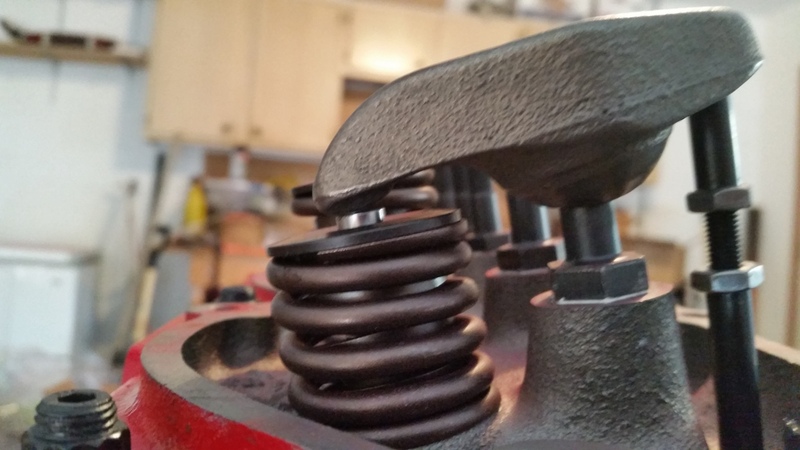
Then checked where the rocker arm was applying wear to the valve stem tip.
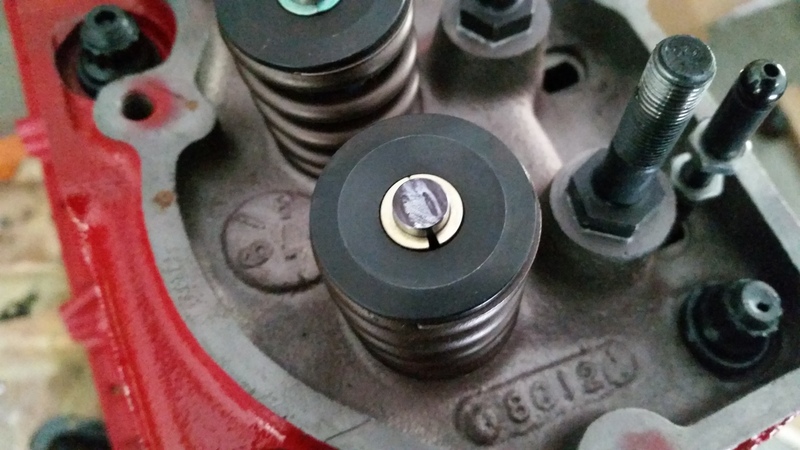
The wear mark was a bit too far away from the pushrod side, which tells me they were too long (expected).
Shortened it a bit, reapplied the marker, and then spun it again.
It was just about perfect.
Tried it in a few other valves and they all lined up about the same.
I may take a trip down to the parts store and just grab some of the 0.060" undersized ones and see how well they line up. Otherwise, anyone know a good supplier of custom length pushrods?
Covered the valve stem tip with marker and then installed a solid lifter I borrowed from my machinist, and then the rocker arm assembly. Tightened until it just barely turned by hand, and then gave the engine a few rotations (first time I've spun it, it was fun).
Again... ignore the color.
Then checked where the rocker arm was applying wear to the valve stem tip.
The wear mark was a bit too far away from the pushrod side, which tells me they were too long (expected).
Shortened it a bit, reapplied the marker, and then spun it again.
It was just about perfect.
Tried it in a few other valves and they all lined up about the same.
I may take a trip down to the parts store and just grab some of the 0.060" undersized ones and see how well they line up. Otherwise, anyone know a good supplier of custom length pushrods?
#399
03-04-2017, 03:54 PM
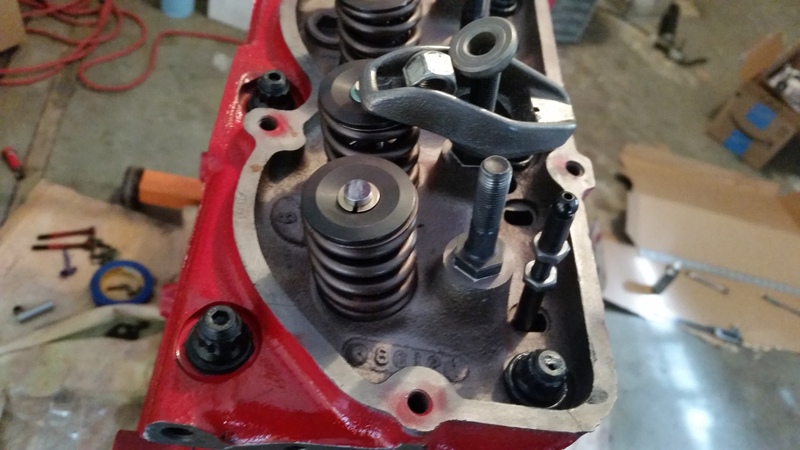
I think I may be okay with the standard undersized pushrods.
I lengthened my checker to the 10.080" that I can get and this is the wear pattern:
I then shortened it back down to what I measured earlier at 10.060" and this is the wear pattern.
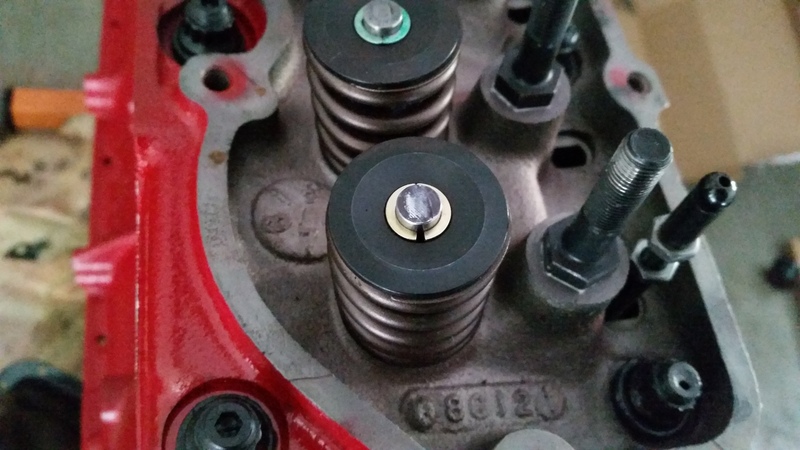
I honestly can't tell the difference.
Thoughts?
I lengthened my checker to the 10.080" that I can get and this is the wear pattern:
I then shortened it back down to what I measured earlier at 10.060" and this is the wear pattern.
I honestly can't tell the difference.
Thoughts?
#402
03-04-2017, 08:29 PM
Interestingly, I actually thought the 10.060" looked closer to the manifold side than the 10.080". I am having O'Reilly get them in so I can at least give them a try. If they work, I'd rather spend $2 a push rod than $8 for custom ones. However, I'd rather they be right.
My next issue....
It seems that Fel Pro, who is about the only company who makes a lot of the gaskets for the 300, has for some reason discontinued making them out of rubber. The only options that seem to be available anywhere are cork. I'm not a fan of cork gaskets and am having a bugger of a time tracking down rubber ones.
Granted, I'd prefer the blue silicone, but the silicone valve cover gasket only fits the 84+ engines due to them using smaller valve cover bolts. The bigger valve cover bolts of the '83 and older blocks (I'm using a 78 block) wouldn't fit through the metal rings in the gasket.
I'm perplexed why they'd discontinue rubber gaskets in favor of cork ones. Less expensive to make?

#404
03-04-2017, 08:38 PM

