When you click on links to various merchants on this site and make a purchase, this can result in this site earning a commission. Affiliate programs and affiliations include, but are not limited to, the eBay Partner Network.
I saw something else from one of your photos that points back to an earlier model truck, at least as it relates to the cab. These trucks were available with shoulder belts --although I've never actually seen one of these trucks equipped with factory shoulder belts.
In '67-'early '71, the bolt hole for the upper belt bracket was located on the inner, back portion of the cab beside the back window.
In the mid-year '71-'72 models, this bolt hole location was moved around to the side of the cab, just behind the rear edge of the door.
Your cab could be a '69 or, it could be at least as late as an early '71.
Also, '67-'70 speedometers had a red line running underneath from 70 MPH to 100 MPH. '71 and '72 speedometers didn't have this red line.
Well my shoulder seat belt bolt hole is on the back portion but my speedo doesn't have a red line has a white line I'm not sure what that means
But wait it doesn't stop there lol so last night I went to go look for the Vin on the frame and it looks like the truck might have been in a collision before the front of the frame looks like it was welded on right before the cross member and so I found the Vin but I don't think it's right lol so I'm going to try and find the one under the cab for a tie breaker
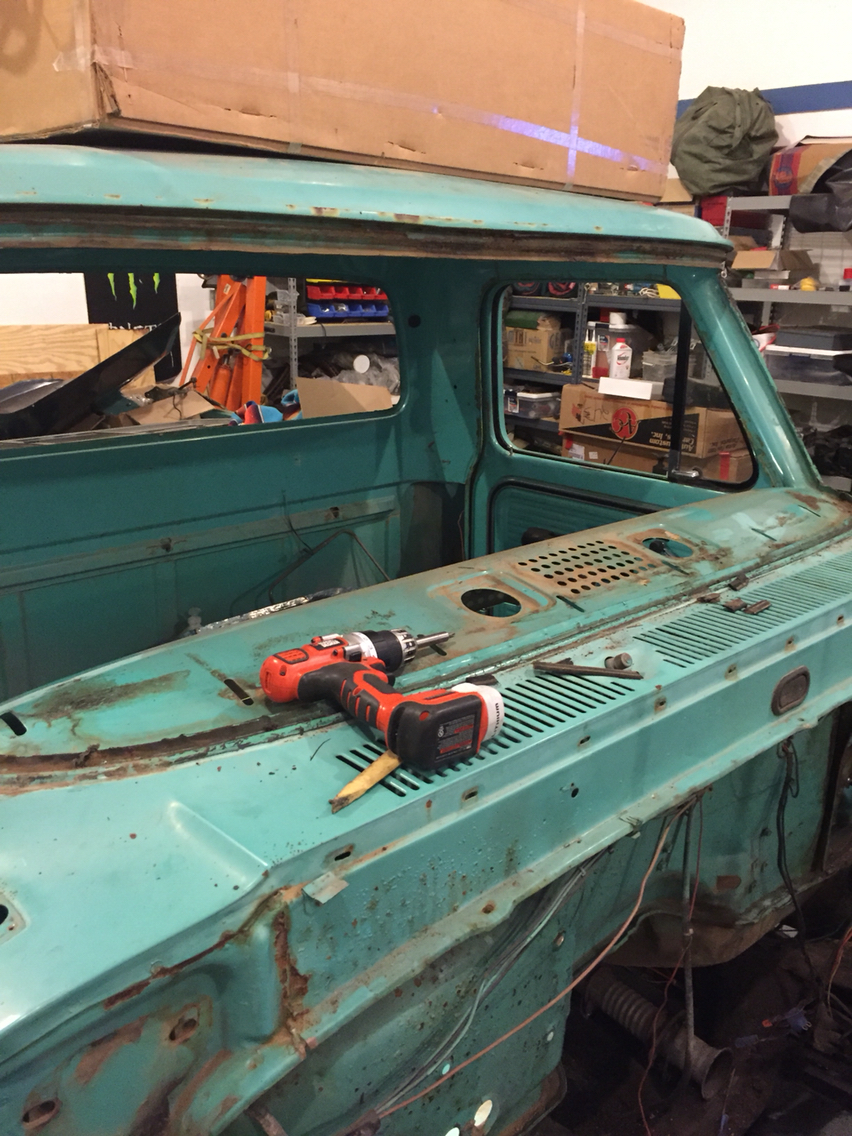
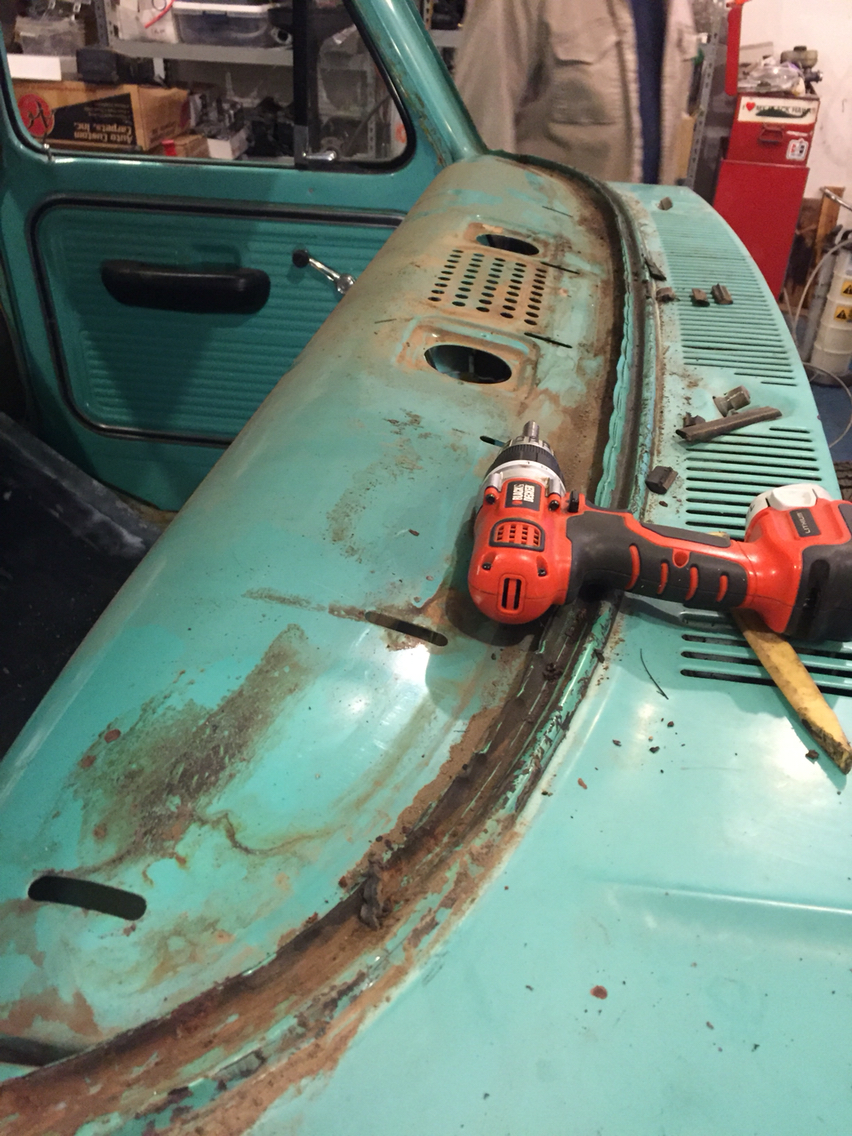
Last night after looking for vins trying to solve the year mystery I went ahead and removed the front and rear windshields luckily only found a few rust holes and made the decision to leave the pad off and weld up the holes on the dash next is a really good washing and some rust stopping coatings then the start of the welds!
The white line under the 70 through 100 MPH readings just means the (formerly) red line has sun faded to white.
'71/'72 instrument clusters wouldn't have had any lines under the numbers on the speedometer.
The N series serial number you found points to a '72 model.
Whatever model the truck actually is, it's certain the frame VIN doesn't match the one listed on the door tag. Vehicle titles are supposed to be based off the frame VIN number but, I'm sure the number on the door was just easier for them to access and read.
DRC, Thank you I'm pretty proud of it I wasn't sure how they would turn out being the first one I have ever done but I like! I got the cover from MAC's antique auto parts I believe. Are you about to redo your seat?
I'm just starting my 72 SWB F100 project, the seat is one of many things on my "to do" list...
The white line under the 70 through 100 MPH readings just means the (formerly) red line has sun faded to white.
'71/'72 instrument clusters wouldn't have had any lines under the numbers on the speedometer.
The N series serial number you found points to a '72 model.
Whatever model the truck actually is, it's certain the frame VIN doesn't match the one listed on the door tag. Vehicle titles are supposed to be based off the frame VIN number but, I'm sure the number on the door was just easier for them to access and read.
hahah my bad I didn't even think about that one (formerly) red line looks like I need to freshen that bad boy back up too thanks for the help! its the simple random facts I need to learn
It does look like they just used the door tag on the title because it was easier I still haven't been able to find the vin under the cab but in do time we shall see
I'm just starting my 72 SWB F100 project, the seat is one of many things on my "to do" list...
Very nice DRC! did you happen to start a build thread id like to follow, but best of luck with the seat its not too bad time consuming if your slightly OCD about things but once I finish mine ill post more pictures of it I'm just waiting for my new springs to come in so I can replace them
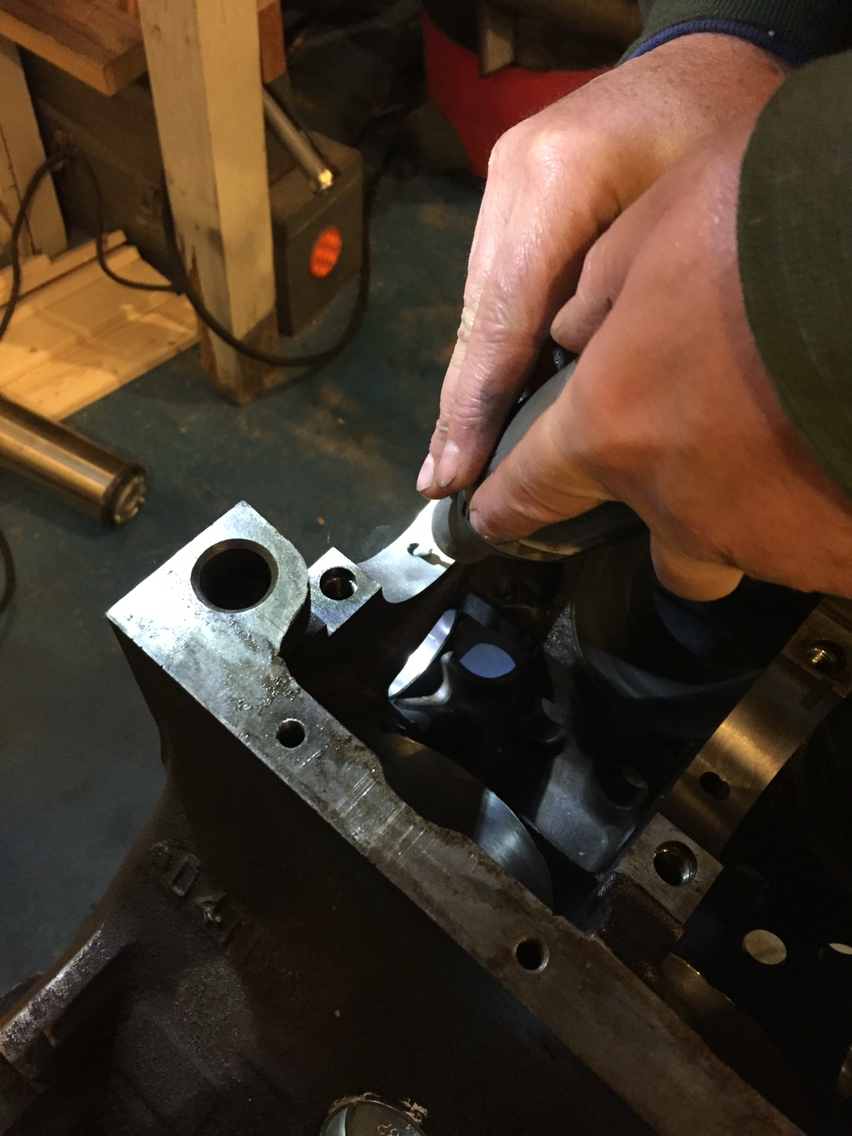
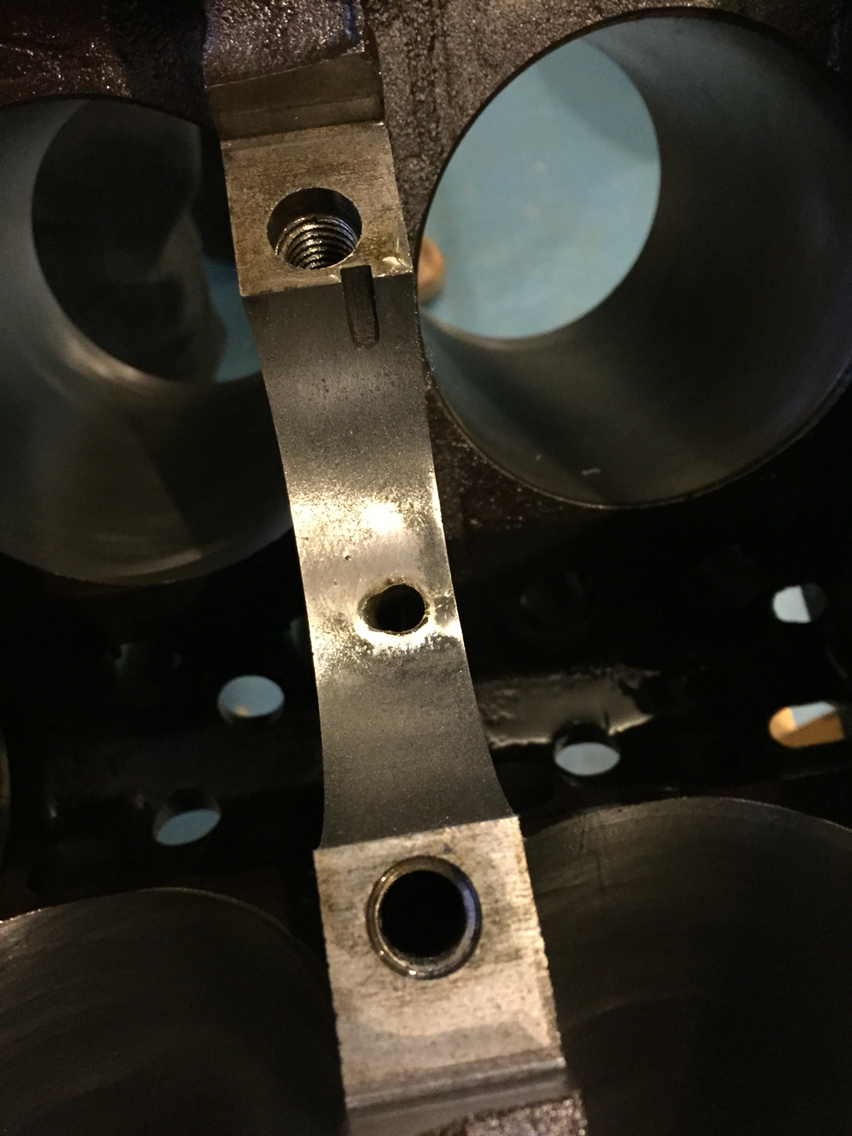
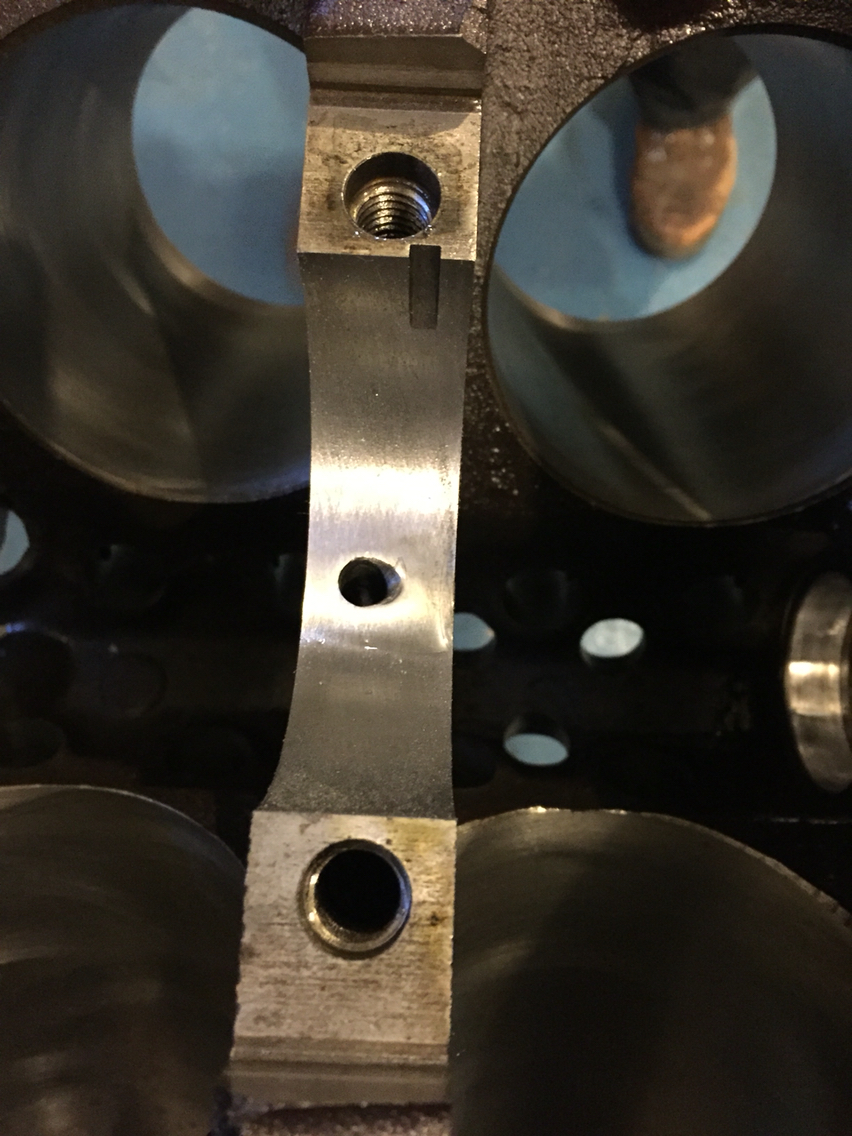
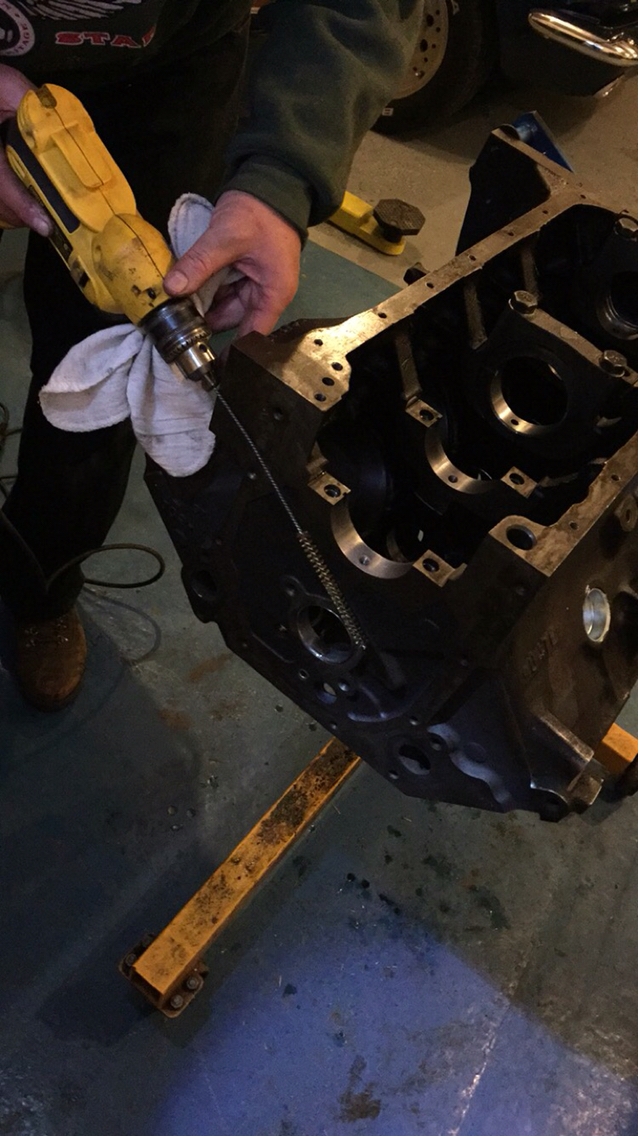
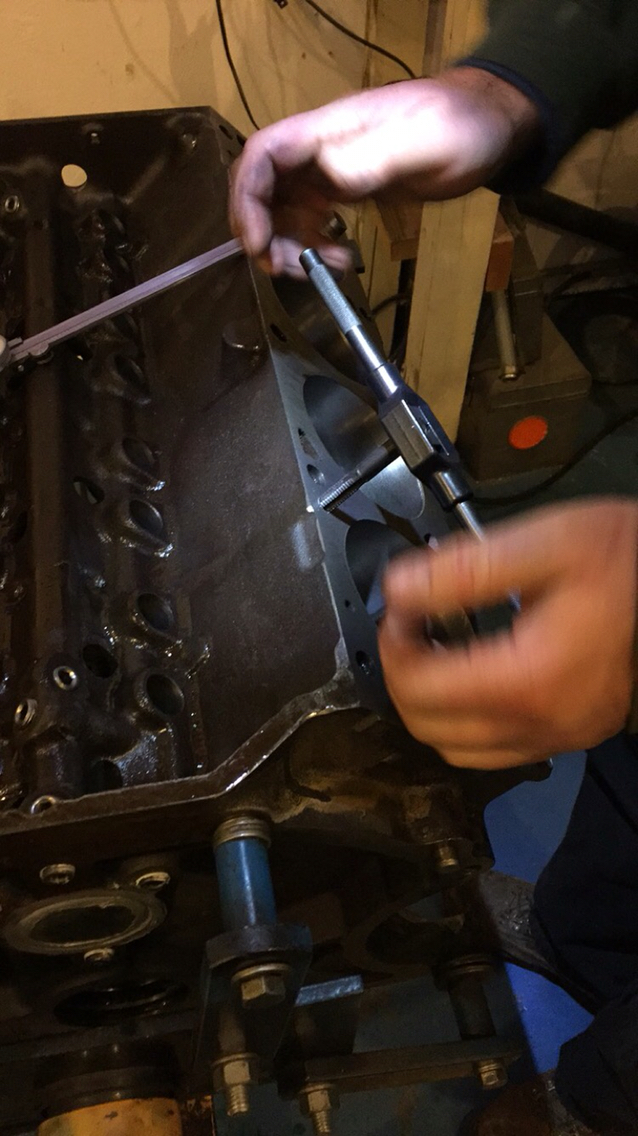
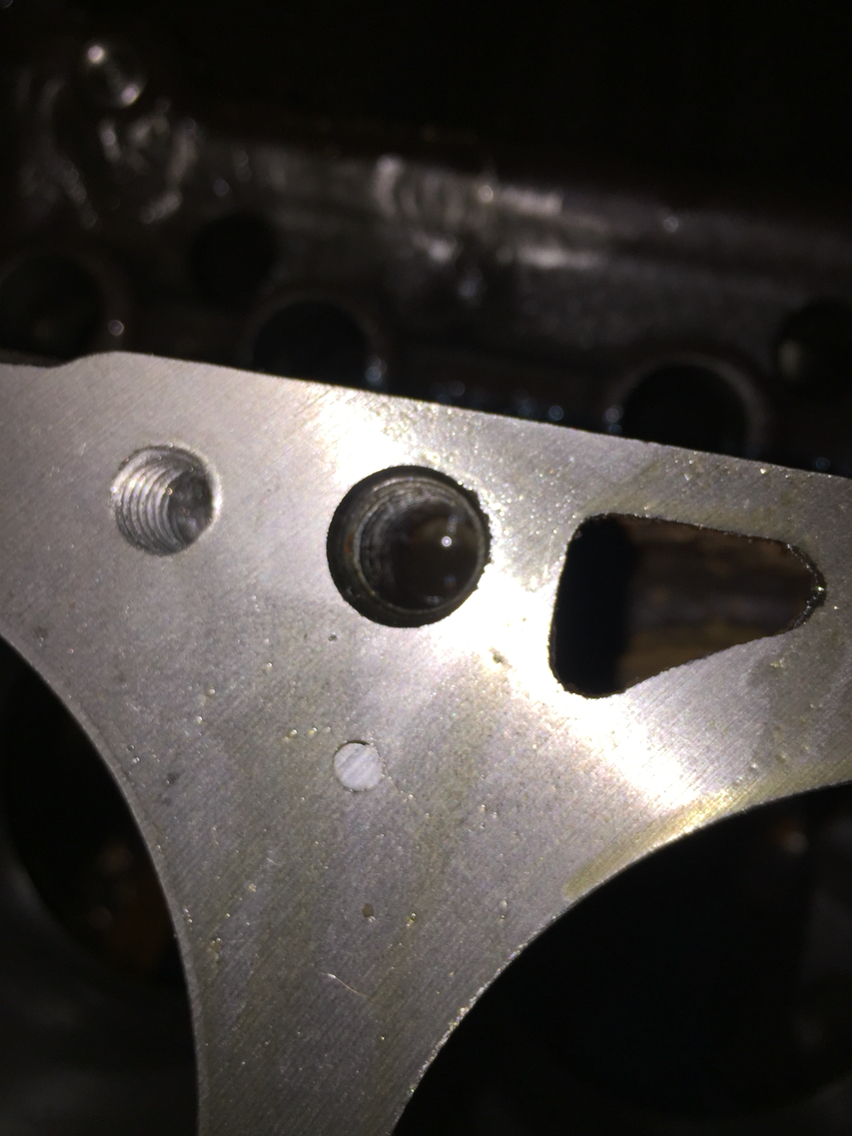
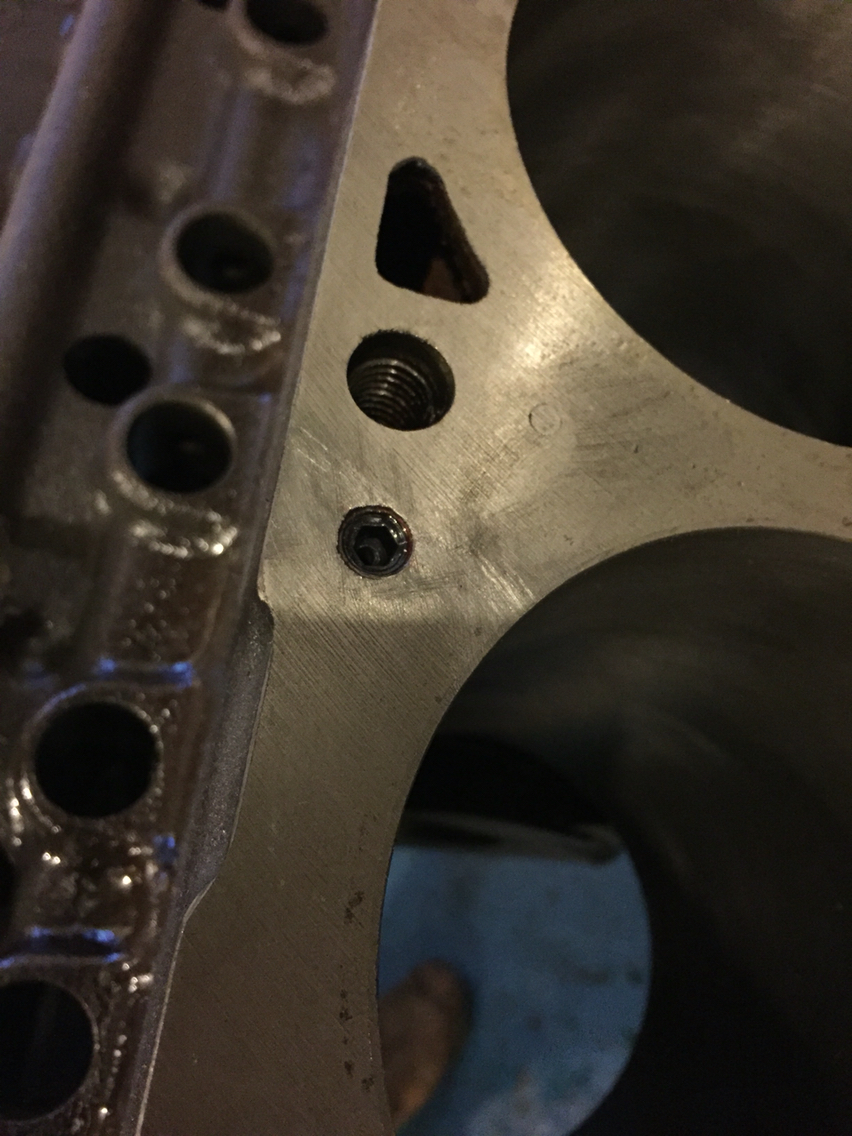
My bad guy's about the slight delay my sister got engaged and that required my attention for the rest of the weekend so unfortunately little Mrs pig-pen had to wait till Monday so last night I got back to her and did a little motor work until I'm able to push her out and give her a good couple of power washings. So since there has been alot of back and forth with the FE motor oil passages I decided to just go ahead and do a few modifications while I had her apart just incase. I restricted the oil passages going to the head tapping and screwing in pin and drilling it out to.070 next was marking up the misalignment and making a notch for better flow of oil to the bearings and crank. I also ordered a new oil pan and windage tray I'll be putting her back together soon!!
Here's a few pictures from last night...I never knew how much of a hassle it would be to keep stopping work and taking off my gloves to take pictures and document the work lol
Sorry 'bout the gloves but thanks for the pics. I like watching progress.
Jefffafa no worries I'm the exact same way I love seeing pics from peoples builds ill be posting many more so stay tuned lol besides it helps me document the progress I make.
6
Made 9 times 831214
Recipe by: Allrecipes
"The hot toddy is a classic winter warmer. Truth be told, it's good any time of year and works particularly well if you're battling a cold."
Thanks so much for your pics of the oil mods. I maybe doing the same things later on. So it's always good to see what I'll be getting into and how it's suppose to look like when it's finished. Does your get-well oil pan have baffles? Which one did you get?
Very nice DRC! did you happen to start a build thread id like to follow, but best of luck with the seat its not too bad time consuming if your slightly OCD about things but once I finish mine ill post more pictures of it I'm just waiting for my new springs to come in so I can replace them
Yeah, I did start a thread. Not much to follow yet though, haven't been able find much free time lately. I'll update as I progress.
Thanks so much for your pics of the oil mods. I maybe doing the same things later on. So it's always good to see what I'll be getting into and how it's suppose to look like when it's finished. Does your get-well oil pan have baffles? Which one did you get?
No problem glad I can return the favor I try to take as many pictures as I can as when I remember too at least ha ha. My new oil pan does have baffles, It's the 5qt moroso steel street/strip pan I'll take more pictures of the oil passages mod as soon as I start putting things together.
I received more presents yesterday
My rocker edelbrock studs
And my new timing chain
I also got a little work done to my bench seat kind of fabricating a spring and repairing the wires will start the cover process maybe soon
 12-31-2015, 08:49 AM


 hahah my bad I didn't even think about that one (formerly) red line looks like I need to freshen that bad boy back up too thanks for the help! its the simple random facts I need to learn
  I'll be putting her back together soon!!
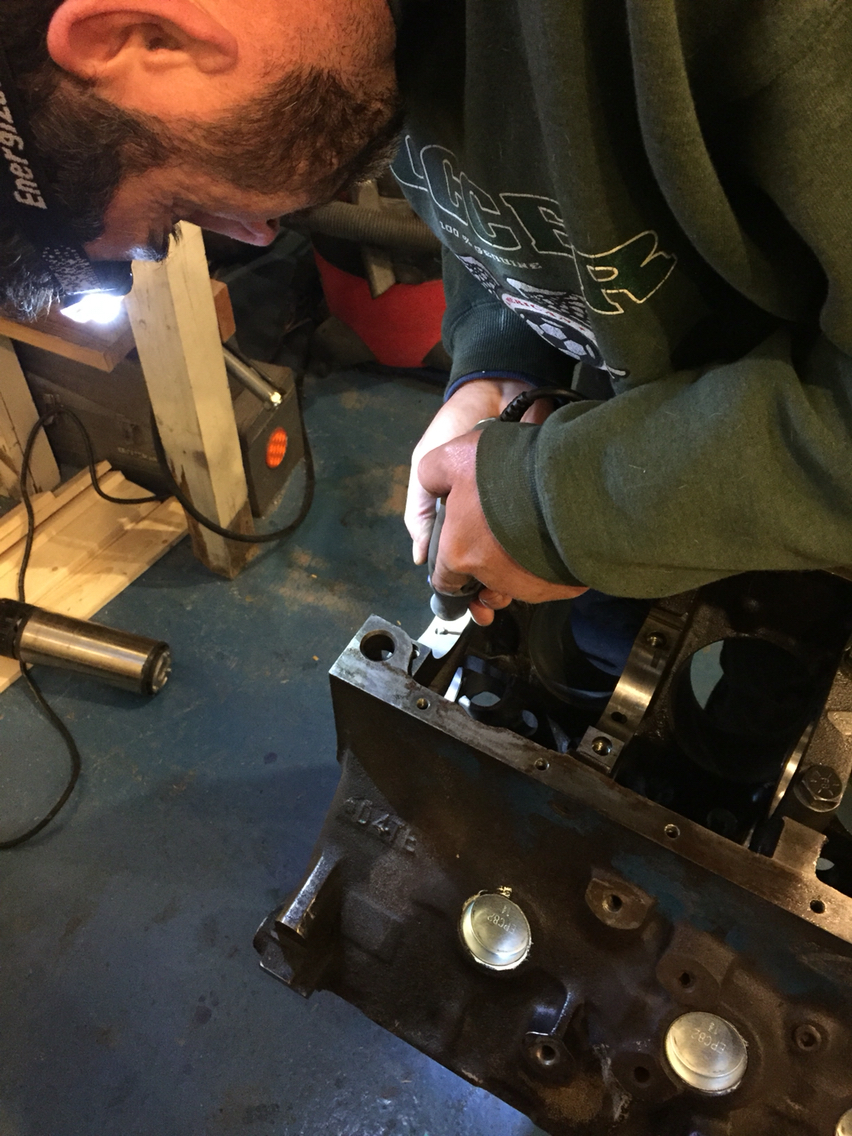
 I like watching progress.


 831214