
Ford SuperDuty Diagnosis on the Cheap
#1
 12-01-2015, 08:22 PM

Join Date: Dec 2015
Location: Chico CA
Posts: 37
Likes: 0
Received 0 Likes
on
0 Posts
Ford SuperDuty Diagnosis on the Cheap
This will be a multi-part write-up, covering how to diagnose, monitor, and run tests on Ford Super Duty Trucks, focusing on the Ford 7.3L Super Duty as that is the truck that I own, but these tools work for all Super Duty Trucks.
Warning: Some technology experience may be required
The write-up will go as follows:
PC Based Diagnosis Testing and monitoring with Forscan
Android Based Diagnosis with Forscan Lite
Android based Monitoring with Torque Pro
Android based Self Tests with CarGauge Pro
I will be posting these over the next few days. Starting with PC based Diagnosis.
Disclamer: I have no affiliation with any of the programs or devices mentioned in this article, I am simply a power user.
Since I am hosting some of these images on my server(forum wont let me post more than 5 images per post). I have created a PDF of my walkthrough in case my server is offline or the images become inaccessible.
#2
12-01-2015, 08:23 PM
Join Date: Dec 2015
Location: Chico CA
Posts: 37
Likes: 0
Received 0 Likes
on
0 Posts
Part 1: PC Based Diagnosis with Forscan
Everyone on this site has heard of AutoEnginuity, It really is an awesome tool, but when I first heard about it I thought it was crazy, I am a big proponent of Open Source Software and decided to see if there was something cheap or free that would work.
Forscan is a piece of free software that I found, it is not open source, but it works really well.
Now on to the how to!
Required Items:
- Laptop PC
- USB Elm 327 Adapter I use this one from amazon: http://goo.gl/qoTdg9
- Super Duty!
Important Note: This tutorial is written on a PC running windows 8.1 but has been tested on Windows 7, 8, 8.1, and 10.
Step 1: Download and Install Forscan for Windows from their website: Download FORScan
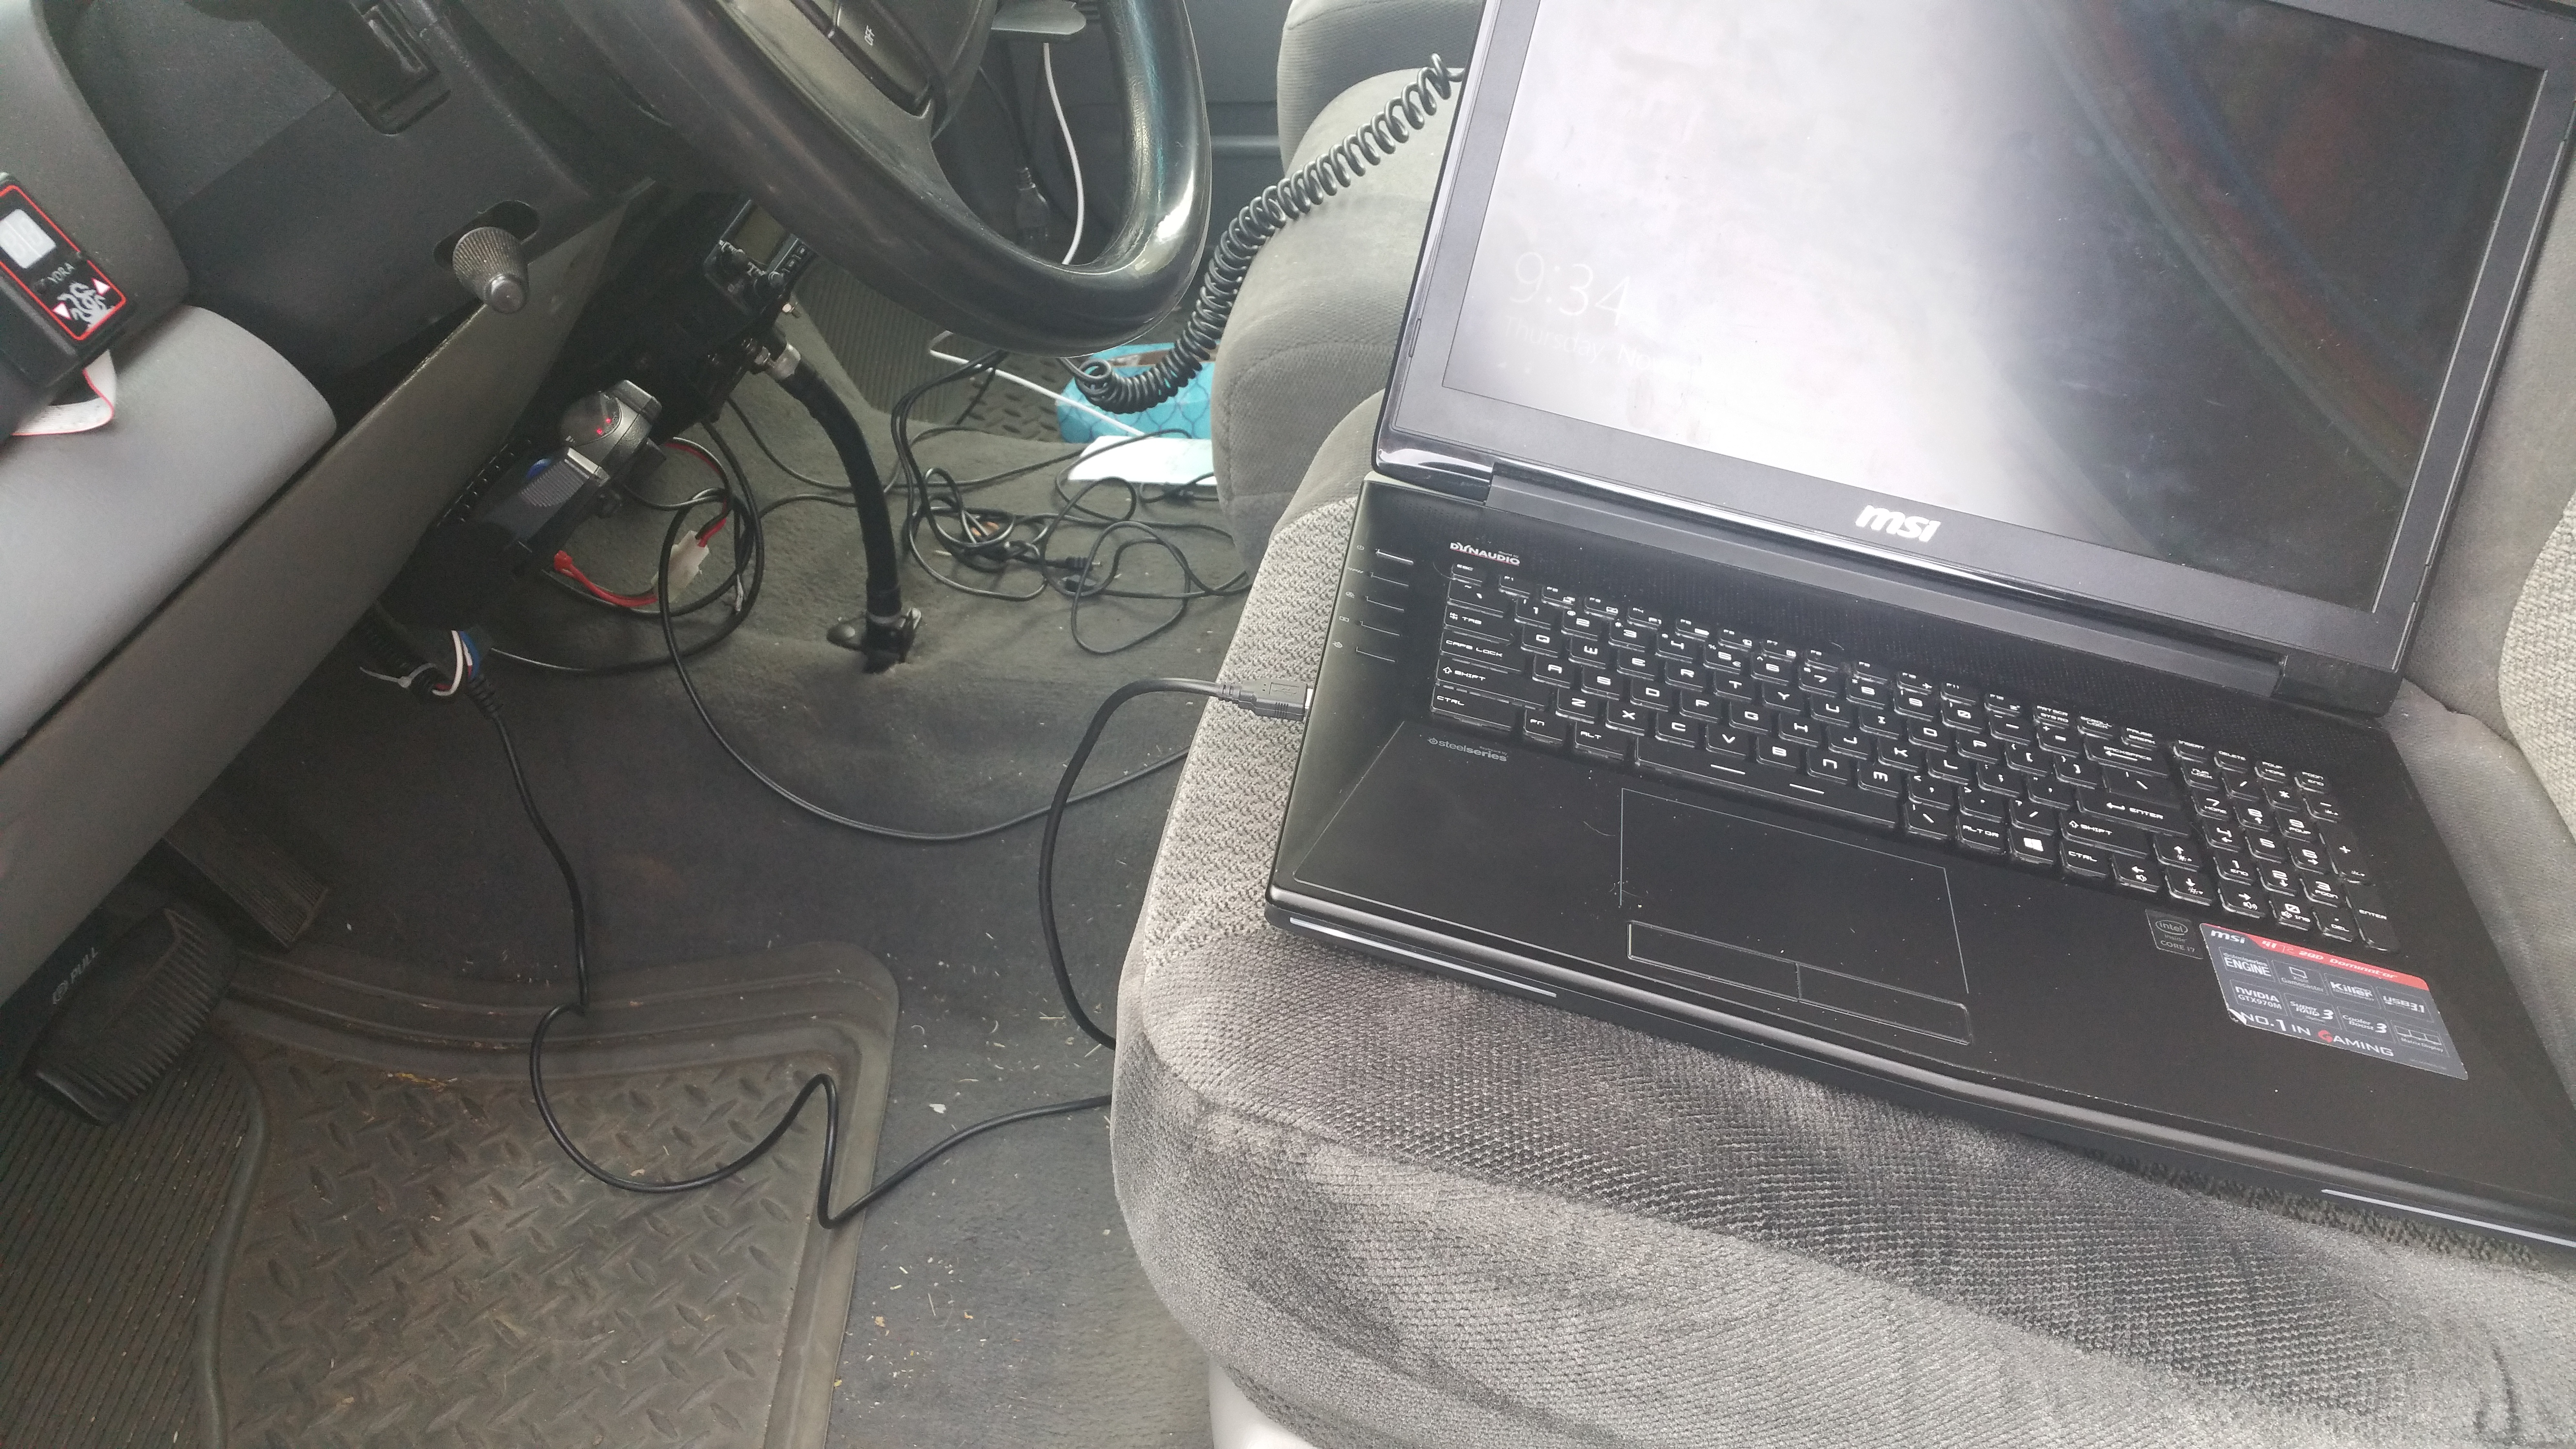
Step 2: Connect your USB ELM327 Adapter to your laptop and to your truck.
Step 3: Open Forscan on your laptop
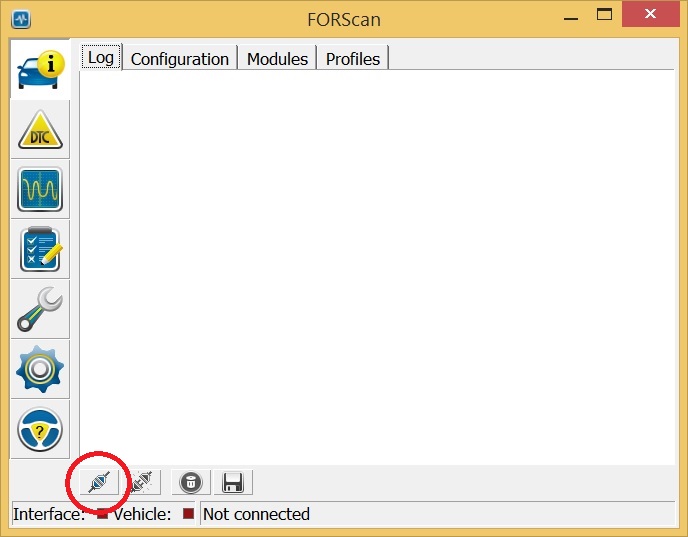
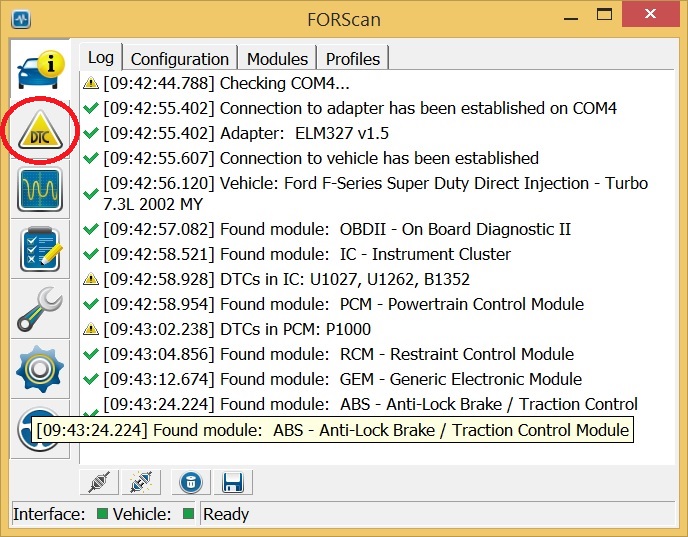
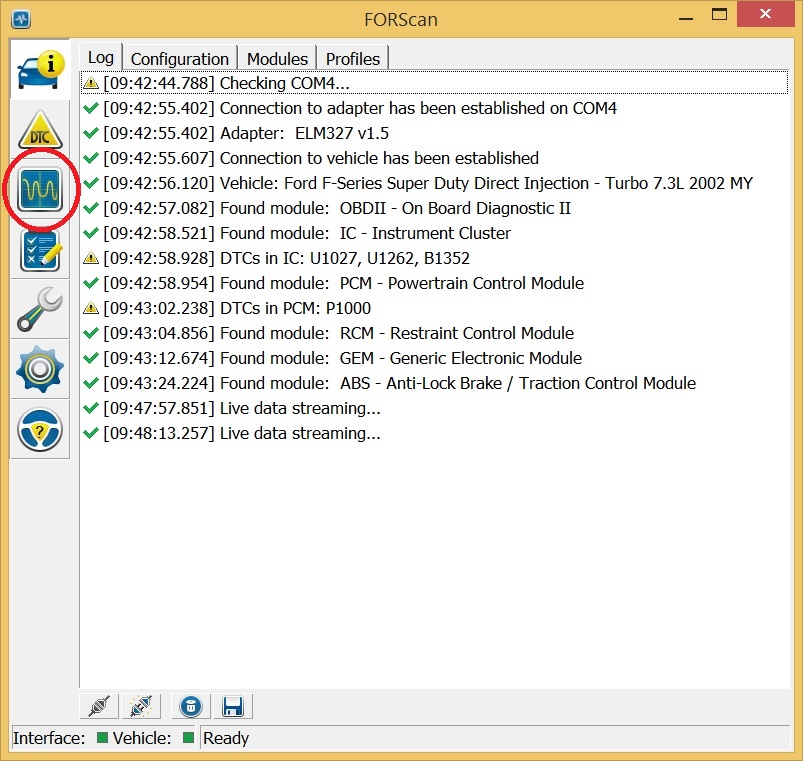
You should be greeted with a screen like this:
Step 4: Connect to your truck for the first time:
Note: If you are not using a usb adapter, make sure your bluetooth adapter is paired with your laptop, forscan SHOULD auto-find and connect to it when you follow these steps.
Click on the connect button circled in red
You will get a popup telling you what is required for it to connect, TURN THE KEY ON, then click OK on that popup.

Step 5: Answer Questions
You will get this popup
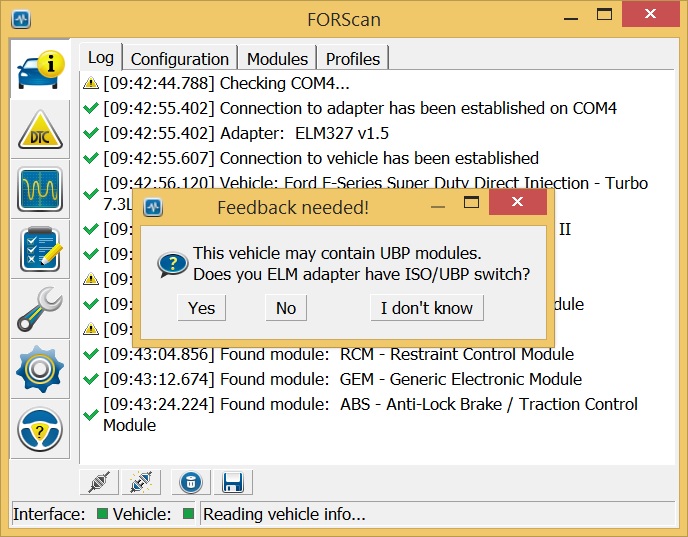
Unless your adapter has a physical switch on it click NO
Then you will get this
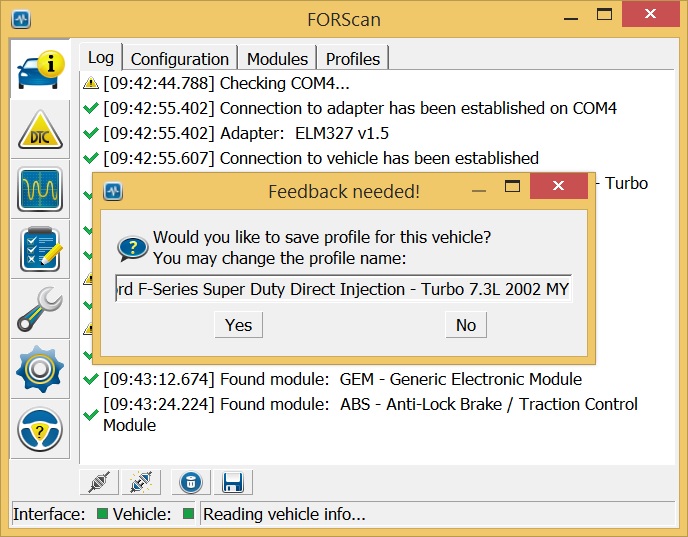
Click Yes. This creates a profile for your truck. From that point forward anytime you connect the Forscan app will remember your dashboard PID�s, which we will get to in a bit.
Now that we are connected, let�s get to the useful part of this.
DTC checking
Step 1: click on the DTC tab
That will take you to a screen showing you all of your DTC�s, including Ford Specific, and a brief explanation.
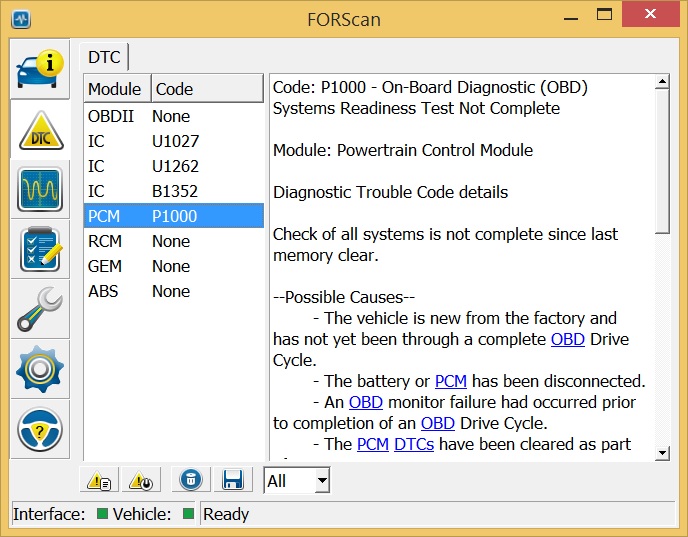
You can click on any of these DTC�s to see more details.
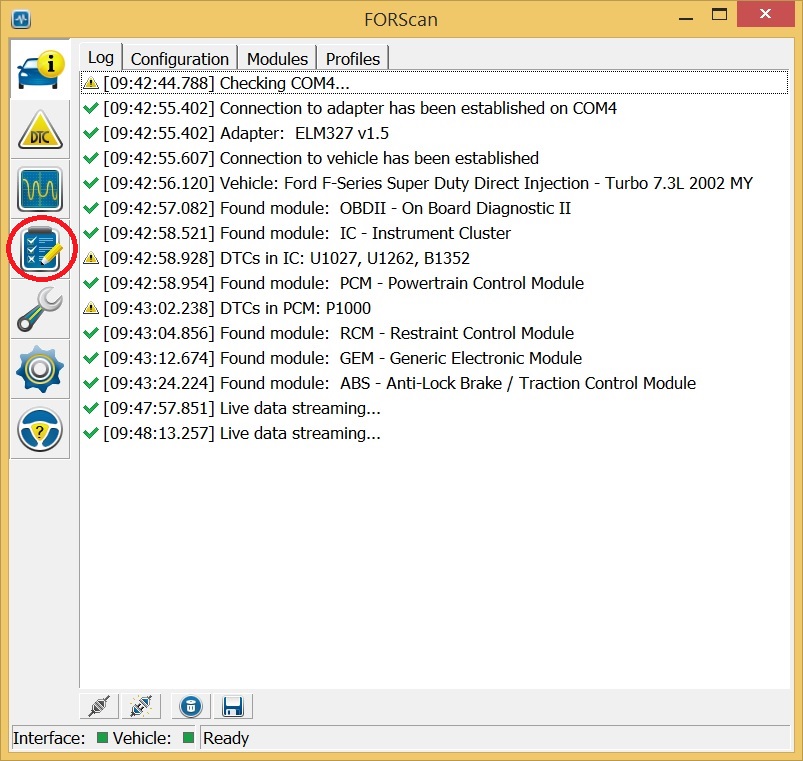
Click on the self tests button.
Then you will see a list of available self tests.
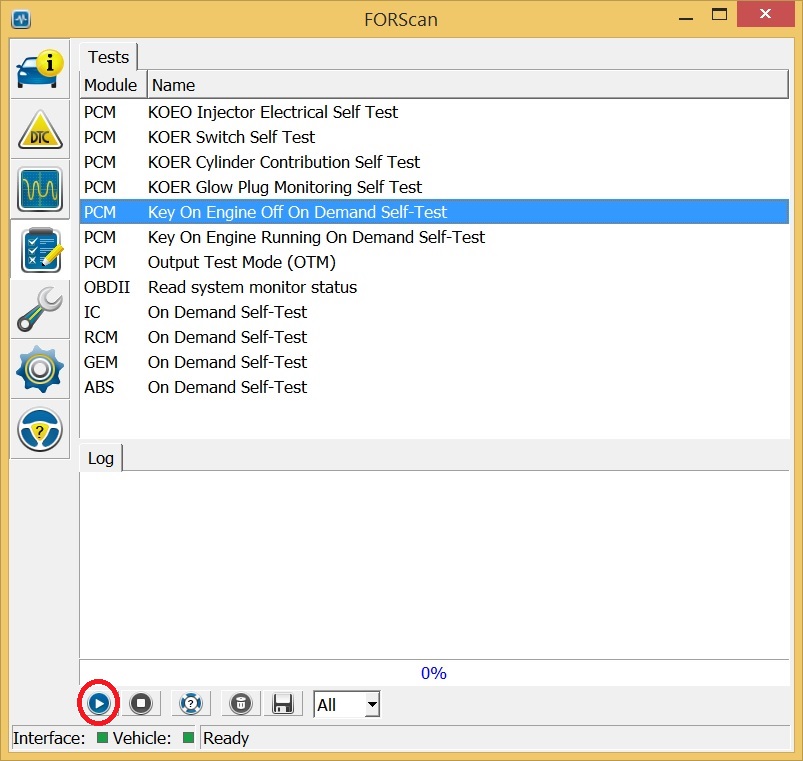
Pick whichever one you want to run and then click the red circled play button, the interface will walk you through them. These self-tests are explained in many places on the forums, I will not be re-explaining them here.
One of the most common things to do with your OBD interface is to monitor parameters in the truck to test for things like a Failing ICP/IPR.
To monitor your truck you will connect as described above.
After that, click on the dashboard icon.
You will see the following screen
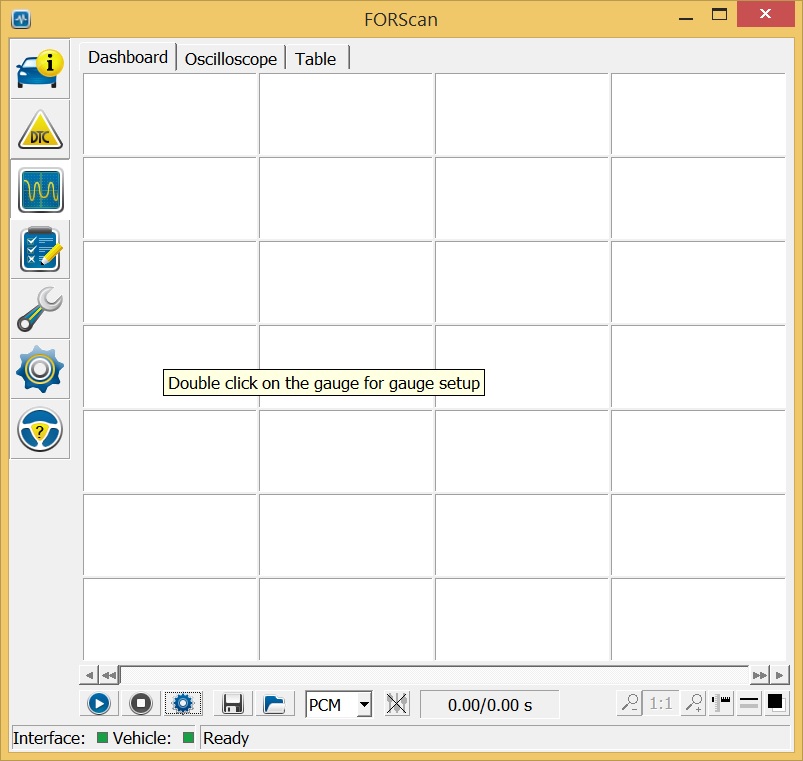
But that doesn�t really help, there is no info there!
Double click on any of the white boxes and you will get a popup
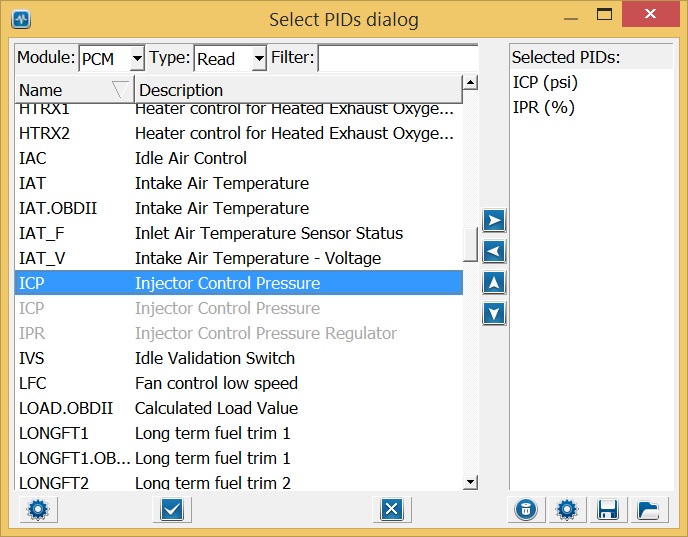
Scroll around and find whatever you would like to monitor. There is more here than the 7.3 supports, so some may not work. When you find one you want to monitor, simply double click on it. When you are done, click the checkmark at the bottom of the popup.
That will take you back to the datalog screen. To start actually viewing data click the play button I have circled below.
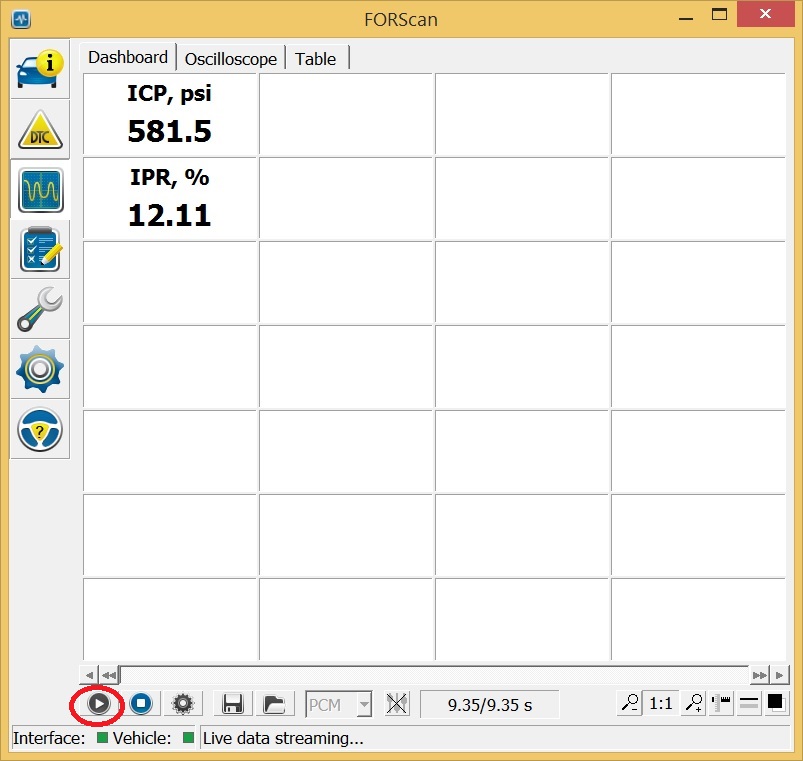
This is how the data will look.
This concludes the PC Forscan part of this Tutorial. Next up, android!
#3
12-01-2015, 08:23 PM
Join Date: Dec 2015
Location: Chico CA
Posts: 37
Likes: 0
Received 0 Likes
on
0 Posts
Disclaimer: This tutorial is written with screen shots from a Samsung Galaxy Note 4, but has been tested on half a dozen different phones.
Required items:
Bluetooth OBD Reader(I use this one: Amazon.com: Vgate Bluetooth Scan Tool OBD2 OBDII Scanner for TORQUE APP ANDROID: Automotive )
Android Phone or Tablet
Super Duty truck!
Now, to start we need to buy the Forscan Lite app. There is a free app that you can use for testing, this tutorial does not cover that.
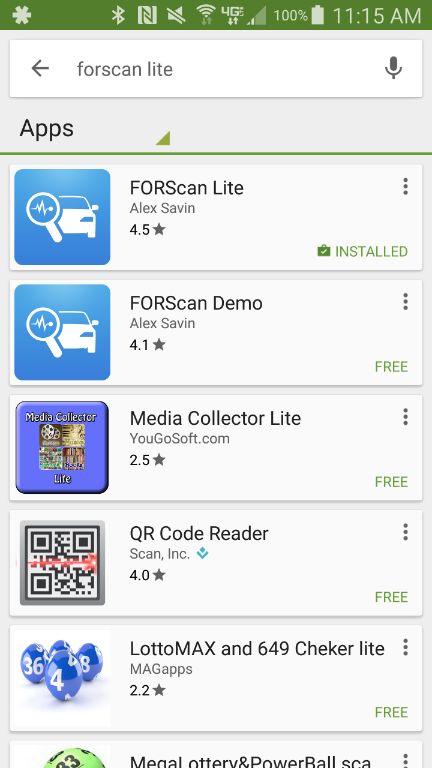
Step 1: Open the google play store, search for Forscan Lite, purchase and install it.
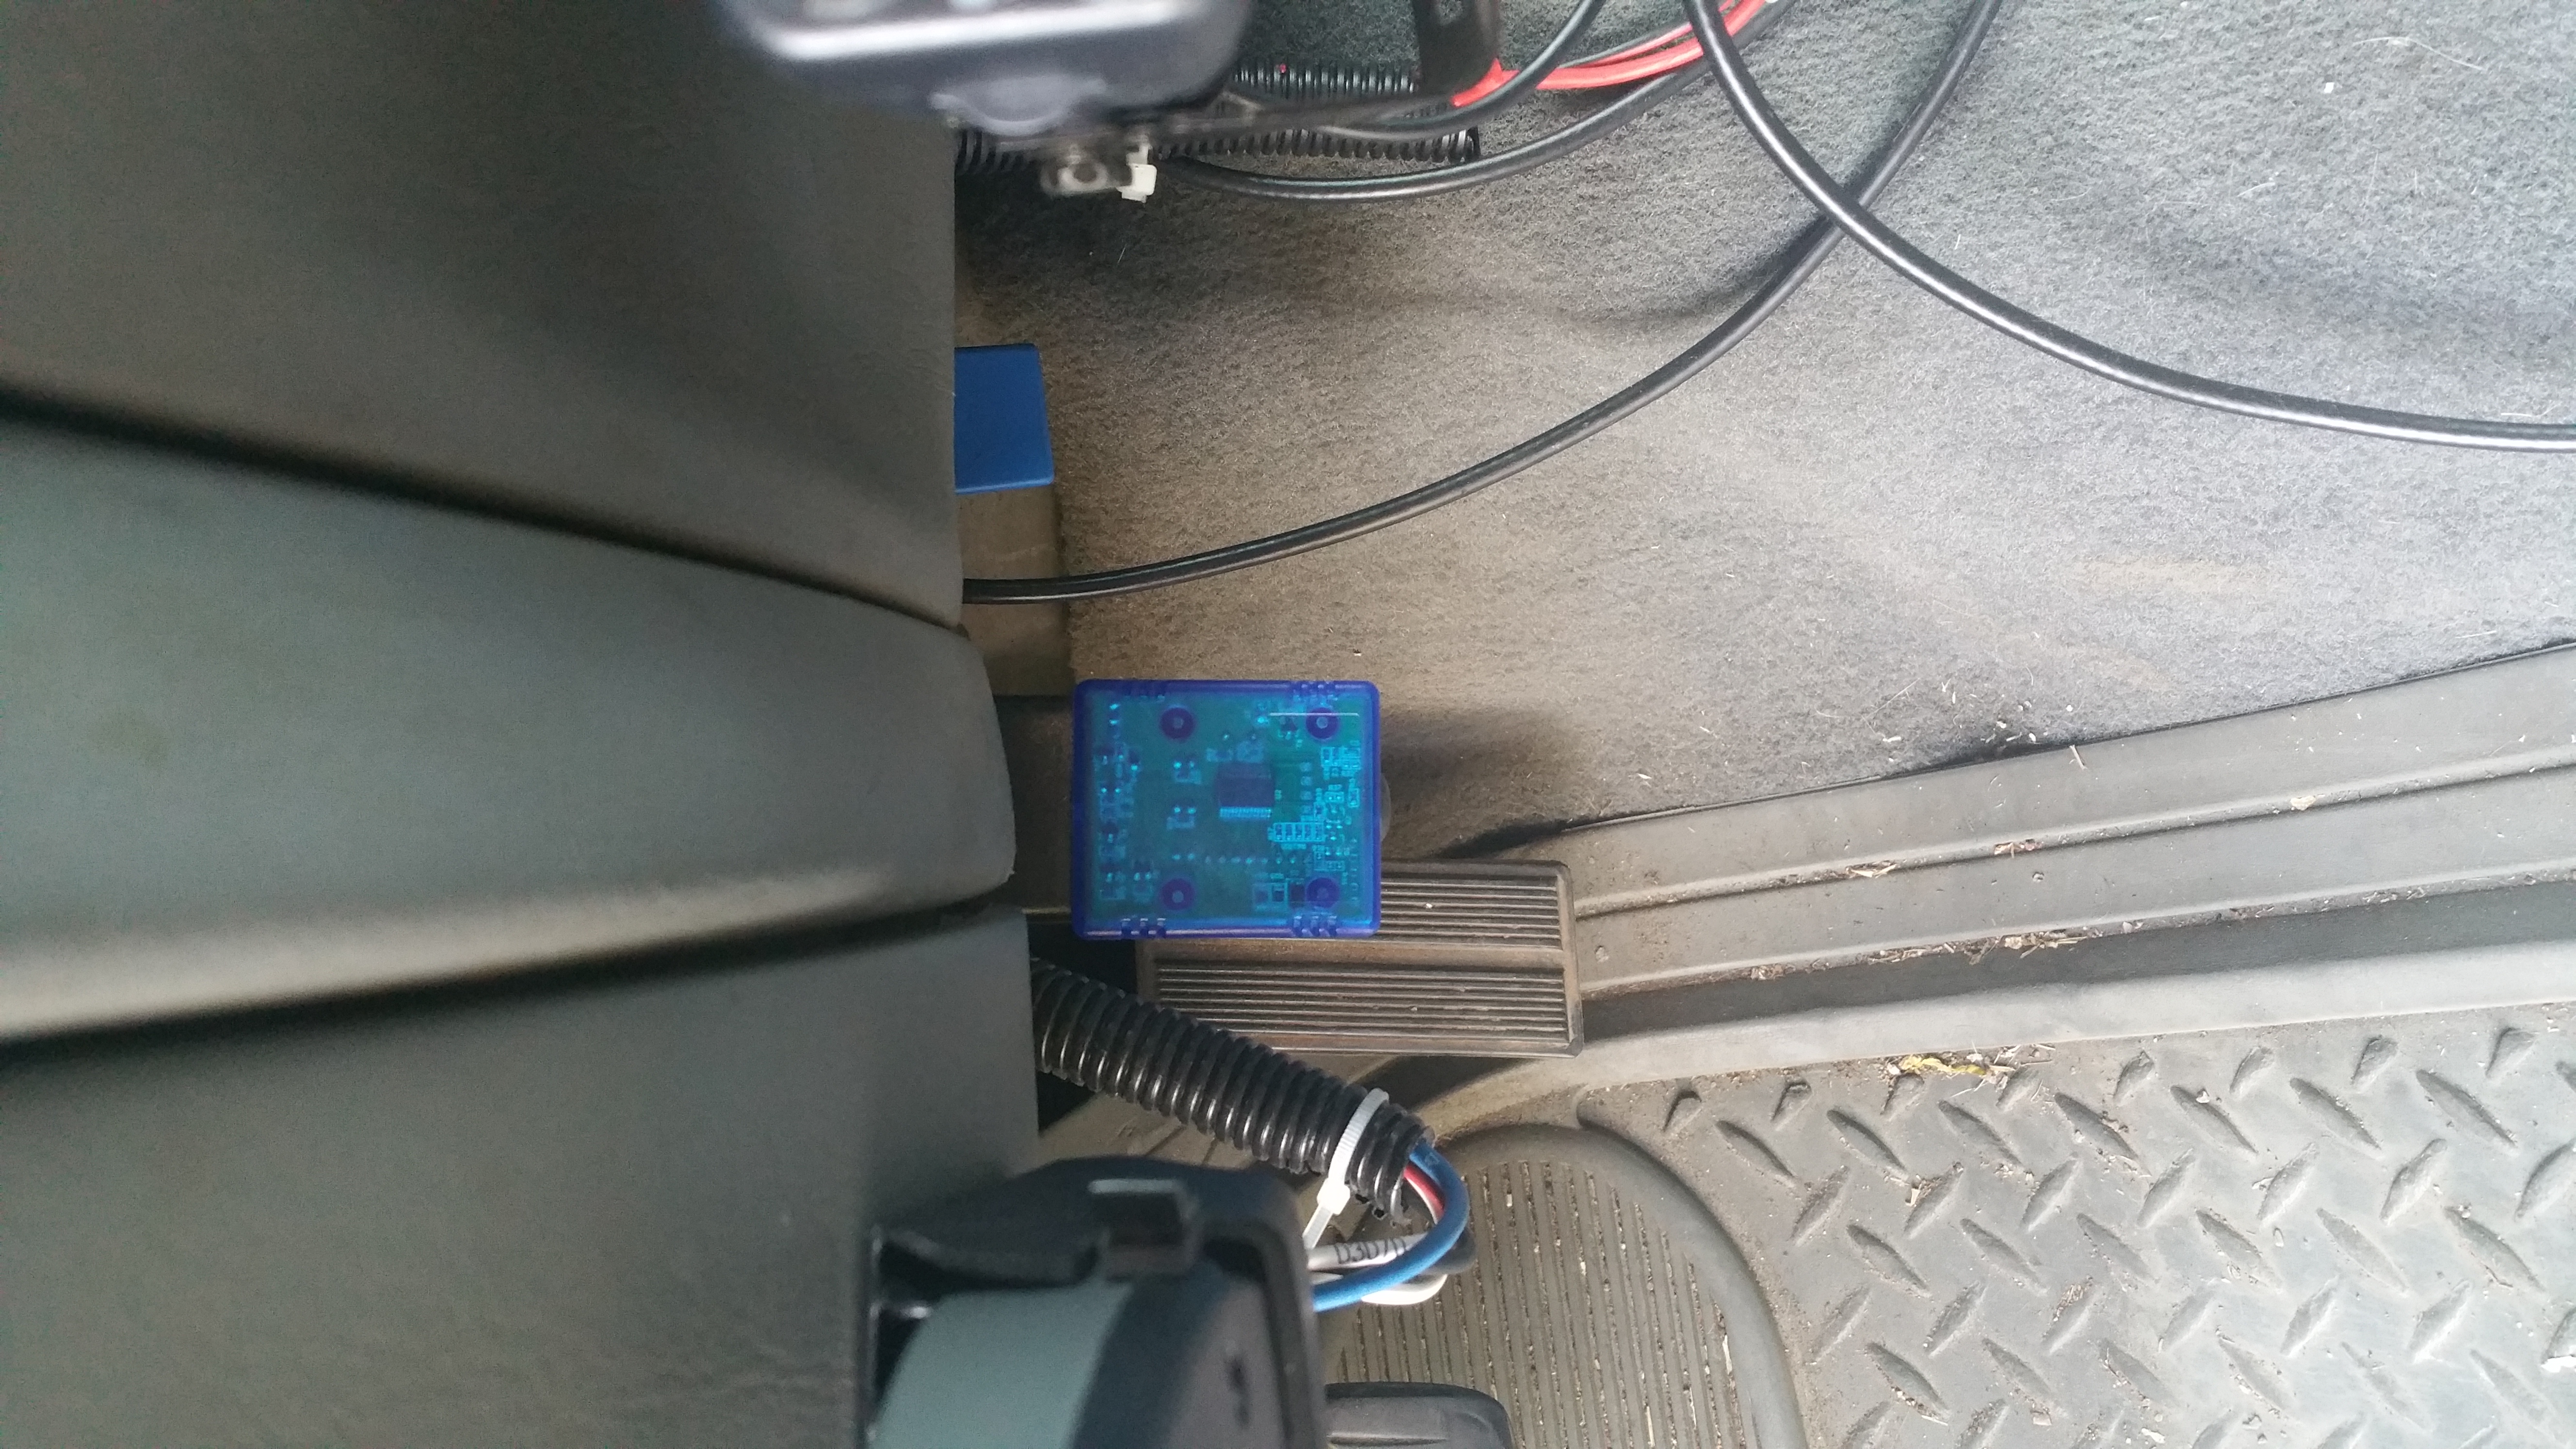
Step 2: Connect your Bluetooth obd reader to your truck and turn the key on.
Step 3: Pair your OBD reader to your phone

Your phone will ask you for a Bluetooth pin, usually this is 0000 or 1234
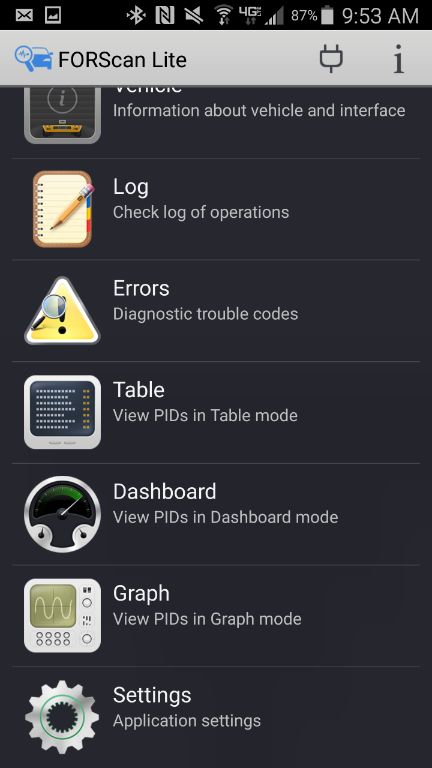
Step 4: Open the Forscan app

Step 5: Configure the app, scroll down to settings, click settings
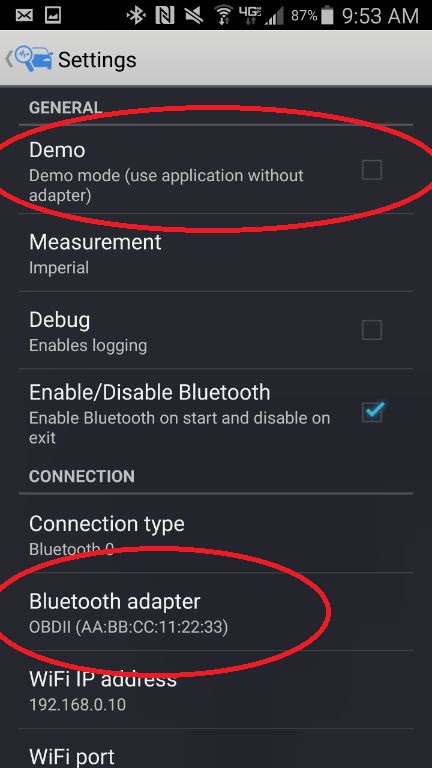
Step 6: In the settings menu make sure Demo mode is not selected and your OBD reader is selected.
Step 7: Connect to the truck.
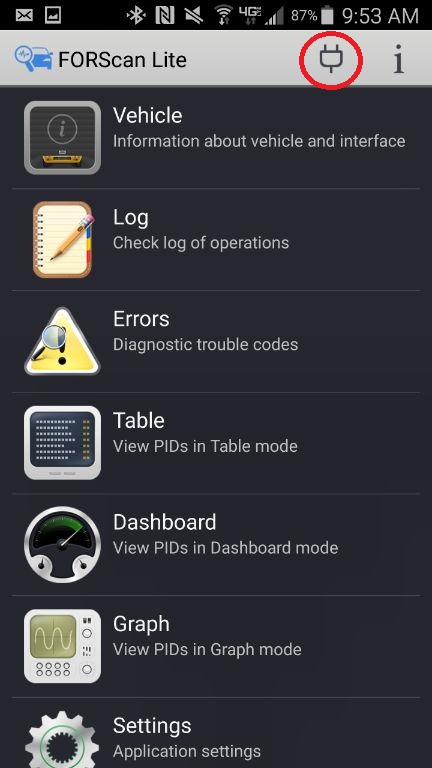
Wait for the light to turn green
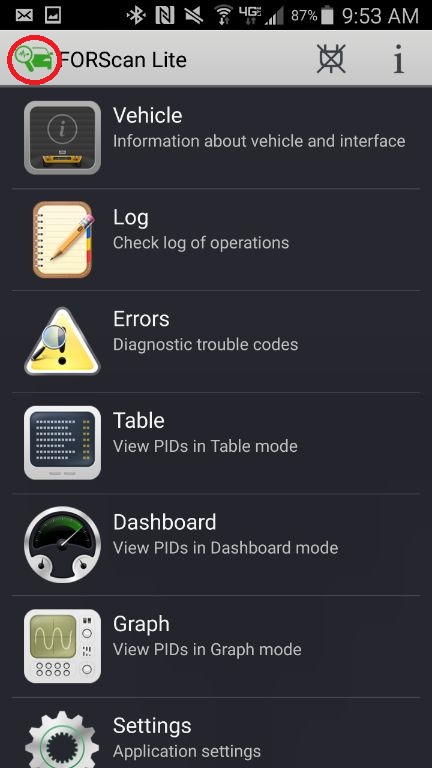
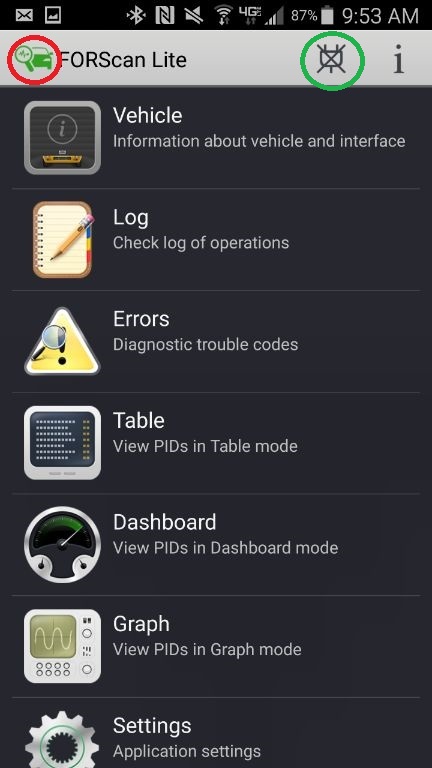
Step 8: Select Errors
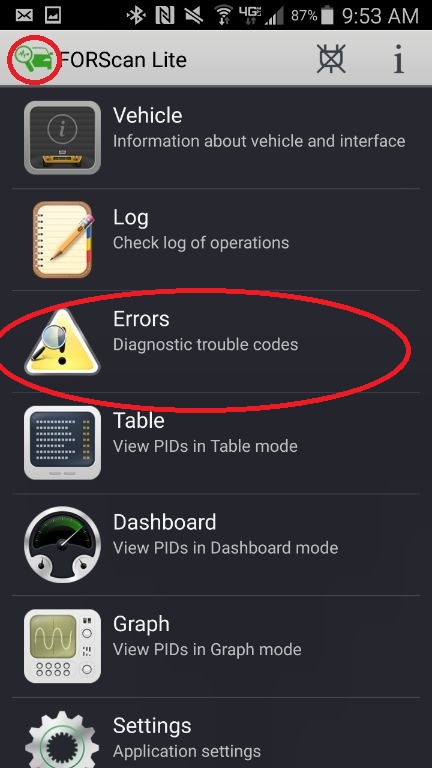
Step 9: See what DTC�s your truck has.
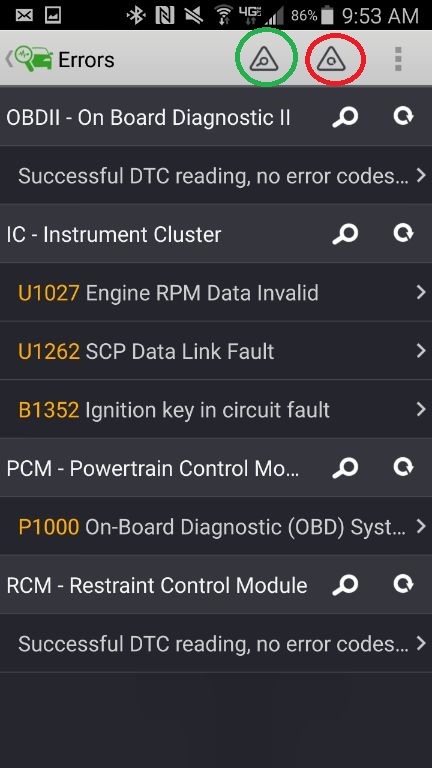
The Red Circle clears ALL DTC�s, the Green Circle re-scans for any DTC�s.
Step 10: Disconnect
Click the button in the green circle to disconnect when done.
#4
12-01-2015, 08:24 PM
Join Date: Dec 2015
Location: Chico CA
Posts: 37
Likes: 0
Received 0 Likes
on
0 Posts
Disclaimer: This tutorial is written with screen shots from a Samsung Galaxy Note 4, but has been tested on half a dozen different phones.
Required items:
Bluetooth OBD Reader(I use this one: http://goo.gl/aVPJLa )
Android Phone or Tablet
Super Duty truck!
Now, to start we need to buy the Torque Pro app. There is a free app that you can use for testing, this tutorial does not cover that.
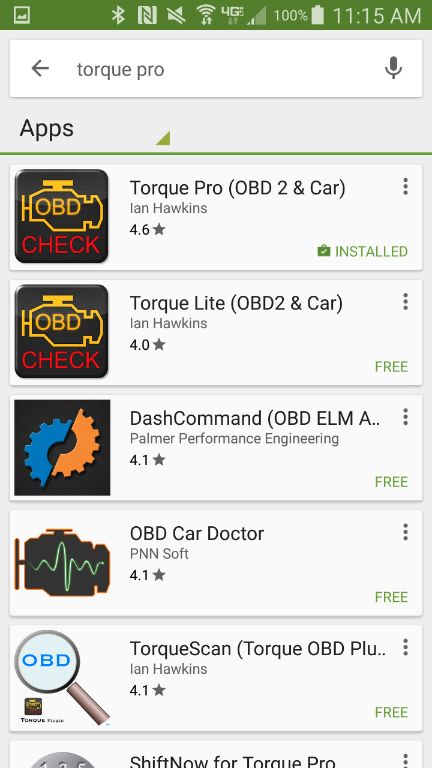
Step 1: Open the google play store, search for Torque Pro, purchase and install it.
Step 2: Connect your Bluetooth obd reader to your truck and turn the key on.
Step 3: Pair your OBD reader to your phone
Your phone will ask you for a Bluetooth pin, usually this is 0000 or 1234
Step 4: Open the Torque Pro app
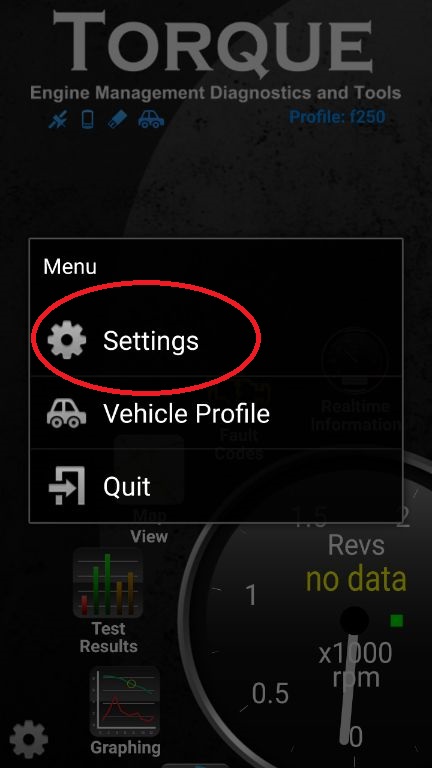
Step 5: Open torque settings to configure the app.
Step 6: Click on Settings
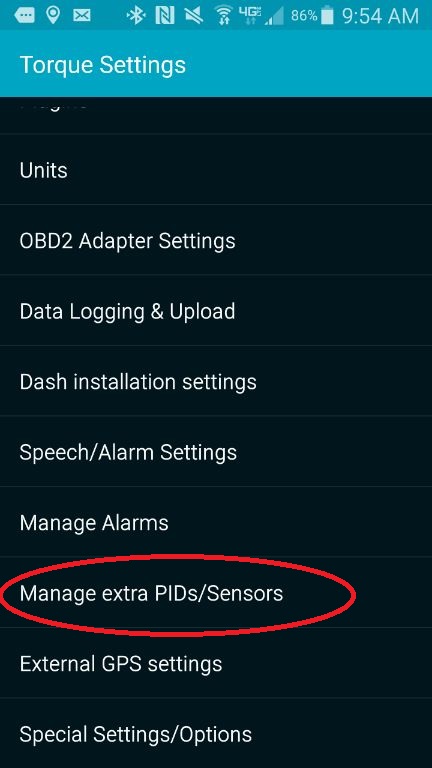
Step 7: scroll down on the screen until you find and click on �Manage Extra PIDs/Sensors�
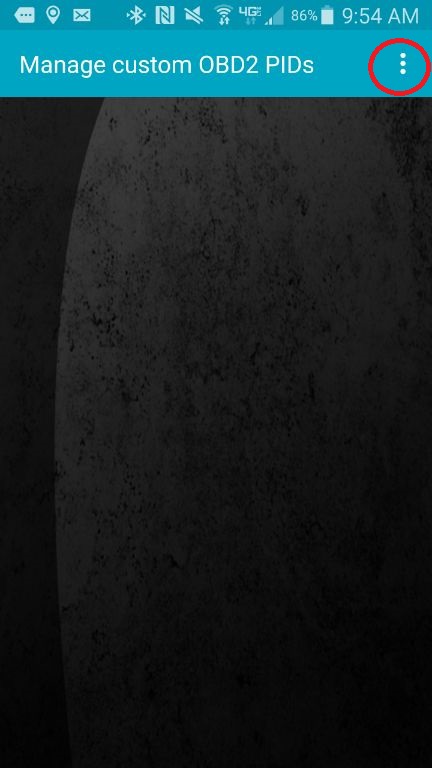
Step 8: click on the menu button in the top right
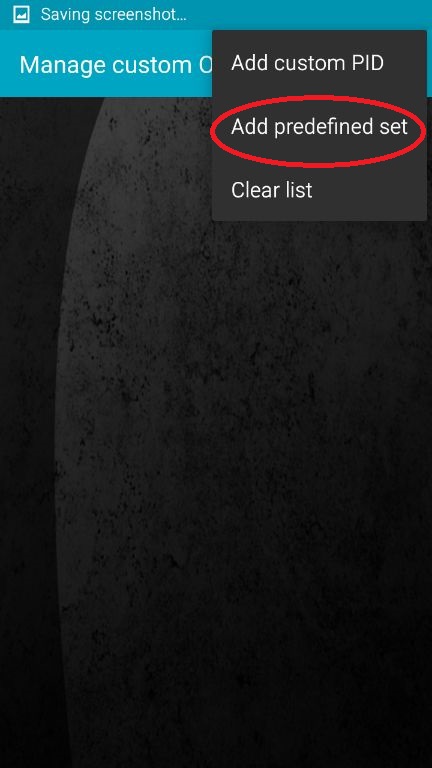
Step 9: Click on �Add Predefined Set�
Step 10: click on �Ford (Incl. Powerstroke)�
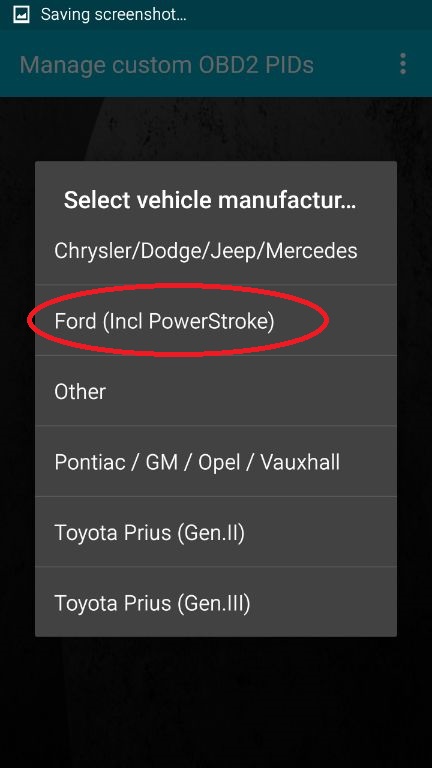
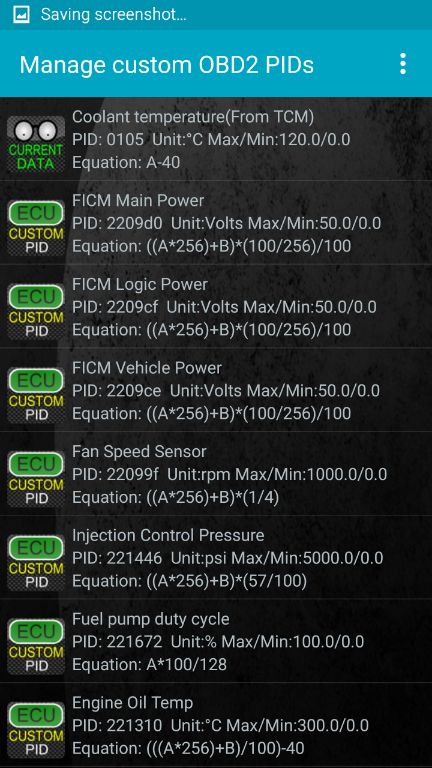
Step 11: Verify you see a large # of new PID�s on the screen
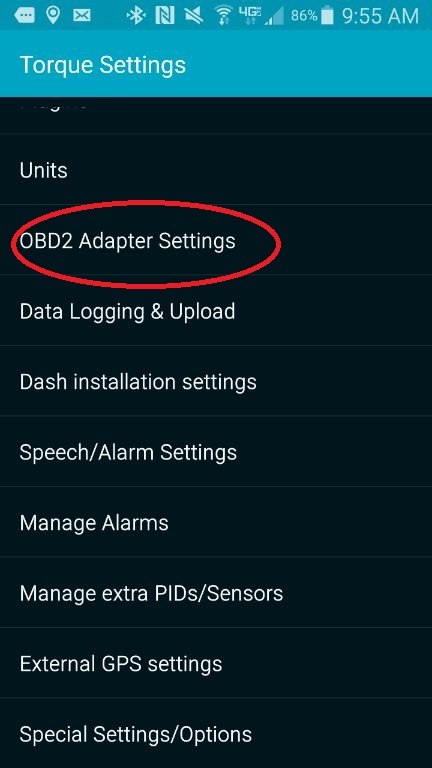
Step 12: Press the back button to get back to the settings screen, then click on �OBD2 Adapter Settings�
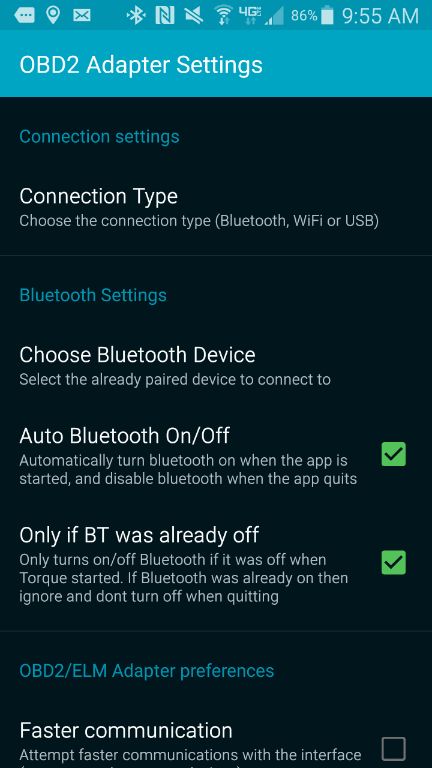
Step 13: Verify connection type, choose Bluetooth device if you wish, Torque will auto find OBD readers if you do not pick.
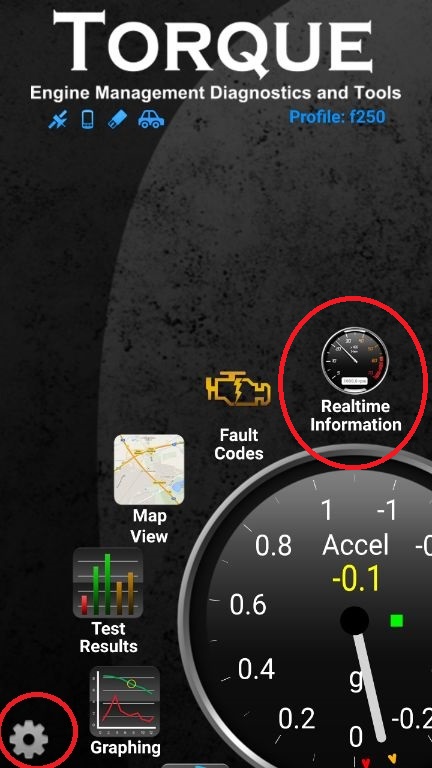
Step 14: Back all the way out to the home screen of the torque app.
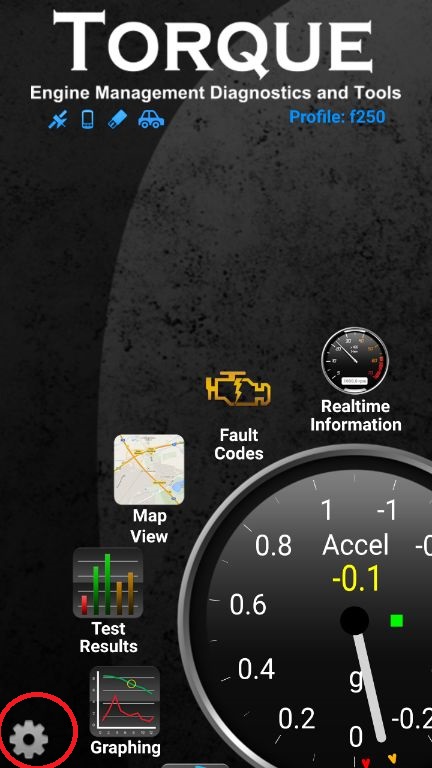
Verify that Torque connects to your reader.
The Red Circle is your GPS Lock, does not matter for monitoring
The Green Circle is your device indicator, it should always be lit
The Blue Circle is connection to OBD reader
The Orange Circle is the OBD reader�s connection to the PCM
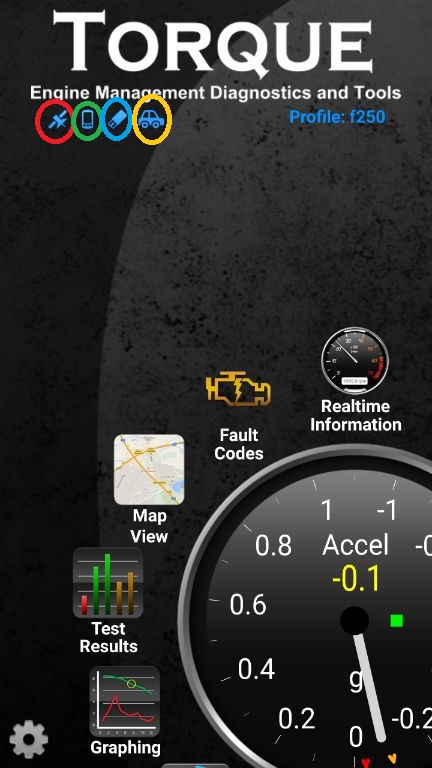
Step 15: Click on realtime information
Step 16: Note that you can swipe left and right to get to an empty screen of gauges

Step 17: press and hold on the screen until you see a popup, then click add display
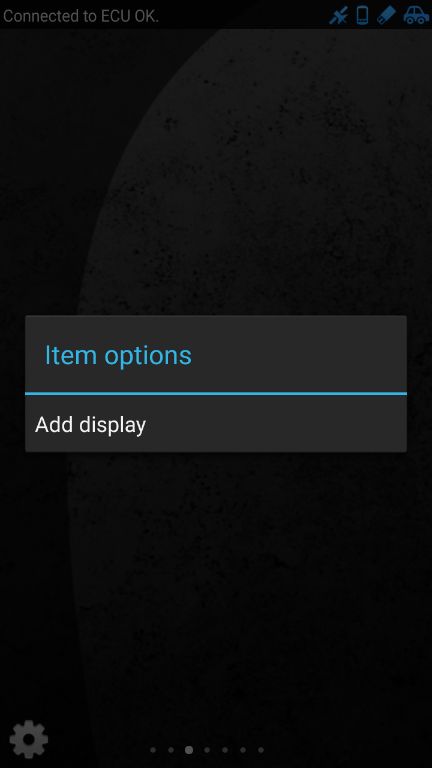
Step 18: Select the type of display you want, I like Dial (needle)
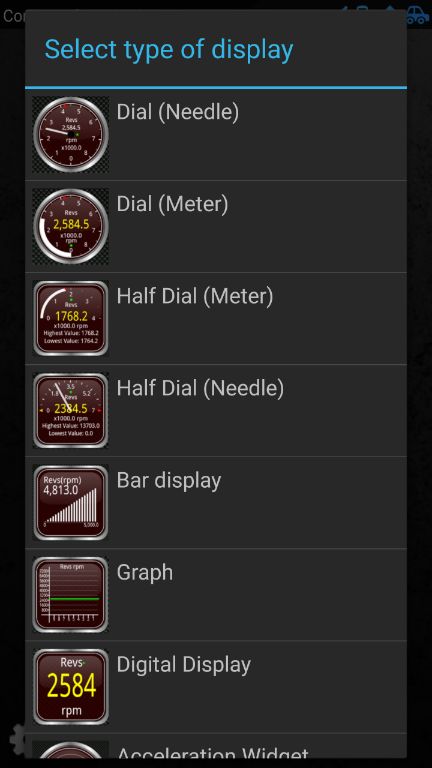
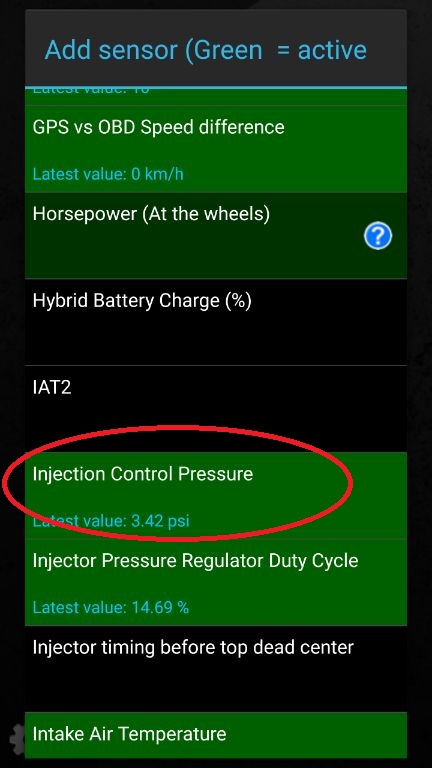
Step 19: Pick the PID you want, for Example ICP
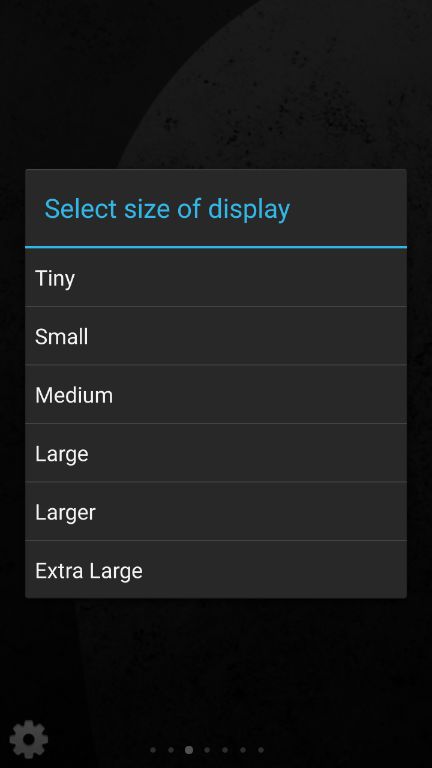
Step 20: Pick a size
Step 21: tap the location you want the gauge, you can also drag it to the grid lines

Step 22: When you tap or release your finger the gauge will lock there.

Repeat steps 17-22 for each gauge you want to add.
#5
12-01-2015, 08:24 PM
Join Date: Dec 2015
Location: Chico CA
Posts: 37
Likes: 0
Received 0 Likes
on
0 Posts
Disclaimer: This tutorial is written with screen shots from a Samsung Galaxy Note 4, but has been tested on half a dozen different phones.
Required items:
Bluetooth OBD Reader(I use this one: Amazon.com: Vgate Bluetooth Scan Tool OBD2 OBDII Scanner for TORQUE APP ANDROID: Automotive )
Android Phone or Tablet
Super Duty truck!
Now, to start we need to buy the CarGauge Pro app. There is a free app that you can use for testing, this tutorial does not cover that.
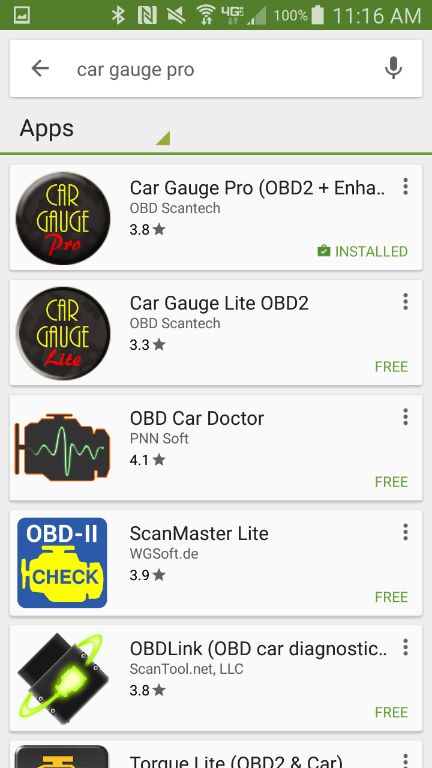
Step 1: Open the google play store, search for Car Gauge Pro, purchase and install it.
Step 2: Connect your Bluetooth obd reader to your truck and turn the key on.
Step 3: Pair your OBD reader to your phone
Your phone will ask you for a Bluetooth pin, usually this is 0000 or 1234
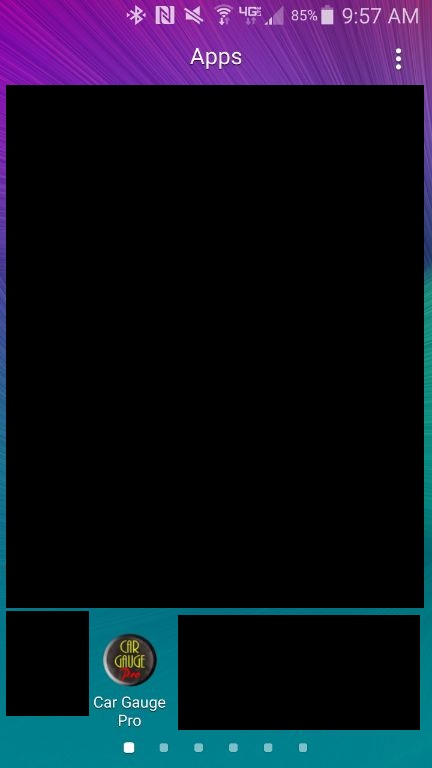
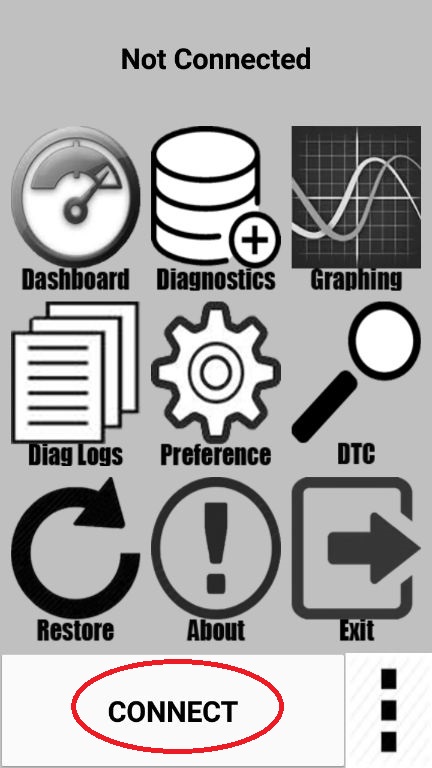
Step 4: Open the CarGauge Pro app
Step 5: Click on connect.
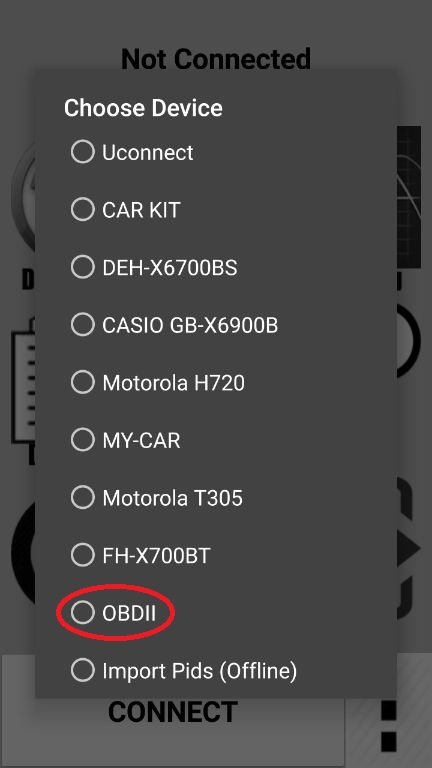
Step 6: Select your OBD reader from the popup
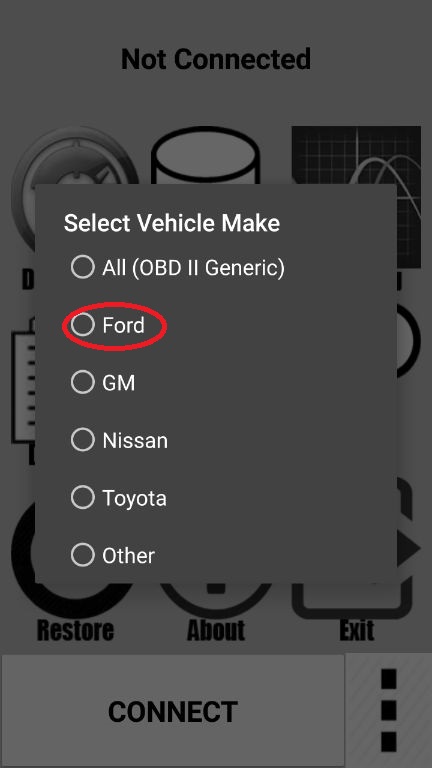
Step 7: Select your vehicle manufacturer (FORD!! :icon_ford: )
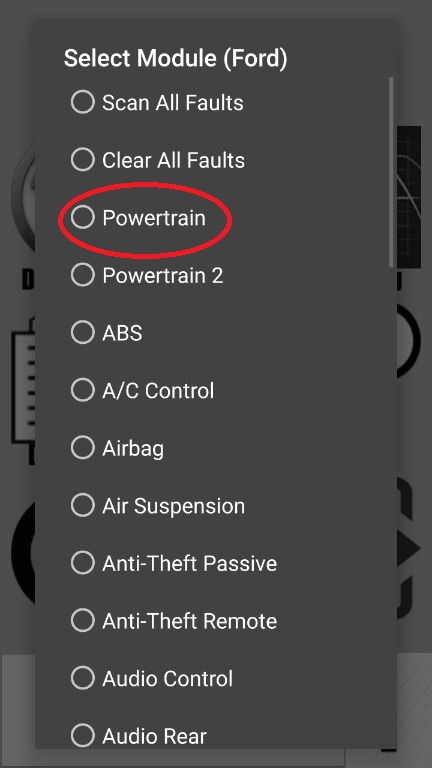
Step 8: Select the Ford Powertrain Module
Step 9: Select the ECU
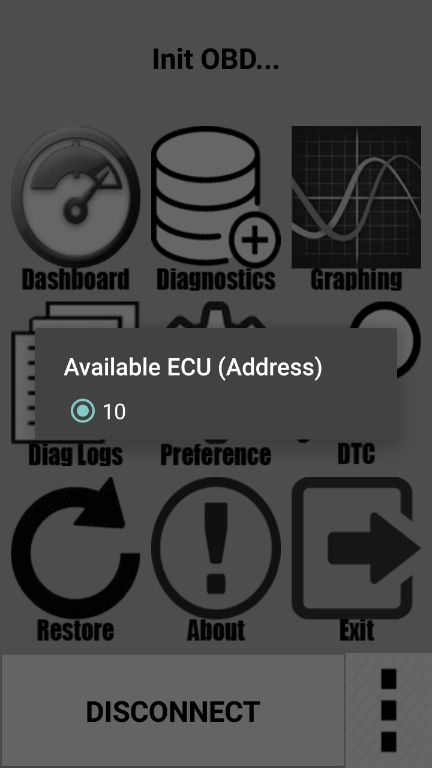
Step 10: Select Auto-Scan for PID�s
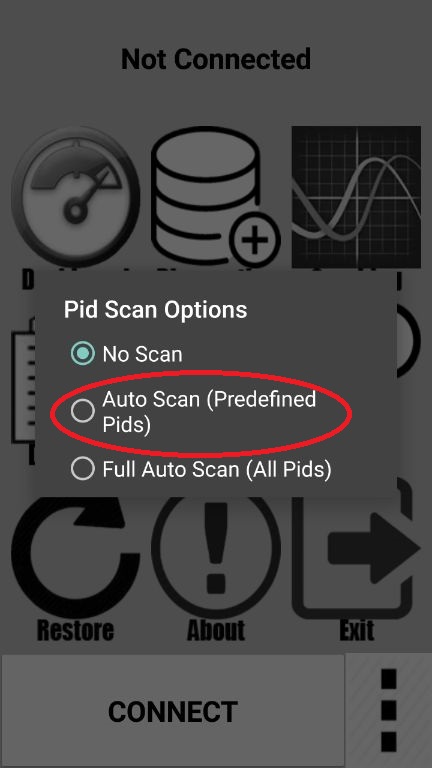
Step 11: click cancel when asked to save the PID list
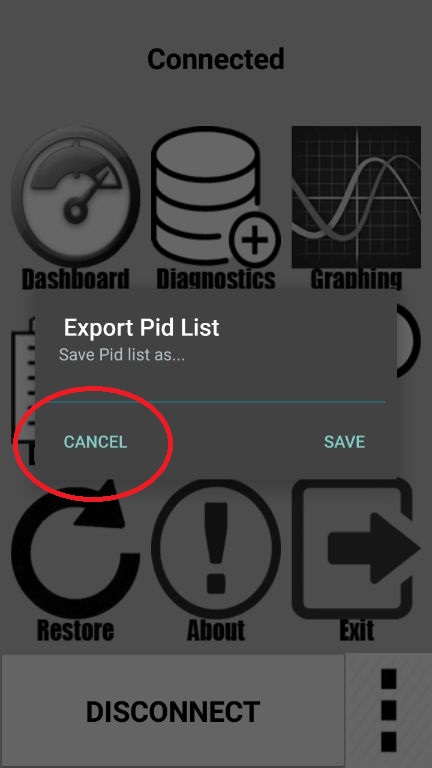
Step 12: Click Diagnostics
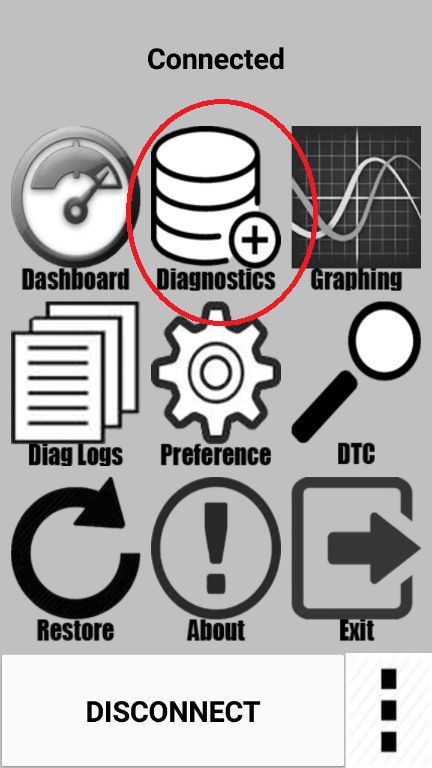
Step 13: Select Self Test
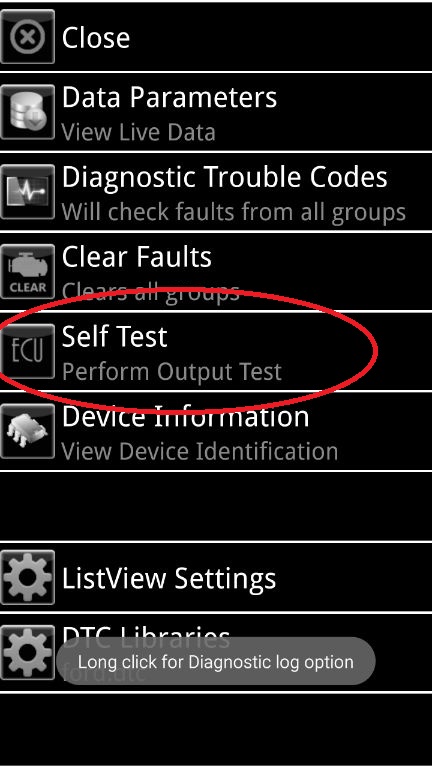
Step 14: Select the test you want to run, for example a Buzz Test
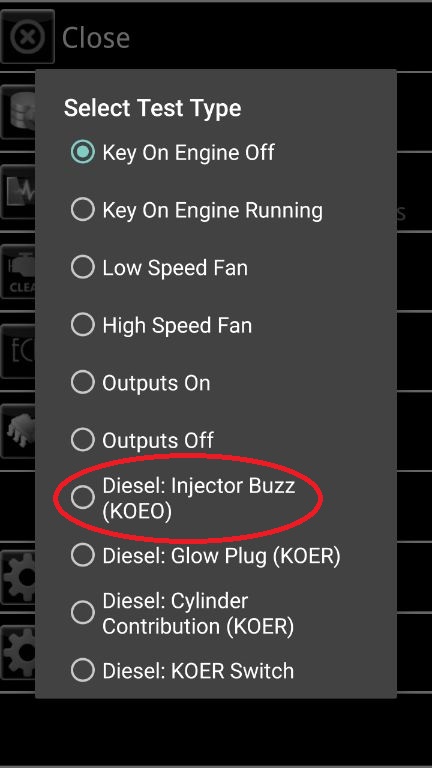
Step 15: let the test run until the red goes away
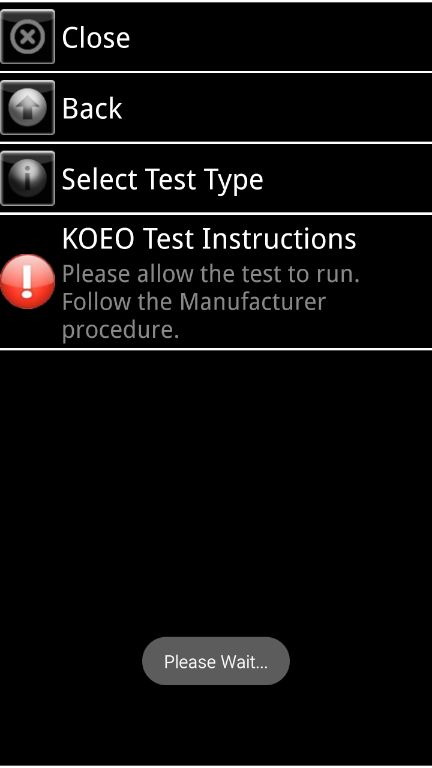
Step 16: Observe any leftover P codes, deal with accordingly

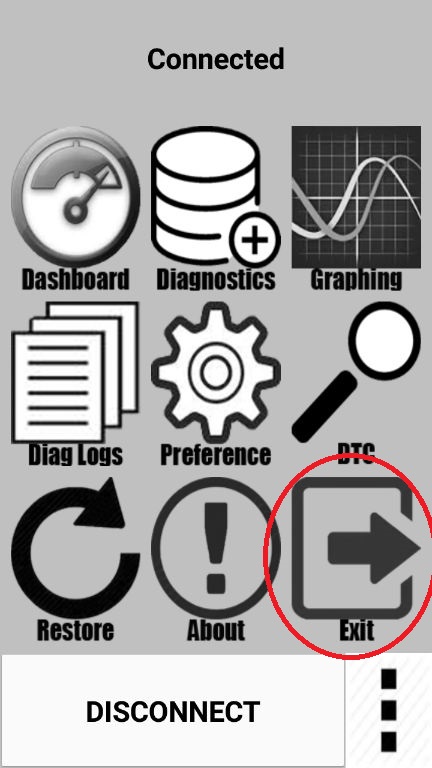
Step 17: Press back button back to the home screen, then press exit when done.
#6
12-01-2015, 08:24 PM
Join Date: Dec 2015
Location: Chico CA
Posts: 37
Likes: 0
Received 0 Likes
on
0 Posts
#7
12-01-2015, 09:06 PM

Trending Topics
#9
12-01-2015, 09:12 PM
Join Date: Dec 2015
Location: Chico CA
Posts: 37
Likes: 0
Received 0 Likes
on
0 Posts
#11
12-02-2015, 06:41 AM

#12
12-02-2015, 08:10 AM
Fleet Mechanic
#13
12-02-2015, 12:14 PM
Posting Guru
Join Date: May 2014
Location: Dustbowl, NV
Posts: 1,072
Likes: 0
Received 0 Likes
on
0 Posts
#14
12-02-2015, 12:30 PM
Join Date: Dec 2015
Location: Chico CA
Posts: 37
Likes: 0
Received 0 Likes
on
0 Posts
I do not know of anything that will natively work on a Macbook without using something like bootcamp to get into windows.
I do not have an AE adapter so I cannot answer for certain, but I imagine it would not be a problem at all, should work fine.
I do not have an AE adapter so I cannot answer for certain, but I imagine it would not be a problem at all, should work fine.
#15
12-02-2015, 04:27 PM
Fleet Mechanic