

Windshield, back glass install

Laughing Gas

Joined: Oct 2012
Posts: 831
Likes: 7
From: Milford, Michigan
I suspect it was made that way deliberately to be tight fit. The windshield installs from the outside so the glass can't blow in and the back window installs from the inside so it didn't blow out with the windows open, but it fits tightly in the frame so it doesn't push in easily from the outside either. I'd suggest lubing the weatherstripping and frame liberally with soap rich water solution before pushing it in.

FTE Legend


Joined: Sep 2003
Posts: 53,953
Likes: 2,387
From: NY and VA

 No pics please, Dave
Junior User
Joined: Apr 2015
Posts: 82
Likes: 0
From: Myrtle Beach
I've always used wheel bearing grease to install glass in older vehicles. I put a dab on a gloved finger, and run it inside the gasket before installing. Cleans up easy, protects the metal and makes it less likely to chip new paint when pulling rope. Never had one leak.

Thread Starter
|
Hotshot
Joined: Oct 2004
Posts: 15,882
Likes: 88
From: Durham NC
For others: On the rear window push on the weatherstripping, not on the glass to reduce chance of breaking glass. On F1s remove the retainer clips and their bases on the inside of the windshield opening, there are not needed with new weatherstripping and glass and just make installation more difficult and risky to the glass.

Laughing Gas
Joined: Jun 2004
Posts: 823
Likes: 4
From: Calais, Vermont
I'm feeling a bit slow on the uptake of some of this. Besides the direction of install for front and rear glass, do I correctly understand that the procedure is pretty much the same? 1) warm up the rubber so it's somewhat pliant, 2) install around the glass with a bead of sealer having been squirted into the channel, 3)apply some sealer to the outside of window frame opening of the truck,4) insert a strong cord in rubber frame channel,5) apply water/soap solution to face of rubber that will be pulled by the chord so that it lifts over and fits onto the window frame, 6) have a helper apply light pressure to the glass to hold it in place and another helper to apply some pressure at the rubber where the chord is being drawn out to assist in install,7) while doing all this, pray that the glass doesn't crack. Is this understanding correct? I may be attempting to install both front and back glass in the next week or so.
FTE Stories
Ford Trucks for Ford Truck Enthusiasts

2027 Ford Super Duty Buyer's Guide (Every Model, Engine, & Package)
Brett Foote
Top 10 Ford Truck Tragedies
Joe Kucinski
AEV FXL Super Duty - the Super Duty Raptor Ford Doesn't Make
Brett Foote
Lobo Vs Lobo: Proof the F-150 Lobo Should Be Even Lower!
Michael S. Palmer
Ford's 2001 Explorer Sportsman Concept Looks For a New Home
Verdad Gallardo
10 Best Ford Truck Engines We Miss the Most!
Joe Kucinski
2026 Shelby F-150 Off-Road: Better Than a Raptor R?
Brett Foote
2027 Super Duty Carhartt Package First Look: 12 Things You NEED to Know!
Michael S. Palmer
10 Most Surprising 2026 Ford Truck Features!
Joe Kucinski
Thread Starter
|
Hotshot
Joined: Oct 2004
Posts: 15,882
Likes: 88
From: Durham NC
pretty much it. Will take more than light pressure, especially on the rear. soaking the weatherstripping in a bucket of very hot water for a few minutes just before installing will help in cooler temps, be sure any sealer on the frame is a very small bead applied as evenly as possible and smoothed to a thin coat with a wet finger. Remember the butyl rubber caulk does not skin over or dry so there is no need to rush. There is no pocket in the rubber for sealer so almost all of it must squeeze out and if uneven it will put excess strain on the glass. Less is more definitely applies in this case.
A modified inexpensive brake spoon can be used to aid lifting the weatherstripping over the flange where coaxing is needed. Grind all the edges and corners round and sand smooth and scratch free until it resembles a tongue. Slip under weatherstripping and slide sideways to help it over the flange. Have at least two full rolls of paper towels, a box of disposable gloves, a large garbage container and a quart of clean up solvent at the ready within arms reach. It's going to get messy if you use sealer. Cover and mask upholstery, rug, and anything else you don't want sealer on (no matter how many times I warn against it, first timers are going to use too much sealer!).
A modified inexpensive brake spoon can be used to aid lifting the weatherstripping over the flange where coaxing is needed. Grind all the edges and corners round and sand smooth and scratch free until it resembles a tongue. Slip under weatherstripping and slide sideways to help it over the flange. Have at least two full rolls of paper towels, a box of disposable gloves, a large garbage container and a quart of clean up solvent at the ready within arms reach. It's going to get messy if you use sealer. Cover and mask upholstery, rug, and anything else you don't want sealer on (no matter how many times I warn against it, first timers are going to use too much sealer!).
FTE Legend
Joined: Sep 2003
Posts: 53,953
Likes: 2,387
From: NY and VA
Lead Driver

Joined: Nov 2002
Posts: 9,670
Likes: 1,249
From: Jefferson City, MO
I will be putting both windshield and rear window in on Monday. I have already put the rear weatherstripping on. I probably need to remove it to put the sealer in (it came with the MidFifty install kit)
On installing the weatherstrip I used a bicycle tire tool. It is plastic and pretty much designed for this type of thing.
Walmart has them for a few bucks:
Bell Sports 7015909 Deluxe Patch-It Bicycle Tube Repair Kit-DLX TUBE REPAIR KIT - Walmart.com
I will take lots of pictures.
I do have a question. My cab is original and in a patina state. How much should I clean the metal around the windshield frame? Also, is there a better way than just a razor blade to get the old rubber remnants off? There isn't much left.
On installing the weatherstrip I used a bicycle tire tool. It is plastic and pretty much designed for this type of thing.
Walmart has them for a few bucks:
Bell Sports 7015909 Deluxe Patch-It Bicycle Tube Repair Kit-DLX TUBE REPAIR KIT - Walmart.com
I will take lots of pictures.
I do have a question. My cab is original and in a patina state. How much should I clean the metal around the windshield frame? Also, is there a better way than just a razor blade to get the old rubber remnants off? There isn't much left.
Laughing Gas
Joined: Jun 2004
Posts: 823
Likes: 4
From: Calais, Vermont
Thanks Ax and all. I'll post some photos of my pretty new blue cab on the frame with some glass in it sometime next week. I'm not quite used to the position I find myself in. It probably took less than a week to take the whole truck apart back in 2006. It's taken until last month to make all the sheet metal repairs and begin painting the thing. I put the bed together about a month ago. Now I am settling into the process of reassembling everything else...this is the fun part, yes?
Cargo Master


Joined: Nov 2014
Posts: 2,442
Likes: 256
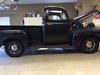
Last time we put the windshield in, it leaked pretty badly at the retaining clips so this weekend we pulled it back out and removed the clips. So this is the third install! Grinded the clips smooth, por painted the channel, used a new DC gasket, used a little crl sealer, rope, soapy water, and suction cups. Worked perfectly, hoping it does not leak on water test.
Problem is that on this install I went with the stainless trim ring gasket and picked up a trim ring off a 51. Our truck is a late 50, so I don't think it's original but it sure looks good! We struggled on getting it to seat in the groove for over an hour and finally gave up. Any advice on installing the stainless trim ring? We can get it on the top and bottom but then the corners flare out.
JB
Problem is that on this install I went with the stainless trim ring gasket and picked up a trim ring off a 51. Our truck is a late 50, so I don't think it's original but it sure looks good! We struggled on getting it to seat in the groove for over an hour and finally gave up. Any advice on installing the stainless trim ring? We can get it on the top and bottom but then the corners flare out.
JB