


P040D
Thread Starter
|
Senior User
Joined: Nov 2003
Posts: 332
Likes: 0
From: NH
P040D
Started my own thread. My truck has this code, limited power and not running well at all since the CE light. I know what the code means and want to try and change out the sensor. I tried looking under the truck, looking towards the up pipe / passenger side. I cannot find ANY sensors in that pipe.
Anyone have a better description of where it is or a picture of it? Thanks!
Anyone have a better description of where it is or a picture of it? Thanks!
Cargo Master


Joined: Jan 2006
Posts: 3,011
Likes: 90
From: SE. MA
Started my own thread. My truck has this code, limited power and not running well at all since the CE light. I know what the code means and want to try and change out the sensor. I tried looking under the truck, looking towards the up pipe / passenger side. I cannot find ANY sensors in that pipe.
Anyone have a better description of where it is or a picture of it? Thanks!
Anyone have a better description of where it is or a picture of it? Thanks!
Thread Starter
|
Senior User
Joined: Nov 2003
Posts: 332
Likes: 0
From: NH
I was able to remove the old sensor today with out to much trouble. I did remove the inner fender cover. I also sprayed PB on the sensor for the last couple of days before trying to loosen it. I then heated it up with a small torch. It came loose right away. What a pain in the *** it was to disconnect the electrical connection!
I will have to wait until Tuesday to install the new one. I never made it to the Ford dealer before the weekend.
I will have to wait until Tuesday to install the new one. I never made it to the Ford dealer before the weekend.
Thread Starter
|
Senior User
Joined: Nov 2003
Posts: 332
Likes: 0
From: NH
Can anyone verify the part number for this sensor? I found 8C3Z-12B591-A EGR valve temperature sensor on Tasca Ford for $28. It looks like the correct one but cannot really tell with their picture.
Post Fiend

Joined: Oct 2009
Posts: 12,123
Likes: 35
From: N. Fort Worth, tx

Trending Topics
Thread Starter
|
Senior User
Joined: Nov 2003
Posts: 332
Likes: 0
From: NH
So finally got the new sensor installed. I cleared the code and the truck runs great again! I took a few pictures in hoping that it will help the next guy that needs to do this.
First this is the sensor you are looking for, looking up from underneath the truck, passenger side.
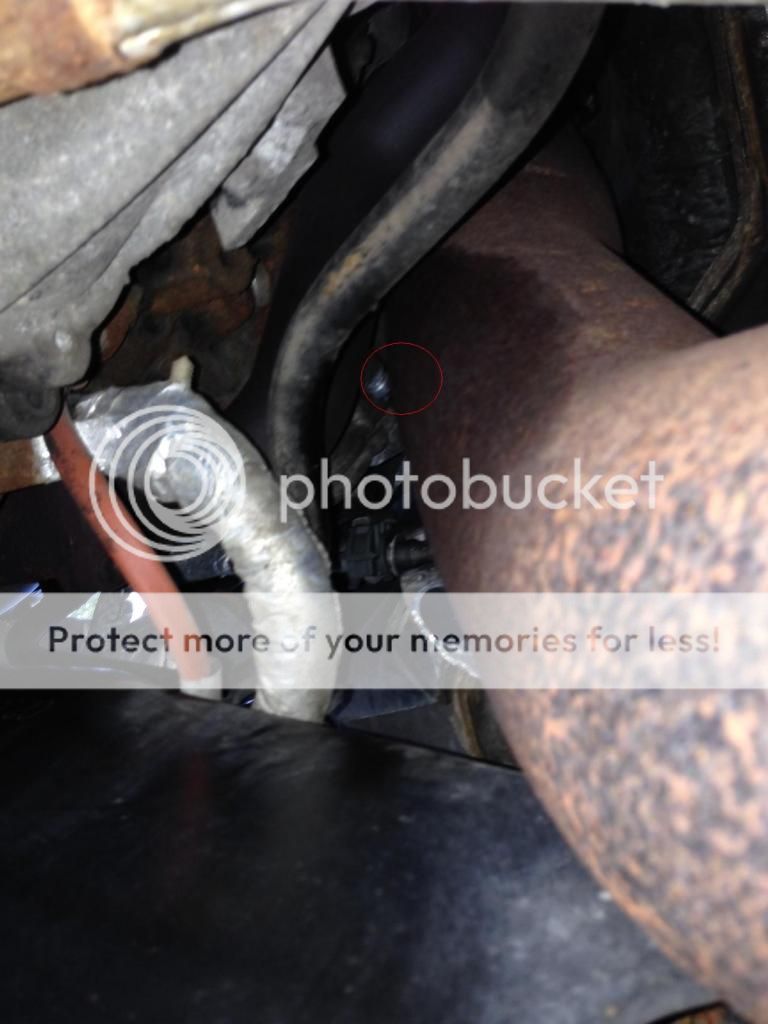
Some people have said they could get to it without removing the inner wheel well, I don't see how unless you have tiny hands! The wheel well is fairly easy to remove. There are about 6 screws and 4 plastic rivets. Remove them and the wheel well can be pulled down. I just let it rest on the tire. See picture:

Once you have the inner wheel well removed you can easily see the sensor.

I sprayed PB on it for a couple of days before I tried to remove it. I then heated up for a bit with a small torch. After that it was easy to remove. Take your time unscrewing it so you do not strip out any threads.
Next remove the air box. Loosen the two clamps and disconnect the electrical connections ( there are three total ). Then simply remove the box from the engine bay.

Once that is removed you can reach the sensor's electrical connector. It slides off a small plastic stand on the engine. Slide it off which will give you more room to disconnect the old sensor then disconnect it. This is the connector:
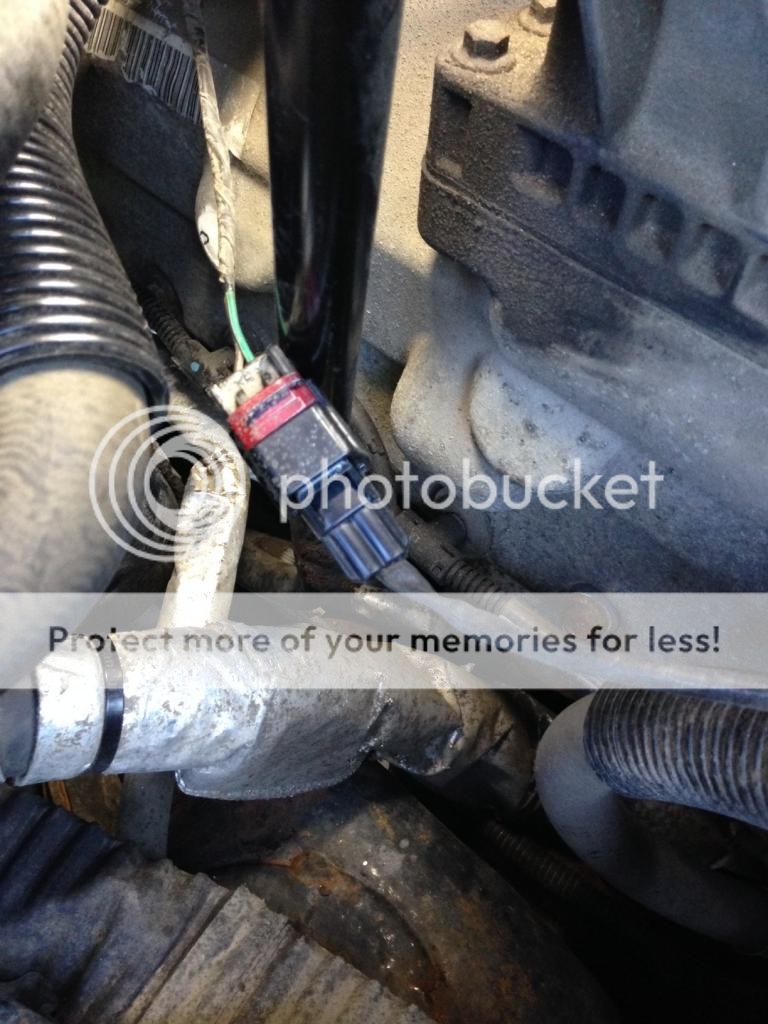
Here is the old and new replacement sensor:
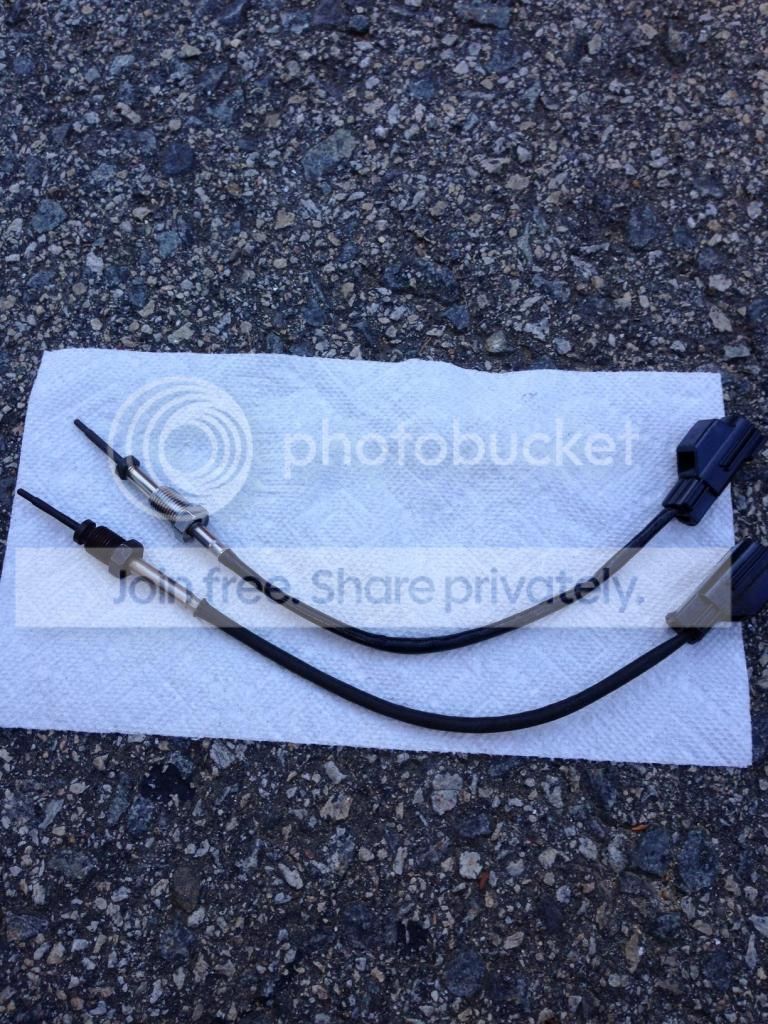
I applied anti-seize to the threads on the new sensor. Reconnect the electrical connection and then screw the sensor in. Install air box, inner fender well in reverse order and you are good to go. I cleared the old code. Not sure if it would have gone away on it's own.
First this is the sensor you are looking for, looking up from underneath the truck, passenger side.
Some people have said they could get to it without removing the inner wheel well, I don't see how unless you have tiny hands! The wheel well is fairly easy to remove. There are about 6 screws and 4 plastic rivets. Remove them and the wheel well can be pulled down. I just let it rest on the tire. See picture:
Once you have the inner wheel well removed you can easily see the sensor.
I sprayed PB on it for a couple of days before I tried to remove it. I then heated up for a bit with a small torch. After that it was easy to remove. Take your time unscrewing it so you do not strip out any threads.
Next remove the air box. Loosen the two clamps and disconnect the electrical connections ( there are three total ). Then simply remove the box from the engine bay.
Once that is removed you can reach the sensor's electrical connector. It slides off a small plastic stand on the engine. Slide it off which will give you more room to disconnect the old sensor then disconnect it. This is the connector:
Here is the old and new replacement sensor:
I applied anti-seize to the threads on the new sensor. Reconnect the electrical connection and then screw the sensor in. Install air box, inner fender well in reverse order and you are good to go. I cleared the old code. Not sure if it would have gone away on it's own.
FTE Stories
Ford Trucks for Ford Truck Enthusiasts

3 Best / 3 Worst Parts of Modern Ford Ownership
Brett Foote
10 Amazing Upgrades That Solve Common Ford Truck Owner Headaches
Pouria Savadkouei
Every 2026 Ford Engine Explained
Brett Foote
10 Ugly Ford Trucks That We Still Kinda Love
Joe Kucinski
10 Things Every Truck Owner NEEDS (2026 Edition)
Michael S. Palmer
Rezvani's Latest Post-Apocalyptic Monster Is a Ford F-150 Raptor Underneath
Verdad Gallardo
Top 10 Most Expensive Ford Trucks Ever Sold on Bring a Trailer
Joe Kucinski
2027 Ford Super Duty Buyer's Guide (Every Model, Engine, & Package)
Brett Foote
Top 10 Ford Truck Tragedies
Joe KucinskiPosting Guru
Joined: Sep 2010
Posts: 2,213
Likes: 1
From: The Woodlands, TX
So finally got the new sensor installed. I cleared the code and the truck runs great again! I took a few pictures in hoping that it will help the next guy that needs to do this.
First this is the sensor you are looking for, looking up from underneath the truck, passenger side.
Some people have said they could get to it without removing the inner wheel well, I don't see how unless you have tiny hands! The wheel well is fairly easy to remove. There are about 6 screws and 4 plastic rivets. Remove them and the wheel well can be pulled down. I just let it rest on the tire. See picture:
Once you have the inner wheel well removed you can easily see the sensor.
I sprayed PB on it for a couple of days before I tried to remove it. I then heated up for a bit with a small torch. After that it was easy to remove. Take your time unscrewing it so you do not strip out any threads.
Next remove the air box. Loosen the two clamps and disconnect the electrical connections ( there are three total ). Then simply remove the box from the engine bay.
Once that is removed you can reach the sensor's electrical connector. It slides off a small plastic stand on the engine. Slide it off which will give you more room to disconnect the old sensor then disconnect it. This is the connector:
Here is the old and new replacement sensor:
I applied anti-seize to the threads on the new sensor. Reconnect the electrical connection and then screw the sensor in. Install air box, inner fender well in reverse order and you are good to go. I cleared the old code. Not sure if it would have gone away on it's own.


