42 Year Old Bolts - '72 Camper Special Budget Resto
#1
 01-08-2014, 05:33 PM

Join Date: May 2013
Posts: 36
Likes: 0
Received 0 Likes
on
0 Posts
42 Year Old Bolts - '72 Camper Special Budget Resto
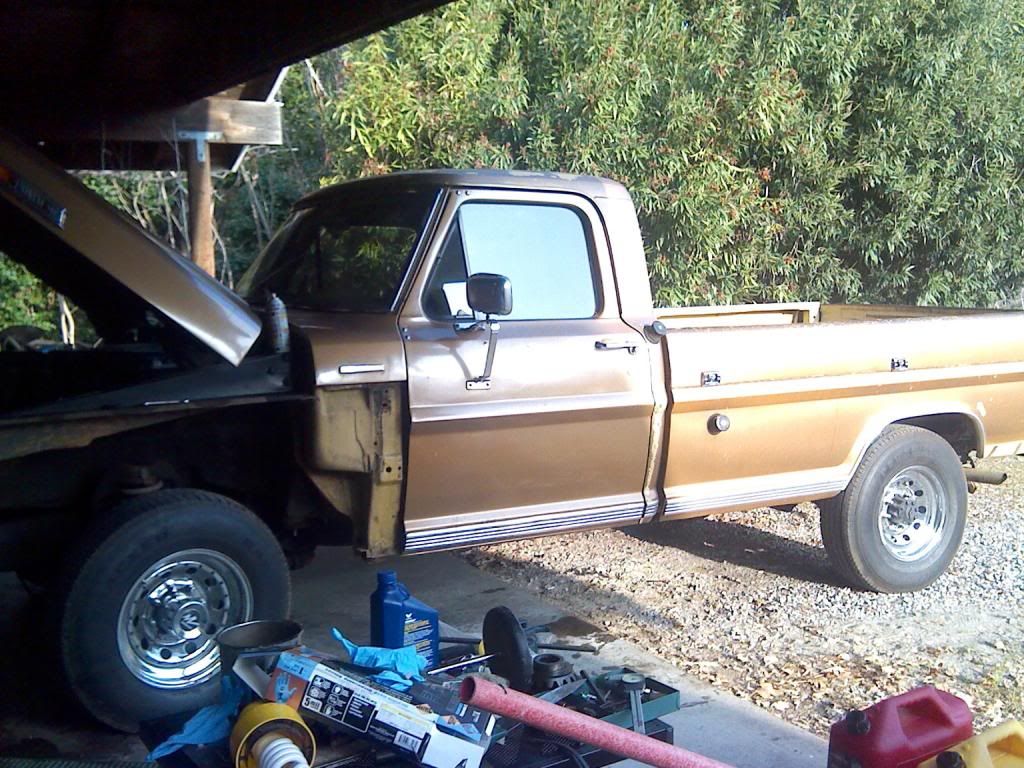
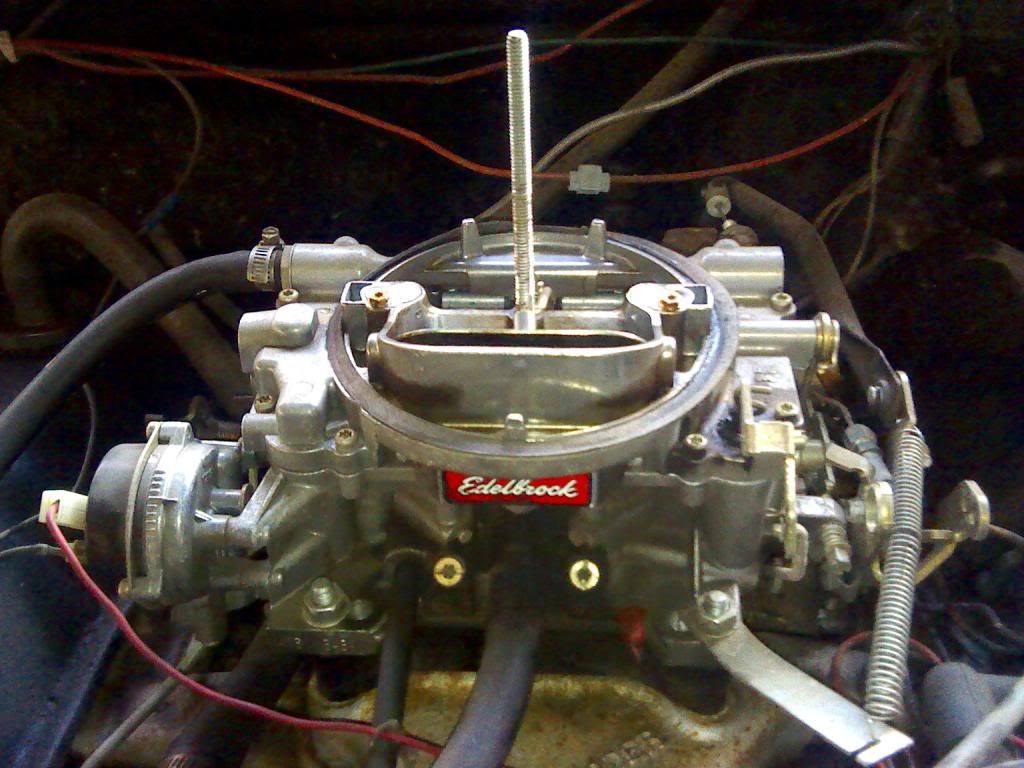
Picked up a '72 Camper Special, 2WD, C6, 360, for $450 - Figure I'll do a budget frame off and try to get some cash back out of it. Seems like a good runner. Pleasantly surprised to find the PO stuck a 600 CFM 4bbl Edelbrock on it; I had been kinda wondering why it had so much get up an go compared to my '85 IDI.
My lesson for today: 42 year old bolts are a son of a to get off. Pulling the front clip, broke three so far. I'm gunna run down to Harbor Freight and get some cut off wheels.
I'll post some pics if anyone's interested later today - Should have the front end degreased by the end of today, hopefully I'll get the cab and bed pulled off by week's end.
Where's the best place to get body mounts? Bronco Graveyard has a kit, just wondering what the consensus is.
Thinking I'll paint the undercarriage, frame black; brake lines, rear end, front suspension components, etc, Ford blue. PO threw a gnarly Krylon gold paint job on there, thinking I'll go for a two tone blue and black - I know it wasn't a factory option, but I haven't seen any combos I really dig on.
Figure I'll keep the powertrain more or less original - air cleaner to match the carb, maybe a lopey cam (any suggestions?). Got a buddy who's pretty good with exhaust work, duals might be in order. Thinking about converting to an electronic ignition. Thoughts on a junkyard Duraspark VS Pertronix or MSD? Tranny's sluggish sometimes, might get a rebuild kit and a shift kit. Not sure yet.
I'm a diesel guy at heart, carburetors and distributors have me scratching my head. Diesel is easy - Got an injection pump with a fuel screw - Run the thing until it stops working. As long as the engine isn't seized, it'll probably muster enough compression to fire.
Pretty interested in converting to hydroboost brakes - The brakes right now are real spongy - I'm gunna try a flush and check all the rubber lines, but I figure if if I've got to replace the master cylinder anyway, might as well upgrade it at the same time.
My lesson for today: 42 year old bolts are a son of a
to get off. Pulling the front clip, broke three so far. I'm gunna run down to Harbor Freight and get some cut off wheels. I'll post some pics if anyone's interested later today - Should have the front end degreased by the end of today, hopefully I'll get the cab and bed pulled off by week's end.
Where's the best place to get body mounts? Bronco Graveyard has a kit, just wondering what the consensus is.
Thinking I'll paint the undercarriage, frame black; brake lines, rear end, front suspension components, etc, Ford blue. PO threw a gnarly Krylon gold paint job on there, thinking I'll go for a two tone blue and black - I know it wasn't a factory option, but I haven't seen any combos I really dig on.
Figure I'll keep the powertrain more or less original - air cleaner to match the carb, maybe a lopey cam (any suggestions?). Got a buddy who's pretty good with exhaust work, duals might be in order. Thinking about converting to an electronic ignition. Thoughts on a junkyard Duraspark VS Pertronix or MSD? Tranny's sluggish sometimes, might get a rebuild kit and a shift kit. Not sure yet.
I'm a diesel guy at heart, carburetors and distributors have me scratching my head. Diesel is easy - Got an injection pump with a fuel screw - Run the thing until it stops working. As long as the engine isn't seized, it'll probably muster enough compression to fire.
Pretty interested in converting to hydroboost brakes - The brakes right now are real spongy - I'm gunna try a flush and check all the rubber lines, but I figure if if I've got to replace the master cylinder anyway, might as well upgrade it at the same time.
#2
01-09-2014, 10:10 AM
#3
01-09-2014, 10:40 AM
Hotshot
Picked up a '72 Camper Special, 2WD, C6, 360, for $450 - Figure I'll do a budget frame off and try to get some cash back out of it. Seems like a good runner. Pleasantly surprised to find the PO stuck a 600 CFM 4bbl Edelbrock on it; I had been kinda wondering why it had so much get up an go compared to my '85 IDI.
My lesson for today: 42 year old bolts are a son of a to get off. Pulling the front clip, broke three so far. I'm gunna run down to Harbor Freight and get some cut off wheels.
I'll post some pics if anyone's interested later today - Should have the front end degreased by the end of today, hopefully I'll get the cab and bed pulled off by week's end.
Where's the best place to get body mounts? Bronco Graveyard has a kit, just wondering what the consensus is.
Thinking I'll paint the undercarriage, frame black; brake lines, rear end, front suspension components, etc, Ford blue. PO threw a gnarly Krylon gold paint job on there, thinking I'll go for a two tone blue and black - I know it wasn't a factory option, but I haven't seen any combos I really dig on.
Figure I'll keep the powertrain more or less original - air cleaner to match the carb, maybe a lopey cam (any suggestions?). Got a buddy who's pretty good with exhaust work, duals might be in order. Thinking about converting to an electronic ignition. Thoughts on a junkyard Duraspark VS Pertronix or MSD? Tranny's sluggish sometimes, might get a rebuild kit and a shift kit. Not sure yet.
I'm a diesel guy at heart, carburetors and distributors have me scratching my head. Diesel is easy - Got an injection pump with a fuel screw - Run the thing until it stops working. As long as the engine isn't seized, it'll probably muster enough compression to fire.
Pretty interested in converting to hydroboost brakes - The brakes right now are real spongy - I'm gunna try a flush and check all the rubber lines, but I figure if if I've got to replace the master cylinder anyway, might as well upgrade it at the same time.
My lesson for today: 42 year old bolts are a son of a
to get off. Pulling the front clip, broke three so far. I'm gunna run down to Harbor Freight and get some cut off wheels. I'll post some pics if anyone's interested later today - Should have the front end degreased by the end of today, hopefully I'll get the cab and bed pulled off by week's end.
Where's the best place to get body mounts? Bronco Graveyard has a kit, just wondering what the consensus is.
Thinking I'll paint the undercarriage, frame black; brake lines, rear end, front suspension components, etc, Ford blue. PO threw a gnarly Krylon gold paint job on there, thinking I'll go for a two tone blue and black - I know it wasn't a factory option, but I haven't seen any combos I really dig on.
Figure I'll keep the powertrain more or less original - air cleaner to match the carb, maybe a lopey cam (any suggestions?). Got a buddy who's pretty good with exhaust work, duals might be in order. Thinking about converting to an electronic ignition. Thoughts on a junkyard Duraspark VS Pertronix or MSD? Tranny's sluggish sometimes, might get a rebuild kit and a shift kit. Not sure yet.
I'm a diesel guy at heart, carburetors and distributors have me scratching my head. Diesel is easy - Got an injection pump with a fuel screw - Run the thing until it stops working. As long as the engine isn't seized, it'll probably muster enough compression to fire.
Pretty interested in converting to hydroboost brakes - The brakes right now are real spongy - I'm gunna try a flush and check all the rubber lines, but I figure if if I've got to replace the master cylinder anyway, might as well upgrade it at the same time.
If you're going to flip it I'd stay away from a lopey cam and tu-tone paint.
I'd keep it one color that most people like. It's already hard to actually MAKE money on a vehicle. Let alone spending extra dough on getting it ready to sell. Just my o.
Finding JY Duraspark would be rare as hen's teeth. You'd have to find 74-76 FE donor (especially for the Dizzy). 74 was 1st year FE's got the Duraspark and I'd stay away from it. Some 74 specific stuff including the ignition module. So that would leave 75/76 only.
#4
01-09-2014, 12:03 PM
Join Date: May 2013
Posts: 36
Likes: 0
Received 0 Likes
on
0 Posts
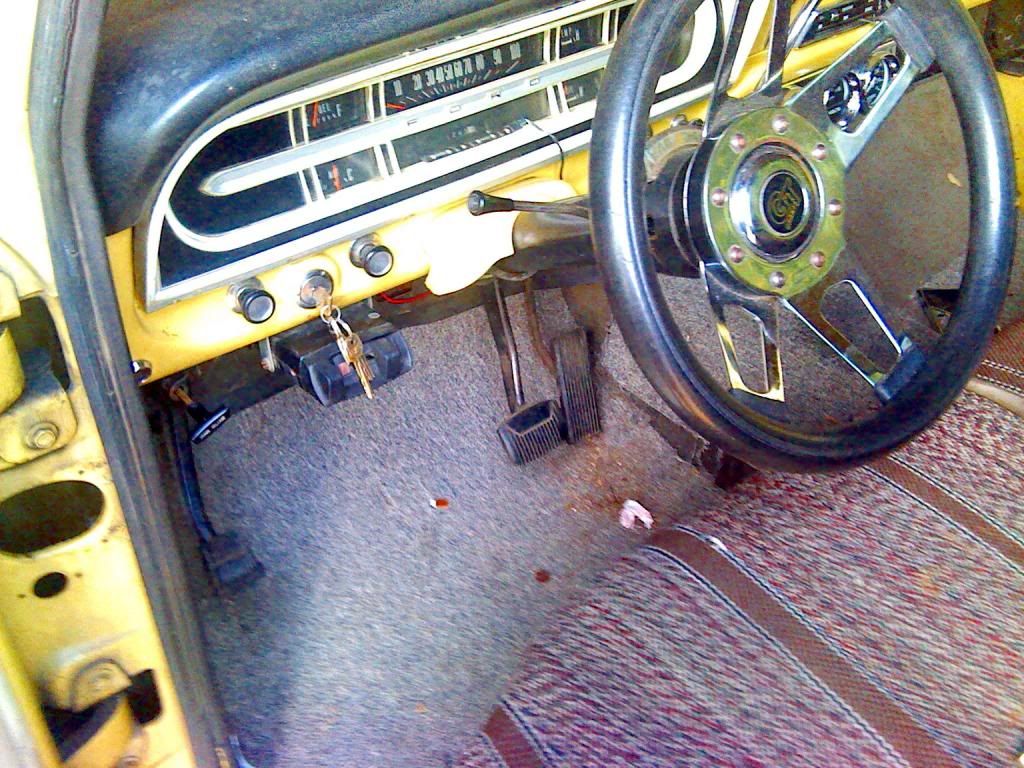
@fe390pc: At first I wanted to go for a decent reproduction of what the truck would have looked like from the factory, but I'm kinda on the fence about it. The rear bumper's non-original, and I doubt I'll be able to find one at junkyards (been looking) - The radio would be a hard one to find, the steering wheel's been changed. The interior and exterior paint don't match. I've got one source for trim, it'd be coming off a '69. Waiting on some pictures from the wrecker who's got the truck. Assuming its in decent shape, I'll pick it up - But the if not, the trim on there is pretty rough, so I was thinking maybe just pull it all. It's tough - the state of the truck really teeters between warranting bringing it back to factory condition, or changing it up a bit and making it a decent looking DD.
@JEFFFAFA: PO listed it as a 390, but I figured it was a 360 since, yeah, all 360s turn into 390s on sales day. I was under the impression that ANY Duraspark module would work, assuming I recurved it for the engine I was working with. OTOH, there are a couple dents at the scrapyard I'll been pulling little stuff off of, one of them may still have the dizzy and associated electronics, didn't think to check last time I was there.
As far as paint goes, I'm leaning towards Ford blue but I'm undecided. Some people that've seen the truck seem to really like the Krylon gold, but I'm not too impressed. I joked I was just going to paint the whole d*mn truck gold. Frame, undercarriage, wheels interior, engine, EVERYTHING.
Overall picture: I've named her Franz. My first truck ('99 2WD F150) was named Franklin, my current DD ('85 F250) is named Frank. Eventually I'll get a Ranger or Courier and name it Frankie.
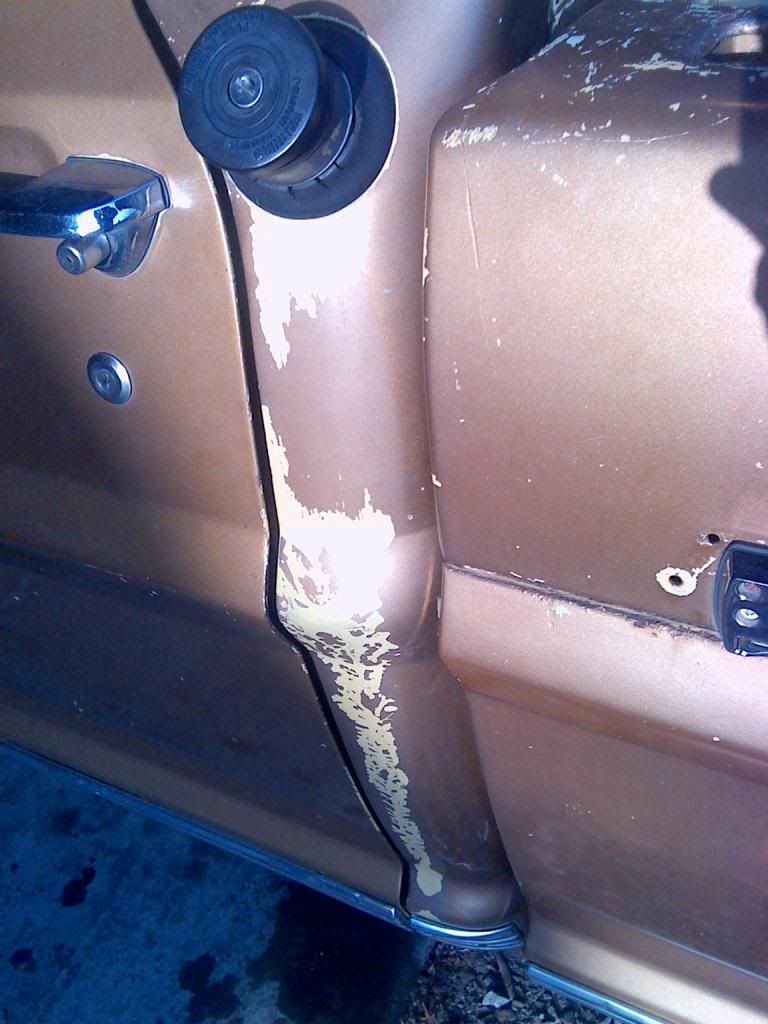
Here's a pretty representative shot of the condition of the paint - Flaking gold and Lt. Goldenrod Yellow (per door jam) underneath.
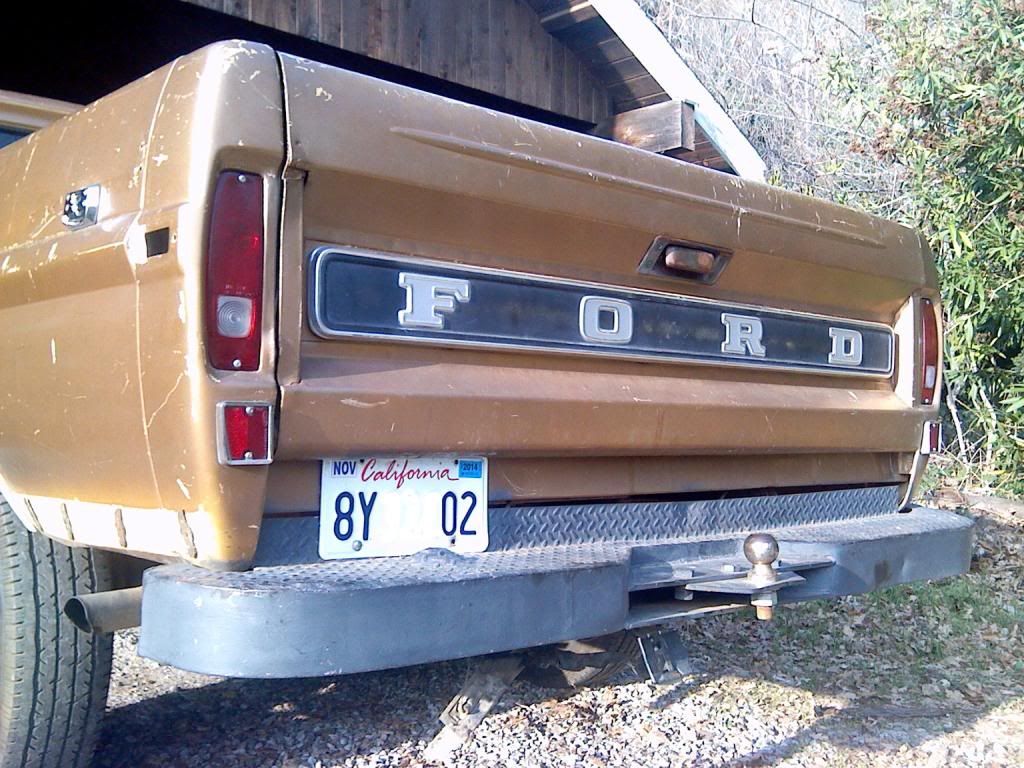
Note the incredibly professional trailer wiring.
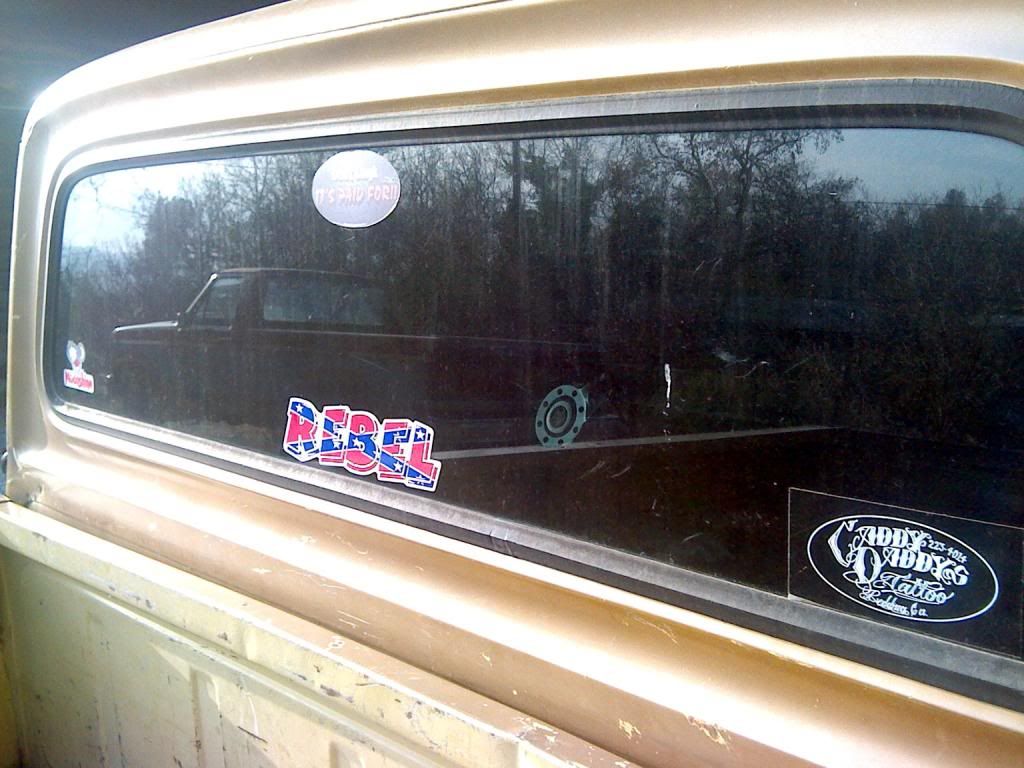
Odd how much southern love this truck seems to have (live in Nor. Cal, btw). Also can see Frank in the reflection.
Interior is pretty clean, minus the office carpet.
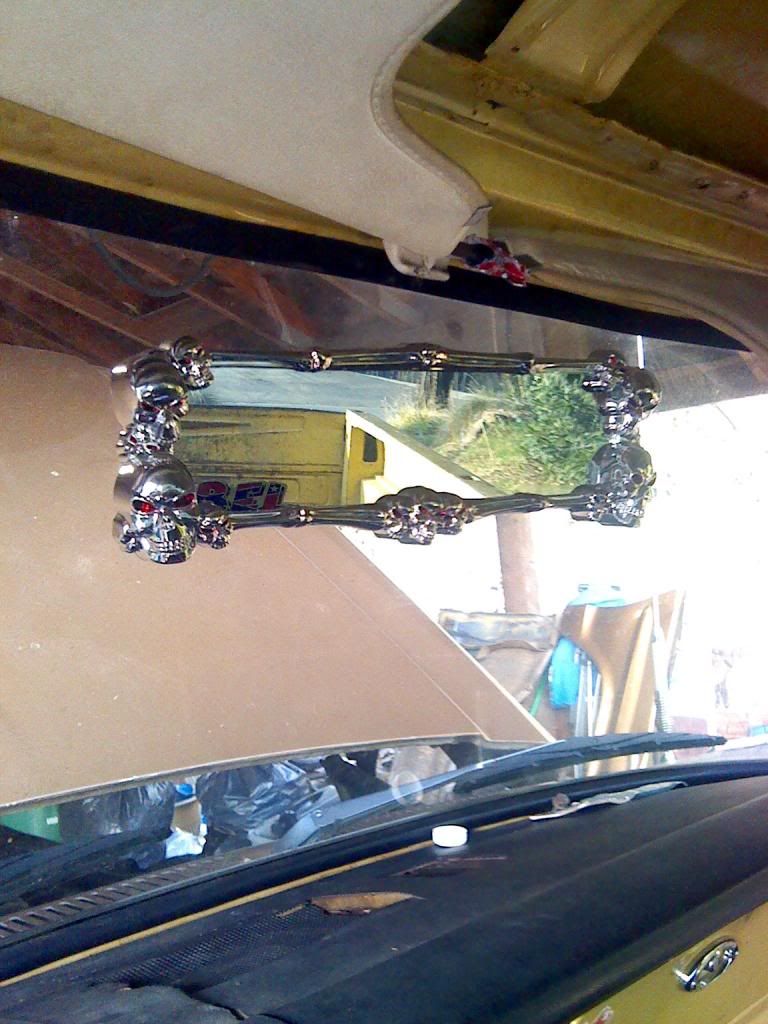
Got this super-dope-fly-bomber-*ss mirror. for FREE. It was included! I'm thinking soaking it in diesel and catching it on fire in front of the truck, to partially make up for its subjection to it.
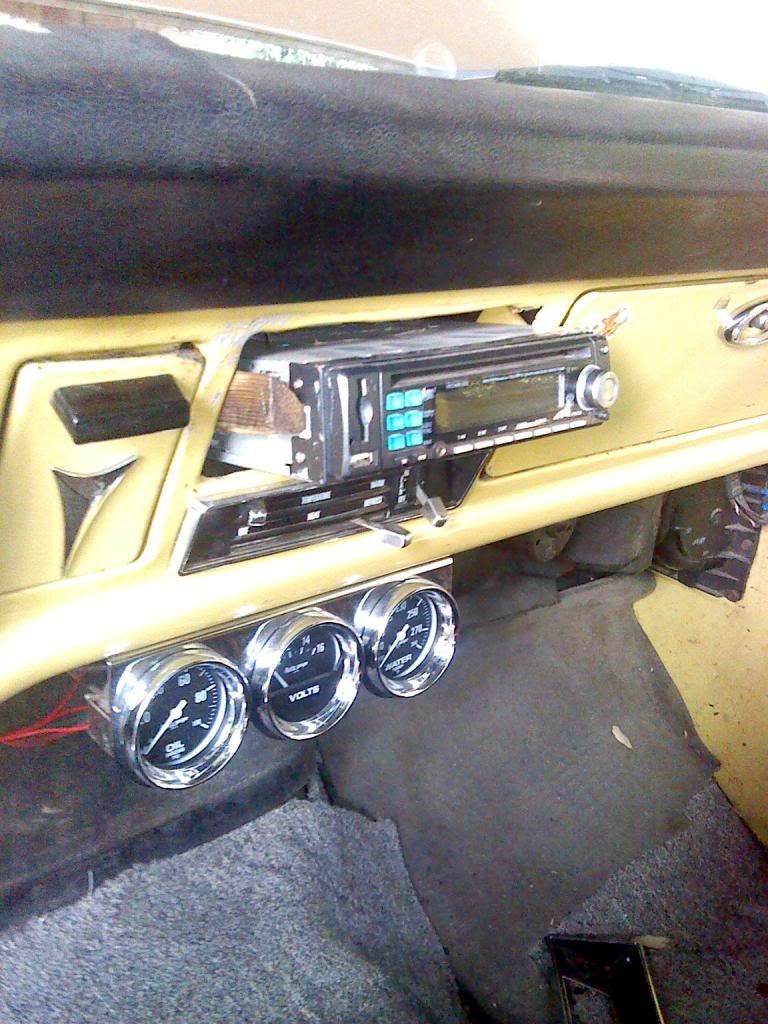
This is how a professional radio installation is performed in my neck of the woods:
Battery tray is toast, inner fender probably is too, considering I can see the tire.
And the carb. I'll try to get some numbers off the intake manifold later today, looks stock, there's a spacer between the carb and the intake. Carb # is 1406.
@JEFFFAFA: PO listed it as a 390, but I figured it was a 360 since, yeah, all 360s turn into 390s on sales day. I was under the impression that ANY Duraspark module would work, assuming I recurved it for the engine I was working with. OTOH, there are a couple dents at the scrapyard I'll been pulling little stuff off of, one of them may still have the dizzy and associated electronics, didn't think to check last time I was there.
As far as paint goes, I'm leaning towards Ford blue but I'm undecided. Some people that've seen the truck seem to really like the Krylon gold, but I'm not too impressed. I joked I was just going to paint the whole d*mn truck gold. Frame, undercarriage, wheels interior, engine, EVERYTHING.
Overall picture: I've named her Franz. My first truck ('99 2WD F150) was named Franklin, my current DD ('85 F250) is named Frank. Eventually I'll get a Ranger or Courier and name it Frankie.
Here's a pretty representative shot of the condition of the paint - Flaking gold and Lt. Goldenrod Yellow (per door jam) underneath.
Note the incredibly professional trailer wiring.
Odd how much southern love this truck seems to have (live in Nor. Cal, btw). Also can see Frank in the reflection.
Interior is pretty clean, minus the office carpet.
Got this super-dope-fly-bomber-*ss mirror. for FREE. It was included! I'm thinking soaking it in diesel and catching it on fire in front of the truck, to partially make up for its subjection to it.
This is how a professional radio installation is performed in my neck of the woods:
Battery tray is toast, inner fender probably is too, considering I can see the tire.
And the carb. I'll try to get some numbers off the intake manifold later today, looks stock, there's a spacer between the carb and the intake. Carb # is 1406.
#5
01-09-2014, 12:14 PM
Logistics Pro
#6
01-09-2014, 12:52 PM
#7
01-09-2014, 01:29 PM
Hotshot
Trending Topics
#8
01-09-2014, 02:05 PM
That is a great start. You have a lot of truck there and it is in great shape for its age. I would still stay away from the Hydro Boost and just repair the brake system you have. If it has Disc Brakes now, they should be dual piston calipers and that is great for a DD truck. Maybe upgrade the rears to Disc?
#9
01-31-2014, 09:13 PM
Join Date: May 2013
Posts: 36
Likes: 0
Received 0 Likes
on
0 Posts
Okay - Slipped my time frame a bit.  Double overtime doesn't leave much time for anything, and as much as I don't mind getting home at midnight and working on Franz here, my neighbors don't appreciate the sound of an grinder @ 3AM. I did do some quiet wrenching in the wee hours, however (removed the hood, by myself, at like 2:30 AM). Now I've got about a week off.
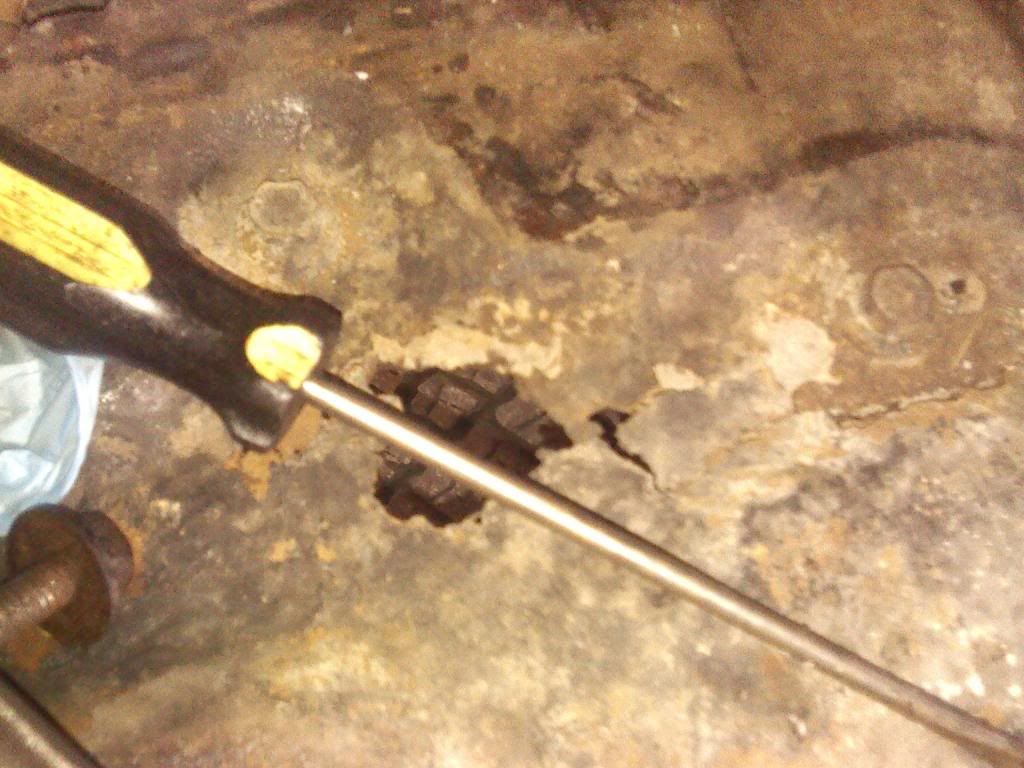
I would have posted an update a few days ago, but the bolts holding the radiator support to the frame were killer to remove - The passenger side bolt came out fine, but the driver's side was seriously fobbed:
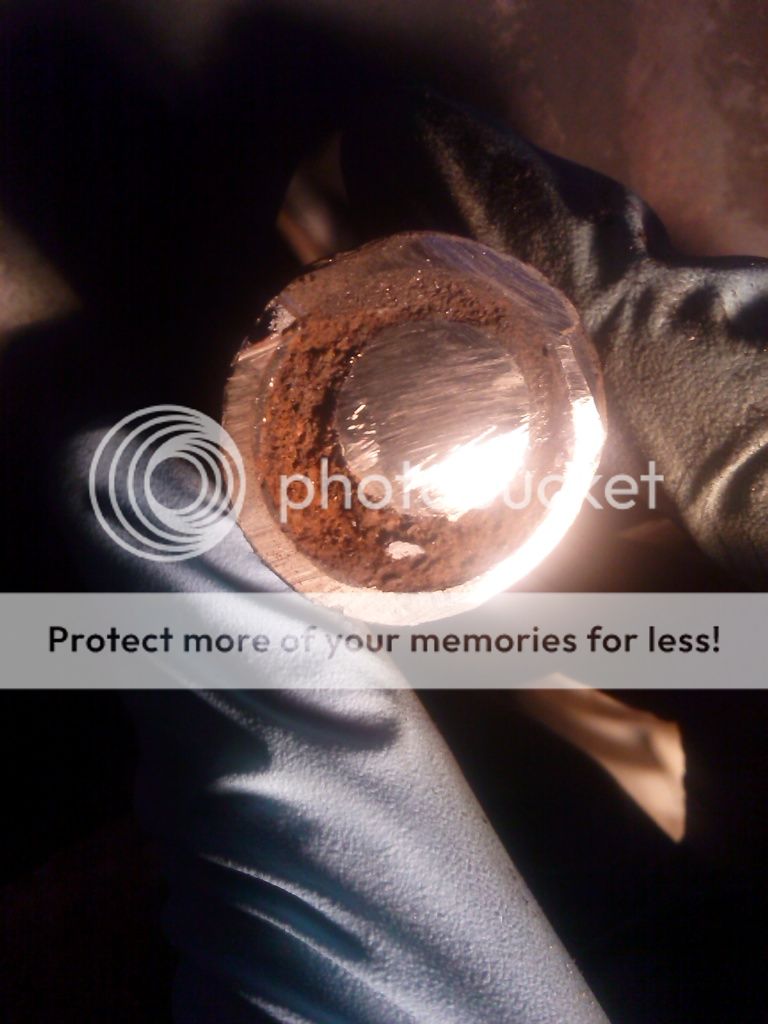
What was once a hollow metal bushing was now a solid rust bushing, with a poor bolt irrevocably trapped within. Long story short, I'd get home from work, blast the bolt and nut with PB Blaster, get something to eat, then try to remove them. Two days of PB Blaster later, I got the nut off the bolt, but the bolt itself wouldn't budge. So I hit it with PB Blaster everyday for a week and just let it soak. Last night I tried one more time to get it off there without cutting the bolt - Most definitely stuck. I stuck the floor jack under the radiator support, figured pushing up would break the bolt loose. Nope, lifted the whole d*mn truck off the ground, though. So I cut the bolt off after melting the rubber mounts with a heat gun, and understood WHY it wasn't moving.
Turns out the grinder is almost as useful as a wrench:
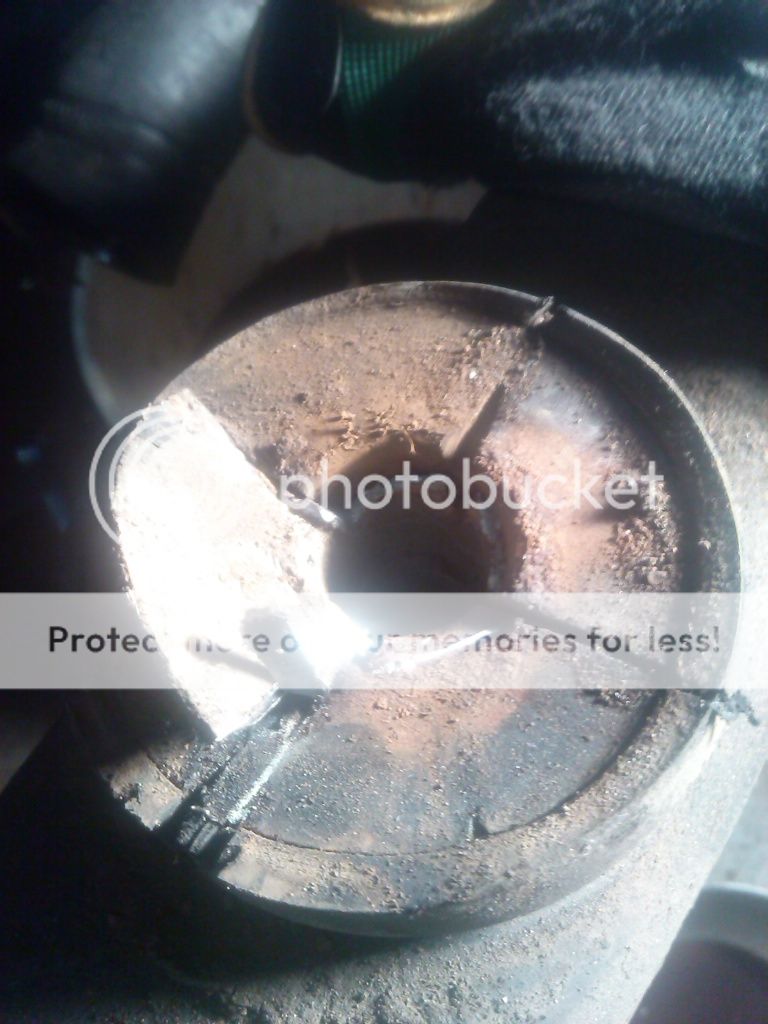
Here's what's left of the original mounts:

Extent of the rust on the pass. side fender:
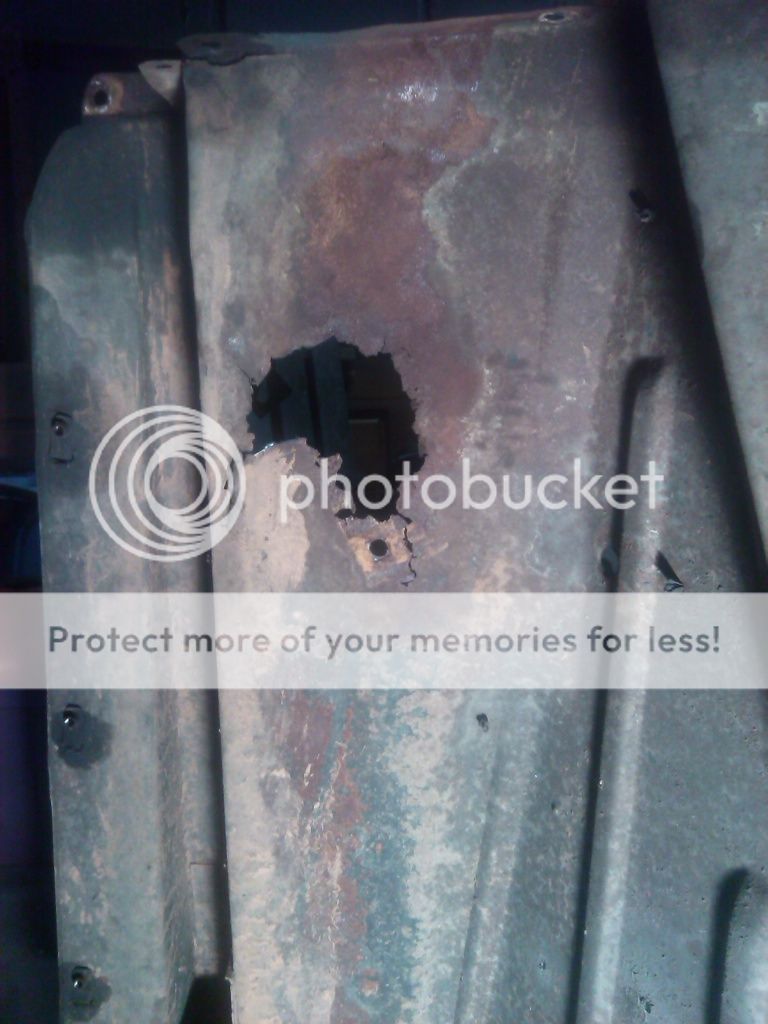
Might be able to get by with cutting out the rust and welding a replacement panel in, I'll know for sure when I start cleaning everything up tomorrow - Anyone know if dentside inner fenders will swap into the bumps? There are a couple of dents at the boneyard, but no bumps.
I thought this was kinda cool, on the radiator fan:
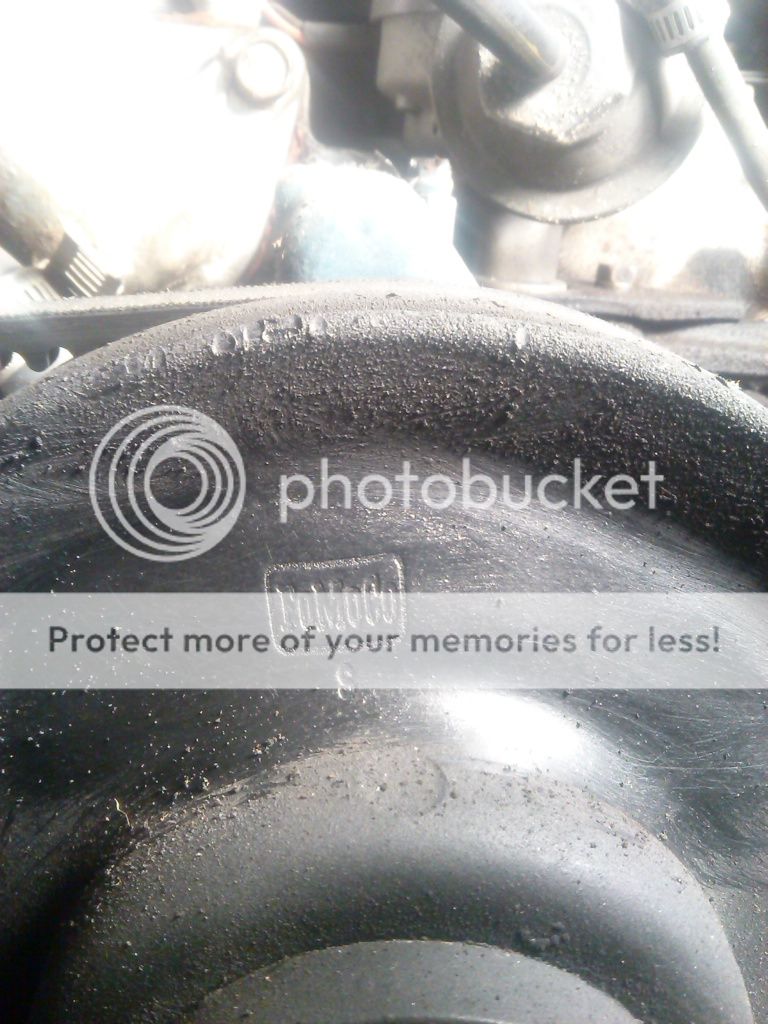
Didn't know Ford actually labeled anything FoMoCo.
Took a wire wheel to the frame to assess the extent of some rust, just some very minor pitting under the rubber radiator support mounts, probably won't even be visible after the frame gets painted. But I did find these numbers, anyone know what they mean?
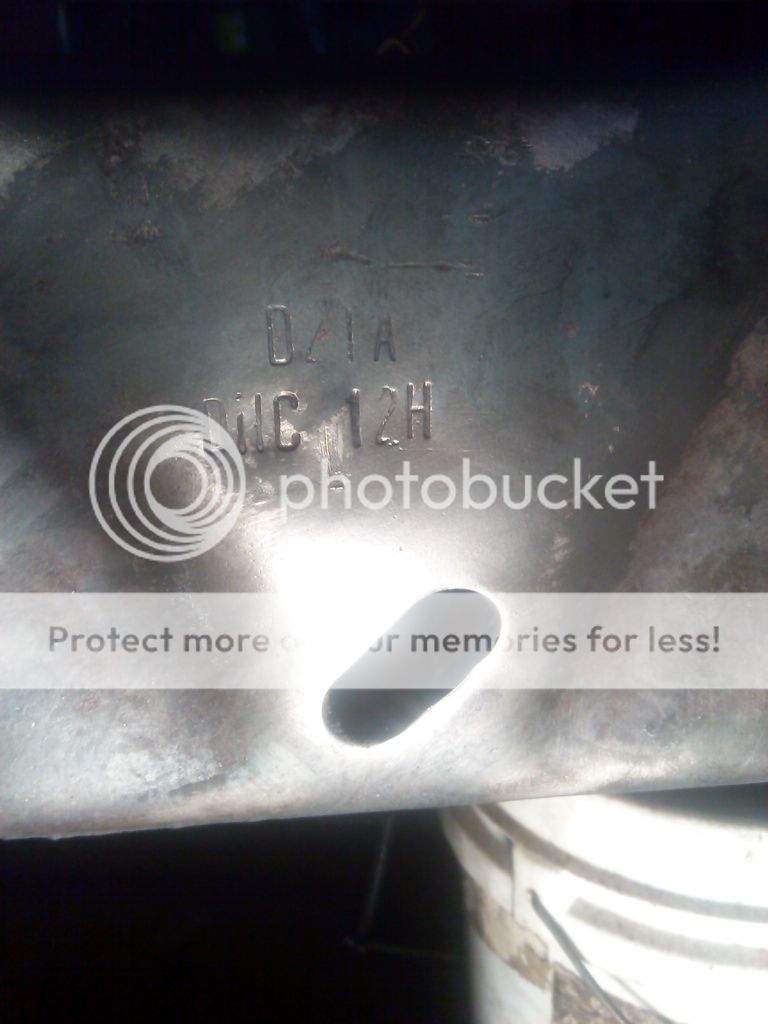
I can see now!
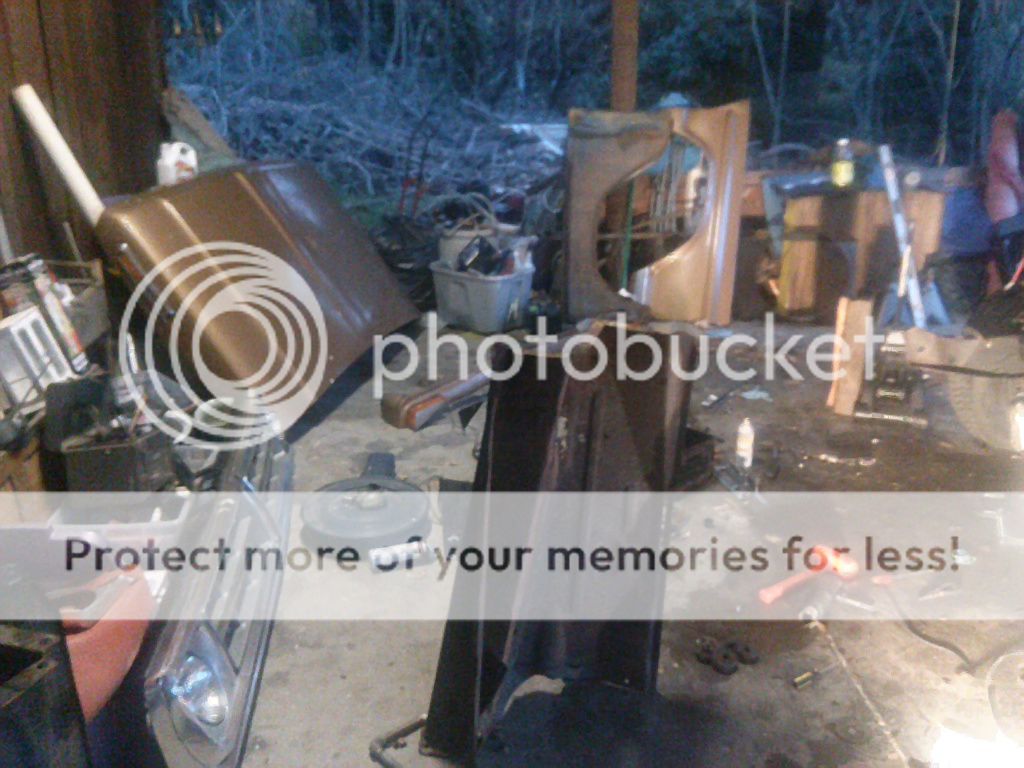
Messy shop. Figure tomorrow I'll start cleaning all the panels and engine components, and prep for sanding body panels and maybe test out some colors. Easier to resand a fender than a cab or bed. I'm trying to figure out how best to mix the original color (goldenrod yellow) and Ford blue.. The cab's interior is clean enough I could sand some problem areas and fix 'em up with some touch up paint, but I want to paint the exterior and engine compartment blue, so I've got to incorporate the goldenrod yellow on the exterior somehow... Any ideas?
Guys have any suggestions on shop manuals? How's Chilton's vs. Haynes? The factory manuals available anywhere besides eBay for less than my first born and 1/2-3/4 of my second?
Anyone know where I could a kit for the radiator support (rubber, bushings, washers, etc.)? I found a guy on another forum that found a kit from Dennis Carpenter, but I can't find it anywhere on the website.
Have any of you guys used these headers before?
http://www.summitracing.com/parts/bi...rd/model/f-250
I'm not quite sure how I missed it, but I've got a dual exhaust system on the truck already! I was walking around the truck, did a double take, and realized that I've got tailpipes on both sides. Looks like 3" out of the manifold, both pipes go into a single muffler, then dual 2" or 2 1/2" out the back. I was doing a bit of reading and looking at the stock manifold, and they do look like small, funny things. Probably $5-10 worth of good iron scrap, though.
Pulled the intake manifold numbers: D5TE-9425-MB. Apparently off a 75-76, need to check to see how the EGR hole was plugged.
The one thing that ticked me off is the tranny - PO said the pan gasket was bad (it was, and the bolts where torqued to.. Well, they were threaded most of the way in, anyway), so I stripped off the gasket, filled her up, tranny still slipped a little, but I thought all was good. Got home the next night, and saw a puddle of tranny fluid under the truck. The leak's coming from the lowest point in the bellhousing. Unless I'm incredibly lucky and the torque converter drain is leaking, I'm thinking it has to be the front pump seal. I'm on the fence - The fluid I drained from the pan was near black, and looked like someone dumped a handful of glitter into it, so I'm thinking that the slipping isn't going to get much better. I've got the choice - A $5 seal and a slipping tranny, or $3-400 on a rebuild kit. I'm leaning towards rebuilding it, considering I don't have to dump any cash into the exhaust, and it'd be good experience for when the C6 in my '85 needs to be rebuilt. Or I could pull a 4-speed out of a junkyard truck and do away with this slushbox nonsense altogether.
Also, embarrassing question, never had to screw around with a distributor before: When I pull the dizzy off the engine, what do I have to take note of to make sure the timing stays the same when I put it back on?
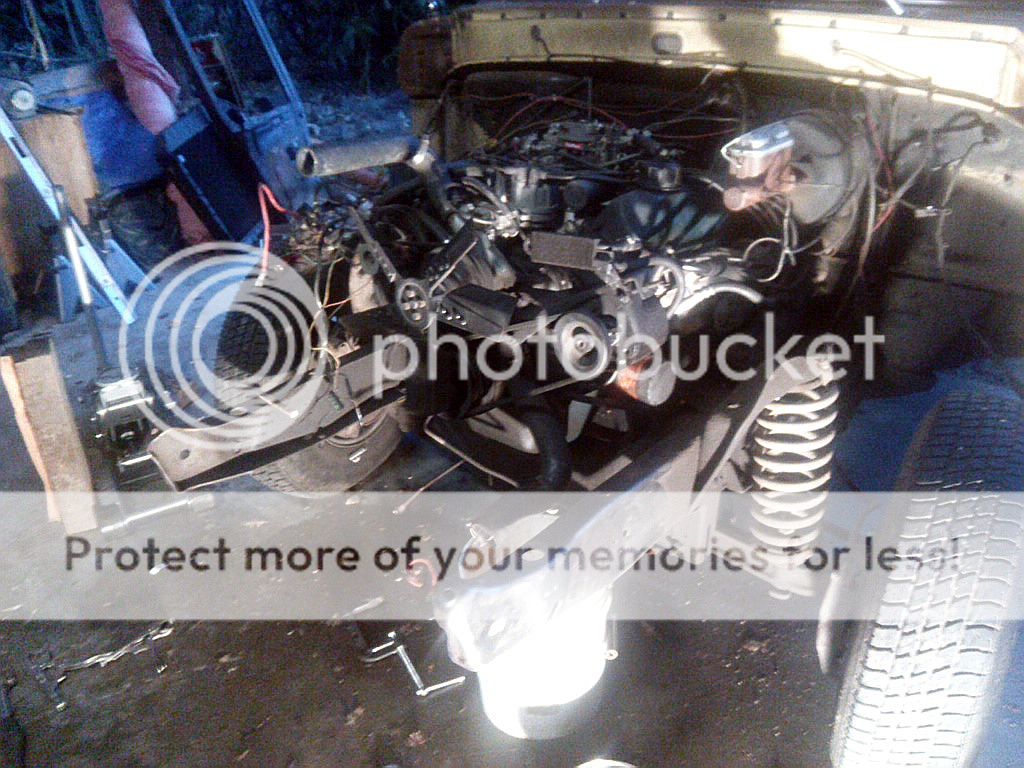
Old bolts sure are aggravating, but I'm having a ton of fun with this. I love wrenching on these old trucks. This is me while I'm working:
Double overtime doesn't leave much time for anything, and as much as I don't mind getting home at midnight and working on Franz here, my neighbors don't appreciate the sound of an grinder @ 3AM. I did do some quiet wrenching in the wee hours, however (removed the hood, by myself, at like 2:30 AM). Now I've got about a week off. I would have posted an update a few days ago, but the bolts holding the radiator support to the frame were killer to remove - The passenger side bolt came out fine, but the driver's side was seriously fobbed:
What was once a hollow metal bushing was now a solid rust bushing, with a poor bolt irrevocably trapped within.
Long story short, I'd get home from work, blast the bolt and nut with PB Blaster, get something to eat, then try to remove them. Two days of PB Blaster later, I got the nut off the bolt, but the bolt itself wouldn't budge. So I hit it with PB Blaster everyday for a week and just let it soak. Last night I tried one more time to get it off there without cutting the bolt - Most definitely stuck. I stuck the floor jack under the radiator support, figured pushing up would break the bolt loose. Nope, lifted the whole d*mn truck off the ground, though. So I cut the bolt off after melting the rubber mounts with a heat gun, and understood WHY it wasn't moving. Turns out the grinder is almost as useful as a wrench:
Here's what's left of the original mounts:
Extent of the rust on the pass. side fender:
Might be able to get by with cutting out the rust and welding a replacement panel in, I'll know for sure when I start cleaning everything up tomorrow - Anyone know if dentside inner fenders will swap into the bumps? There are a couple of dents at the boneyard, but no bumps.
I thought this was kinda cool, on the radiator fan:
Didn't know Ford actually labeled anything FoMoCo.
Took a wire wheel to the frame to assess the extent of some rust, just some very minor pitting under the rubber radiator support mounts, probably won't even be visible after the frame gets painted. But I did find these numbers, anyone know what they mean?
I can see now!
Messy shop. Figure tomorrow I'll start cleaning all the panels and engine components, and prep for sanding body panels and maybe test out some colors. Easier to resand a fender than a cab or bed. I'm trying to figure out how best to mix the original color (goldenrod yellow) and Ford blue.. The cab's interior is clean enough I could sand some problem areas and fix 'em up with some touch up paint, but I want to paint the exterior and engine compartment blue, so I've got to incorporate the goldenrod yellow on the exterior somehow... Any ideas?
Guys have any suggestions on shop manuals? How's Chilton's vs. Haynes? The factory manuals available anywhere besides eBay for less than my first born and 1/2-3/4 of my second?
Anyone know where I could a kit for the radiator support (rubber, bushings, washers, etc.)? I found a guy on another forum that found a kit from Dennis Carpenter, but I can't find it anywhere on the website.
Have any of you guys used these headers before?
http://www.summitracing.com/parts/bi...rd/model/f-250
I'm not quite sure how I missed it, but I've got a dual exhaust system on the truck already! I was walking around the truck, did a double take, and realized that I've got tailpipes on both sides.
Looks like 3" out of the manifold, both pipes go into a single muffler, then dual 2" or 2 1/2" out the back. I was doing a bit of reading and looking at the stock manifold, and they do look like small, funny things. Probably $5-10 worth of good iron scrap, though. Pulled the intake manifold numbers: D5TE-9425-MB. Apparently off a 75-76, need to check to see how the EGR hole was plugged.
The one thing that ticked me off is the tranny - PO said the pan gasket was bad (it was, and the bolts where torqued to.. Well, they were threaded most of the way in, anyway), so I stripped off the gasket, filled her up, tranny still slipped a little, but I thought all was good. Got home the next night, and saw a puddle of tranny fluid under the truck.
The leak's coming from the lowest point in the bellhousing. Unless I'm incredibly lucky and the torque converter drain is leaking, I'm thinking it has to be the front pump seal. I'm on the fence - The fluid I drained from the pan was near black, and looked like someone dumped a handful of glitter into it, so I'm thinking that the slipping isn't going to get much better. I've got the choice - A $5 seal and a slipping tranny, or $3-400 on a rebuild kit. I'm leaning towards rebuilding it, considering I don't have to dump any cash into the exhaust, and it'd be good experience for when the C6 in my '85 needs to be rebuilt. Or I could pull a 4-speed out of a junkyard truck and do away with this slushbox nonsense altogether.Also, embarrassing question, never had to screw around with a distributor before: When I pull the dizzy off the engine, what do I have to take note of to make sure the timing stays the same when I put it back on?
Old bolts sure are aggravating, but I'm having a ton of fun with this. I love wrenching on these old trucks. This is me while I'm working:
#10
01-31-2014, 09:47 PM
Post Fiend
Didn't know Ford actually labeled anything FoMoCo.
Took a wire wheel to the frame to assess the extent of some rust, just some very minor pitting under the rubber radiator support mounts, probably won't even be visible after the frame gets painted. But I did find these numbers, anyone know what they mean?
Took a wire wheel to the frame to assess the extent of some rust, just some very minor pitting under the rubber radiator support mounts, probably won't even be visible after the frame gets painted. But I did find these numbers, anyone know what they mean?
With headers ya get what ya pay for. I'd go for at least 3/8-inch thick flanges and 16g tubes.
Also, embarrassing question, never had to screw around with a distributor before: When I pull the dizzy off the engine, what do I have to take note of to make sure the timing stays the same when I put it back on?
#11
01-31-2014, 10:16 PM
#12
02-01-2014, 10:53 AM
Hotshot
2X what Hio said. While it's really not necessary I go one step farther. What Hio said will keep it in time. Not only do I set the engine at TDC with the #1 cylinder on the compression stroke (rotor pointing at #1 wire terminal) and mark the location of the rotor on the Dizzy's housing, I also mark the location of the Dizzy's housing in relation to the block. Example, mark where the vacuum advance's nipple is pointing to. I like to stab the Dizzy EXACTLY where it was before. Call me picky but I've never had trouble re-starting. Of course still check the timing once you fire her up.
#13
02-01-2014, 12:48 PM

Senior User
Join Date: Sep 2007
Location: Redding, CA
Posts: 102
Likes: 0
Received 0 Likes
on
0 Posts
#14
02-01-2014, 03:43 PM
Posting Guru
For shop manuals, get a CD from Faxon Auto Literature, then download it to your computer. Print off the pages you need for each project as you go.
Search
For a more professional looking stereo install:
"HowIdunnit" Metra 99-9222 Stereo Install Warning:Pics!!!!!
This is a �HowIdunnit� article regarding the installation of a modern single DIN stereo into my 1969 F250CS. I did this during the latter stages of my firewall cover installation project, as everything was being reinstalled into the truck. I began this installation with the heater box, heater controls, instrument panel, ash tray and glove box not yet reinstalled. I had already wired the stereo wiring harness into the truck. I am using a Highliner Headliner with four speakers. I have it wired up so that the drivers side speaker are the 'front' speakers, and the passenger side speakers are the 'rear' speakers. Doing so allows me to balance both sides of the truck for stereo effect.

I used the Metra 99-9222 install kit for a 1975-1993 Volvo. These are available through Amazon.com, Best Buy, at various places online, or local stereo installation shops. The kit runs around $20.
The stereo I used is a JVC KD-R200 AM/FM CD player unit, with a removable faceplate.
It also has a small remote control unit.
The faceplate you want to use out of the Metra kit is the largest of the three, the one with the triangle shape. It has plastic tabs in it for shaft style radio units. These will have to be cut out.

Test fit your stereos installation sleeve to see if any additional trimming will be required. Mine fit just fine into the opening.

The back of the faceplate has cutting lines for easy removal of the shaft plates.

To cut the shaft plates out of the faceplate, use a high speed rotary hobby too, such as a Dremel tool.

Once the shaft plates are removed, I test fit the stereos installation sleeve into the opening. It fit perfectly!

Now, we go out to the truck.
I have already bent the stock radios mounting ears back out of the way. If you have not done this yet, now is the time. They are easy to bend by hand.

I temporarily reinstalled the heater control unit, to make sure I didn�t mount the faceplate too low, and interfere with the installation of it later.

I installed the faceplate into the radio opening, positioned it where I wanted it to sit, and taped it into place. Be very careful with this step; you will have to live with the results for as long as the stereo is in your truck!

After you have rummaged through your excess hardware margarine tubs, and found some appropriate sheet metal screws, drill the correspondingly sized pilot holes through the tabs of the faceplate, and into the mounting ears of the truck.

The face plate screwed into the mounting ears. It�s very sturdy.

Install a short length of plumbers tape. Plumbers tape is a metal strap with holes in it. There is a speaker mounting stud just above the radio that is a very handy place to mount the tape to. You will want the tape to support the back of the stereo unit.


At this point, I installed the heater box, and hooked up the heater control cables. I then installed the heater control unit back into the dash.

The stereo sleeve fits like it was designed to go there!

If you haven�t already done so. wire up your stereo�s wiring harness and speaker wires.
Route your antenna lead.

After installing the sleeve for the last time, bend down the appropriate tabs to secure the sleeve to the faceplate.

Attach the antenna lead to the back of the stereo, and insert it into the sleeve until it clicks into place. Reach through the ashtray opening, and the glove box opening, and plug the wiring harness into the back of the stereo. Secure the plumbers tape to the mounting stud on the back of the stereo. Install the face plate, if removable.
Admire your work!

Search
For a more professional looking stereo install:
"HowIdunnit" Metra 99-9222 Stereo Install Warning:Pics!!!!!
This is a �HowIdunnit� article regarding the installation of a modern single DIN stereo into my 1969 F250CS. I did this during the latter stages of my firewall cover installation project, as everything was being reinstalled into the truck. I began this installation with the heater box, heater controls, instrument panel, ash tray and glove box not yet reinstalled. I had already wired the stereo wiring harness into the truck. I am using a Highliner Headliner with four speakers. I have it wired up so that the drivers side speaker are the 'front' speakers, and the passenger side speakers are the 'rear' speakers. Doing so allows me to balance both sides of the truck for stereo effect.
I used the Metra 99-9222 install kit for a 1975-1993 Volvo. These are available through Amazon.com, Best Buy, at various places online, or local stereo installation shops. The kit runs around $20.
The stereo I used is a JVC KD-R200 AM/FM CD player unit, with a removable faceplate.
It also has a small remote control unit.
The faceplate you want to use out of the Metra kit is the largest of the three, the one with the triangle shape. It has plastic tabs in it for shaft style radio units. These will have to be cut out.
Test fit your stereos installation sleeve to see if any additional trimming will be required. Mine fit just fine into the opening.
The back of the faceplate has cutting lines for easy removal of the shaft plates.
To cut the shaft plates out of the faceplate, use a high speed rotary hobby too, such as a Dremel tool.
Once the shaft plates are removed, I test fit the stereos installation sleeve into the opening. It fit perfectly!
Now, we go out to the truck.
I have already bent the stock radios mounting ears back out of the way. If you have not done this yet, now is the time. They are easy to bend by hand.
I temporarily reinstalled the heater control unit, to make sure I didn�t mount the faceplate too low, and interfere with the installation of it later.
I installed the faceplate into the radio opening, positioned it where I wanted it to sit, and taped it into place. Be very careful with this step; you will have to live with the results for as long as the stereo is in your truck!
After you have rummaged through your excess hardware margarine tubs, and found some appropriate sheet metal screws, drill the correspondingly sized pilot holes through the tabs of the faceplate, and into the mounting ears of the truck.
The face plate screwed into the mounting ears. It�s very sturdy.
Install a short length of plumbers tape. Plumbers tape is a metal strap with holes in it. There is a speaker mounting stud just above the radio that is a very handy place to mount the tape to. You will want the tape to support the back of the stereo unit.
At this point, I installed the heater box, and hooked up the heater control cables. I then installed the heater control unit back into the dash.
The stereo sleeve fits like it was designed to go there!
If you haven�t already done so. wire up your stereo�s wiring harness and speaker wires.
Route your antenna lead.
After installing the sleeve for the last time, bend down the appropriate tabs to secure the sleeve to the faceplate.
Attach the antenna lead to the back of the stereo, and insert it into the sleeve until it clicks into place. Reach through the ashtray opening, and the glove box opening, and plug the wiring harness into the back of the stereo. Secure the plumbers tape to the mounting stud on the back of the stereo. Install the face plate, if removable.
Admire your work!

Thread
Thread Starter
Forum
Replies
Last Post
Merlyn James
1973 - 1979 F-100 & Larger F-Series Trucks
7
04-04-2017 11:42 PM