When you click on links to various merchants on this site and make a purchase, this can result in this site earning a commission. Affiliate programs and affiliations include, but are not limited to, the eBay Partner Network.
Drew, that looks really good! What will the top/face surface be? Will the base be finished wood or covered? Seems a shame to cover up that beautiful wood work.
Can't wait to see it finished...
Part of it will be painted, part will be wood. The wood that you're seeing is really just cheap plywood that is not very strong by itself. I will use fiberglass mat to strengthen the console and give a surface that I can bodywork and make changes a little easier. I plan to use some more of the cherry wood like I used for the instrument panel.
Originally Posted by 4tl8ford
As always, Stunning work
Originally Posted by bobbytnm
Drew,
I love it everytime you start a new thread. There is always something cool to look at and to get inspiration from.
Another nice project! Thanks for sharing
Bobby
Originally Posted by yamagrant
ATTA BOY Drew. You are truley an inspiration. Keep up the good work.
Shucks....... Thanks. Just trying something a little different.
Originally Posted by drptop70ss
Looks good, I had the same idea for mine, just havent decided on bench or bucket seats yet. I want to leave behind the seats for storage so either way I will be stopping the console in front or between the seats. I thought about making it out of wood and then fiberglassing over it so I could paint it.
We're on the same wave length regarding finish.
Originally Posted by Project-55
Drew, I knew from your first cardboard console layout that it was going to look super and as usual you have pulled it off and put me to shame.
I think the waterfall look is cool but I like an elbow rest so why not incorporate an arm rest into your waterfall design???
Just one of my warped thoughts, hehe.
No putting you to shame after all that engineering you've done on your tilt setup.
The waterfall is for the moment on the back burner. It seems that as I sat in the truck it would create an awkward projection between the seats. I'll have to rethink that part.
Originally Posted by underthebridgejim
Darn Drew, you make it look so easy. I've learned my limitations when it comes to working with wood, and they are all but non existent. Thanks, you journeyman craftsman give the rest of us inspiration, and let us know that maybe, just maybe, with a little instruction I/We just might be able to do something, that I/We would be willing to admit was ours. LOL I'm very serious, and grateful for all the lessons.
Not really hard.........just basic tools and fairly cheap materials. I appreciate your kind words.
Originally Posted by smallello
That looks good! Are you going to paint over that?
Some paint......some wood......still a work in progress.
Drew... wish I had your artist's eye. I've stared at mine for hours and can't get past the dash board extension for the air conditioning vents. I know whatever you come up with will be unique and beautiful. Nice work and imagination so far for sure.
Drew... wish I had your artist's eye. I've stared at mine for hours and can't get past the dash board extension for the air conditioning vents. I know whatever you come up with will be unique and beautiful. Nice work and imagination so far for sure.
j
I've spent a lot more time thinking about what I want to do than actually working on it. Hopefully it will evolve into something useful. Still not sure where I want to go with it.
I like your center console and instrument cluster... I'm not a wood worker and will never claim to be you have a great talent. I'll keep following this thread!
You also could use foam core board from the art supply store to create the form. It's available in several thicknesses, 1/8 - 1/2" is commonly available and easy to work with. Glue together with carpenter's glue, reinforce the joints with toothpicks, bamboo skewers, masking tape and/or T pins until the glue dries. Cover with stretch jersey material from the yard goods store and harden with resin. Fill and smooth with bondo and paint.
Drew, that dash is awesome! I've been thinkin' of making a radio and speaker cover for my 48 now.Mite use some solid maple I have in the shop.Gonna be a challenge since you set the bar so high. Great work so far.
You also could use foam core board from the art supply store to create the form. It's available in several thicknesses, 1/8 - 1/2" is commonly available and easy to work with. Glue together with carpenter's glue, reinforce the joints with toothpicks, bamboo skewers, masking tape and/or T pins until the glue dries. Cover with stretch jersey material from the yard goods store and harden with resin. Fill and smooth with bondo and paint.
I am thinking of making a panel using this method. Does it need to be reinforced with metal if you want to mount a stereo in it?
I personally don't have any experience with the foam core material Axe had mentioned. I would think that material would need some support to carry the weight of the radio a little better.Vibration while driving and all that.Could be easier to work with than a solid piece of wood.Mite need to fab a trim piece to cover the edges too.As a carpenter I don't like seeing end grain. My OCD kickin' in I guess.
The foam core is similar to drywall, paper faces sandwiching a center layer of styrofoam. It is very light weight and inexpensive, cuts with a sharp utility or hobby knife. Not meant to be structural or exposed, just a support to cover with stretch jersey material (think lightweight sweatpants) then harden the fabric with fiberglass resin. The inside can be reinforced with wood, or other material and/or additional layers of fiberglass cloth and resin. The fabric will stretch and bridge over the raw edges of the FC board. You can build up thickness by laminating layers, if you want to shape edges etc, you could glue on balsa wood blocks or strips then shape by carving or sanding..
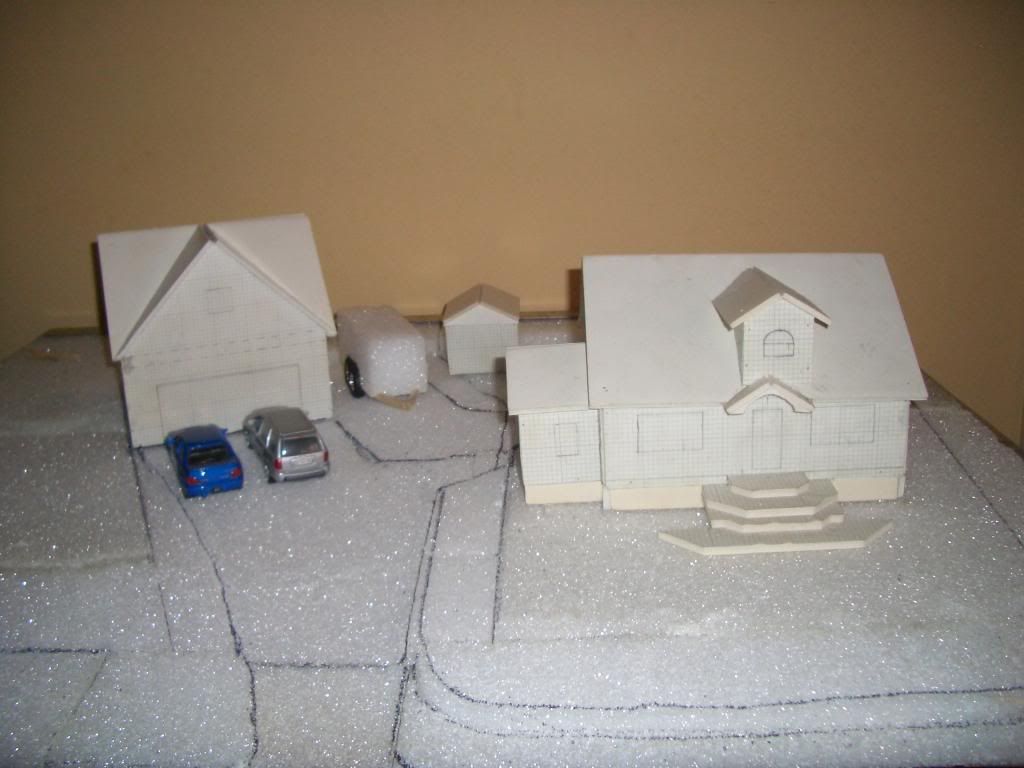
here is a quick scale model I made of my house and garage (and even a storage building) in a couple hours from 1/4" FC board to help visualize the volumes and relationships when I was designing my garage. Note: The cars are actually oversized for the scale.
Without making a really long story out of this, I got hold of some hardener for my polyester resin that apparently was defective. I had some features molded into parts of the console that would not kick off and harden. Created somewhat of a mess for me and I was ready get out some sheet metal and make another console out of stee. I did finally get hardener from a different source and managed to salvage the work I had put in on the original console that you saw in this thread.
I failed to photograph all of what I did to the console due to considerable frustration dealing with defective materials.
This is the only photograph that I can find that shows the console after I had smoothed the fiberglass and primed it. Since I was hell bent on making a cruise-in this past year, once I got the console in the truck, it hasn't been pulled back out.
Rezvani's Latest Post-Apocalyptic Monster Is a Ford F-150 Raptor Underneath
Slideshow: Called the Fortress, the 850-horsepower pickup combines Raptor underpinnings with military-inspired features, survival equipment, and a starting price of $285,000.


 Thanks. Just trying something a little different.