


How To: Headliner
Thread Starter
|
Posting Guru
Joined: Jul 2012
Posts: 1,394
Likes: 5
From: cincinnati ohio
How To: Headliner
well today i had to redo the headliner for the 84, figured this question comes up a decent amount so a hhow to could help, its super super easy, i beleive anyone of you should be able to do this,
anyways
Materials needed:
-first off, a crappy headliner that needs replaced,

-Clips, like chip bag clips, i visit moms kitchen for those when i do headliners lol but a wifes kitchen will sufice, im only 18 so im not married

-electric or cordless drill
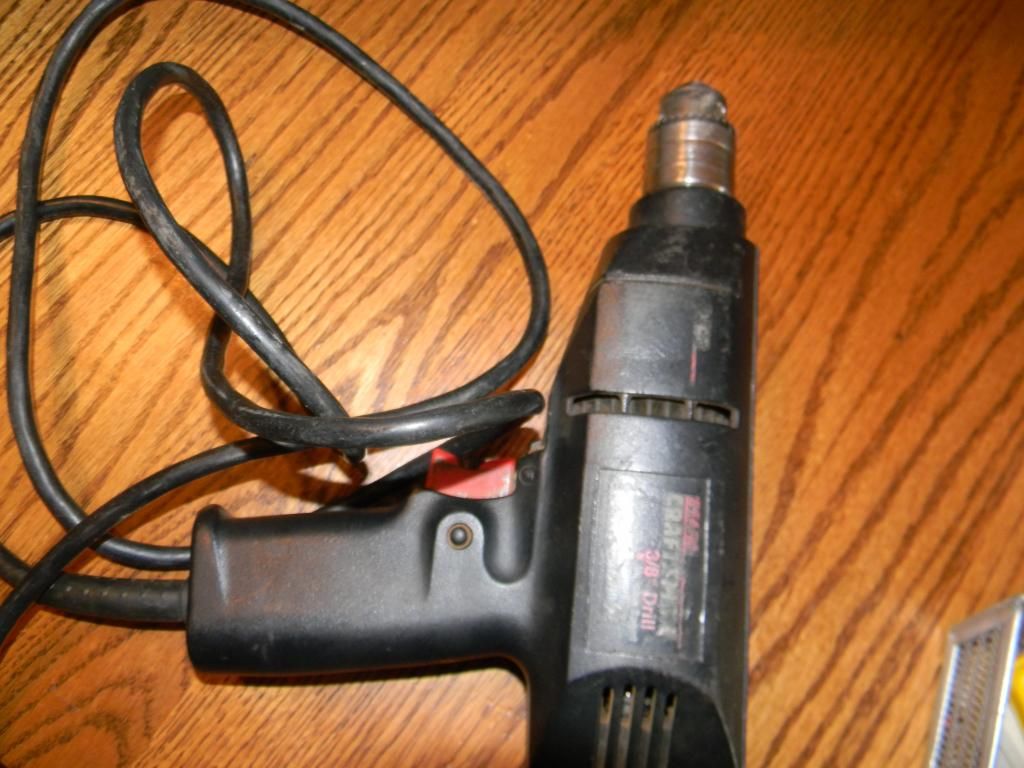
-a flap wheel attatchment for said drill
-new headliner material, i visit local upholstrey shop i got 2 yards worth
-spray adhesive, got also from my local shop

-razor blade
1st things first, go outside, this will make a huge mess, like get put in the doghouse for a few weeks if tried inside
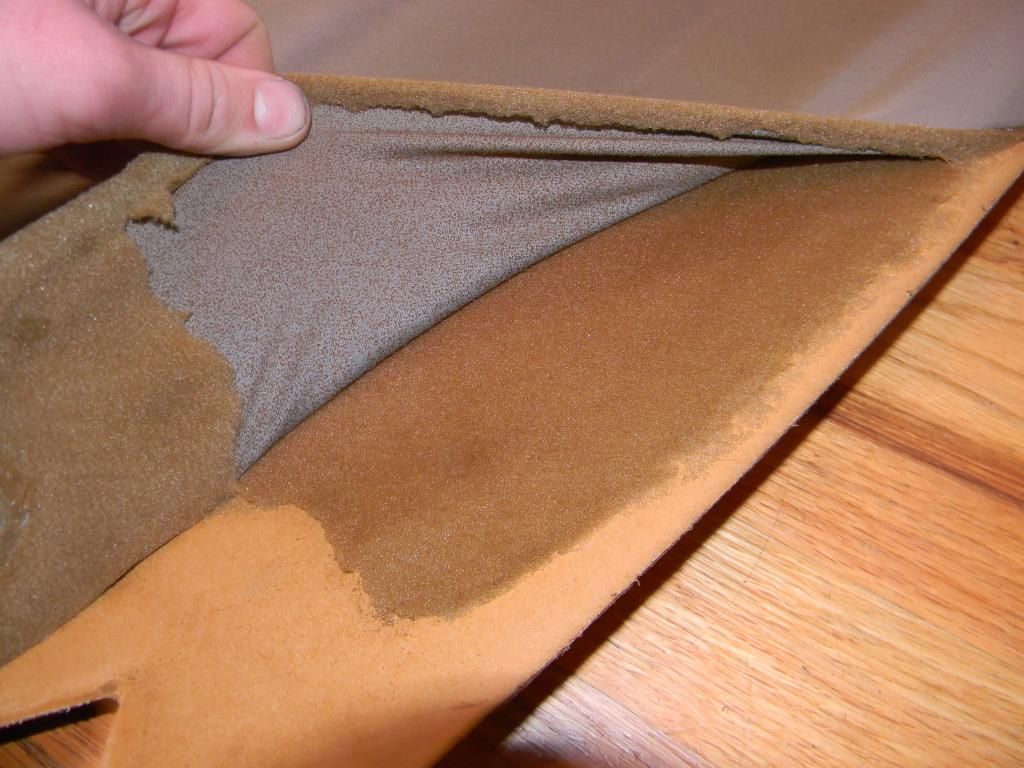
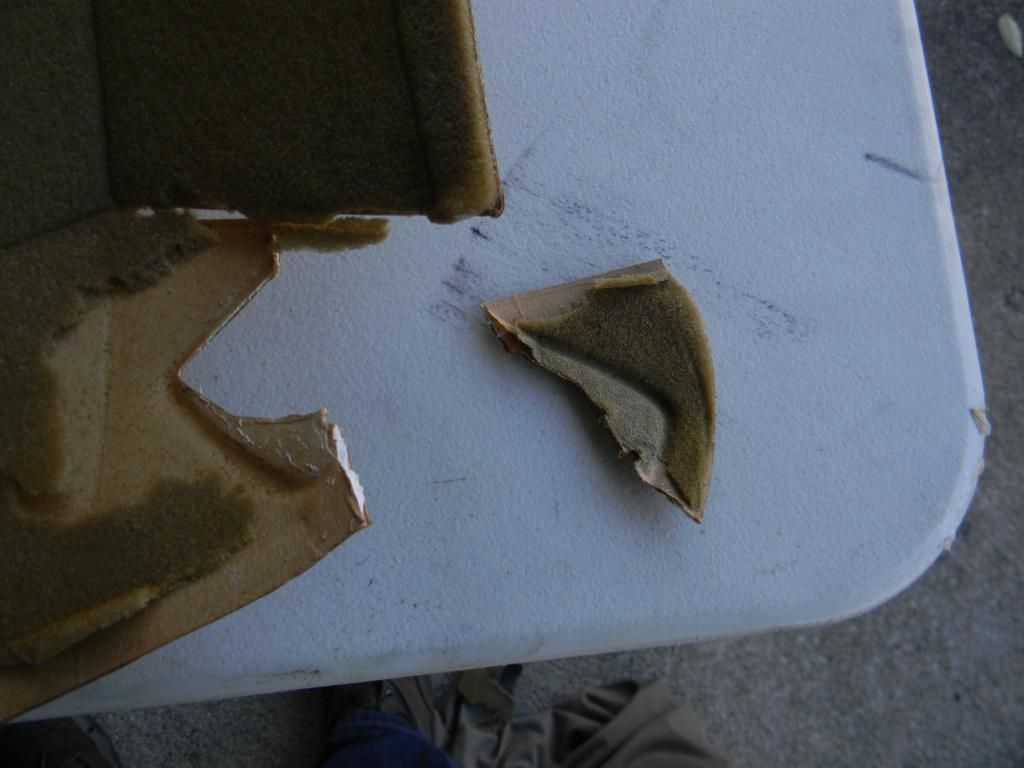
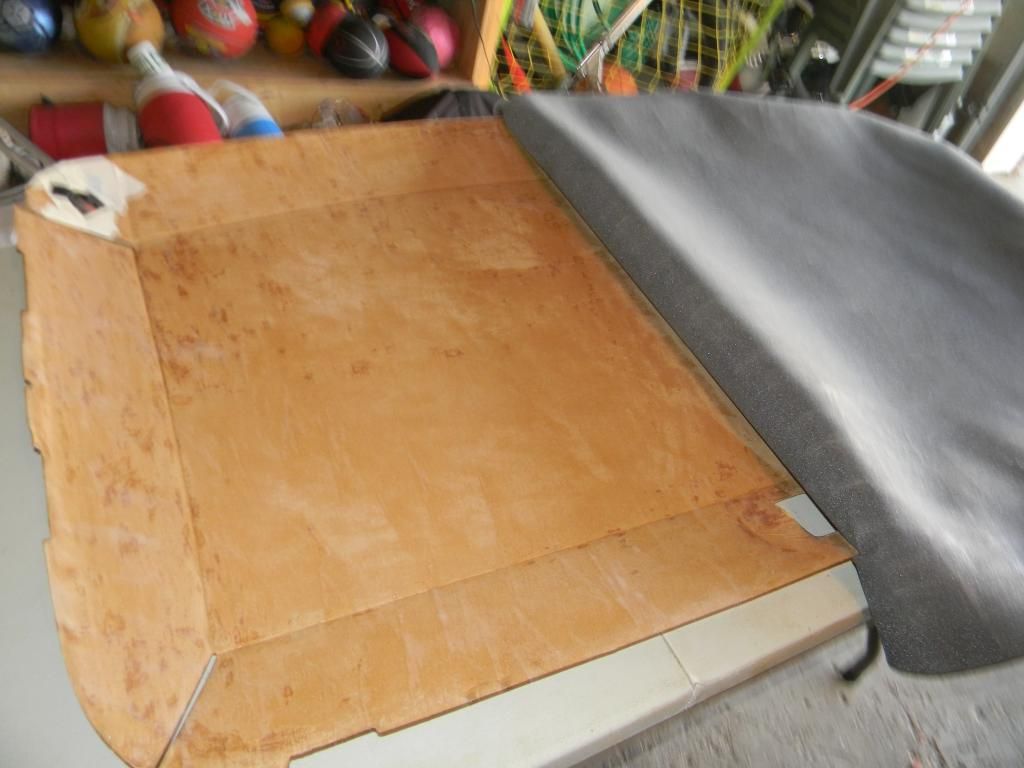
set up a table, put the headliner on it, and pull the old headliner material off like so, it will not take the foam off with it
you will end up with a pile of this

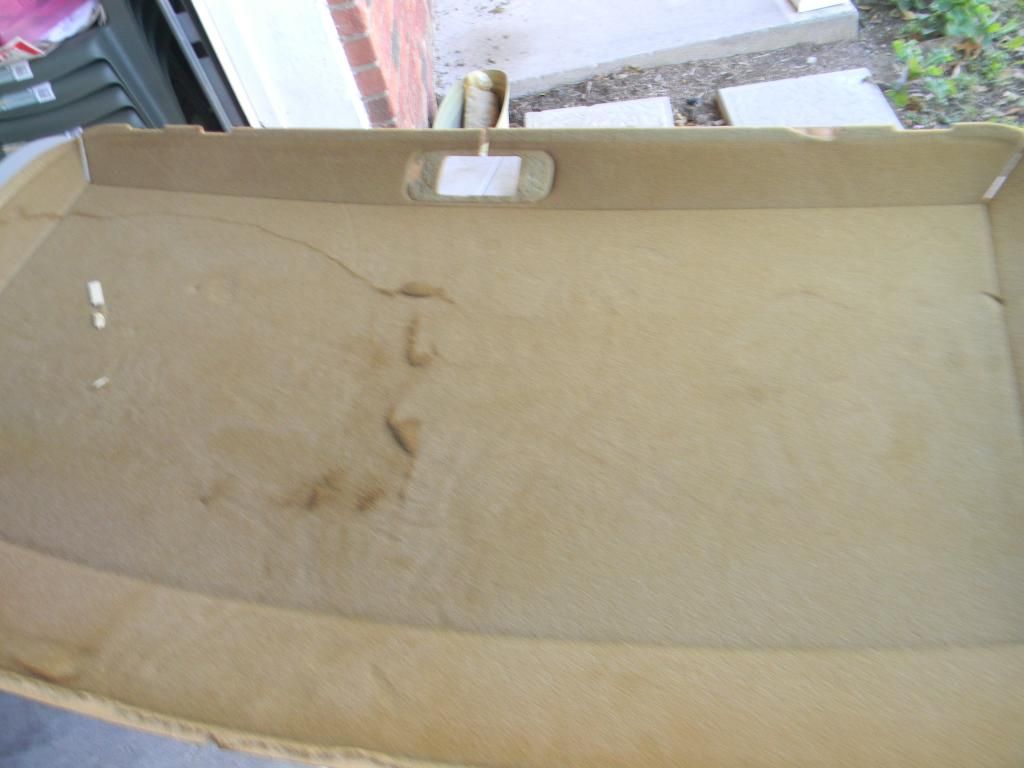
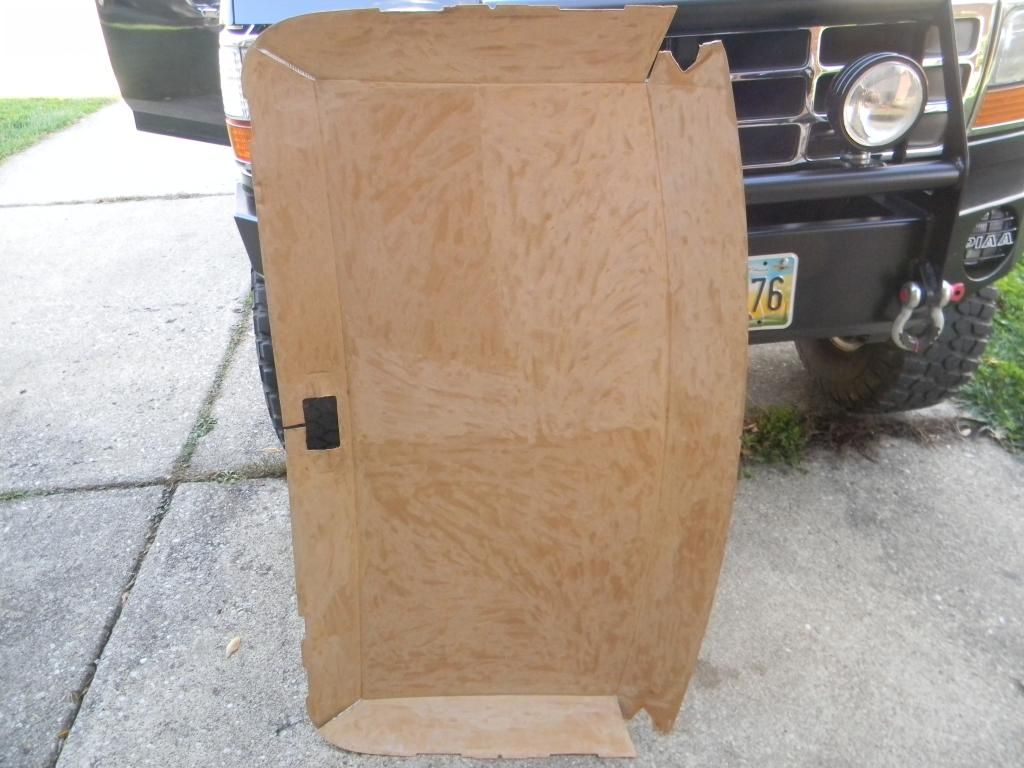
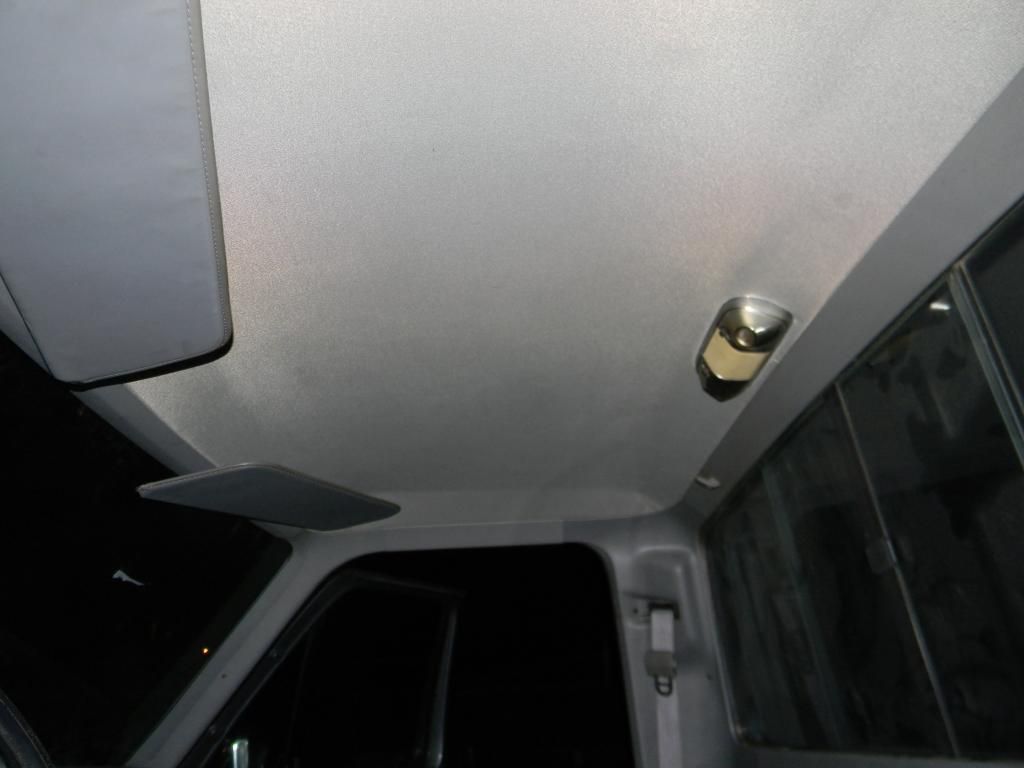
leaves you with the headliner board looking like so
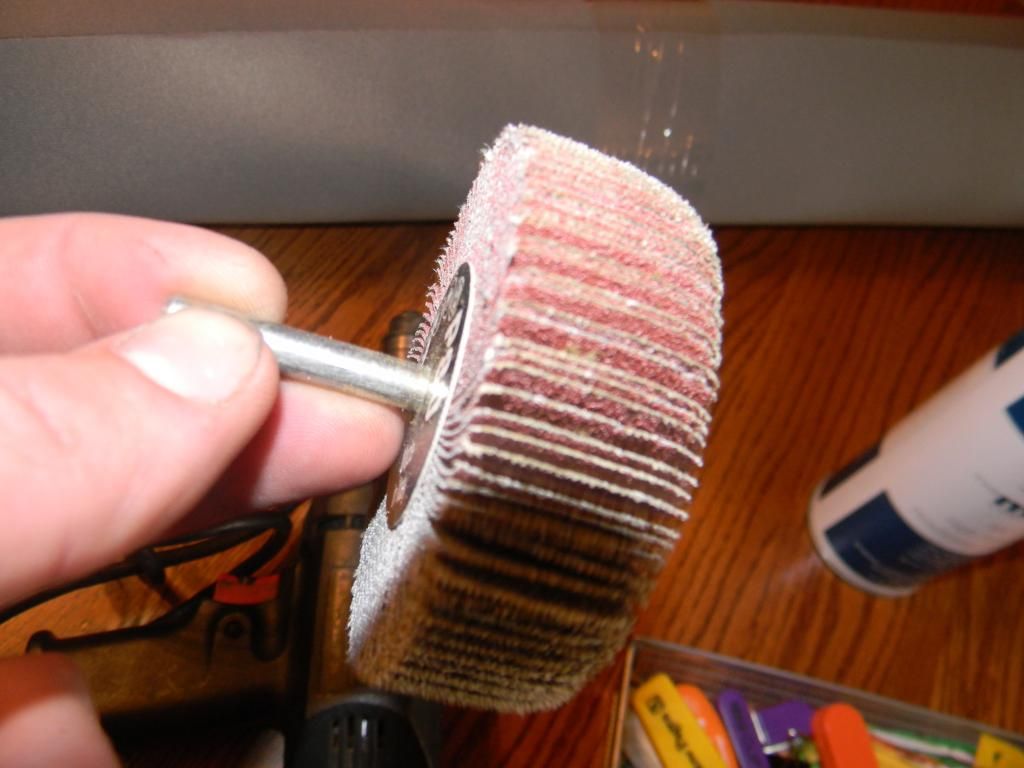
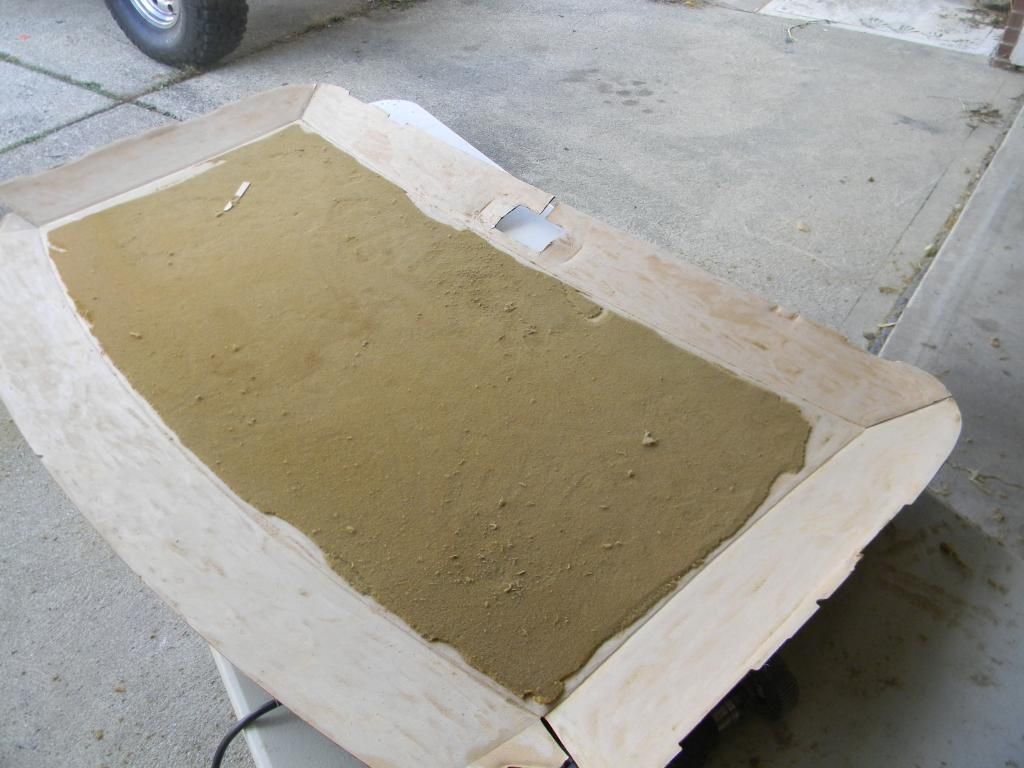
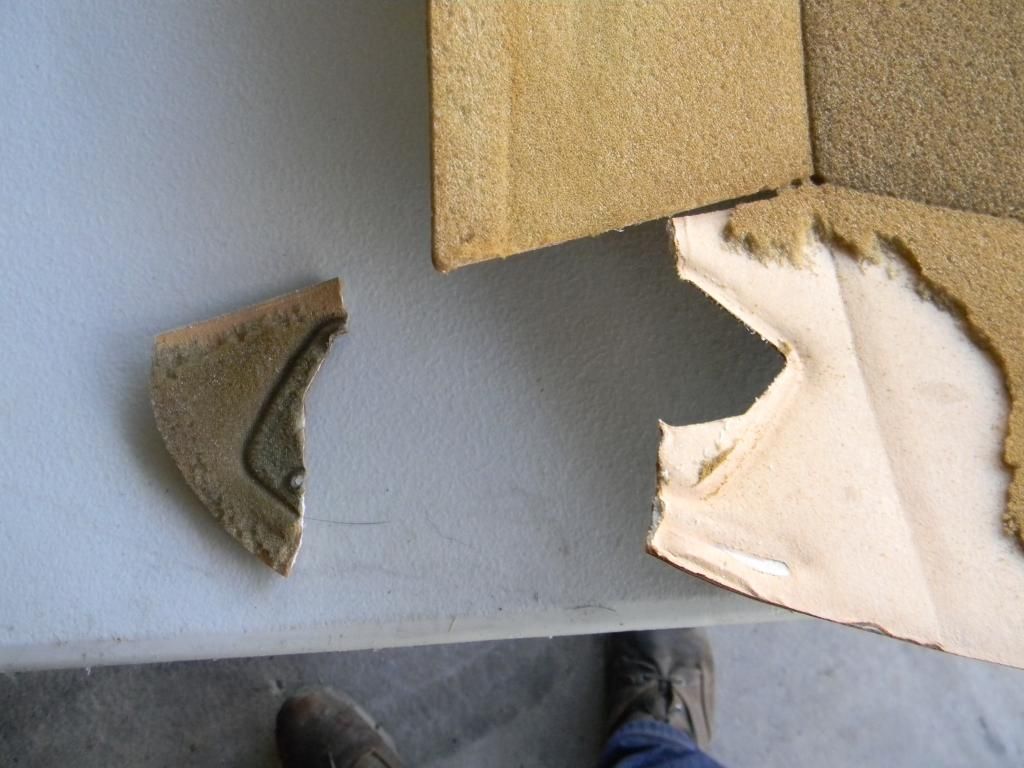
take the drill with the flap wheel and begin taking the foam off the cardboard, the wheel will not hurt the cardboard just be careful around the edges, on most of these i have done the area around the sun visor mount is usually pretty thin, both sides on this one were already broken off, simple tape will fix that issue, not a big deal just make sure you re attach it later well
this step took me 30 minutes with the drill to remove the foam
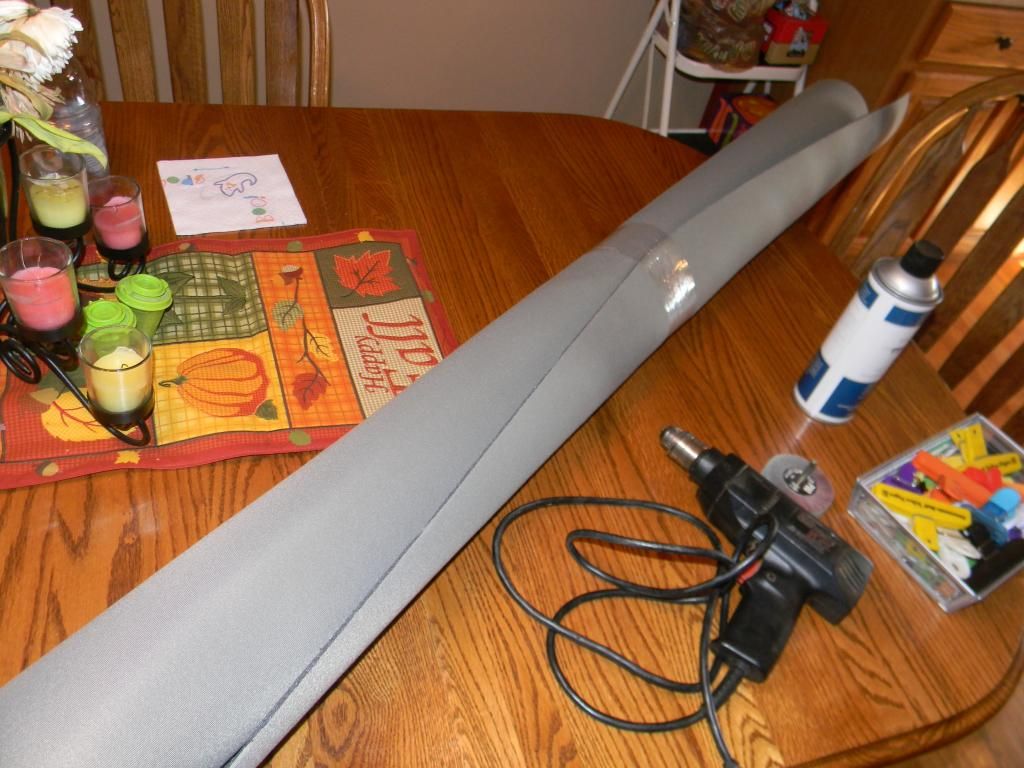
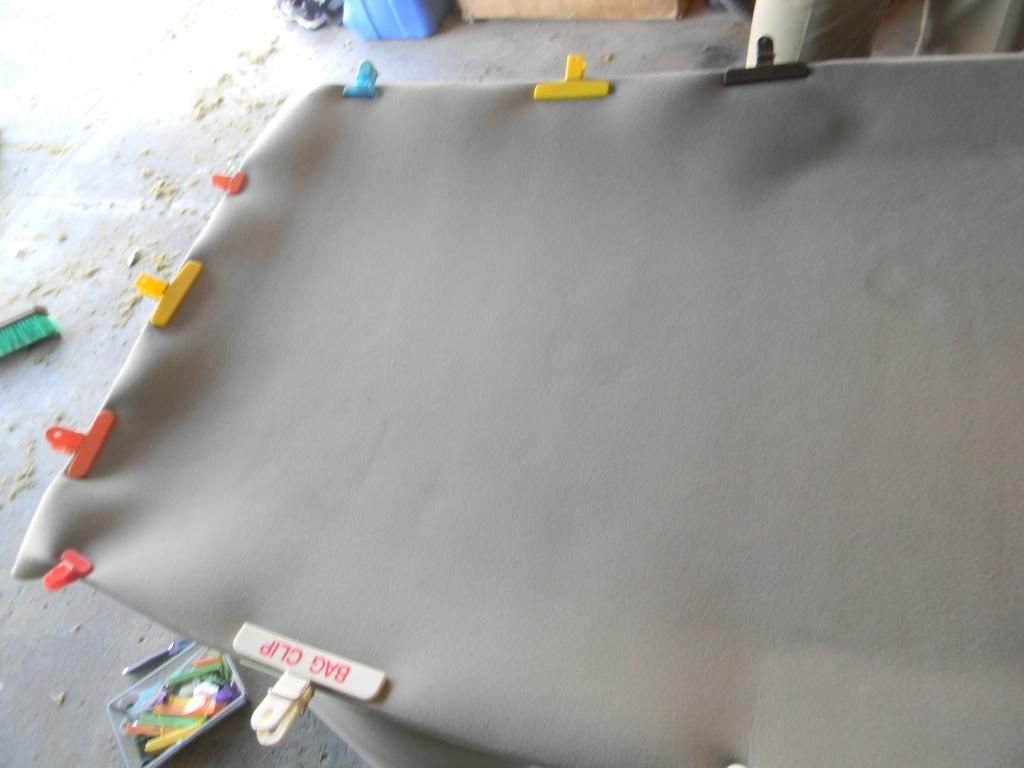
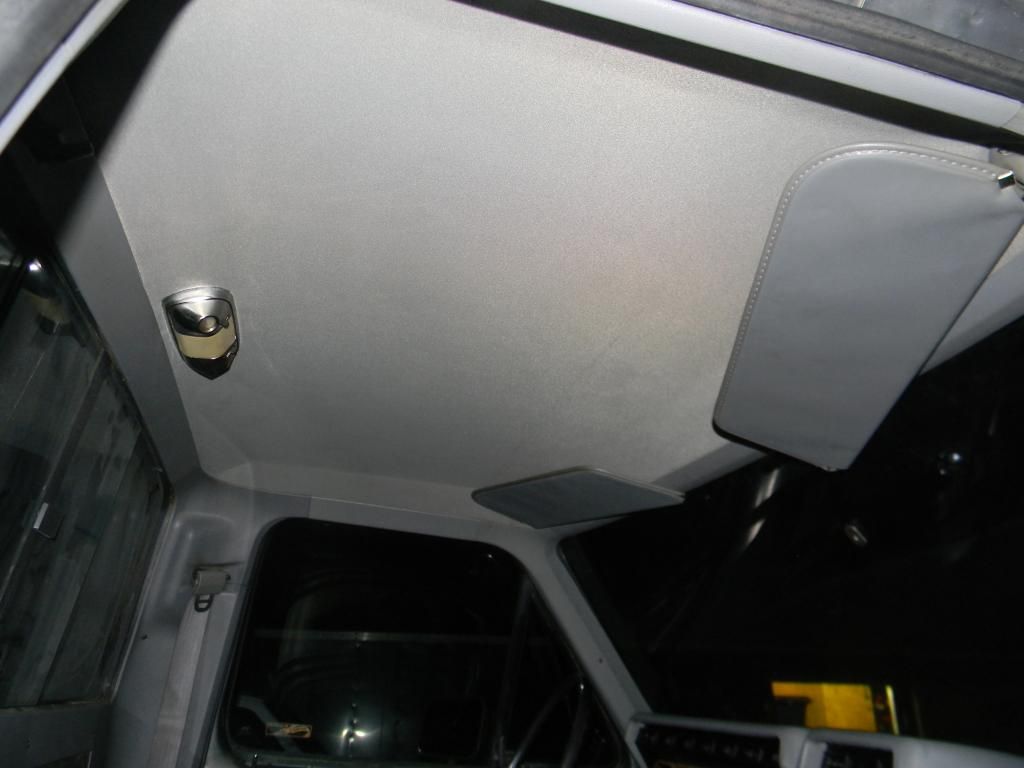
next step clean off your table and set the headliner board on it, then lay the new material out on it evenly where you want it, you will have excess if you get 2 yards worth

next once its where you want it, place the clips around the outter edge on one half of the board like so
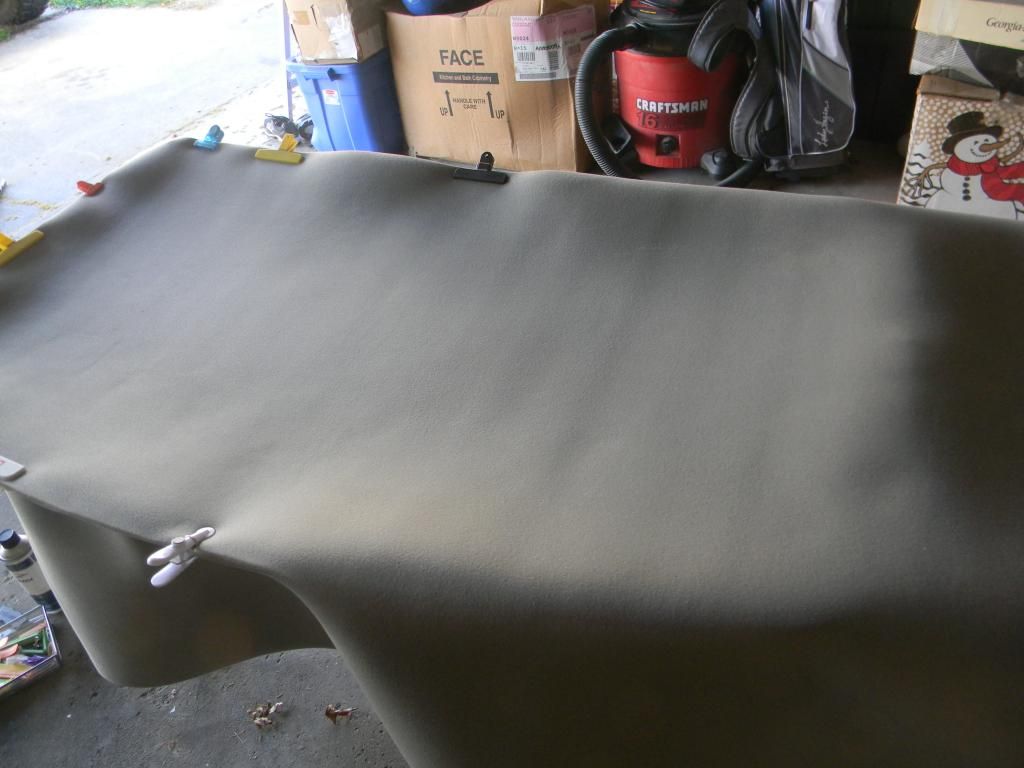
now fold back the unclipped side
now spray your adhesive down on both the board and the foam backing of the material, make sure you do both!
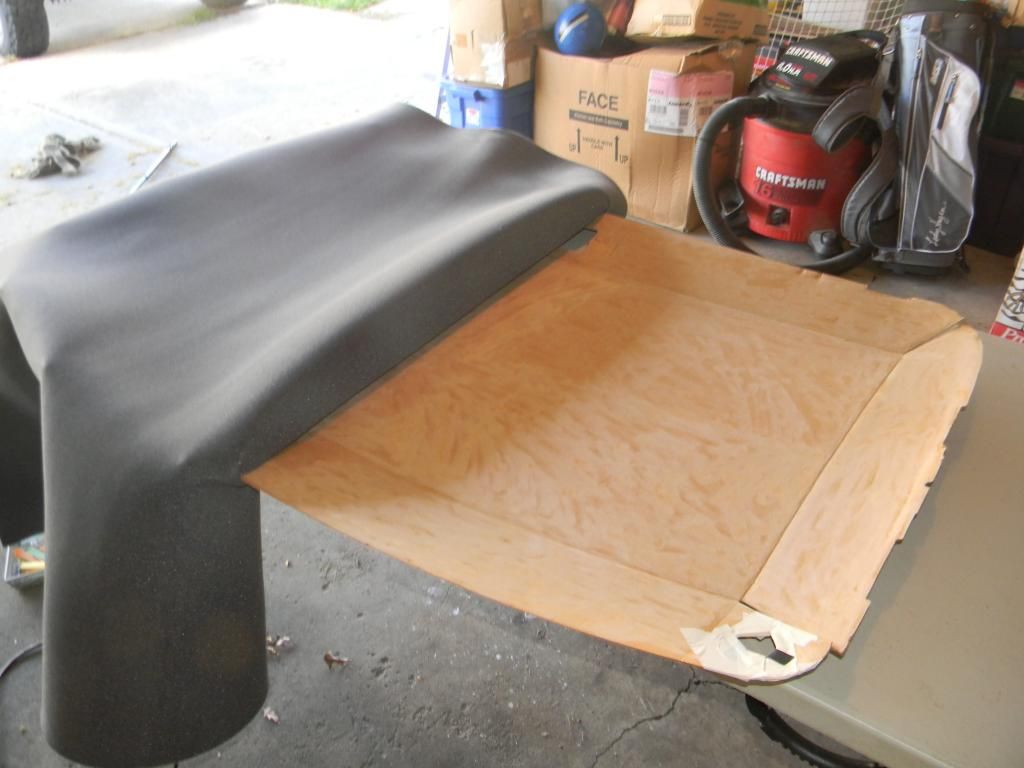
now i pull the side you just sprayed straight up with one hand, then walk it back slowly and use my other hand to smooth it out flat on the board, here a second set of hands could be helpful
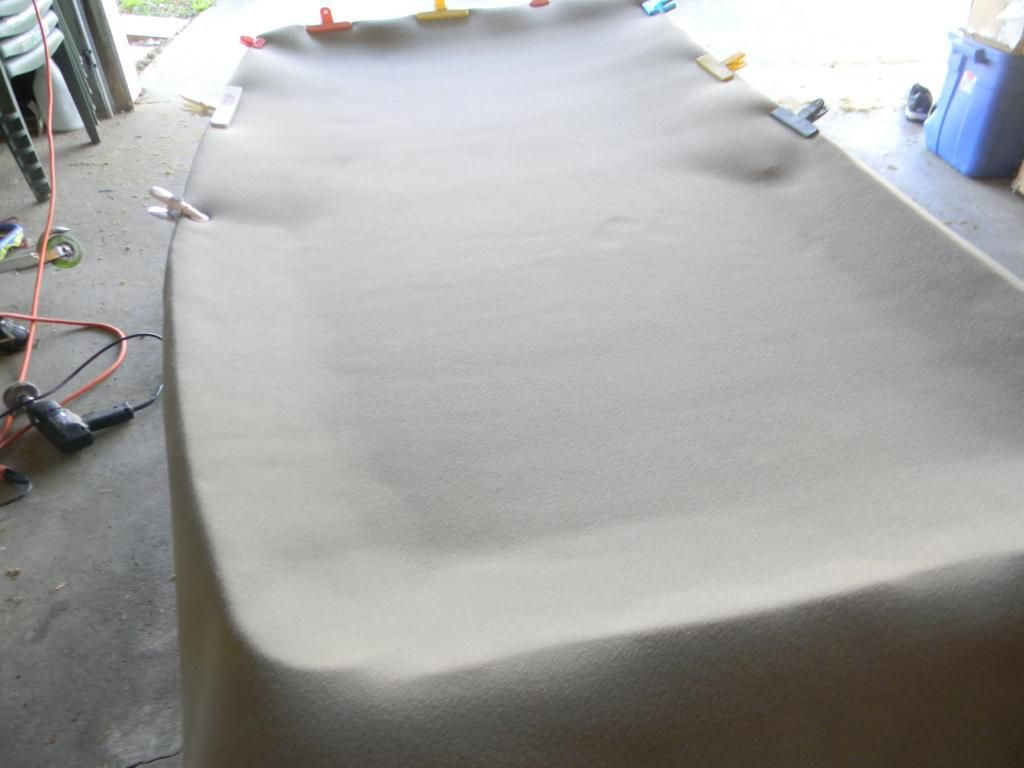
now let that side sit a few minutes, then remove the clips, place one on each side at the edge of the section you just did, then repeat on the other side exact same process

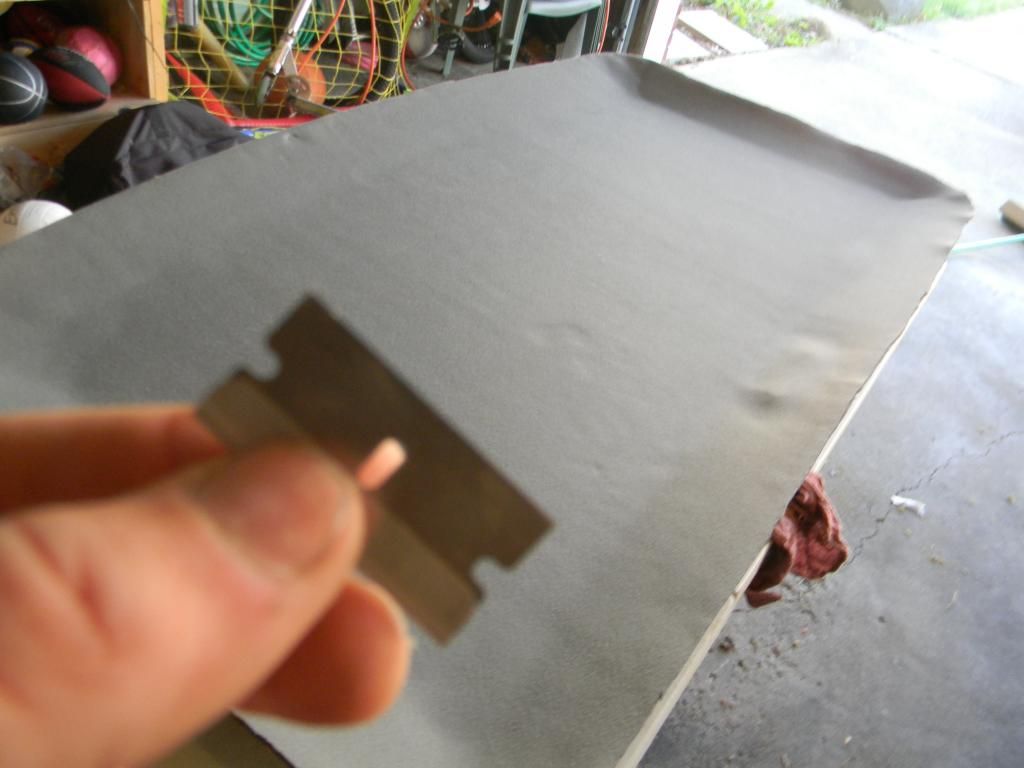
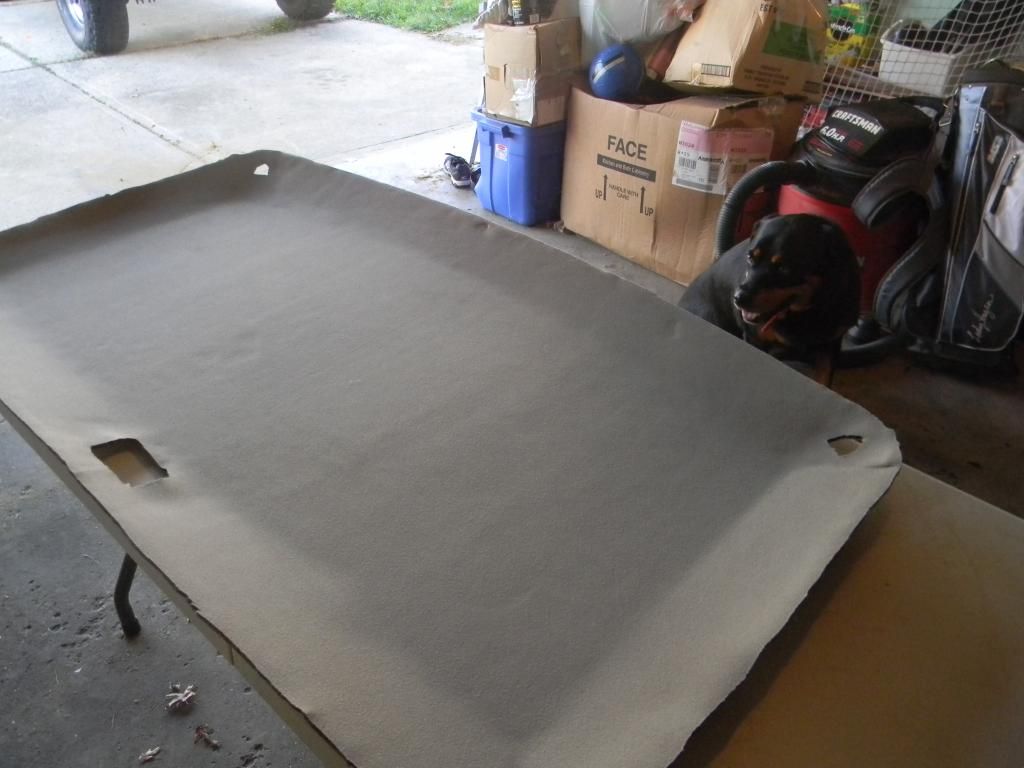
then remove the clips, take the razor, trim your sides, and cut out hole for dome light and visor. cut outs for dome light and visor mounts do not need to be perfect along with the outer edge, the trim hides it anyways
and walla, a course in headliner 101
installed it later tonight
anyways
Materials needed:
-first off, a crappy headliner that needs replaced,
-Clips, like chip bag clips, i visit moms kitchen for those when i do headliners lol but a wifes kitchen will sufice, im only 18 so im not married
-electric or cordless drill
-a flap wheel attatchment for said drill
-new headliner material, i visit local upholstrey shop i got 2 yards worth
-spray adhesive, got also from my local shop
-razor blade
1st things first, go outside, this will make a huge mess, like get put in the doghouse for a few weeks if tried inside
set up a table, put the headliner on it, and pull the old headliner material off like so, it will not take the foam off with it
you will end up with a pile of this
leaves you with the headliner board looking like so
take the drill with the flap wheel and begin taking the foam off the cardboard, the wheel will not hurt the cardboard just be careful around the edges, on most of these i have done the area around the sun visor mount is usually pretty thin, both sides on this one were already broken off, simple tape will fix that issue, not a big deal just make sure you re attach it later well
this step took me 30 minutes with the drill to remove the foam
next step clean off your table and set the headliner board on it, then lay the new material out on it evenly where you want it, you will have excess if you get 2 yards worth
next once its where you want it, place the clips around the outter edge on one half of the board like so
now fold back the unclipped side
now spray your adhesive down on both the board and the foam backing of the material, make sure you do both!
now i pull the side you just sprayed straight up with one hand, then walk it back slowly and use my other hand to smooth it out flat on the board, here a second set of hands could be helpful
now let that side sit a few minutes, then remove the clips, place one on each side at the edge of the section you just did, then repeat on the other side exact same process
then remove the clips, take the razor, trim your sides, and cut out hole for dome light and visor. cut outs for dome light and visor mounts do not need to be perfect along with the outer edge, the trim hides it anyways
and walla, a course in headliner 101
installed it later tonight
Thread Starter
|
Posting Guru
Joined: Jul 2012
Posts: 1,394
Likes: 5
From: cincinnati ohio
And thanks guys

pedant
Joined: Jan 2008
Posts: 23,576
Likes: 40
From: EXTREME southwest CT

Very nice. 
Rep's for the writeup.
I just did mine a few weeks back.
Scraped the foam off with a putty knife.
It looks like that flap wheel would take some of the tedium out of the job.
Did it leave a mess of foam dust?
Did you just use masking tape to fix those broken corners?
I put mine back with helicopter tape and wicked some CA (Crazy Glue) into the broken cardboard to stiffen it up.
Maybe I just went overboard???
Thread Starter
|
Posting Guru
Joined: Jul 2012
Posts: 1,394
Likes: 5
From: cincinnati ohio
Very nice.
Rep's for the writeup.
I just did mine a few weeks back.
Scraped the foam off with a putty knife.
It looks like that flap wheel would take some of the tedium out of the job.
Did it leave a mess of foam dust?
Did you just use masking tape to fix those broken corners?
I put mine back with helicopter tape and wicked some CA (Crazy Glue) into the broken cardboard to stiffen it up.
Maybe I just went overboard???
heck it is even tedious holding the drill that long with thee flap wheel on it but nothing too crazy.
yes it does make a big mess, thats why i make sure to do it outside lol
on this one i used a combo of masking and electrical tape, on two other ones i have done i used duct tape,
Really doesnt matter which method you use as long as it firmly re attatches it before the new material goes on
Trending Topics
pedant
Joined: Jan 2008
Posts: 23,576
Likes: 40
From: EXTREME southwest CT
It only took me 15-20 minutes to scrape it all off.
There were 'crumbles' but no airborne dust doing it by hand.
I quickly went over it with a scouring pad when I was done.
It's SO nice not to have a saggy, stained and dented headliner anymore.
I bought a kit on Ebay.
Do you mind if I ask how much the material and glue cost you, locally?
There were 'crumbles' but no airborne dust doing it by hand.
I quickly went over it with a scouring pad when I was done.
It's SO nice not to have a saggy, stained and dented headliner anymore.
I bought a kit on Ebay.
Do you mind if I ask how much the material and glue cost you, locally?
FTE Stories
Ford Trucks for Ford Truck Enthusiasts

Top 6 Best Deals Available on New Fords & Lincolns Right Now
Brett Foote
This Hennessey Takes the Expedition Tremor's Off-Roading Capability to the Next Level
Verdad Gallardo
Top 10 Fords at 2026 Carlisle Ford Nationals
Joe Kucinski
3 Best / 3 Worst Parts of Modern Ford Ownership
Brett Foote
10 Amazing Upgrades That Solve Common Ford Truck Owner Headaches
Pouria Savadkouei
Every 2026 Ford Engine Explained
Brett Foote
10 Ugly Ford Trucks That We Still Kinda Love
Joe Kucinski
10 Things Every Truck Owner NEEDS (2026 Edition)
Michael S. Palmer
Rezvani's Latest Post-Apocalyptic Monster Is a Ford F-150 Raptor Underneath
Verdad Gallardo
Thread Starter
|
Posting Guru
Joined: Jul 2012
Posts: 1,394
Likes: 5
From: cincinnati ohio
It only took me 15-20 minutes to scrape it all off.
There were 'crumbles' but no airborne dust doing it by hand.
I quickly went over it with a scouring pad when I was done.
It's SO nice not to have a saggy, stained and dented headliner anymore.
I bought a kit on Ebay.
Do you mind if I ask how much the material and glue cost you, locally?
There were 'crumbles' but no airborne dust doing it by hand.
I quickly went over it with a scouring pad when I was done.
It's SO nice not to have a saggy, stained and dented headliner anymore.
I bought a kit on Ebay.
Do you mind if I ask how much the material and glue cost you, locally?
Thread Starter
|
Posting Guru
Joined: Jul 2012
Posts: 1,394
Likes: 5
From: cincinnati ohio
Thanks and also for the suggestion hahaha

Freshman User
Joined: Jun 2013
Posts: 27
Likes: 0
Great looking job, Big Green. The pics and explanation are great. The headliner in my '98 is in pretty bad shape, caused by too much hot weather. I had priced getting it done professionally, guy wanted $90. I can do it myself now.
Kenn in Texas
Kenn in Texas
Thread Starter
|
Posting Guru
Joined: Jul 2012
Posts: 1,394
Likes: 5
From: cincinnati ohio
no problem, howd it turn out?


