


DIY head install/remove bracket.
Thread Starter
|
Senior User
Joined: Oct 2012
Posts: 354
Likes: 3
DIY head install/remove bracket.
First wanna say thanks to Dale (Jugermaut) for supplying me with the OTC bracket for measurements. Bryan (Tuscany) for helping me with my welding skills. Thanks guys!
Please do not PM me with request to make this bracket. Thanks!
List of material and tools.
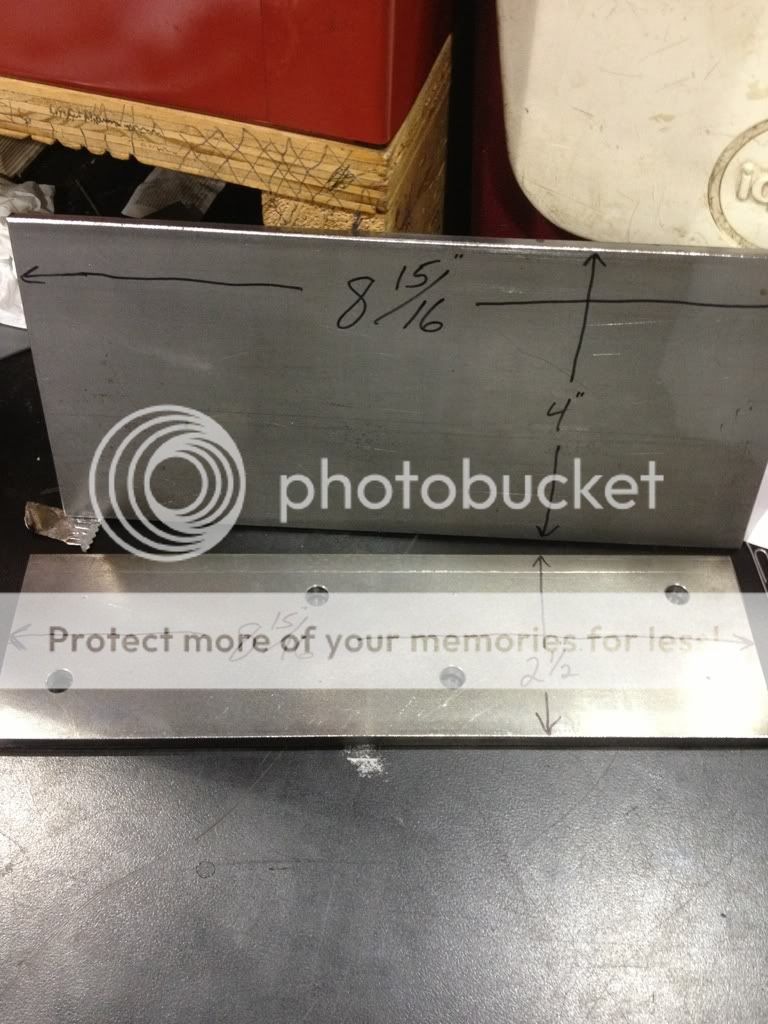
Flat stock 2 1/2" wide X 1/4" thick X 8 15/16" long, and 4" wide X 1/4" thick X 8 15/16" long.
Center drill
"L" drill
2" colbalt hole saw
Bendable flat metal (105* jig)
Four 1/4 X 20 X 1 1/2" bolts/nuts
Four 1/4" washers
Four 6m X 1.0 X 45mm long bolts
Four 1/8" NPT black pipe couplers (3/4" long)
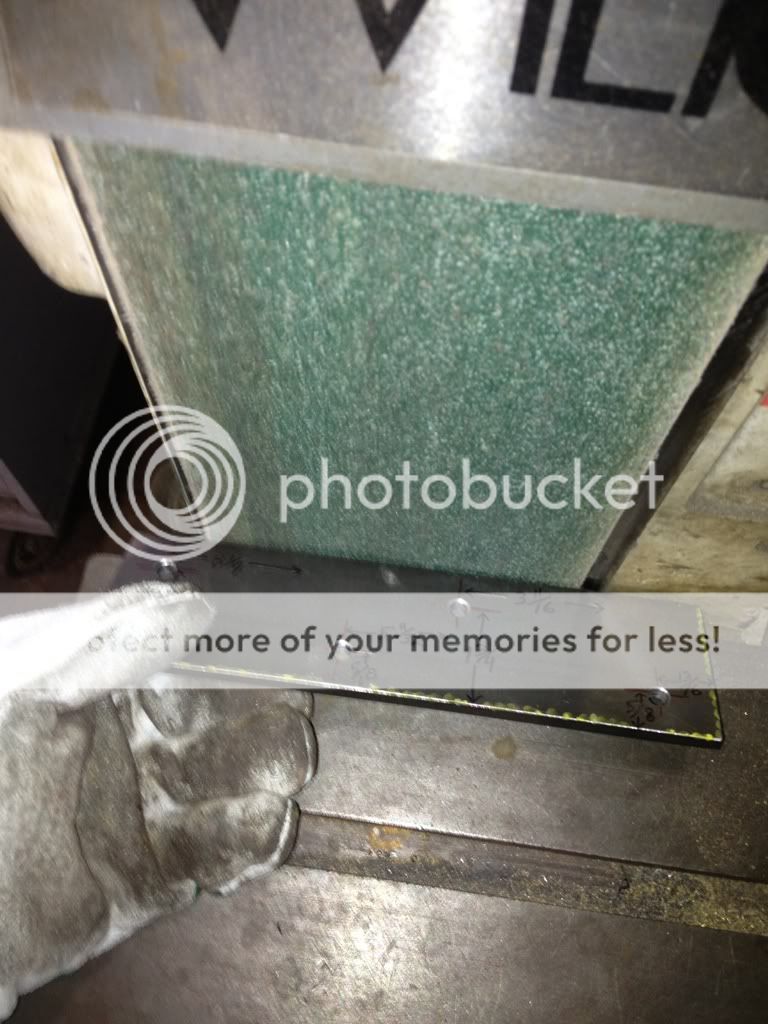
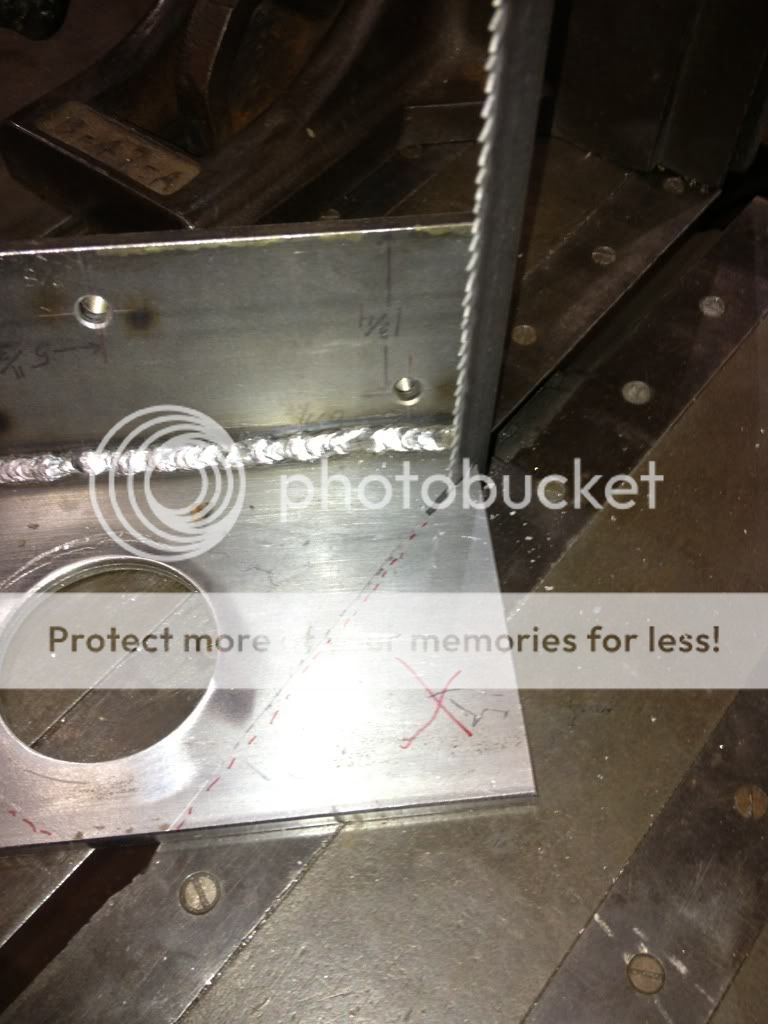
When cutting length of flat stock, be sure it's square with factory edge. Marked in "yellow" is the measuring start points (bottom edge and right edge).

Come off the bottom edge of the 2 1/2 flat stock to 5/8" and mark/scribe the length of piece. Now coming off the right edge to 13/16" and mark/punch for your first hole to be drilled.


At this point if you have new/used intake gaskets laying around, used the marked/punched dimple as a guide. The 5/8" marked/scribed line will be your guide for the left hole.
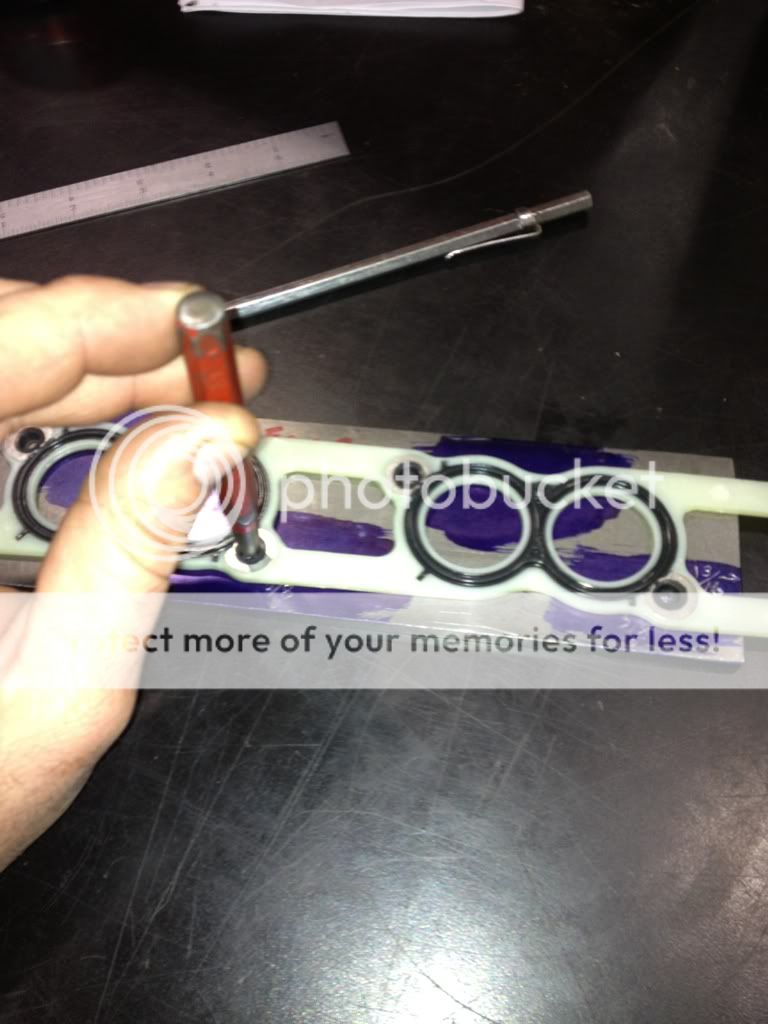
Now mark/punch the top two holes, if you used the gasket to mark/punch your holes, then your ready to move down and start drilling.
Those of you who don't have a gasket handy, look at the pic below to get your measurements. Be sure your right edge is square with the factory bottom edge.

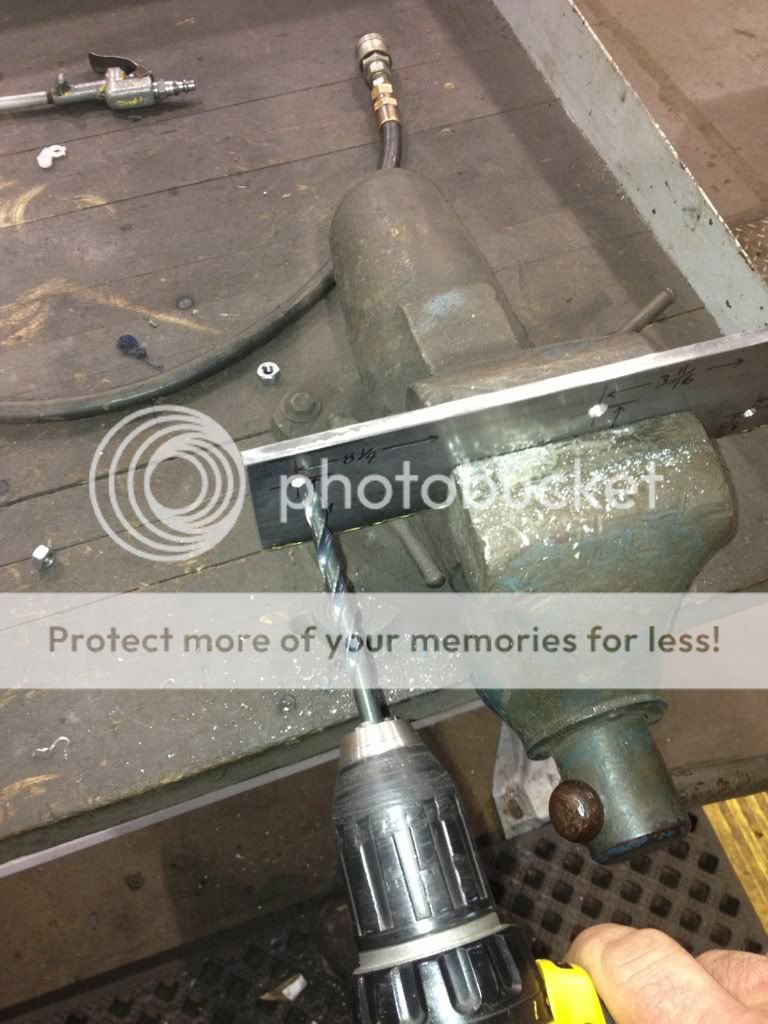
Time to drill bottom plate. Drill the punch marks first with a center drill so the "L" drill don't walk on you.
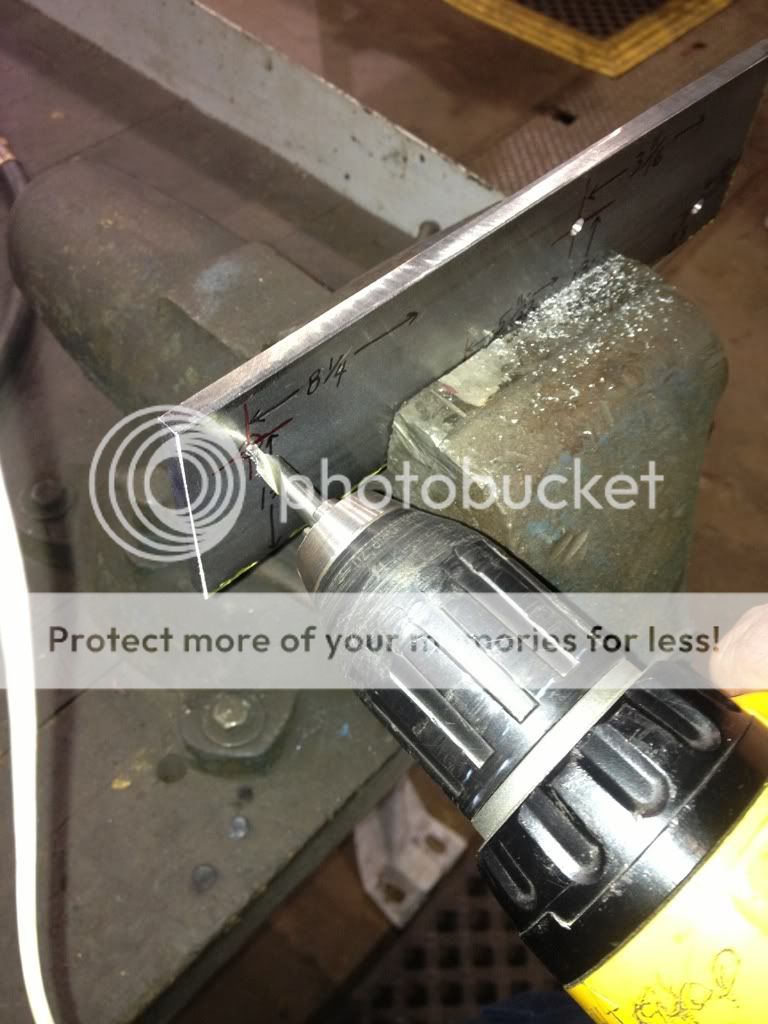
Next, take the 4" flat stock piece and make sure the right edge is square with the factory bottom edge. Use the pic below to get your measurements for the 2" hole saw.

After you marked/punched where the 2" hole is going, use the center drill to start a hole and prevent the hole saw drill from walking.

Now for the hole saw, it's best to use a drill press. You can try using a hand drill, but might have trouble holding the drill square and cause the hole saw to "bind".
Your going to keep the RPM's slow when using a hole saw. Going at a faster RPM will cause the hole saw to "chatter" and "burn up" the teeth on the blade. Use oil to keep the teeth cool, and remember "SLOW RPM"!!

After you have the 2" hole in the 4" flat stock, you need to "bevel" the bottom edge for welding, and the 2 1/2" flat stock will get a bevel on the top edge.
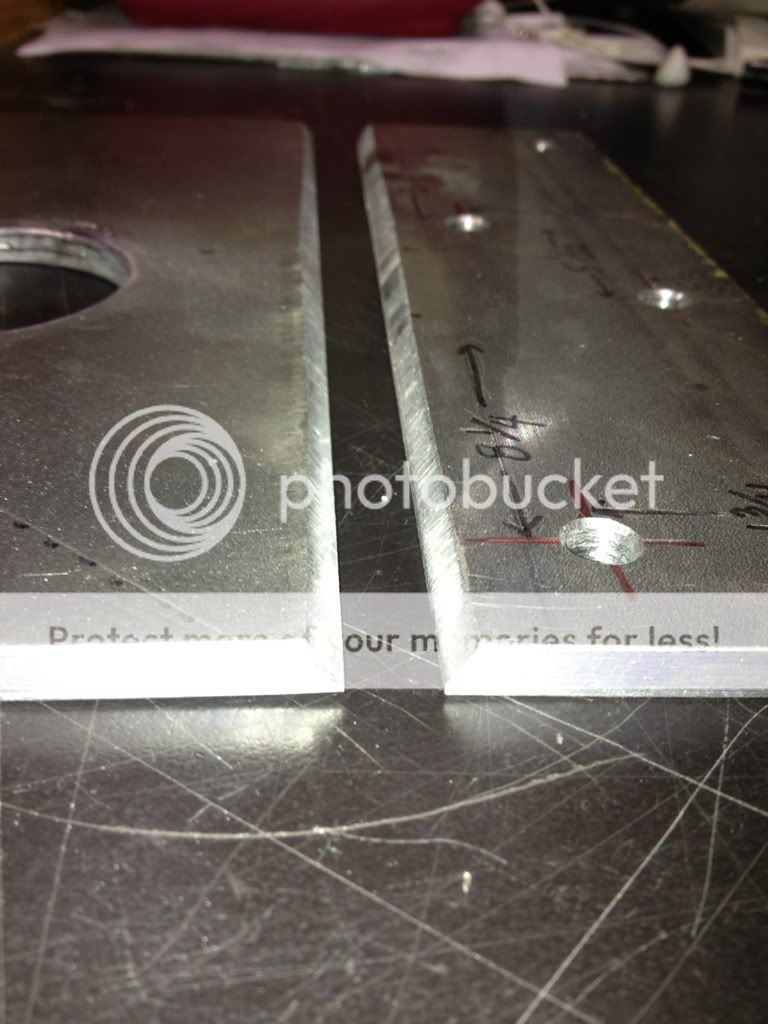
NOTICE in all the pics, your 4" flat stock will have the 2" hole just left of center. The 2 1/2" flat stock will always have the very first measured/marker hole on the bottom/right. DON'T accidentally "flip" one of the pieces and weld them on backwards.
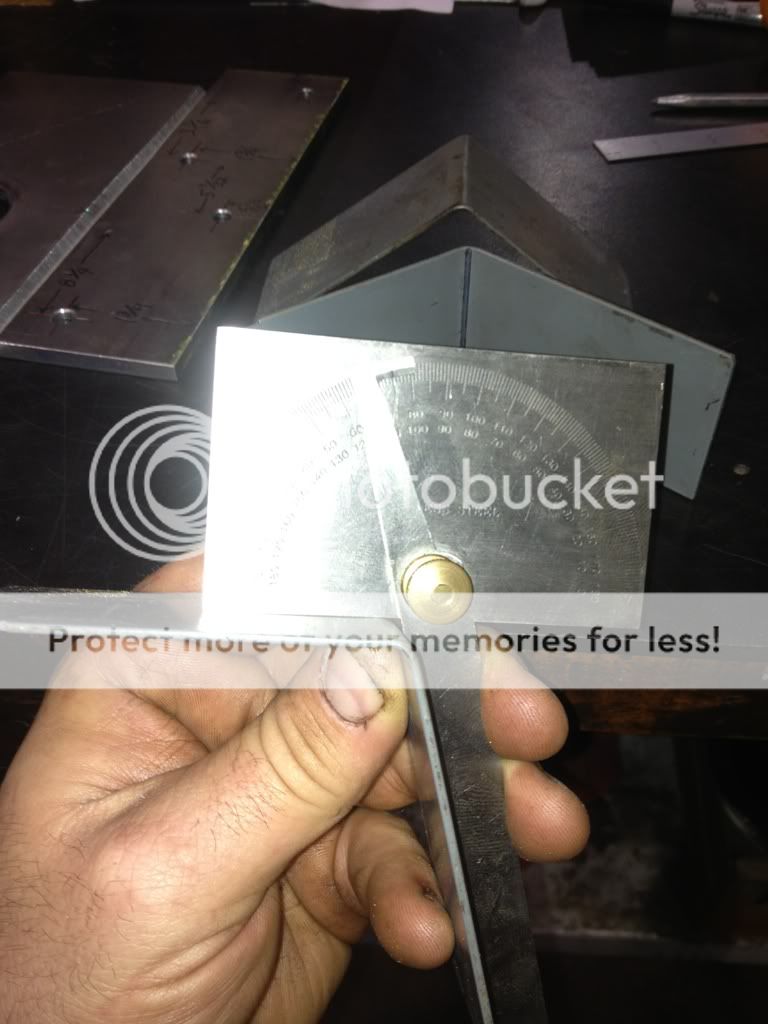
Now move onto making the 105* template/jig. I used metal drawer dividers. Anything flat that can be bent and stay sturdy. Give them a bend till your at 105*.
Back to the bracket, clamp the 4" flat stock in a vise. Use the 105* templates/jig and clamp them to the 4" flat stock.
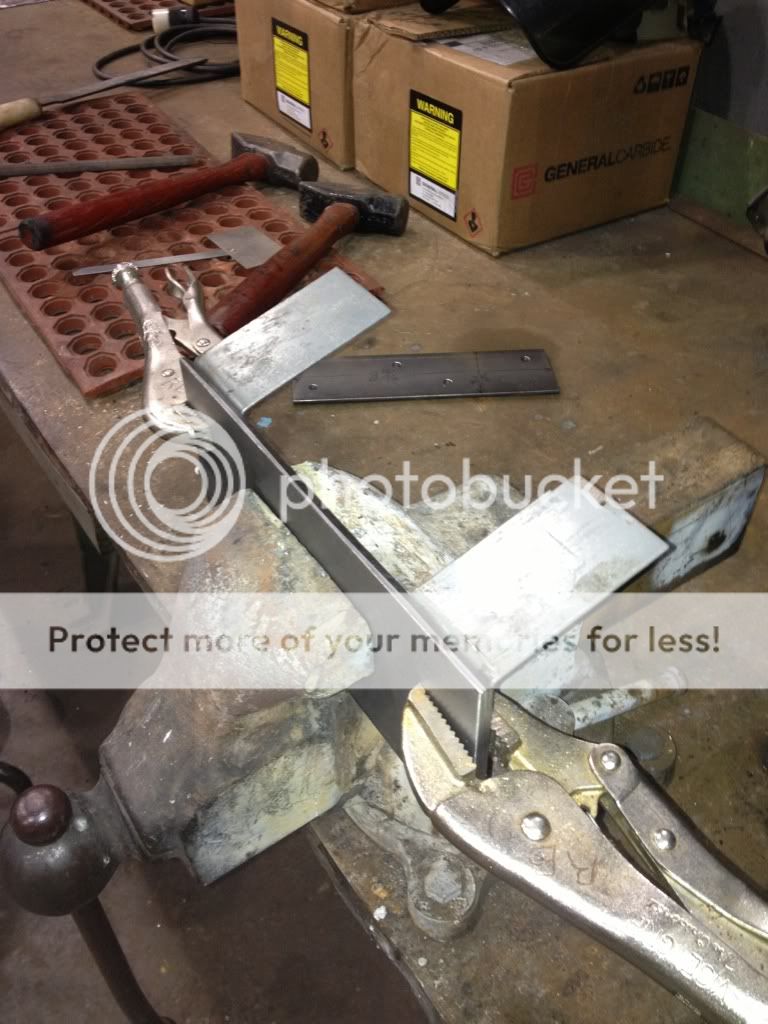
Now put your 2 1/2 flat stock onto the 105* jig and adjust until your "bevel" edges line up, also match up the two flat stock pieces line up length wise.
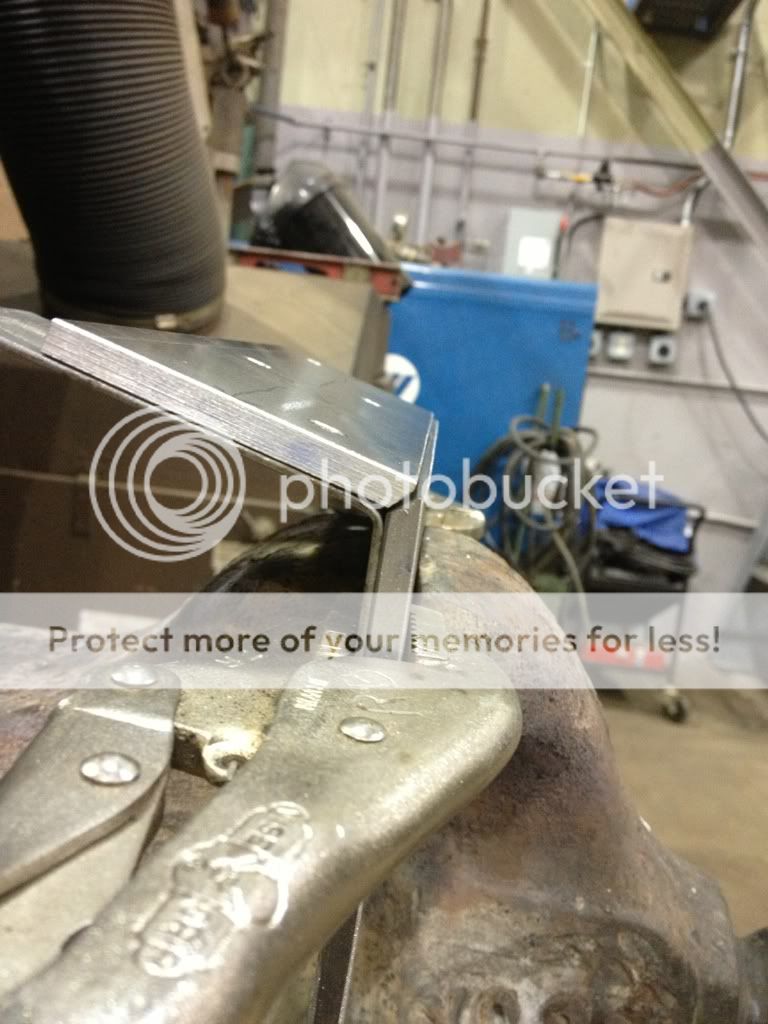
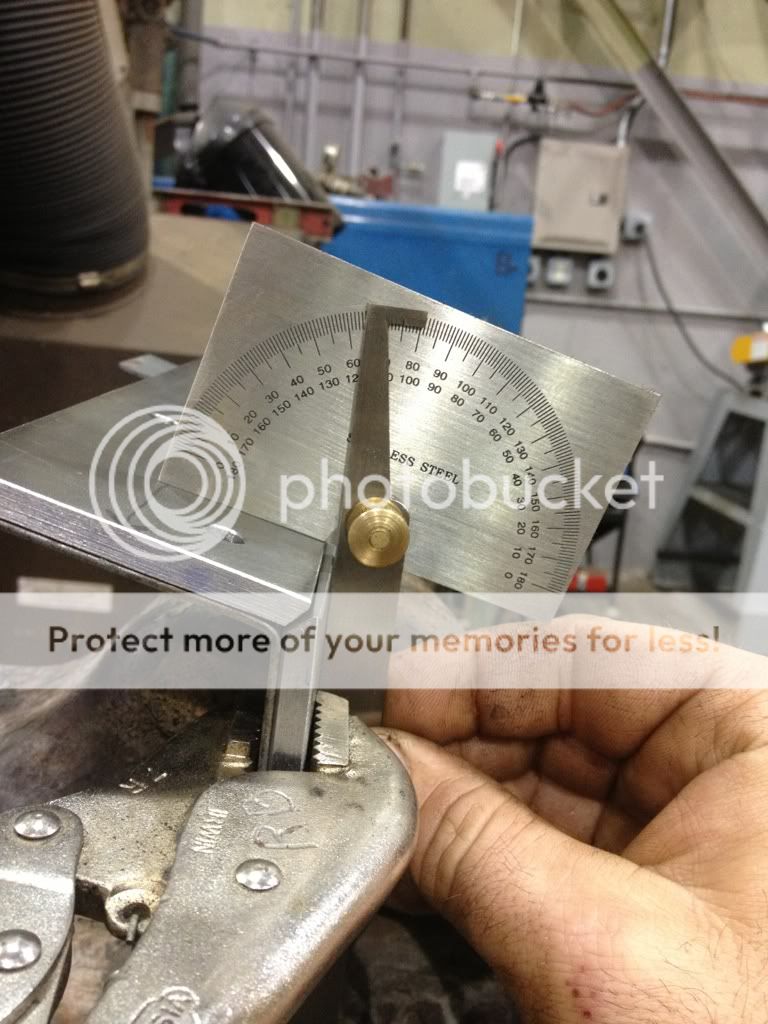
Now check to be sure you still have 105* angle.
Now your ready to weld the back side of the bracket.
After the bracket has cooled, flip over and weld the front side.
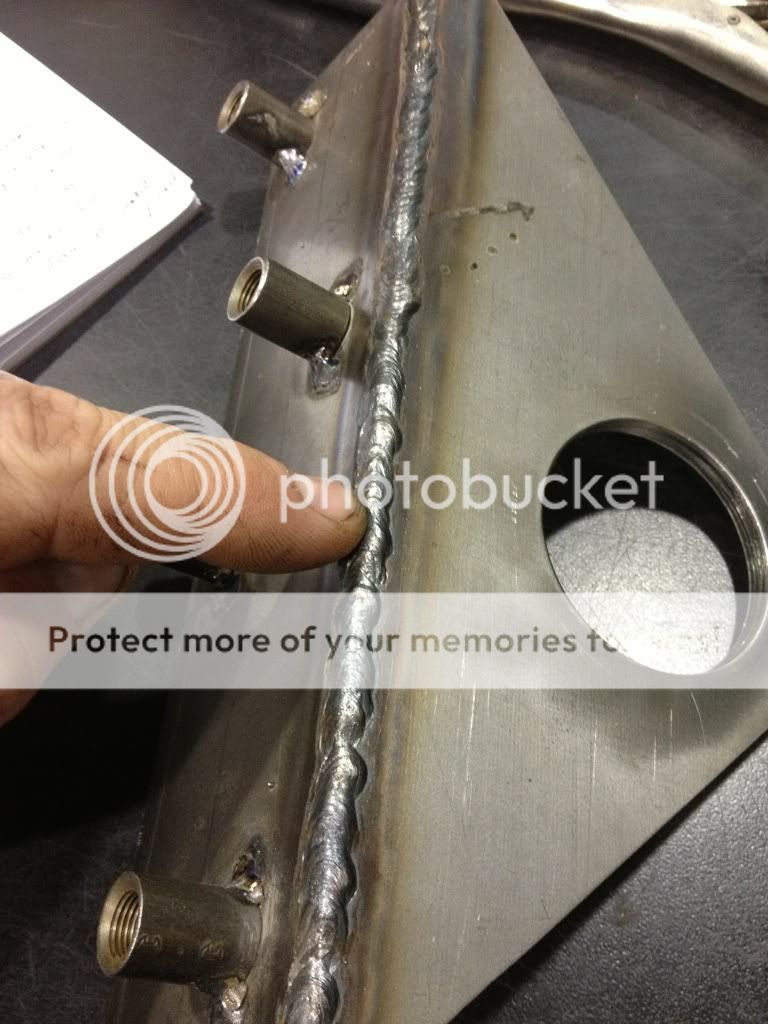
You are ready to add the 1/8" NPT couplers. I used 1/4" X 20 bolts/nut/washer to bolt the coupler to the bracket. Try to keep the coupler hole centered up with the bracket hole. Now tack weld these couplers to bracket (pic below). These couplers act as a spacer needed for the head/rocker box clearance.
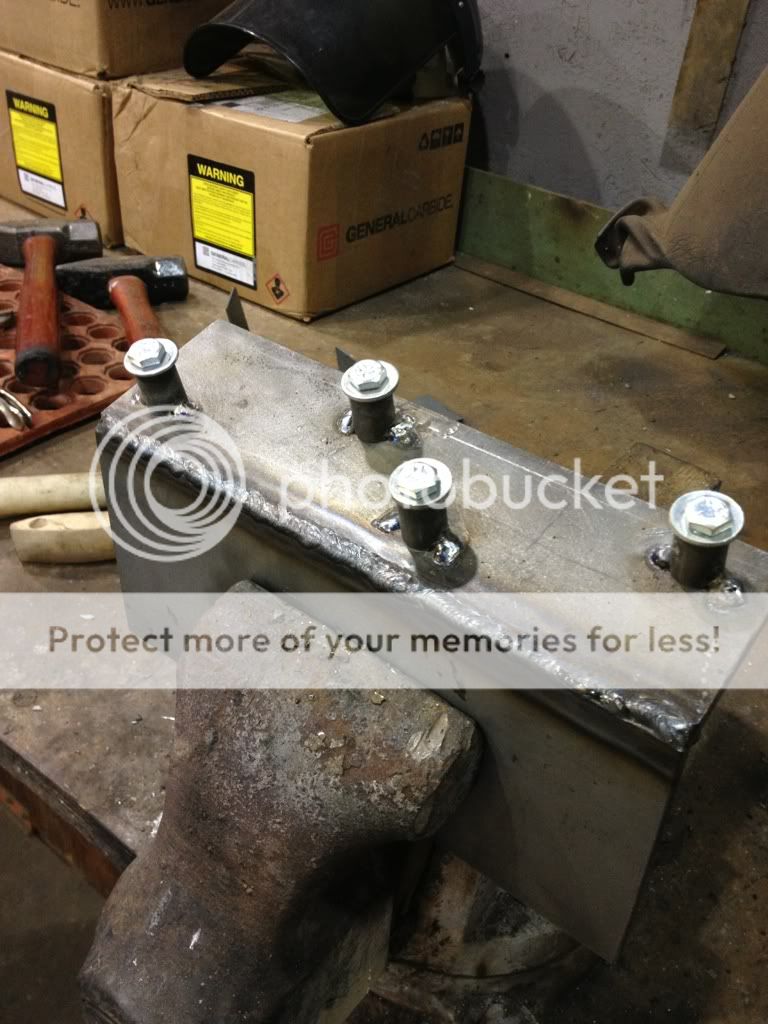
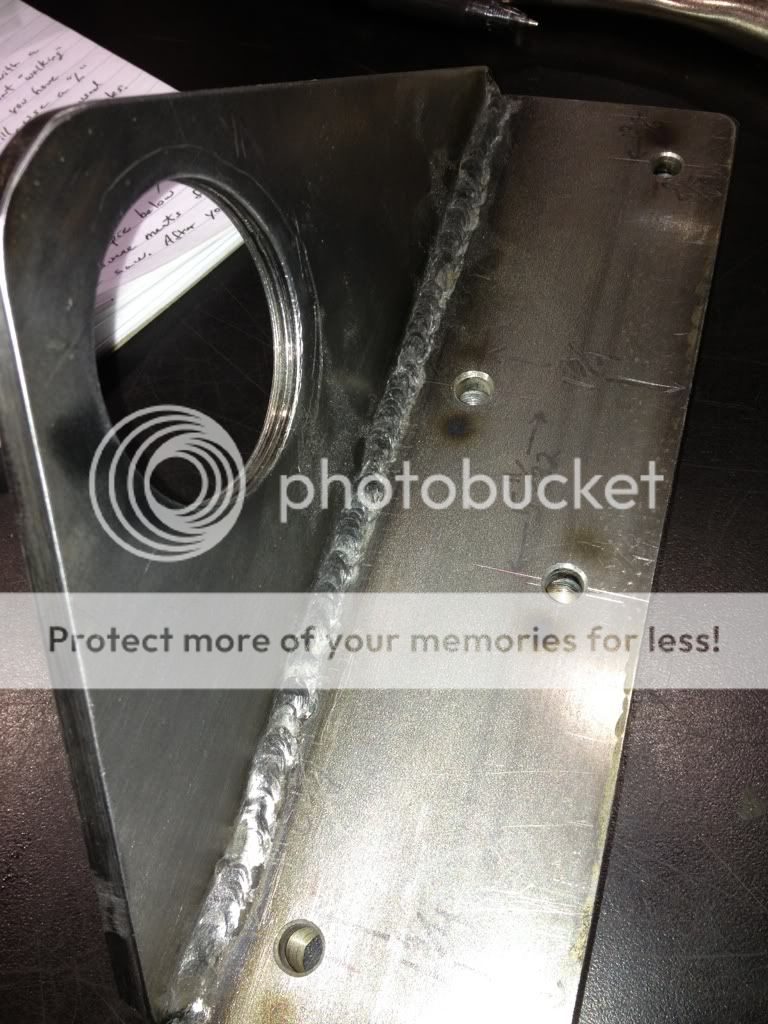
At this point you are done. You can cut off the corners of the top of bracket or leave it square. I chose to cut the corners off for "looks".
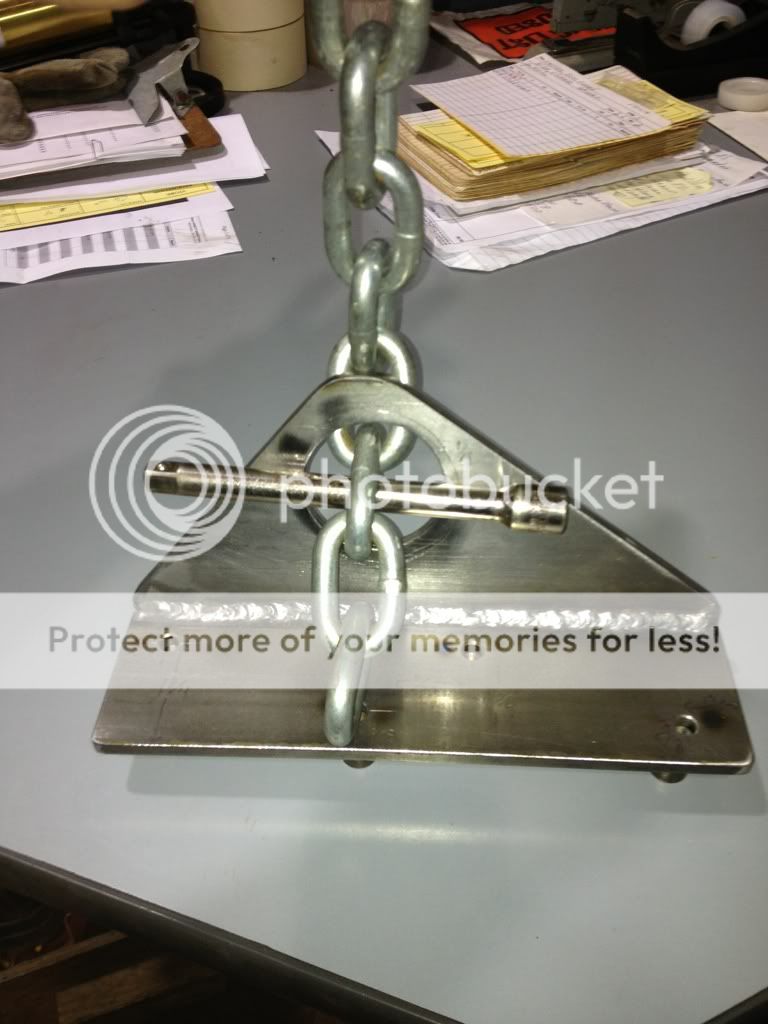
When hooking up the chain to bracket for lifting/install head, Dale set the chain up thru the back of bracket and locked it in with a ratchet extension. I don't know how a hook will work, but Dale's method kept the head at the right angle to lower the head evenly with the block/head gasket.
You will use the 6m bolts and washers to bolt the bracket to head for lifting/install.

Please do not PM me with request to make this bracket. Thanks!
List of material and tools.
Flat stock 2 1/2" wide X 1/4" thick X 8 15/16" long, and 4" wide X 1/4" thick X 8 15/16" long.
Center drill
"L" drill
2" colbalt hole saw
Bendable flat metal (105* jig)
Four 1/4 X 20 X 1 1/2" bolts/nuts
Four 1/4" washers
Four 6m X 1.0 X 45mm long bolts
Four 1/8" NPT black pipe couplers (3/4" long)
When cutting length of flat stock, be sure it's square with factory edge. Marked in "yellow" is the measuring start points (bottom edge and right edge).
Come off the bottom edge of the 2 1/2 flat stock to 5/8" and mark/scribe the length of piece. Now coming off the right edge to 13/16" and mark/punch for your first hole to be drilled.
At this point if you have new/used intake gaskets laying around, used the marked/punched dimple as a guide. The 5/8" marked/scribed line will be your guide for the left hole.
Now mark/punch the top two holes, if you used the gasket to mark/punch your holes, then your ready to move down and start drilling.
Those of you who don't have a gasket handy, look at the pic below to get your measurements. Be sure your right edge is square with the factory bottom edge.
Time to drill bottom plate. Drill the punch marks first with a center drill so the "L" drill don't walk on you.
Next, take the 4" flat stock piece and make sure the right edge is square with the factory bottom edge. Use the pic below to get your measurements for the 2" hole saw.
After you marked/punched where the 2" hole is going, use the center drill to start a hole and prevent the hole saw drill from walking.
Now for the hole saw, it's best to use a drill press. You can try using a hand drill, but might have trouble holding the drill square and cause the hole saw to "bind".
Your going to keep the RPM's slow when using a hole saw. Going at a faster RPM will cause the hole saw to "chatter" and "burn up" the teeth on the blade. Use oil to keep the teeth cool, and remember "SLOW RPM"!!
After you have the 2" hole in the 4" flat stock, you need to "bevel" the bottom edge for welding, and the 2 1/2" flat stock will get a bevel on the top edge.
NOTICE in all the pics, your 4" flat stock will have the 2" hole just left of center. The 2 1/2" flat stock will always have the very first measured/marker hole on the bottom/right. DON'T accidentally "flip" one of the pieces and weld them on backwards.
Now move onto making the 105* template/jig. I used metal drawer dividers. Anything flat that can be bent and stay sturdy. Give them a bend till your at 105*.
Back to the bracket, clamp the 4" flat stock in a vise. Use the 105* templates/jig and clamp them to the 4" flat stock.
Now put your 2 1/2 flat stock onto the 105* jig and adjust until your "bevel" edges line up, also match up the two flat stock pieces line up length wise.
Now check to be sure you still have 105* angle.
Now your ready to weld the back side of the bracket.
After the bracket has cooled, flip over and weld the front side.
You are ready to add the 1/8" NPT couplers. I used 1/4" X 20 bolts/nut/washer to bolt the coupler to the bracket. Try to keep the coupler hole centered up with the bracket hole. Now tack weld these couplers to bracket (pic below). These couplers act as a spacer needed for the head/rocker box clearance.
At this point you are done. You can cut off the corners of the top of bracket or leave it square. I chose to cut the corners off for "looks".
When hooking up the chain to bracket for lifting/install head, Dale set the chain up thru the back of bracket and locked it in with a ratchet extension. I don't know how a hook will work, but Dale's method kept the head at the right angle to lower the head evenly with the block/head gasket.
You will use the 6m bolts and washers to bolt the bracket to head for lifting/install.
Thread Starter
|
Senior User
Joined: Oct 2012
Posts: 354
Likes: 3
LOL! It sure beats breaking your back! Ahhh, to be in my 20's again! HA!
Thread Starter
|
Senior User
Joined: Oct 2012
Posts: 354
Likes: 3


Trending Topics
Super Moderator


Joined: Jul 2004
Posts: 21,113
Likes: 3,939
From: Ohio

I think he is serious about getting them heads out  Nice job! Would you like this added to the Tech Folder for future reference?
Nice job! Would you like this added to the Tech Folder for future reference?
FTE Stories
Ford Trucks for Ford Truck Enthusiasts

10 Best Ford Truck Engines We Miss the Most!
Joe Kucinski
2026 Shelby F-150 Off-Road: Better Than a Raptor R?
Brett Foote
2027 Super Duty Carhartt Package First Look: 12 Things You NEED to Know!
Michael S. Palmer
10 Most Surprising 2026 Ford Truck Features!
Joe Kucinski
Top 10 Ford Trucks Coming to Mecum Indy 2026
Brett Foote
5 Best / 5 Worst Ford Truck Wheels of All Time
Joe Kucinski
Ford Super Duty: 5 Things Owners LOVE, 5 Things They LOATHE!
Joe Kucinski
Every 2026 Ford Truck Engine RANKED from WORST to FIRST!
Michael S. Palmer
The Best F-150 Deal of Every Trim Level (XL through Raptor)
Joe KucinskiThread Starter
|
Senior User
Joined: Oct 2012
Posts: 354
Likes: 3
Tech Folder..... Sure why not, it will be easier to find after I get slammed with PM's! LOL!


Fleet Owner

Joined: Apr 2012
Posts: 27,307
Likes: 549
From: Spanaway
Some if not all of the tools are so much money.
They you look at what they are and take a second and
a third look and say how much!?
Like this little beauty

AKA Cam/crank shaft alignment tool.
Too bad I suck at drawing or I would make one to post.
Sean

They you look at what they are and take a second and
a third look and say how much!?
Like this little beauty
AKA Cam/crank shaft alignment tool.
Too bad I suck at drawing or I would make one to post.
Sean

New User
Joined: Aug 2015
Posts: 2
Likes: 0
OP: Great post! I wish I could weld...
For those of us still browsing a year or two later, the equivalent of these brackets can now be found on ebay for about $45 shipped. My welding skills are non-existent, so it beats $135 for the original tool that we all will hopefully only ever use for one day!
For those of us still browsing a year or two later, the equivalent of these brackets can now be found on ebay for about $45 shipped. My welding skills are non-existent, so it beats $135 for the original tool that we all will hopefully only ever use for one day!