




need help with rust repair

Thread Starter
|
Junior User
Joined: Jan 2011
Posts: 93
Likes: 0
From: jacksonville fl
need help with rust repair
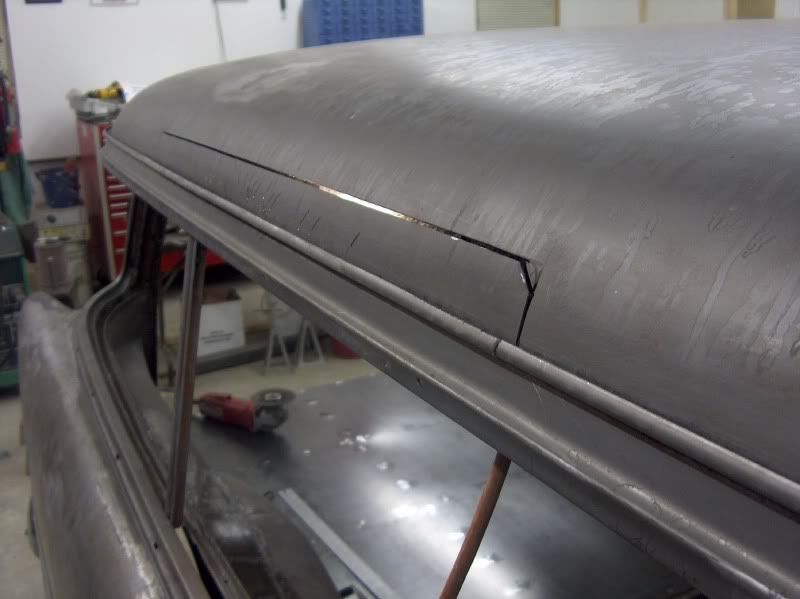
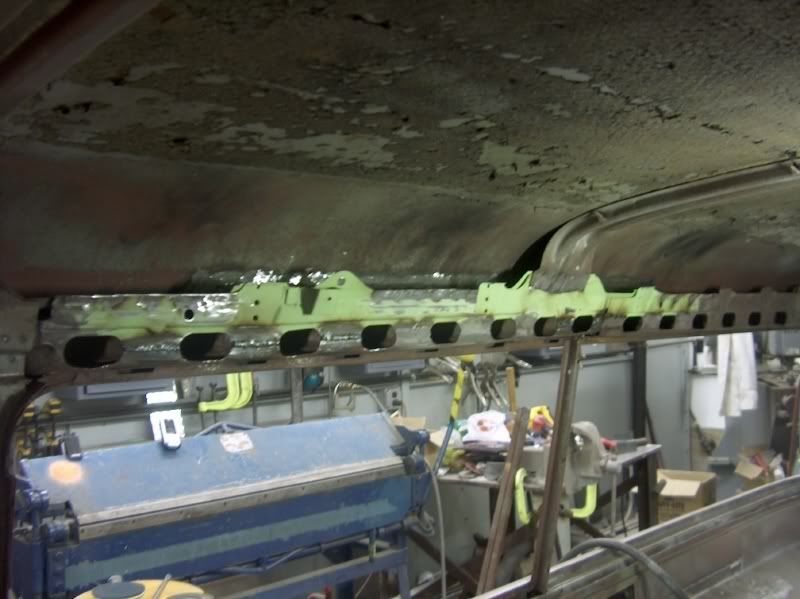
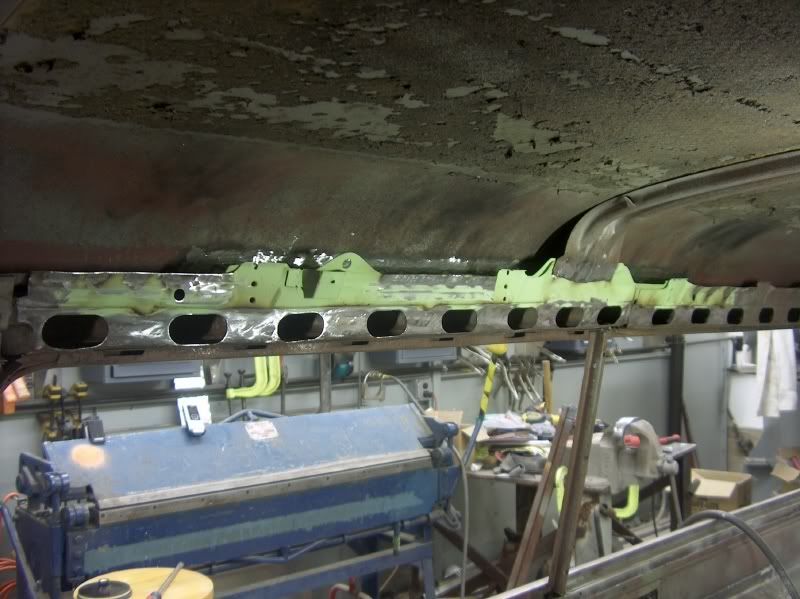
i am rebuilding this 80 f150 someone has painted the truck at some point they filled the rain gutters with a putty that trapped in moister and has caused some rust here are some pictures i want to fix it but need some ideas 
[IMG]<a href="http://s296.photobucket.com/albums/mm178/hobbystock98/?action=view&current=cab1.jpg" target="_blank"><img src="http://i296.photobucket.com/albums/mm178/hobbystock98/cab1.jpg" border="0" alt="Photobucket"></a>[/IMG]
[IMG]<a href="http://s296.photobucket.com/albums/mm178/hobbystock98/?action=view&current=cab1.jpg" target="_blank"><img src="http://i296.photobucket.com/albums/mm178/hobbystock98/cab1.jpg" border="0" alt="Photobucket"></a>[/IMG]

Tuned


Joined: Aug 2007
Posts: 459
Likes: 123
From: Maryland
If that rust was caused by the seam sealer in the drip rail, ie: from the outside, you would see deep pitting next to the holes where some of the rust was only partially through. This has nothing to do with sealant in the drip rail, and much more to do with condensation that built up inside the roof and collected inside the area you are showing above, where it rusted from the inside out. This may be partially due to the area of the country where the truck has been located, as wide temp swings in a 24 hour period help to form condensation. Here is a post of a similar repair I did to a 55 Chevy wagon, that may help shed some light on what you may be faced with in your repair...
************************************************** ***
If you've seen a hole in the roof that is noticeably up from the drip rail, chances are it has rusted from the inside-out, as you'll soon see.
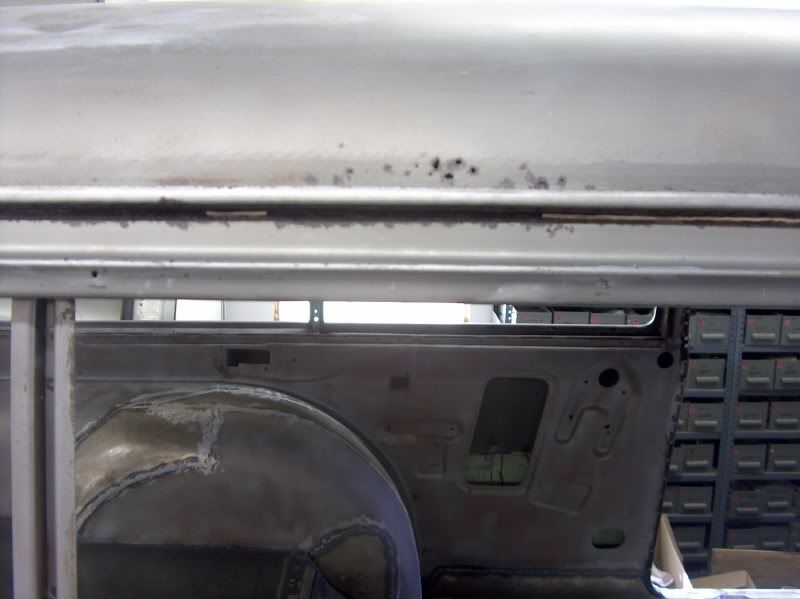
While waiting to do some painting, might as well cut up something. But not until after a quick check on the inside as well to see the extent of the problem.
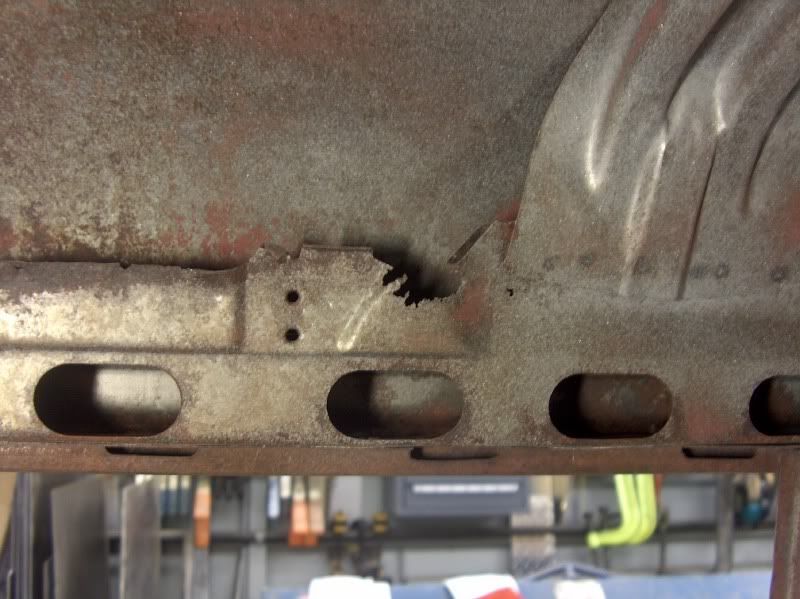
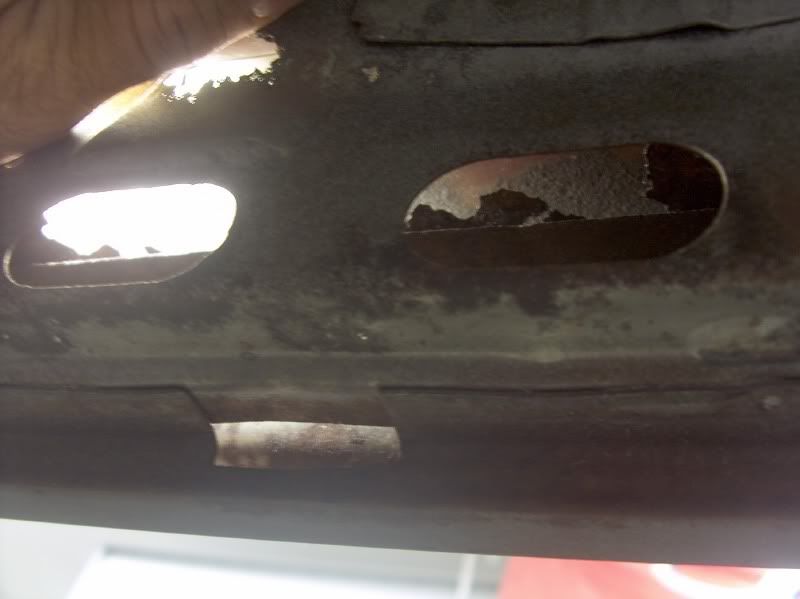
Looks pretty ugly, and will require taking out more than I originally thought. Time to mark out the cut line.
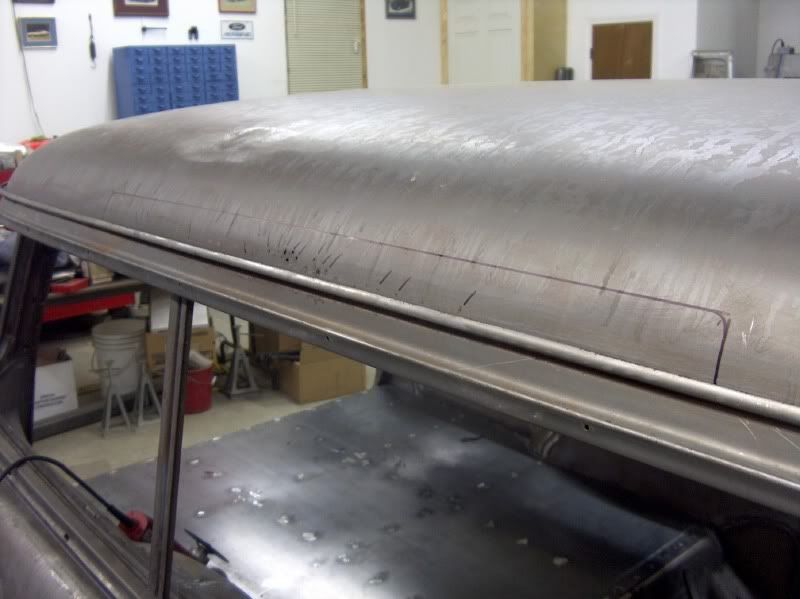
If you've never seen what holds the roof on, there are about a gazillion spot welds that hold it down to the gutter. Maybe not that many, but when you are drilling them out, well it seems so.

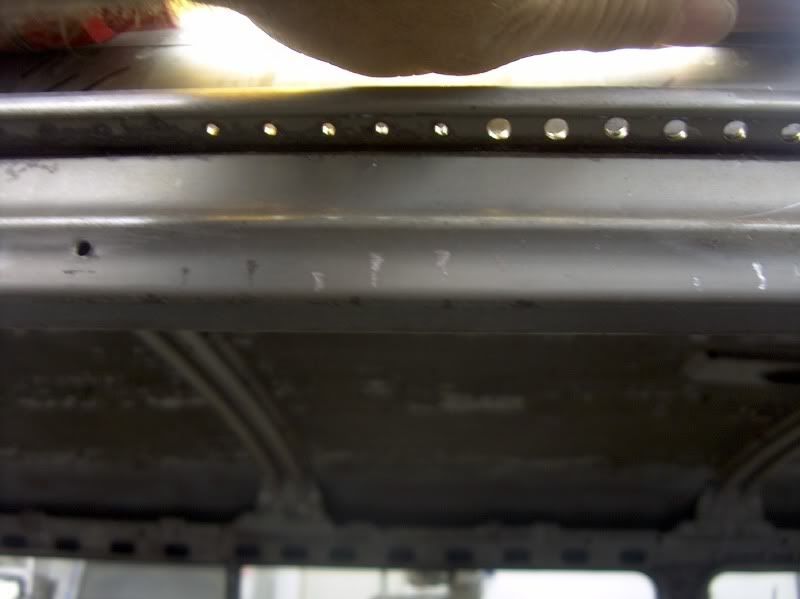
Once all the spot welds are drilled out, it is easily removed. This is going from bad to worse. The rain gutter doesn't look too healthy inside.
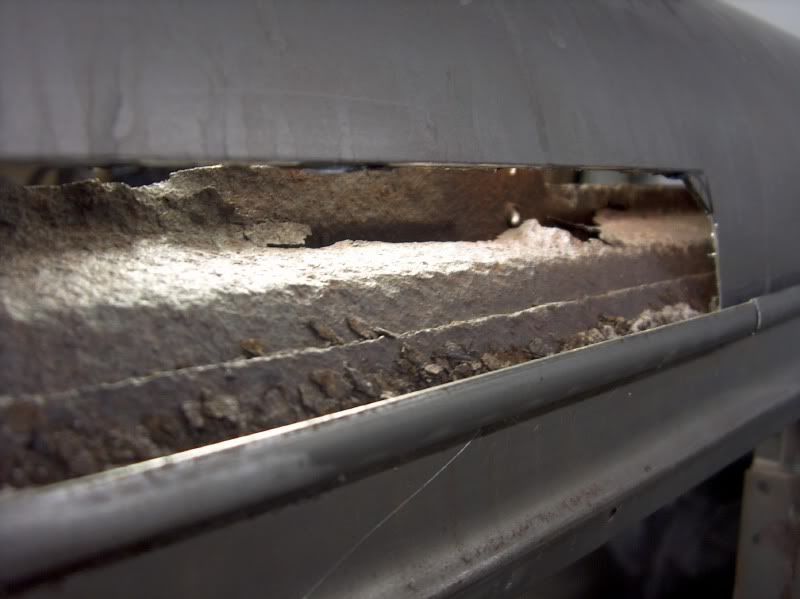
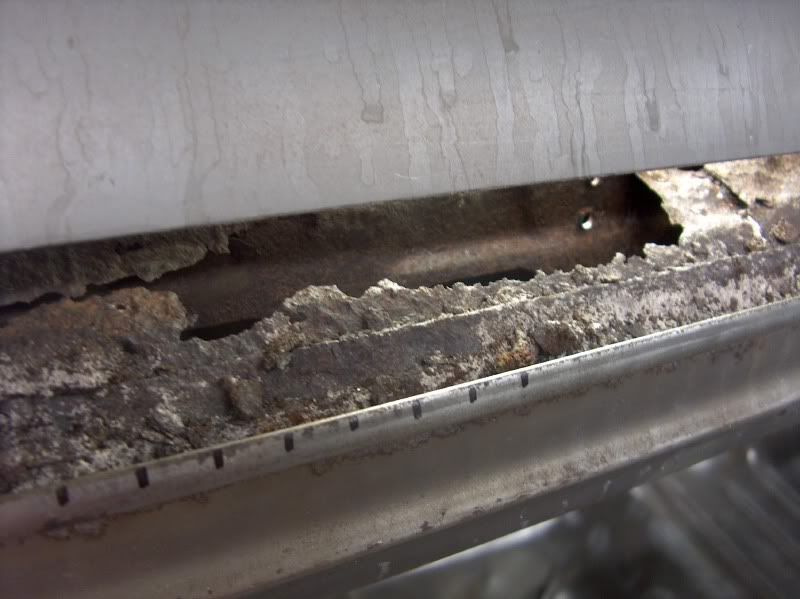
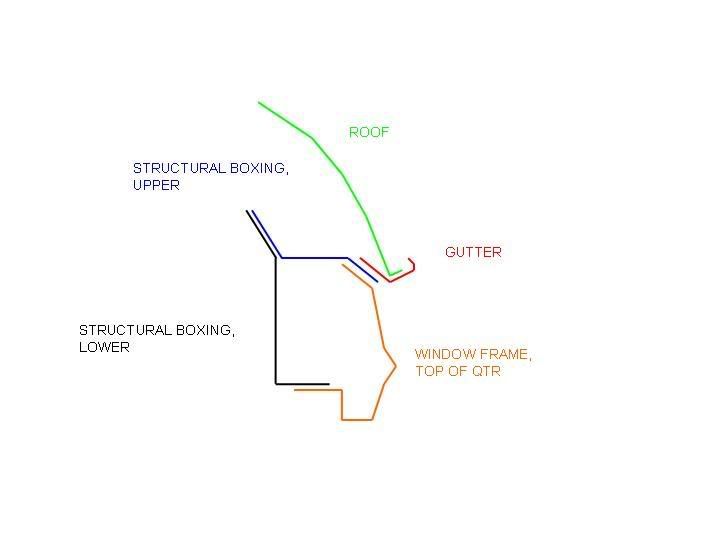
In true domino fashion, time to lose the gutter, and the profile shot will show how they are assembled together.


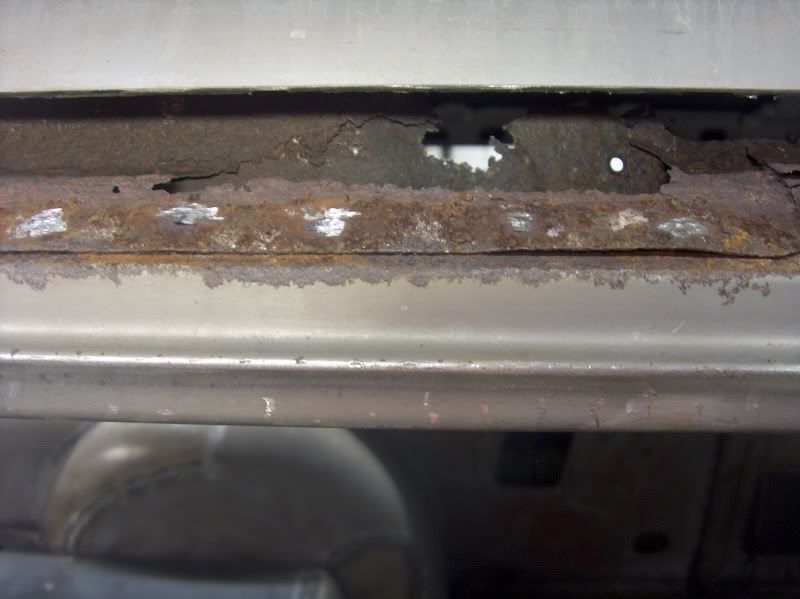
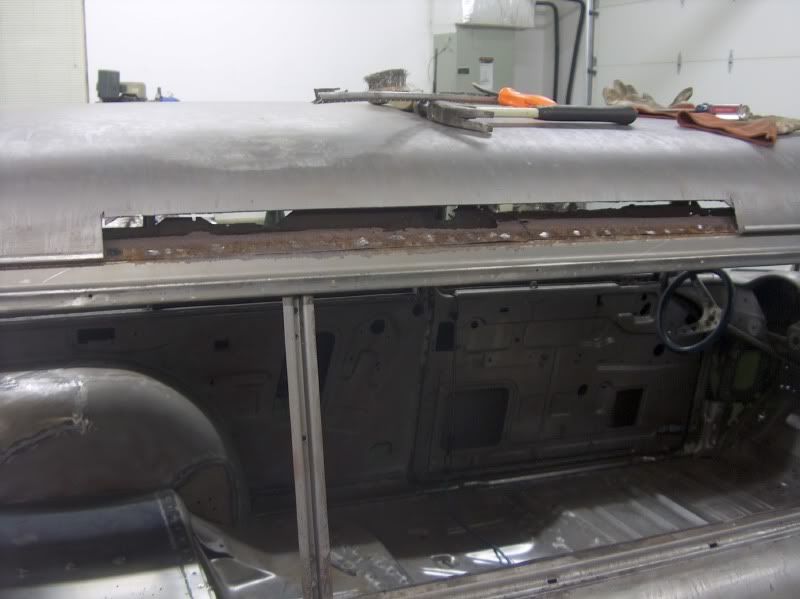
Maybe this would make the start of a good Vista Cruiser? After some much needed sheet metal replacement takes place on the inside, we'll try our hand at making a rain gutter.
Let's pause here and clarify the major components we're working with:
The rusty pieces came out as good as could be expected, and were limited help in forming new pieces. Some of the measurements had to be transposed from the opposite side of the roof, which was virtually flawless. After further inspection of the affected area, I'm thinking it was a condensation problem, and the moisture followed down the roof crossmember just like a gutter. The car must have been parked with a downhill slope to that side.
Gaining access:
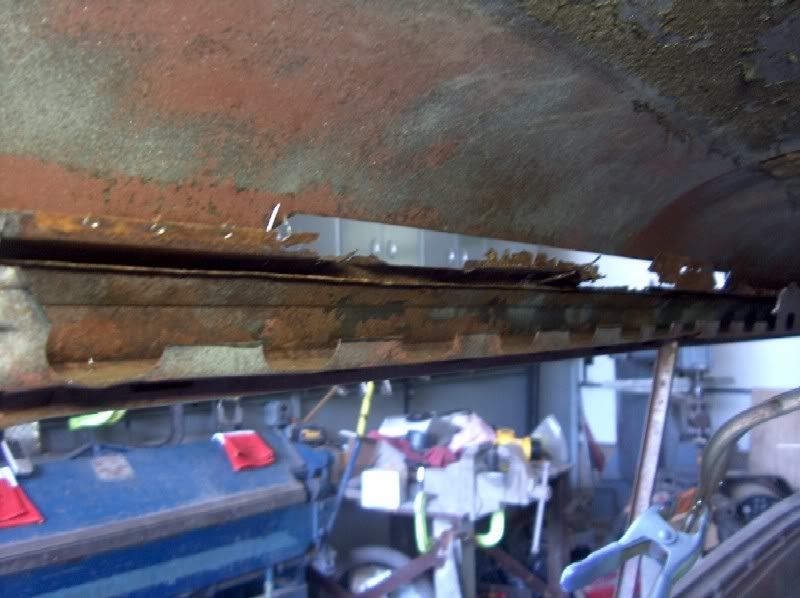
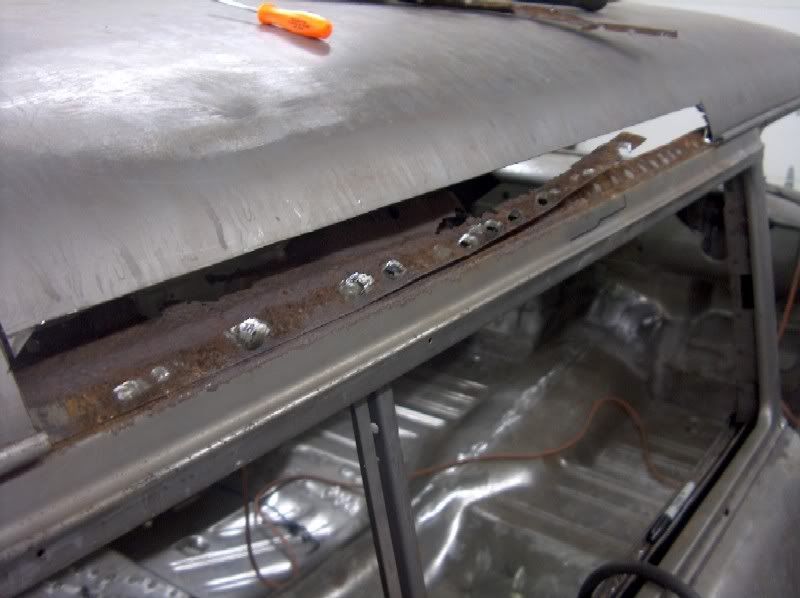
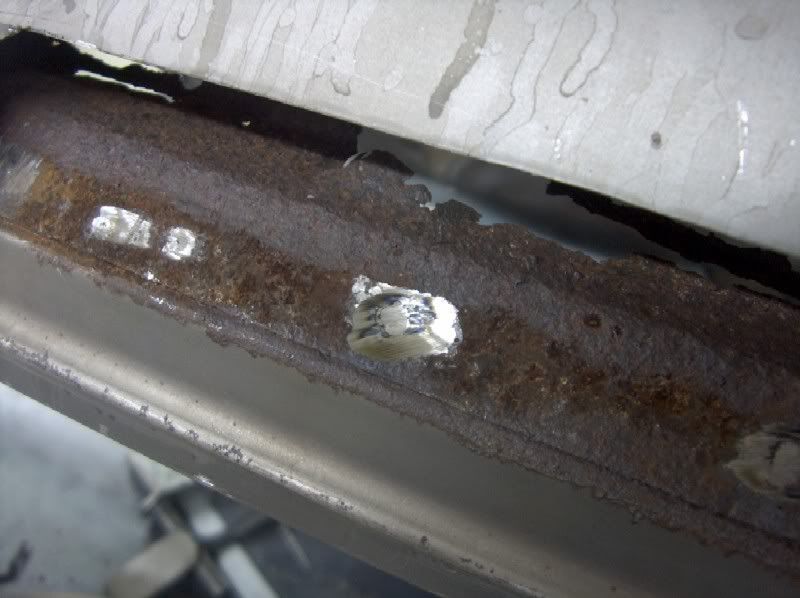
Here's a good indicator for using the 3" cut off wheels as a grinder for removing spot welds. The top layer starts to turn blue when the metal gets thin and hot. Once you are through to the second layer, you will see the bright metal surrounded by the blue ring. Time to stop and pry them apart.
Think these will sell on ebay?
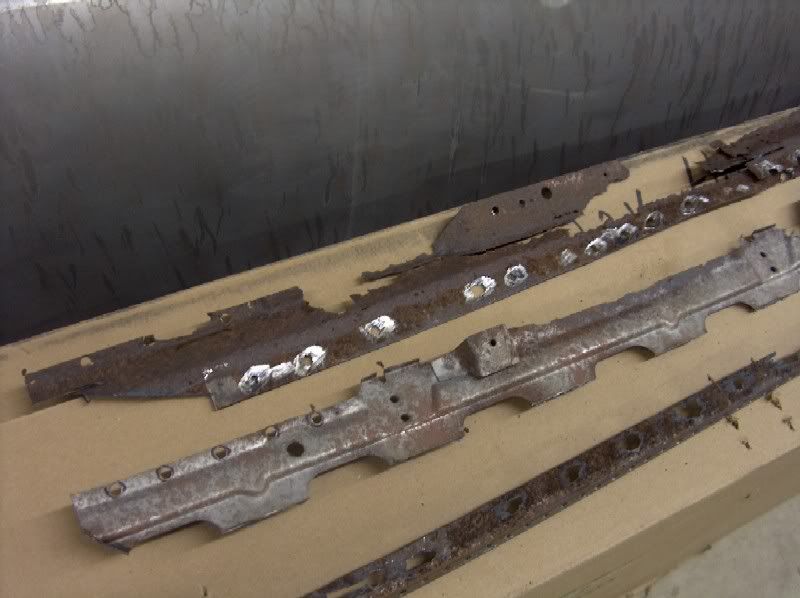
A trial run at rain gutters
Fabricating the new pieces
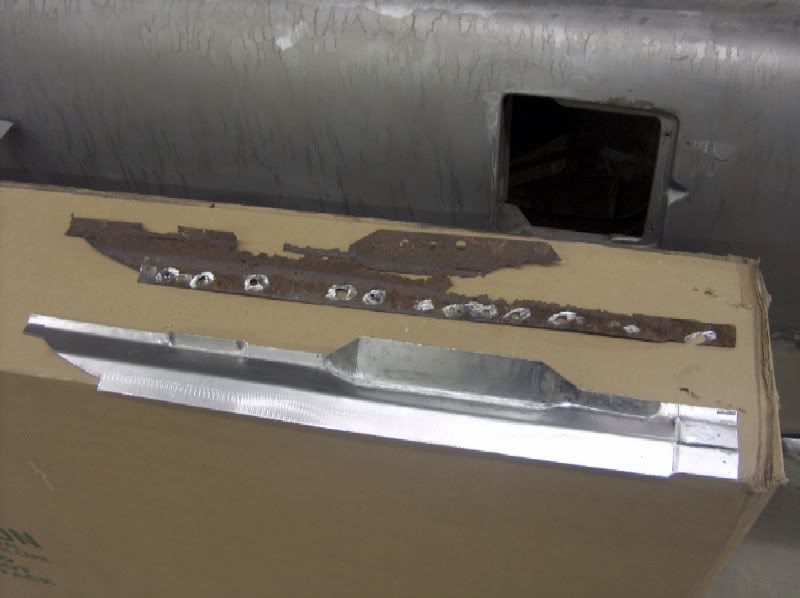
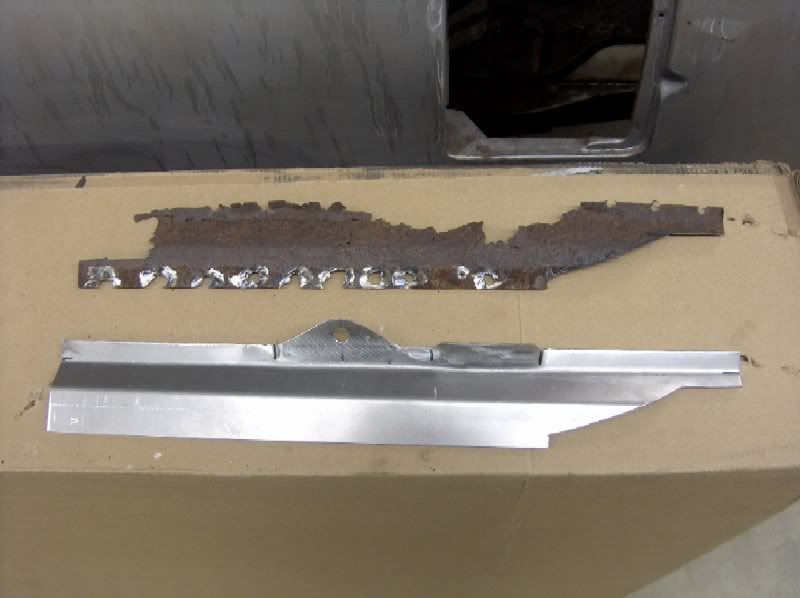
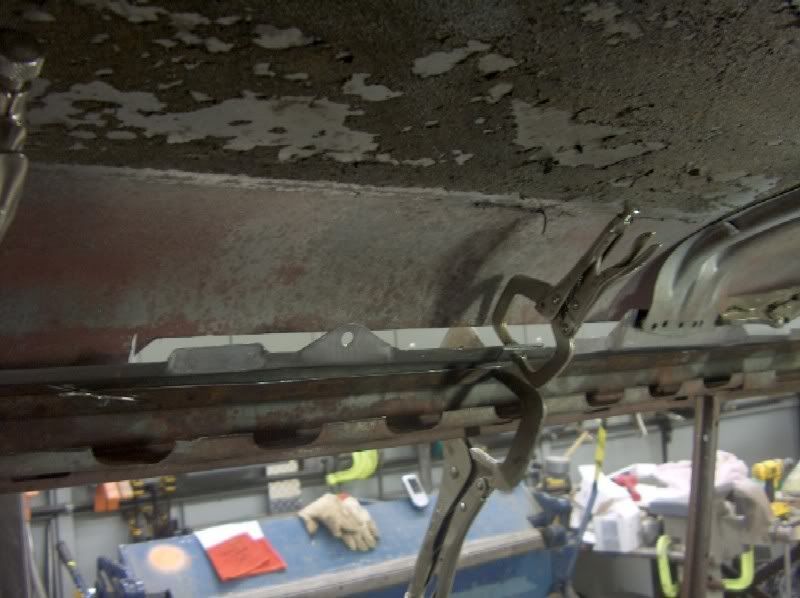
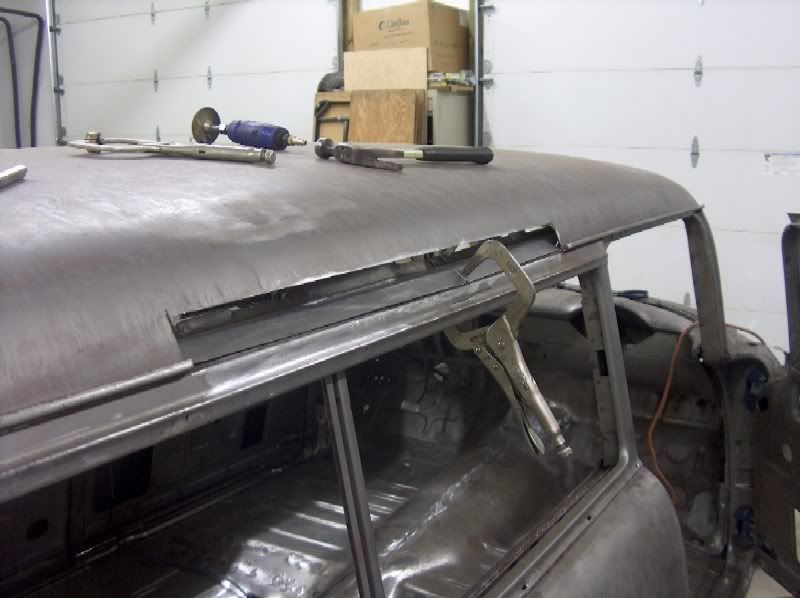
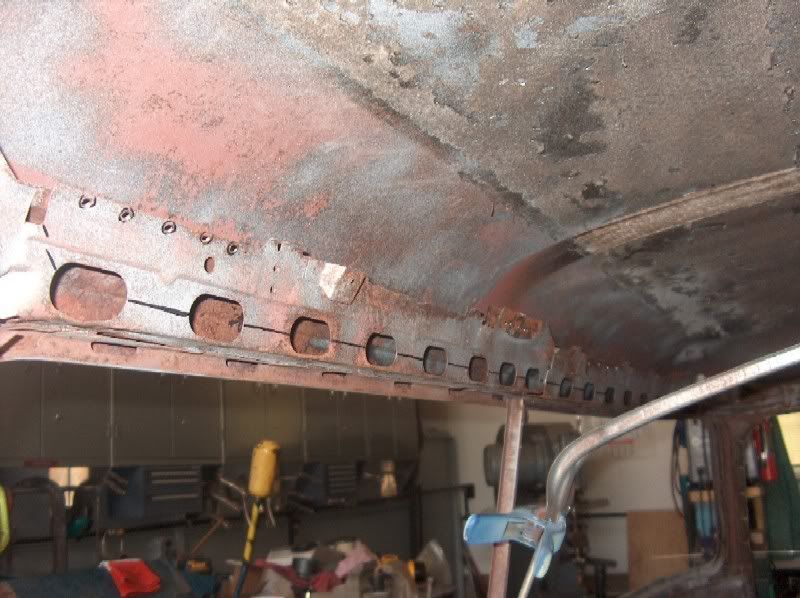
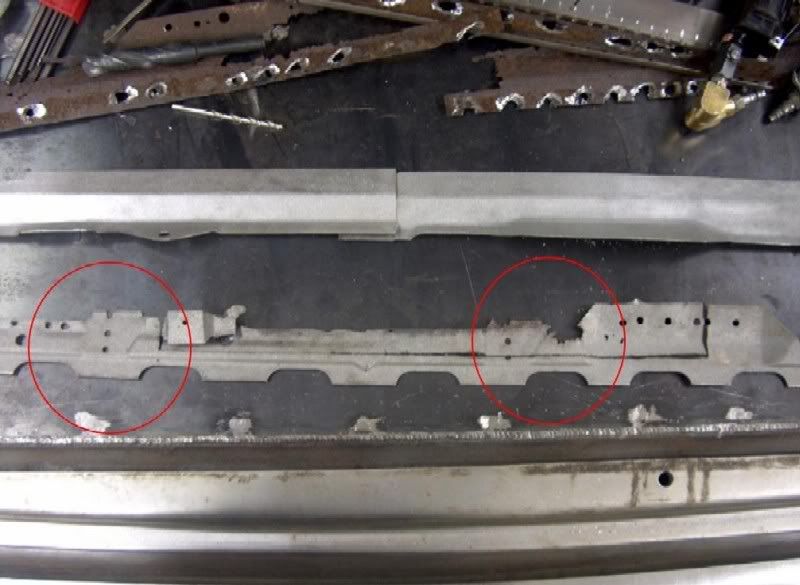
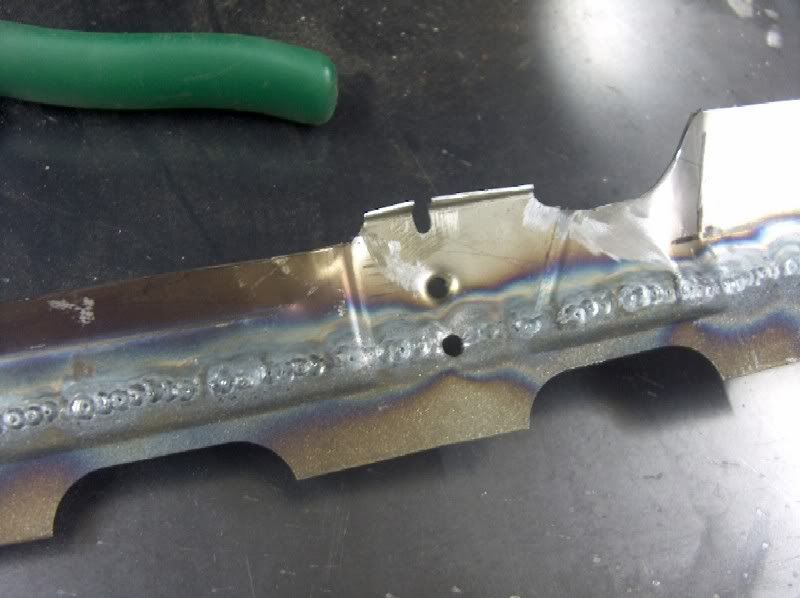
There was one more section that needed repair, specifically the section holding the headliner bows. Looking at the next pic, the left red circled area is what it should look like, and the right red circled area shows where some of the rust spread, weakening the headliner bow support. Time to cut this out, bend up a replacement, and weld together.
************************************************** ***
If you've seen a hole in the roof that is noticeably up from the drip rail, chances are it has rusted from the inside-out, as you'll soon see.
While waiting to do some painting, might as well cut up something. But not until after a quick check on the inside as well to see the extent of the problem.
Looks pretty ugly, and will require taking out more than I originally thought. Time to mark out the cut line.
If you've never seen what holds the roof on, there are about a gazillion spot welds that hold it down to the gutter. Maybe not that many, but when you are drilling them out, well it seems so.
Once all the spot welds are drilled out, it is easily removed. This is going from bad to worse. The rain gutter doesn't look too healthy inside.
In true domino fashion, time to lose the gutter, and the profile shot will show how they are assembled together.
Maybe this would make the start of a good Vista Cruiser? After some much needed sheet metal replacement takes place on the inside, we'll try our hand at making a rain gutter.
Let's pause here and clarify the major components we're working with:
The rusty pieces came out as good as could be expected, and were limited help in forming new pieces. Some of the measurements had to be transposed from the opposite side of the roof, which was virtually flawless. After further inspection of the affected area, I'm thinking it was a condensation problem, and the moisture followed down the roof crossmember just like a gutter. The car must have been parked with a downhill slope to that side.
Gaining access:
Here's a good indicator for using the 3" cut off wheels as a grinder for removing spot welds. The top layer starts to turn blue when the metal gets thin and hot. Once you are through to the second layer, you will see the bright metal surrounded by the blue ring. Time to stop and pry them apart.
Think these will sell on ebay?
A trial run at rain gutters
Fabricating the new pieces
There was one more section that needed repair, specifically the section holding the headliner bows. Looking at the next pic, the left red circled area is what it should look like, and the right red circled area shows where some of the rust spread, weakening the headliner bow support. Time to cut this out, bend up a replacement, and weld together.
Tuned
Joined: Aug 2007
Posts: 459
Likes: 123
From: Maryland
Dress the exposed welds a bit, and the rest will be cleaned up in the sand blast cabinet in preparation for epoxy primer. Then this stuff can start going back together.
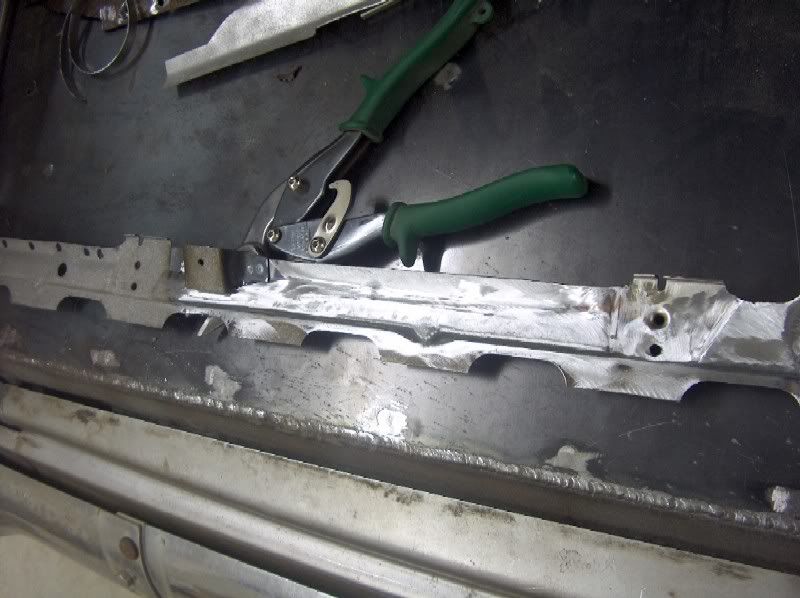
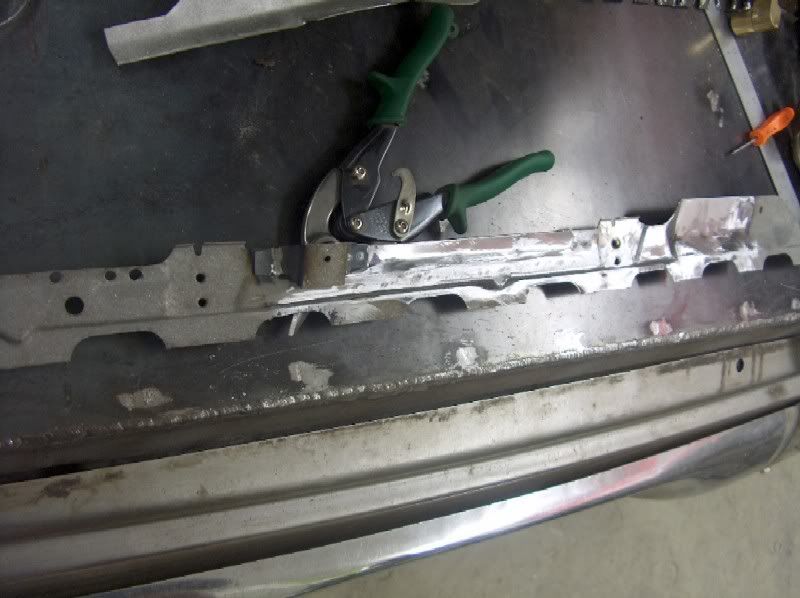
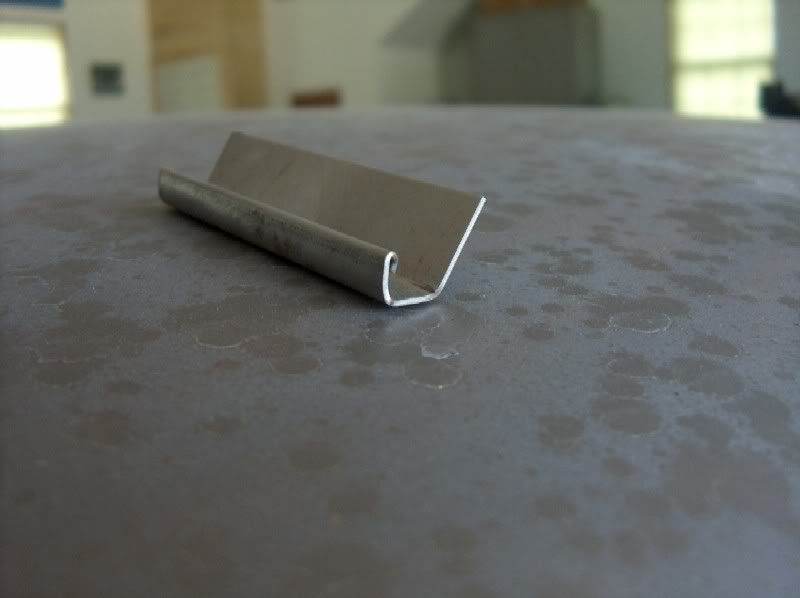
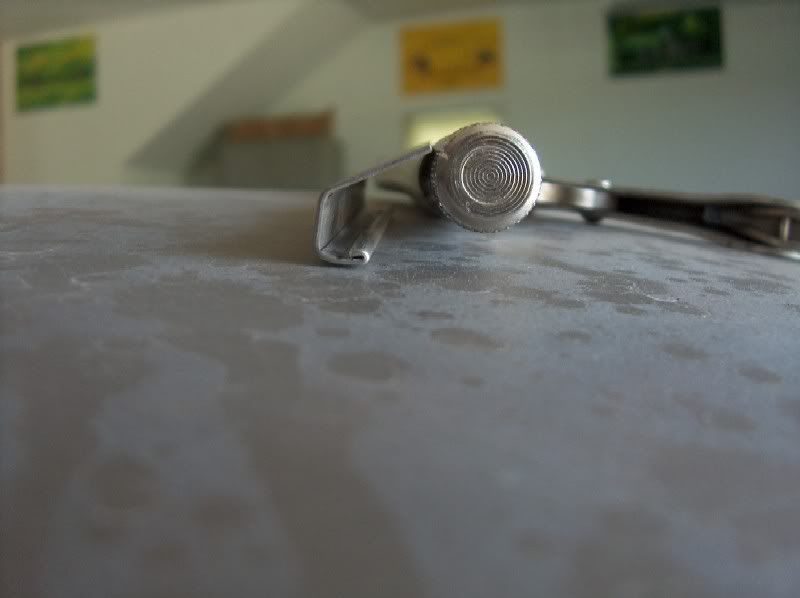
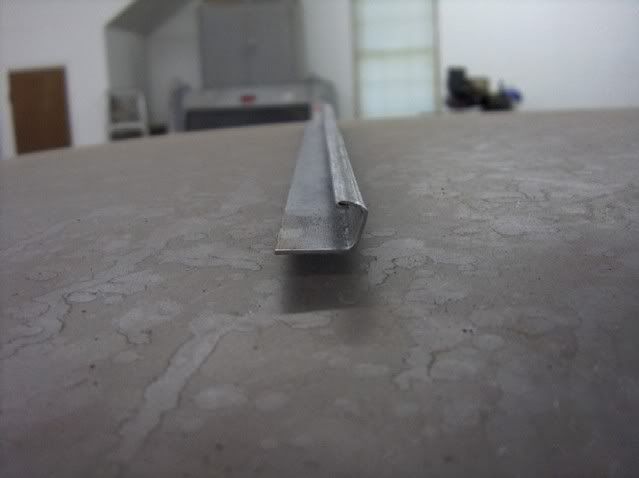
Well most of the roof patches are just about done, ready for paint, but we'll need the rain gutter as well, so let's get that done so it can be painted at the same time. The section needed was about 31" long, and you tend to get crisper bends on shorter sections (especially with worn out machinery), so I made two pieces 16" long. Here's the bend process:
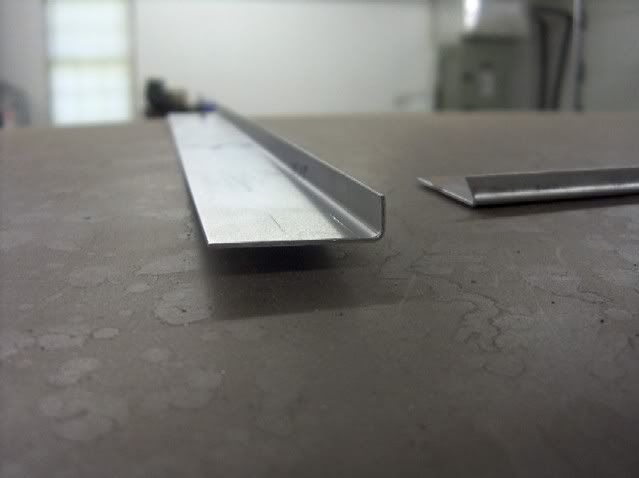
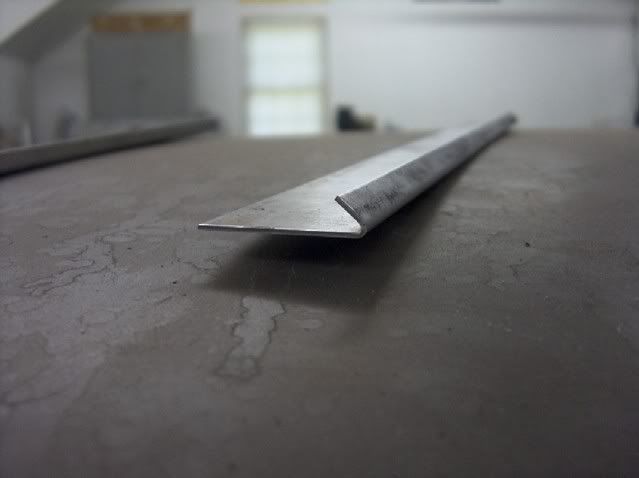
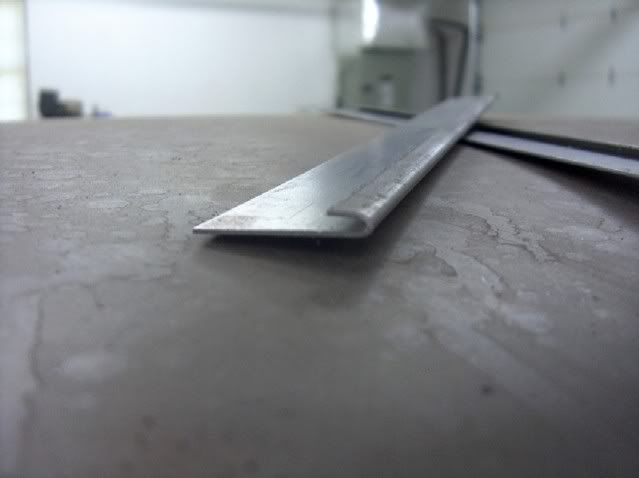
These were all done in the apron brake, with the last one accomplished using the clamping section of the brake to flatten out the bend. Next, a mark is made to cut the "tail" to size, and this cut will be done using a 3" x 1/32 cutoff wheel. To prevent from cutting through into the back side, slide a piece of scrap under the "tail".
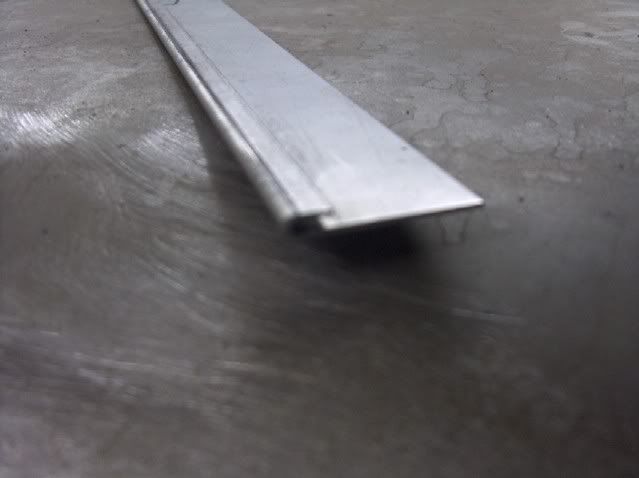
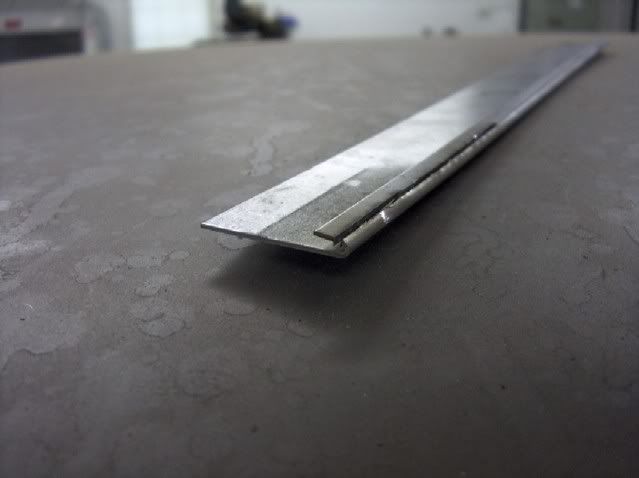
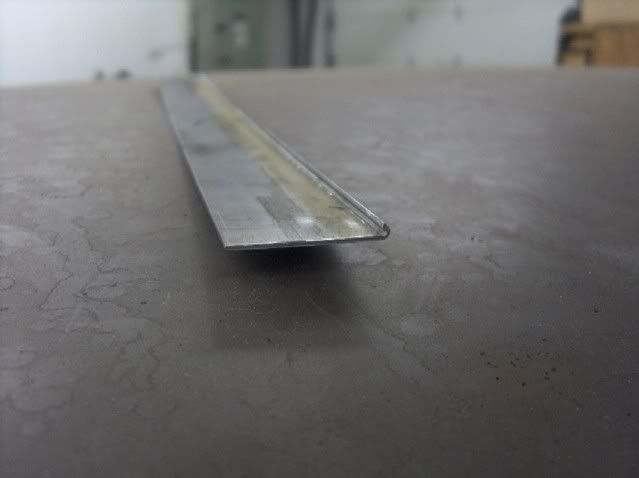
Once the tail is cut this short, we'll need to resort to the press brake with some flattening dies to compress the fold flat, mimmicking the factory original. This could also be done using a good flat body hammer.
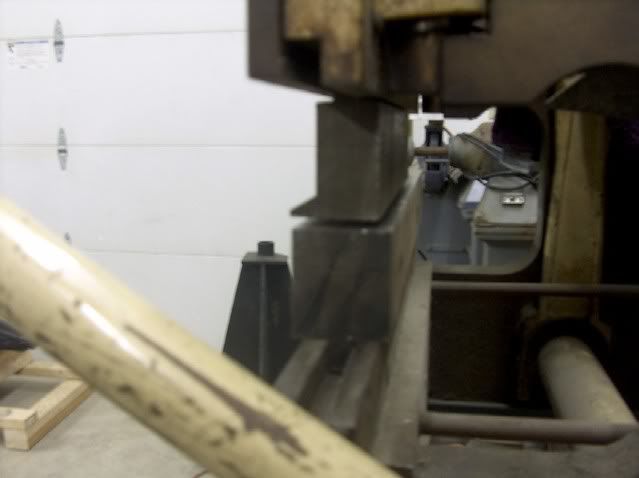
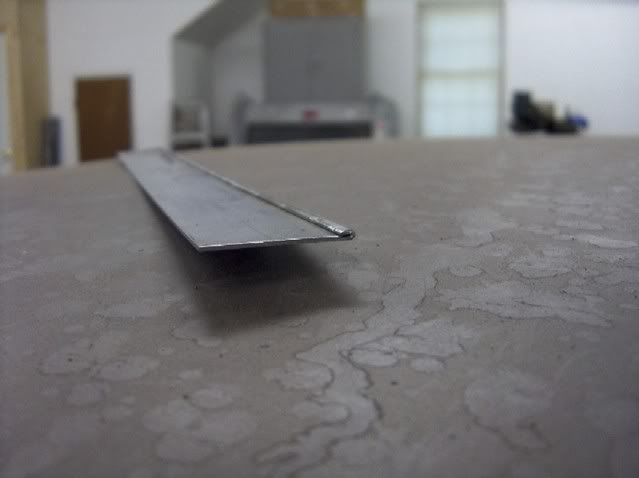
Then it's back to the apron brake, and with the newly made fold facing out, make a slight bend to form the curved surface you see on the outside of the gutter.
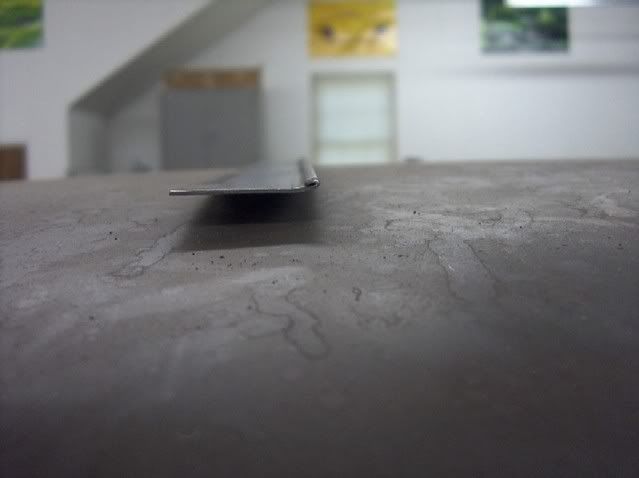
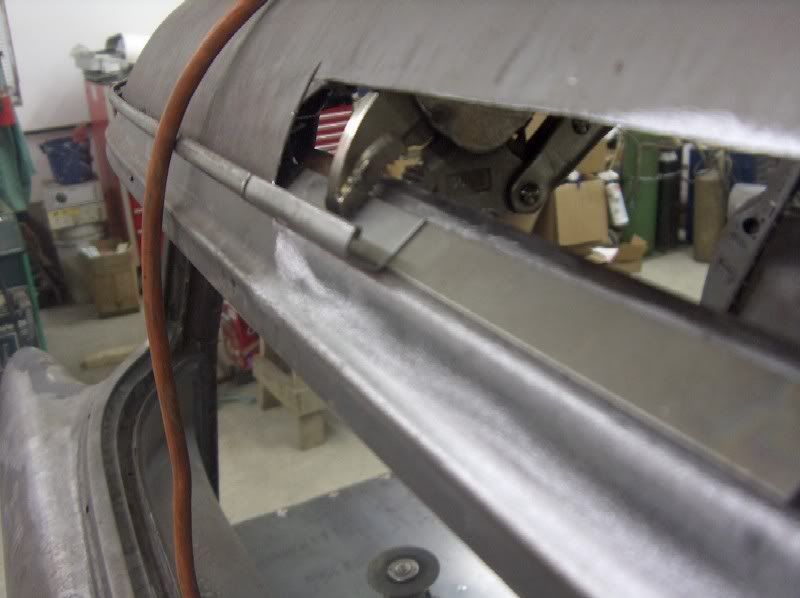
Then the rest of the bends, and a trail fit.
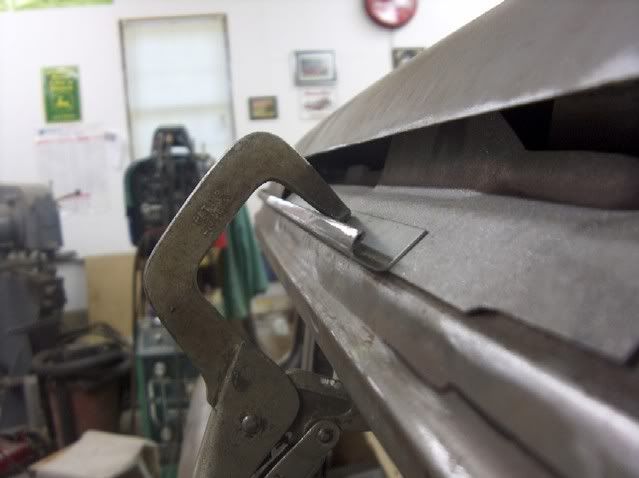
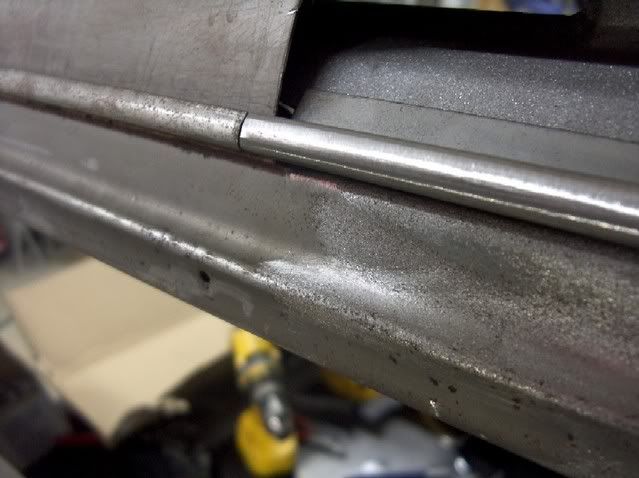
Although the gutter was fairly straight and needs to have a slight radius to match the roof, the heat from the plug welds should be sufficient to shrink the back edge and draw the gutter in tight to the car where it belongs.
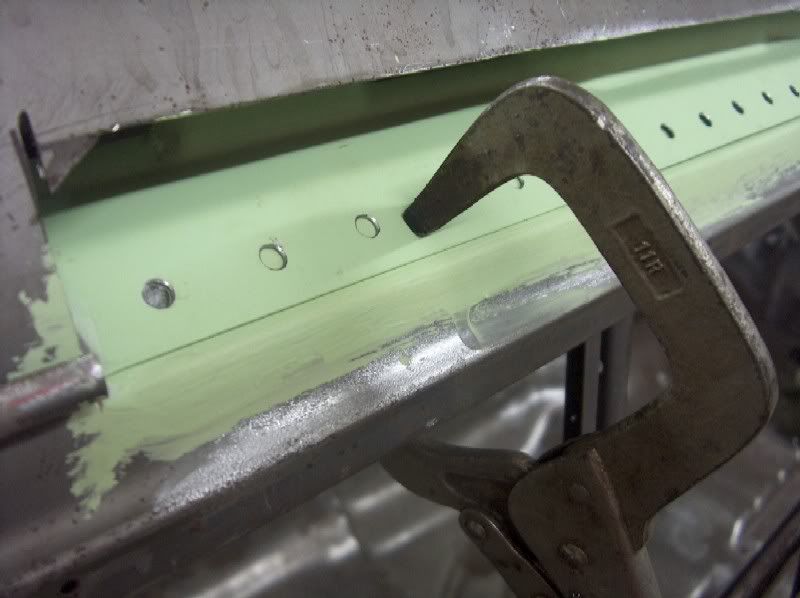
Well the epoxy primer has dried so let's get started on the drip rail install. Some epoxy primer was also painted on the top edge of the quarter the other day, in an attempt to prolong the lifespan this second time around. Plug holes were drilled, and the first piece was welded in place.
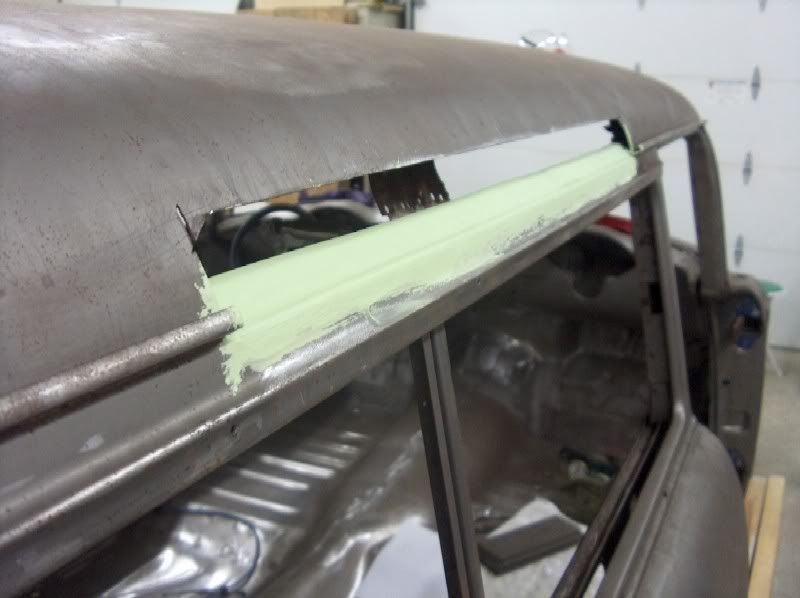
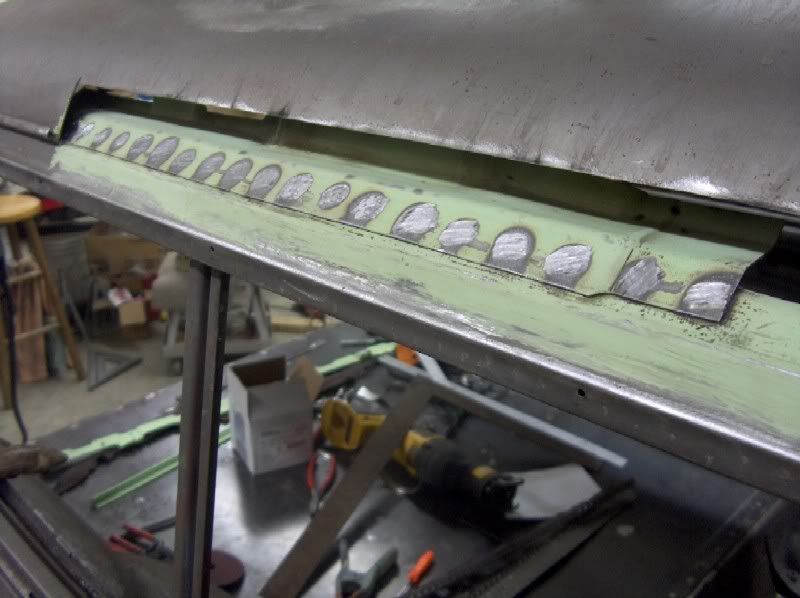
All the plug welds were ground flush as the drip rail will position on top of this for welding. The next piece was overlapped and welded in place.
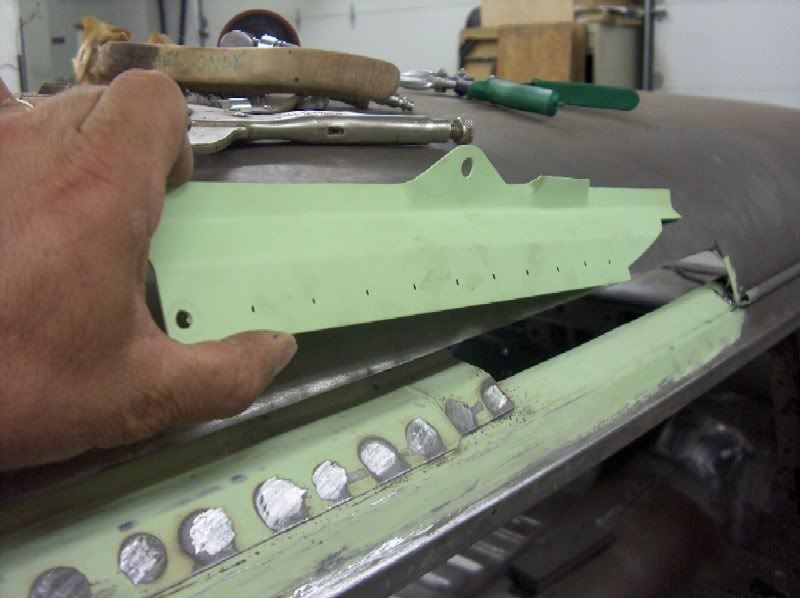
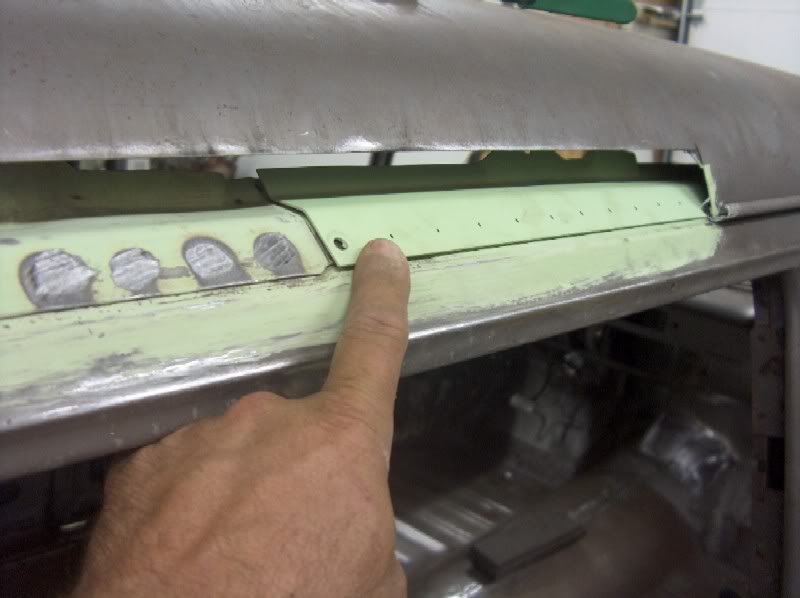
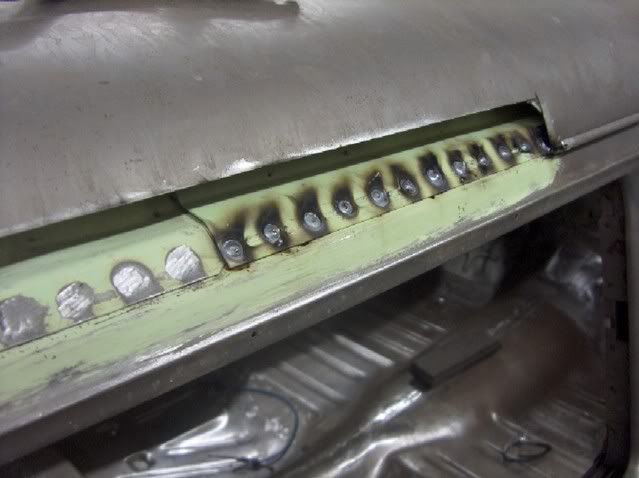
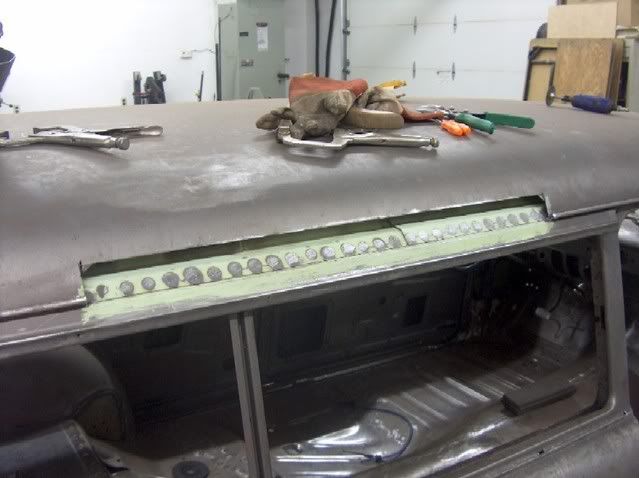
And now for the drip rail
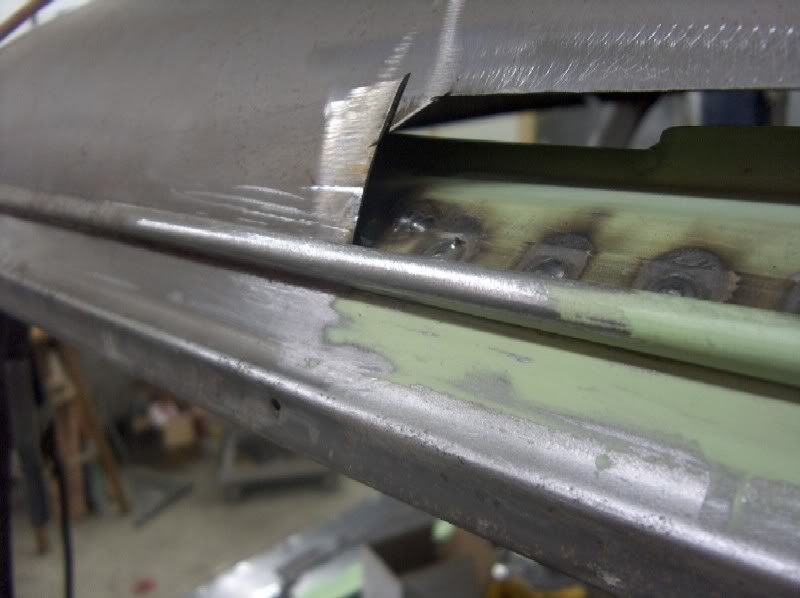
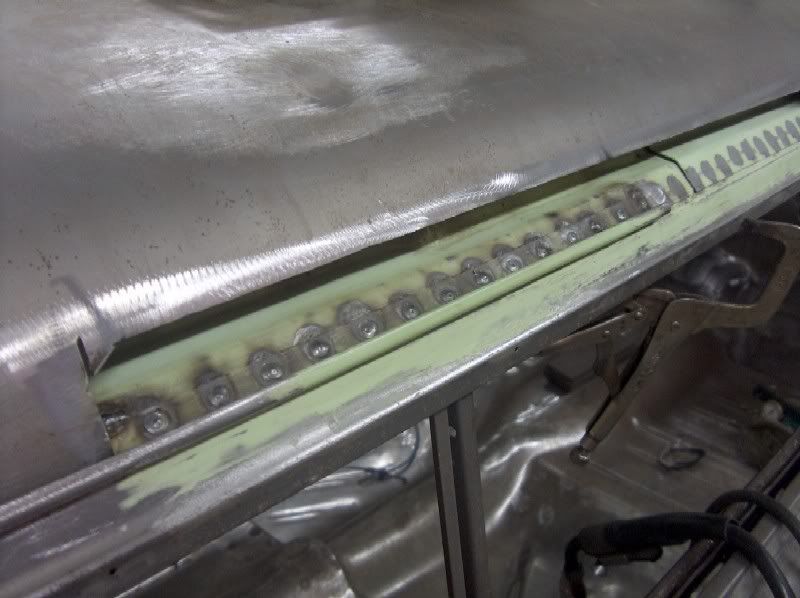
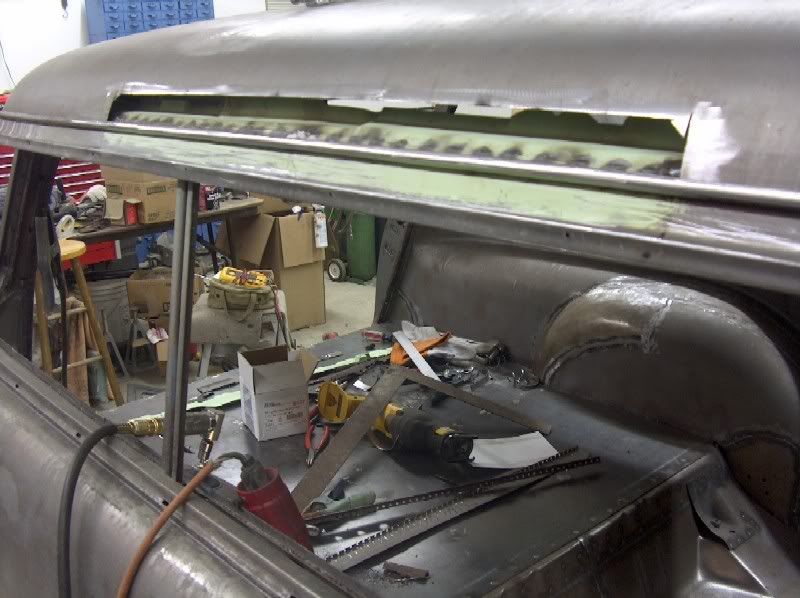
Well I bent up a patch for the gaping hole in the roof. When you don't have the right tooling, sometimes you have to improvise. It would have been nice to use a slip roll to form the contour, but since I don't have one, we'll have to settle for incremental bends to form the radius. Then the bottom flange is bent, and we'll clamp it in place to scribe a mark from the back side and trim to fit.

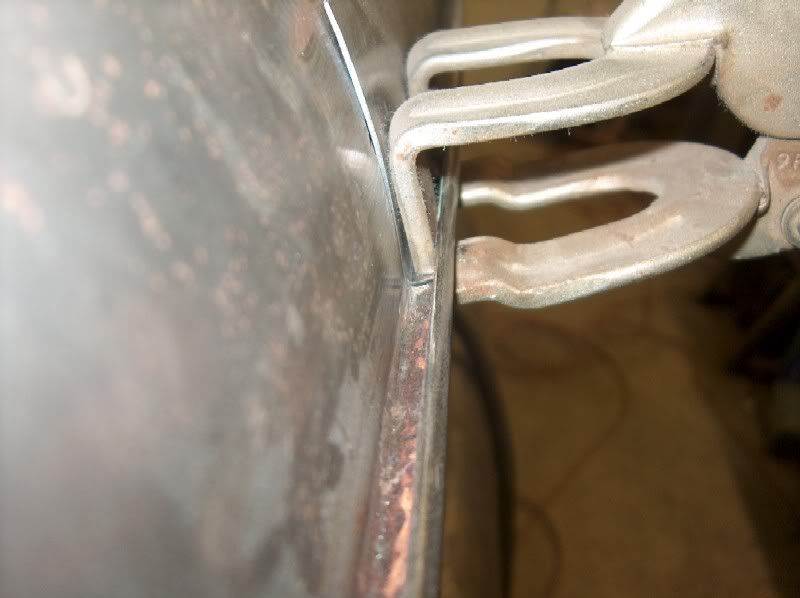
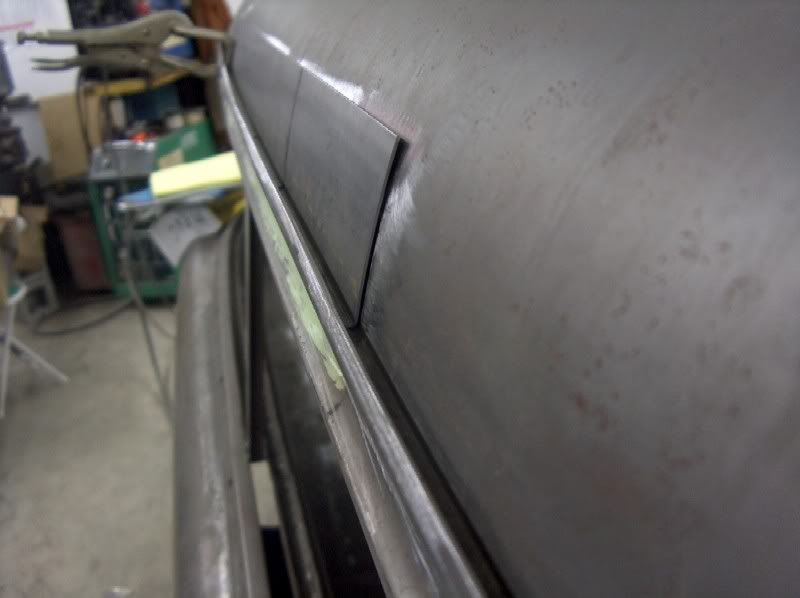
All trimmed, clamped in place.
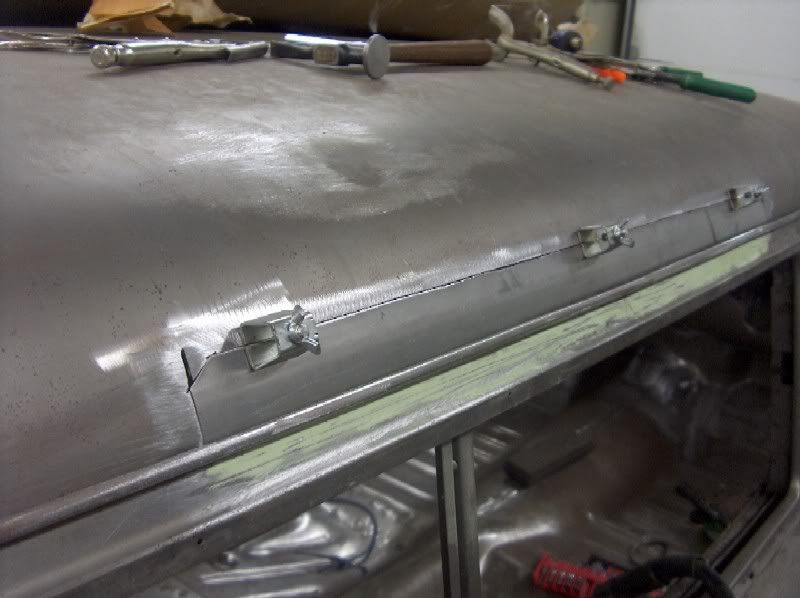
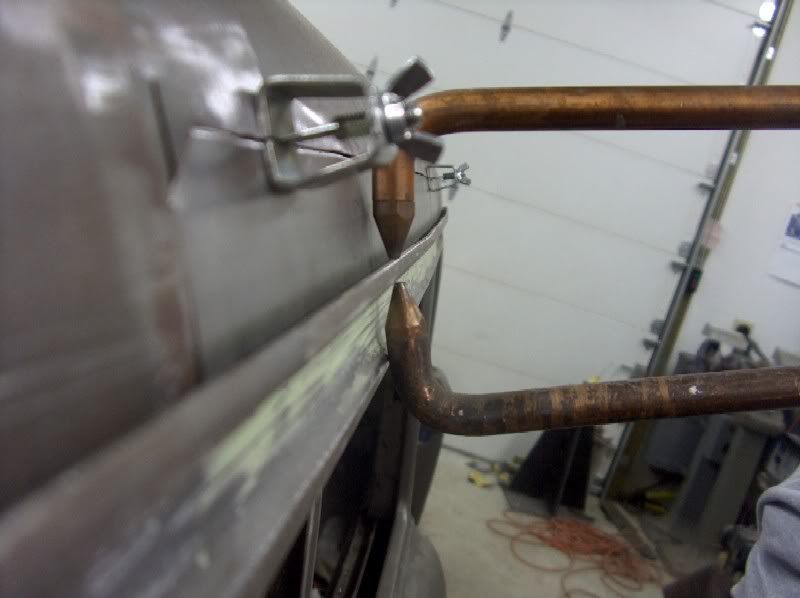
Now to see if I can pick up some tips for the spot welder tomorrow, they will likely need to be custom made to fit in the narrow void between the drip rail and the roof. If that is unsuccessful, I guess we're plug welding from the bottom side.
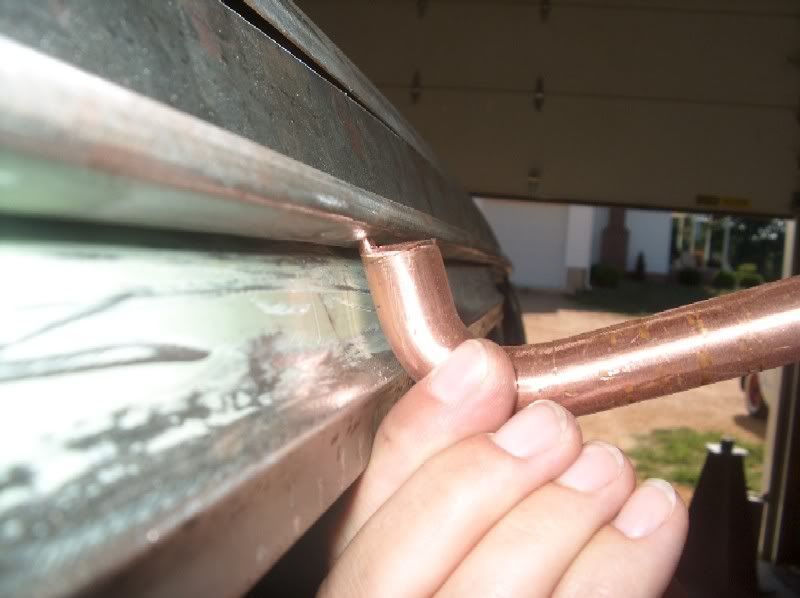
The normal cone shaped tips will definitely not fit the bill:
Well most of the roof patches are just about done, ready for paint, but we'll need the rain gutter as well, so let's get that done so it can be painted at the same time. The section needed was about 31" long, and you tend to get crisper bends on shorter sections (especially with worn out machinery), so I made two pieces 16" long. Here's the bend process:
These were all done in the apron brake, with the last one accomplished using the clamping section of the brake to flatten out the bend. Next, a mark is made to cut the "tail" to size, and this cut will be done using a 3" x 1/32 cutoff wheel. To prevent from cutting through into the back side, slide a piece of scrap under the "tail".
Once the tail is cut this short, we'll need to resort to the press brake with some flattening dies to compress the fold flat, mimmicking the factory original. This could also be done using a good flat body hammer.
Then it's back to the apron brake, and with the newly made fold facing out, make a slight bend to form the curved surface you see on the outside of the gutter.
Then the rest of the bends, and a trail fit.
Although the gutter was fairly straight and needs to have a slight radius to match the roof, the heat from the plug welds should be sufficient to shrink the back edge and draw the gutter in tight to the car where it belongs.
Well the epoxy primer has dried so let's get started on the drip rail install. Some epoxy primer was also painted on the top edge of the quarter the other day, in an attempt to prolong the lifespan this second time around. Plug holes were drilled, and the first piece was welded in place.
All the plug welds were ground flush as the drip rail will position on top of this for welding. The next piece was overlapped and welded in place.
And now for the drip rail
Well I bent up a patch for the gaping hole in the roof. When you don't have the right tooling, sometimes you have to improvise. It would have been nice to use a slip roll to form the contour, but since I don't have one, we'll have to settle for incremental bends to form the radius. Then the bottom flange is bent, and we'll clamp it in place to scribe a mark from the back side and trim to fit.
All trimmed, clamped in place.
Now to see if I can pick up some tips for the spot welder tomorrow, they will likely need to be custom made to fit in the narrow void between the drip rail and the roof. If that is unsuccessful, I guess we're plug welding from the bottom side.
The normal cone shaped tips will definitely not fit the bill:
Tuned
Joined: Aug 2007
Posts: 459
Likes: 123
From: Maryland
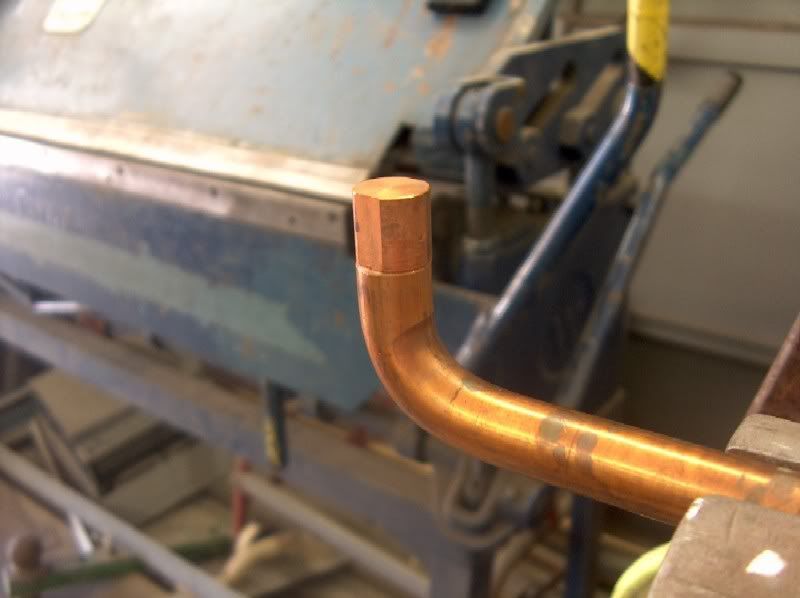
Looks like we'll have to make our own, so lets start out with some flat tips, and start on the bottom. This one has to be trimmed down pretty short to fit in there because of the outward crease just below the drip edge:
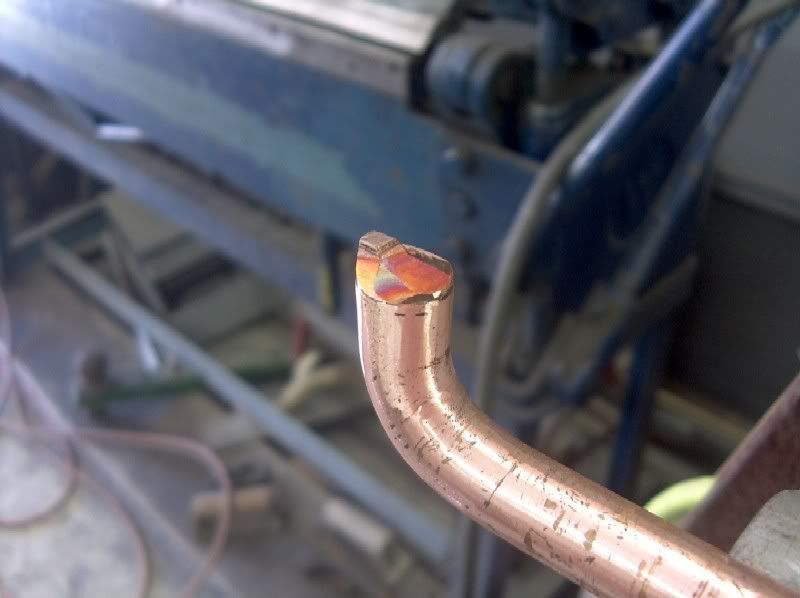
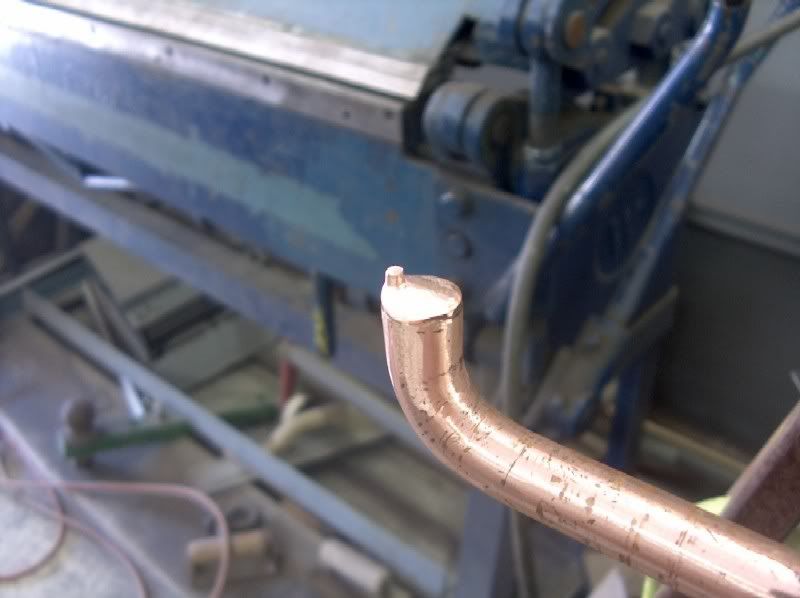
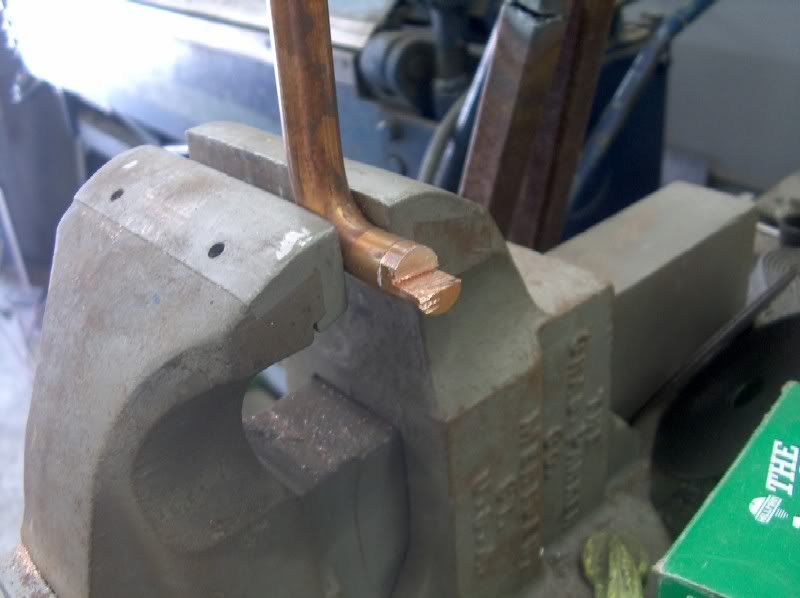
Then to shape up the top one, it will need the extra length to reach past the drip edge:
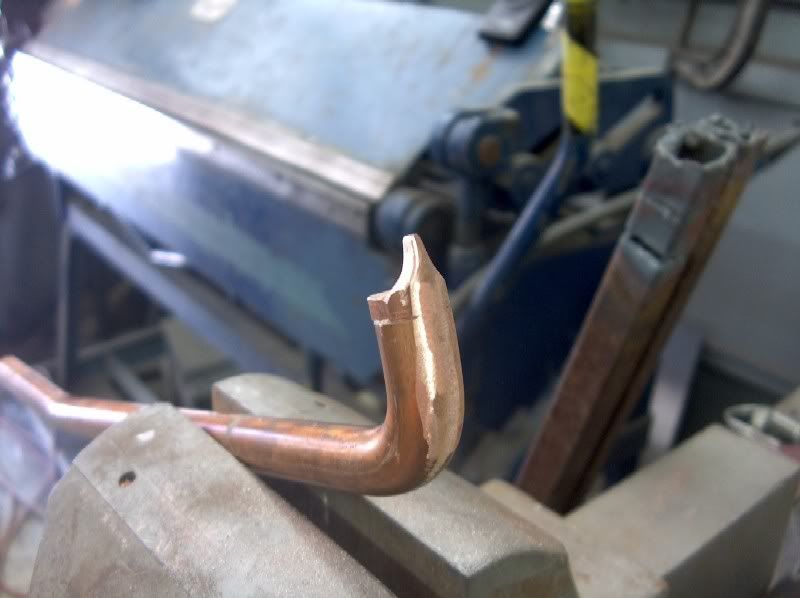
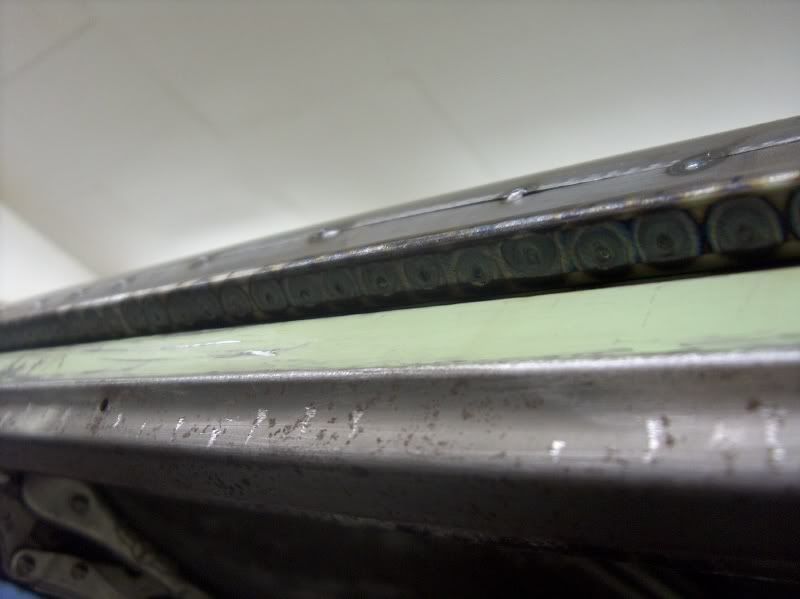
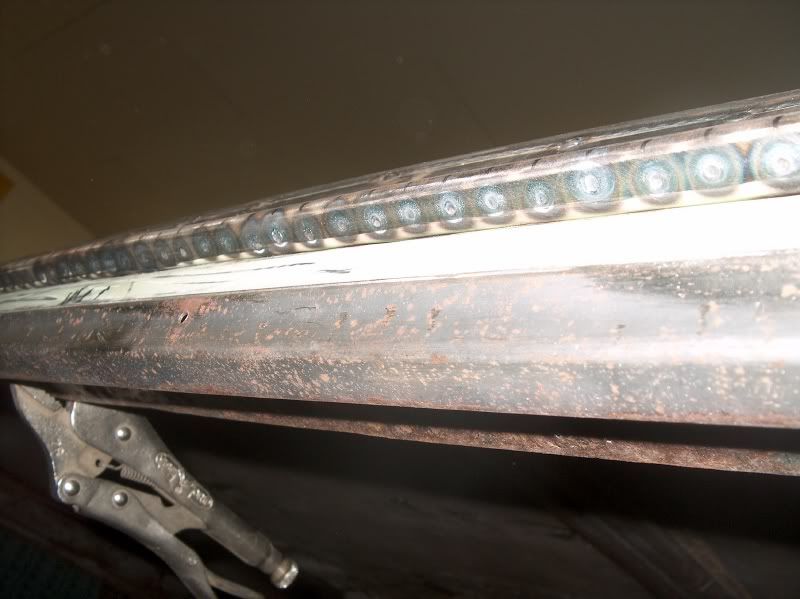
Then a test fit, this just may work!
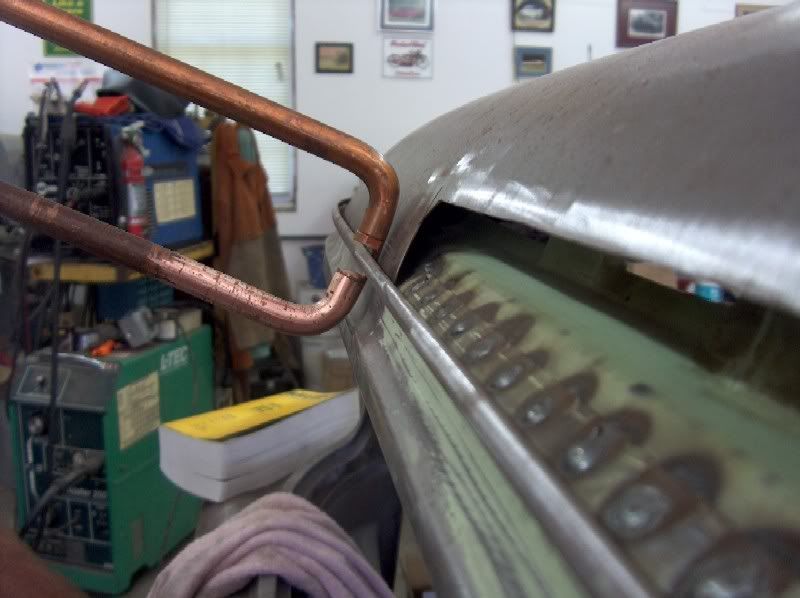
Let's see the spot welder in action:

This looks darn near a factory finish!


We got the rest of the spot welds done, and the welder performed beautifully, tips are ready for another roof!
Then we got the mig welder going and started getting the hole closed up.
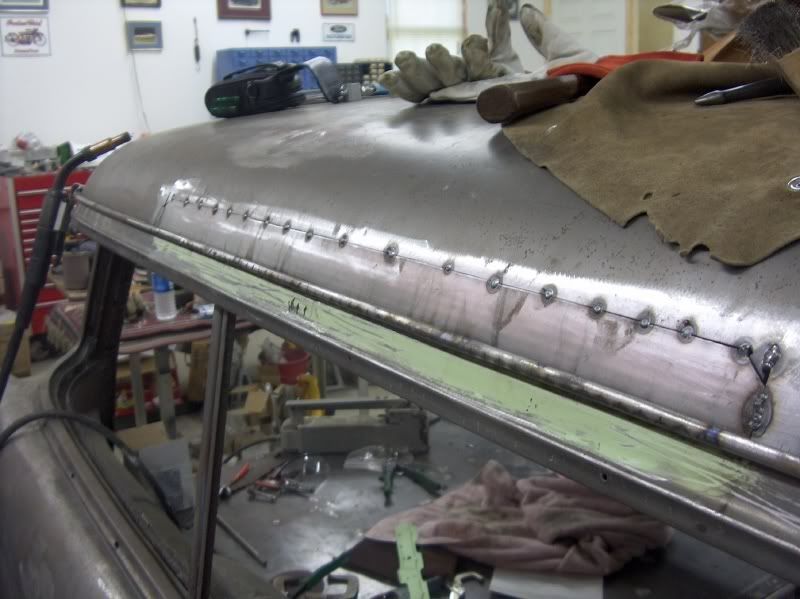
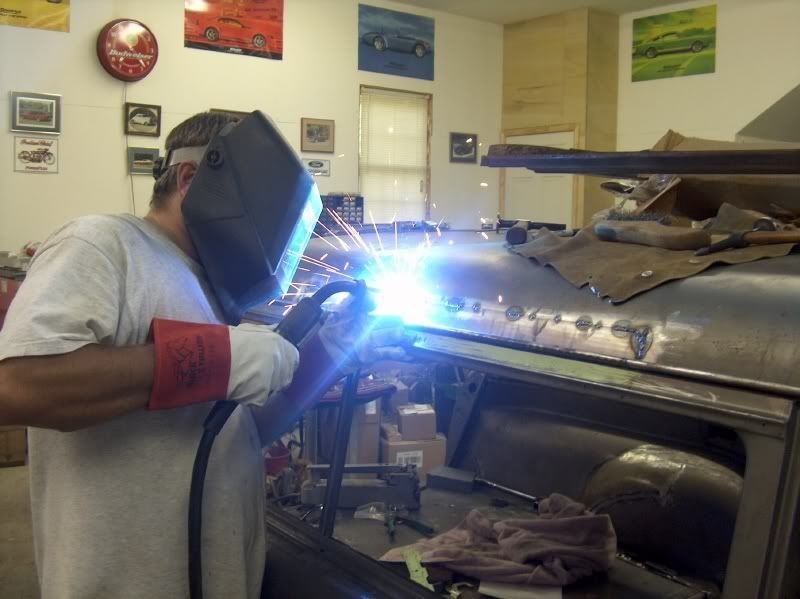
Finally got the rest of the roof structure welded back in the wagon, and the welds dressed. There are a few low spots in the roof repair, so will need to address those at a later time with some hammer welding to minimize any filler.
Using the hindsight 20/20 thing, the opening should have been cut up a bit higher, so the long weld would be more readliy accessible to hammer/dolly. I do have a U shaped dolly that I can use in this instance, but the metal finishing after closing up the "patch" should always be a consideration.


Then to shape up the top one, it will need the extra length to reach past the drip edge:
Then a test fit, this just may work!
Let's see the spot welder in action:
This looks darn near a factory finish!
We got the rest of the spot welds done, and the welder performed beautifully, tips are ready for another roof!
Then we got the mig welder going and started getting the hole closed up.
Finally got the rest of the roof structure welded back in the wagon, and the welds dressed. There are a few low spots in the roof repair, so will need to address those at a later time with some hammer welding to minimize any filler.
Using the hindsight 20/20 thing, the opening should have been cut up a bit higher, so the long weld would be more readliy accessible to hammer/dolly. I do have a U shaped dolly that I can use in this instance, but the metal finishing after closing up the "patch" should always be a consideration.
Thread Starter
|
Junior User
Joined: Jan 2011
Posts: 93
Likes: 0
From: jacksonville fl
thanks for the detail i will be making some patch panels although my plan was to cut off the drip rail anyhow.next question these clamps you are using what are they called and where can i get some

Admom


Joined: Feb 2001
Posts: 9,414
Likes: 201
From: Silver Springs

Awesome repair job and thanks for sharing. 
They are Butt Weld Clamps.
http://www.eastwood.com/intergrip-pa...-set-of-4.html
or
Search results for: 'butt weld clamp'
They are Butt Weld Clamps.
http://www.eastwood.com/intergrip-pa...-set-of-4.html
or
Search results for: 'butt weld clamp'
Posting Guru
Joined: Oct 2009
Posts: 2,066
Likes: 4
From: Rogue River, Oregon
Trending Topics

New User
Joined: Jun 2011
Posts: 8
Likes: 0
From: North East
FTE Stories
Ford Trucks for Ford Truck Enthusiasts

Top 6 Best Deals Available on New Fords & Lincolns Right Now
Brett Foote
This Hennessey Takes the Expedition Tremor's Off-Roading Capability to the Next Level
Verdad Gallardo
Top 10 Fords at 2026 Carlisle Ford Nationals
Joe Kucinski
3 Best / 3 Worst Parts of Modern Ford Ownership
Brett Foote
10 Amazing Upgrades That Solve Common Ford Truck Owner Headaches
Pouria Savadkouei
Every 2026 Ford Engine Explained
Brett Foote
10 Ugly Ford Trucks That We Still Kinda Love
Joe Kucinski
10 Things Every Truck Owner NEEDS (2026 Edition)
Michael S. Palmer
Rezvani's Latest Post-Apocalyptic Monster Is a Ford F-150 Raptor Underneath
Verdad Gallardo


Admom
Joined: Feb 2001
Posts: 9,414
Likes: 201
From: Silver Springs
I'm very curious because I'm getting ready do to some work on my Falcon.
New User
Joined: Jun 2011
Posts: 8
Likes: 0
From: North East
Butt weld clamps
I have heard a cons about using the clamps where they get stuck. The reason I thought about using the these clamps is for my Floor pan replacements, and wheel arches, etc. for lining up. Part of the problem may be in replacement panels being thinner gauge metal than original, as I found out when ordering panels.
Tuned
Joined: Aug 2007
Posts: 459
Likes: 123
From: Maryland
I only use the clamps for fitting up and holding a patch panel in place. When it comes to welding, the clamps get removed as needed (to get them away from the weld area) and the panels allowed to butt tightly together before tacking in place.


 .
.

Thread
Thread Starter
Forum
Replies
Last Post
schino
1980 - 1986 Bullnose F100, F150 & Larger F-Series Trucks
20
Mar 26, 2016 10:14 AM
