Ford F-250: How to Replace Your Side Window
We will show you how to access the gain access, replace the glass, and put it all together in four easy to follow steps.
This article applies to the Ford F-250 and F-350 Super Duty (2005-2014).
If your window is shattered or pretty scratched up you can get hit with a hefty repair bill at a shop. However, if you know how to spin a wrench and don't get frustrated easily, replacing a side window is a task that's not hard to accomplish. I recommend this task for anyone who's even slightly mechanically inclined, has all the proper tools, the patience, and a helper.

Materials and Tools Needed
- Various sized sockets
- 1/4" socket extension
- Packing tape
- Silicon spray
- Shop vacuum
- Flat head screwdriver or trim panel puller
Step 1 - Gain access
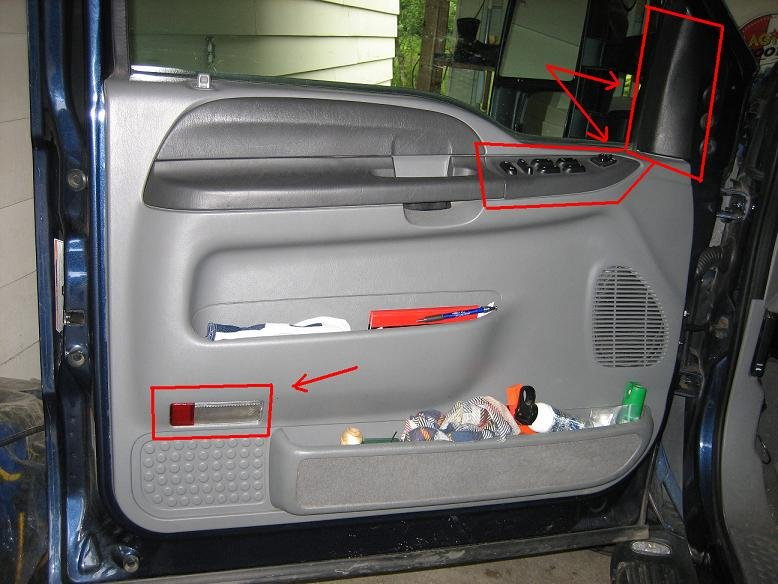
This step is pretty dependent on the truck's year as well as trim level as the connection points vary between these. However, you'll generally find screws that will need to removed in these areas:
- Under the sail panel
- Along the bottom of the door panel
- In the change pocket
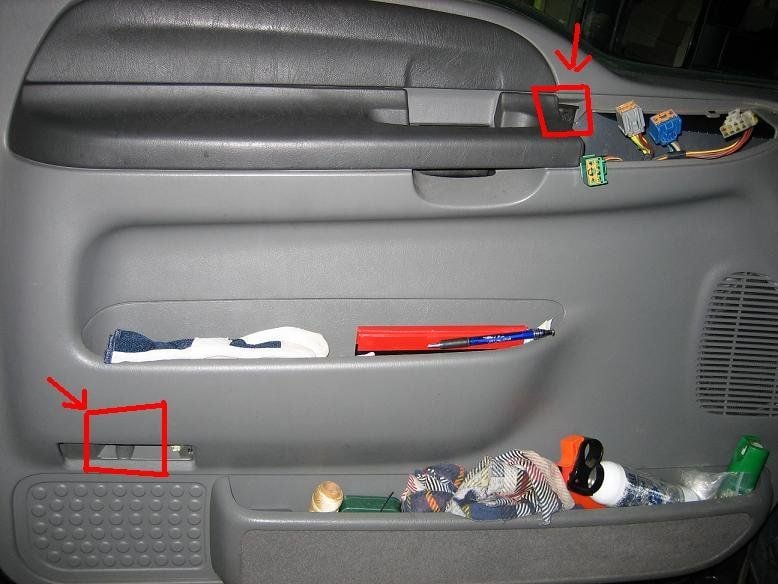
- Behind the door handle or on the door handle
- Under the window controls
When removing the door panel be sure to take your time and disconnect any electrical wires running to it so you don't damage them. If you feel any resistance when trying to take it off, stop and double check that you removed all screws holding it on.
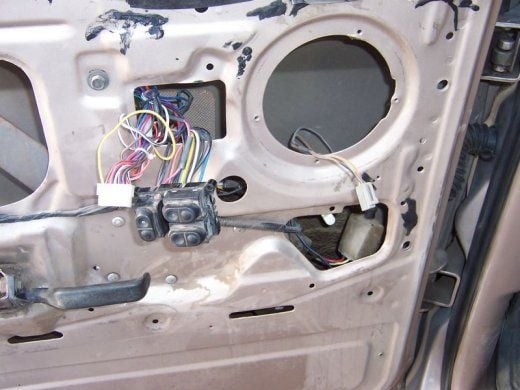
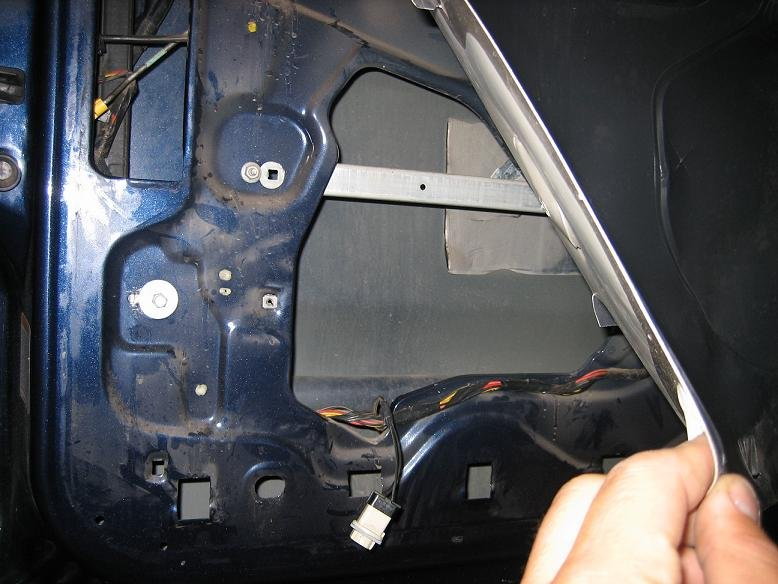
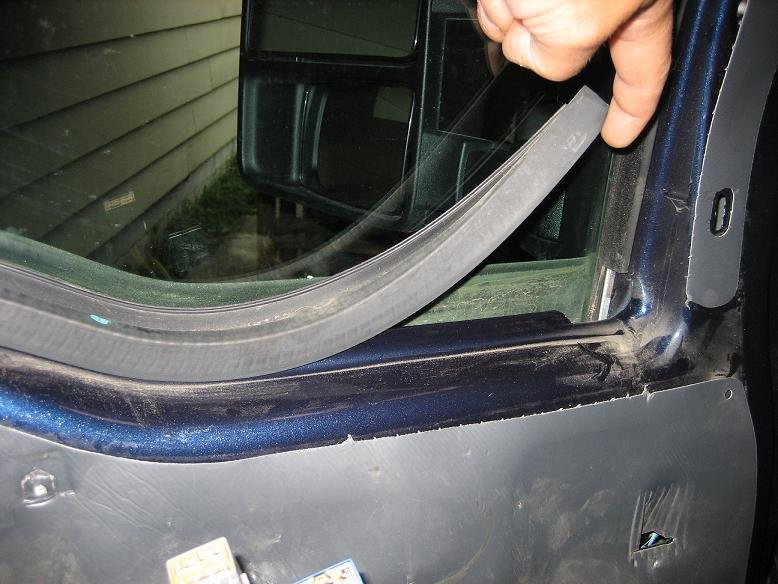
Once the door panel is off, you'll need to remove the door speaker by unbolting it and then unclipping it from the wire harness (see Figure 4). You'll also want to remove the factory water shield plastic that runs along the door panel and the trim that runs along the top of the window (see Figures 5 and 6).
After everything is out of the way, reconnect the window controls and just let it dangle.
Pro Tip
If you are using a flat head screwdriver, wrap the end in painter's or electrical tape to prevent it from damaging your trim.
Step 2 - Remove old window
If your old window is shattered inside the door, you'll have to remove all the big pieces by hand. Wear very thick gloves when doing this and dispose of it properly. Once all the big pieces are out of the way you'll need to use your shop vac to vacuum up all the small pieces. If the shop vac can't fit into certain areas, a ball of packing tape is pretty good at picking up pieces as well. If your window isn't shattered you'll want to put the window up and then run packing tape over the door frame onto the glass on both sides to keep it up.
- Remove the window channel bolts in the red squares, this will allow you to be able to move the glass channel around. See Figure 7.
- If the old glass isn't in the door, use your flat head screwdriver to clean out the glass channel now, otherwise do it when the glass is removed.
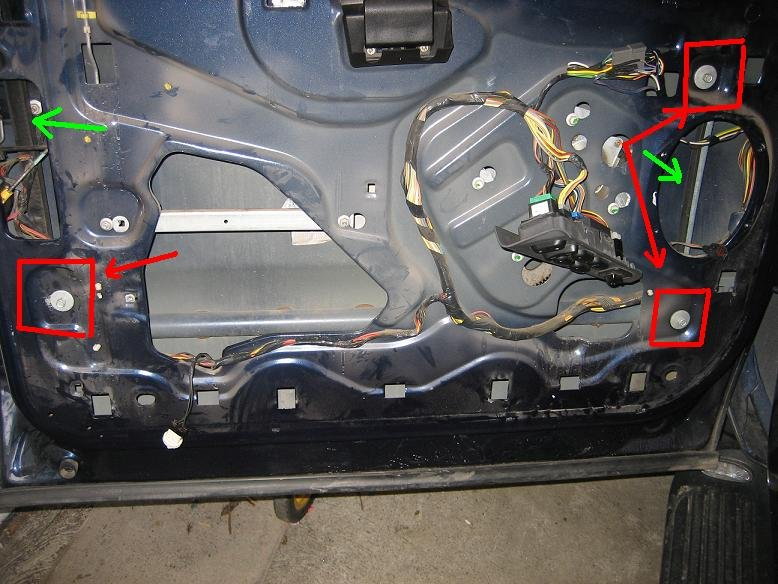
- Remove the bolts in the red squares in Figures 2 and 3, the location may vary slightly depending on the truck. To gain access, you may need to move the window up or down. This will release the window brackets, so be sure your packing tape is tight or you have someone holding the window.
- If your old glass is still in, go to the outside of the door and with some help pull up and out towards the front of the truck to remove the glass.

Step 3 - Install new glass
Some glass will come with brackets, some won't. If you find the glass for relatively the same price with and without them, I suggest getting it with them, it will save you a decent chunk of time doing some trial and error. However if it doesn't have the brackets (as shown in Figure 8) you'll need to reuse the old ones. I suggest loosely attaching the brackets and test fitting before using silicon glue to completely secure them.
- From the outside of the truck, tilt the new glass into the door channel, and slowly slide it down. DO NOT force the glass or you may shatter it. If it feels like it’s stuck, pull it back up and slightly readjust the angle. Have your helper on the inside of the door to help guide it into the regulator channel
- Tighten the two bolts you removed in Figures 2 and 3 in Step 2 to secure the window into place.
- If the glass is tight in the channel, you can use silicone spray to help it slide more freely.
- Using the window controls, test the movement of the window now before re-installing everything else.
Step 4 - Finish installation
This step is pretty straightforward. You'll just need to do the reverse of Step 1 and re-install the door panel. If the water shield has lost its stickiness, a little glue or double stick tape is more than enough to keep it in place. I suggest putting the door lock down as it makes it easier to get the door panel to slide back on.
Featured Video: Door Panel Removal
Related Discussion
- Front Door Glass Replacement - Ford-trucks.com