Ford F-150: How to Replace Your Power Window Motor
Here's how to replace the window motor yourself and save a lot of money on labor costs.
This article applies to the F-150 (2004-2014).
Replacing your door window motor isn’t the easiest thing to accomplish, but with some patience you can do it yourself. With a little precaution, it’s a job that’s pretty hard to mess up; if you know your way around tools, then doing it yourself is recommended.

Materials Needed
- New window motor(s)
- Thin flat head screw driver with some electrical tape around the head
- 5/8” – 3/4” hole saw or drill bits around that size and a pilot hole drill bit
- Socket set and a socket extension
- Magnetic telescoping pole or something similar
- Packing tape
Step 1 – Prepare the truck
- Disconnect the battery or remove the fuse that controls the window motors (see owner’s manual for proper fuse to pull).
- If your window is stuck in the up position, you will need to use the packing tape to secure the window; you don’t want it to slip on the track while changing the motor.
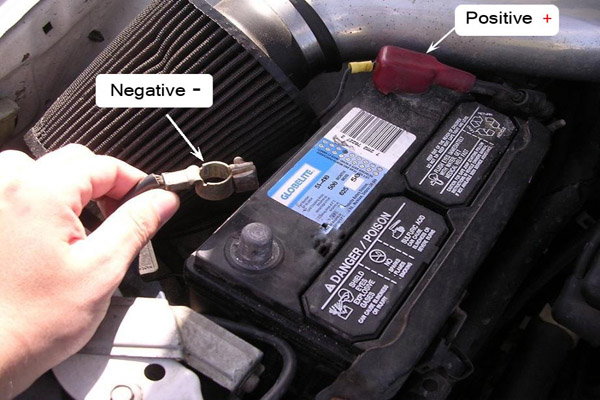
Figure 1. Disconnecting the battery is one option. 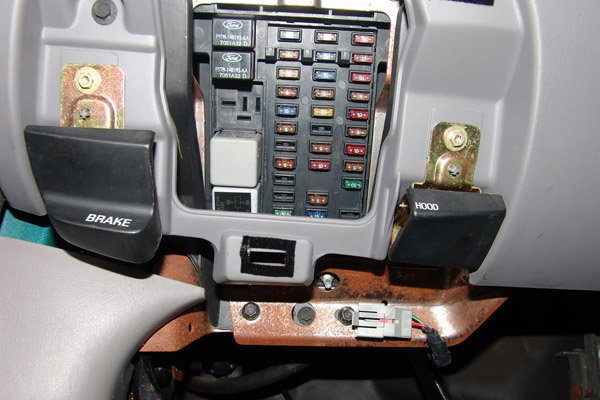
Figure 2. Fuse box in an F-150.
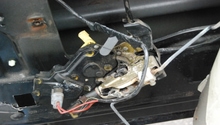
Step 2 – Remove trim panels
These steps are dependent on truck year and trim level, so some may not apply or will vary slightly:
- Make sure to have electrical tape wrapped around the end of the flat head; this will help prevent it from scratching the door trim.
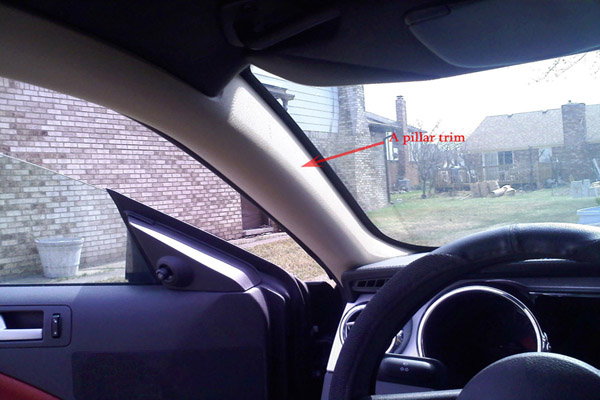
- Remove the upper A-pillar trim on the door; you can use your flat head to pry it loose if needed, then just pull back and it will un-clip itself.
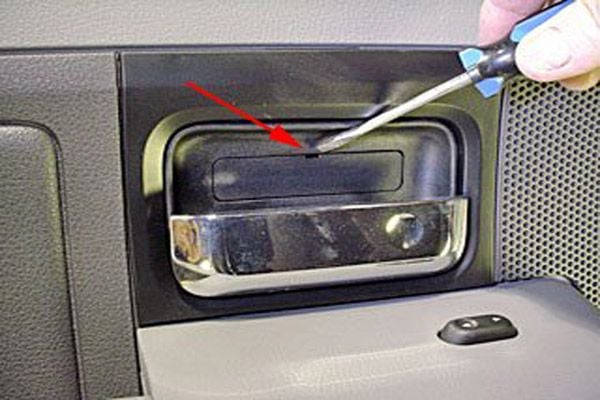
- Pull the door handle towards you, and pry up the plastic square behind it using your flat head. Alternatively, you may need to remove the plastic square in the change pocket/grab handle.
- Remove the 8mm bolt.
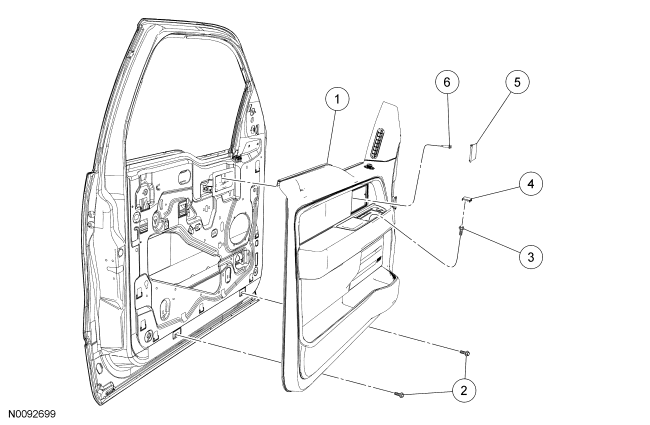
- Remove the two bolts on the bottom of the door panel (Figure 3).
- Remove the door handle by unclipping it from the door panel on the rear side of the panel, then slide it through the panel.
- Un-clip any wiring harnesses from the switch panel.
- Grabbing the entire door panel, slide it up and then pull it off, but still support it.
- Make sure nothing else is attaching the door panel to the truck, then set it to the side.
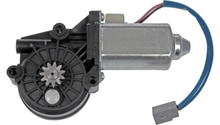
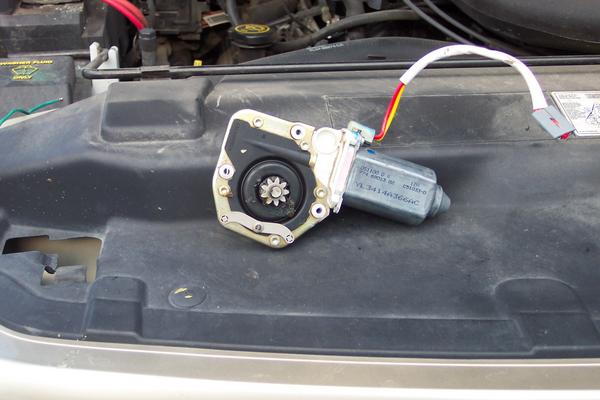
Step 3 – Remove window motor
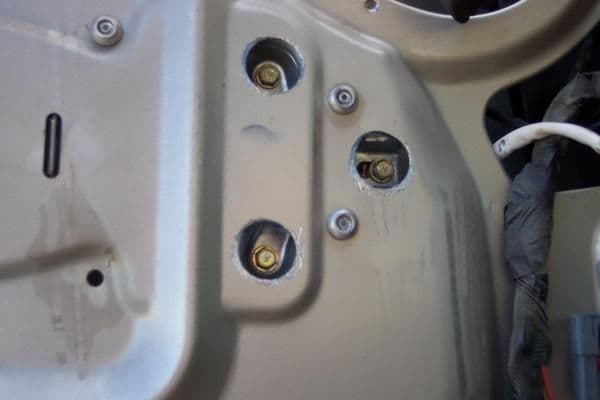
- Locate the 2-3 dimples in the upper corner towards the mirror on the inner door skin.
- Drill a pilot hole in the center of each dimple, taking care not to push the drill bit too far in and damage anything.
- Using your hole saw or larger drill bit, drill a hole big enough to fit a 8mm socket through. Use the pilot hole as a guide.
- Using the telescoping magnet, try to remove any metal shavings that fell down into the door.
- Remove the three 8mm bolts holding the motor in place.
- Un-clip the wiring harness from the motor.
- On older trucks you may need to remove the door speaker as well to be able to fit your hand in there to grab the motor.
- Grabbing the back of the motor, rotate it clockwise towards the door lock.
- Once the gears release, pull it towards the outside door skin and then remove it.
Step 4 – Re-install
Install is the reverse procedure of the previous steps:
- Line up motor and then rotate counter-clockwise to lock into place.
- Re-install the three 8mm bolts.
- Re-install door panel following the panel removal procedure in reverse, taking care to make sure you line up the door lock into the hole.
- Re-install the upper a-pillar trim.
- Reconnect the battery or the fuse.
Related Discussion
- Power Window Motor Repair - Ford-Trucks.com