radiator support hardware
#1
it's been a while since disassembly -- do the springs go between the top of the frame and underneath the radiator saddle? carriage bolts from the top?
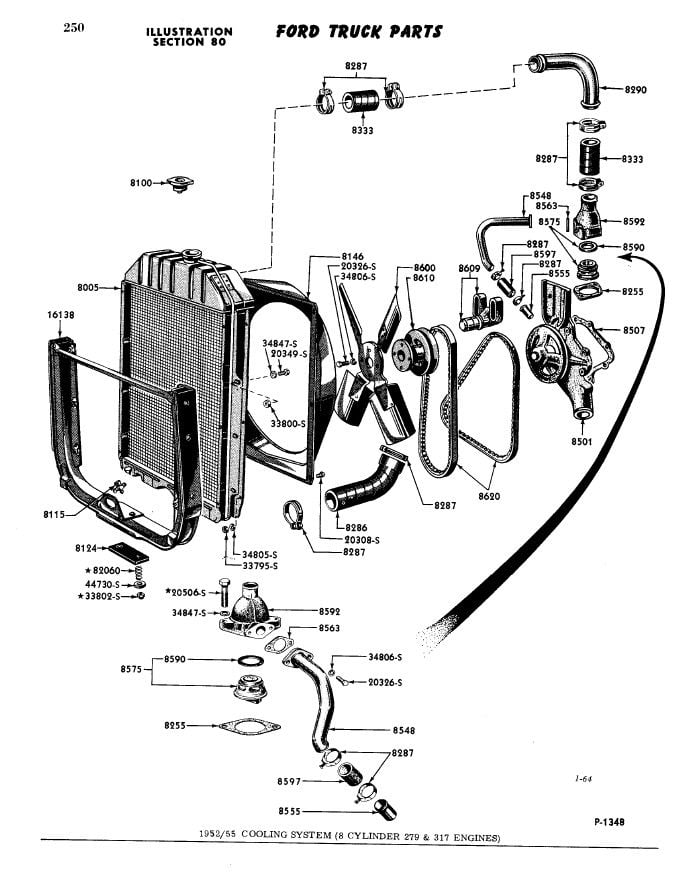
trying to find a diagram online with no luck, but did see a "radiator support pad" listed, which i don't think i have (not sure where it would go?).
'52 F3. thanks in advance.
trying to find a diagram online with no luck, but did see a "radiator support pad" listed, which i don't think i have (not sure where it would go?).
'52 F3. thanks in advance.
#2
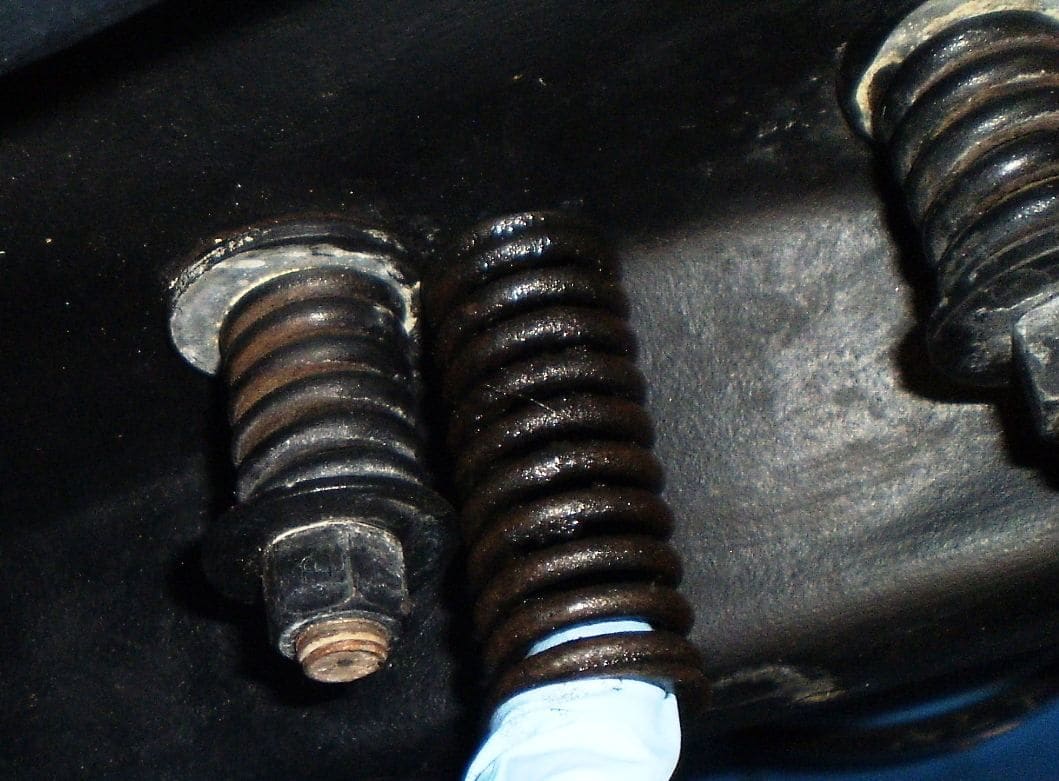
The pad goes between the radiator support and the frame crossmember. The carriage bolts go in from the top and the springs go on first from the bottom followed by the washers and nuts. The idea is basically to have the radiator support and its associated weight carried by the frame, but the springs underneath will allow some flex and movement in the frame and chassis over rough roads without tweaking the body. The frames in these trucks are an integral and active part of the suspension and were intended to flex and twist a certain amount.
#3
#5
#6
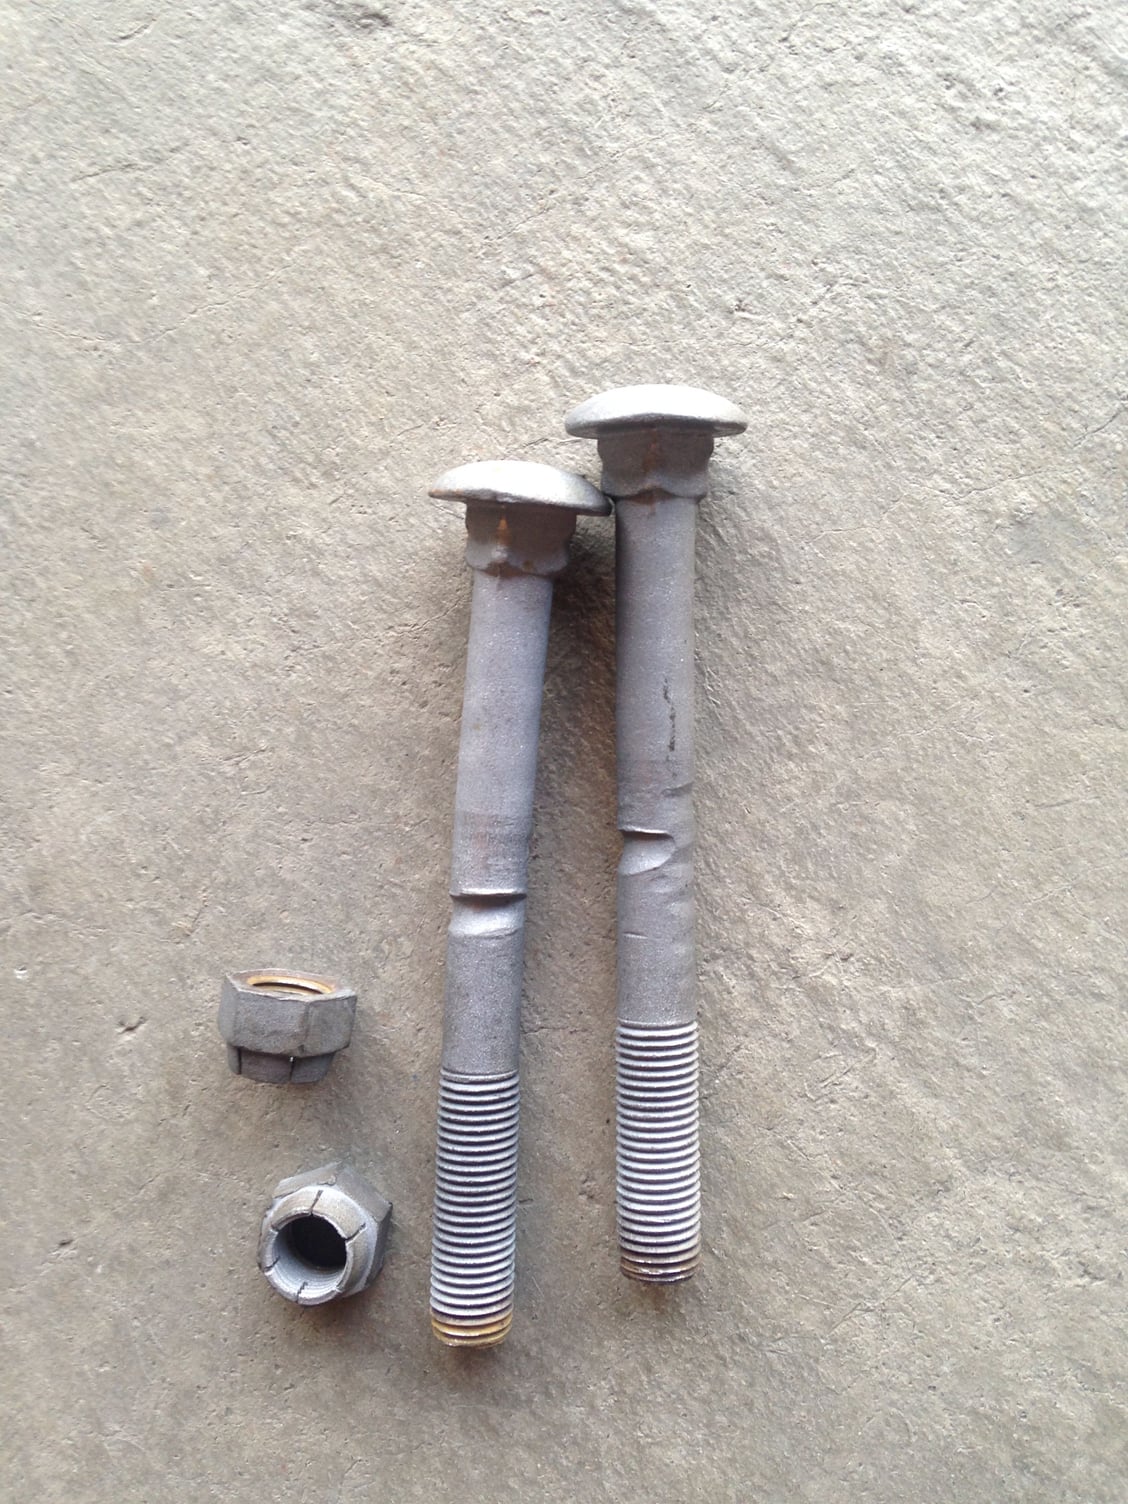
any recollection how much the springs compressed (a little or a lot)? my original bolts were tweaked, so i'm using standard carriage bolts/nuts with lock washers.
#7
If you replaced them with the same length bolts then you will need to drill a hole in them for a cotter key so they will not come loose. Hopefully you kept the castellated nuts but if not the just tighten until you can see the hole that you drilled (maybe ¼" from end) so you can get the cotter key in. All the front sheet metal is attached to that radiator mount so it needs to flex slightly as the frame flexes or bad things will happen to your bodywork upstream. Your cab is on rubber mounts so it flexes. If your fenders do not flex . . . well you can imagine the consequences. Paint cracks will be your first indicator.
Trending Topics
#8
If you replaced them with the same length bolts then you will need to drill a hole in them for a cotter key so they will not come loose. Hopefully you kept the castellated nuts but if not the just tighten until you can see the hole that you drilled (maybe ¼" from end) so you can get the cotter key in. All the front sheet metal is attached to that radiator mount so it needs to flex slightly as the frame flexes or bad things will happen to your bodywork upstream. Your cab is on rubber mounts so it flexes. If your fenders do not flex . . . well you can imagine the consequences. Paint cracks will be your first indicator.

#9
was planning to just double-nut.
it was hard enough finding 7/16" carriage bolts (non-standard size)-- no luck at ace hardware, lowes, home depot, etc. fastenal and grainger could special order them for me, but in packs of 20. finally lucked out yesterday at an industrial specialty fastener place in denver -- best of all, the guy just gave them to me.
originals are also actually 4 1/4" long, whereas replacements available in either 4 or 4 1/2" (so i erred on the side of going longer).
the old bolts are bent, but i suppose i could set it all back up and get a sense of how much the spring is compressed once the cotter hole is clear.
it was hard enough finding 7/16" carriage bolts (non-standard size)-- no luck at ace hardware, lowes, home depot, etc. fastenal and grainger could special order them for me, but in packs of 20. finally lucked out yesterday at an industrial specialty fastener place in denver -- best of all, the guy just gave them to me.

originals are also actually 4 1/4" long, whereas replacements available in either 4 or 4 1/2" (so i erred on the side of going longer).
the old bolts are bent, but i suppose i could set it all back up and get a sense of how much the spring is compressed once the cotter hole is clear.
#10
was planning to just double-nut.
it was hard enough finding 7/16" carriage bolts (non-standard size)-- no luck at ace hardware, lowes, home depot, etc. fastenal and grainger could special order them for me, but in packs of 20. finally lucked out yesterday at an industrial specialty fastener place in denver -- best of all, the guy just gave them to me.
originals are also actually 4 1/4" long, whereas replacements available in either 4 or 4 1/2" (so i erred on the side of going longer).
the old bolts are bent, but i suppose i could set it all back up and get a sense of how much the spring is compressed once the cotter hole is clear.
it was hard enough finding 7/16" carriage bolts (non-standard size)-- no luck at ace hardware, lowes, home depot, etc. fastenal and grainger could special order them for me, but in packs of 20. finally lucked out yesterday at an industrial specialty fastener place in denver -- best of all, the guy just gave them to me.

originals are also actually 4 1/4" long, whereas replacements available in either 4 or 4 1/2" (so i erred on the side of going longer).
the old bolts are bent, but i suppose i could set it all back up and get a sense of how much the spring is compressed once the cotter hole is clear.
Just adjust the nut(s) up to match the spot on the original bolt.
#12
#13
It looks like you could reuse those nuts. The difference may be '50 vs '52 but it could be assembly plant to plant difference. Even today plants sometimes run out of "just in time" parts so they do a TSO (temporary substitution order) approved by engineering which lets them buy parts locally in order to keep the assembly line moving. Whatever solution you use those nuts just need some sort of positive lock. Based upon the witness marks on those bolts it is obvious that there is a lot of vibration in that area.
Also the rust marks on the bottom should give you a guide to how much those springs need to be compressed.
Also the rust marks on the bottom should give you a guide to how much those springs need to be compressed.
#14
The evidence on the original bolts shows that there is significant movement in that area, thanks for the picture. There is a reason for correct installation. but I was planning something different, every time I come on here I learn something.
#15
Thread
Thread Starter
Forum
Replies
Last Post
Marauder2004
1948 - 1956 F1, F100 & Larger F-Series Trucks
6
01-13-2019 10:57 AM
kh0432
1980 - 1986 Bullnose F100, F150 & Larger F-Series Trucks
7
08-23-2015 07:35 PM
Tyler S
1948 - 1956 F1, F100 & Larger F-Series Trucks
10
08-06-2013 07:52 PM
aldrowsboy
1948 - 1956 F1, F100 & Larger F-Series Trucks
11
05-16-2013 08:49 PM


