Pics of how you ran your hard Brake lines..
#1
 01-24-2014, 02:59 PM


Join Date: May 2013
Posts: 235
Likes: 0
Received 0 Likes
on
0 Posts
#2
01-24-2014, 03:50 PM
Elder User
Join Date: Feb 2012
Location: Central Oregon
Posts: 948
Likes: 0
Received 0 Likes
on
0 Posts
What are you looking for, or just all of it? I had never done them either until this truck. I made a bracket for the MC and booster, then went to NAPA and started buying lines (precut with fittings installed). Here is the MC with the residual pressure valve and proportioning valve for the rear. If you need a basic diagram, Speedway Motors has a good one showing what components you need.
 https://static.speedwaymotors.com/RS/cmr/TechPics/street-rod-brake-system.jpg

I just worked my way to the back, and then the front. It was fairly straightfroward, with a couple of caveats. I bought a basic bender and it seemed to work fine, it just took some practice to get the bends going in the right direction. Some wire bent as a pattern is a good idea too.

The main problem I had was that I couldn't flare a line to save my life. Try as I might, they would flare oblong/off-center. I tried three different tools and was unsuccessful. I took the three lines that I needed flared to a local shop and they did them for me (that was the only thing, short of machine shop work, that I didn't do myself on the entire truck (ticked me off)). So, I was able to plumb the entire truck with precut lines with the exception of the three that I had to cut to length for 3 of the 4 wheels. They are not the prettiest, but they work.

The other issue I ran into is that once done, I applied pressure and every single joint leaked. After some prodigious tightening, everything worked fine. It is just one of those jobs you have to jump into and get done.
Let me know if you need other pics and I can try to get them. It is good to finally get to drive it, BTW. Keep at it and you will be there in no time.
Dave

#3
01-24-2014, 05:32 PM


Join Date: Jul 1997
Location: Beautiful Hueytown Alabam
Posts: 5,668
Received 727 Likes
on
259 Posts
Hey Don...
my pics are toward the bottom of the article
http://jniolon.classicpickup.com/plu...iscbrakes.html
later
John
my pics are toward the bottom of the article
http://jniolon.classicpickup.com/plu...iscbrakes.html
later
John
#5
01-24-2014, 07:34 PM

There are pictures and descriptions on my build page:
https://www.ford-trucks.com/forums/1...b-flat-v8.html
Posts 19 and 20 are specifically about brakes, but post 42 has some views of the brake lines. (you can see how crooked I got the line that runs under the bell housing. )
)
I don't have the booster or valving because I kept the drum brakes all around, but you only asked about plumbing. Maybe the pics will help.
https://www.ford-trucks.com/forums/1...b-flat-v8.html
Posts 19 and 20 are specifically about brakes, but post 42 has some views of the brake lines. (you can see how crooked I got the line that runs under the bell housing.
)I don't have the booster or valving because I kept the drum brakes all around, but you only asked about plumbing. Maybe the pics will help.
#6
01-27-2014, 10:32 AM
Join Date: May 2013
Posts: 235
Likes: 0
Received 0 Likes
on
0 Posts
#7
01-27-2014, 11:41 AM
Whether or not you need them depends on the types of brakes you are using front and rear. I supposedly don't need them because I'm using the original drum brakes all the way around. At least that's how the dual master cylinder was advertised.
If you are using disk/disk, or disk/drum, you will need the residual check valves and proportioning valve.
Trending Topics
#8
01-27-2014, 01:23 PM
Lead Driver
On my 55, I bought straight lines with the ends on them and just cut and re-flared where necessary.
Here is one picture.
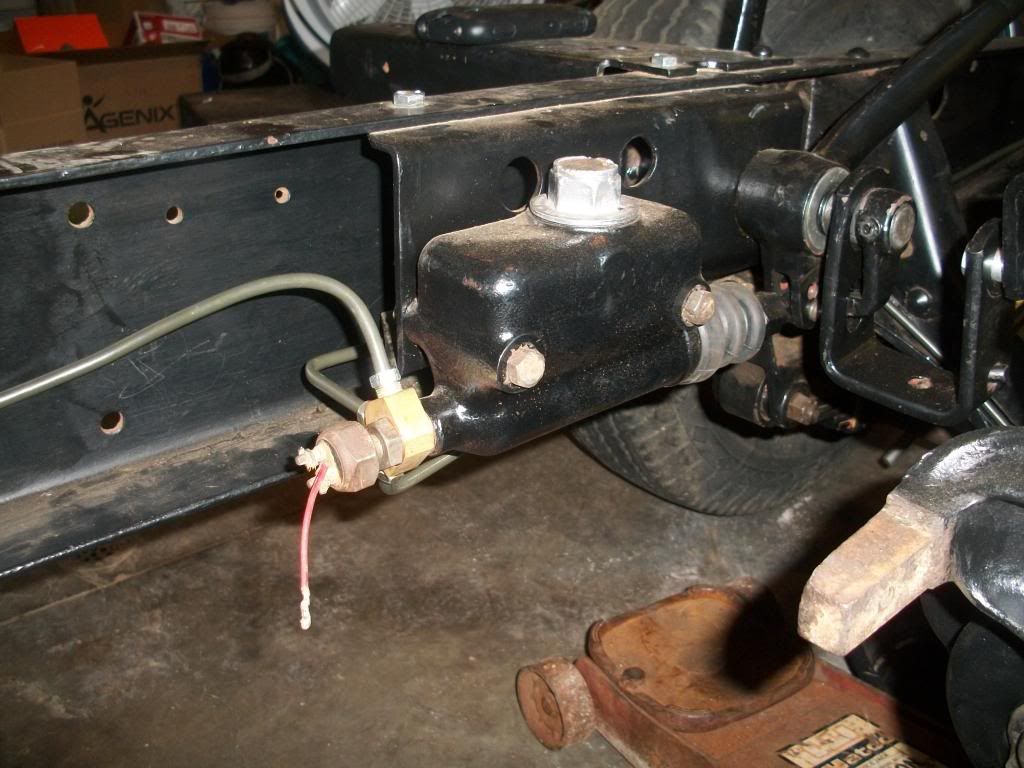
My truck is still just the frame with no body. I can take any pictures you like. Shoot, I'm sure I have a bunch just not on Photobucket yet.
Oh, I filled the lines with sand and that made bending so much easier. I also used the trick of using wire for a pattern in some places.
Here is one picture.
My truck is still just the frame with no body. I can take any pictures you like. Shoot, I'm sure I have a bunch just not on Photobucket yet.
Oh, I filled the lines with sand and that made bending so much easier. I also used the trick of using wire for a pattern in some places.

Thread
Thread Starter
Forum
Replies
Last Post
wyazel1
1973 - 1979 F-100 & Larger F-Series Trucks
10
09-06-2014 05:58 PM
fox007
1973 - 1979 F-100 & Larger F-Series Trucks
9
11-25-2013 11:06 PM