Ford F-150/F-250: How to Align Your Tires
It's so easy to get an alignment from a shop that people rarely do it themselves. If you don't feel like spending money on something you can do yourself, then read on. This guide only covers adjusting front wheel alignment for the F-150 and F-250 and Super Duties.
Maintaining proper wheel alignment is critical to ensuring your F-150 steers straight and preventing excessive tire wear. While a qualified mechanic can do the job for you, a patient do-it-yourselfer can do a basic front wheel alignment at home. Be aware though, that this job can get complicated depending on your truck's design and condition.

Materials Needed
- Fishing line
- Four vinyl floor tiles
- Light grease
- Four jack stands
- Precision ruler
- Hand wrenches
Step 1 - Grease up
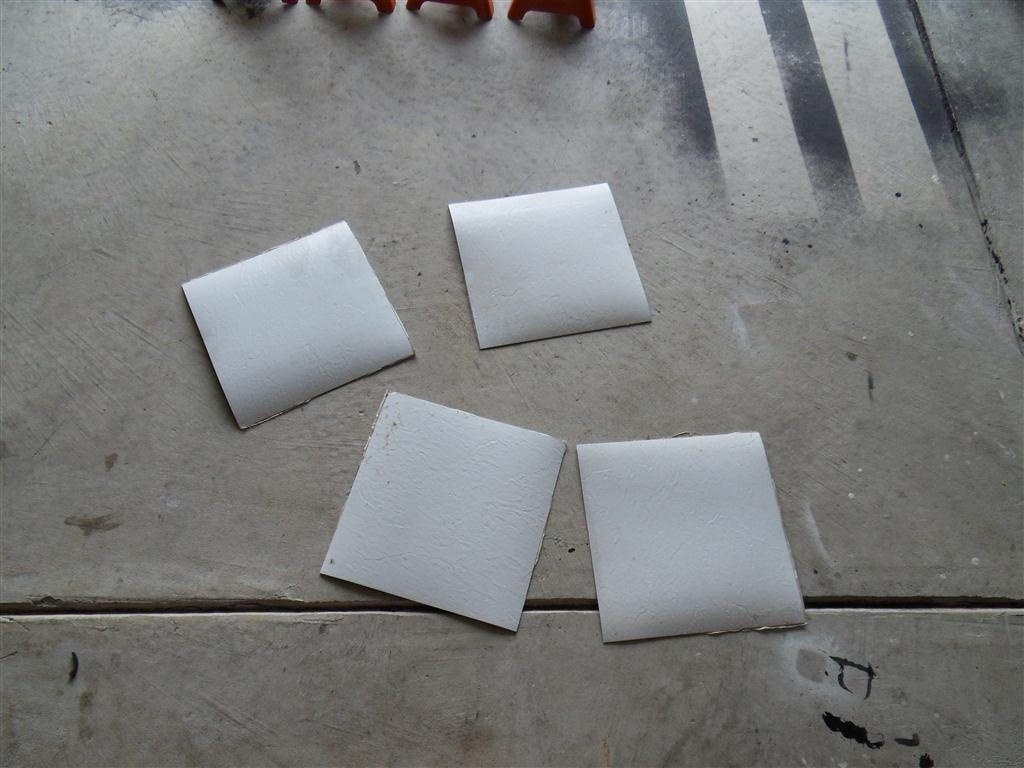
You'll need to get four vinyl tiles. Make sure they're large enough to completely fit under the contact patch of your tires. 12"x12" is a good place to start for stock wheels, but it's a better idea to just go outside measure that yourself. There's not harm in using oversized tiles anyway.
Smear grease on the face of one tile, then place the second tile face down on the first tile. Repeat the process with the other two tiles. These will be "swivels" that allow you to adjust the toe on your front suspension while the truck is on the ground.
Step 2 - Measure the distance
Measure the distance between the front wheels to find your track width. Place the swivels that distance apart from each other, making sure the tires will rest completely on the swivels.
Step 3 - Drive onto greased tiles
Give yourself a bit of space before driving onto the swivels to make sure that your steering wheel is straight. If your wheels and steering wheel isn't absolutely dead on straight, your alignment will be off.

Step 4 - Tie a fishing line
Place two jack stands on one side of the truck and then tie a length of fishing line tightly between the jack stands. Repeat on the other side.
-
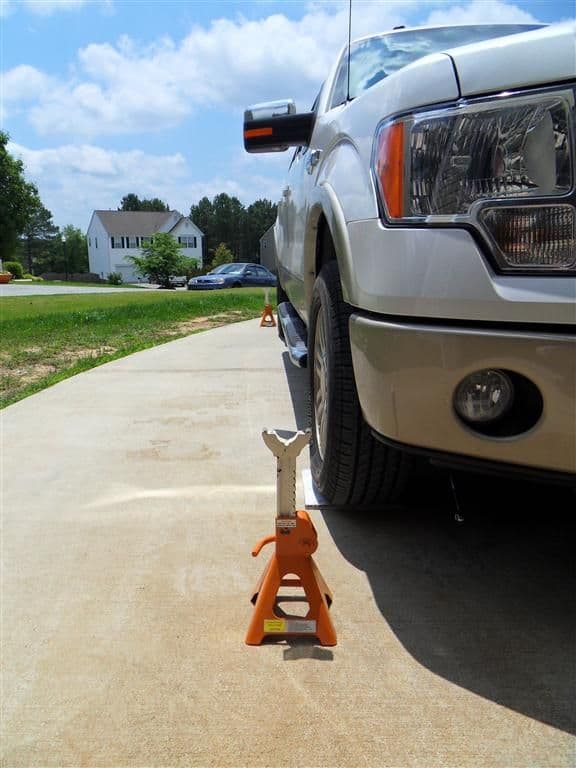
Figure 4. Fishing line tied to jack stands -
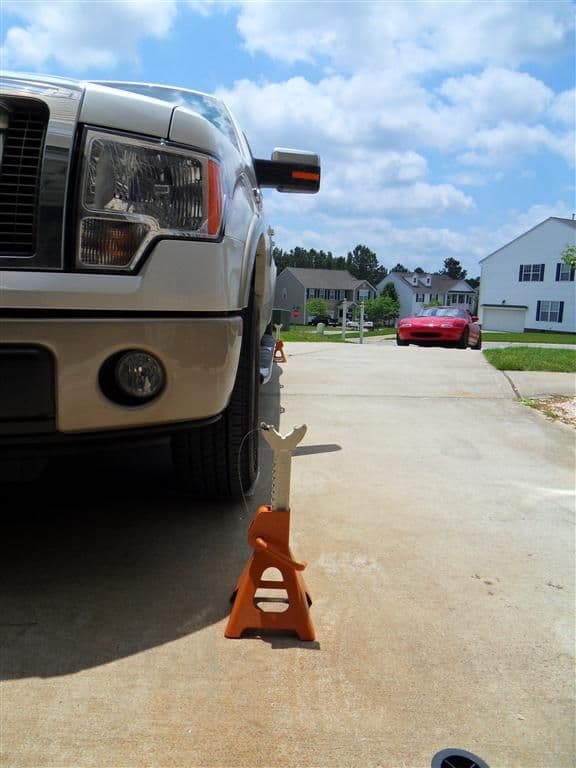
Figure 5. Fishing line tied to jack stands
Step 5 - Ensure even distance
Make sure the wheel hubs are equal distance from the lines. You want the lines to be parallel to the frame. The distance of the line from the hubs is arbitrary so long as it's even. in this example, we're using using 100mm as our standard. This step assumes the front and rear track width match and the frame is straight.
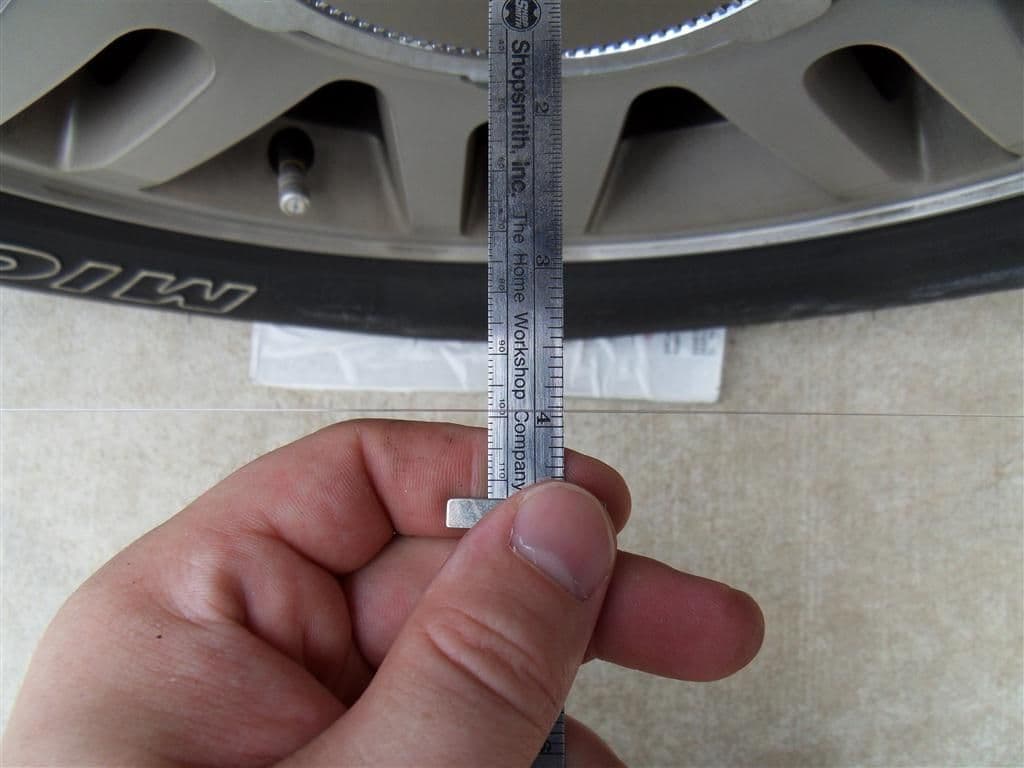
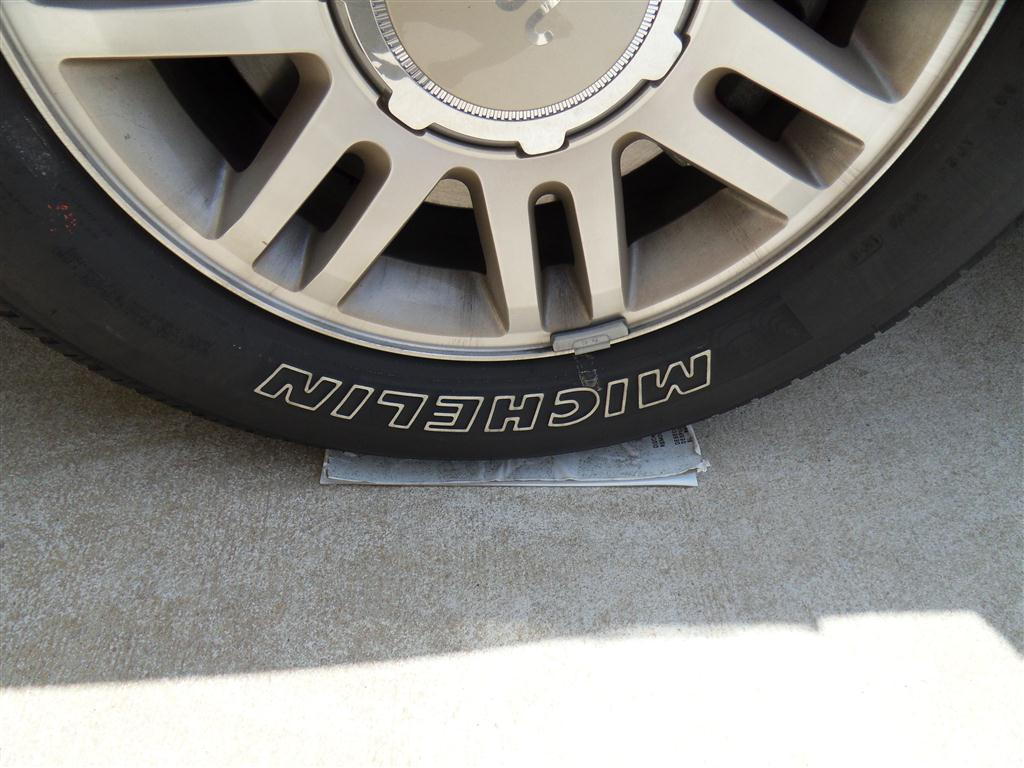
Step 6 - Measure the toe
From one side, measure the distance of the edges of the front wheel to the line. If the difference between the front and read edges is negative, you have a toe-in condition. If the difference between the front and rear edges is positive, you have a toe-out condition. In this example the front edge is 104mm and the rear edge is 108mm from the line. The wheel has toe in, or is pointed inward when viewed from above. The wheel has toe out if the reverse is true.
-
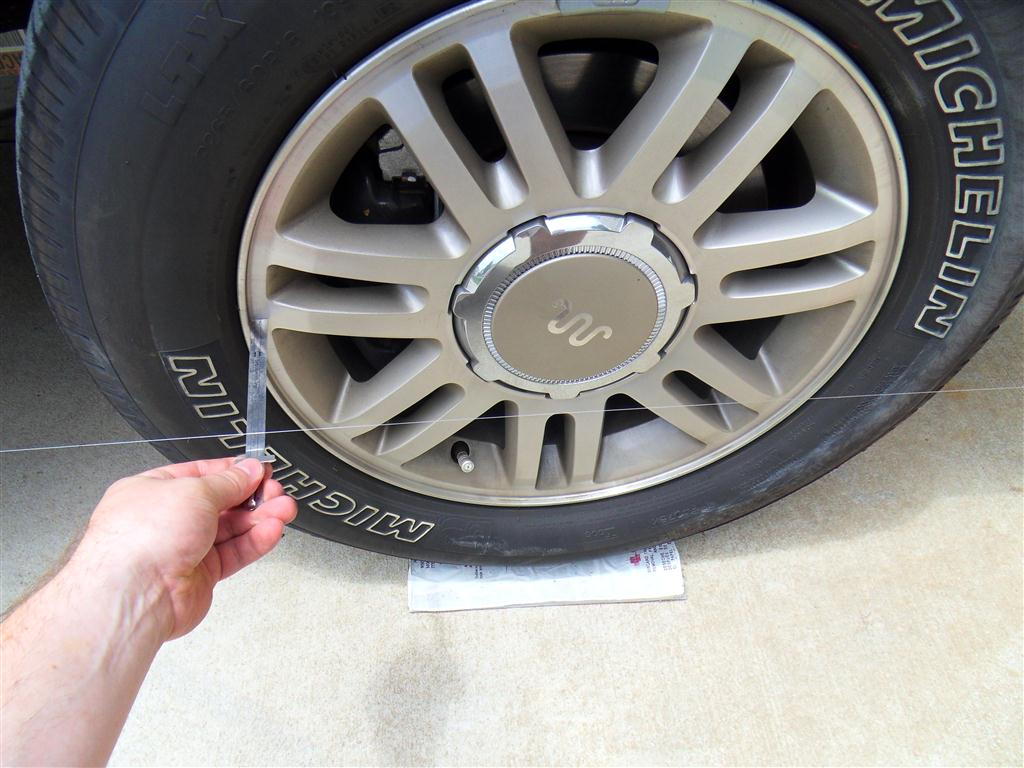
Figure 7. The rear of this wheel measured 108mm -
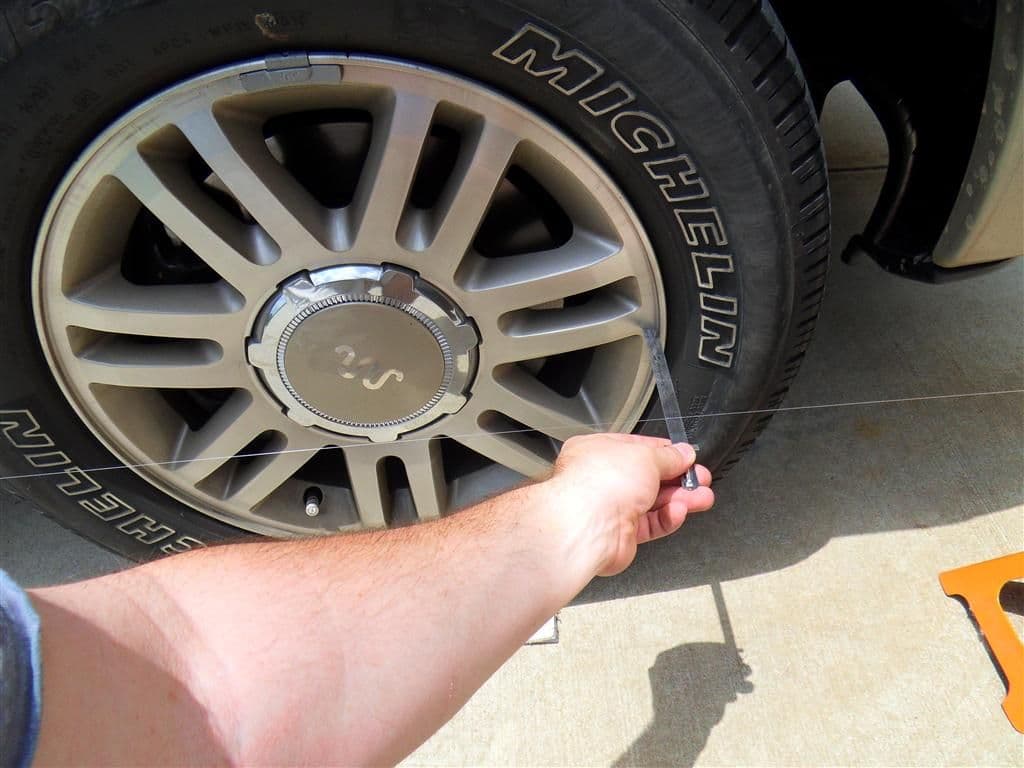
figure 8. The front of this wheel measure 104mm
Step 7 - Compare measurement
Compare your measurements with factory specifications. The spec for 2010 F-150's is .02° of toe-in. The manual allows for some variance and, if you want to be safe, you could just zero out the front and rears. If realignment is necessary, locate the tie rods that connect each wheel to the steering assembly.
Step 8 - Adjust the tie-rod
For the Ford F-150 (2004+)
Position your wrenches on the tie-rod like they are in the picture. The wrench closest to the wheel is 21mm and the other one is 15mm and fits directly on the tie rod. The longer the wrench is, the more leverage you'll have and the easier it'll be to do this.
Loosen the nut closest to the wheel hub. Now, you can adjust the toe of your tire by twisting the tie-rod. Clockwise turns pull the toe in. Counterclockwise turns pushes the toe out. Generally, 1/6 of a turn is about 2mm in either direction.
Tighten the retaining nut when you're done adjusting your toe.
-
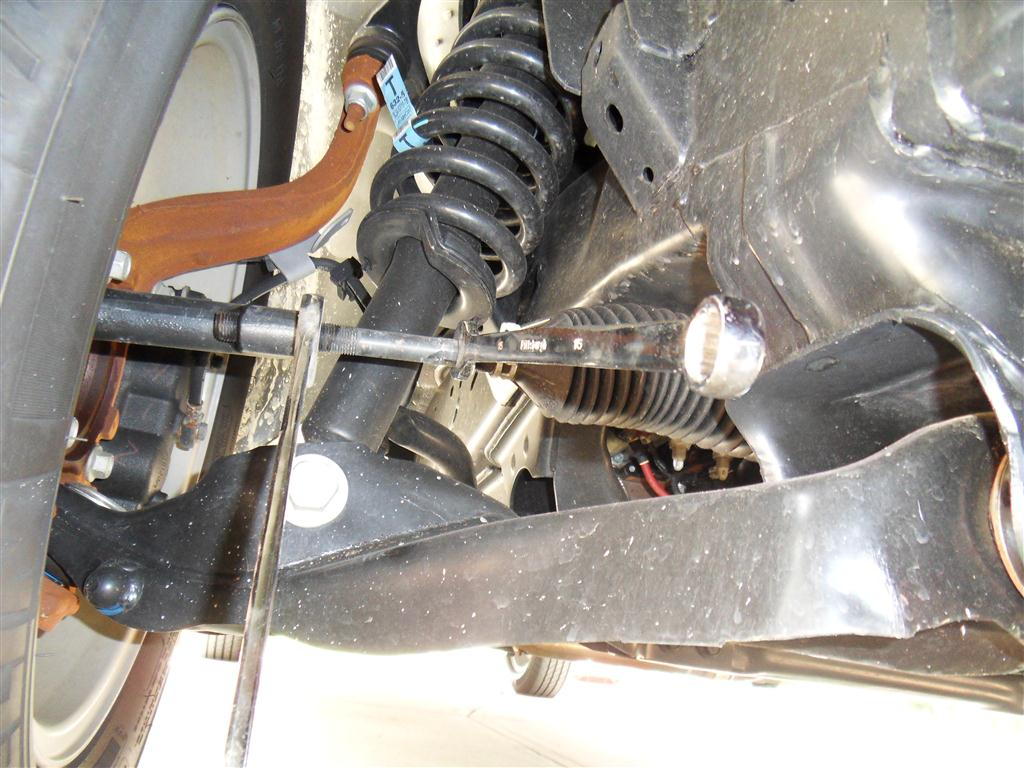
Figure 9. The tie-rod is a threaded rod that connects to the wheel spindle. This is what turns your truck. -
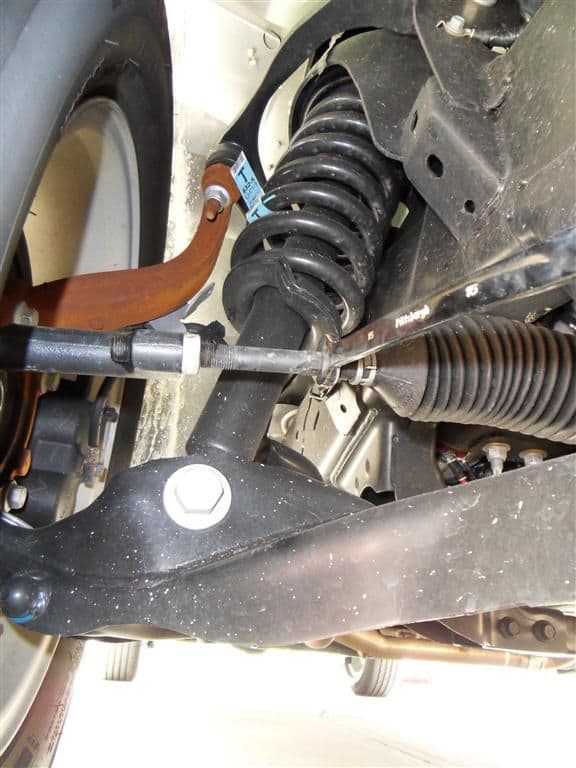
Figure 10. Twist the tie rod while the retaining nut is loose in order to adjust toe.
For the F-250 Super Duty (2005+)
To adjust the toe in your Super Duty, first loosen the tie-rod adjust sleeve nuts. Then rotate the adjusting sleeve to alter your truck's toe. When finished, retighten the adjusting sleeve nuts. The right-hand adjusting sleeve clamp's opening should be positioned downward (within 45 degrees of vertical).
-
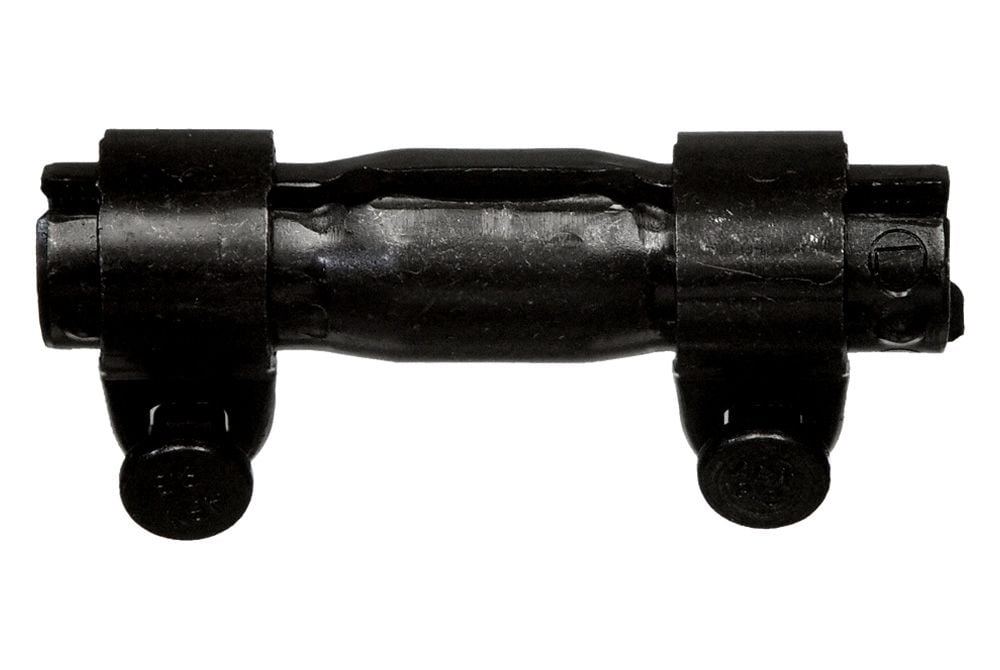
Figure 11. The tie-rod sleeve adjuster looks like this and sits on the tie-rod under your F-250 or other Super Duty. -
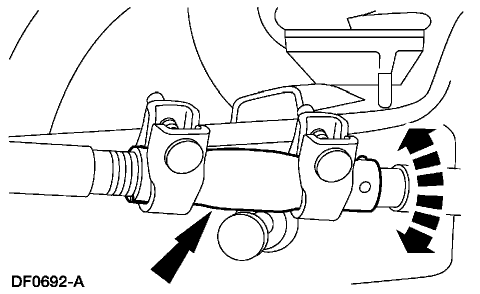
Figure 12. Twist the tie-rod while the sleeve adjuster is loose to adjust toe.
Step 9 - Finishing up
When you're done, repeat the process on the other side. It's important that both sides are aligned to the same spec.
Take the car for a quick test drive when you're finished to make sure it's tracking correctly. If your truck pulls to one side, restart the process or take it to a shop.
Related Discussion and Site
- How-To DIY Alignment - F150online.com
- Toe-Adjustment Diagram - AllData.com