F-150/F-250: How to Find and Repair a Puncture
Typically repairing a tire puncture is something that can easily be done at a shop, but if you're prepared, you can do it yourself. Follow our guide to learn how to and when to repair a punctured tire.
The reality of having a punctured tire is an experience most F-150 and F-250 owners will face. You can use a plug, patch the tire or have an auto repair shop fix it depending on the situation. Reviewing the amount of tire damage, finding the punctured area and sealing it by using the right method is key. Most experts believe a plug is a temporary fix. Plugging a tire doesn't require you to remove the tire from the rim, so you don't know if there's been other damage inside it. Patching a tire requires you to remove the tire from the rim. It's more time consuming, but the process also fixes the tire from the inside out. Most shops will both plug and patch punctured tire. For large holes, the best option is to replace the wheel with a new tire to ensure safety.

Materials Needed
- Tire Plug Kit
- Truck jack
- Jack stands
- Wrench
- Pliers
If you spend a lot of time on the road, buying a repair kit at a cost of $35 or less can save you money if you have tire issues again in the future. The cost of bringing the tire to an auto shop can be up to $20. Using a plug requires less time and takes a few minutes to complete. Depending on your experience, fixing a puncture can take up to 20 minutes to finish. Necessary tools including a wrench, a car jack, and pliers are helpful.
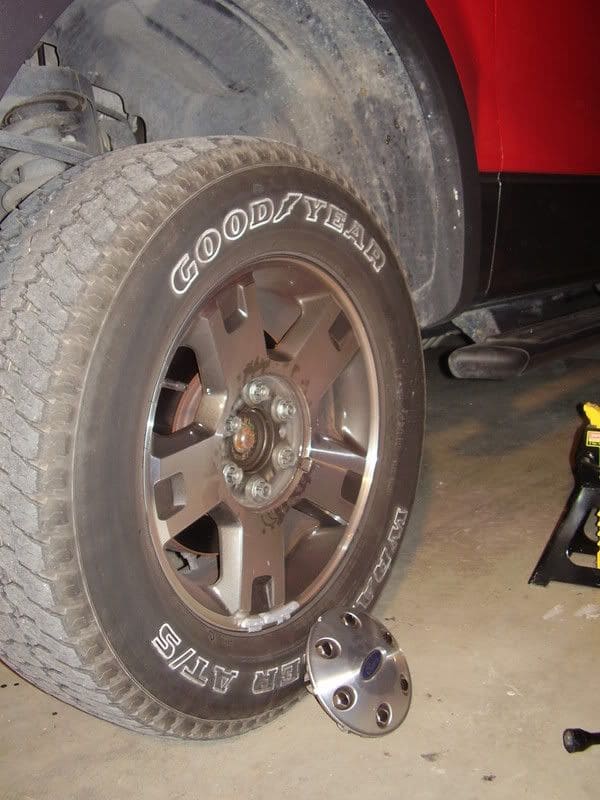
Step 1 – Remove Wheel
Use a wrench to loosen the lug nuts. Lift the car upward using a jack. Remove the lug nuts to take the wheel off of the hub.
Step 2 – Locate leak
Figuring out why a tire is losing air can be difficult. Obvious punctures (like screws) are easy to find. Remove these larger obstructions with pliers.
A tire that's leaking air from a small hole will me more difficult to pinpoint. The easy way to spray the tire with soapy water, fill it with air, and watch for bubbles forming on the surface. Mark the source of the bubbles.
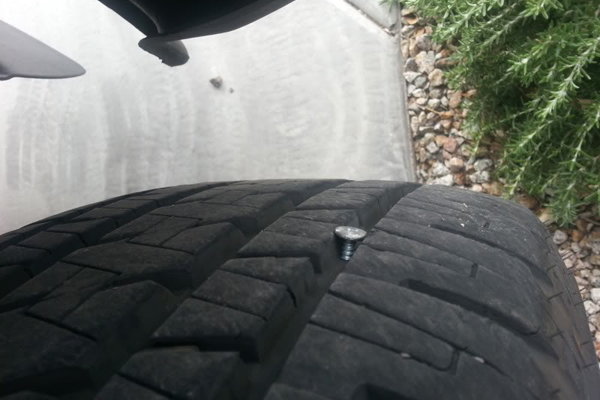
Figure 2. Safely remove obvious punctures with pliers or whatever tool will work. 
Figure 3. Spray tire with soapy water to find punctures to small to see.
Step 3 – Twist and plug
Prepare the hole for plugging by twisting the t-handle into the puncture. Then apply sealant to your plug and twist it into the tire.

Figure 4. Clean out the puncture with the abrasive T handle. Leave it in the tire while you prepare the patch. 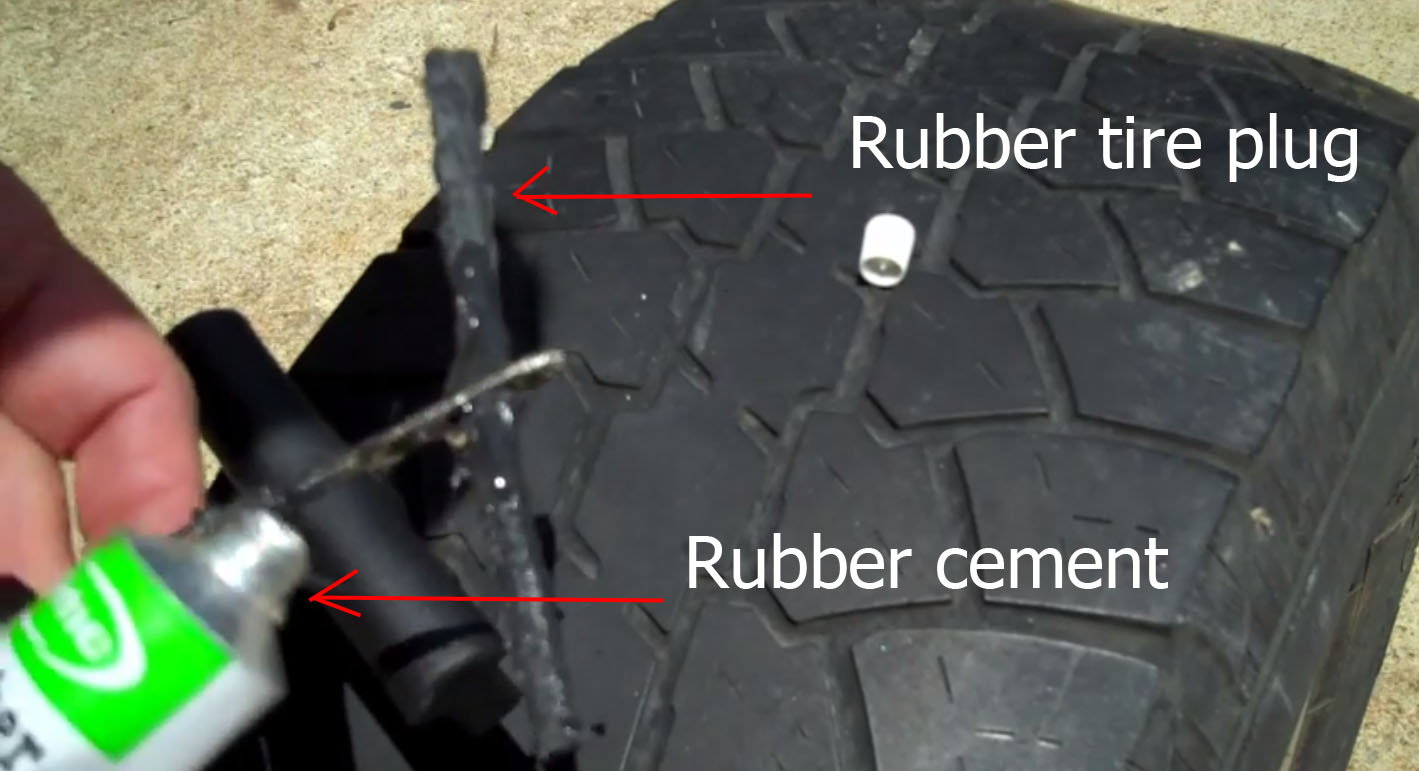
Figure 5. Coat tire plug with rubber cement before inserting into puncture. 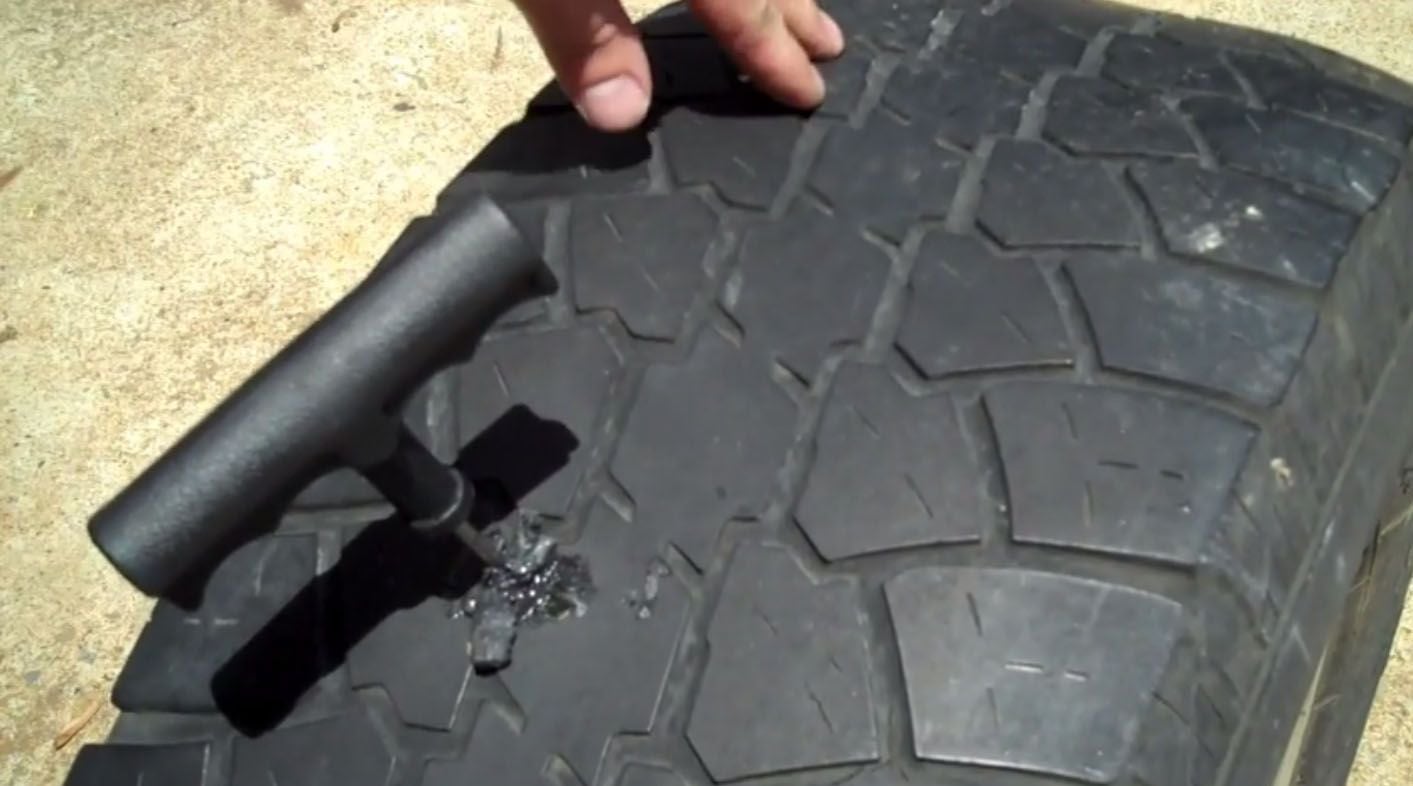
Figure 6. Twist the patch in puncture hole.
Step 4 – Trim tire plug
Trim down the plug tread to half an inch.
Step 5 – Check for leaks
Re-inflate the tire before lowering the car. Spray the spot with soapy water to make sure it's not leaking air.
We recommend going to your local tire shop to have them properly plug and patch your tire. You can do it yourself, but removing your tire from the rim, patching the tire, and then remounting it can be time consuming. This is one of the few cases where taking it to the shop might be the cheaper option: plug and patch kits tend to cost around $20. Though, if you're a do-it-yourself fanatic, we have a video below that can help. Our guide on removing a tire from the rim will help you get started.
(Related Article: How to Mount Tires to Rims - Ford-Trucks.com)
Featured Video: How to Find and Repair a Puncture
Related Video
- Find and Fix Tire Leak - Youtube.com