When you click on links to various merchants on this site and make a purchase, this can result in this site earning a commission. Affiliate programs and affiliations include, but are not limited to, the eBay Partner Network.
So I found a cheap set of injector line clamps on eBay and put them on today... ... ...
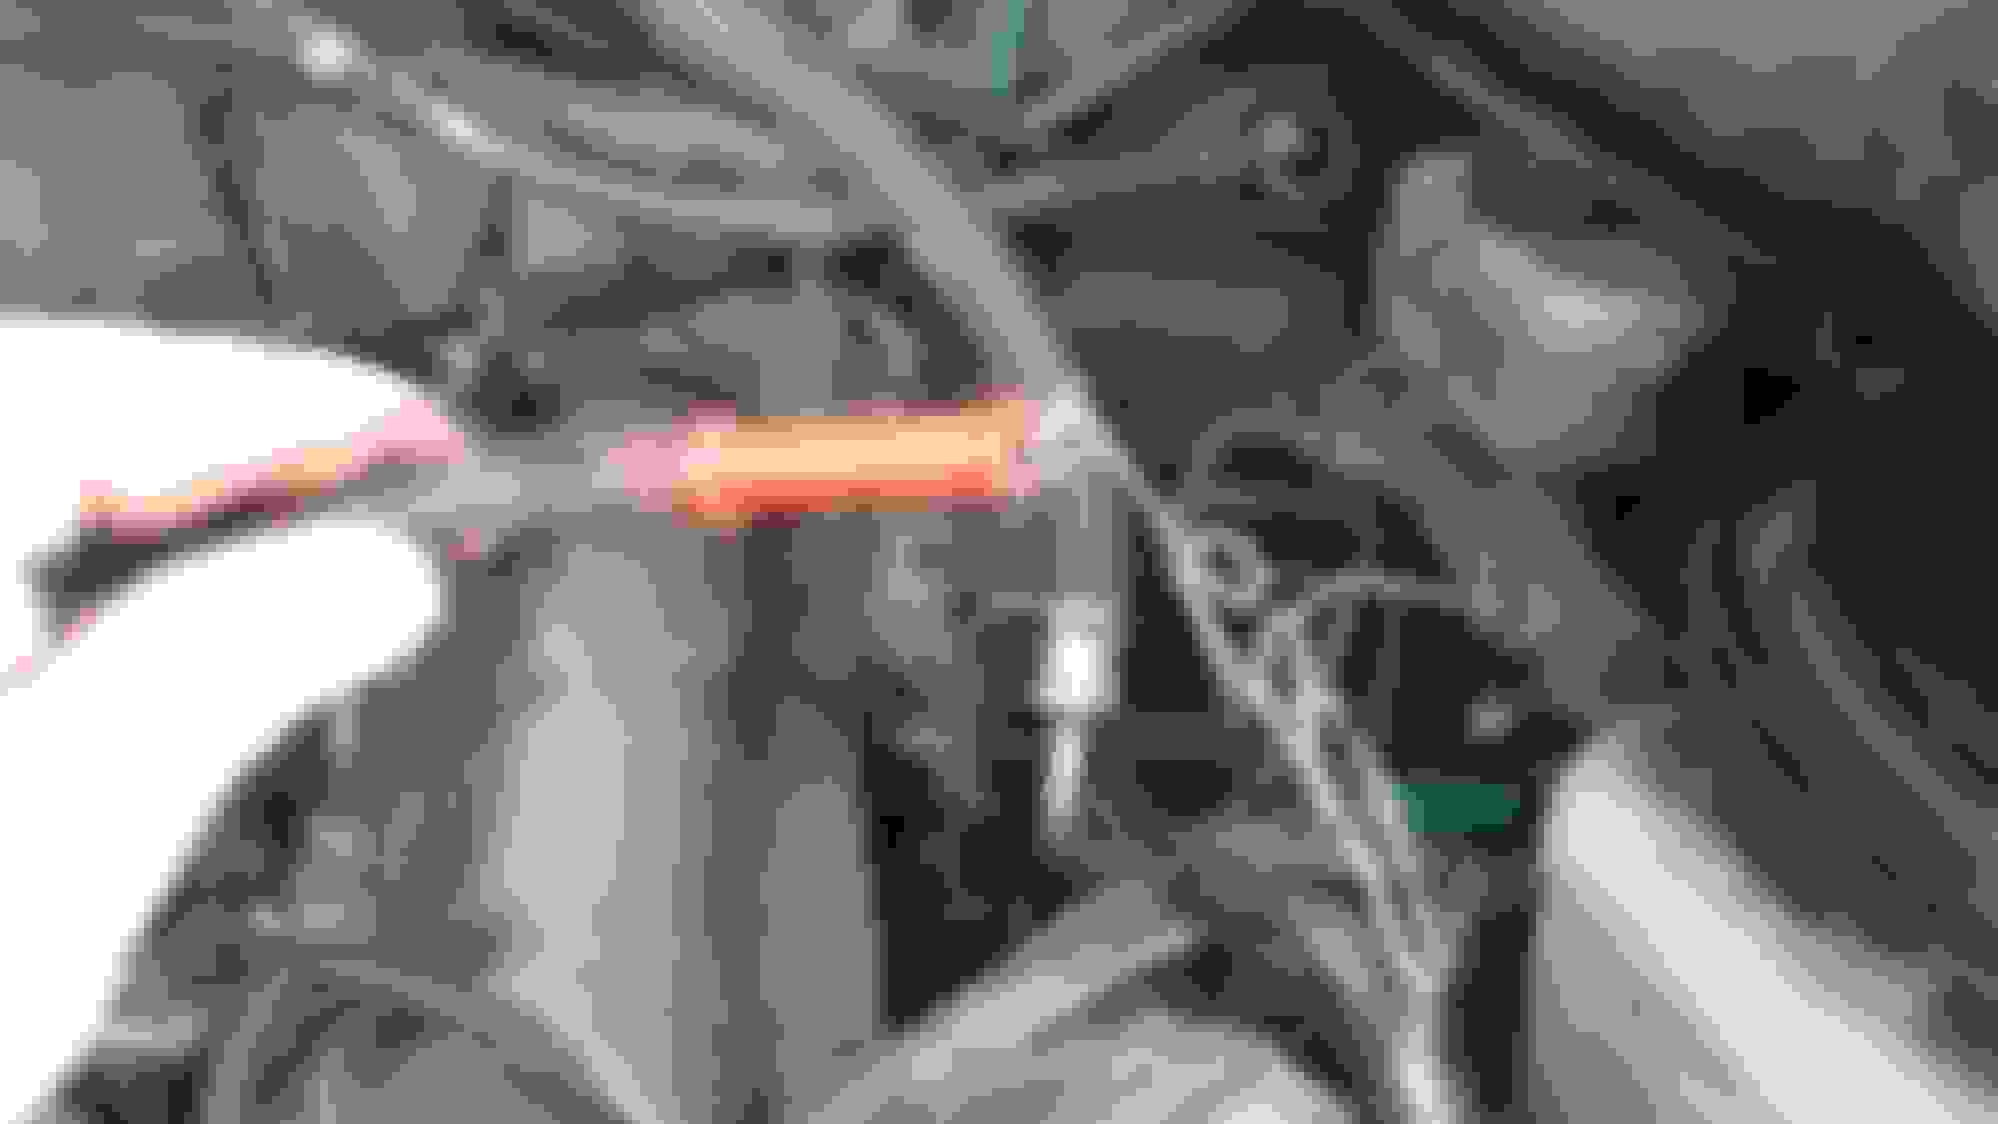
Apparently I have a very bad air intrusion issue. I cracked all the lines to line them up in the clamps because they are all tweaked a little and didn't get ANY diesel spilling out of the lines.
I've known since I bought the truck it would need a new throttle cable but I was hoping it could wait... It can't.
Installed front mudflaps the other day and ground the driver's running board back so the new mudflap wouldn't rub. The old mudflap had a hole in it from 20 some years of left turns lol. Got an accidental discount at Canadian Tire due to the mudflaps being in the wrong bin... saved 15 bucks!
Apparently I have a very bad air intrusion issue. I cracked all the lines to line them up in the clamps because they are all tweaked a little and didn't get ANY diesel spilling out of the lines.
Uh... not exactly. Unless you loosened both ends of the line, you aren't going to get fuel out of them(except perhaps a drop or two), because the IP side is effectively blocked.
If you loosened up the IP side as well, fuel will drip out the IP side generally, not the injector side.
Uh... not exactly. Unless you loosened both ends of the line, you aren't going to get fuel out of them(except perhaps a drop or two), because the IP side is effectively blocked.
If you loosened up the IP side as well, fuel will drip out the IP side generally, not the injector side.
Got a cab guard for it. It's a little tall because its off a newer superduty.
Also checked the fit on the bed rails my father in law gave me. Looks like they'll fit fine once i get the toolbox on! (Tape measure is where the toolbox will be)
Threw me off on cab guard. I have always heard them called headache racks. The extra height does not look bad. plus if you have anything long it will rest on it not the roof
Threw me off on cab guard. I have always heard them called headache racks. The extra height does not look bad. plus if you have anything long it will rest on it not the roof
I've always called them headache racks too but the last few times I've used that term people look at me like I have two heads!
so - i finally got around to a little project that i had been meaning to tackle for a long long time .. it's nice to have been in there and got er' done ..
namely cleaning out my windshield cowl of leaves and debris on the inside - and sealing this area on the outside from dripping rainwater onto my air cleaner .. as well as straightening it up and attending to the wipers and glass ..
at some time in the far away past someone had been in there and done a poor job of lining everything back up upon re-installation .. these minor misalignments - although cosmetic have always bothered me .. they had reinstalled the cowl piece too far to the passenger side so it touched that fender and left a larger gap on the drivers side .. making the hood appear slightly off .. that and they had installed the pass side wiper one too low on the wagon wheel / that was also requiring attention .. the pass side wiper wheel was in newer condition .. so i take it that 20 years ago this was replaced - hastily or by a person with poor eyesight / skill ..
so .. as the rainwater seepage and trim was also bothering me .. as well as the wipers worn out .. i decided that it was time to go over the entire cowl area and re-make it great again ..
i used my handy dandy trim arrow head removal tool and excised the windshield trim .. this went well enough - i didn't bend or damage it - or the glass ..
though / i should have just saved the effort and ripped it off without let or hindrance as i much prefer the look naked without the chrome around the windshield and have decided to leave it off ..
removal of the cowl was straight forward enough .. just about 8ish phillips screws on the engine side .. and popping off the antenna cap / 4 screws / and dykes made popping out the wire easy enough ..
removed the wiper arms .. i do this with a larger open ended wrench and electrical tape the jaw for a coushin .. straight edge marked alignment and wedged the wrench using force opposite the spring direction ..
the hood required being moved to the upper most position on the hinge mounting point on the firewall .. simply scratch awled the the bolt circumference for later reference and loosened / tightened them down .. at the top of their position .. and with the hood up .. removed the cowl .. also i put masking tape / on the fender edges / lower hood edges / and upper cowl edge tabs .. so as not to scratch the fenders .. cowl .. hood .. or glass ..
snipped the hose to the glass sprayer and while it was off cleaned the nozzle with a thin wire ..
i used my little portable wet vac / 20 dollar walmart special / though despite the low price i am pleased with the performance of the little 1gal stanley hand vac .. got a full load of leaves out - down to deep in the fender with the attachment on there ..
removed the under cowl support bracket that had long turned to a rust color .. wire wheeled it off and blasted it with rubberized coating .. installed a nice stainless #8 screw where visible ..
replaced the cowling again .. this time centering it well before tightening it down .. and replaced the old cracked useless cowl gasket with rubberized garage door gasket from home depot .. with stainless washers to spread the pressure as the foam rubber is different then the hard plastic gasket that it replaces ..
and then rolled and pressed plumbers dope down into the back hood seam in the center 20" of this area to water proof it from dripping on the air cleaner .. this took kindof awhile to get it fully pressed in and nice and even .. but it turned out nice .. i used a spreader to even it out in the gap .. the dope is easy to work and eventually got it nice and straight with a taper at the edges for runoff .. water tight now ..
with the windshild trim off i was able to upgrade to a larger wiper - 21" now fits going right to the edge .. don't try this size with trim it would contact at the roof .. it goes all the way to the edge of the glass with it off ..
clocked the ol' crooked wiper arm correctly one tooth up and it's perfecto now .. ..
dropped the hood back down .. and made some fine tuning body adjustments to line everything up nicer than ever ..
used some strong urethane reducer solvent (amonia glass cleaner attempt was a fail) and cleaned the grime off the inside of the windshild glass ..
all in all very pleased with the trimless look .. the extra viewing area and wiper coverage .. the cleaned up cowl .. the watertight gasket and overall cleaner look of the fit ..
Replaced rubber hose to lift pump, all three olives, IP fitting O-ring, and finally the fuel heater to stop the tantrum throwing when going down the road .
Fuel heater cost me $255, and the IP O-ring was 7 something! Canada EH!! LOL haha.
Test fit my new $20 LED reverse lights from Amazon.
The previous owner had some lights there at one point but only the brackets were left. They are a bit larger than I would have hoped but at least I should be able to see backing up now!
I'm going to wire them up with a relay and a switch so I can manually turn them on too. I'll wire them with some 2 connector trailer plugs so if I ever have to replace them I can just unhook them from the harness instead of pulling the whole thing.
 12-22-2016, 04:38 AM


 .
.