


 dint see no lift ...


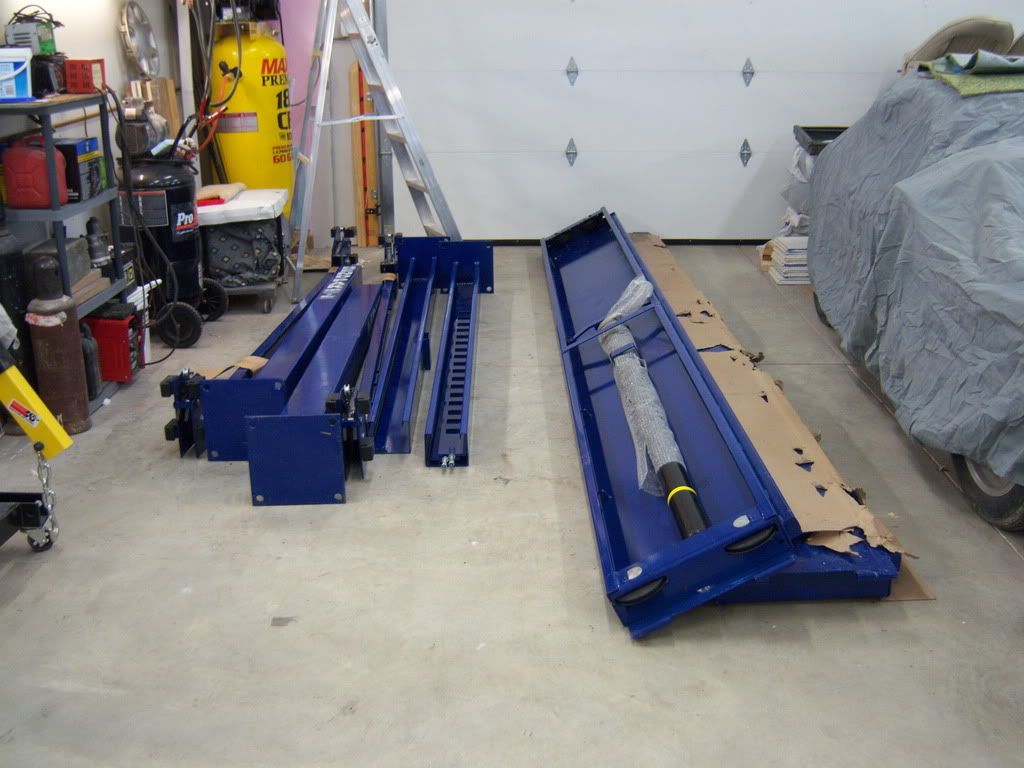
Got my NEW lift!!!! Set up pix...
Thread Starter
|
Elder User
Joined: Apr 2008
Posts: 648
Likes: 0
From: Saskatoon
I'll have to say: this was the BEST Father's Day EVER!!! After about 4 hours I got' er all together and going up..down...up...down...then the kids got on (see pics)....up..down...up...down, then some friends ... up...down..up...down... then the wife...up...down...up...down.... Now, now boys - stay on topic!!:bounce:
And yes, after the lift was done I actually spent some quality time with my boys!
So, other than a few VAGUE parts i- the instructions (air hook-up), it was fairly straight forward. Especially as I took into account the previous tips on cable routing which helped - Thanks!!

As for the air hook-up, the instructions didn't show the air button or where the air hose connects, but after some CSI work we where able to find the button and figure it out.

As I`ve said - I had a friend who had done a few - here`s a picture of a guy (and his girl...) you want to have around when working on you lift, your car, your shop.... :thumbup:
 �
�
Of course once we had it all together, the posts straightened plumb (had to move a couple posts a bit with a 2x4 and hammer) and the hydraulics connected, we noticed the entire unit was ****-eyed in the shop.

It was easily remedied with the caster kit, so, although I had said in another post maybe save your money here as you may never move your lift, I take it back, because even if you have to move it a couple inches you'll need the casters.

I was able to put them together, connect them, lower the lift all the way until it was on the big wheels and easily move it square in the shop, then remove them again. I made a rack on the wall beside the lift to get them up and out of the way when not in use.


Gotta say - I`m thrilled. Everyone who`s seen it, again a couple guys with experience, thinks it`s HEAVY DUTY. It`s so heavy duty in fact, that the oil-drip trays are made of heavy stainless...

...these could easily have been made of plastic to save money and weight...or even aluminum.
The only thing I think I might change is how the jack x-bar (youngest is standing on it) moves on the ramps. The roller jack - of course - has rollers that make it glide along the ramps, but the x-bar justs rests metal on metal, which not only takes all the paint off both surfaces, it tends to bind. Maybe once all the paint is scraped off it`ll be easier to move ...Or I`ll fab up some rollers.
So, THANKS 1st to the guys at BendPak, especially Jeff who initially sold me on this lift and Bruce at Babco Sales who got the unit routed and shipped to me. Everything these guys said thus far has been dead-on and that counts for a lot.:beer:
I`ll be running cars up and down the new lift in the coming weeks, so I`ll update it then. The only problem I have now is: which car goes on first - The Galaxie to do the power steering... Or the 46 Merc to weld a beam...or...
Oh - and here's the great wife (with her race 240Z) tht puts up with it all!

And yes, after the lift was done I actually spent some quality time with my boys!
So, other than a few VAGUE parts i- the instructions (air hook-up), it was fairly straight forward. Especially as I took into account the previous tips on cable routing which helped - Thanks!!
As for the air hook-up, the instructions didn't show the air button or where the air hose connects, but after some CSI work we where able to find the button and figure it out.
As I`ve said - I had a friend who had done a few - here`s a picture of a guy (and his girl...) you want to have around when working on you lift, your car, your shop.... :thumbup:
�Of course once we had it all together, the posts straightened plumb (had to move a couple posts a bit with a 2x4 and hammer) and the hydraulics connected, we noticed the entire unit was ****-eyed in the shop.
It was easily remedied with the caster kit, so, although I had said in another post maybe save your money here as you may never move your lift, I take it back, because even if you have to move it a couple inches you'll need the casters.
I was able to put them together, connect them, lower the lift all the way until it was on the big wheels and easily move it square in the shop, then remove them again. I made a rack on the wall beside the lift to get them up and out of the way when not in use.
Gotta say - I`m thrilled. Everyone who`s seen it, again a couple guys with experience, thinks it`s HEAVY DUTY. It`s so heavy duty in fact, that the oil-drip trays are made of heavy stainless...
...these could easily have been made of plastic to save money and weight...or even aluminum.
The only thing I think I might change is how the jack x-bar (youngest is standing on it) moves on the ramps. The roller jack - of course - has rollers that make it glide along the ramps, but the x-bar justs rests metal on metal, which not only takes all the paint off both surfaces, it tends to bind. Maybe once all the paint is scraped off it`ll be easier to move
...Or I`ll fab up some rollers.So, THANKS 1st to the guys at BendPak, especially Jeff who initially sold me on this lift and Bruce at Babco Sales who got the unit routed and shipped to me. Everything these guys said thus far has been dead-on and that counts for a lot.:beer:
I`ll be running cars up and down the new lift in the coming weeks, so I`ll update it then. The only problem I have now is: which car goes on first - The Galaxie to do the power steering... Or the 46 Merc to weld a beam...or...
Oh - and here's the great wife (with her race 240Z) tht puts up with it all!
Thread Starter
|
Elder User
Joined: Apr 2008
Posts: 648
Likes: 0
From: Saskatoon
Now now...OK...you're right.
I noticed today - you can change the ramps and blocks around and enter lift from either end - ya-hoo!!
I noticed today - you can change the ramps and blocks around and enter lift from either end - ya-hoo!!
Thread Starter
|
Elder User
Joined: Apr 2008
Posts: 648
Likes: 0
From: Saskatoon
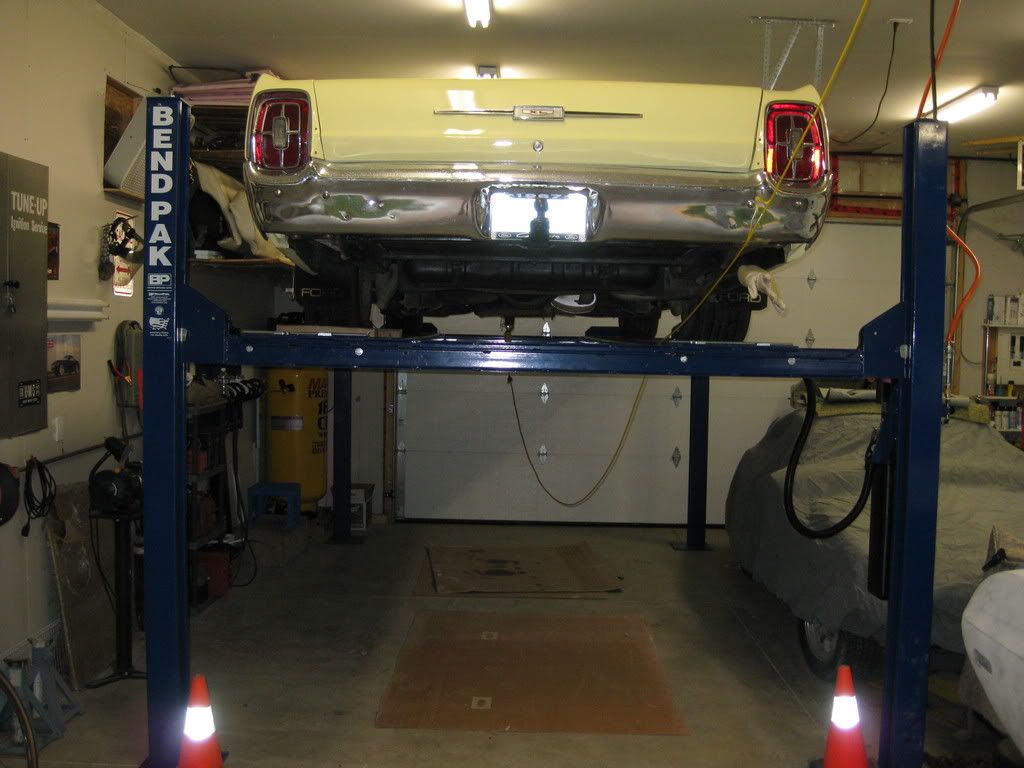
I just finished putting my 67 Galaxie 500XL on the lift. At first I had the ramps at the narrow position but the tires would have been right on the outer edges, maybe even over a scoatch. So I widened the ramps to the second position and it was perfect. Very happy already I went with the Xtra tall and wide!
As for height, I'm 6'2" and in my 11 foot shop I can easily stand under the Galaxie on the lift with about 6" to spare to the ceiling. As well, at first I had the ramps set to rise with the lift, but then they were right at Forehead height They are easily removed, so off they came!
I'll post some photo's right away here.
As for height, I'm 6'2" and in my 11 foot shop I can easily stand under the Galaxie on the lift with about 6" to spare to the ceiling. As well, at first I had the ramps set to rise with the lift, but then they were right at Forehead height
They are easily removed, so off they came!I'll post some photo's right away here.

Postmaster
Joined: Aug 2003
Posts: 4,172
Likes: 1
From: Oakdale,Ca.
That's awesome, I always wanted a lift but never found a place I could put it to keep it out of my way. Instead we put in a pit...not nearly as handy, but helps on a lot of things.
Trending Topics
Thread Starter
|
Elder User
Joined: Apr 2008
Posts: 648
Likes: 0
From: Saskatoon
I have a pit in the front garage too - they are definitley the next best thing - make a good bumker or hurricane hideout too!
FTE Stories
Ford Trucks for Ford Truck Enthusiasts

Rezvani's Latest Post-Apocalytic Monster Is a Ford F-150 Raptor Underneath
Verdad Gallardo
Top 10 Most Expensive Ford Trucks Ever Sold on Bring a Trailer
Joe Kucinski
2027 Ford Super Duty Buyer's Guide (Every Model, Engine, & Package)
Brett Foote
Top 10 Ford Truck Tragedies
Joe Kucinski
AEV FXL Super Duty - the Super Duty Raptor Ford Doesn't Make
Brett Foote
Lobo Vs Lobo: Proof the F-150 Lobo Should Be Even Lower!
Michael S. Palmer
Ford's 2001 Explorer Sportsman Concept Looks For a New Home
Verdad Gallardo
10 Best Ford Truck Engines We Miss the Most!
Joe Kucinski
2026 Shelby F-150 Off-Road: Better Than a Raptor R?
Brett FooteThread Starter
|
Elder User
Joined: Apr 2008
Posts: 648
Likes: 0
From: Saskatoon
Got some lift-time in last weekend and boy - was it great! No more stooping, laying on the concrete, getting in&out of the pit...I'm thinking that over the next (god willing) 20 or 30 years, it'll have saved me both a lot of money and a ton of wear and tear on my body!
Anyways, the Galaxie Steering Box puked 2 summers ago and I was using "arm-strong" steering ever since ( I either had a project over the pit, or was building the shop). With the lift, I had the steering box out and replaced in a couple hours. While it was up there, I changed the oil and semi-fixed the e-brake too, also not working for a while (still needs parts though).
The other cool thing I hadn't thought of, is that I can approach from either side. My shop has doors at both ends with a driveway on one end and a lane on the other - so it makes it nice to be able to pull through, or bring it in the easiest way.

Thread
Thread Starter
Forum
Replies
Last Post
e-tek
1961 - 1966 F-100 & Larger F-Series Trucks
217
Apr 7, 2014 12:13 AM
vrsc
6.7L Power Stroke Diesel
31
Sep 17, 2011 08:55 PM
e-tek
1948 - 1956 F1, F100 & Larger F-Series Trucks
15
Jun 6, 2008 11:45 PM