
Scratch Removal


Thread Starter
|
New User

Joined: Jul 2010
Posts: 10
Likes: 0
Scratch Removal
I posted this on a couple forums, but I figured I would share with you guys as well and make my contribution to the forum....
So based on my personal experience, these are just some of the many techniques to do this. I'm sure others have different ways or opinions, so please post them up and I would be happy to add them to here. I'll rate it on difficulty as well ranging from 1 to 5 (1 being so easy my dog can do it, and 5 being pretty difficult, so research and read before you do)
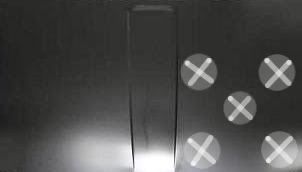
Lets start with taking a look at your enemy closely to see what you are up against:
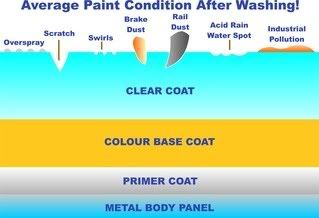
(image taken from Creative Resins Distribution Limited)
Overspray/Industrial Pollution: A paint imperfection that occurs when chemicals in the air (like paint, acid raid, insecticides, and other pollutants) land on your paint and stick to it. Removing these imperfections is like detailing your car a few times. The droplets must be removed from the paint, and then the paint underneath must be recleaned, polished, and protected with either a sealant or a wax.
Brake Dust/Rail Dust: A paint imperfection that occurs on a normal basis. When you apply your brakes, the dust from the brake pads does not only attach to the wheels, it also finds its way onto your paint. This is a relatively easy imperfection to remove, if vehicle is washed weekly. It is removed with a professional clay bar application before the vehicle is waxed or sealed.
Scratch: A paint imperfection that occurs when a sharp object (such as a finger nail, ring, shopping cart, etc.) rubs into the clear-coat layer or your paint or beyond. An average clear-coat is half of the thickness of a human hair. Removing this imperfection requires the use of a compound, wet sanding, or a polish on a machine or by hand. Some scratches that go beyond the clear-coat cannot be removed through a professional detailing service and must be filled by a body shop.
Swirls: A paint imperfection that occurs on a daily basis, when particles such as sand, dirt, salt, etc. are picked up by the wind and rubbed against your vehicles paint. Automatic car wash brushes also create deep swirl marks. Like a scratch these are removed by the use of a compound, wet sanding, or a polish with a machine or by hand.
Acid Rain/Bird Dropping Etches: A paint imperfection that occurs when a vehicles is subjected to an area where acid rain could fall onto the vehicle. The highly acidic chemicals eat away at the clear-coat of a vehicle. Bird droppings have similar acidity and thus need to be removed as quickly as noticed to avoid the acids from eating away at the clear-coat. Again, these are removed from the surface with the use of a compound or polish with a machine or by hand.
What it means to remove a scratch:
Basically it comes down to this, the scratch/swirl will only be removed when the material around the defect is removed as low as the depth of the defect. Does that makes sense? Meaning you have to remove as much clear coat around the scratch that it levels out that area. General rule of thumb is if you can run your fingernail across the scratch and your nail catches the scratch you can't safely remove it with detailing products and it must be filled with paint.
Before you do any kind of paint reconditioning, you need to prep the paint for cleaning. Do a very good wash and dry, sometimes even 2 washes are needed. Follow the wash with a clay bar application. I personally like using a foam gun with 1 bucket and a grit guard, but the 2 bucket method is better then one bucket.
Also do this in a shaded area, where the surface is cool, otherwise the product will get baked on your paint and will very very hard to remove. If you don't have a shade borrow a friend's garage, go to walmart and buy a 10x10 ez up (comes in a blue bag) for $90. If you still can't do anything about the shade, work in very small areas, I'm saying 1' by 1' areas.
Before you start: wear comfortable clothes with no jewelry or belt (you don't want to accidentally scratch a panel you just worked so hard on). Also, when you get frustrated take a break, no one is rushing you, do the best you can! If it didn't turn out the way you expected, take a second think of what went wrong, ask in this thread, etc...
1st way of removing defects is by hand:
skill level: 1
what you need:
-compound (Meguiar's Scratch-X, 3M Rubbing Compound, ect. all can be found at your local automotive store)
-polish (a pure polish, not one that says cleaner polish, wax cleaner, etc.) like Meguiar's M205
-foam application pads (I realized the foam ones work better then the cotton ones in removing defects, save the cotton ones for waxes, glazes, and sealants)
-terry or microfiber towels
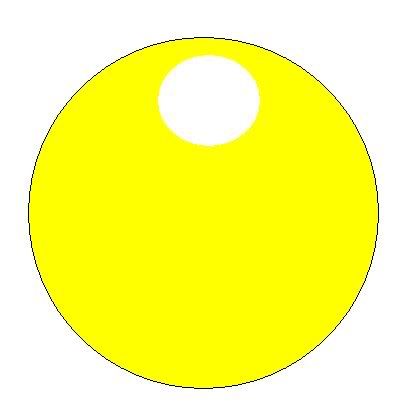
start by applying a dime size amount of product onto your pad, place the product at the top of your pad as that's the only place your fingers will create pressure, like so:
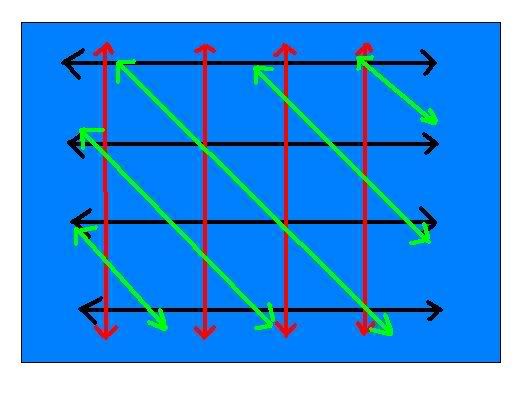
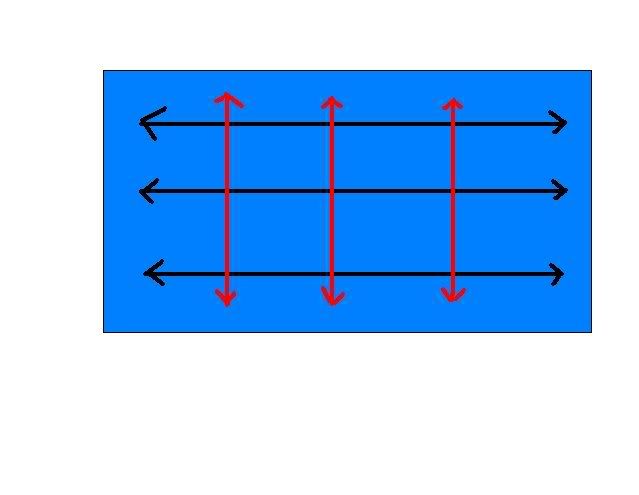
Rub your little heart out in the following directions:
-side to side (black)
-up and down (red)
-diagonally (green)
The compound you use will determine when you should stop. When you see the product drying and starting to haze, that means you're done. wipe it off with a clean towel. It might take more then 1 application. Once you get your scratches removed, use the polish to bring more shine back to the paint, using the same method as before. When you are removing any product with a towel, remove it with one side, then go over the area again with a different clean side of the towel to remove any dust. It's easy if you do a 2' by 2' section at a time and just go over everything slowly and carefully.
Wash and dry your car before polishing and waxing to remove compound dust. If only using polish, washing is not needed, as some sealants work best with the polishing oils still on your paint. This 100% when using products from Meguiar's only, if you are not sure about compatibility of your polish with your wax, it is best to consult the manufacturer.
[center]
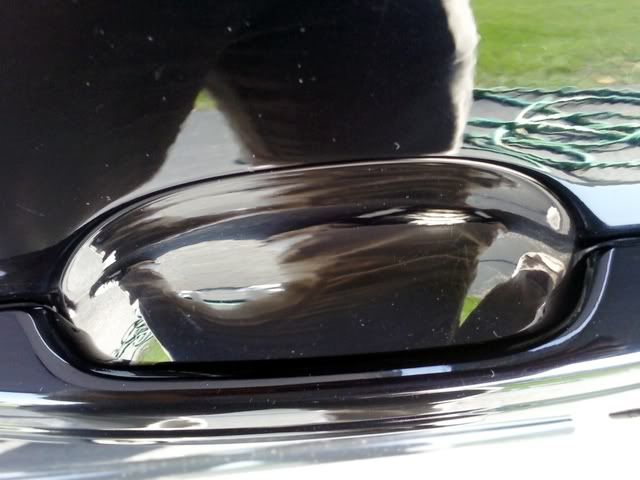
Before:
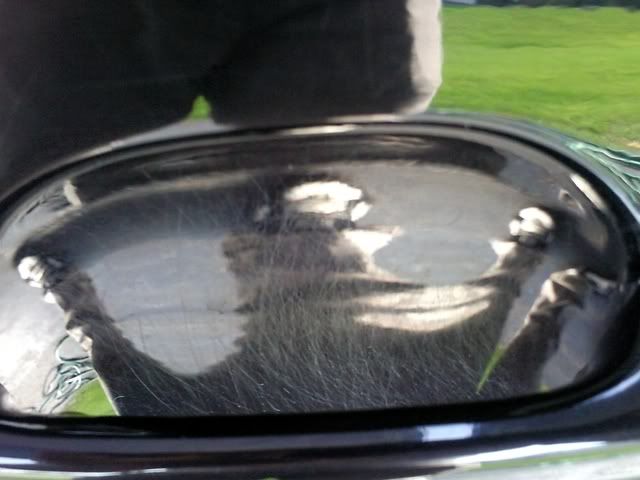
After:
2nd way of removing defects is with the use of a Dual Action Polisher:
skill level: 2-3
what you will need:
-dual action polisher (Meguiar's G100 or G110, Porter Cable 7424, Flex XC3401 to name a couple)
-Polishing pads will work, cutting pads require a little more skill and experience on a DA
-same compounds as by hand can be used, but I recommend Meguiar's M105
-a pure polish
-clean terry or microfiber towels
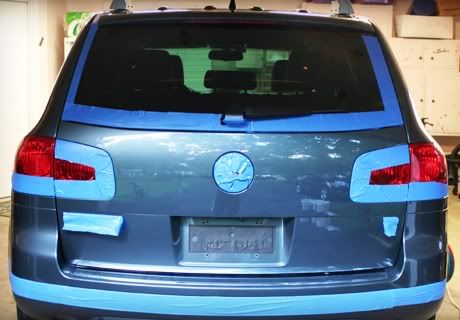
Before doing anything it is wise for you place tape around all plastics and cracks of the vehicle so that the compound dust doesn't get into places you can't wash out like so:
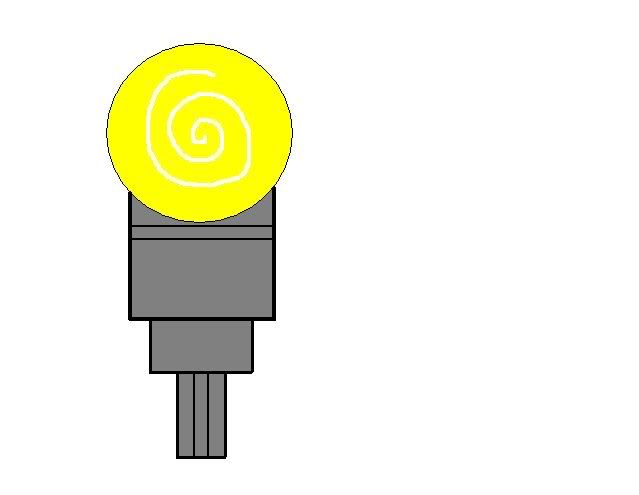
Start by applying a generous amount of product on the pad your first time (as you use more of the product apply less). Apply product by either making an X on the pad (I like this way) or making a swirl of the product on the pad like this:
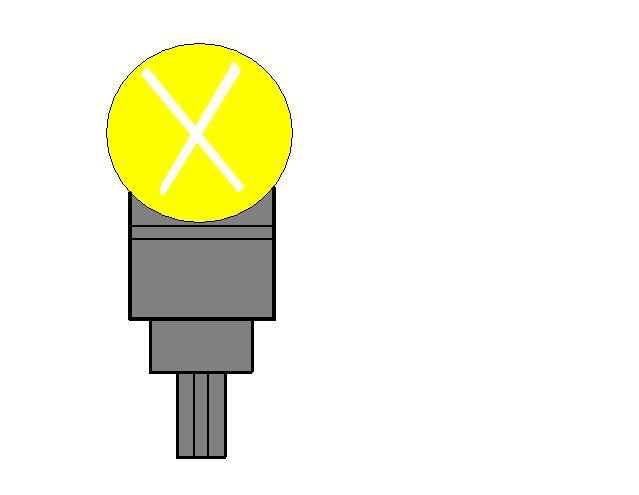
OR
Once you got your product on there spread it over the are you are going to work with by simply pressing the pad on the DA in the 4 corners of the area and one in the center like so:
Set your DA speed to 5, if you are using a Flex, set it to 4. Use medium pressure on your DA (about 20 lbs) and work the product in the same directions as you by hand with SLOW arm movements, let the machine do its work for you. When the product hazes, stop, wipe it off. If you still see the scratch/swirls, do it again. If that doesn't work, try upping your speed on the DA by half a turn, if that doesn't help, use a more aggressive product. When finished go over everything with a polish to remove any marks left by the compound. If you see that you are having a hard time removing the compound/polish with a towel you are either polishing too long, your pad is dirty, you're not using enough product. To remove stuck on polish/compound spray some quick detailing spray you got with your claybar kit on the area, and it will help remove it easily. IMPORTANT: clean your pads on the fly after every body panel you do!!!!! What I mean by this is when you are done with a panel and you are using a polish or compound, take a clean towel, set your DA to 5 and run the pad on the clean towel to break up any built up polish. This will prevent you from creating haze marks on your paint!
Wash and dry your car before polishing and waxing to remove compound dust. If only using polish, washing is not needed, as some sealants work best with the polishing oils still on your paint. This 100% when using products from Meguiar's only, if you are not sure about compatibility of your polish with your wax, it is best to consult the manufacturer.
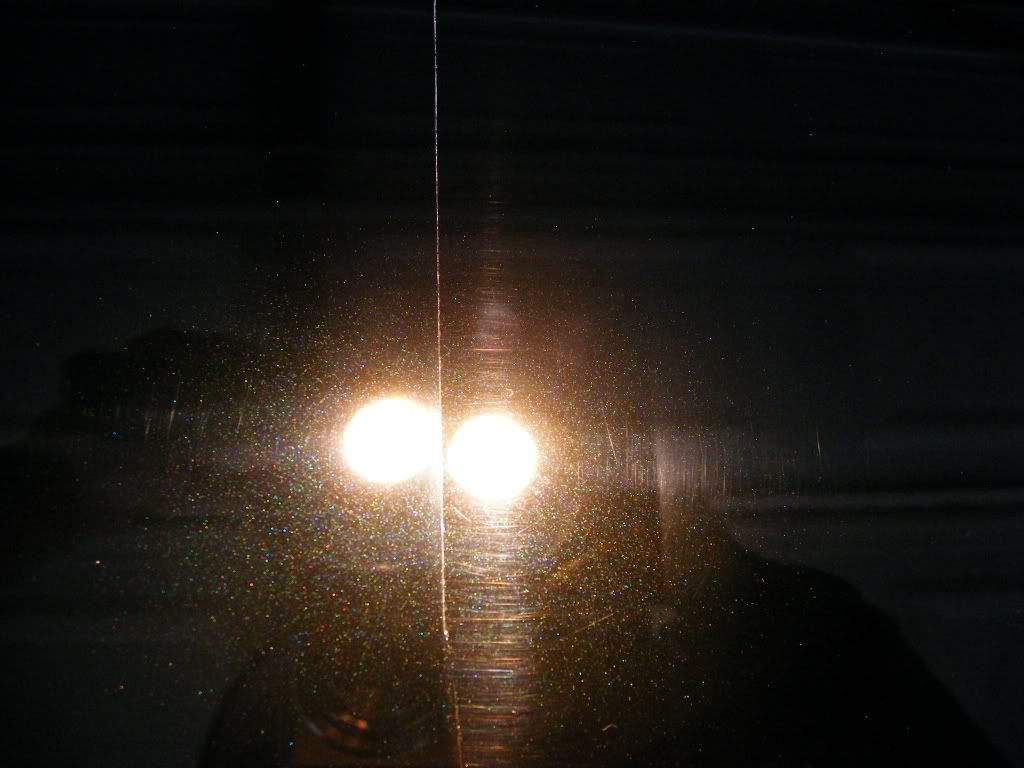
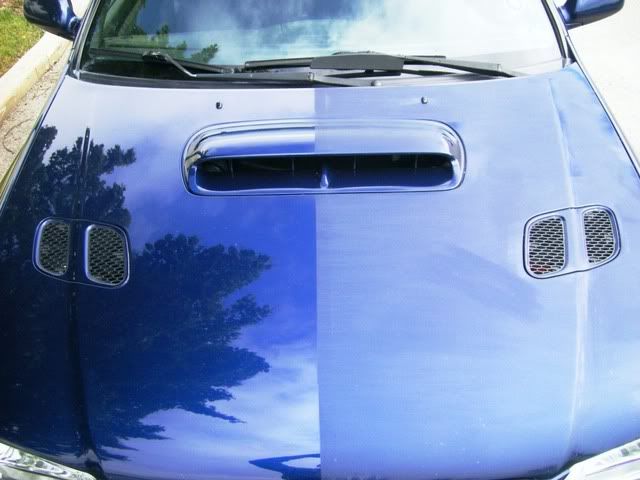
Here's a 50/50 shot of a hood. Left side was done using a DA
3rd way of removing defects is with the use of a Rotary Buffer:
Skill level: 4-5
What you need:
-Rotary buffer (Milwuakee, Dewalt, Vector, Flex all make great products, Vector being the cheapest)
-Polishing Foam Pads (if the defects aren't too bad)
-Wool cutting pads (if the defects are deep)
-compound (you can also use rotary specific compounds like the Meguiar's #4 if the defects are deep)
-Dual Action polisher
-Polishing pads for the DA
-Pure Polish
-Terry or microfiber towels
The DA is much safer option for any beginner. It is much easier to burn through paint with a rotary so if this is your first time with a rotary try it out on your least favorite/expensive vehicle. However, a DA will not remove all of the deeper defects as it is a little limited in the amount of defects it will remove. The rotary comes in handy when you have deep scratches or swirls or working on a boat.
Again tape up your car like explained before.
Apply your compound like explained before for the DA on your pad. Set your rotary to the lowest setting. Again spread your product like you would for the DA. Spread your product around on the panel with lowest setting only using the weight of the machine (don't press down on it yet). Now, set your rotary to about 1000 rpm's. When working with a rotary don't apply as much pressure as you would on the DA (use maybe about 10 lbs of pressure), and use medium arm speed. You can also make multiple lines of product on the panel you are working on and simply pick up the product as you work on the panel, however this might be tricky for beginners without splaterring product everywhere, so it might be a good thing to practice. Don't let the rotary sit in one spot too long or you will have burn marks! If you didn't remove anything, do it again the same way. If still zero improvement move your speed up. I would not recommend ever going past 2000 RPM's on a rotary on a clear coat if you are just learning how to use it. If you see that you are having a hard time removing the compound/polish with a towel you are either polishing too long, your pad is dirty, you're not using enough product. To remove stuck on polish/compound spray some quick detailing spray you got with your claybar kit on the area, and it will help remove it easily. IMPORTANT: clean your pads on the fly after every body panel you do!!!!! What I mean by this is when you are done with a panel and you are using a polish or compound, take a clean towel, set your Rotary to 1500 RPMS and run the pad on the clean towel to break up any built up polish. This will prevent you from creating haze marks on your paint!
WHAT I LIKE TO DO WITH A ROTARY IS THE FOLLOWING:
For a compound:
-SPREAD THE PRODUCT ONTO THE CAR WITH 500 RPM'S
-WORK PRODUCTS IN WITH LIGHT PRESSURE AT 1200 RPM'S
-MIST AREA DOWN WITH A SPRAY BOTTLE CONTAINING ONLY WATER
-WORK PRODUCTS FURTHER WITH 1500 RPMS AND MEDIUM PRESSURE
For a polish:
-SPREAD THE PRODUCT ONTO THE CAR WITH 500 RPM'S
-WORK PRODUCTS IN WITH LIGHT PRESSURE AT 1200 RPM'S
-BURNISH PAINT WITH 800 RPM'S
Once you are done, get your DA and go over the car again. There are very high chances (unless you are knowledgeable about rotaries) that you have left hazing marks with the rotary. The DA with some polish will get rid of those. There are also special methods of using the rotary to "jewel" paint which will not have the same results when using a DA, but this basically involves using a very very fine polish (like the Menzerna PO85RD with a finishing pad, or any other non-abrasive pad) to jewel the paint and remove any faint imperfections in the paint. It is a longer process through which you take the gloss and shine of your paint to a whole new level before protection.
Wash and dry your car before polishing and waxing to remove compound dust. If only using polish, washing is not needed, as some sealants work best with the polishing oils still on your paint. This 100% when using products from Meguiar's only, if you are not sure about compatibility of your polish with your wax, it is best to consult the manufacturer.
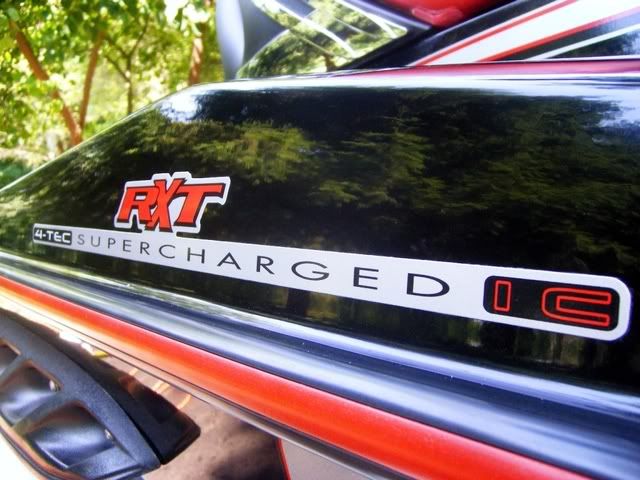
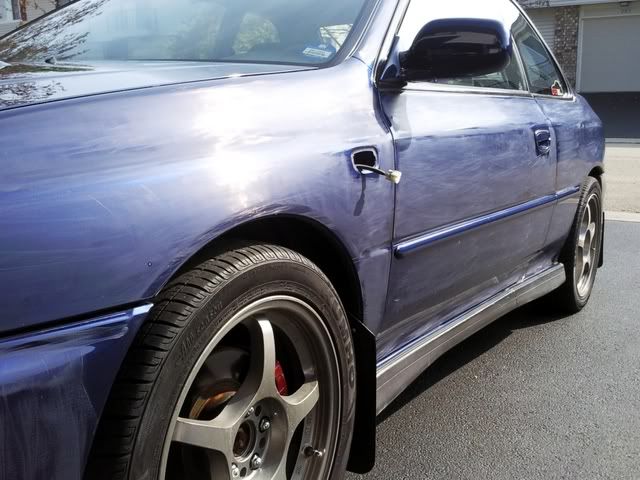
Before:
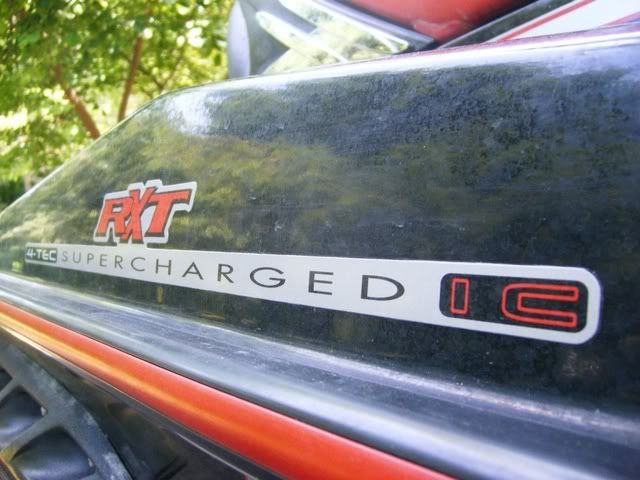
After:
4th way of removing defects is with wet sanding:
Skill level: 5
What you need:
-2000 grid sandpaper
-3000 grid sandpaper
-sanding block/backing plate
-Dual Action polisher
-Polishing pads for the DA
-Light compound
-Pure Polish
-Terry or microfiber towels
-Paint thickness meter/gauge
Sometimes it is easier to simply wet-sand a body panel rather then use a rotary buffer. It's what you are more comfortable in doing. Also wet sanding is an easier process for removing heavy orange peel. I would highly advise against wet-sanding your car if you still have factory paint! doing spot here and there is ok, but not your entire car. The clear-coat from factory is very very thin and it leaves very little room for error. I cannot stress this enough, if you have never done this, go to a local body shop and ask for a body panel from their garbage and practice. Again using wet sanding on a factory paint job is not advised. To really do an entire panel like this you need a paint thickness gauge to measure the depth of your paint so you won't sand through the clear coat. Once removed.... it cannot be brought back without a repaint...only do this if you are comfortable and knowledgeable about the subject and your vehicle's paint! I decided to add this only to be a starting point in your learning and practice.
Tape up you car.
Get your 2000 grid sandpaper. Soak any paper in water for at least 15 minuted before use. Use your 2000 grid paper with medium pressure against your paint going only side to side (black). Do the same with you 3000 grid paper but sand in an up and down motion (red). Here's where wetsanding becomes debatable, some say using paper that is 2000 grit or above is a waste of time as the same defects can be removed with a rotary on a wool pad a good compound, however, defects like orange peel and in some instances transfer paint from hitting objects, can be removed easier with wetsanding. Can you use something that's below 2000 grit, like 1500 for example, sure you can! but you better know what you are doing.
Here's a 50/50 of a wet sanded hood:
Once you are done wet sanding (weather it be just one little spot or your entire vehicle) wash your car to remove any dust.
Grab your rotary and some some compound and get rid of those out those sand marks! Here's a before/after pic of the marks compounded out (this is still before polishing).

Wash and dry your car before polishing and waxing to remove compound dust. You will need to polish the vehicle or spot after the compound to bring back the gloss and shine of the paint. Remember to wax/seal your vehicle after doing this as you are leaving the paint unprotected.
Here are some good product you guys can try which are reasonably priced, but most importantly have proven consistent results If anyone else has any good recommendations please post them up!
Clay Bars:
Blackfire Clay Lubricant
Meguiar's Clay Bar
By Hand (in order of least to most aggressive)
Meguiar's Swirl-X
Meguiar's Scratch-X
Meguiar's Ultimate Compound
By DA (in order of least to most aggressive)
Menzerna PO85RD
Menzerna Super Finish PO106FA
Meguiar's #80 Speed Glaze
Meguiar's M205 Polish (if followed after the 105, it is arguably one of the best combo's out there right now)
Meguiar's #83 Dual Action Cleaner/Polish
Menzerna SIP PO83
Meguiar's M105 Ultra Cut Cleaner/Compound
By Rotary (in order of least to most aggressive)
Menzerna PO85RD
Menzerna Super Finish PO106FA
Meguiar's M95 Speed Cut
Menzerna SIP PO83
Meguiar's M01 Medium Cut Cleaner
Meguiar's M04 Heavy Cut Cleaner
Enjoy,
Rafal
Let me know if you have any questions.
One more thing, you should be thinking on how to protect your clean, smooth, shinny paint right? From experience here's your best bet:
-get a really nice pure sealant, they might not be cheap but well worth every penny. Put a coat on and LEAVE IT ON YOUR CAR IN THE SHADE/COOL/DRY PLACE for at least 1 HOUR so that it has time to properly seal. If you truly want a sealant to last 4-5 months, leave it on for the full 12 hours which is the average time of sealant's curing time. Now remove it. Follow it with at least one more coat of a good wax. Get a wax that is rich in oils and high carnauba wax. Let that sit for another at least 30 min. and remove it.
Here's some helpful links in buying all the products you could ever want/need:
www.AutoDetailingSolutions.com
Car Care Products,auto care products,car waxes,car polish,detailing supplies,Autogeek We Are Car Care,Meguiar's,Mothers, Pinnacle
Top of the Line Auto Detailing Supplies
Car Wax, Car Polish, Auto Detail Supplies : CHEMICAL GUYS WHOLESALE AUTO DETAILING SUPPLIES CAR WASH PRODUCTS PROFESSIONAL CAR DETAIL SUPPLY FACTORY DIRECT
Sparkle Auto detailing products aftermarket accessories car cleaning product enhancers
Adam's Polishes
If you don't have any products at all, and would like to purchase a "starter detailing kit" here's what I would suggest you need. Also, these are just a small sample of products that are very easy to use. Remember proper auto care is THE BEST preventative maintenance you can do on your car:
1. Dual Action Buffer w/pads (you will need at least 2 polishing pad, at least one finishing pad for applying wax/sealant, 1 cutting pad, couple cotton bonnets for removal of wax/sealant. I do not recommend using a cutting pad on the DA, but it is good and sturdy to put your cotton bonnet over to remove wax/sealant):
Meguiar's G110V2 Dual-Action Polisher Ultra Kit
Porter Cable 7424 Car Buffer, 7424 Polisher
2. Paint cleaners and Compounds:
Meguiar's M105 Ultra Cut New Version 12 oz. - DA Polisher Approved
Meguiar's M83 Dual Action Cleaner/Polish 12 oz.
P21S Paintwork Cleanser
Blackfire Scratch Resistant Clear Compound
3. Polish:
Blackfire Gloss Enhancing Polish
Poorboy's Professional Polish: Now Poorboy’s Professional Polish is creamy”, making it more user-friendly and a real pleasure to apply! poorboys
Meguiar's M205 Ultra Finishing Polish 12 oz.
Adam's Fine Machine Car Polish
4. Wax or Sealant (get both if you can):
Meguiar's M26 Hi Tech Yellow Wax 16 oz.
Meguiar's M20 Poly Sealant 16 oz.
Meguiar's NXT Generation Tech Wax 2.0
Blackfire Wet Diamond
Klasse Sealant Glaze
Adam's Machine SuperWax
Migliore: Exterior Waxes
4. Clay Bar kit:
Meguiar's Smooth Surface Clay Kit
Adam's Clay Bar & Detail Spray Combo
SmartWax Detail Clay Kit
5. Random stuff that will be needed:
-microfiber towels (get a Costco card for this, the $50 Membership is well worth it). you can get 36 towel for $19.99, use them a couple times, put them in an oil rag pile...
-sheepskin washmits (again costco, 4 for $19.99)
-at least 2 buckets w/ a gritguard (I prefer the Gilmour Foamaster: Gilmour Foamaster Gun)
-drying towels, make sure your drying towels are 100% cotton
-jelly blade (cuts drying time by a ton)
-tire shine
-glass cleaners
-vinyl cleaners
I know this looks like a long list, and will end up costing your anywhere from $250-$400 depending on products you get, but again this is something important to do and have and is well worth the investment. Also, if you detail your car every few months, these products will last for a while, just make sure you keep them closed!
on a side note if you don't tape up your car and you get wax or polish even after you wash the car... get some All Purpose Cleaner and a little brush and go to town on all the crevices in your car.. it'll take a while so just prepare yourself.
So based on my personal experience, these are just some of the many techniques to do this. I'm sure others have different ways or opinions, so please post them up and I would be happy to add them to here. I'll rate it on difficulty as well ranging from 1 to 5 (1 being so easy my dog can do it, and 5 being pretty difficult, so research and read before you do)
Lets start with taking a look at your enemy closely to see what you are up against:
(image taken from Creative Resins Distribution Limited)
Overspray/Industrial Pollution: A paint imperfection that occurs when chemicals in the air (like paint, acid raid, insecticides, and other pollutants) land on your paint and stick to it. Removing these imperfections is like detailing your car a few times. The droplets must be removed from the paint, and then the paint underneath must be recleaned, polished, and protected with either a sealant or a wax.
Brake Dust/Rail Dust: A paint imperfection that occurs on a normal basis. When you apply your brakes, the dust from the brake pads does not only attach to the wheels, it also finds its way onto your paint. This is a relatively easy imperfection to remove, if vehicle is washed weekly. It is removed with a professional clay bar application before the vehicle is waxed or sealed.
Scratch: A paint imperfection that occurs when a sharp object (such as a finger nail, ring, shopping cart, etc.) rubs into the clear-coat layer or your paint or beyond. An average clear-coat is half of the thickness of a human hair. Removing this imperfection requires the use of a compound, wet sanding, or a polish on a machine or by hand. Some scratches that go beyond the clear-coat cannot be removed through a professional detailing service and must be filled by a body shop.
Swirls: A paint imperfection that occurs on a daily basis, when particles such as sand, dirt, salt, etc. are picked up by the wind and rubbed against your vehicles paint. Automatic car wash brushes also create deep swirl marks. Like a scratch these are removed by the use of a compound, wet sanding, or a polish with a machine or by hand.
Acid Rain/Bird Dropping Etches: A paint imperfection that occurs when a vehicles is subjected to an area where acid rain could fall onto the vehicle. The highly acidic chemicals eat away at the clear-coat of a vehicle. Bird droppings have similar acidity and thus need to be removed as quickly as noticed to avoid the acids from eating away at the clear-coat. Again, these are removed from the surface with the use of a compound or polish with a machine or by hand.
What it means to remove a scratch:
Basically it comes down to this, the scratch/swirl will only be removed when the material around the defect is removed as low as the depth of the defect. Does that makes sense? Meaning you have to remove as much clear coat around the scratch that it levels out that area. General rule of thumb is if you can run your fingernail across the scratch and your nail catches the scratch you can't safely remove it with detailing products and it must be filled with paint.
Before you do any kind of paint reconditioning, you need to prep the paint for cleaning. Do a very good wash and dry, sometimes even 2 washes are needed. Follow the wash with a clay bar application. I personally like using a foam gun with 1 bucket and a grit guard, but the 2 bucket method is better then one bucket.
Also do this in a shaded area, where the surface is cool, otherwise the product will get baked on your paint and will very very hard to remove. If you don't have a shade borrow a friend's garage, go to walmart and buy a 10x10 ez up (comes in a blue bag) for $90. If you still can't do anything about the shade, work in very small areas, I'm saying 1' by 1' areas.
Before you start: wear comfortable clothes with no jewelry or belt (you don't want to accidentally scratch a panel you just worked so hard on). Also, when you get frustrated take a break, no one is rushing you, do the best you can! If it didn't turn out the way you expected, take a second think of what went wrong, ask in this thread, etc...
1st way of removing defects is by hand:
skill level: 1
what you need:
-compound (Meguiar's Scratch-X, 3M Rubbing Compound, ect. all can be found at your local automotive store)
-polish (a pure polish, not one that says cleaner polish, wax cleaner, etc.) like Meguiar's M205
-foam application pads (I realized the foam ones work better then the cotton ones in removing defects, save the cotton ones for waxes, glazes, and sealants)
-terry or microfiber towels
start by applying a dime size amount of product onto your pad, place the product at the top of your pad as that's the only place your fingers will create pressure, like so:
Rub your little heart out in the following directions:
-side to side (black)
-up and down (red)
-diagonally (green)
The compound you use will determine when you should stop. When you see the product drying and starting to haze, that means you're done. wipe it off with a clean towel. It might take more then 1 application. Once you get your scratches removed, use the polish to bring more shine back to the paint, using the same method as before. When you are removing any product with a towel, remove it with one side, then go over the area again with a different clean side of the towel to remove any dust. It's easy if you do a 2' by 2' section at a time and just go over everything slowly and carefully.
Wash and dry your car before polishing and waxing to remove compound dust. If only using polish, washing is not needed, as some sealants work best with the polishing oils still on your paint. This 100% when using products from Meguiar's only, if you are not sure about compatibility of your polish with your wax, it is best to consult the manufacturer.
[center]
Before:
After:
2nd way of removing defects is with the use of a Dual Action Polisher:
skill level: 2-3
what you will need:
-dual action polisher (Meguiar's G100 or G110, Porter Cable 7424, Flex XC3401 to name a couple)
-Polishing pads will work, cutting pads require a little more skill and experience on a DA
-same compounds as by hand can be used, but I recommend Meguiar's M105
-a pure polish
-clean terry or microfiber towels
Before doing anything it is wise for you place tape around all plastics and cracks of the vehicle so that the compound dust doesn't get into places you can't wash out like so:
Start by applying a generous amount of product on the pad your first time (as you use more of the product apply less). Apply product by either making an X on the pad (I like this way) or making a swirl of the product on the pad like this:
OR
Once you got your product on there spread it over the are you are going to work with by simply pressing the pad on the DA in the 4 corners of the area and one in the center like so:
Set your DA speed to 5, if you are using a Flex, set it to 4. Use medium pressure on your DA (about 20 lbs) and work the product in the same directions as you by hand with SLOW arm movements, let the machine do its work for you. When the product hazes, stop, wipe it off. If you still see the scratch/swirls, do it again. If that doesn't work, try upping your speed on the DA by half a turn, if that doesn't help, use a more aggressive product. When finished go over everything with a polish to remove any marks left by the compound. If you see that you are having a hard time removing the compound/polish with a towel you are either polishing too long, your pad is dirty, you're not using enough product. To remove stuck on polish/compound spray some quick detailing spray you got with your claybar kit on the area, and it will help remove it easily. IMPORTANT: clean your pads on the fly after every body panel you do!!!!! What I mean by this is when you are done with a panel and you are using a polish or compound, take a clean towel, set your DA to 5 and run the pad on the clean towel to break up any built up polish. This will prevent you from creating haze marks on your paint!
Wash and dry your car before polishing and waxing to remove compound dust. If only using polish, washing is not needed, as some sealants work best with the polishing oils still on your paint. This 100% when using products from Meguiar's only, if you are not sure about compatibility of your polish with your wax, it is best to consult the manufacturer.
3rd way of removing defects is with the use of a Rotary Buffer:
Skill level: 4-5
What you need:
-Rotary buffer (Milwuakee, Dewalt, Vector, Flex all make great products, Vector being the cheapest)
-Polishing Foam Pads (if the defects aren't too bad)
-Wool cutting pads (if the defects are deep)
-compound (you can also use rotary specific compounds like the Meguiar's #4 if the defects are deep)
-Dual Action polisher
-Polishing pads for the DA
-Pure Polish
-Terry or microfiber towels
The DA is much safer option for any beginner. It is much easier to burn through paint with a rotary so if this is your first time with a rotary try it out on your least favorite/expensive vehicle. However, a DA will not remove all of the deeper defects as it is a little limited in the amount of defects it will remove. The rotary comes in handy when you have deep scratches or swirls or working on a boat.
Again tape up your car like explained before.
Apply your compound like explained before for the DA on your pad. Set your rotary to the lowest setting. Again spread your product like you would for the DA. Spread your product around on the panel with lowest setting only using the weight of the machine (don't press down on it yet). Now, set your rotary to about 1000 rpm's. When working with a rotary don't apply as much pressure as you would on the DA (use maybe about 10 lbs of pressure), and use medium arm speed. You can also make multiple lines of product on the panel you are working on and simply pick up the product as you work on the panel, however this might be tricky for beginners without splaterring product everywhere, so it might be a good thing to practice. Don't let the rotary sit in one spot too long or you will have burn marks! If you didn't remove anything, do it again the same way. If still zero improvement move your speed up. I would not recommend ever going past 2000 RPM's on a rotary on a clear coat if you are just learning how to use it. If you see that you are having a hard time removing the compound/polish with a towel you are either polishing too long, your pad is dirty, you're not using enough product. To remove stuck on polish/compound spray some quick detailing spray you got with your claybar kit on the area, and it will help remove it easily. IMPORTANT: clean your pads on the fly after every body panel you do!!!!! What I mean by this is when you are done with a panel and you are using a polish or compound, take a clean towel, set your Rotary to 1500 RPMS and run the pad on the clean towel to break up any built up polish. This will prevent you from creating haze marks on your paint!
WHAT I LIKE TO DO WITH A ROTARY IS THE FOLLOWING:
For a compound:
-SPREAD THE PRODUCT ONTO THE CAR WITH 500 RPM'S
-WORK PRODUCTS IN WITH LIGHT PRESSURE AT 1200 RPM'S
-MIST AREA DOWN WITH A SPRAY BOTTLE CONTAINING ONLY WATER
-WORK PRODUCTS FURTHER WITH 1500 RPMS AND MEDIUM PRESSURE
For a polish:
-SPREAD THE PRODUCT ONTO THE CAR WITH 500 RPM'S
-WORK PRODUCTS IN WITH LIGHT PRESSURE AT 1200 RPM'S
-BURNISH PAINT WITH 800 RPM'S
Once you are done, get your DA and go over the car again. There are very high chances (unless you are knowledgeable about rotaries) that you have left hazing marks with the rotary. The DA with some polish will get rid of those. There are also special methods of using the rotary to "jewel" paint which will not have the same results when using a DA, but this basically involves using a very very fine polish (like the Menzerna PO85RD with a finishing pad, or any other non-abrasive pad) to jewel the paint and remove any faint imperfections in the paint. It is a longer process through which you take the gloss and shine of your paint to a whole new level before protection.
Wash and dry your car before polishing and waxing to remove compound dust. If only using polish, washing is not needed, as some sealants work best with the polishing oils still on your paint. This 100% when using products from Meguiar's only, if you are not sure about compatibility of your polish with your wax, it is best to consult the manufacturer.
Before:
After:
4th way of removing defects is with wet sanding:
Skill level: 5
What you need:
-2000 grid sandpaper
-3000 grid sandpaper
-sanding block/backing plate
-Dual Action polisher
-Polishing pads for the DA
-Light compound
-Pure Polish
-Terry or microfiber towels
-Paint thickness meter/gauge
Sometimes it is easier to simply wet-sand a body panel rather then use a rotary buffer. It's what you are more comfortable in doing. Also wet sanding is an easier process for removing heavy orange peel. I would highly advise against wet-sanding your car if you still have factory paint! doing spot here and there is ok, but not your entire car. The clear-coat from factory is very very thin and it leaves very little room for error. I cannot stress this enough, if you have never done this, go to a local body shop and ask for a body panel from their garbage and practice. Again using wet sanding on a factory paint job is not advised. To really do an entire panel like this you need a paint thickness gauge to measure the depth of your paint so you won't sand through the clear coat. Once removed.... it cannot be brought back without a repaint...only do this if you are comfortable and knowledgeable about the subject and your vehicle's paint! I decided to add this only to be a starting point in your learning and practice.
Tape up you car.
Get your 2000 grid sandpaper. Soak any paper in water for at least 15 minuted before use. Use your 2000 grid paper with medium pressure against your paint going only side to side (black). Do the same with you 3000 grid paper but sand in an up and down motion (red). Here's where wetsanding becomes debatable, some say using paper that is 2000 grit or above is a waste of time as the same defects can be removed with a rotary on a wool pad a good compound, however, defects like orange peel and in some instances transfer paint from hitting objects, can be removed easier with wetsanding. Can you use something that's below 2000 grit, like 1500 for example, sure you can! but you better know what you are doing.
Here's a 50/50 of a wet sanded hood:
Once you are done wet sanding (weather it be just one little spot or your entire vehicle) wash your car to remove any dust.
Grab your rotary and some some compound and get rid of those out those sand marks! Here's a before/after pic of the marks compounded out (this is still before polishing).
Wash and dry your car before polishing and waxing to remove compound dust. You will need to polish the vehicle or spot after the compound to bring back the gloss and shine of the paint. Remember to wax/seal your vehicle after doing this as you are leaving the paint unprotected.
Here are some good product you guys can try which are reasonably priced, but most importantly have proven consistent results If anyone else has any good recommendations please post them up!
Clay Bars:
Blackfire Clay Lubricant
Meguiar's Clay Bar
By Hand (in order of least to most aggressive)
Meguiar's Swirl-X
Meguiar's Scratch-X
Meguiar's Ultimate Compound
By DA (in order of least to most aggressive)
Menzerna PO85RD
Menzerna Super Finish PO106FA
Meguiar's #80 Speed Glaze
Meguiar's M205 Polish (if followed after the 105, it is arguably one of the best combo's out there right now)
Meguiar's #83 Dual Action Cleaner/Polish
Menzerna SIP PO83
Meguiar's M105 Ultra Cut Cleaner/Compound
By Rotary (in order of least to most aggressive)
Menzerna PO85RD
Menzerna Super Finish PO106FA
Meguiar's M95 Speed Cut
Menzerna SIP PO83
Meguiar's M01 Medium Cut Cleaner
Meguiar's M04 Heavy Cut Cleaner
Enjoy,
Rafal
Let me know if you have any questions.
One more thing, you should be thinking on how to protect your clean, smooth, shinny paint right? From experience here's your best bet:
-get a really nice pure sealant, they might not be cheap but well worth every penny. Put a coat on and LEAVE IT ON YOUR CAR IN THE SHADE/COOL/DRY PLACE for at least 1 HOUR so that it has time to properly seal. If you truly want a sealant to last 4-5 months, leave it on for the full 12 hours which is the average time of sealant's curing time. Now remove it. Follow it with at least one more coat of a good wax. Get a wax that is rich in oils and high carnauba wax. Let that sit for another at least 30 min. and remove it.
Here's some helpful links in buying all the products you could ever want/need:
www.AutoDetailingSolutions.com
Car Care Products,auto care products,car waxes,car polish,detailing supplies,Autogeek We Are Car Care,Meguiar's,Mothers, Pinnacle
Top of the Line Auto Detailing Supplies
Car Wax, Car Polish, Auto Detail Supplies : CHEMICAL GUYS WHOLESALE AUTO DETAILING SUPPLIES CAR WASH PRODUCTS PROFESSIONAL CAR DETAIL SUPPLY FACTORY DIRECT
Sparkle Auto detailing products aftermarket accessories car cleaning product enhancers
Adam's Polishes
If you don't have any products at all, and would like to purchase a "starter detailing kit" here's what I would suggest you need. Also, these are just a small sample of products that are very easy to use. Remember proper auto care is THE BEST preventative maintenance you can do on your car:
1. Dual Action Buffer w/pads (you will need at least 2 polishing pad, at least one finishing pad for applying wax/sealant, 1 cutting pad, couple cotton bonnets for removal of wax/sealant. I do not recommend using a cutting pad on the DA, but it is good and sturdy to put your cotton bonnet over to remove wax/sealant):
Meguiar's G110V2 Dual-Action Polisher Ultra Kit
Porter Cable 7424 Car Buffer, 7424 Polisher
2. Paint cleaners and Compounds:
Meguiar's M105 Ultra Cut New Version 12 oz. - DA Polisher Approved
Meguiar's M83 Dual Action Cleaner/Polish 12 oz.
P21S Paintwork Cleanser
Blackfire Scratch Resistant Clear Compound
3. Polish:
Blackfire Gloss Enhancing Polish
Poorboy's Professional Polish: Now Poorboy’s Professional Polish is creamy”, making it more user-friendly and a real pleasure to apply! poorboys
Meguiar's M205 Ultra Finishing Polish 12 oz.
Adam's Fine Machine Car Polish
4. Wax or Sealant (get both if you can):
Meguiar's M26 Hi Tech Yellow Wax 16 oz.
Meguiar's M20 Poly Sealant 16 oz.
Meguiar's NXT Generation Tech Wax 2.0
Blackfire Wet Diamond
Klasse Sealant Glaze
Adam's Machine SuperWax
Migliore: Exterior Waxes
4. Clay Bar kit:
Meguiar's Smooth Surface Clay Kit
Adam's Clay Bar & Detail Spray Combo
SmartWax Detail Clay Kit
5. Random stuff that will be needed:
-microfiber towels (get a Costco card for this, the $50 Membership is well worth it). you can get 36 towel for $19.99, use them a couple times, put them in an oil rag pile...
-sheepskin washmits (again costco, 4 for $19.99)
-at least 2 buckets w/ a gritguard (I prefer the Gilmour Foamaster: Gilmour Foamaster Gun)
-drying towels, make sure your drying towels are 100% cotton
-jelly blade (cuts drying time by a ton)
-tire shine
-glass cleaners
-vinyl cleaners
I know this looks like a long list, and will end up costing your anywhere from $250-$400 depending on products you get, but again this is something important to do and have and is well worth the investment. Also, if you detail your car every few months, these products will last for a while, just make sure you keep them closed!
on a side note if you don't tape up your car and you get wax or polish even after you wash the car... get some All Purpose Cleaner and a little brush and go to town on all the crevices in your car.. it'll take a while so just prepare yourself.

Thread
Thread Starter
Forum
Replies
Last Post
Colorado69
1967 - 1972 F-100 & Larger F-Series Trucks
10
Mar 26, 2015 08:34 AM
allanGEE
Appearance & Dress-Up
5
Oct 20, 2014 06:31 AM


