
5 star window trim

Hotshot


Joined: Jan 2001
Posts: 16,893
Likes: 3,135
From: SE Wisc. (the Rust Belt)
There are four metal tabs under the rubber seal, in instructions in the shop manual it says to cut these tabs off if you're using the stainless windshield trim. The trim doesn't do anything to hold the windshield in so I don't know why they are needed. I've broken a windshield because of them. I cut them off to get them out of the way.
That all being said, the instructions are rather vague about installing the stainless trim. I've installed the trim a few times in my truck and the best way I have found to do it is, first, find help, you'll need at least two people to install it. Use a lot of soapy water as lubricant. I install the trim into the rubber first, but only insert it around 3/4 of the window, leave to two ends dangling at the bottom. Install the window then use a plastic tool to push the ends of the trim into the slits in the rubber, clip on the center cover that covers the seam on the bottom.
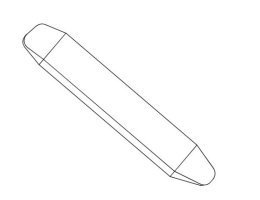
This is the type of tool the pros use, it's made of nylon.
That all being said, the instructions are rather vague about installing the stainless trim. I've installed the trim a few times in my truck and the best way I have found to do it is, first, find help, you'll need at least two people to install it. Use a lot of soapy water as lubricant. I install the trim into the rubber first, but only insert it around 3/4 of the window, leave to two ends dangling at the bottom. Install the window then use a plastic tool to push the ends of the trim into the slits in the rubber, clip on the center cover that covers the seam on the bottom.
This is the type of tool the pros use, it's made of nylon.
Senior User
Joined: Apr 2010
Posts: 222
Likes: 0
From: Alberta, Canada
It took 2 of us the best part of an afternoon to install mine. I don't think there is any way to install it without removing the windshield first. I would suggest getting a new seal if yours is not newer (soft, not dried out). We removed the wind shield, removed the seal from the windshield, installed the trim on the seal, put the seal back on the glass, and then put the whole deal back on the truck. This was a huge pain in the butt. I would not attempt it by myself. I got some plastic trim tools, like hard plastic pry bars, to work the seal with so it doesn't scratch paint or trim, check with a glass shop to get one. We used a lot of glass cleaner as lubricant to help the seal slide (both for removal and re-installation). Basically to get the trim on the seal we started on the bottom (where the trim splits, lined up the first corner and slowly worked our way around putting the trim on the seal, it will pop off as you go, and the tight corners are a huge pain. Once we finally got the trim on the seal we put the seal on the glass and masking taped it in place as it will want to "spring out". Then I wrapped a string around the inside of the seal (in the glass channel), placed it in the windshield hole, used lots of glass cleaner as lube, and pulled the string out seating the seal. This sounds way, way easier then it actually was, be sure to do your deep breathing exercises first as it WILL get frustrating. Keep in mind this is only how I did it and others may have a better way. Good Luck!
Senior User
Joined: Apr 2010
Posts: 222
Likes: 0
From: Alberta, Canada
Apparently Bob was typing at the same time... The tool he shows is what I was talking about. Soap would work well too, likely better then glass cleaner. I didn't have the metal tabs, PO may have removed them.

Post Fiend
Joined: May 2008
Posts: 7,641
Likes: 21
From: Poway, Ca.
Breaking my windshield and bending that strip (They are VERY SOFT - I paid about $350 for mine - 4 years ago) are two of those things that are not worth messing up for the $90 I was quoted to have a glass guy drive out to my house and spend the 45 minutes to put it in for me.
Fleet Mechanic

Joined: Mar 2010
Posts: 1,342
Likes: 1
From: Jamestown, IN
One thing I do know is that you have to be careful if you have a buffer to polish the trim because if you get it just a little too hot while shining it will warp and then your in for a heck of a fight. Dont ask me how I know.


Thread
Thread Starter
Forum
Replies
Last Post
gumshoe
1973 - 1979 F-100 & Larger F-Series Trucks
18
Apr 26, 2023 09:38 AM
Earnie Rosenow
1973 - 1979 F-100 & Larger F-Series Trucks
4
Jun 11, 2016 10:16 AM
phoneman91
1987 - 1996 F150 & Larger F-Series Trucks
1
Mar 16, 2014 11:41 AM
1951, 1952, chrome, expedition, f1, ford, install, installation, molding, removal, star, trim, truck, window, windshield


