Walker's 66 Ford F100 Restoration
#136
 03-19-2010, 08:22 PM


Hey Etek,
Excellent professional work. Rarely, do I offer congrats to thread, but it is rare to see work to such high standards. Very good fitment on those doors too. I like the seams, they look great. It is obvious you have some experience here. The proof is in the pudding as they say. If you are ever up in the Motor City, say hi, and we can knock back a cold one in an old Dearborn Bar (or River Rouge if you can hang). I will give you the three dollar tour in a fast old ford. Keep it up, I am glad to see another one saved from the crusher.
John
#137
03-21-2010, 12:03 AM
Join Date: Apr 2008
Location: Saskatoon
Posts: 648
Likes: 0
Received 0 Likes
on
0 Posts
e-tek, I starting posting pictures of my projects a few years ago and found afterward that some of the mistakes I made had been made previously by others on that same forum. It just seemed the information was not readily available as there weren't many "picture documentaries", but you would soon hear after making said mistake and posting pictures of it that "oh yeah, I had that problem too". (Many times I wished for a "BTW, when you get to this part,.......") In reading through your thread, I merely saw a process taking place where you did not mention in your updates that the casual observer may want to verify positioning of a new panel to the existing one adjacent to it or at least verify a dimension prior to welding it in place, crutial when you have much sheet metal missing due to rust. So I thought to compliment your thread by adding the "lessons learned" in hopes that it may help out someone who would undertake the same or similar task. I don't think I was pointing any fingers at you, nor was it intended. I think project progress threads like these show many people what is possible, even if they are not capable of the work themselves. For those that are capable, it helps to eliminate a learning curve of what to expect, and hopefully the process to take. We all learn something by reading these threads, even if it's not the same vehicle we're working on.
If you feel I hi-jacked your thread, I apologize, it was not intentional. We can all see you've got the bull by the horns, Good luck with your build.
If you feel I hi-jacked your thread, I apologize, it was not intentional. We can all see you've got the bull by the horns, Good luck with your build.

#138
03-21-2010, 12:36 AM
Join Date: Apr 2008
Location: Saskatoon
Posts: 648
Likes: 0
Received 0 Likes
on
0 Posts
One of the doors had tell-tale signs of trouble underneath filler....After grinding much of it away, I found new rust forming and old rust lurking....so I stripped just enough today to get some Phosphoric Acid on it to see if it would treat properly....

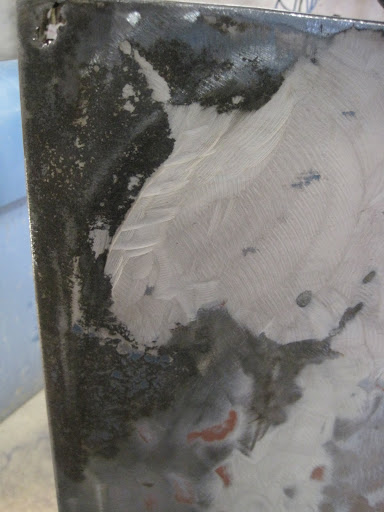
Only perforation was in the outside corner...


Now that "most" of the body metal work is done (save for fitment, gaps and cutting drain holes!! ) I went around front to rapair rust where the rad support mounts to the frame. After grinding the rust out and making the hole large enough to accept a large flat washer, I welded it solid and ground it flat.


Owner had the rad support and a fender sandblasted and should be bringing them by soon. It'll be nice to bolt the front end up and have it look like a truck again!
I think I see a light!!! (end of the tunnel....)
Only perforation was in the outside corner...
Now that "most" of the body metal work is done (save for fitment, gaps and cutting drain holes!!
) I went around front to rapair rust where the rad support mounts to the frame. After grinding the rust out and making the hole large enough to accept a large flat washer, I welded it solid and ground it flat.Owner had the rad support and a fender sandblasted and should be bringing them by soon. It'll be nice to bolt the front end up and have it look like a truck again!
I think I see a light!!! (end of the tunnel....)
#139
03-21-2010, 10:45 PM
Join Date: Apr 2008
Location: Saskatoon
Posts: 648
Likes: 0
Received 0 Likes
on
0 Posts
Anyways......back to our regularily scheduled programming....
Treated the tops of the box with Phosphoric Acid (Metal Ready) to nuetralize the rust.


And fitted the other side rear cab corner...

As well as the inner panel I made earlier. Once I clean up the original pieces I can weld it all up.

Treated the tops of the box with Phosphoric Acid (Metal Ready) to nuetralize the rust.
And fitted the other side rear cab corner...
As well as the inner panel I made earlier. Once I clean up the original pieces I can weld it all up.
#140
03-22-2010, 12:16 AM

#141
03-29-2010, 07:49 PM
Glad this back. I enjoy seeing everyones style of work. I always pick up on other methods that could work for me.
Some of E-teks methods I don't like, but other things he does I'm learned from. I enjoy seeing all the other project other guys are doing also.
If they are good or bad I still enjoy seeing what they are doing and the outcome. It has been too many long years since I done a restoration and I'm itching to get back at it. I have a year left to go before I take early retirment and that will give me time to clear up non vehicle project so I can work on my trucks and cars here and also start some one elses.
My retirement plans are to have my new flatdeck trailer all set up for hauling peoples projects from city to city, be they complete or wrecks/donors for guy projects.
So guy keep the sling and arrows out and let enjoy the progress of these wondeful trucks.
#142
03-29-2010, 08:42 PM
For a long time, I have had a love for older trucks, the documentation of this has been really fun for me to see. I just needed to express that, if in anyway I offended anyone (or anyones work standards) I am sorry that was not my intention. Recently metal fabrication and rebuilding has became more interesting to me. Let me just say an ugly ducking is being turned into a swan here. In my eyes Ford trucks from 1958 - 66 are the best trucks Ford built by far.
#143
03-29-2010, 09:04 PM
Join Date: Apr 2008
Location: Saskatoon
Posts: 648
Likes: 0
Received 0 Likes
on
0 Posts
OK, we're back. Thanks much to the mods TigerDan and IB Tim. Very professional.
I've been doing body work since growing up in my Dad's shop in the early 70's. I learned with lead and file, pick and dolly. I've painted cars with laquer and I've progressed through all the updates until present methods. Although now it is purely hobby, I have tried to keep up those "old" skills, as well as learn the new ones. Of course I also know that I must constanlty learn - which is why I love these forums.
As for the work done on this truck though, I have this to say: it's the right method for this resto. The original truck has been saved. All rust has been removed and/or treated properly (phosphoric acid, POR 15, etc). The rusted out portions have been rebuilt either with hand-formed piece-metal, or purchased pieces from Dennis Carpenter FORD. Poper fillers have been used and I would say again: for this truck, in this climate, for this use, these fillers are more suitable than anything else.
I know it's difficult for some people to understand saving things in this condition, but this isn't Arizona - I wish it were!! Here in central Canada, even the fenders and rad support that replaced the older pieces, have rusted areas that need to be repaired. There's very little metal in these parts that hasn't seen the rust worm. And although I stand behind my work and can gaurantee a quality repair for the owner, I don't feel it was deserving of being metal-finished. I've metal-finished many things in the past, but I hav eto agree with most professionals today - plastic filler is no less robust than a purely metal-finsihed repair. Each has it's own implications and the implications for metal-only repairs are becoming fewer and farther between.
Of course everyone will have their opinions. This is my thread and those are mine. If you have differeing opinions, please start your own thread to express them. Cheers!
PS - I do appreciate the positive comments - and also the constructive ones. Let's keep it going.
Now let's get this truck on the road!
Last edited by e-tek; 03-29-2010 at 09:08 PM. Reason: PS
#144
03-29-2010, 09:19 PM
Join Date: Apr 2008
Location: Saskatoon
Posts: 648
Likes: 0
Received 0 Likes
on
0 Posts
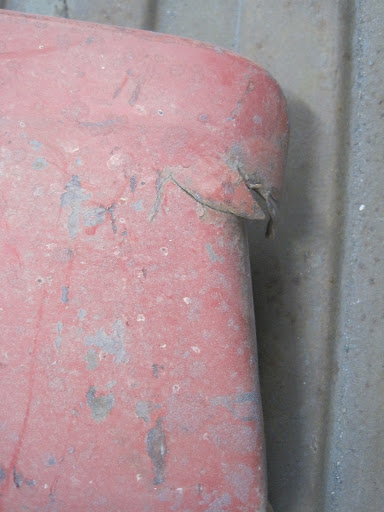
You thought the original parts where question-able....here's the repalcement parts after sand-blasting. A little more work required before the bolt up!


As many here will know, I'm also working hard to get my 46 Merc running (with a 53 flathead replacement for my original 46)https://www.ford-trucks.com/forums/8...d-rebuild.html. With the long weekend coming up I'm hoping to get a lot done on both projects - but that will be influenced by the time I spend at the first big SK car show of the year!!
As many here will know, I'm also working hard to get my 46 Merc running (with a 53 flathead replacement for my original 46)https://www.ford-trucks.com/forums/8...d-rebuild.html. With the long weekend coming up I'm hoping to get a lot done on both projects - but that will be influenced by the time I spend at the first big SK car show of the year!!
#145
03-29-2010, 10:10 PM

#146
03-29-2010, 10:48 PM
#147
03-29-2010, 11:17 PM
Join Date: Apr 2008
Location: Saskatoon
Posts: 648
Likes: 0
Received 0 Likes
on
0 Posts
) Believe me, I am NOT looking forward to it! If I could find a MUCH cleaner one, I would. Know of one? Anyone? I called around myself and haven't found one any better, plus the owner already paid for it and the sand-blasting - all things you need to consider....
#149
03-30-2010, 01:54 AM
The Basic core support is reproduced. A picker and lead guy can easily drill a hole and make a slot for the battery box J nut and fabricate the apron brackets.
I find it it not economically feasible to repair parts like this when new is available and simpily modified. The reproduction core support is the same gauge as original and once installed and painted it is indecipherable from the original.
If you do plan to repair the core, hole saw a drain hole on each side next to the frame mounts to act as drain holes. Something ford never did and what allows them to rust out so bad.
Fenders are also reproduced and fit perfectly as is the lower stone guard.
Inner square aprons for the 65 66 Square type are not reproduced, however they are plentiful in the south west for modest cost and rust free.
Garbz
#150
03-30-2010, 07:46 AM

I'm not sure where of just where you're saying to drill the holes....

A) -- Can the suggested holes be drilled in a fully-assembled truck or do you have to do the hole drilling with the front end / core support off the truck?
B) -- What diameter hole do you recommend - 1/2" hole?
C) -- Any chance you might have a picture or two of these holes or their suggested location that you could share here?
Thanks in Advance, Garbz!

BarnieTrk
