


63 Progress pics

Thread Starter
|
Senior User
Joined: Mar 2007
Posts: 389
Likes: 0
From: Glendale, AZ
rcaer10j, here are some pics of the master cylinder mount I made and the brake pedal bracket. I used a tie rod off of 1/4 midget for the brake pedal extension to the master cylnder. I don't rememeber what the pedal was designed for but I believe it was 50-52 Ford . If you need more pics send me a PM and I will e-mail you more.


Mr. Vintage, this is the master cylinder and booster from the donor Camaro subframe so that it is correct with the front disc brakes. You can mount any master cylinder under the floor, you just need the brake pedal and mount.
camperspecial65, I do have pics of the before, but they are in picture form not digital. I will try and find some and scan them to the computer. It is looks a whole lot different now.
fatcathp, the wiring harness that I used was American AutoWire Highway 22 Series. It really was pretty simple to install, but it was very time consuming because off all the extras that went into this truck. I should have kept track of the time but it probably would have scared me. My guess is about 60 hours or more in the wiring. I had some issues with the power window switches and door lock switches.
Kevin
. If you need more pics send me a PM and I will e-mail you more.Mr. Vintage, this is the master cylinder and booster from the donor Camaro subframe so that it is correct with the front disc brakes. You can mount any master cylinder under the floor, you just need the brake pedal and mount.
camperspecial65, I do have pics of the before, but they are in picture form not digital. I will try and find some and scan them to the computer. It is looks a whole lot different now.
fatcathp, the wiring harness that I used was American AutoWire Highway 22 Series. It really was pretty simple to install, but it was very time consuming because off all the extras that went into this truck. I should have kept track of the time but it probably would have scared me. My guess is about 60 hours or more in the wiring. I had some issues with the power window switches and door lock switches.
Kevin
Thread Starter
|
Senior User
Joined: Mar 2007
Posts: 389
Likes: 0
From: Glendale, AZ
I just finished getting some more pics on photobucket.
I got the doors installed.
I drilled holes in the hinges, when I prefit the doors, for an 1/8" rod so that I could put them right back where they were.

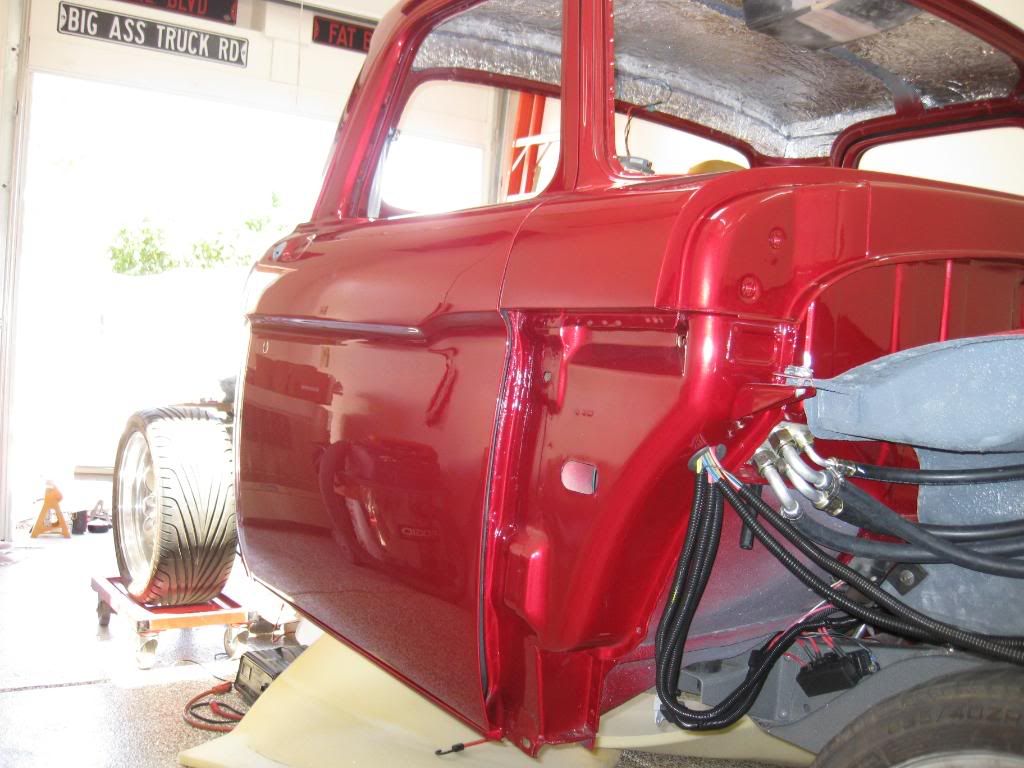
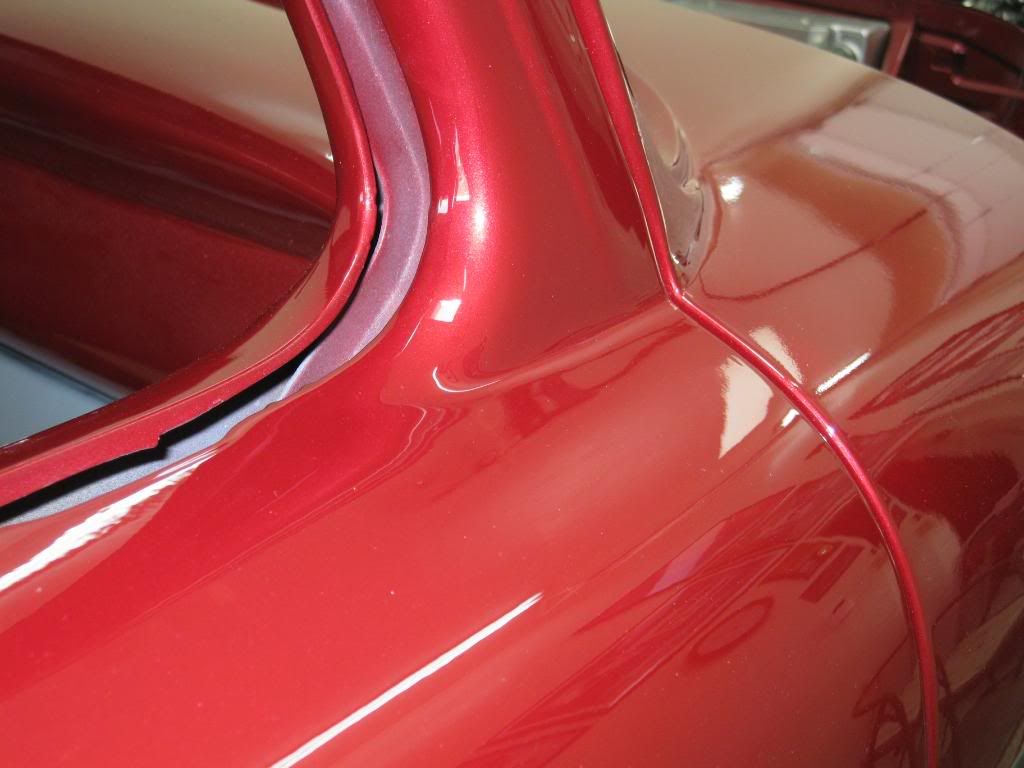
I rounded off the drip rail to male it match the curve in the door better.
I need to get the dust off of the truck.

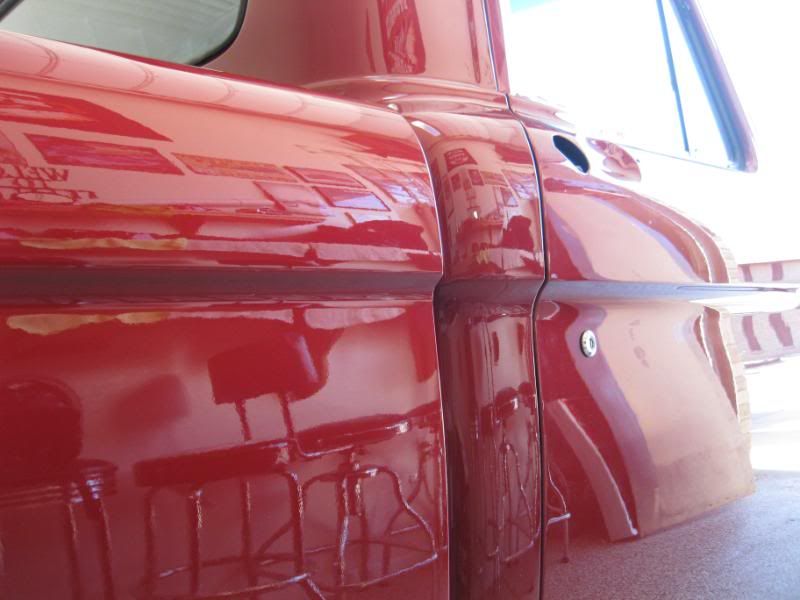
This shows where I cut the cowl and reformed it to make it match up with the door. They both had a different radius so I changed it.
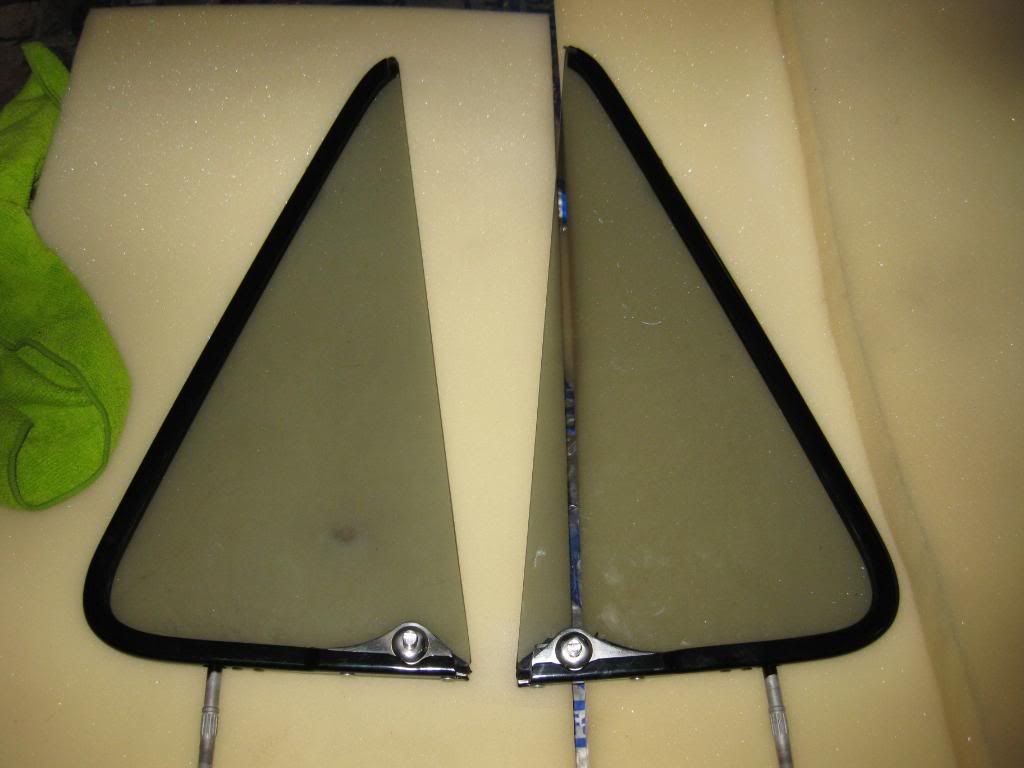
I had the vent frames powdercoated to make them look like new. The place only charged me $10 to do these. I had new glass made in smoked glass so I won't have to tint the windows.
I now have put nutserts in the doors to mount the mirrors. I will put the front fenders and grill together when it comes back from upholstery, it goes in August 14th. Less chance of anything getting scratched when it is out of my sight.
Kevin
I got the doors installed.
I drilled holes in the hinges, when I prefit the doors, for an 1/8" rod so that I could put them right back where they were.
I rounded off the drip rail to male it match the curve in the door better.
I need to get the dust off of the truck.
This shows where I cut the cowl and reformed it to make it match up with the door. They both had a different radius so I changed it.
I had the vent frames powdercoated to make them look like new. The place only charged me $10 to do these. I had new glass made in smoked glass so I won't have to tint the windows.
I now have put nutserts in the doors to mount the mirrors. I will put the front fenders and grill together when it comes back from upholstery, it goes in August 14th. Less chance of anything getting scratched when it is out of my sight.
Kevin
Elder User
Joined: Nov 2005
Posts: 998
Likes: 2
From: Benton, AR
Now that alignment technique is awesome. So simple yet so time saving in the long run. The only way I'll ever have a truck with as much perfect detail as yours is if I buy one done, lol. Thanks for the updates.
Thread Starter
|
Senior User
Joined: Mar 2007
Posts: 389
Likes: 0
From: Glendale, AZ
I have been working on this truck for about 8 years now. I have worked on it when I can and have been buying parts when the funds are there. I haven't cared how long it takes to get it done, I just want it nice when it is done. I learned to drive in this truck. My wife and I went on dates in this truck.
Take your time and learn as you go and you can build anything that you want to.
Kevin
Take your time and learn as you go and you can build anything that you want to.
Kevin
Thread Starter
|
Senior User
Joined: Mar 2007
Posts: 389
Likes: 0
From: Glendale, AZ
Bill,
I used Fast Coat Powdercoating for the wing vent frames. I found them by accident. My neighbor(Ron)took these for me to get powdercoated at a place that his stepson has work done at and he ended up at the wrong place. They did a nice job on mine and were very reasonable.
602-847-4347 5611 N. 53rd Ave.
I don't have any idea how large of items that they can handle.
Hope this helps,
Kevin
FTE Stories
Ford Trucks for Ford Truck Enthusiasts

3 Best / 3 Worst Parts of Modern Ford Ownership
Brett Foote
10 Amazing Upgrades That Solve Common Ford Truck Owner Headaches
Pouria Savadkouei
Every 2026 Ford Engine Explained
Brett Foote
10 Ugly Ford Trucks That We Still Kinda Love
Joe Kucinski
10 Things Every Truck Owner NEEDS (2026 Edition)
Michael S. Palmer
Rezvani's Latest Post-Apocalyptic Monster Is a Ford F-150 Raptor Underneath
Verdad Gallardo
Top 10 Most Expensive Ford Trucks Ever Sold on Bring a Trailer
Joe Kucinski
2027 Ford Super Duty Buyer's Guide (Every Model, Engine, & Package)
Brett Foote
Top 10 Ford Truck Tragedies
Joe Kucinski
Thread Starter
|
Senior User
Joined: Mar 2007
Posts: 389
Likes: 0
From: Glendale, AZ
Here are some pics of the latest progress on my truck. I finally got the bed finished, painted and put on the truck.
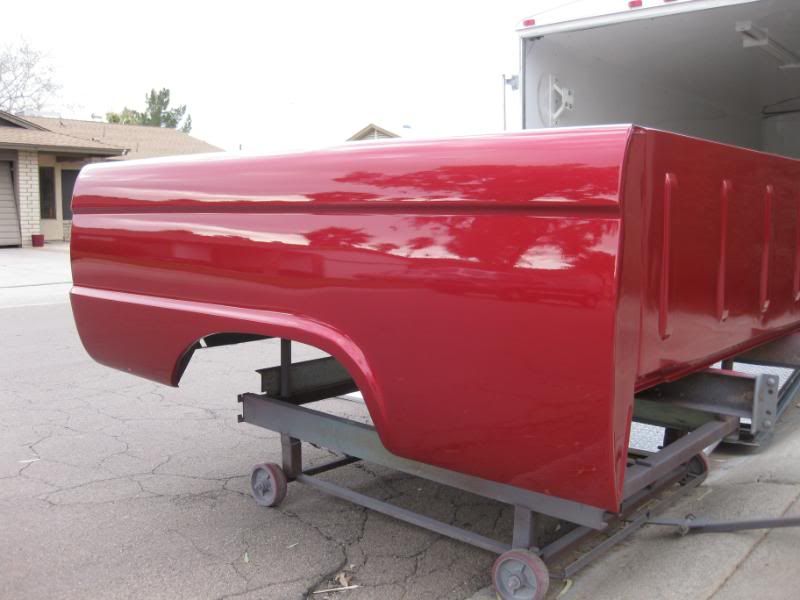

Here is a close up of the radius that I put in the bed to make it look like the cab.
I will get some pics of the tailgate with the third brake light in it soon.
Kevin
Here is a close up of the radius that I put in the bed to make it look like the cab.
I will get some pics of the tailgate with the third brake light in it soon.
Kevin
Thread Starter
|
Senior User
Joined: Mar 2007
Posts: 389
Likes: 0
From: Glendale, AZ
I just realized that I never posted finished pics of my truck.
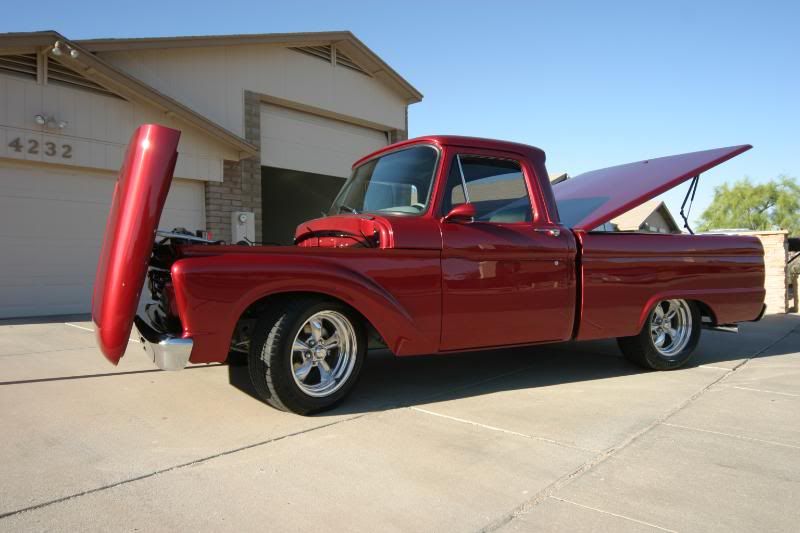

I'm really happy with the way that it turned out. Now that it is done, I am starting a remodel on it to put a 4.6L DOHC fuel injected engine in it. Hopefully by summer it will be going in.
Kevin
I'm really happy with the way that it turned out. Now that it is done, I am starting a remodel on it to put a 4.6L DOHC fuel injected engine in it. Hopefully by summer it will be going in.
Kevin
Freshman User
Joined: Aug 2010
Posts: 26
Likes: 0
Wow what an incredible looking truck. Love the very simple looking interior with the dash all filled in and shaved.. Love the look of the stereo console up high... That and that hood the way it opens.. I can say I wouldn't do that to my truck but it looks cool..
Nice Job and wow 8 years is a long time.. Props on sticking to it...
Nice Job and wow 8 years is a long time.. Props on sticking to it...