


Installed Another Homelink (pics)
Thread Starter
|
Senior User
Joined: Apr 2007
Posts: 199
Likes: 0
OK guys...I installed another Homelink. This time in my 2008 SD.
I had the forethought this time to take pictures to document the install for those of you who want to give this a try.
While this install is on an 08, the procedure has been the same since the 1st one I installed on my 2000 Expedition.
I picked up this unit on eBay for about $30. Try to locate a complete visor from any vehicle (doesn't have to be a Ford) instead of the module alone. Look for the module with the LED that looks like a house for the rolling code module.
Alright then...here we go:
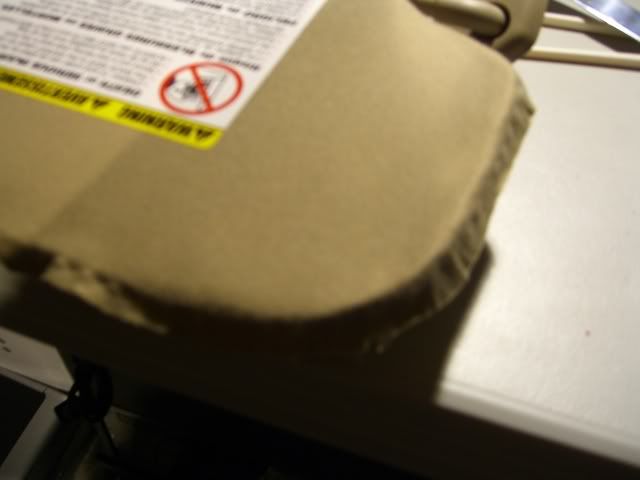
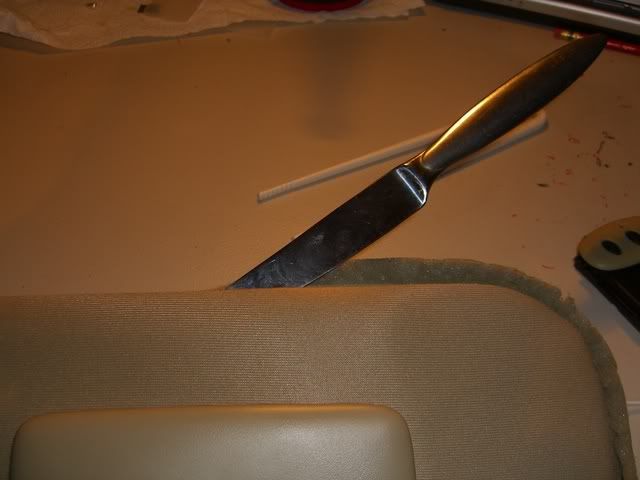
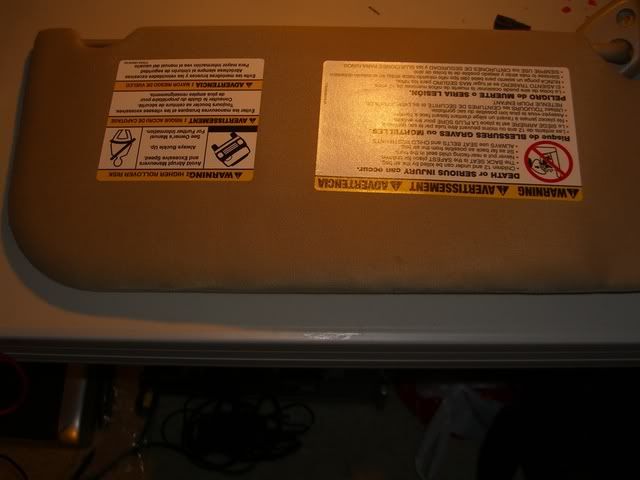
After removing the visor and unplugging the power, begin by starting to pull the fabric carefully from the seam. I use a butter knife to slightly separating the halves of the visor.
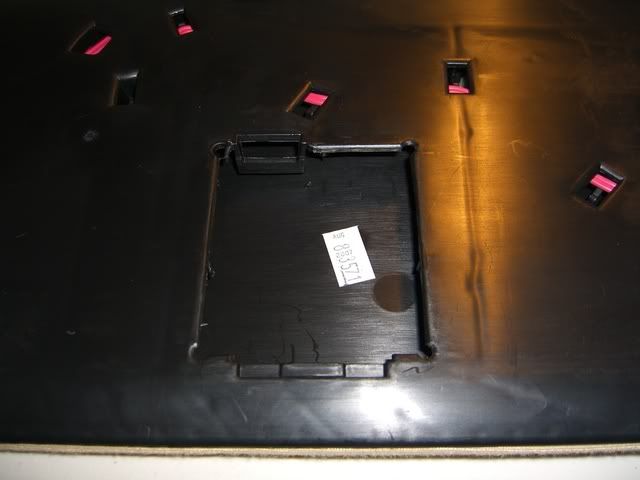
After you've gone all of the way around, you will have exposed the installation area:
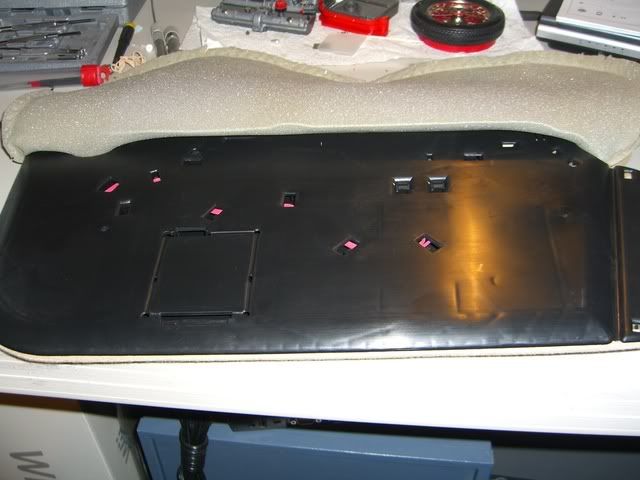
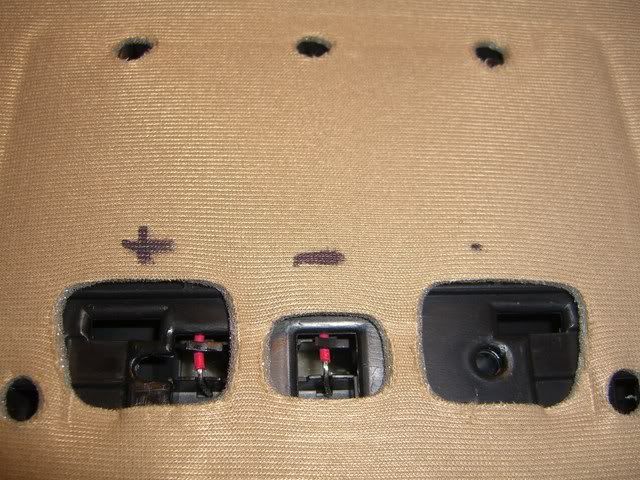
Here I have the buttons separated from the module. Just carefully pry the tabs to remove the buttons and the button cover:
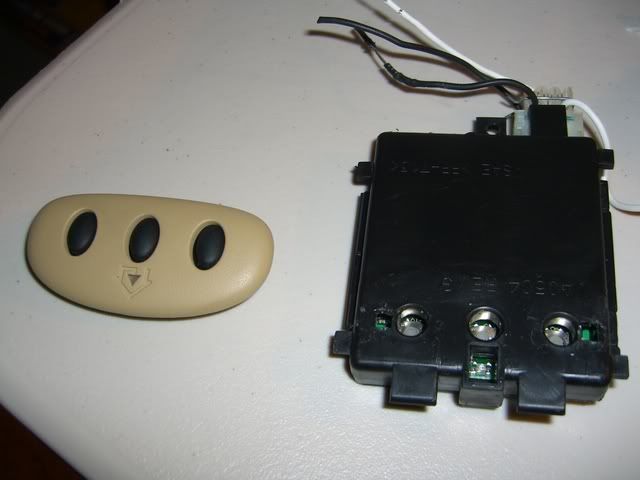
Next I removed the vanity mirror to determine the positive and negative wires to the mirror light. Here you can see that I marked them to make it easier to wire the module up:
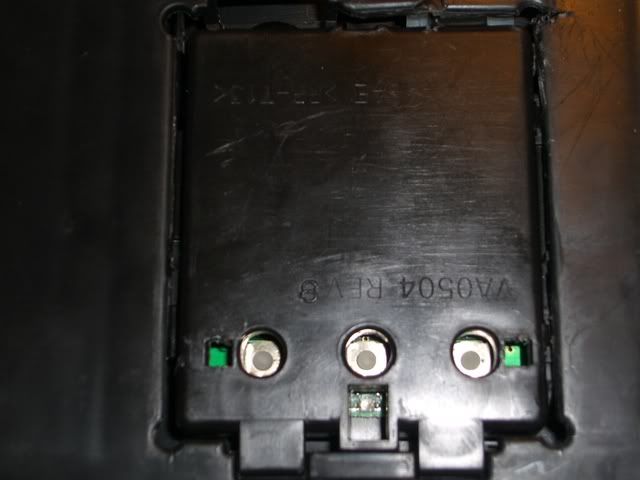
Cut out the pre-scored area and install the module after wiring (you may want to temporarily plug the visor in and press the buttons on the Homelink to ensure that your wiring is correct before popping the module in):
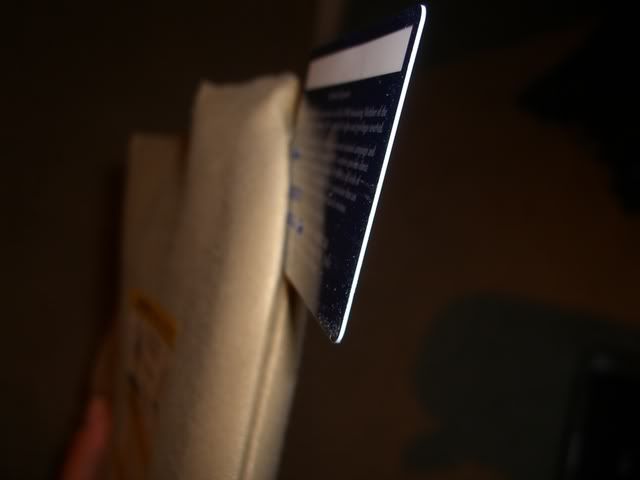
I like to use a credit card to re-insert the fabric:
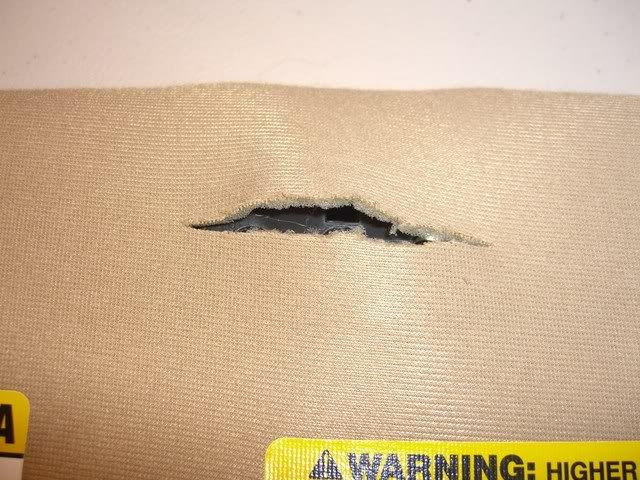
Visor back together. Now you'll want to carefully cut a slit to pop the buttons and cover back on:
That's it!!! Now just re-install the visor and program the module. You can find the programming instructions at
HomeLink; Home automation,Wireless control system, universal transceiver, RF control, Home security, smart home, vehicle to home, home automation, remote control lighting and home control
I had the forethought this time to take pictures to document the install for those of you who want to give this a try.
While this install is on an 08, the procedure has been the same since the 1st one I installed on my 2000 Expedition.
I picked up this unit on eBay for about $30. Try to locate a complete visor from any vehicle (doesn't have to be a Ford) instead of the module alone. Look for the module with the LED that looks like a house for the rolling code module.
Alright then...here we go:
After removing the visor and unplugging the power, begin by starting to pull the fabric carefully from the seam. I use a butter knife to slightly separating the halves of the visor.
After you've gone all of the way around, you will have exposed the installation area:
Here I have the buttons separated from the module. Just carefully pry the tabs to remove the buttons and the button cover:
Next I removed the vanity mirror to determine the positive and negative wires to the mirror light. Here you can see that I marked them to make it easier to wire the module up:
Cut out the pre-scored area and install the module after wiring (you may want to temporarily plug the visor in and press the buttons on the Homelink to ensure that your wiring is correct before popping the module in):
I like to use a credit card to re-insert the fabric:
Visor back together. Now you'll want to carefully cut a slit to pop the buttons and cover back on:
That's it!!! Now just re-install the visor and program the module. You can find the programming instructions at
HomeLink; Home automation,Wireless control system, universal transceiver, RF control, Home security, smart home, vehicle to home, home automation, remote control lighting and home control
Thread Starter
|
Senior User
Joined: Apr 2007
Posts: 199
Likes: 0
Well...Think of Homelink as a factory installed universal remote for your garage door(s) and/or gates.
It eliminates having openers clipped to your visor and works with different garage door opener manufacturers.
Many different auto manufacturers install it as a factory option, but homelink does not sell it aftermarket, so you have to get one from eBay or your local pick-a-part.
I use mine for my 2 garage doors and the remaining button is used for my community gate.
Hook it, I'll pull it.
Joined: May 2007
Posts: 15,037
Likes: 4
From: Grand Lake, La.

Well...Think of Homelink as a factory installed universal remote for your garage door(s) and/or gates.
It eliminates having openers clipped to your visor and works with different garage door opener manufacturers.
Many different auto manufacturers install it as a factory option, but homelink does not sell it aftermarket, so you have to get one from eBay or your local pick-a-part.
I use mine for my 2 garage doors and the remaining button is used for my community gate.
It eliminates having openers clipped to your visor and works with different garage door opener manufacturers.
Many different auto manufacturers install it as a factory option, but homelink does not sell it aftermarket, so you have to get one from eBay or your local pick-a-part.
I use mine for my 2 garage doors and the remaining button is used for my community gate.
Thanks for the explanation. I was kind of thing towards that but didn't know for sure. You did a great job with the install.
Trending Topics
Hotshot

Joined: Apr 2004
Posts: 13,589
Likes: 2
From: NW burbs of chicago

FTE Stories
Ford Trucks for Ford Truck Enthusiasts

10 Best Ford Truck Engines We Miss the Most!
Joe Kucinski
2026 Shelby F-150 Off-Road: Better Than a Raptor R?
Brett Foote
2027 Super Duty Carhartt Package First Look: 12 Things You NEED to Know!
Michael S. Palmer
10 Most Surprising 2026 Ford Truck Features!
Joe Kucinski
Top 10 Ford Trucks Coming to Mecum Indy 2026
Brett Foote
5 Best / 5 Worst Ford Truck Wheels of All Time
Joe Kucinski
Ford Super Duty: 5 Things Owners LOVE, 5 Things They LOATHE!
Joe Kucinski
Every 2026 Ford Truck Engine RANKED from WORST to FIRST!
Michael S. Palmer
The Best F-150 Deal of Every Trim Level (XL through Raptor)
Joe Kucinski
Elder User
Joined: Apr 2002
Posts: 529
Likes: 1
Does the ignition key need to be on for that to work? Seems like it should- since it'll be parked in the damn driveway and not doing so would give the bad guys easy access to getting themselves shot coming in the house via the garage...

Freshman User
Joined: Mar 2007
Posts: 25
Likes: 0
Just wanted to say thanks for your write-up. Explanation was great. Didn't have to split apart the visor. Popped out the vanity light to gain access to power. Fed the wires from the Homelink to the vanity light through the empty passageway between the light and Homelink.
Carefully tucking in the fabric with a credit card was easy.
Looks factory.
Thanks,
Don
Carefully tucking in the fabric with a credit card was easy.
Looks factory.
Thanks,
Don


