



cab lights any problems?

Senior User
Joined: Nov 2006
Posts: 136
Likes: 0
From: Chadds Ford, PA
installed them on my 06 and have had no problems yet with anything leaking....going to take a thin bead of clear silicon sooner or later and go around where the fixture meets the roof. Definately worth the look when done!
Hotshot


Joined: Aug 2006
Posts: 17,398
Likes: 317
From: Whittier, CA
I just installed mine a few weeks ago. When you get the lamp bases you'll see that there is a foam seal just around the 3 holes that penetrate your roof. It seemed like a pretty good seal to me. I took the extra step of putting globs of silicone just around the area of the holes.
For johnjohn, I would not recommend sealing around the whole lamp base. If you look closely at the lamp you'll see a hole in one end. That is for condensation under the lens to drain out. That needs to remain open.
A lot of guys install these things and I have not yet read of any leaks, even when the bases don't fit perfectly.
Bill
For johnjohn, I would not recommend sealing around the whole lamp base. If you look closely at the lamp you'll see a hole in one end. That is for condensation under the lens to drain out. That needs to remain open.
A lot of guys install these things and I have not yet read of any leaks, even when the bases don't fit perfectly.
Bill
Tuned
Joined: Jan 2007
Posts: 413
Likes: 0
From: Holden,La.
I installed Mine a couple of years ago and not one problem with leaks. Just be sure and cover the gasket with clear silicone and put a little extra around the holes before mounting them.
good luck with it.
You will like the look after it is done, not a truck without them (jmo)
good luck with it.
You will like the look after it is done, not a truck without them (jmo)

Senior User
Joined: Jul 2007
Posts: 219
Likes: 2
From: Houston, TX
I installed mine a couple months ago and no problems. I was going to put silicon on mine, but was told I didn't need it. After looking at the base of the light I figured I probably wouldn't. One tip though. When you put the lights on, they will not necessarily sit flat on the roof. DO NOT over-tighten and I would not recommend trimming, at first anyway. A few of mine where not touching the roof all the way around.......until the next morning that is. Give them a day to settle and see how it looks. I have like 3 of mine that I could see some light under the edges after they were installed. Really T-ed me off, cause I am very picky. But one of the guys that helped me out said not to worry about it. Sure enough, the next day 2 of them were flush with the roof and then by the end of that day or the next they were ALL good. Oh, and get a knock-out if you can for the big hole, sooooo nice. Perfect hole every time. Good luck and hope this helps.

Elder User
Joined: Aug 2007
Posts: 914
Likes: 1
From: Saskatoon, SK, CA
I know the cold climate thing... we've had about 30 days of -35 degree weather since November 1st. Installed mine just before winter and have had no problems with them leaking - we've had enough moderate above freezing weather as well and it has had many baths so I would have known by now if they leaked.
As others have said, I wouldn't put any silicone around the edges if they don't fit perfectly - it shouldn't need it with the foam rubber seal underneath. I'm hoping mine fit a little better to the cab once we get some heat on them in the summer.
As others have said, I wouldn't put any silicone around the edges if they don't fit perfectly - it shouldn't need it with the foam rubber seal underneath. I'm hoping mine fit a little better to the cab once we get some heat on them in the summer.
Trending Topics

Thread Starter
|
New User
Joined: Nov 2007
Posts: 9
Likes: 0
FTE Stories
Ford Trucks for Ford Truck Enthusiasts

2027 Ford Super Duty Buyer's Guide (Every Model, Engine, & Package)
Brett Foote
Top 10 Ford Truck Tragedies
Joe Kucinski
AEV FXL Super Duty - the Super Duty Raptor Ford Doesn't Make
Brett Foote
Lobo Vs Lobo: Proof the F-150 Lobo Should Be Even Lower!
Michael S. Palmer
Ford's 2001 Explorer Sportsman Concept Looks For a New Home
Verdad Gallardo
10 Best Ford Truck Engines We Miss the Most!
Joe Kucinski
2026 Shelby F-150 Off-Road: Better Than a Raptor R?
Brett Foote
2027 Super Duty Carhartt Package First Look: 12 Things You NEED to Know!
Michael S. Palmer
10 Most Surprising 2026 Ford Truck Features!
Joe Kucinski
Hotshot
Joined: Aug 2006
Posts: 17,398
Likes: 317
From: Whittier, CA
I've been thinking about writing this for a while, so I'll take this opportunity. I did not do this, and it's too late for me, so just consider it for what it's worth.
I followed all the instructions I could find about placement of the clearance lights. I don't have any issues with the centers across the cab, but I believe the often repeated dimension of 5.5" back from the windshield seal rubber is not quite right. At least on my cab I'm convinced that they would have fit the contour better if they had been just a little further back. And it won't be much, maybe 1/2" on the outer lamps, less than that on the inner pair, and 5.5" might be just right for the center lamp.
If I could do this again, without spending $40k on a new truck, here is what I would do.
Buy an extra lamp base. They are less than $10. Take that base and cut off the studs, cut off the electrical connector, and remove the rubber seal. Now you'll have a lamp that will sit on the cab surface without any holes having yet been drilled. That will be your pattern.
Now, layout the holes following the instructions. In short, that is one lamp on centerline, 8" outward to the next pair, and 12.5" or 13" out to the outermost pair. Start out with the traditional 5.5" back from the windshield seal rubber. Now using that basic layout, place your template base on the cab and check the fit to the cab around the entire base. Slide it straight forward or rearward until you get a perfect fit to the cab contour. As I noted above, I believe you'll find the outer lamps are a better fit when back just a little further from the windshield. When you get the perfect fit, mark the location and layout the holes.
It would be great if someone would invest the $10 and a little extra time to try this. Otherwise we all just keep repeating the 5.5" dimension when time after time it proves to be not quite correct.
Best of luck to you,
Bill
I followed all the instructions I could find about placement of the clearance lights. I don't have any issues with the centers across the cab, but I believe the often repeated dimension of 5.5" back from the windshield seal rubber is not quite right. At least on my cab I'm convinced that they would have fit the contour better if they had been just a little further back. And it won't be much, maybe 1/2" on the outer lamps, less than that on the inner pair, and 5.5" might be just right for the center lamp.
If I could do this again, without spending $40k on a new truck, here is what I would do.
Buy an extra lamp base. They are less than $10. Take that base and cut off the studs, cut off the electrical connector, and remove the rubber seal. Now you'll have a lamp that will sit on the cab surface without any holes having yet been drilled. That will be your pattern.
Now, layout the holes following the instructions. In short, that is one lamp on centerline, 8" outward to the next pair, and 12.5" or 13" out to the outermost pair. Start out with the traditional 5.5" back from the windshield seal rubber. Now using that basic layout, place your template base on the cab and check the fit to the cab around the entire base. Slide it straight forward or rearward until you get a perfect fit to the cab contour. As I noted above, I believe you'll find the outer lamps are a better fit when back just a little further from the windshield. When you get the perfect fit, mark the location and layout the holes.
It would be great if someone would invest the $10 and a little extra time to try this. Otherwise we all just keep repeating the 5.5" dimension when time after time it proves to be not quite correct.
Best of luck to you,
Bill
Posting Guru
Joined: Dec 2006
Posts: 1,391
Likes: 1
From: NorCal
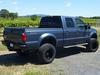
Here are my factory installed cablights:

I measured my factory installed lights and found the 3 center lights are spaced 8" apart (center to center) and the outer lights are 12-1/2" away (center to center) from the others.
The distance from the top edge of the windshield rubber to the front edge of the lamp base is 3-1/2" and it is the same for all 5 lights.
Make sure all the lights face directly forward (not angled out as the windshield curves)
I measured my factory installed lights and found the 3 center lights are spaced 8" apart (center to center) and the outer lights are 12-1/2" away (center to center) from the others.
The distance from the top edge of the windshield rubber to the front edge of the lamp base is 3-1/2" and it is the same for all 5 lights.
Make sure all the lights face directly forward (not angled out as the windshield curves)

Posting Guru
Joined: Aug 2005
Posts: 1,473
Likes: 0
From: Coal Country, ND
I live in North Dakota, so yeah I know about the cold climate thing.
I say put'em on and forget 'em. I have cab lights on the 79 250 and my 05 SuperDuty and have never had any problems.
I say put'em on and forget 'em. I have cab lights on the 79 250 and my 05 SuperDuty and have never had any problems.
Senior User
Joined: Jul 2007
Posts: 219
Likes: 2
From: Houston, TX
I followed motoman's instructions to the tee for mine. I really like the way they look. I think they look better than factory done. On some of the factory trucks it appears to me that the two outside lights are setback further. I like them to follow the contour of the windshield. But to each his own and regardless if they face straight or follow the windshield they look good.

More Turbo

Joined: Dec 2002
Posts: 743
Likes: 2
From: MI -- farmboy
i used motomans directions and installed 3 sets so far. I have never used silicone, I use just the foam gaskets that are supplied. I am in michigan and the trucks have seen winters, one is on its 4th winter with these lights. No problems. Dont worry, just take your time and measure 3 or 4 times before you drill.

Elder User
Joined: Jan 2007
Posts: 807
Likes: 0
From: Houston, TX
I've been wanting to do this on my '03 for a while. I'm pretty comfortable pulling things out and installing stuff, but I was curious from those who have done it before, how long do you estimate it took you? A full weekend day, more, less?
tnx,
TX
tnx,
TX
More Turbo
Joined: Dec 2002
Posts: 743
Likes: 2
From: MI -- farmboy
2 hours. Had a friend help, we made templates and taped them the the cab, measured, measured and measured again. Then we measured and finally drilled the holes. Put an old sheet over the dash to catch the metal shavings, we were able to leave the headliner in, just removed the visors and pulled the liner and wedged it down with a piece of wood. Drill from the top, very careful not to punch through and put hole in the liner (that is what the wood block was for). I think we used a 3/4 inch carbide tooth holesaw, like one you use on electric panels for a condiut hole. That worked the best. Ran wire to runnings lights off the headlight switch. The only problem I had was the lights did not come with the METRIC nuts that were required. Had to go to the hardware and clean them out of metric nuts and lock washers.
Just make sure you make little cardboard templates and black tape. Read the directions twice. I found out that the lights need to face forward, they sit nicer that way and that is how the stock lights are. My first install the lights followed the contour of the roof steel around the windshield. Still looked very good, but keeping them facing forward was better all the way around.
good luck and have fun.
Just make sure you make little cardboard templates and black tape. Read the directions twice. I found out that the lights need to face forward, they sit nicer that way and that is how the stock lights are. My first install the lights followed the contour of the roof steel around the windshield. Still looked very good, but keeping them facing forward was better all the way around.
good luck and have fun.