When you click on links to various merchants on this site and make a purchase, this can result in this site earning a commission. Affiliate programs and affiliations include, but are not limited to, the eBay Partner Network.
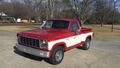
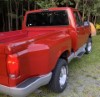
I’m going to replace my wooden floor soon on my flareside. I believe I will be able to replace the two outer sections of wood directly under the bed sides without dismantling my bed sides. My truck is a California model and is close as rust free as it gets. All of the carriage bolts and nuts are seized free, etc. So, I believe this will be an easy job. Not having to remove the bed sides, etc. Or do the bed sides need removed regardless ? Im thinking I could save a few hundred dollars not buying a kit with pre groves boards. In comparison to just buying some oak boards at Home Depot, etc. Or having a local saw mill cut them out of rough cut lumber. I realize without groves on the boards. The metal channels will not be flush or recessed into the bed floor. I’m ok with that. Any feedback or additional advice would be appreciated. My truck is kept indoors and only driven rare occasions.
You did not say what year your truck is as the wood changed over the years and what do I mean about "changed over the years"?
Early years used boards think 5 or 6.
Later years used plywood 3 parts, 2 outer and 1 down the center.
I think the new metal strips you can get is made for the plywood and it sits on top of the wood.
Now for them bed sides and if you need to remove them or not?
You will need to undo the bolts and raise the sides to get the old wood out and the new wood back under the bed sides.
The wood floor will be something like this.
The cross members get put across the frame and the wood on top of them and the bed sides on the wood.
The above is a metal floor that the cross members are welded to.
I then put the flare side bed sides on the metal floor like if it would be if it was wood.
You can see how the bed sides (red) are on top of the metal floor (black).
Oh and the wood was painted truck color not all fancy with stain & clear.
Dave ----
I think the plywood was 83 or 84 but the wood goes under the bed sides and front panel so they either need to be raised up or come off all the way.
Again look at what you have and you can see the sides & front panel lips sit on top of the wood.
Because the panels sit on top of the wood is why the bolting lips rust away,
I know as I had to fix mine before I could bolt them to the metal floor.
If your metal strips are still good I think you will need to use a rotor on the boards to set the strips back in.
Dave ----
I did the wood floor myself on a 53 f100. The beds probably did change through the years, but I had the same idea you had, not grooving the boards. When I went to install the new boards, I found I had to groove the boards. On my bed the front metal part of the bed had a channel that boards fit into under the front. The boards also fit under the sides. There is a relationship there, and they will not fit without grooving them. Unless you modify the front channel piece and then the whole bed is going to sit higher on the truck. If you groove the boards, everything fits like stock. I even used 5/4 decking boards and I still had to groove them to make everything line up.
Try it, maybe yours will work without grooving the boards. But if you need to groove them you will quickly figure that out like I did. I just borrowed and router and cut the sides of the boards with that.
I think the plywood was 83 or 84 but the wood goes under the bed sides and front panel so they either need to be raised up or come off all the way.
The change was late in the 1982 model year. I believe in July 1982. Flaresides built after mid-July 1982 had the 3 piece plywood(MDO) floors. I have built or rebuilt both versions. The wood is easy to replace. Whether boards or the plywood, they're 3/4" thick. The bed technically does not have to be unbolted or even lifted, but since the bed bolts go through the wood, they need to be removed regardless. The outer boards that slide under the bed sides can be replaced with the bed installed, but the next inboard boards will have to be removed so the outer boards can be slid inwards.
On my bed the front metal part of the bed had a channel that boards fit into under the front. The boards also fit under the sides.
On the 1980-1986 Flareside beds, the wood sits on top of the front head board, but under the bed sides. Same with the rear sill, the wood sits on top of the rear sill, but under the bed sides.
If they're tight on each end, I just sanded the bottom of each end of the boards for about 3/4" until the fit in there snugly.
On the 1980-1986 Flareside beds, the wood sits on top of the front head board, but under the bed sides. Same with the rear sill, the wood sits on top of the rear sill, but under the bed sides.
If they're tight on each end, I just sanded the bottom of each end of the boards for about 3/4" until the fit in there snugly.
So there is a thickness relationship between the front and the sides? It's been awhile since I did it. 3/4 inch sounds right, if you use 3/4 it may fit right in place, but I used 5/4 boards which are 1 1/4 thick. So I must have had to groove them 1/2 inch. If you used 1 1/2 wood you would need even deeper grooves.
So there is a thickness relationship between the front and the sides?
Yes, but only in the four corners of the bed. The wood floor sits on top of the front head board and the rear sill, but at the same time has to slid under the bed sides. So the interference issues are only with the outmost boards that have to fit under the sides. All the boards in the middle are just sitting on the ends like a shelf, so it doesn't matter how thick they are. Here's a pic of my '84 below. The rear sill basically has a 3/4" high shelf so that the ends of the boards are flush with the steel if that makes any sense lol. But you can see on the rear where the boards have to fit under the bed sides. The front is exactly the same. I had to sand the ends of the boards down a bit to get them to fit in there. After you put a few coats of finish on them they fatten up a bit, and sometimes just the way the steel is bent the gap may be a bit less than 3/4". The flange on the bottoms of the bed sides is 1" wide, so that's how much of the boards need to slide under.
So there is a thickness relationship between the front and the sides? It's been awhile since I did it. 3/4 inch sounds right, if you use 3/4 it may fit right in place, but I used 5/4 boards which are 1 1/4 thick. So I must have had to groove them 1/2 inch. If you used 1 1/2 wood you would need even deeper grooves.
That was definitely your problem. As I was contemplating using 5/4 decking boards also. Thinking they were 3/4 inch thick. They are not, they are actually exactly 1 inch thick. I knew that would create a problem. So, I threw away that idea. I can buy all oak boards that I need that are 3/4 inch for $322 compared to $622 oak board pre grooved kits for my particular truck. I don’t think I ll have the slightest problem not using grooved boards. As long as they’re exactly the same width and thickness as previous boards. My old ones will be easy to match up with new. As 5 of them are in perfect condition. While the remaining 2, one is warped and the other has one foot of rot. Extremely minor. So, I will be able to easily compare new and old boards. A big advantage compared to not have good condition old boards to compare to.
Tried to zoom in here not sure how well these will turn out, but hopefully they help make sense of it...
That picture definitely helps. Thank you. You confirmed my thoughts. I don’t think I ll have the slightest problem or challenge. The only real work I will have is cutting the two side pieces. But, that shouldn’t be bad as I have two very good old templates. Only challenge will be cutting them with a jig saw. Being oak is a hard wood. But, that shouldn’t be very difficult either. I’m very lucky my truck is rust and rot free. That’s the real challenge for most people in regard to these beds.
Tried to zoom in here not sure how well these will turn out, but hopefully they help make sense of it...
That picture definitely helps. Thank you. You confirmed my thoughts. I don’t think I ll have the slightest problem or challenge. The only real work I will have is cutting the two side pieces. But, that shouldn’t be bad as I have two very good old templates. Only challenge will be cutting them with a jig saw. Being oak is a hard wood. But, that shouldn’t be very difficult either. I’m very lucky my truck is rust and rot free. That’s the real challenge for most people in regard to these beds. You did an incredible restoration on yours. Very nice, mine is the same exact color blue. I owned 2 of these flareside trucks. The same exact color blue. This truck has an extremely sentimental story behind me owning 2 of them over the course of 30 years. I have been blessed with the second model I found.
The only real work I will have is cutting the two side pieces. But, that shouldn’t be bad as I have two very good old templates.
Actually, you don't even need the old boards to use as templates, you can just throw them away. Just slide the new board into place, and from the wheel side you can use a pencil to mark where it needs to be cut. You will get a better fit this way. You need to slide the board in place to mark the holes for the carriage bolts anyway, and then pull them back out to drill them.
Here's a picture before I re-installed the fenders. You can see how easy it is to mark where to cut the board. Just slide it in there, and pencil along the fender tub.
I later painted the edges of the outer boards black so that they didn't contrast so much.
I have since sold this truck, but she was pretty when it was all finished.
Rezvani's Latest Post-Apocalytic Monster Is a Ford F-150 Raptor Underneath
Slideshow: Called the Fortress, the 850-horsepower pickup combines Raptor underpinnings with military-inspired features, survival equipment, and a starting price of $285,000.