When you click on links to various merchants on this site and make a purchase, this can result in this site earning a commission. Affiliate programs and affiliations include, but are not limited to, the eBay Partner Network.
Hey folks, you guys have been helping me out a ton with my 82� answering my endless questions as I get it prepped for starting after a few years of sitting, and I am extremely grateful, thanks� hopefully this will help someone else out, it seems to be a very important aspect to clean out this area, or if you need to fix the wipers.
After reading through many many threads I decided to try to compile a slightly more complete step by step for armatures like me. There were a few things that I ran accross that all the pros will scoff at, but I had to figure out after poking around and cutting up my hands exploring� here goes:
Step 1 - remove the screws along the front of the cowl and the top between the slits.
there are about 10-15 total from left to right.
Step 2: Remove the wiper arms, washer fluid spray head, and radio antenna�
Not sure if it was correct, but I pulled down (quite hard) to get the hose off, when I did the spray head flew off a ended up down on my frame, luckily I found it. It has little retention wings to keep it in place, but mine clearly didn�t work.
The wiper arms were fun to figure out. You have to lift the arm off the glass and hold it out, then take a screw driver and pull the little tab out about 1/4�. That will lock the arm out and allow you to just wiggle it off the spline.
Unscrew the antenna from the mount to start. Use a small screw driver and pop of the chrome cap from the antenna to access the screws. Remove screws and then pull the wire from the bottom of the connection� again, not sure if this is the right way, but it worked for me.
Now the cowl should be relatively lose and wiggle around, and there shouldn�t be anything holding it in place or keeping you from taking it off. I took a slim screw driver and slipped it between the lower windshield trim and the cowl at the end to push it forward enough to get the cowl up and over the wiper arm studs. There are 2 tabs, 1 at each end that need to clear the trim as well, that�s why you need to go forward first. I had the hood up for most of this part, but at some point you can lower the hood to get the cowl up and off, just do a little trial and error wiggling it around to get the front clear of the firewall and the aft clear if the windshield trim.
Mine is off for repair, some jackwad busted some of the slats right in the middle� that will be a follow up here in a bit.
I did read that if you have a really nice paint job it can be tricky, but from what I did, if your careful you shouldn�t have much of an issue. I didn�t really bang into anything getting mine out.. even though it currently looks like crap� 😂
As you can see, at least in Texas, you get a crap load of leaves down in the oversized gutter under the cowl cover. I�m sure pine needles are almost as bad.
remove the rubber piece on the passenger side to access the area as well
The lower windshield trim was completely filed with leaves and dirt. I started with an o-ring removal tool and a vacuum and just went to town digging out the crap trapped in there.
then I just started scooping out handful after handful of leaves, twigs, and dirt ( the leaves had been there piling up so long they composted� no wonder people get rust and leaks in there.
this is also a good opportunity to check out your wiper linkage� which� I guess the duct tape finally gave way? What kind of Jerry-rigged shade tree fix is that!?! 😂
once the bulk is gone make sure you check the sides down to the bottom and get all that stuff out as well. Mine was probably piled up to the top, but I cleaned them first through the kick panel access plates inside the cab first� I�ll post what that looks like again here just to show anyone who hasn�t seen it� it was shocking!
this is what that channel looks like from the top passenger side, there is one on each side. I took a vacuum hose and ran it down to the bottom and sucked out everything I could (again after this pic).
side note: no wonder leaves get sucked into the air system and catch on fire at some point, it is wide open to everything that falls into the cowl!!! What a crappy design�
I finally took a hose and just started washing out the whole gutter area with a bristle brush to clean everything and assess the potential damage. Surprisingly there were no major holes rusted through from what I can tell.
the circled part is the broken wiper linkage. My next task will be to rust kill paint the whole gutter, then I am going to use the paint on Flex-seal and coat the bottom and sides, hopefully that will work. The rustiest part is in front of the driver, which is where water is entering the cab, hopefully that solves it.
Since your grille/louver is damaged, you should go to the junkyard and get a cowl piece from a 87-up truck. They did away with the slots and went to smaller round holes to combat some of the problems you are seeing.
Franklin, that is a good idea, I may end up doing that.
It started raining here so my paint and seal plan got put on hold for now� but I washed the cowl and brought it inside and I am attempting the repair and putting a screen on it to prevent future leaf issues.
This is what I have so far:
Issue #1 broken slats as previously eluded to.
I started by straightening out the slats the best I could with a pair of needle nose being careful not to flex the already brittle metal too much.
Then I got a JBweld metal stick, cut a chunk, mixed it and started applying it to the broken pieces. Note: once mixed the putty hardened pretty quick and I had to mix a second small chunk for the 3rd broken slat, but I was working slow.
I did notice there seemed to be remnants of a seal on the bottom side of the cowl. I scraped off what I could, cleaned it with alcohol, and put on a thick widow seal that I got from Lowe�s. I have no idea what size the seal is supposed to be (maybe the pros here can let us know), but there were a couple fat chunks so I went thick with the new stuff. I basically just followed the glue pattern from before.
if this is totally wrong, please let me know 😂
To prevent future leaf issues, I have read in other threads the suggestion to put on a finer screen. While at Lowe�s I got a sheet of aluminum as seen, an cut pieces to fit under the openings.
my current issue, advice and ideas would be appreciated, is how to affix the metal to the bottom without it looking ridiculous from the top� as in, bailing wire or zip ties through the slats are not good plans.
On the radio ant I don't think it comes apart like that as I have never seen one come apart like that, hope it's not broken.
You undo it from the radio and pull the wire out from behind the radio/dash and side panel as a whole.
On the screen can you JB Weld it on the bottom side?
When you were at Lowes did you pick up a bottom garage doir seal?
You use it for the cowl to hood seal to replace the broken factory one. It is held on by the front cowl screws.
Dave ----
You may be correct, but it sure made it a lot easier having it separate right there for me 😂… It didn’t take all that much pressure to come apart, so hopefully it just goes back together smoothly. It is an antenna after all, shouldn’t be too complicated… I hope.
I thought about that, but the JB weld would be really permanent. I was thinking about using a silicone or something dotted around the underside, hopefully it would make a nice even hold yet not be seen from the top at all. I’ll will get it done today and update the photos and the process 🤙🏻
The cowl / hood seal that runs along the front screws is actually in oddly good shape. It has its fuzz still and is relatively flexible to my surprise. I have cleaned it and plan to just reinstall it when the cowl goes back on.
I like what you're doing here. I replaced the HVAC resistor in my DD Ram a couple of weeks ago and was shocked (SHOCKED, I tells ya) how much crap was up inside there... I'm glad the resistor burnt itself out before it caused a catastrophic fire. This looks like a tedious, unsexy job but absolutely necessary.
If you want a semi-permanant hold for your screen door mesh try weatherstripping adhesive. It'll hold better than silicone and remain flexible for years. There's tons of two-part epoxies that'll get the job done too... l can see why you don't want to have to do this a second time. The mesh you picked out was a good choice. I probably would've gotten some coarse screen and been scratching my head about how to attatch it... you've got some solid areas to work with and for glue to attach to.
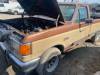
Your truck looks like it's the same color as my 85, Med Desert Tan (code 9N)... probably the most 80s of all the 80s colors.
I was thinking about using a silicone or something dotted around the underside...
Nice write-up, but ixnay on the iliconesay.
Notice that vinegar scent while silicone is curing? That's acetic acid, designed to lightly etch the base material for a good bond. Unfortunately, it can also give corrosion a head start, especially if the bond ever weakens and moisture is present.
I think newer silicone have less acetic acid because of this problem, but it's still there. Lots of other sealer products out there, so it's best to find something more suitable where corrosion could be an issue. I'd suggest a sealer designed specifically for auto body work.
Thanks for the input guys, both those are probably better routs then the one I ended up with� but we will see 🤞🏻
when I start a project I am all gas until I can get it done for the most part, for better or worse.
I decided to roll with a clear Loctite super something� got it home and started putting it on, and it just didn�t feel right� so I went to the garage and grabbed a caulk I had laying around. I wanted use something that wasn�t permanent in case I ran into some kind of issue. The JB weld Steel stick would have worked great, just till the end of time.
since it doesn�t matter what the bottom looks like I wasn�t too careful with that side.
I zip-tied the screen to the slats nice and tight, then I put a fat bead around sides and carefully dotted around the middle behind some slats for mid grip. When the cowl is upside down, there is a raised edge thank god, or it would be impossible to keep it clean. For the dots, I pressed the tip against the screen where there was a full back� then squeezed until I saw it squish out the other side but still in the channel. I wanted sloppy overflow on the back (bottom side) so it would grab the screen material and hold on.
I have a couple spot to razor off when it�s cured, but not too bad for such a ridiculously sloppy process. Once it is cured and holding I will clip off the zip ties and will hopefully have pretty clean finish (I�ll get a new paint job at some point and the screen will be painted and match). I anticipate these will get messy and need frequent cleaning, but it�s better then the crud that was piled up in there.
I like what you're doing here. I replaced the HVAC resistor in my DD Ram a couple of weeks ago and was shocked (SHOCKED, I tells ya) how much crap was up inside there... I'm glad the resistor burnt itself out before it caused a catastrophic fire.
Your truck looks like it's the same color as my 85, Med Desert Tan (code 9N)... probably the most 80s of all the 80s colors.
It would appear that during the period that I did t own this truck, mine did have some sort of fire around the resistor coils, but luckily not too much damage…. The plastic housing that holds them is melted down, you can see if from the engine bay.
This is an 1982, If I’m reading my door tag correctly, the two colors are 82 & 89 which correlates to Fawn and Dark metallic Fawn… I did get it repainted in the 90’s and although they the paint was very close, I believe the current colors are Tumbleweed Tan and Prairie dog brown 😂… how I remember those names is beyond me.
This is an 1982, If I�m reading my door tag correctly, the two colors are 82 & 89 which correlates to Fawn and Dark metallic Fawn� I did get it repainted in the 90�s and although they the paint was very close, I believe the current colors are Tumbleweed Tan and Prairie dog brown 😂� how I remember those names is beyond me.
Tumbleweed Tan and Prarie Dog brown??
Trying to make brown fun again, Ford?
Geez... let's just call it brown, light, dark, or medium, and leave the clever paint names to the guys at Mopar... ...they like that sort of thing.
Tumbleweed Tan and Prarie Dog brown??
Trying to make brown fun again, Ford?
Geez... let's just call it brown, light, dark, or medium, and leave the clever paint names to the guys at Mopar... ...they like that sort of thing.
Hey, be careful there, I used to have a Plum Crazy Purple 340 Duster, That after that paint peeled off, I had it painted Hemi Orange... LOL
Hey, be careful there, I used to have a Plum Crazy Purple 340 Duster, That after that paint peeled off, I had it painted Hemi Orange... LOL
HICs (High Impact Colors) are making a big comeback! I think the most prominent colors l see on new Challengers are Sublime and Plum Crazy.
Sassy Grass green, Tor-Red, Panther Pink, Lemon Twist, lots of great colors in that lineup. Maybe they'll bring back the Mod Top option... a Top Banana Charger Hellcat with a sunflower printed vinyl top would most certainly be considered "High Impact"... it'd definitely leave an impression.
... something like this ;
I've had a lot of Mopars and lately I've had the itch for a 71-74 Charger. Didn't really favor em when l was younger, but they're just so... audacious. l think l need one, even a 318/auto model would suffice.
Rezvani's Latest Post-Apocalytic Monster Is a Ford F-150 Raptor Underneath
Slideshow: Called the Fortress, the 850-horsepower pickup combines Raptor underpinnings with military-inspired features, survival equipment, and a starting price of $285,000.


 2 DR,5.8L,AT,RWD,TAN/BROWN,Tilt,Co lu 000 A


 ...they like that sort of thing.
 LOL
LOL
