When you click on links to various merchants on this site and make a purchase, this can result in this site earning a commission. Affiliate programs and affiliations include, but are not limited to, the eBay Partner Network.
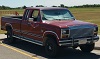
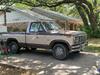
Howdy all, 1982 - F150 - 302 - AT - XLT Lariat - Fawn/dark fawn
In the process of tinkering around with the old girls interior, I noticed that on the dash, air vents, and various other parts… there use to be a thin silver ******* that is almost completely gone off of everywhere. The XLT by the stereo had most of the silver worn off as well. I can’t be certain which all little pieces had it, but I know the air vents and I am pretty sure on the upper dash around the warning lights had it…. Anyhow, if anyone Is thinking about re-silvering, I wiped it with alcohol and used a silver paint pen from my kids supplies, and it worked surprisingly well. Cheap and easy baby… before and after
Last edited by TXwingnutt; Aug 18, 2022 at 09:15 AM.
There is indeed, all the parts that I silvered had that thin little raised ridge going along the edge. If you take a paint pen, hold it sideways a bit (not point straight on) and run the side of the tip down the ridge it goes on pretty smoothly and you run a lower risk of slipping off and painting unwanted parts. The air vents are actually a little concave so the tip rides along it in a channel almost for those (tip straight on fine for those)
There is indeed, all the parts that I silvered had that thin little raised ridge going along the edge. If you take a paint pen, hold it sideways a bit (not point straight on) and run the side of the tip down the ridge it goes on pretty smoothly and you run a lower risk of slipping off and painting unwanted parts. The air vents are actually a little concave so the tip rides along it in a channel almost for those (tip straight on fine for those)
Yea it is not hard when you are young but get a few years on you and your hands start to shake it cant be done
At the time I did mine the shaking was not too bad but dont think I can do it now and I am taking pills for it
Dont get old!
Darn I for got to check mine, had a trainee that was having issues off loading his trailer I had to go help and forgot ........
DId I say dont get old? I am old and for got LOL
Dave ----
Sorry I did not get a picture, left phone inside and too lazy to get it.
I also did the lip around the "XLT" and down each side and across the bottom of that bezel.
On the main bezel Also did around and bottom of it and the cluster lip.
I see I did the 2 AC vents over on the passenger side but missed the drivers side
I see you are missing the screw holes across the top of each part.
Look up Plastex.com it is made to repair things like that.
I have a old car you cant get parts for and for get any dash bezels.
Mine had most of that top lip that also uses screws to hold it in place to the dash frame.
I had to make molds out of tape and used Plastex to build it back up so holes could be drilled for the screws.
I got pictures I could post if you want.
Dave ----
hmmm… around the XLT… not bad, I may give that a shot as well. Do you happen to know which parts actually came with silver originally? I looked pretty close and could not really tell if there was silver on any other parts… from mine at least.
You read my mind about those busted brittle plastic pieces!! That was coming down the line, I think 2/3 of all the holes and tabs are missing or broken off the dash pieces!! One of the ones on the XLT bezel I found and super glued it back in place… and I was going to use washers for the screw holes, but didn’t like that idea much…
Thanks for the forward thinking amigo! Plastex is my next stop.
I will see if I can get some pictures of my trucks dash.
What I have on my web site of the dash.
Looks like I did the head light, cubby lips, the cluster and AC vents and the vary outer lip on the main bezel.
Center bezel did the HVAC lip and around the outer too.
I dont know what the factory had in silver?
Maybe check out Ebay for NOS ones to see what they look like.
Well… looks like I may need another paint pen then 😂
This is one of the other interior items I want to tackle… I’m not sure what happened but his is what I ended up getting back when I got the truck back…
I have to try and change out the ignition actuator as well as the horn, which is my best guess as to why he used a pair of pliers to move a rod on the steering column when starting the truck, maybe I can knock out 2 birds with one disassemble… 🤔
Are you sure that is a horn button and not a start button?
If the key only turns far enough to let it runbut not start then you hit the button to start.
Would keep others guessing and it would never get stolen LOL
Dave ----
I think literally every screw part on the plastic dash and bezel pieces are broken in some capacity. I did a little research and asking around and have decided to try the new JB weld plastic stick to attempt to rebuild them. Someone who has used it said it would be perfect, strong, sandabke, and significantly cheaper then the other built up products… I’ll post the pictures as it goes and give a field report 👍🏻
Ok.. quick turn around… for anyone looking to use that stuff… so far so good.
I Cut off a 3/4” slice for interior parts and another for the dash parts, kneaded it as instructed, then broke off blobs of appropriate size for each little part.
what to expect:
- it warms up as you knead it because it’s an epoxy clearly. It says wear gloves to knead it, which I did with one hand, but it is pretty sticky and hard to put in place with a gloved hand, so I assisted with the other Ungloved hand.
- it is quite soft when you first start molding but starts to firm up as you go, which makes it easier to get right as it hardens.
- seemed like about 5-10min or so to work with it in optimal conditions, but I did it pretty quick so it may go a little longer.
hopefully it is easy to sand because the molding process wasn’t laser perfect… I’ll post update after curing, sanding, and drilling 👍🏻 Need to paint it black or fawn as well when it all done…
Well… this JBweld plastic stick is pretty awesome for rebuilding broken plastic pieces… It is rock hard and has one hell of a bond from what I can tell.
Like a Dumb ***, I rebuilt one of the stereo tabs on the bottom in the wrong place 🤦🏻♂️… luckily a Dremel with a sanding drum on it works like a champ for shaping… and in this case removing the excess bond used.
I shaped and and used a little black paint on the instrument bezel, so far so good.
This Hennessey Takes the Expedition Tremor's Off-Roading Capability to the Next Level
Slideshow: The VelociRaptor Expedition gains a lift, upgraded suspension, Brembo brakes, and trail-ready equipment while retaining the stock 440-horsepower EcoBoost V6.
Rezvani's Latest Post-Apocalyptic Monster Is a Ford F-150 Raptor Underneath
Slideshow: Called the Fortress, the 850-horsepower pickup combines Raptor underpinnings with military-inspired features, survival equipment, and a starting price of $285,000.