When you click on links to various merchants on this site and make a purchase, this can result in this site earning a commission. Affiliate programs and affiliations include, but are not limited to, the eBay Partner Network.
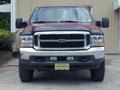
I bought my 2007 F250 with 6.0L diesel back in November. Still getting acquainted with it. I have to admit that I am finding it mechanically much more intimidating than my old '89 F250 7.3 idi .
I was having dead battery issues. I took the batteries to Advance Auto and they said one was bad, the other OK. I installed one new battery and drove the truck to AA for a charge system check. They told me the alternator had a bad diode. I bought a new alternator.
Now I am trying to figure out how to install the bloody thing. Unlike most of the bells and whistles on this vehicle, the alternator is perched right up on top of the engine. I can see it and get at the bolts and electrical connections. Should be a piece of cake, right?
But… then I went and looked up how to do it.
Under Alternator Removal and Installation, Diesel Engine, my Chilton manual says: Remove the drivebelt (see Chapter 1).
Chapter 1 says, under Drivebelt, Replacement, Diesel Engine: Drain the cooling system. 6.0L engine: Remove the cooling fan and fan clutch (see chapter 3). (Oh by the way, you may have to cut the shroud for removal.)
Chapter 3 says, under 6.0L & 6.4L Diesel Engines: Fan Removal and Installation: Remove the radiator (see Section 6).
Section 6, Radiator removal and installation, says to remove the cooling fan and clutch as one of the preparatory steps BEFORE removing the radiator.
So… WTF? Can somebody please tell me how to change the stupid alternator, which I can see and touch, without having to first take half the blinking engine apart?
And just how does one remove the fan so you can remove the radiator to remove the fan?
Arrrgh. Maybe I should sell this truck and go back to my good ol' 7.3 idi.
If it’s a rust free truck, save the work and I might buy it so you don’t have change the alternator.
Otherwise, Chilton books are garbage. Get a Ford service DVD off eBay.
None of that has to come off, and they might be describing a situation of the lower alternator of a dual alternator vehicle.
There are many stories and a few videos on YouTube of how to do this. I’m a half hour past bedtime or I’d give more details - maybe in the morning if someone else doesn’t.
On the tensioner way below the alternator, you can fit a tool or 1/2” bar wrench and turn it to loosen the belt. There is a little kickstand on it to lock it in the non tensioned state. The belt slips off the pulley and the rest is three bolts, one nut, and one connector. Then do it in reverse.
You can even do it not using the tensioner, remove the cable and connector and the front bolt. Placing you hand on the back of the alternator and holding it down, release the two back bolts. Then slowly let the alternator back rise up and the belt relaxes. You do that in reverse to but the alternator back on, but with the warning of not trying to lever the alternator by putting a rod or screwdriver in the bolting holes. That can break the aluminum case.
I’d hunt for the videos, but bed is calling.
edit. Remove the 10mm nut on the pass battery post and remove that 4ga cable. That’s the positive connection to the alternator and you don’t want the wire hot at the alternator. That’s a much easier way the disconnecting the two negative terminals before any alternator work.
The truck in this video apparently has the fan shroud removed, which looks like it might make access to the belt a bit easier. The narrator doesn't say anything about taking off the shroud, though.
I will attempt to swap alternators today and post my results this evening.
Last edited by BalerTwineGuy; Mar 19, 2022 at 09:35 AM.
Reason: forgot link!
There are a lot of videos and threads about doing the changeout. Google can be your friend.
We tend to call it a stator, mine is removed and was so because I kept swapping alternators for the alternator testing videos I was doing. There is not much room down there and my tensioner did not have the kickstand. My very first changeout was done with the hand method, which many end up doing if they are swapping alternators in the parts store parking lot. Which is kind of weird, as many parts stores let you borrow tools like the tensioner wrench. You can also use a pry bar to pull up on the belt on the center side of the alternator, and some are strong enough to pull the belt between the tensioner and alternator to set the kickstand.
How do you even remove that stator? I’ve been trying to find a video on it but no luck. I’ve seen a few videos where people say “remove the shroud” and the video skips them actually doing it then cuts to it being off already.
I now have the new alternator installed, and my multimeter said it was putting out about 14.4 volts at idle. Yay!
But, what a PITA. I tried the "just pull on the belt" approach recommended in the videos above. Those guys must have et more Wheaties for breakfast than I did. I sure couldn't move the tensioner enough to latch the "kickstand."
I fiddled around for several hours groping blindly to feel for the square hole on the tensioner, then trying to get a breaker bar in the hole and de-tension the belt. Between the taut belt and the shroud fins there just wasn't enough room to squeeze two hands and a wrench and see what I was doing. I gave up on that approach.
After considerable head scratching and cussing, I wound up using a modification of the not-using-the-tensioner method suggested by TooManyToys. I was nervous about holding the alternator down while unscrewing the last bolt with the belt under tension (I was afraid putting it back together under tension might risk misaligning mounting bolts & stripping threads). So what I did was to put a big C clamp holding the alternator to the mounting bracket before removing the screws. All three mounting screws came out easily with no twisting force on 'em. Then I loosened the clamp, and the alternator gradually tipped and loosened the belt.
Once the alternator was off, and the belt was loose, I was able to fumble a ratchet wrench into the tensioner hole, twist the tensioner and lock it in the de-tensioned position. Installing the new alternator was easy once the tension was off the belt. Unfortunately, the wrench popped out of the adjuster hole, and it took more cussing to get a breaker back in place. And then I actually had to put a cheater on the beaker to get enough leverage to twist the tensioner. The little "click" when the latch pawl released was a beautiful sound.
You really need a tensioner wrench for these. Usually a flat thin bar with a square on the end. Soem tools have multiple attachments for the tensioners.
Drain a gallon on coolant. I put a 3/8" hose on the nipple into a gallon jug. Use a 6mm hex wrench to open the petcock slightly. If you use the large hex, you risk snapping it off. Opening the petcock too far lets the coolant escape the o-ring, and the coolant gets messy. It's slow but clean and easier to reuse the coolant.
Best as I remember.
.
Remove the two hoses on top of the radiator, careful with the small nipple.
Remove the four bolts holding the radiator clamps. I usually use a bungee to pull the radiator forward.
Lift out the shroud at the front of the fan; you have to work it through.
Disconnect the fan connection.
Remove the nuts holding the stator and slide it forward.
The hard part; is removing the fan. Rent a fan removing tool from the auto parts store, which may not even work. I've had to use an air hammer twice to break it loose; I don't put it on the same way anymore. And it still takes force to break it loose.
My video of how I put the fan back in without the stator to hold it in place, 'cause I'm tired of screwing with the thing - fan and stator.
So by stator I’m talking about just that little curved piece at the top. It looks like it attaches somehow and can be removed from the big assembly that surrounds the whole fan for simple belt and pulley access. This is another problem in trying to figure it out as the internet seems to have 15 names for it.
Drain a gallon on coolant. I put a 3/8" hose on the nipple into a gallon jug. Use a 6mm hex wrench to open the petcock slightly. If you use the large hex, you risk snapping it off. Opening the petcock too far lets the coolant escape the o-ring, and the coolant gets messy. It's slow but clean and easier to reuse the coolant.
Best as I remember.
.
Remove the two hoses on top of the radiator, careful with the small nipple.
Remove the four bolts holding the radiator clamps. I usually use a bungee to pull the radiator forward.
Lift out the shroud at the front of the fan; you have to work it through.
Disconnect the fan connection.
Remove the nuts holding the stator and slide it forward.
The hard part; is removing the fan. Rent a fan removing tool from the auto parts store, which may not even work. I've had to use an air hammer twice to break it loose; I don't put it on the same way anymore. And it still takes force to break it loose.
When I did it I removed the fan nut using the loaner tool from Autozone. The wrench's fit was a little loose, so I cut and folded a piece of sheet metal as a shim to remove the slop. Then used a short prybar wedged in the cover hole and a piece of 1/2 inch black pipe as a punch with a hammer to break the nut loose. A few raps with the hammer to the pipe, and it came off with relative ease.
Before I decided to remove the stator permanently, I was able to pull the belt enough with my left hand and use a long prybar in my right hand to engage the tensioner kickstand, but I was always afraid I was going to damage the A/C line thats perfectly in-line with the belt. With the stator removed it's really easy to get a 1/2 breaker bar in there, along with everything else being easier.
For the fan removal I use a 24" 3/8 ratchet extension through the holes in the water pump pulley up against the threaded rod on the front of the intake to hold it in place. Then I break the nut with the mongo Harbor Freight crescent wrench I bought the very first time I ever pulled the fan. And that mongo wrench has come in handy for all sorts of things since then. Always good to have multi-use tools instead of expensive single use ones.
I keep telling myself I'm going to get some air and cordless tools, but I keep on doing things the old fashioned way. Those cordless ratchets sure look handy for loosening stuff on the 6.0's hard to reach spots.
Originally Posted by Fuzzpuss
Then I break the nut with the mongo Harbor Freight crescent wrench I bought the very first time I ever pulled the fan. And that mongo wrench has come in handy for all sorts of things since then.
I might have to get one of those. Glad you mentioned it.
Rezvani's Latest Post-Apocalytic Monster Is a Ford F-150 Raptor Underneath
Slideshow: Called the Fortress, the 850-horsepower pickup combines Raptor underpinnings with military-inspired features, survival equipment, and a starting price of $285,000.