When you click on links to various merchants on this site and make a purchase, this can result in this site earning a commission. Affiliate programs and affiliations include, but are not limited to, the eBay Partner Network.
The Re pops are actually a little nicer, seem to holding on well, they don�t use the serrated metal clips that dig into the paint. I picked up a pair of used front oem fronts, they dig into the paint down to the metal, made a mess of the new paint. The rear are re pops that have plastic clips.
Hey all, I’ve been doing a few things to the truck, I thought I should start posting them up. I’ll break it up into a few separate posts.
No major issues, but a few small items came up. Pics below.
First up, I had a coolant leak. The hose for the throttle body to intake was leaking, especially when cold. It ran down the intake / rh head, and would drip down from the bottom of the bell housing, as well as a little bit down the front to the distributor. I thought the worst at first when I saw a drip on the bell housing. I chased it down with dye, and in the end, it was an easy fix, I had used a gear clamp on it, and the way the hose fits on, it’s not 100% perfectly straight. Swapped out that clamp for a FI clamp, and done.
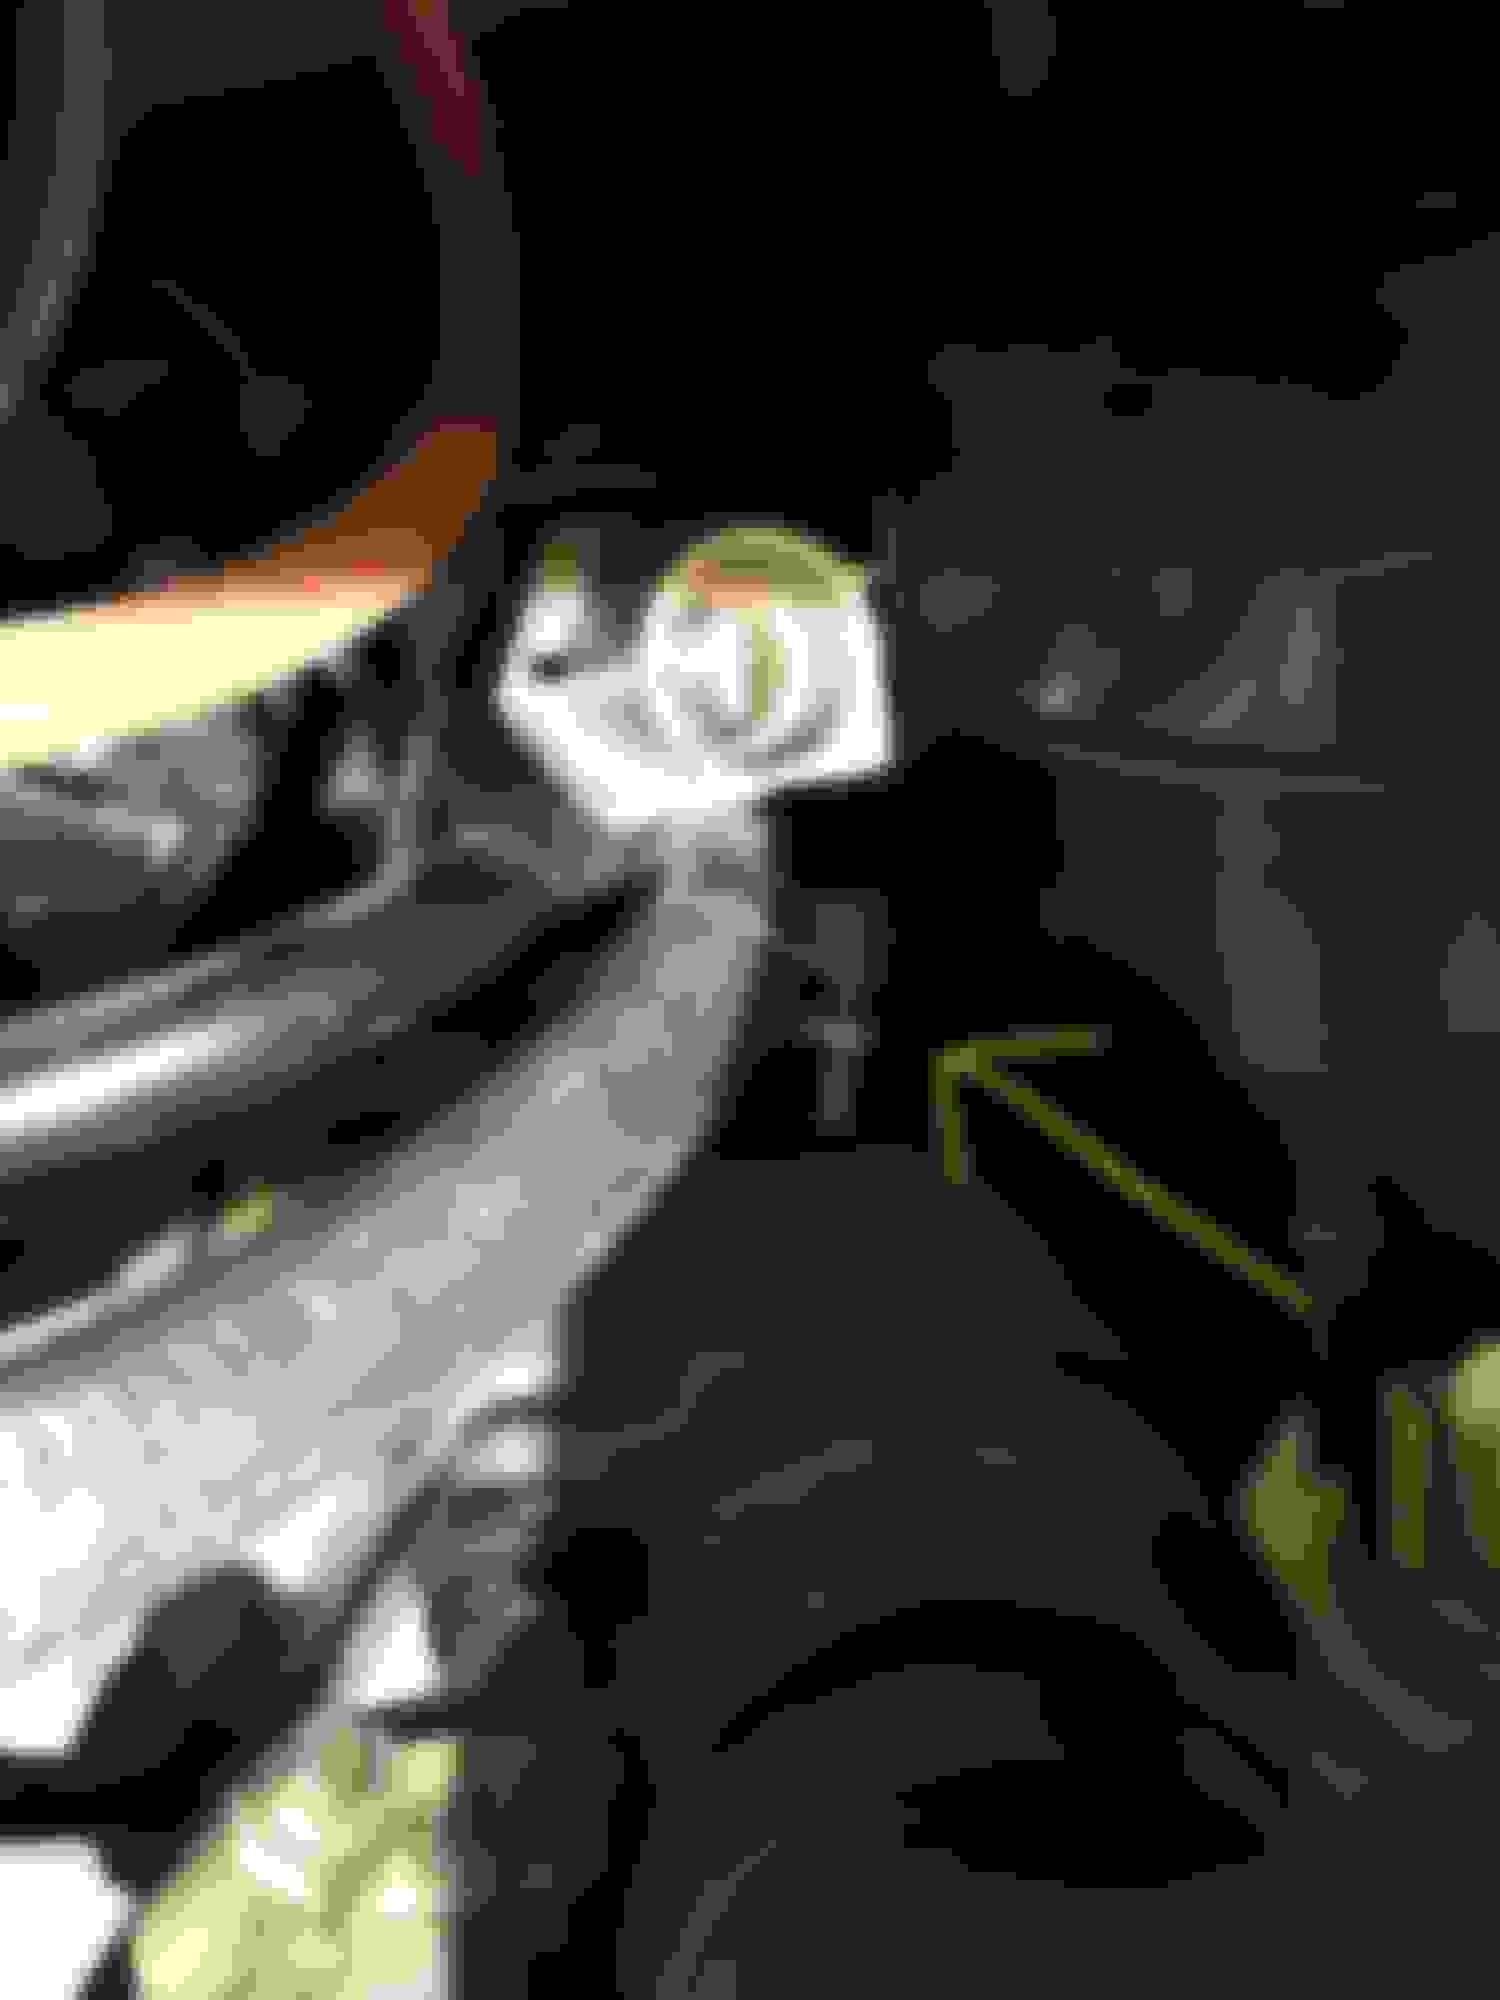
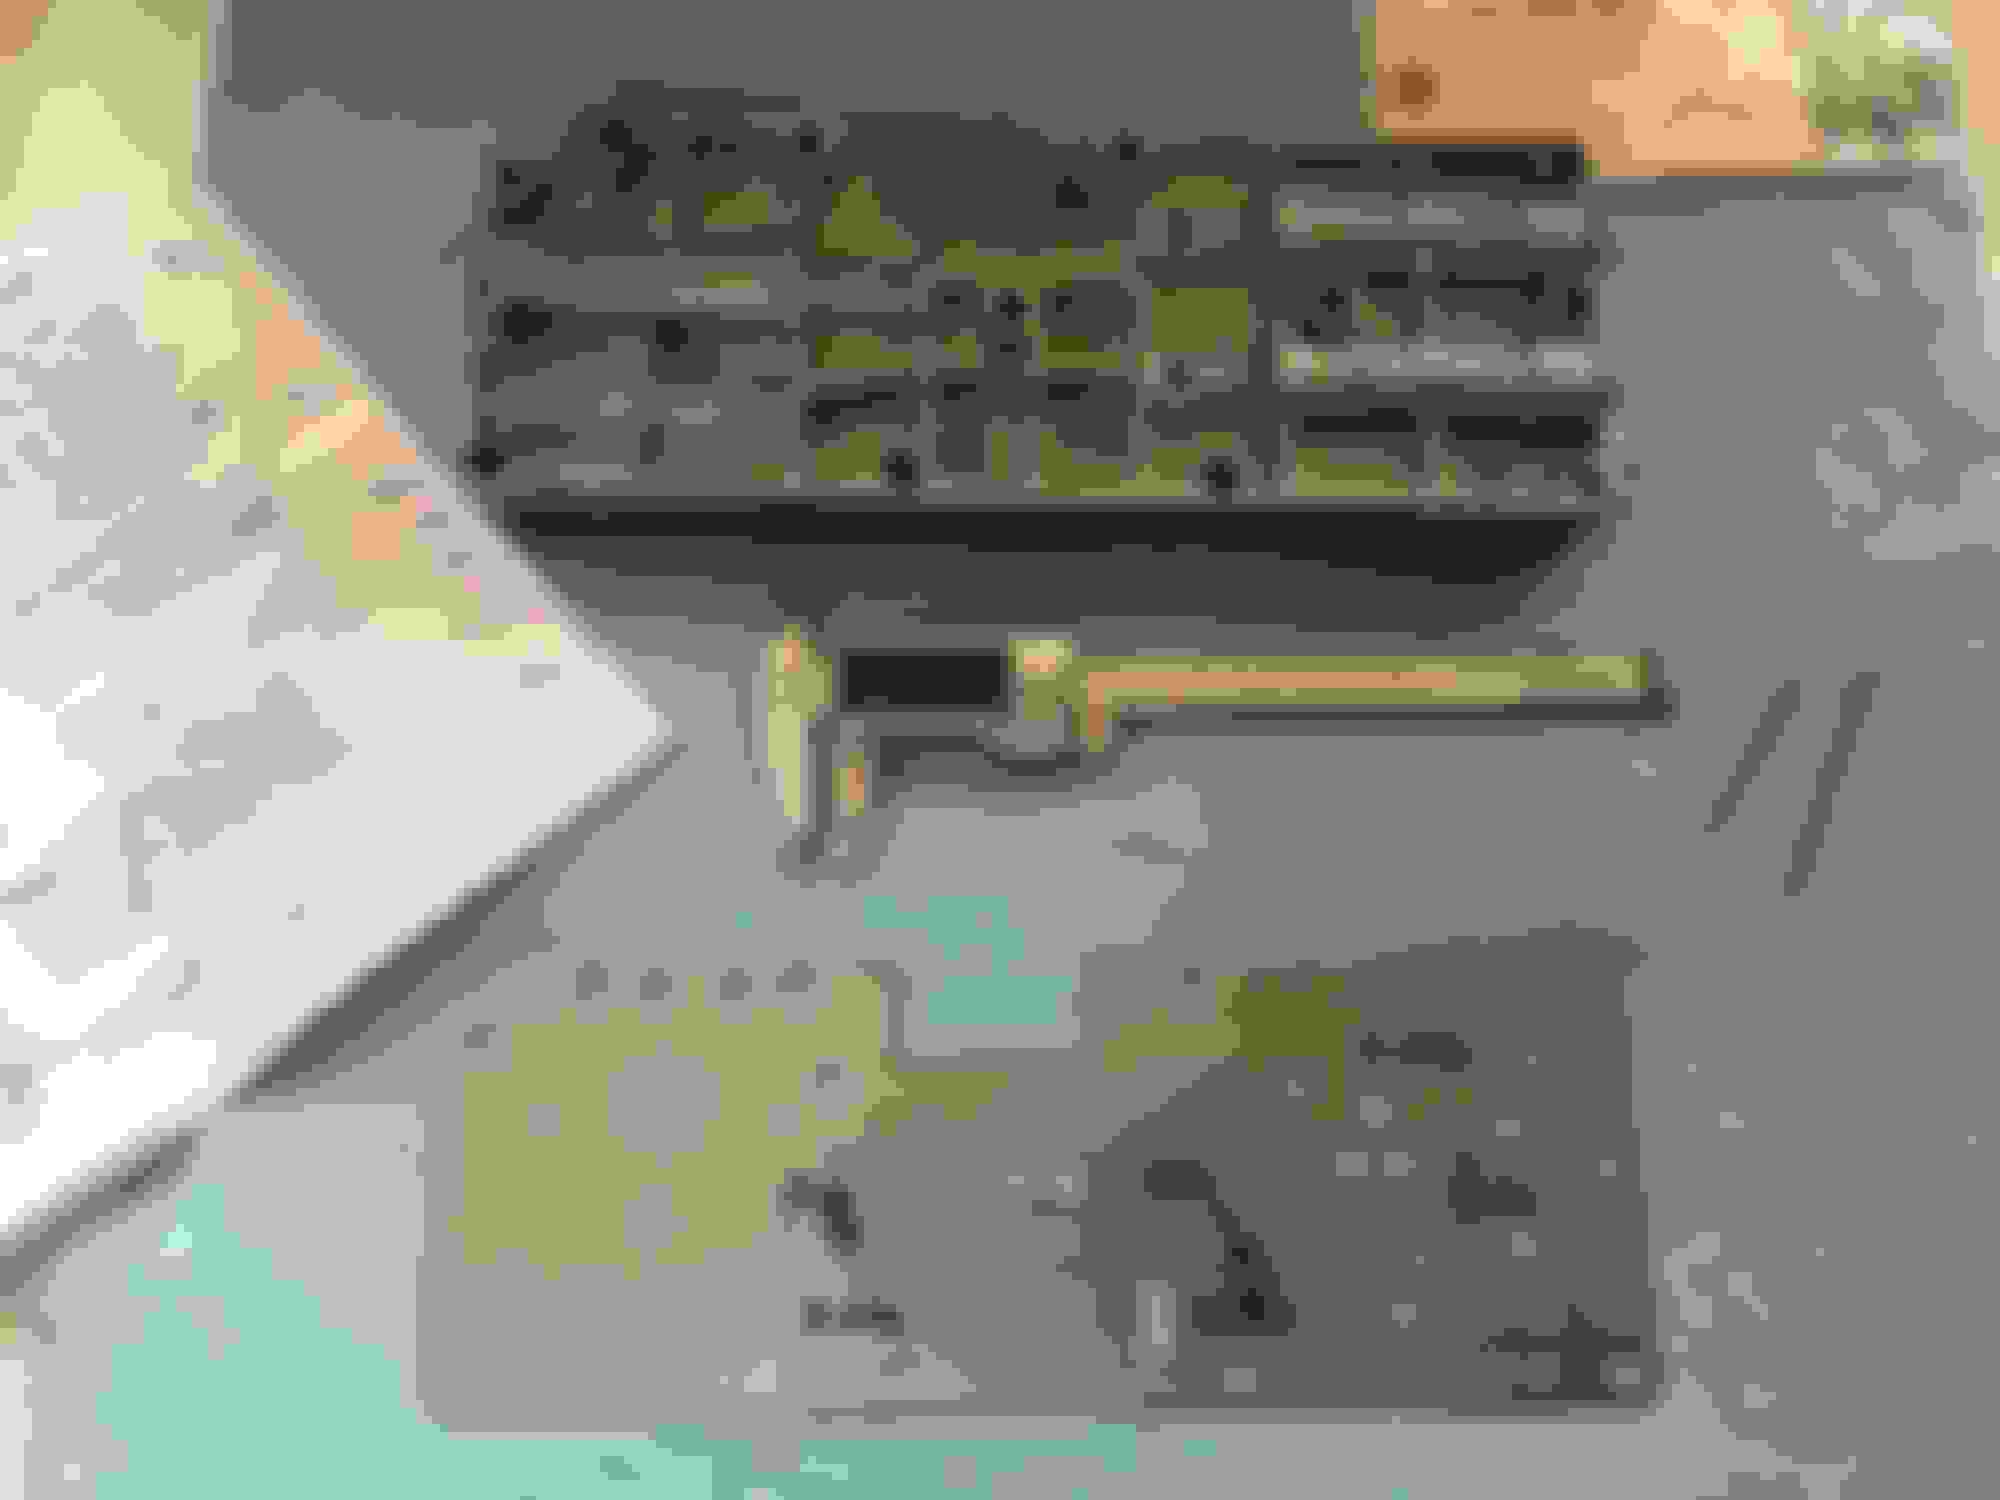
Trailer brake controller is in, I only have the factory 4 pin on this truck, no factory brake control. I ran two wires down the frame when I laid in the other wiring harnesses, so it wasn’t a huge job. Hitman, thanks for the offer, I didn’t need anything in the end. I picked up a new Curt triflex controller, got everything all wired up, and then promptly dropped it… It now has a nice rattle inside… I robbed a good Tekonsha Primus out of another truck that will never pull again, and used that instead.
I installed it in the little cubby hole, it’s almost horizontal there and used two 30a breaker switches. I had one fail internally yrs ago turning on the brake lights continuously and killing the batteries overnight - it’s nice to be able to just switch it off. I also wanted to be able to control the 12v on the 7 pin for other things in the future, if I want to tap into that. The switches I installed beside the 12v outlet in the dash, great spot, lots of room behind and out of the way.
Pics.
Wasn’t leaking bad, but enough you could smell it time to time, and make a few drops on the bell housing.
Brake controller. I’m not sure if there is another use for that cubby, but I never use it, perfect spot for the controller.
Lots of room in behind, perfect spot for switches. If I had moved them up slightly. You can easily get 3 or 4 in that spot.
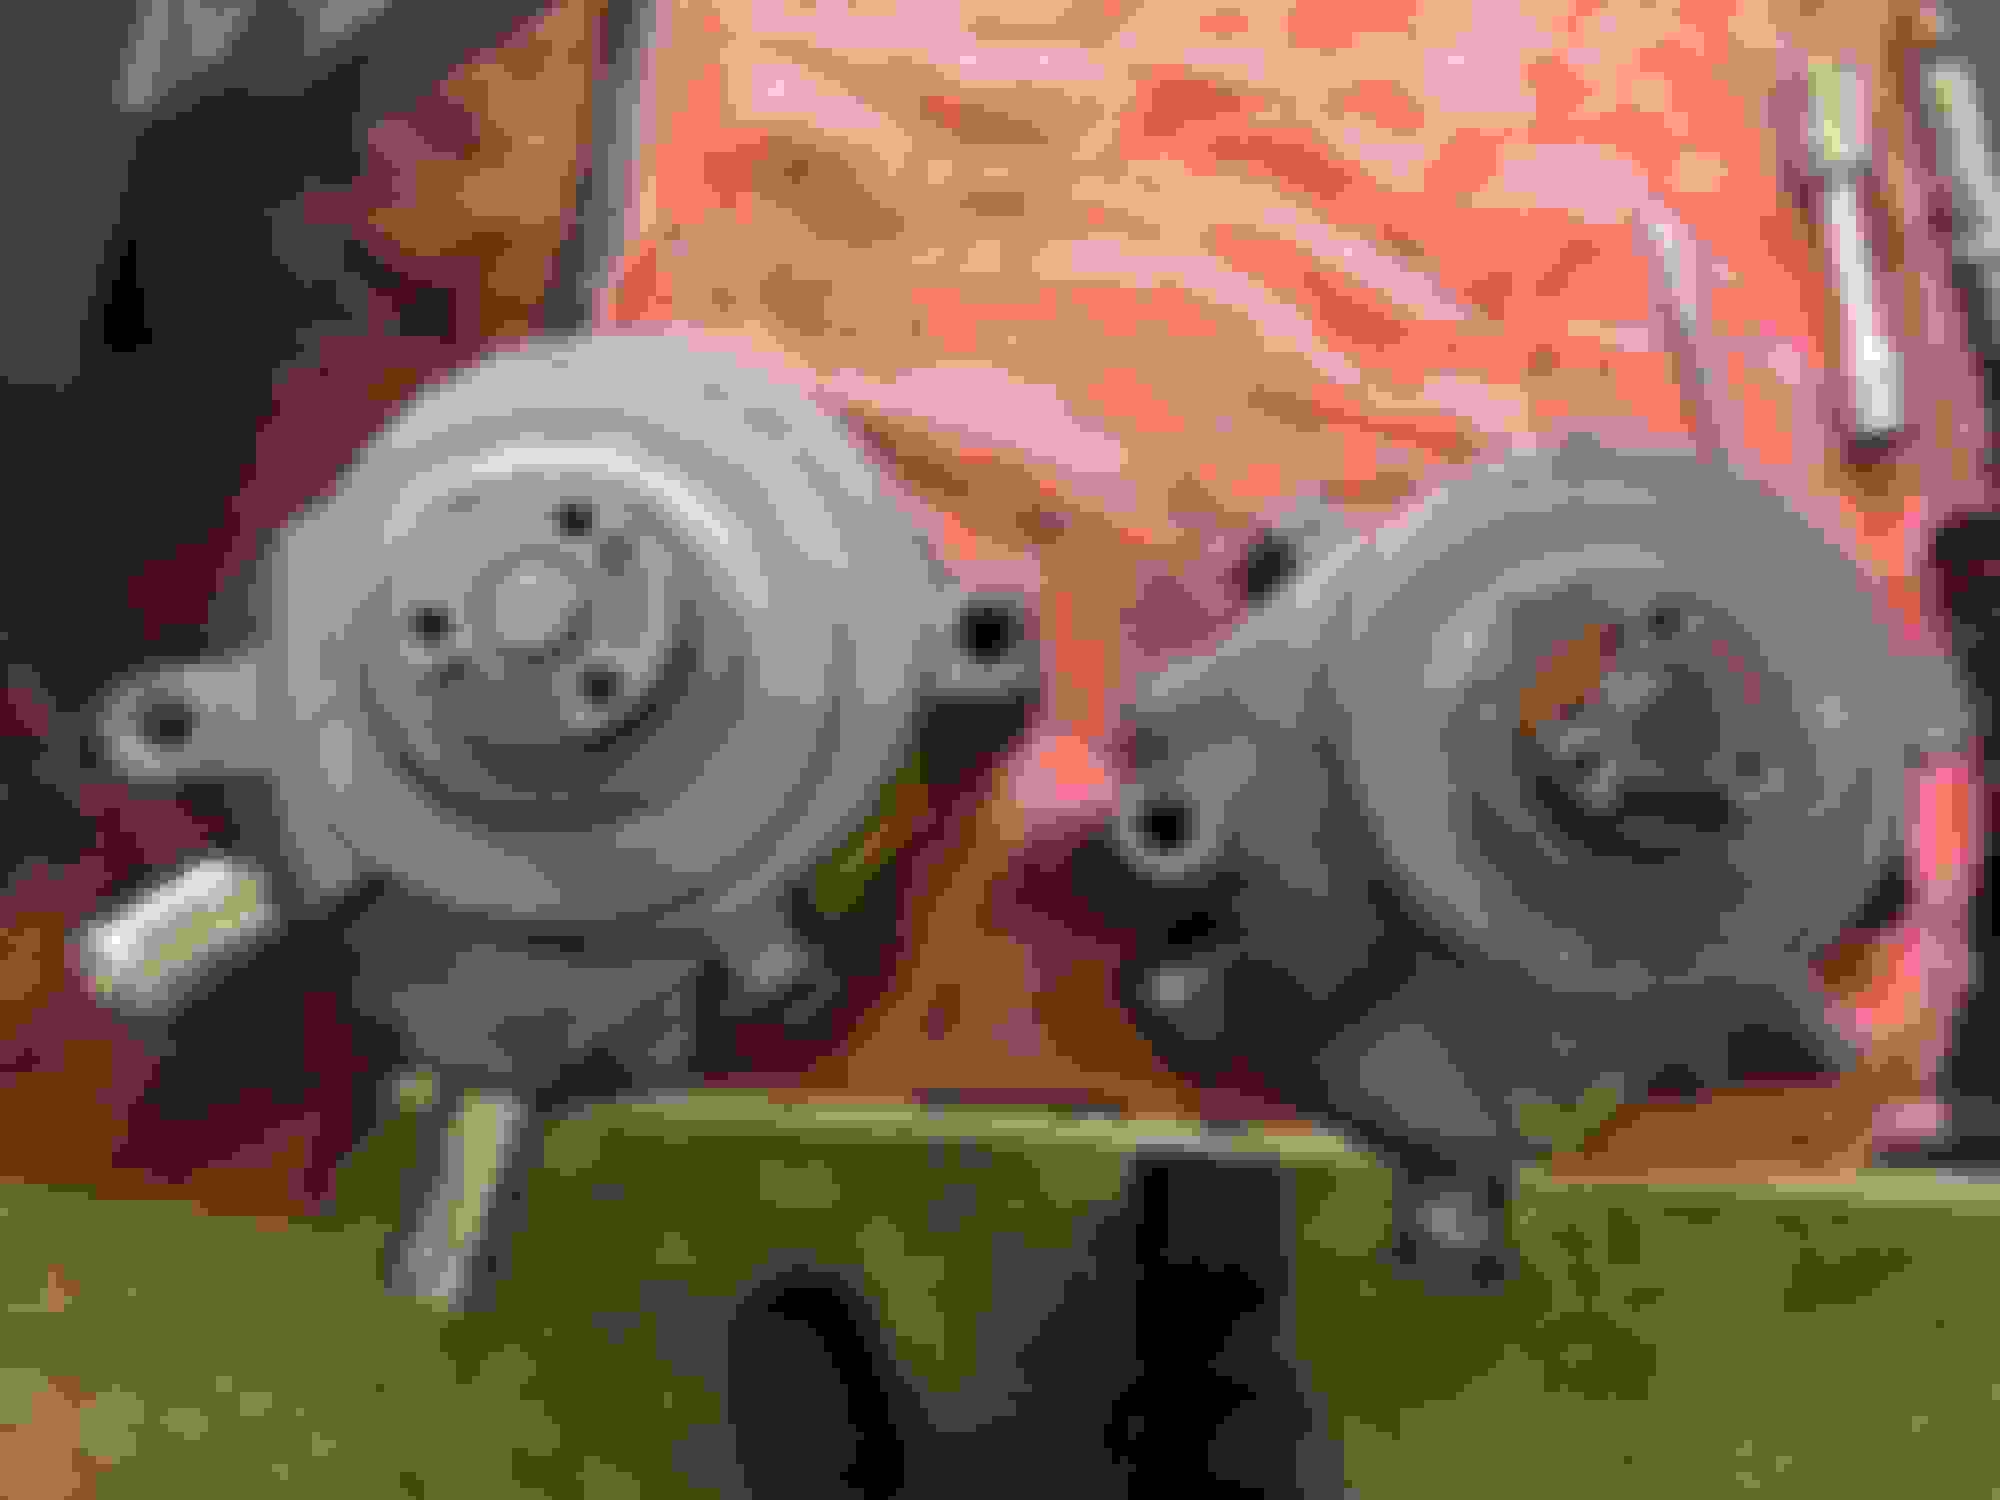
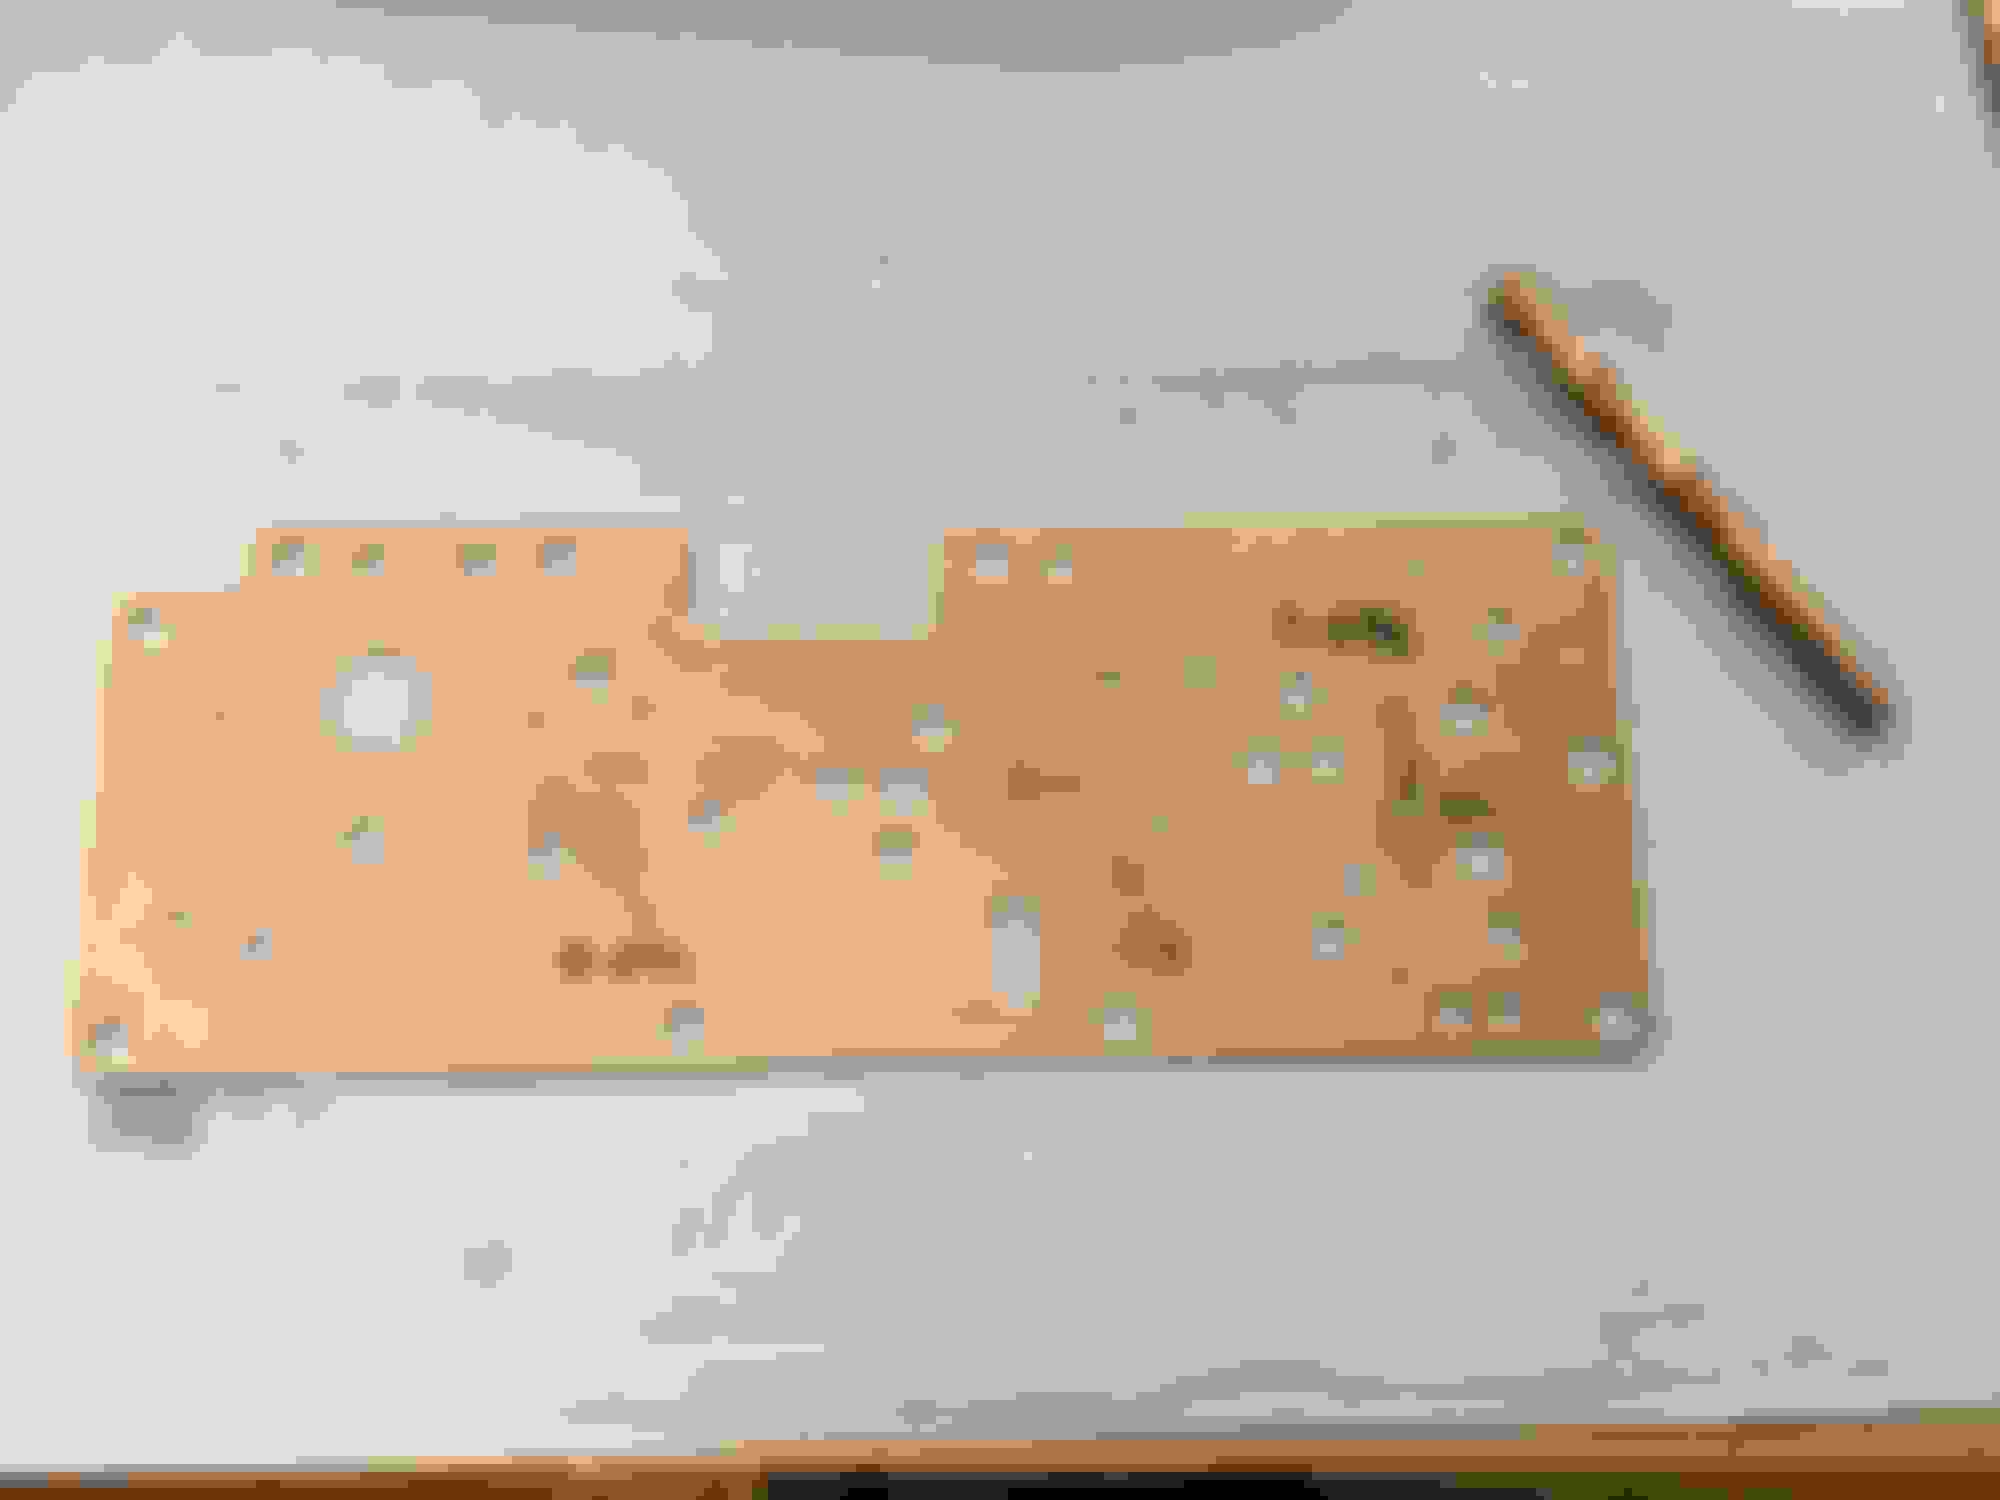
I changed out the air pump and condenser. With the rad etc out of the way, I found it easiest to just remove the whole air pump bracket and do it on the bench.
The condenser, I was going to replace it during the rebuild, but the one I bought did not fit - and I can not remember off hand what brand it was. (Unfortunately, I lost most of the pictures on my iPad. They are all backed up on a desktop, but gone here). It was the lines on the side, they were not bent correctly, and couldn’t be modified to fit around the rad support.
I used a Spectra Premium PN 7-4531, it needed minor trimming on the rh side condenser mount to fit around the rad support structure. I still haven’t charged up the system yet, slightly on the chilly side for checking pressures. Hoping this solves the high side pressure issue.
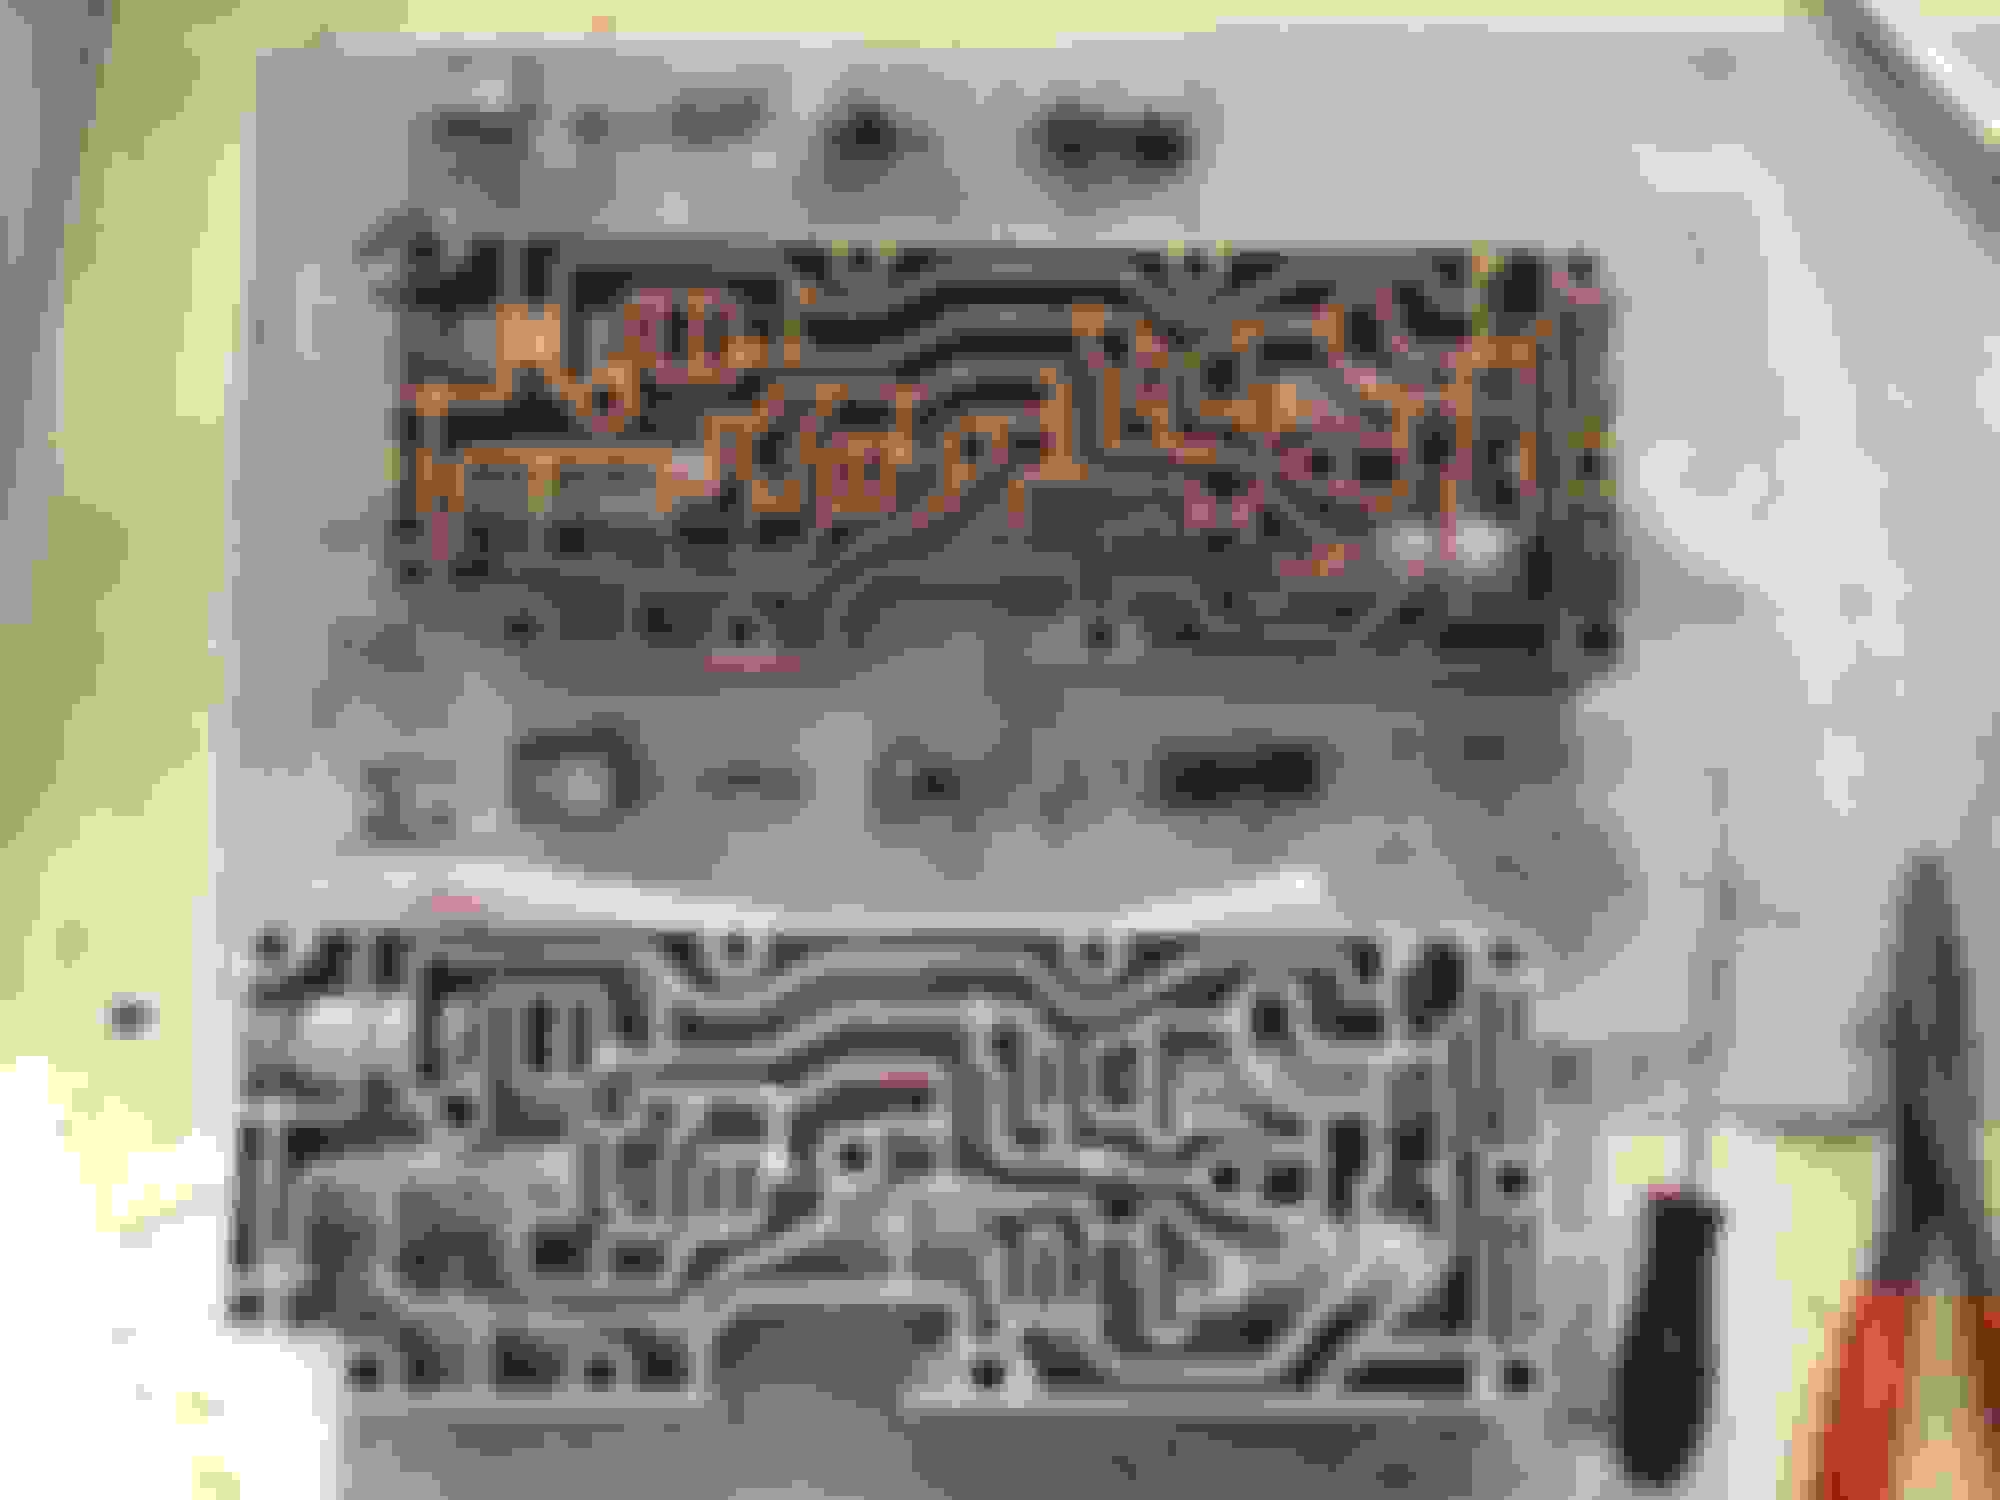
Air pump. This one was making a lot of noise, at idle it was quiet, but 1,500 rpm and above it buzzed away. There are 4 bearings that I could see, might be one more center bearing buried in there, and they were dry as a bone. I picked up a Cardone PN 32625. Works great, but had to do a couple mods first.
The pump body is the same, but the inlet and outlet fittings are different, and the mounting point threads were wrong. The fittings, were loose in the housing anyway, literally pulled out by hand, one was so loose it wasn’t even finger tight.. I cut the ends off, welded back together straight and carried on. I made them slightly longer than the originals, better engagement on the hoses. The mounting points, two were inverted. I can’t remember which way it was, but they had one heli coil in the wrong spot. Drilled it out, installed a coil on the correct side and no issues. It nice a quiet and doing its thing now.
Pics
Easy to get to without the rad in the way.
On a separate note.. this is after about 1,000 miles. Machine shop did a nice job cleaning out the block. Not a spec in the coolant.
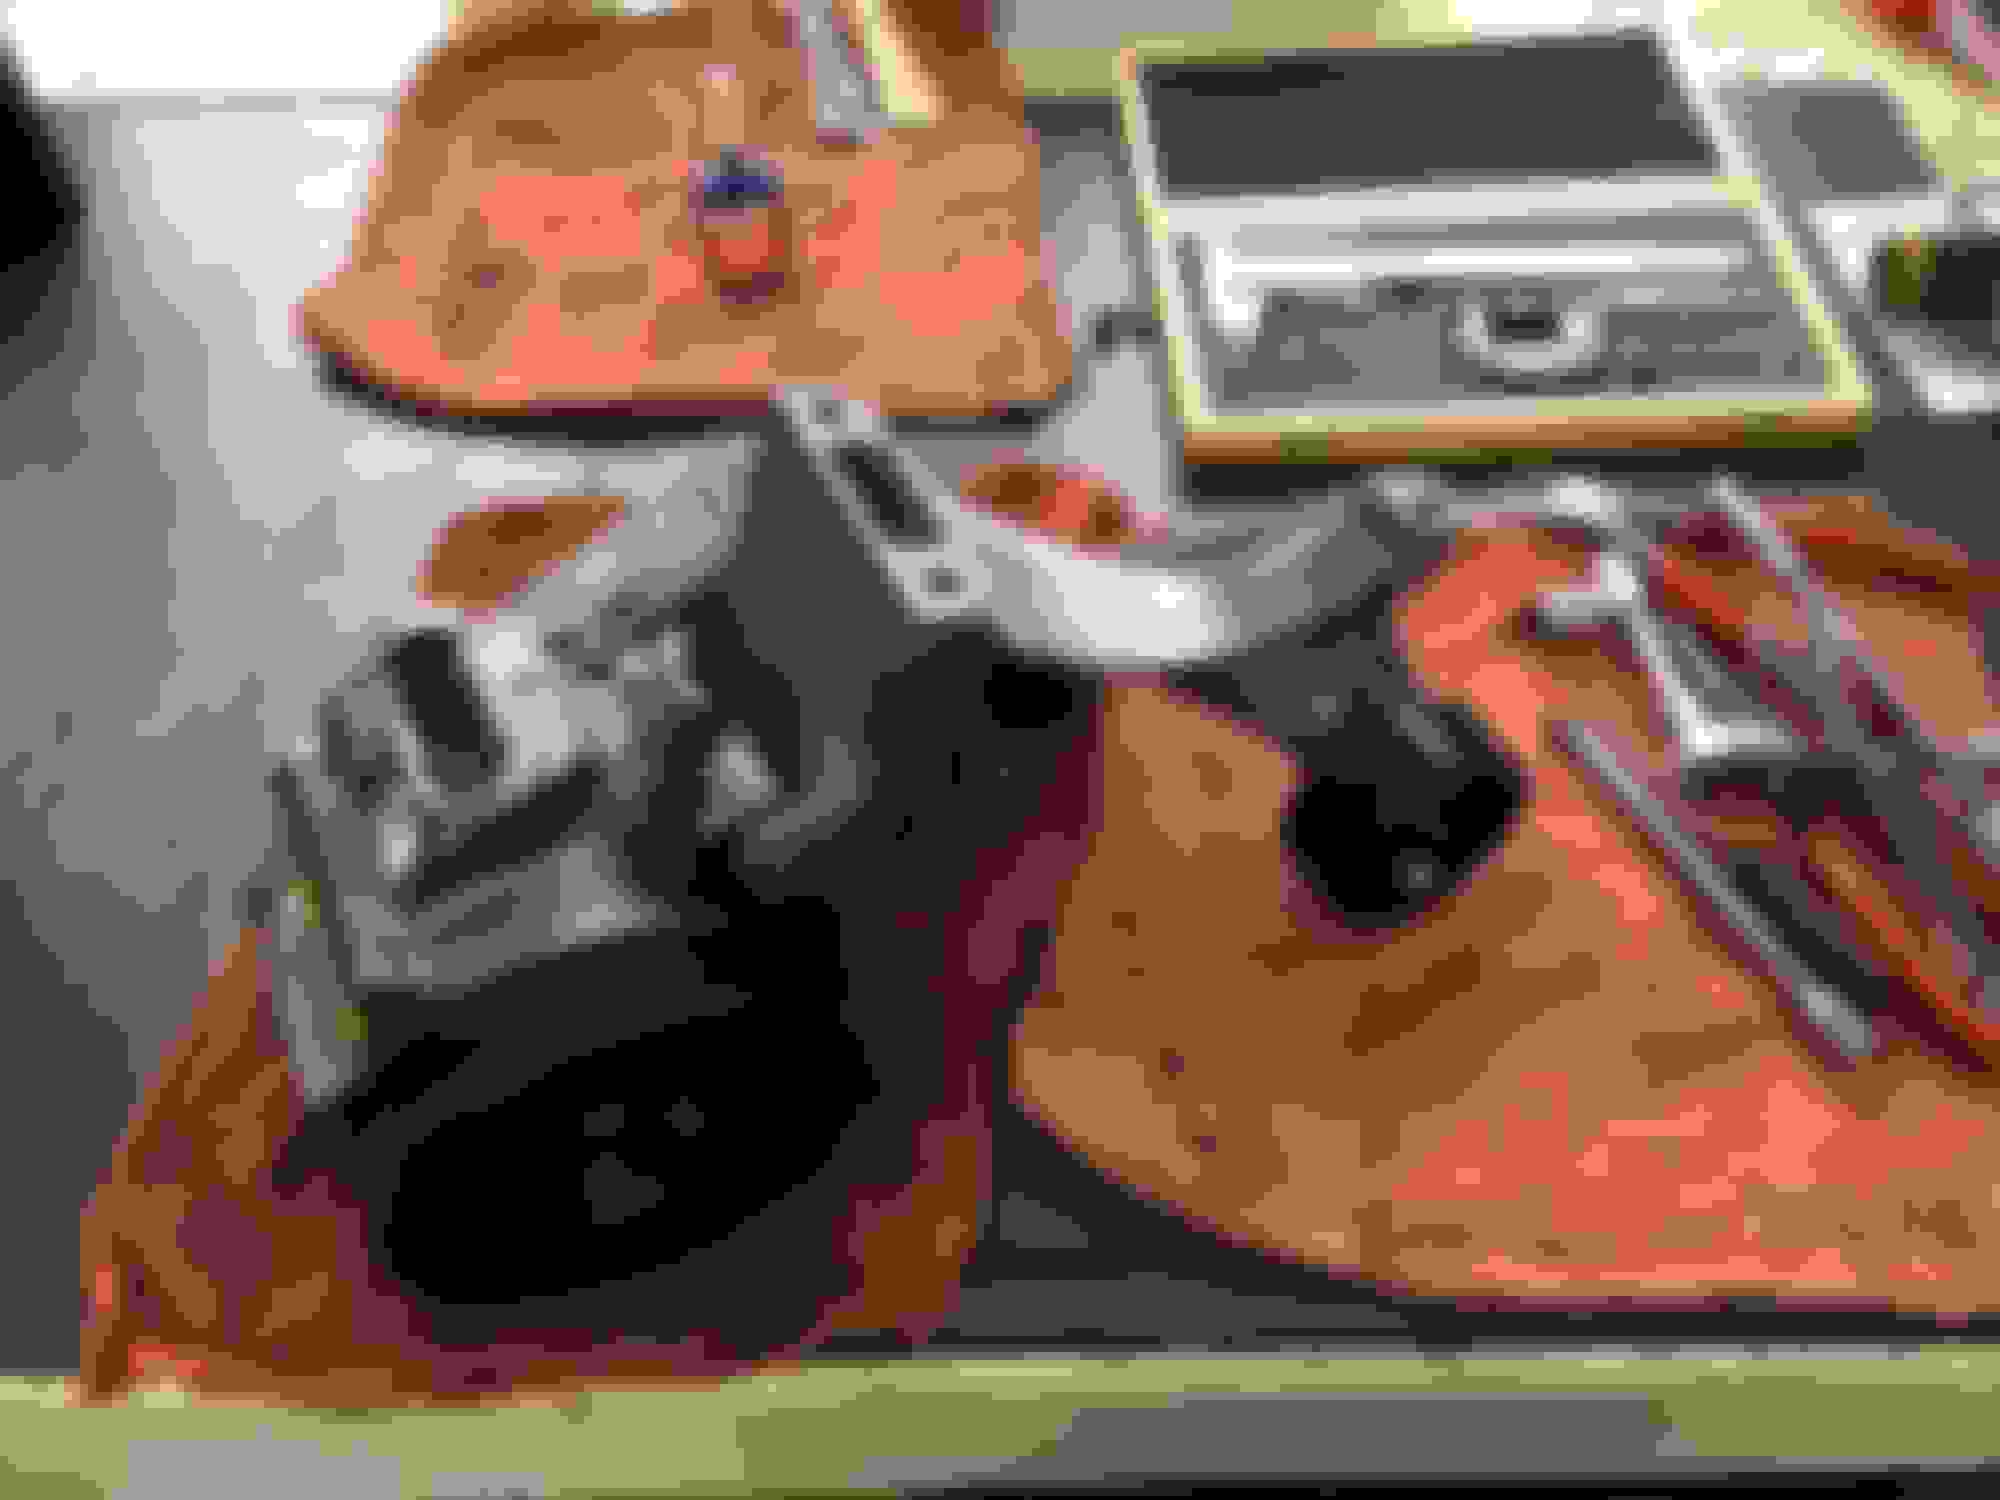
Old air pump. Bearings dry as a bone, I suppose if someone was industrious you could rebuild it.
Fittings as delivered.. I cut them on the yellow lines.
Fittings in the old pump wouldn’t come out without ruining them. Note the helicoil in the wrong spot on the new pump mount.
Ready to go. I used J.b weld to reinstall the fittings. ( Note: if you using sealant or epoxy, etc - use it on the male side only, if you use it on the female side, you’ll push the sealant into what ever you’re working on)
Transmission / valve body / shift kits. This is where I messed up in the build.
Speaking with Transgo during the rebuild, I mis-interpreted the instructions. The calibration plate needs to be opened up to the start setting for your configuration. I did not do that, I used it as supplied. When I spoke with them, I asked if I can just use it the way it was or at the basic setting and then open it up if I wish. And yes, he said that exactly the best way to do it..
But, using it with the basic setting as supplied doesn’t work well. The orifice holes are opened up with pilot holes (0.053”), not for your configuration / engine. You still have to open those up to what you have to the starting size. I did not do that, and used it with the pilot holes. Which does work, just not optimally. You do get some funky shifts, little more firm, but still lazy. I really don’t know how else to describe it. And reverse was slightly on the slow side, yet firm.
I opened them up to the first stage for the “V8”. Now it shifts nicely, and I’m very happy with it. No complaints at all. It is not harsh. It’s slightly firmer than stock. Shifts well. I could go more, but for right now I’ll leave it where it is. I put about 60 miles on it yesterday, and completely forgot about it, it was shifting so nicely.
I also tried the Punisher VB, 1-2 and 2-3 is nice, firm but not harsh, but the 3-4 is harsh. You can send it back for adjustment if you wish, or adjust yourself, but frankly I’m happy with the Tugger kit and I’ll stick with that for this truck. I’ll save the Punisher for another project.
Side Note. I did not change the stock setting / orifice on the TC lockup. It’s working fine.
Don’t forget to use a larger drill bit to clean up (de-burr) the edges of the holes once opened up. By hand only, just a couple twists to clean up the edges so they can’t tear into the gasket.
Tugger vs Punisher. Slightly different accumulator set up. Tugger on top. Punisher on bottom with o-ringed end cap, and as stock no return spring.
Beyond those items, it all seems to working well. We didn’t get much snow this year, but I used it to plow a few times, no issues.
The belt tensioner was ok on the end, it was the idler pulley that was making noise and wobbling. I had the wrong one installed. Swapped it out with a new correct one, and no issues. Not sure how I mixed it up, but somehow I did. I had a plastic pulley on there, same size and fits, but wrong and didn’t last long. I used the same metal pulley that is on the tensioner. Belt drive system is working well now.
I changed the oil to Mobil1 10w30 - Good oil pressures (60 at start, 45-48 on the highway, 30 at idle when hot), shifts well now, runs well and smooth. It’s is still running on the stock PCM, so long as there are no issues that come up I plan on installing the PiMPx in the near future.
Phoenix Graphix Pin stripes. I didn’t get a pic of it, but when I installed these, there were several small air bubbles in the pin stripes. The instructions say to park it in the sun and they will disappear, not to worry. At first there were so many, I thought no way. But I left them, it’s been 10 months, and sure enough they flattened right out, gone.
Edit: Front driveshaft. I bought a rebuilt one off rock auto. Looks nice, fits, etc, but unknown u joints come with it, no markings on them. This one after only a few short plowing sessions with it already has play in the slip joint. You can move it up and down 1/16” already. I plan on ordering a new one from Denny’s.
A few random pics..
That’s about it, I don’t have any other major plans, the PiMPx and charge up the ac when it warms up. Just drive it.
I put my Tekonsha Prodigy in that little cubby hole and wired in a 30amp breaker and used the factory TBC harness. I used to put my wallet there but I put it in the ashtray now.
How do you like the Prodigy? P3? I considered it, but for the little local pulling this truck will do, the Primus should work fine. If I were building a dedicated truck for towing, I’d have used a P3. This Primus has always worked well, applies the brakes nicely, very fine application.
How do you like the Prodigy? P3? I considered it, but for the little local pulling this truck will do, the Primus should work fine. If I were building a dedicated truck for towing, I�d have used a P3. This Primus has always worked well, applies the brakes nicely, very fine application.
I take it back I just went and looked and it is a Primus IQ. I must have put my Prodigy in my Class C. I used the Prodigy for 4 years before selling my camper. I towed a snowmobile trailer and a 7k lb enclosed trailer with 2 axles and it worked great. I towed an 11k lb trailer from Michigan to Alaska and back with my F350 without any issues from the Primus.
Caribou hunting

 01-16-2024, 05:58 PM


 I robbed a good Tekonsha Primus out of another truck that will never pull again, and used that instead.