When you click on links to various merchants on this site and make a purchase, this can result in this site earning a commission. Affiliate programs and affiliations include, but are not limited to, the eBay Partner Network.
... getting rid of the little piston slap in my 215. A.K.A. how I've spent my free time for the past month or two.
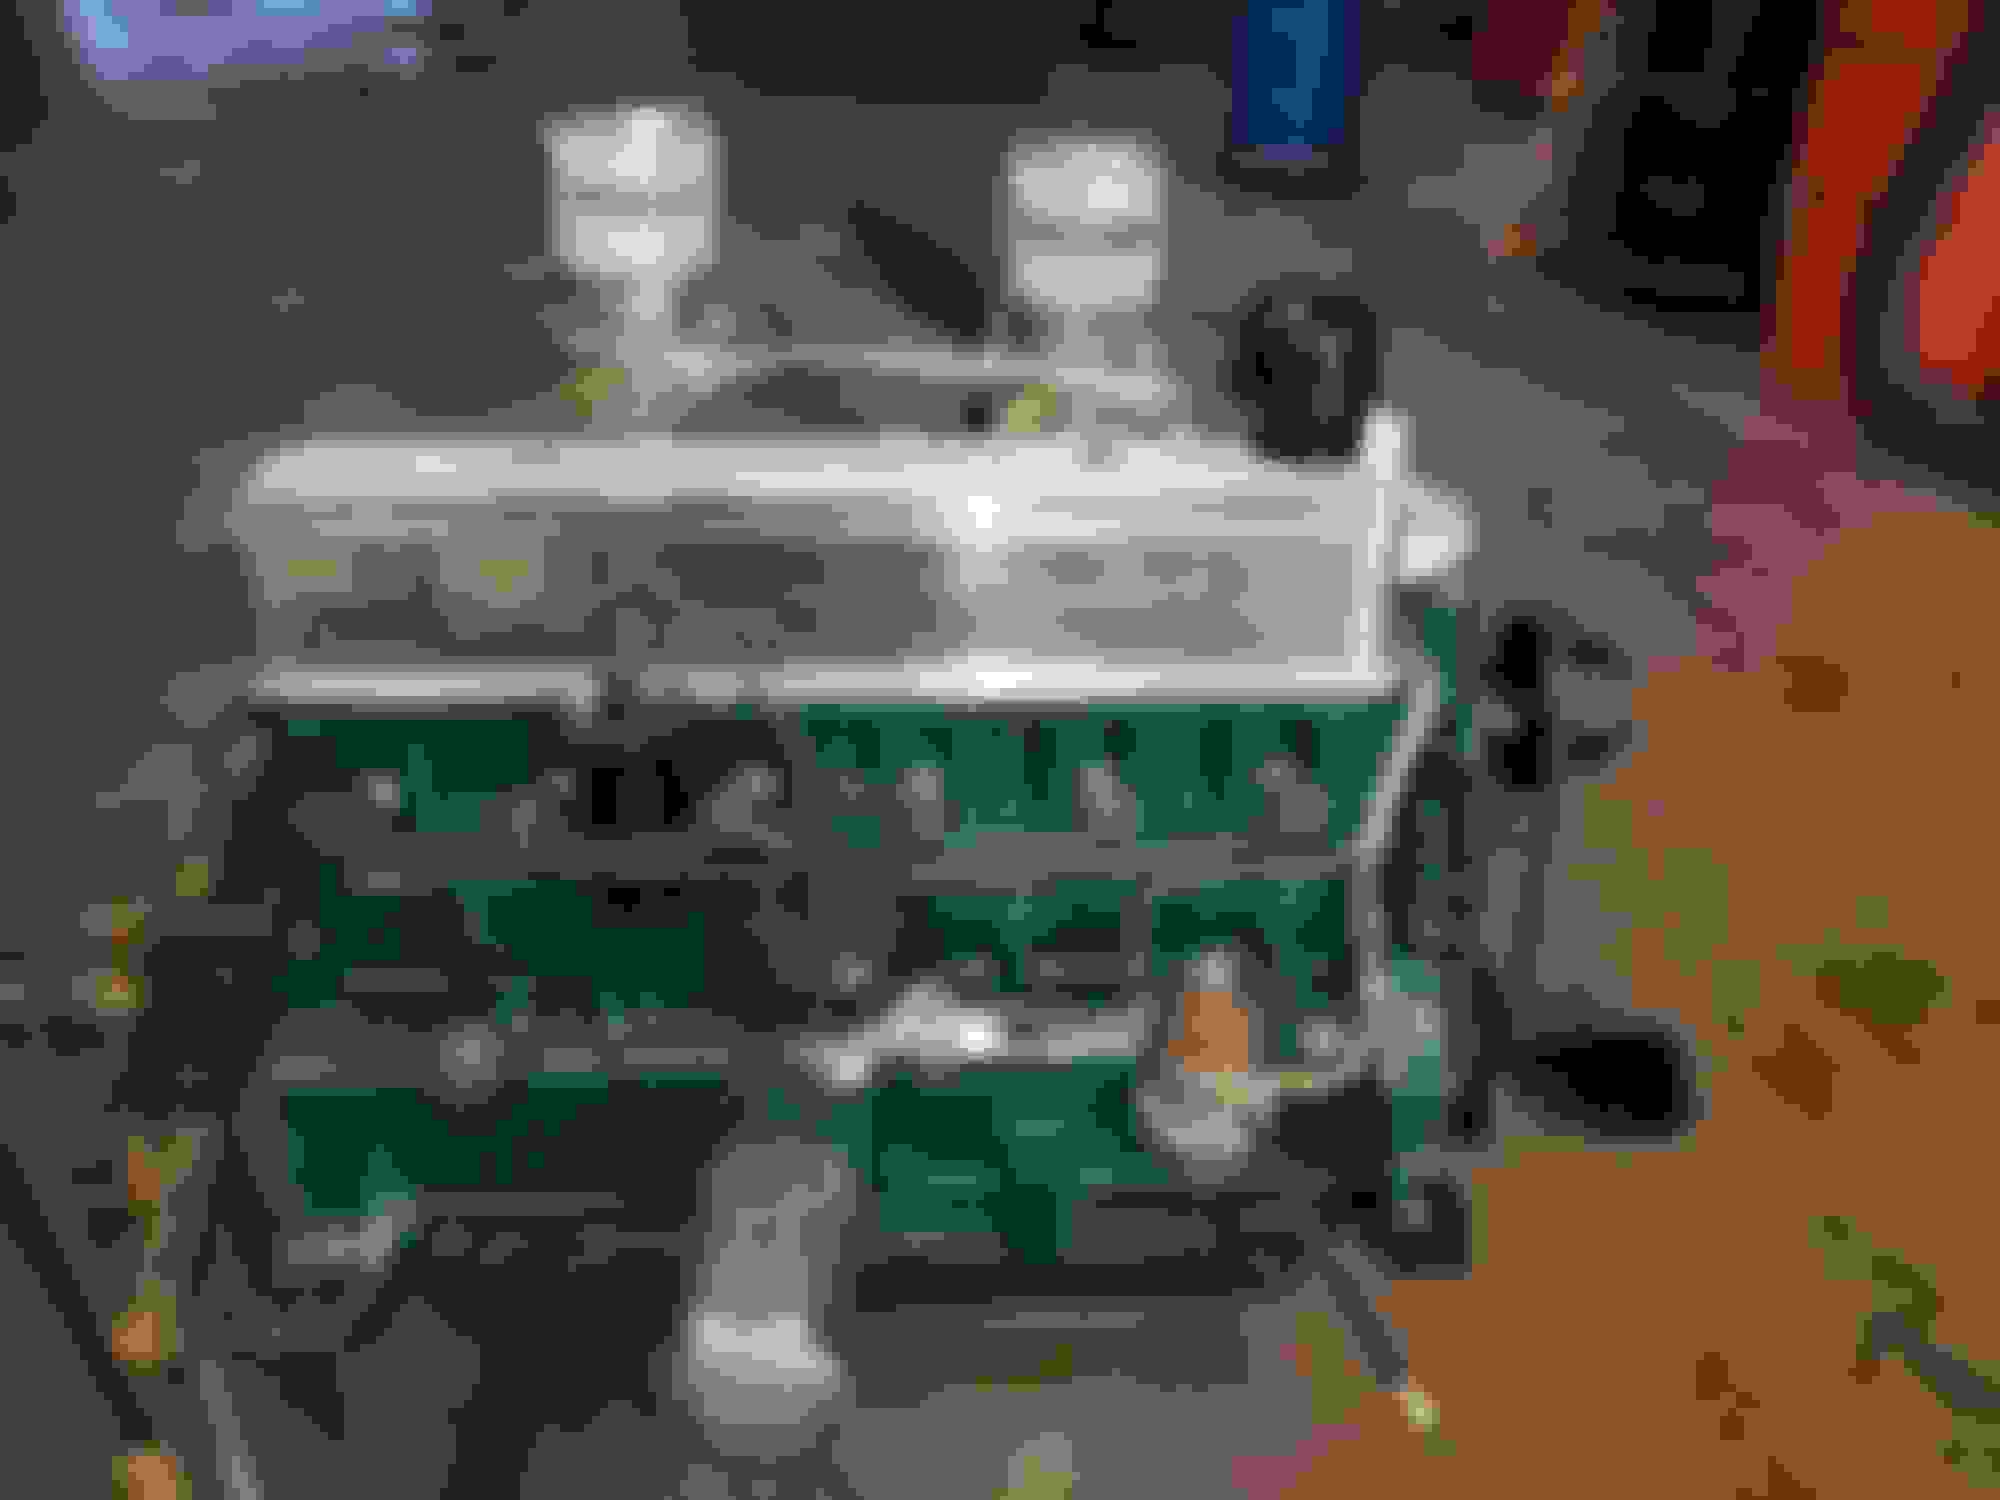
When I bought my truck the oil pressure was a bit low and it had a small knock. I eventually threw a set of rod and main bearings in it which took care of the oil pressure but not the knock. It never was much of a knock, mostly noticeable only at idle. I figured it was piston slap and would be o.k. for many years. But ya know how it goes, that little noise nobody else notices will bug you to death. So I pulled the engine out, stripped it and sent it to the machine shop. Never knowing if the mileage on the clock is actually 93,000 or 493,000 all I can say is the bearings were still 0/0, the bores were still standard (though a little worn) and even the front crank seal had the Fomoco logo molded in. Wrist pin bushings had some slight wear and I found the rocker shaft and rocker tips a bit worn. Valves still OE, with Ford logos, a bit worn on the sealing faces but the stems still in spec.The inside of the block was fairly clean, excepting a light coating of crusty crud typical of non-PCV engines. Piston tops were typical of single carb inline sixes - centers had a little carbon, ends almost perfectly clean. All in all, pretty good shape for something 65+ years old, at least in better condition than me. ;-)
So, to save time and money, it was punched .060". Crank still 0/0 but the rods needed to be re-sized and bushings replaced. Had .030 cut from the head, .020 from the deck, mostly to raise C/R a bit. Original cam had a chipped tooth on the distributor drive, luckily Kevin (bigwin56f100) hooked me up with a used one. I took it to Erson Cams (here in Louisville) and had it cut to my spec. The OE grind is fairly decent but I just wanted to gain a little more grunt on the bottom and better match it to the twin carbs I planned on using.
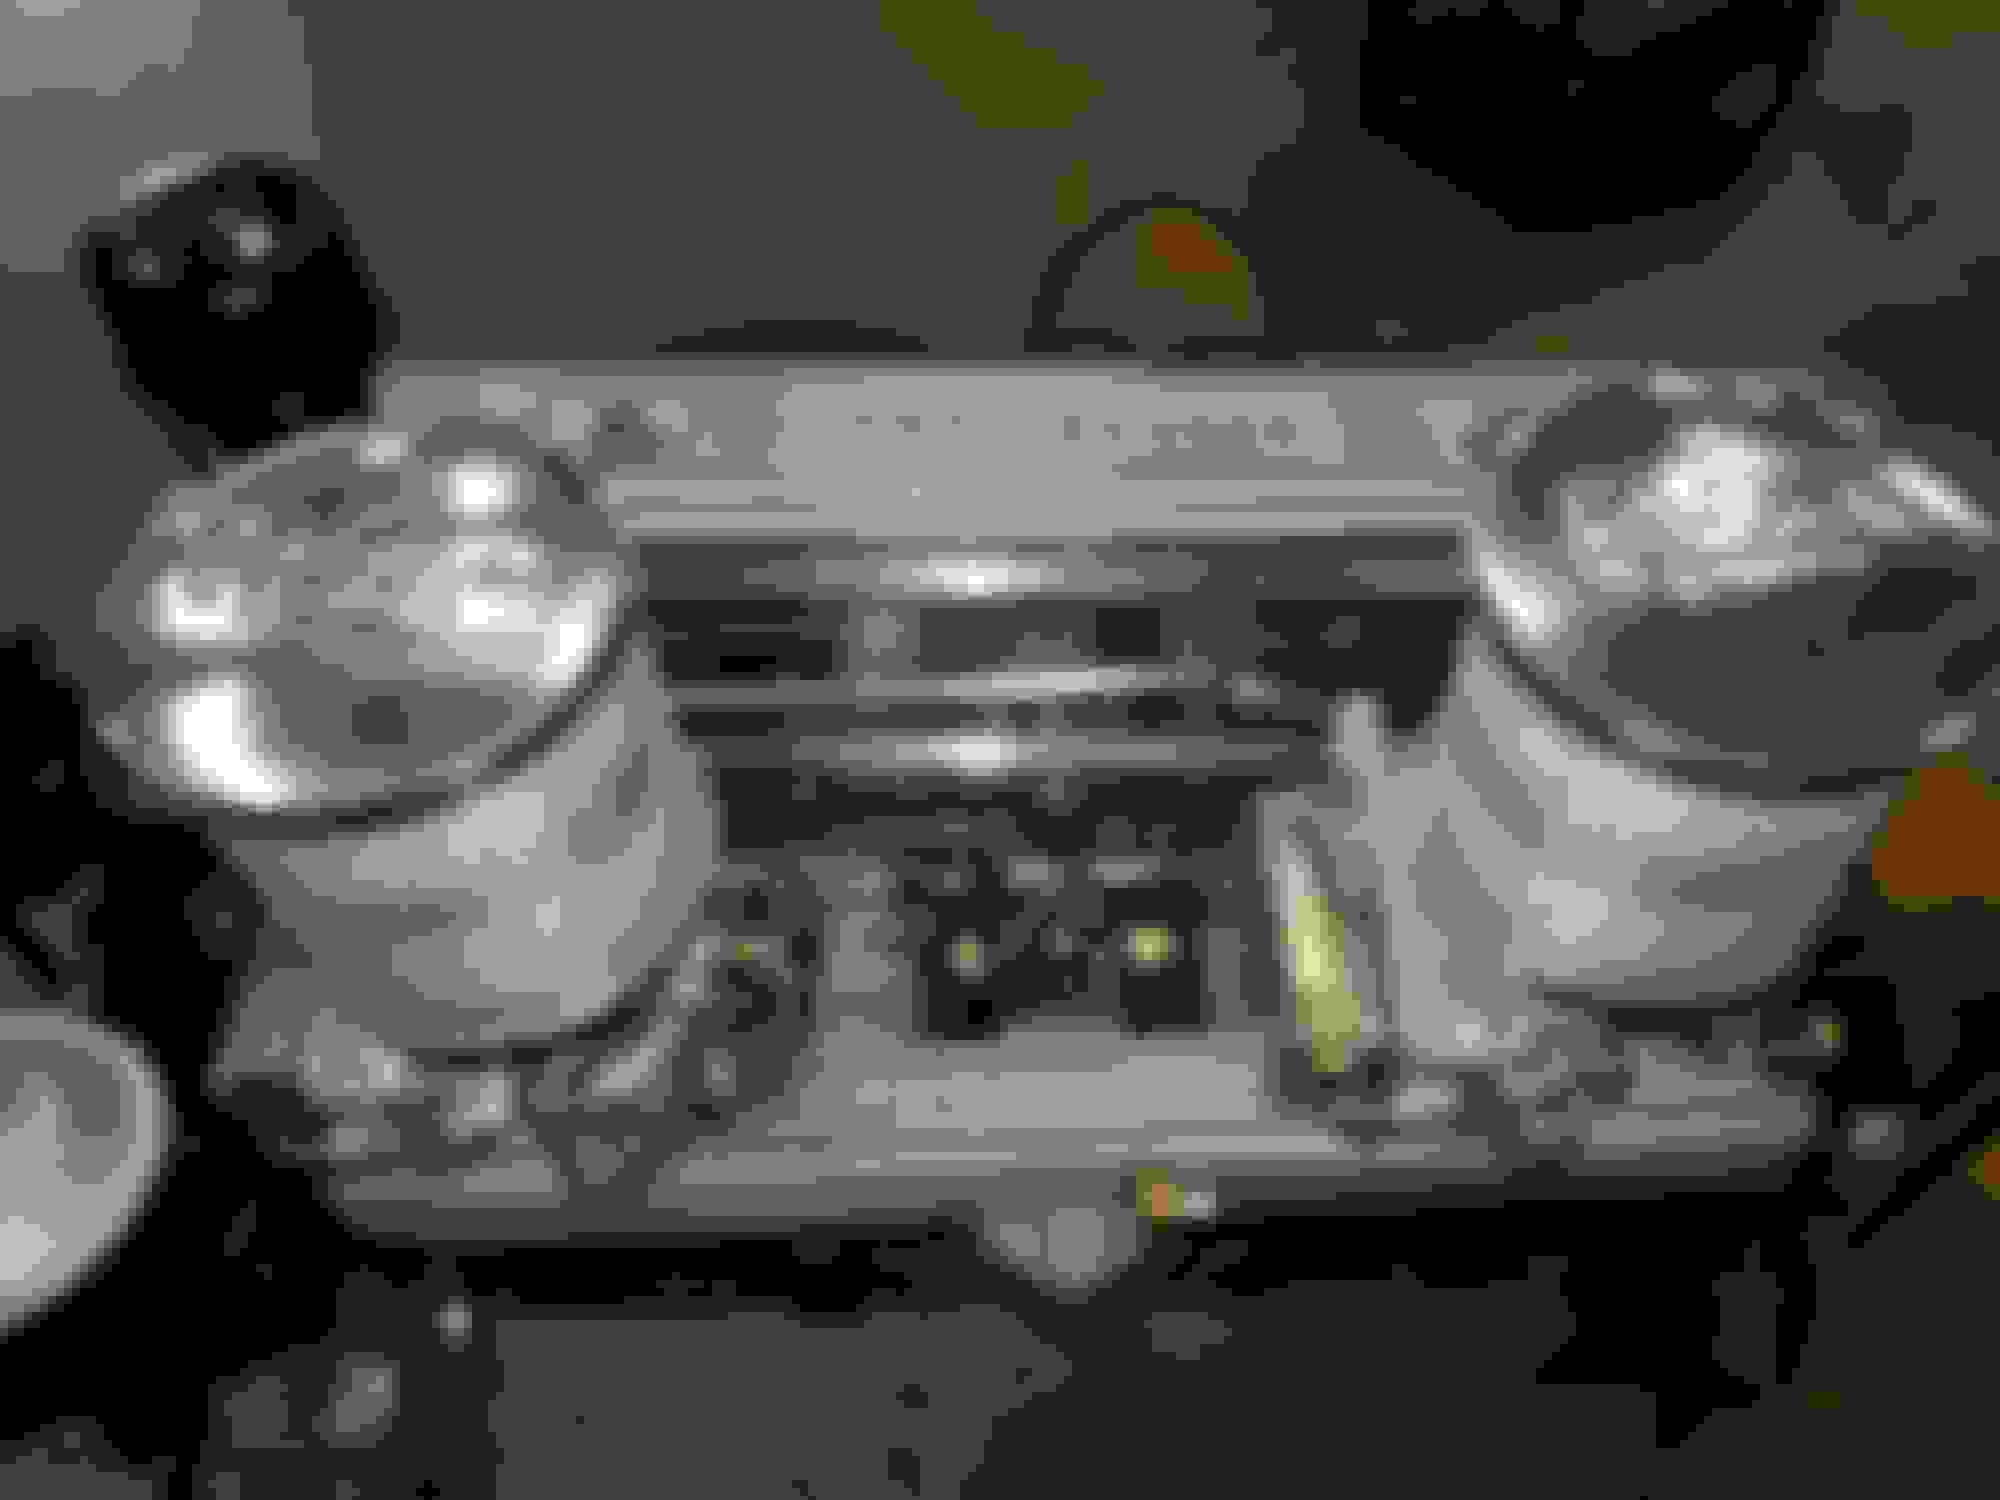
Speaking of twin carbs... who doesn't think twin glass bowl 1904s on an Offy manifold doesn't look cool? Appearance aside, my primary motivation was to quit starving the end cylinders. I've worked on so many multi-carb engines in my career that the only thing holding me back was knowing finding a matched pair that hadn't been rebuilt several times by typical "it'll work" rebuilders who strip hundreds of carbs and rebuild them from collection bins would be impossible. The only right way is to start with new carbs. After all, it only takes a couple times to learn not to use an axe to drive a cup-headed nail. Central and South America had 223s around longer than we did and, some years ago, a company in Venezuela began reproducing the 1904 (or subsequent model.) Then the Chinese jumped on that wagon and began reproducing the Venezuelan copy. But here's the thing - they aren't really 1904s but more of a copy of a 1908 (? I haven't been able to find much info on the subsequent 1904 offshoots other than there were a few models superceding the 1904.) Notice that the copies have a squared-off choke plate (most obvious difference.) I also found the bore is slightly larger and with a slightly wider bolt spread. That's why, in my pictures, you'll notice I 'through-bolted' them. I matched the manifold diameter to the carb base then used 1/4" through bolts and nuts vs. filling in the manifold holes and re-drilling. I figured there was no reason to modify a good, unused manifold to match carbs of unknown quality. Let's all hope these carbs pan out. I've taken one apart and it actually seems to be of good quality and I've noticed some improvements over the two 1904s I have. The only gripe I had was the foam floats which I replaced with original brass floats. I also replaced the metal bowls with glass ones (cool factor +100) however the float pins need to be changed as the glass bowls won't serve as pin retainers like the metal bowls do. Not a big deal unless you don't catch that feature until the pin slides out and the float can't control the fuel level in the carb. Can you say, "My engine is flooded!" and ")(*^&#*$%#*%&^!!!" ? I have yet to fill the bowls with fuel, I am anticipating needing to cut some neoprene bowl gaskets, just like I had to do with the original 1904s. The good news is the carb's bowl faces have been been engineered better and have very flat surfaces.
O.K., enough talk, time for a little picture **** to keep y'all interested.
Wow! All I can say is you are right on the cool factor. That is a thing of beauty. Everywhere you look there's something special, all the way down to the finned aluminum oil filter cover. Nice job! Now let's see a video of it running.
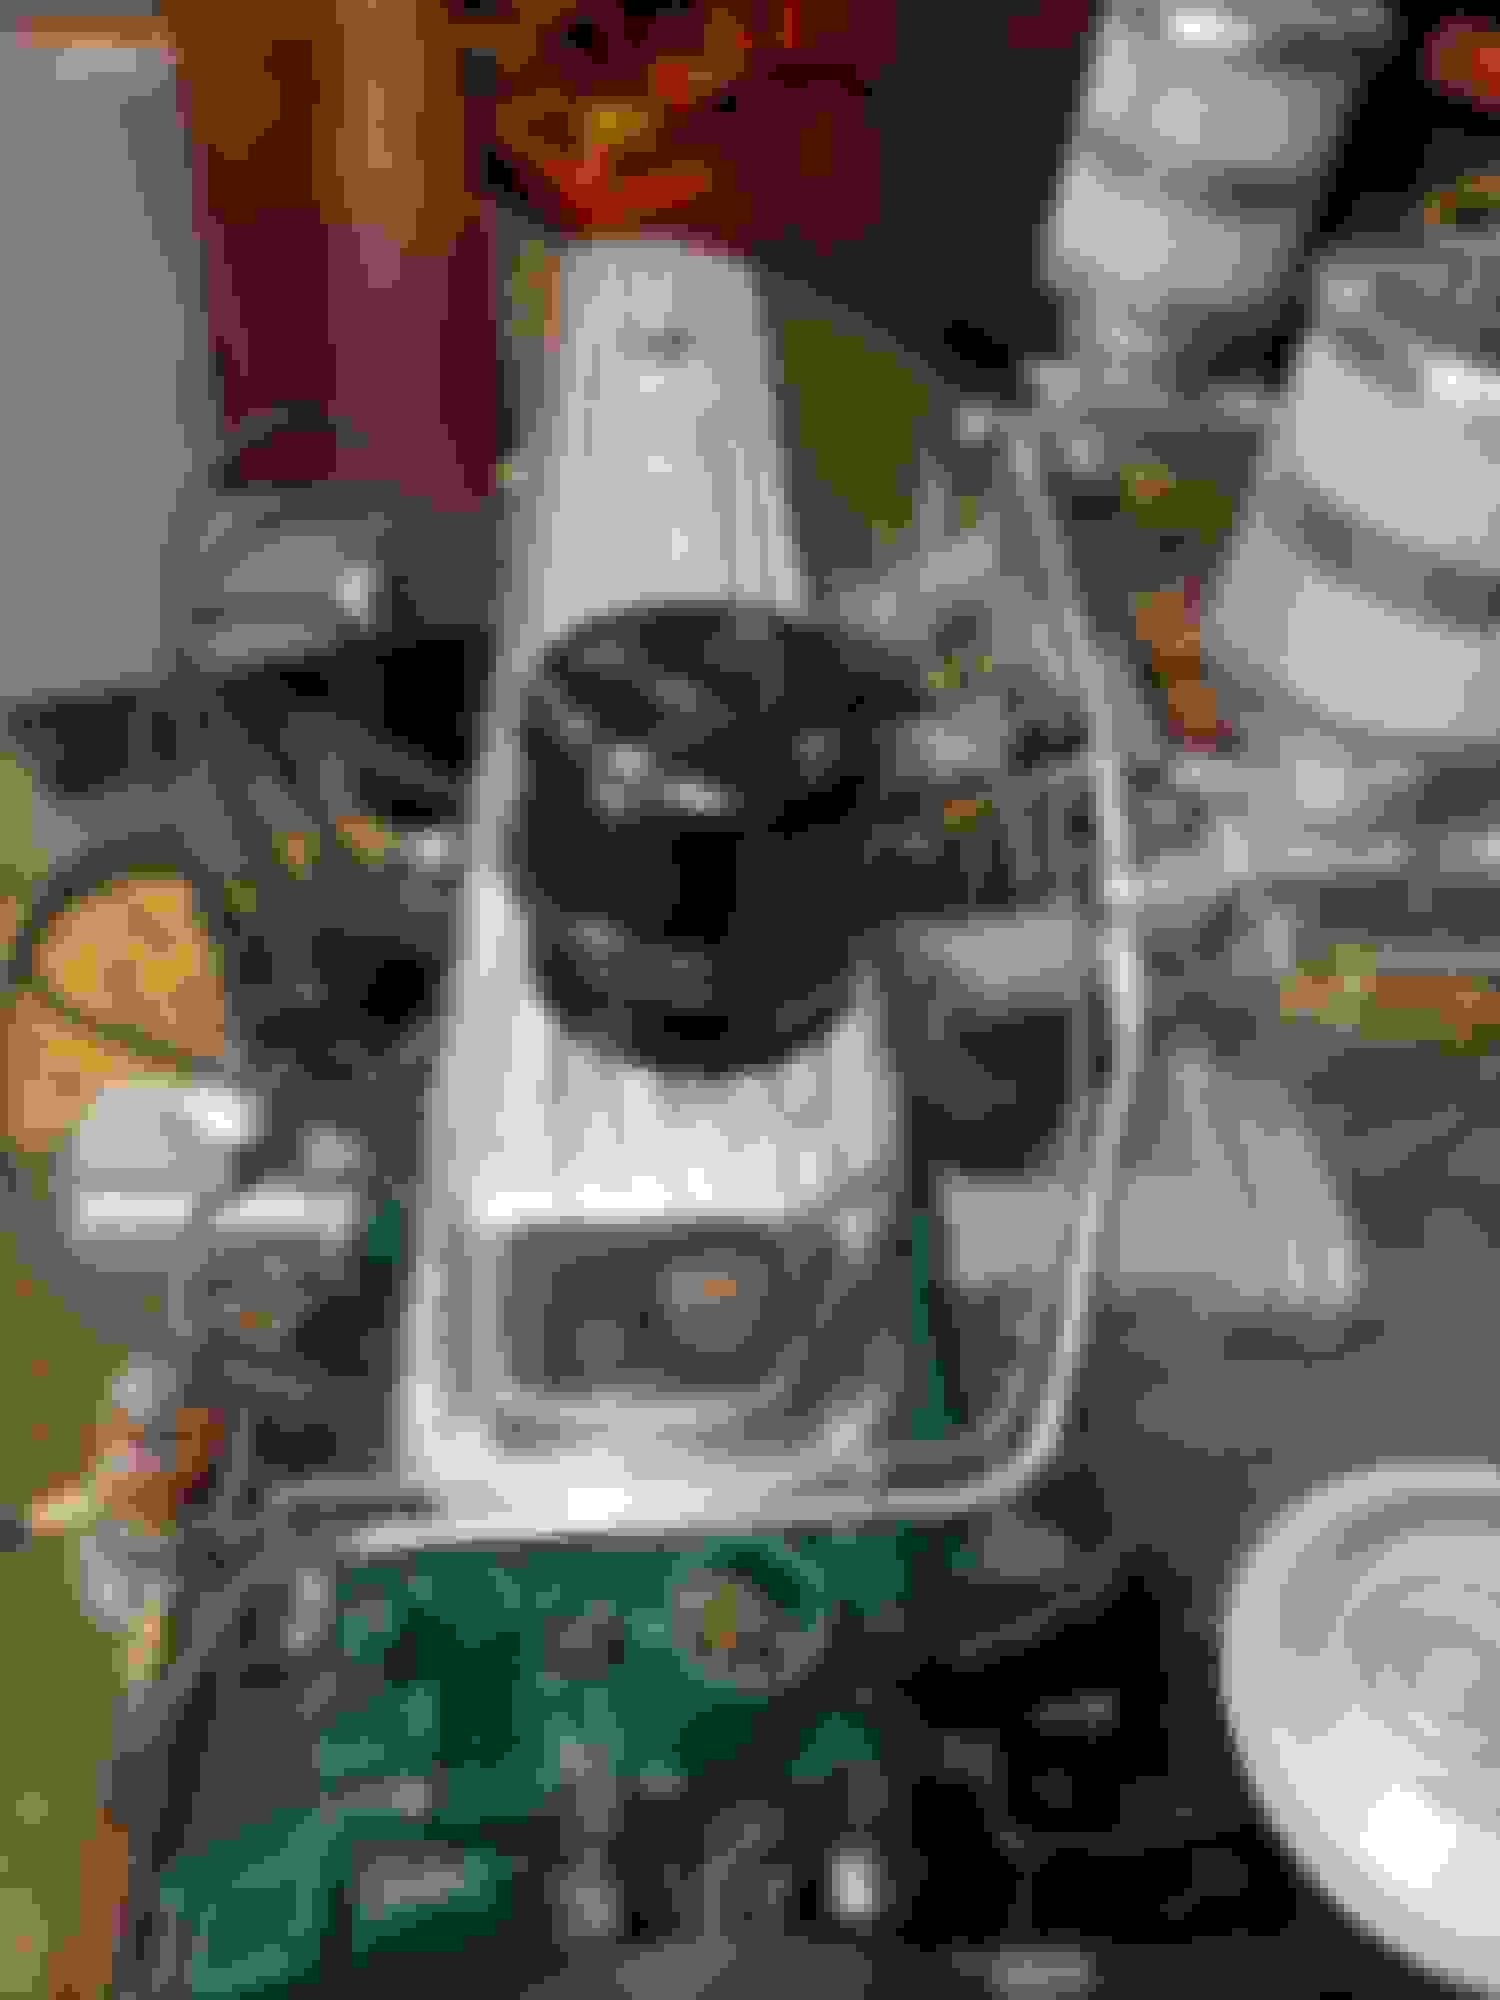
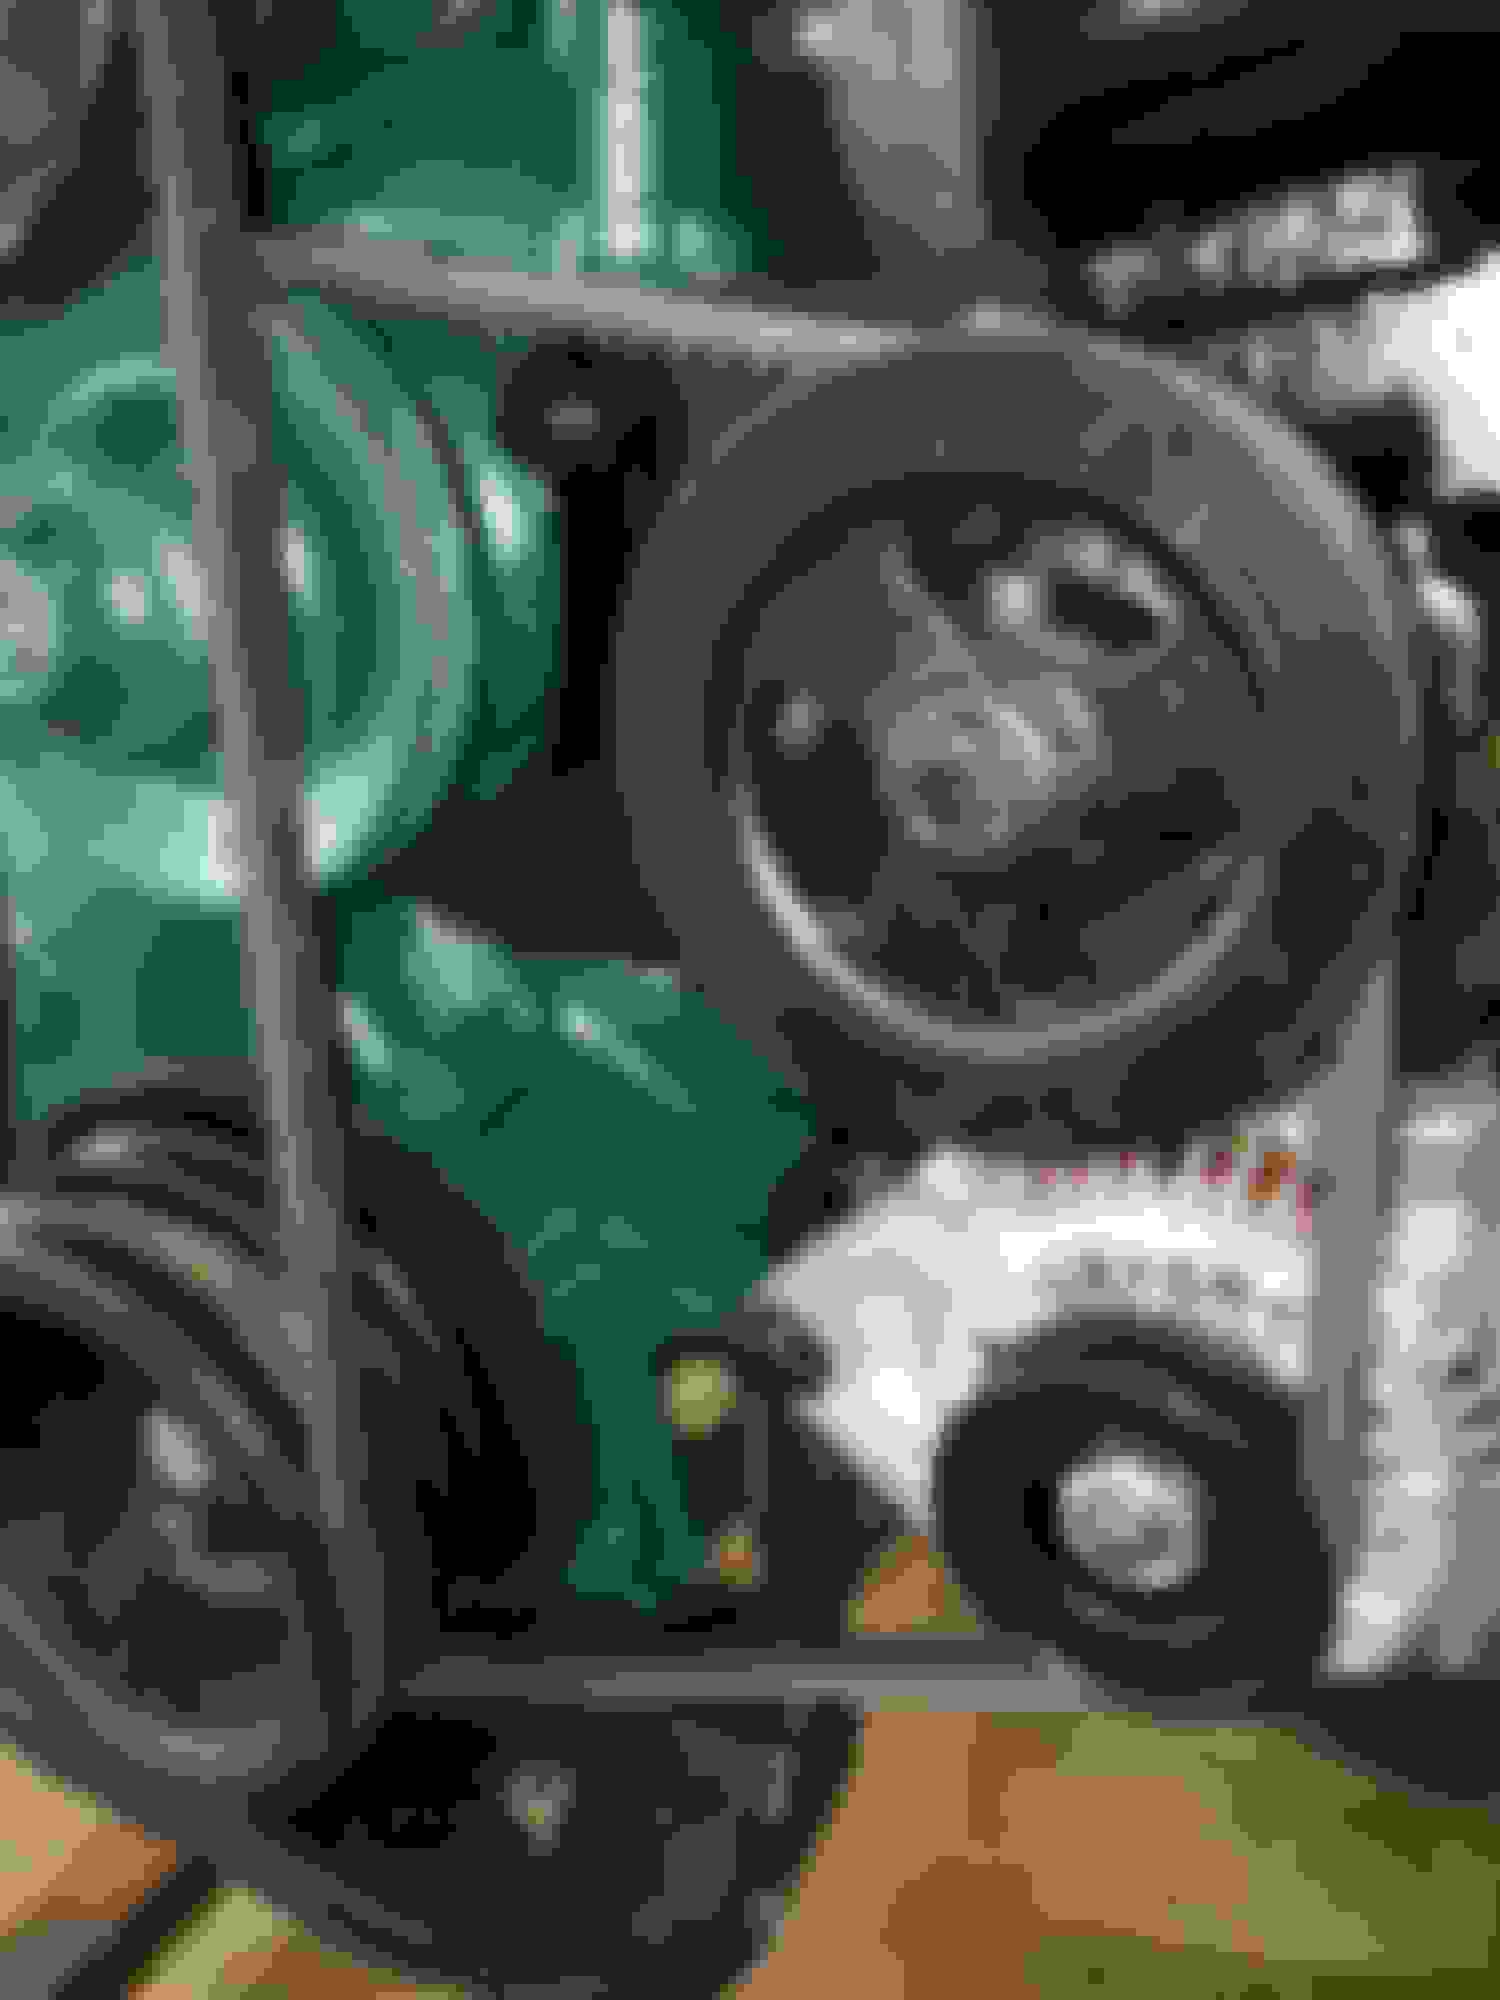
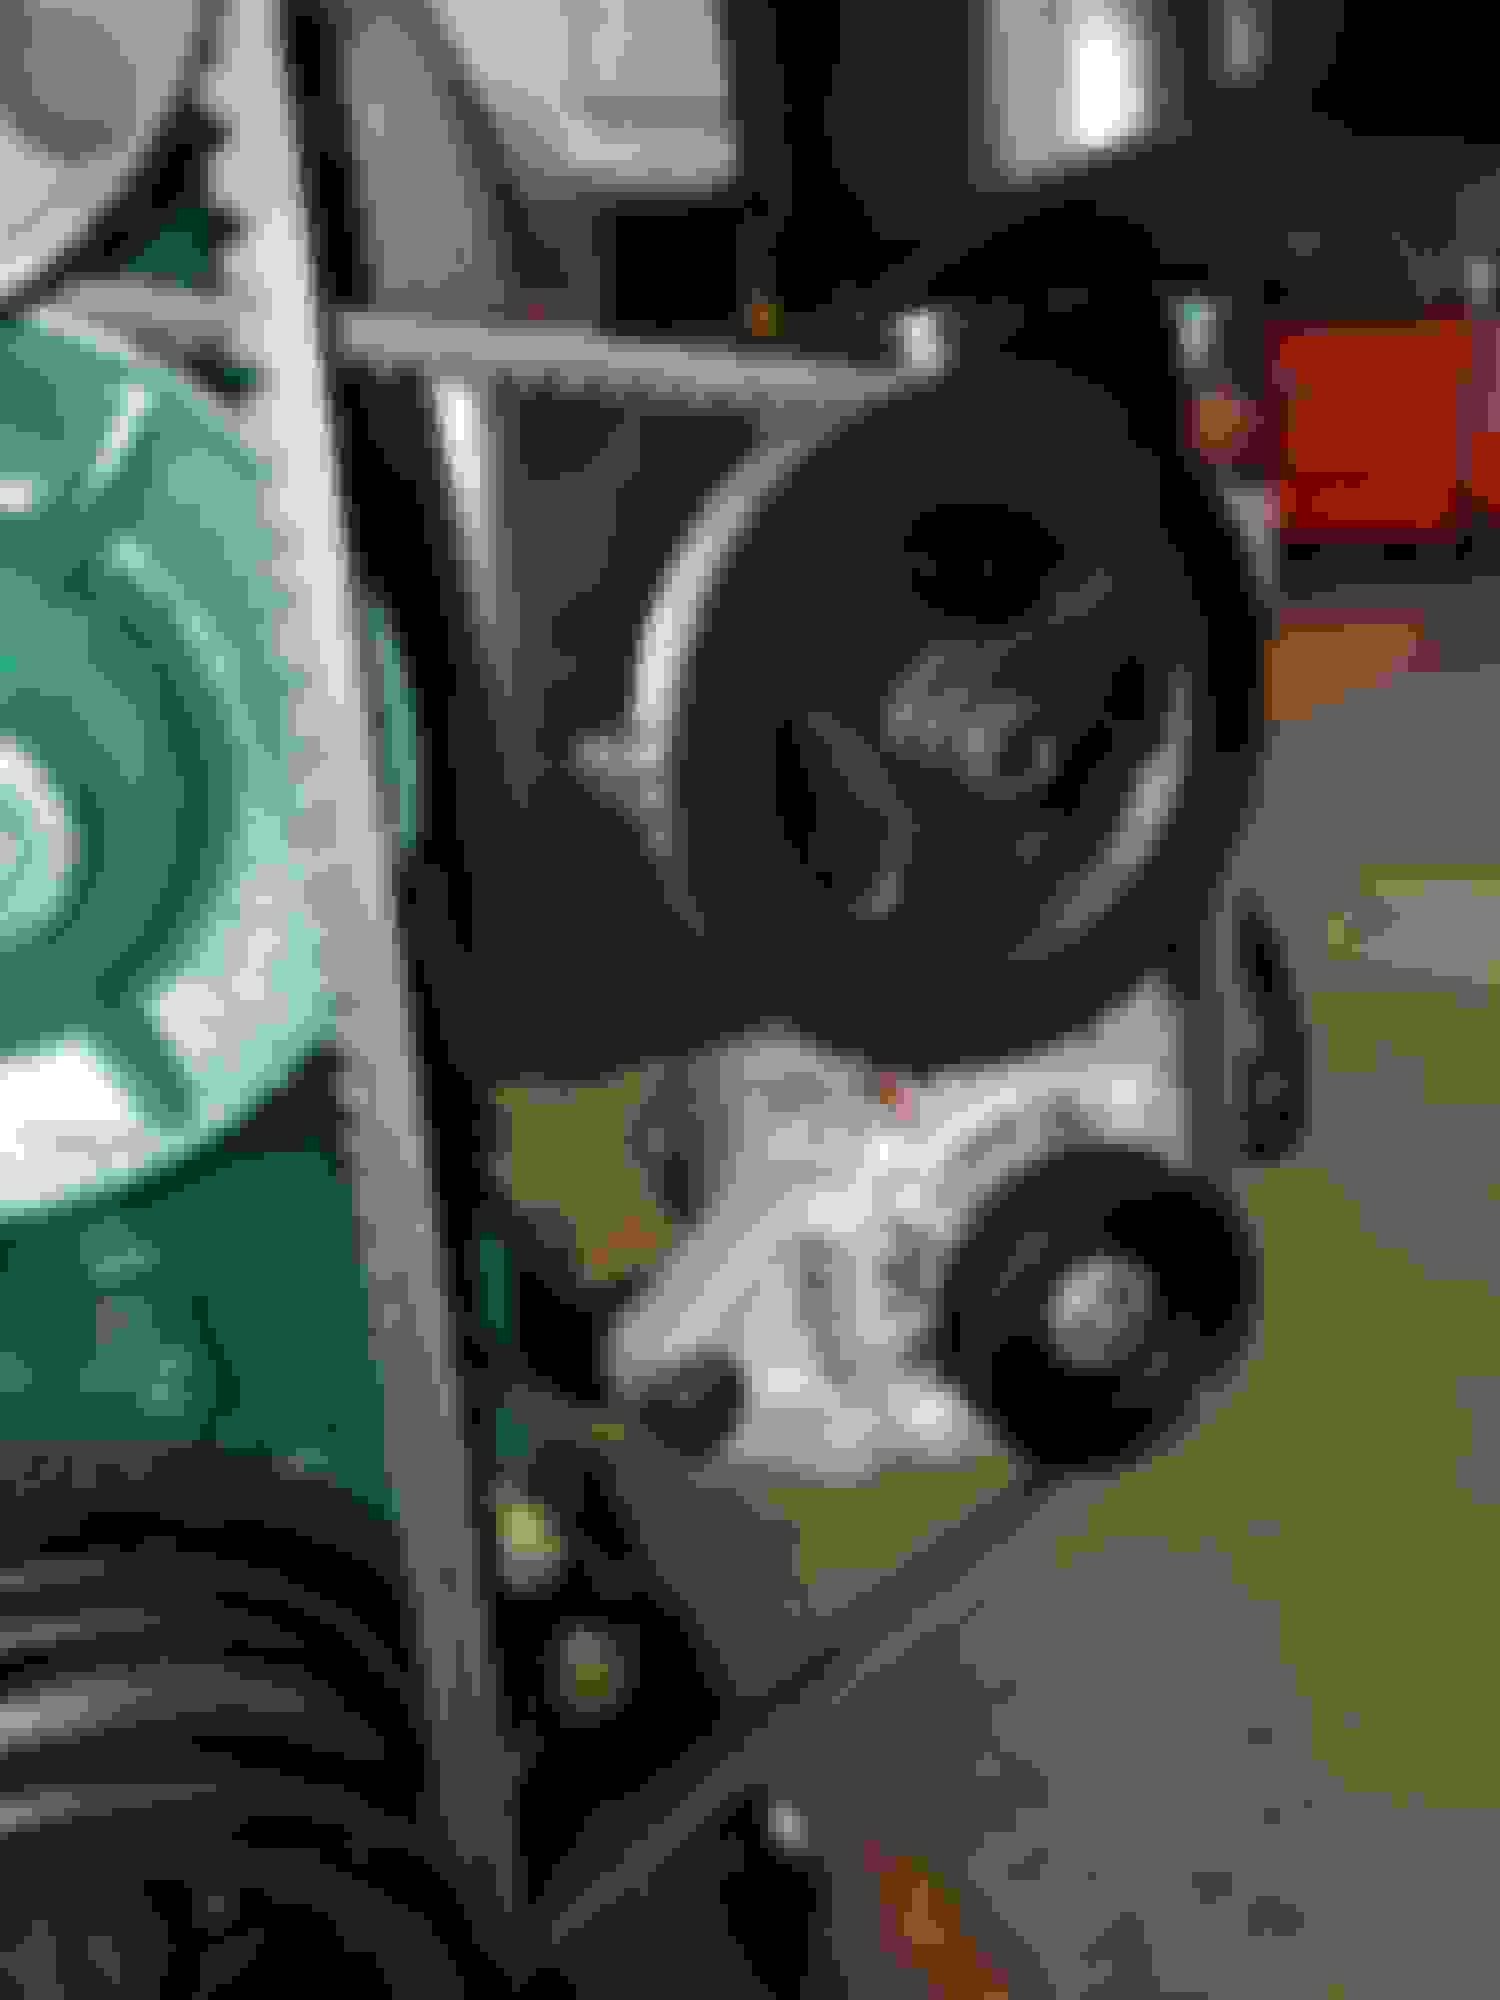
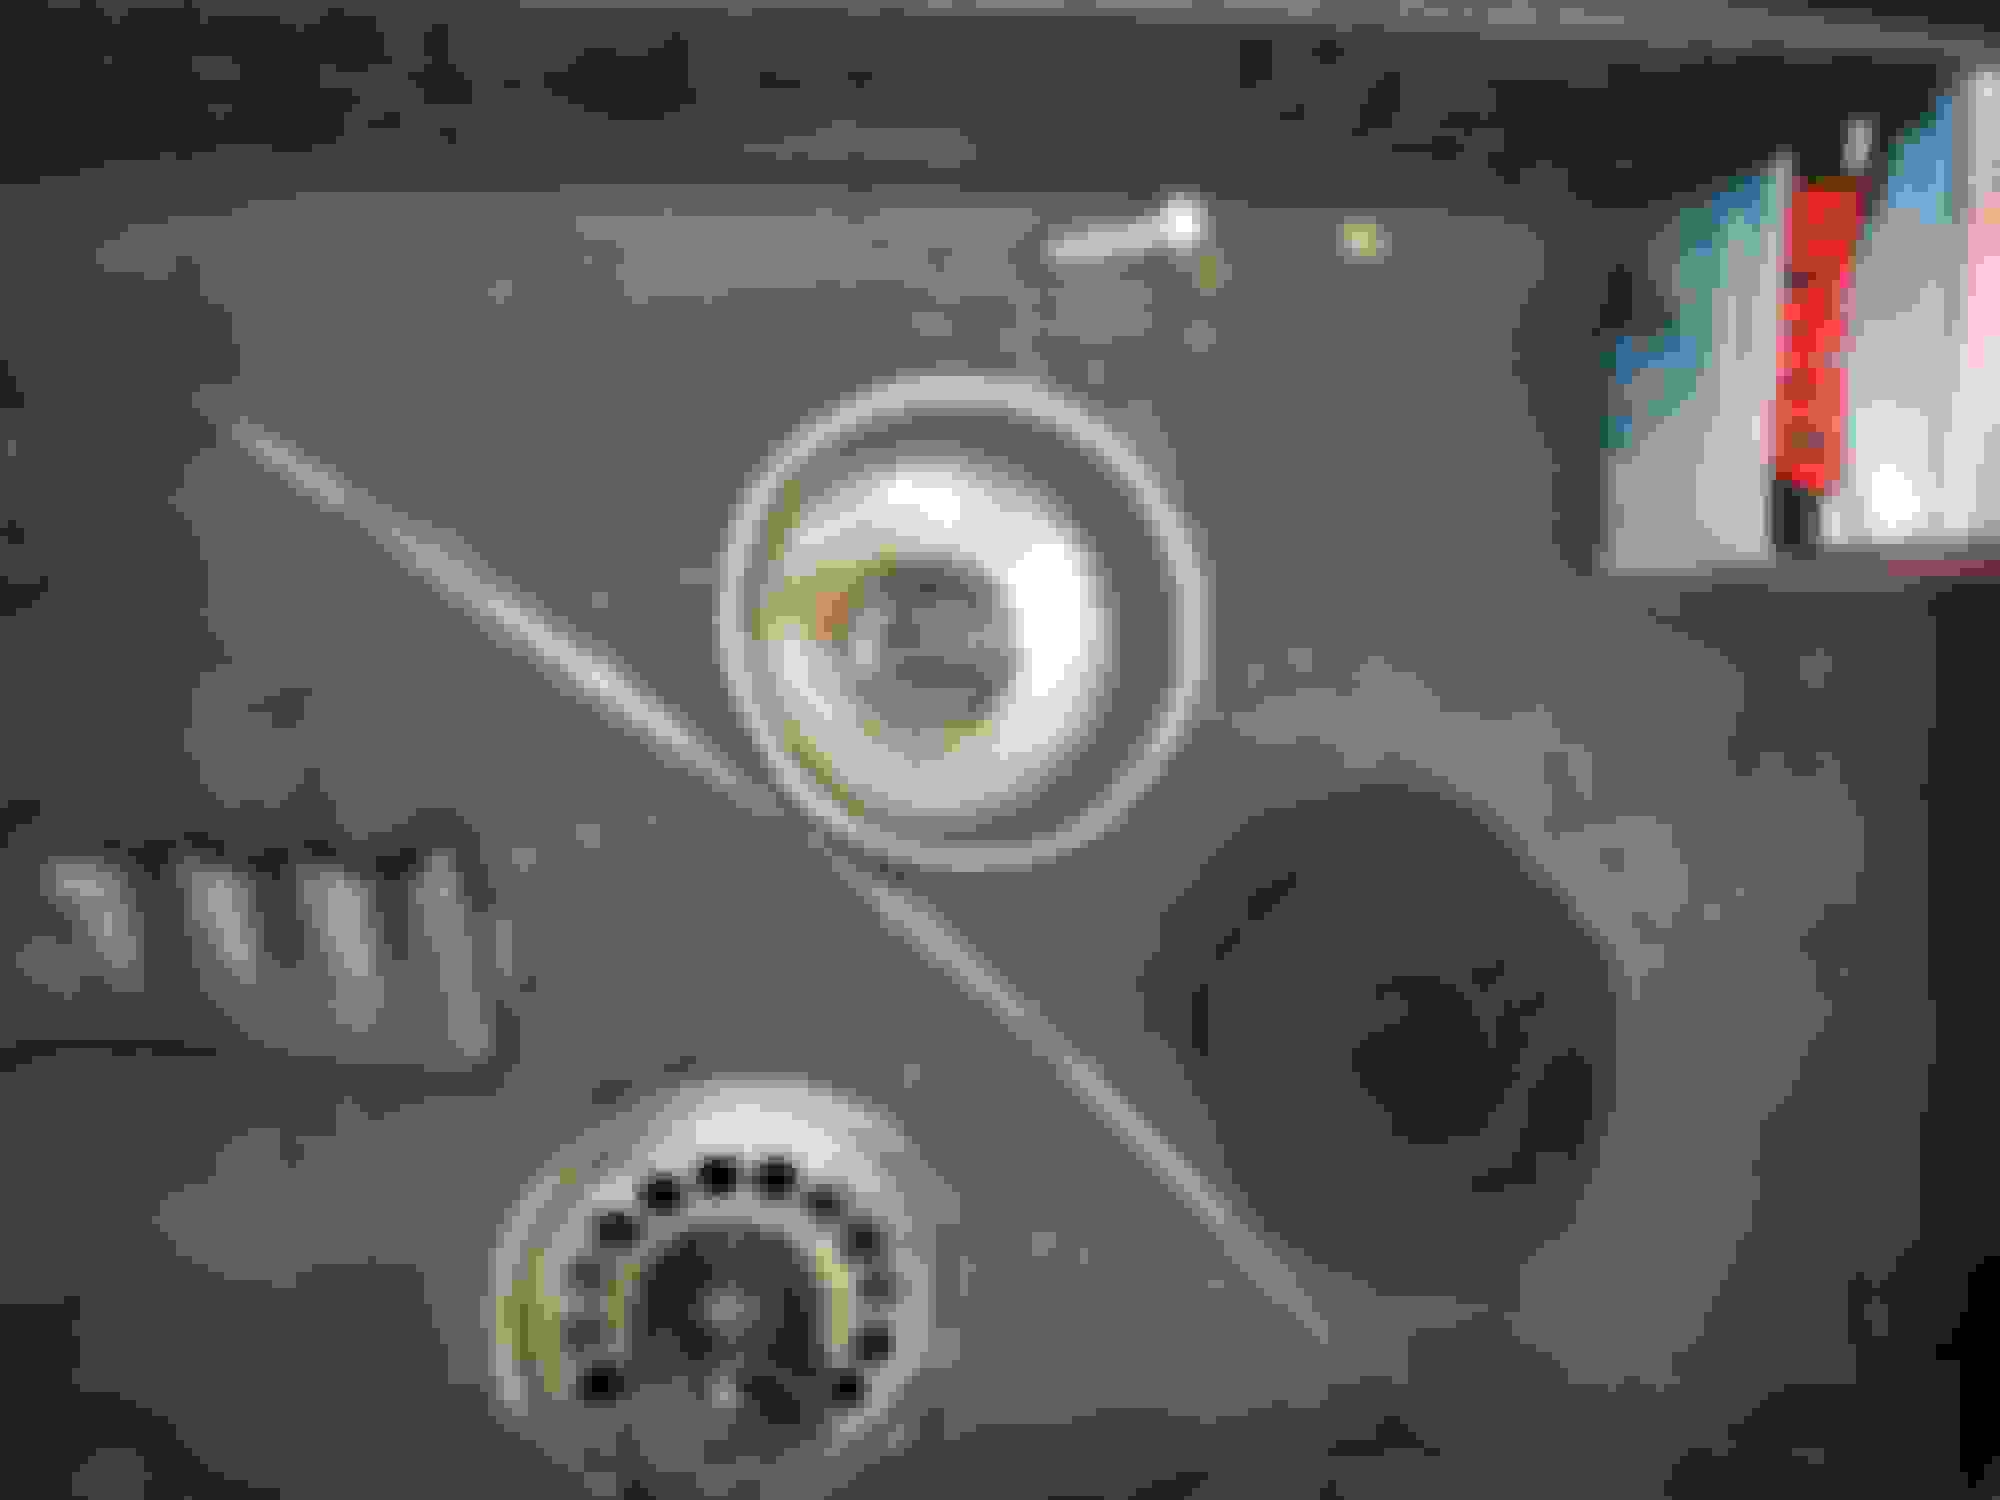
By now I'm expecting some of you have noticed something funny going on at the front of the engine. While I'm not exactly a purist I'm not a full-blown darksider either. I guess you could say I try to remain in a somewhat 'period correct' area. I'll begin with the fact that I love a good three-on-the-tree column. I also really love the B-W overdrive I have. (talk about millennials that can't drive a stick... LOL) I wouldn't mind changing the original steering box to a power box but I don't want to go through re-engineering the column in order to retain the shifter. Keeping that in mind and also the staying period correct, I'm going with the slave assist Bendix/Eaton combo. That, the engine tweaks, LED headlights and, dare I say it, changing over to 12 volts is as far from stock as this truck is going. My reason for going twelve volt is since I was going to the Eaton pump, and making custom brackets, I figured it was time to just do it. Plus, if I mounted the pump on top I could pretty much bury the tiny alternator from view. I tried using the lower cast iron bracket from a '62 223 Ford but it didn't quite work out with the front engine mounting cradle. BTW, if anyone wants to try it, I have what is probably the last NOS bracket, unused/non-mounted and will happily part with it. It mounts the P/S pump just below the generator.
Moving right along... my plan for the mounting bracket came from a place in my head that remembers bits and pieces of who knows how many cars I've worked on. Reality or a beer induced dream? Who knows? Bending that double offset in a piece of 3/8" plate was a lot of fun. Not.
Hopefully the pictures will explain it without so many words:
I see that pic from the top looks like the belt isn't aligned correctly but, believe me, it is. I used .094 wall SS tubing and a Starret flat bar to ensure alignment.
The funny thing is the adjuster bar I used had to be cut in half and a piece of 3/4" flat bar stock welded in the middle to accommodate the alternator's offset ear. Later that night I got on eBay to look for a remote reservoir (an idea that didn't work for me, eventually) and I saw three similar, uncut, adjuster bars with prices ranging from $45 - $115. Oh, well... LOL. Anyway, the way I designed it was if the water pump needs to be changed only the P/S pulley and the three bolts behind it need to be removed, along with the two attaching the bracket to the pump. The rear bracket and alternator will support the pump, in place, while the water pump is exchanged. Takes about three minutes. Of course it took two days to make all of it.
While I'm thinking of it, the green is exactly the original color of the engine. No two-tone. No Aspen DD Green. Top to bottom, including the valve cover, the bellhousing and the flywheel pan were all the same color with no other beneath it. I'm not saying they all should be that way, Ford pretty much used whatever was on hand and cost effective back then. The only thing I'm on the fence about now is the guys are trying to talk me into painting the valleys between the valve cover and oil filter ribs green also. Thoughts? Also, the oil filter cover... I figured who wants to see a crappy orange oil filter hanging on the side of a green engine? Speedway online had a $15 off first purchase coupon and the cover was $25, so for $10 I was in. A little bling never hurts, right?
Ditto on the fuel lines. It's been forever since I've silver-soldered fuel lines but I just couldn't bring myself to lump a bunch of brass fittings on the carbs. Same with the air filters. But even so, too many of the available options are just junky and too short to allow air flow. Luckily I remembered Charlie Price in Vero Beach, Fla. He's just down the road from where my parents used to live. Nice guy, great work - look his site up, Vintage Speed. He bought out the rights to Eddie Edmunds' designs and the filters add a touch of 'period correct aftermarket' to the engine.
While I'm at it, I have to give props to Cowboy John in Florida for supplying me the pieces I needed to rebuild the old Edsel fuel pump I found. I guess i just have a thing for glass fuel bowls.
Regarding the LOM distributor - many of us know the LOM was effective, compared to manually advancing the timing, that is. Beyond that it was pretty crappy. Change up the induction and you were screwed. Enter an enterprising person that figured out a distributor from a 300 six fits nicely, with some modifications to the portion that drives the oil pump, thus adding centrifugal advance to the vacuum advance. Then someone else realized the oil pump from a '64 223 had a 5/16" hex drive that would match the 300's distrbutor. Woohoo! I was all in. Of course, like so many of us do, I ordered the parts months before I began the work. It wasn't until I began assembling the short block that I realized the oil pickup tube was completely different. Add another day in order to cut, bend, tweak, stare, make a new attaching plate and finally braze together a pickup tube that would work. You have been warned. ;-)
BTW, don't mind the dirty oil stain on the deck in the second picture. We had three antique fire engines in the shop today, getting ready for The Pegasus Parade (Kentucky Derby.) You just have to know that's where a Detroit Diesel powered truck had been parked (6-71.) "If a Detroit's running, it's dripping."
Thanks for the props, y'all. I'm having a lot of fun with this. I haven't done this kind of work in years. It's nice to do some work that's more than just making something functional and then getting to share it with your peers. Even the guys I work with are digging it. I guess there is an upside to becoming an old fart. LOL
One more thing then I'm calling it a night. I hate seeing crud build up in an engine so I planned on upgrading the case ventilation with a PCV system. Getting rid of the draft tube and including a PCV valve is no big deal, with enough effort I could probably round up a NOS Ford conversion kit from '61 or so. But where's the fun in that? Add in the new multi-carb setup with *ahem* 'offshore', unknown quality carbs and I wasn't really looking forward to sort through a raft of PCV valves, trying to find one that works properly with this setup. Well, that's how I rationalized spending $129 on a PCV valve, for what it's worth. Check out ME Wagner PCV valves. Then came the plumbing. Oh, and why not include a small catch can? So I ditched the draft tube, drilled a hole through the middle of a 1 �" expansion plug, made a little bracket and mounted it all:
In case you weren't sure, I like bending tubing. LOL
Now that PCV system was only half finished. If it's going to suck air out there has to be air going in, right? I didn't want some goofy looking, K&N, My Purple Pony cone filter on top of that valve cover. After having the machine shop boil the crud out of everything the 'steel wool' filter in the OE breather had disappeared. So, it was time to get serious, open a beer (or more) and tackle the issue. Grabbing a screwdriver and a pair of diags I pried the top off the OE breather. I drilled a �" hole in the cross bar that secures to breather to the valve cover and welded in a piece of �" all thread. Into the top center of the cap I welded a �" coupling nut (o.k., it looks more like pigeon poop than weld but I was trying to not burn through the cap.) I bought a replacement foam filter for a small room air conditioner and cut 'donuts' from it and stacked them inside the cap. After screwing it all together tightly and mounting it on the vavle cover so the stamped 'Front' was correctly positioned I marked the positioned for the deflector and tacked it in place. A quick couple coats of satin black and I was in business. Now I just have to decide whether or not to stay black or paint it green, should I happen to paint the valve cover ribs. (Stll looking for input) Finished product in first photo/post #1
I was going to ask how you addressed the LOM distributor "issue", sounds like that is taken care of! Are you using manifold vacuum to operate the new dizzy?
 05-02-2019, 08:07 PM