When you click on links to various merchants on this site and make a purchase, this can result in this site earning a commission. Affiliate programs and affiliations include, but are not limited to, the eBay Partner Network.
Here is another build thread for the archives! So for those of us who drive these classic trucks. Rusted cab corners are an all too common problem. Several years ago I cut out the driver's side cab corner, rocker panel, and floor pan and replaced them. Fast forward, I decide finally to replace the passenger side cab corner in a 1 day marathon DIY project. Anyway here goes!
IF YOU WOULD LIKE TO WATCH THIS PROJECT AS A VIDEO, CLICK THE LINK BELOW:
So I have a 95 F150 standard cab. So I ordered replacement panels along with a tube of seam sealer. I already own everything else to accomplish this project.
Step 1:
Take pictures of your existing cab corner and sill (if these is anything to left). This will give you a reference for your repair as you go. Too often these patch panels are a little different from stock and require some forming. Also take the time to cover anything you don't want covered in metal grinding dust and hit with welding sparks. Get all your tools assembled and lets have at it!!
Step 2:
Cut out the everything that is rusted out. Make sure your cut lines are straight. This makes it easier to line up replacement panels later. If you didn't not know. These trucks are mostly spot welded and seam sealed together. This how manufacture companies cut down on cost, production time, and vehicle weight. Thus you are going to want to drill out all the spot welds holding the rocker panel/sill piece in place. There are spot welds around the cab corner and behind the rocker panel/sill. For this job I was not removing the entire rocker panel, but only the portion that was rusted. You can choose to do the whole thing. When you are finished it should look like this:
Here is the piece I cut out. My major motivation for doing this job now was because the seat belt mount had rusted clean out. As you can see below:
Step 3:
Now is a good time to inspect all the exposed metal for rust and see if you need to cut anymore steel out. After you have performed this task, you are going to clean all the other metal surfaces and get them read for welding. For clean and well bonded welds, you want clean metal. Since you will be spot welding the rocker panel back, there will be areas where bare metal will be sandwiched together. If this is left untreated/paint, this is an early recipe for rust. Since you can't weld through paint, you want to use weld through primer to coat these areas. This is what it should look like when finished:
As you can see there is tons of pitting and rust in the flange piece that the rocker panel will be spot welded to. You have two options, you can cut all of that out (highly recommend) or you can weld steel plates over it and fill all the holes and pitting in with welds (this is what I did. it takes longer, but I had not choice due to the sound deadener on the floor panel).
Step 4:
Spot weld rocker panel in place:
As you will notice in this picture, I started the process of welding the steel plates over the rusted flange. I also used this steel to form a new floor pan piece just behind the seat belt mount.
You will also notice the quarter size hole in the rocker panel/sill piece inside the corner. I have know idea why Ford would put this hole there as well as the two smaller holes on either end (which I tack welded closed). Inside a factory cab corner, these holes would be filled close with a gap filler foam. I was unable to source this foam and I also think the foam acts as a sponge for water. So I killed two birds with one stone and welded a plate over this hole. I did not do this not he driver side when I replaced the cab corner and I developed rust in the corner after one winter. Do yourself a favor and close these holes. They probably were meant to be drainage holes, but all the do is cause problems.
Step 5:
After your sill installed, you need to cut and install the actual rocker panel. The panel I bought can actually be used to cover the entire sill piece. However, layers of carbon steel is just another recipe for rust. So I cut the entire edge that wraps around the sill. Once you well the ends of the rocker panel where they become the A and B pillars, you can tack weld the center sections. In order to speed up the project, I opted to rivet the center sections in place using solid aircraft rivets. Here is what it looks like:
To me rivets are just as good as tack welds but require less work and make less of a mess.
Step 6: Final Step!
We are down to the very last step which is actually welding the cab corner in place. You have two options here. You can replace what is rusted (what I did) or you can replace a lot more of the corner. My method allows me to leave the bed in place and thus shortens the project time and intensity. Simply, cut out the shape you need to fix the corner and weld in place! It should look like this:
Where the cab corner wraps around into the door jam, there isn't enough steel on the panel to completely cover the gap down near the sill. You will need to fill this cab with piece of steel and weld.
And thats!!! HERE'S THE IMPORTANT PART: Make sure you use seam sealer to seal every little gap and corner where all the panels meet or over lap. Unless you welded every square inch of these patch panels, water will penetrate the gaps between the steel and cause rust! Remember the underside and under the carpet doesn't have to look pretty because it is never seen. So seal away and don't hold back!
This is also a good time to bondo and sand any imperfections in your welds. If you don't need to do this, I envy your welding skills.
After you perform this crucial step, I HIGHLY HIGHLY HIGHLY recommend you prime and paint all bare steel ASAP!!! After all your hard work you don't want to see rust trying to destroy it. Pick up a can of 2 part primer, your color of choice, and 2 part clear coat. These two part paints are mimic a factory spray job by having the ability to mix hardener into the paint when an internal capsule is cracked and mixed (shook) together. The results are fantastic and last a long long time. otherwise, you can use any old hardware store brand primer, paint, and clear coat to finished the job. If you are trying to match the factory paint color, visit automotivetouchup.com. For about $20 you can get the factory color of your truck in a spray can. I should also mention the spray nozzles on these cans are amazing. The fan and consistency is out of this world.
Anyhow here is the corner and rocker panel primed:
I know the bondo job wasn't perfect, but I could hardly be bothered since this is a door jamb and will never be noticed.
Finally here is the cab corner and rocker panel painted:
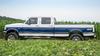
Damn it looks good if I do say so myself!! If you don't like it, well then go fix your owe. This job suits me fine!😁 If you are curious this color is a factory Ford color called Bright Sapphire Metallic paint code JA. It was a limited color for vehicles between 94-95.
IF YOU WOULD LIKE TO WATCH THIS PROJECT AS A VIDEO, CLICK THE LINK BELOW:
I see you just overlapped the rotten inner floor with the new rocker and scab pieces
I am curious as to why you did not pull us the sound deadener and replace the Rotten inner floor?
I see you just overlapped the rotten inner floor with the new rocker and scab pieces
I am curious as to why you did not pull us the sound deadener and replace the Rotten inner floor?
So the inner floor really isn’t rotten. I over lapped the patches of steel around the seat belt area because I tack welded the bottom of the patch. Then I shaped it using a body hammer. At that point a butt seam was not doable. So I settled for a lap joint. As for the flange piece. I wish I had replaced it but I didn’t buy that patch panel. So I just made the patch pieces from scratch.
Rezvani's Latest Post-Apocalytic Monster Is a Ford F-150 Raptor Underneath
Slideshow: Called the Fortress, the 850-horsepower pickup combines Raptor underpinnings with military-inspired features, survival equipment, and a starting price of $285,000.