



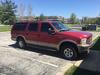




Our 05 Excursion and Project

Thread Starter
|
Junior User
Joined: May 2010
Posts: 58
Likes: 0
From: Miami, Florida
Getting a bit "image deprived" as I only got one photo today of the engine back in the frame.
At this point, all the seals have been changed, the EGR delete is in and the engine has been mated back to the trans and in the frame again. They also swapped out the water pump as the shaft seal on the pump showed some minor drip marks on it. At this stage it was $150 more.

From here they have to put in the 3 1/2" down pipe and the exhaust returning the dump out behind the rear passenger tire.
As it sits now, I should be getting the truck back late tomorrow and she's back home for my "less impressive" upgrades.
At this point, all the seals have been changed, the EGR delete is in and the engine has been mated back to the trans and in the frame again. They also swapped out the water pump as the shaft seal on the pump showed some minor drip marks on it. At this stage it was $150 more.
From here they have to put in the 3 1/2" down pipe and the exhaust returning the dump out behind the rear passenger tire.
As it sits now, I should be getting the truck back late tomorrow and she's back home for my "less impressive" upgrades.
Thread Starter
|
Junior User
Joined: May 2010
Posts: 58
Likes: 0
From: Miami, Florida
OK... Got the Excursion back today. Got it back late in the afternoon. Everything feels awesome. Truck is definitely more responsive and maintains speed requires less pedal than before.
We got a canned tune done up by the shop we took the truck to. They are quite well known for the diesel work here in South Florida. While we did not make any “performance” mods, we did get the tune which helps a bit with power and fuel mileage. That coupled with the better breathing exhaust and 3.5” pipe and we got a better pedal.
Anyway.... got it back and happy with everything and after I was done for the day, I went out and swapped the rear wheels from my V10 Excursion. Was very surprised when I pulled the rears off the diesel truck. The rears have newer model F250 18” wheels. They put the wheels on with only a 1” spacer. When I went to remove the wheels and spacers they came off insanely easily. To the point that I’d be surprised if they were on with 90 pounds of torque. Holy crap! Lesson.... check those lugs regularly! I usually check before any long trip which we take every 3 or 4 months.
Anyway... swapped out wheels on the rear using brand new 2” hub centric spacers on my current V10 Ex. They all went on with 150 ft-lbs of torque at the spacer and wheels. My current Fuel 20” Wheels got swapped over to the new truck. I’ll get some photos up tomorrow after I recharge for the night...
We got a canned tune done up by the shop we took the truck to. They are quite well known for the diesel work here in South Florida. While we did not make any “performance” mods, we did get the tune which helps a bit with power and fuel mileage. That coupled with the better breathing exhaust and 3.5” pipe and we got a better pedal.
Anyway.... got it back and happy with everything and after I was done for the day, I went out and swapped the rear wheels from my V10 Excursion. Was very surprised when I pulled the rears off the diesel truck. The rears have newer model F250 18” wheels. They put the wheels on with only a 1” spacer. When I went to remove the wheels and spacers they came off insanely easily. To the point that I’d be surprised if they were on with 90 pounds of torque. Holy crap! Lesson.... check those lugs regularly! I usually check before any long trip which we take every 3 or 4 months.
Anyway... swapped out wheels on the rear using brand new 2” hub centric spacers on my current V10 Ex. They all went on with 150 ft-lbs of torque at the spacer and wheels. My current Fuel 20” Wheels got swapped over to the new truck. I’ll get some photos up tomorrow after I recharge for the night...
Thread Starter
|
Junior User
Joined: May 2010
Posts: 58
Likes: 0
From: Miami, Florida
Today's update....
Went ahead and swapped the 20" Fuel Wheels onto the new truck.
These were on the truck when we got them. While OK, I prefer the new ones.

These are the new ones. They are 20" with a significantly smaller sidewall. Much prefer the ride with these. The looks are better as well and work better on the grey truck than they did on the white truck. Also planning on blacking out the badges so it should tie in well.

Here they are side by side. Sorry for the angle. Had to shoot from under the other truck as I had them side by side to swap wheels.

shot down the side to give you an idea of the offset positioning. There are no spacers in there.

I'll likely head to my alignment guru this weekend to get her aligned now that I have the new shoes on.
Last thing I did tonight was to swap out the front fogs from the stock crap to a pair of Rigid SAE D-Series lights. All I have to say is that it is an AMAZING difference. I'll take some shots of the lights in place tomorrow AM and I'll post them up. I am also going to do a write up on it and the parts used so folks have the reference. I'll do it in a separate thread.
Went ahead and swapped the 20" Fuel Wheels onto the new truck.
These were on the truck when we got them. While OK, I prefer the new ones.
These are the new ones. They are 20" with a significantly smaller sidewall. Much prefer the ride with these. The looks are better as well and work better on the grey truck than they did on the white truck. Also planning on blacking out the badges so it should tie in well.
Here they are side by side. Sorry for the angle. Had to shoot from under the other truck as I had them side by side to swap wheels.
shot down the side to give you an idea of the offset positioning. There are no spacers in there.
I'll likely head to my alignment guru this weekend to get her aligned now that I have the new shoes on.
Last thing I did tonight was to swap out the front fogs from the stock crap to a pair of Rigid SAE D-Series lights. All I have to say is that it is an AMAZING difference. I'll take some shots of the lights in place tomorrow AM and I'll post them up. I am also going to do a write up on it and the parts used so folks have the reference. I'll do it in a separate thread.
Thread Starter
|
Junior User
Joined: May 2010
Posts: 58
Likes: 0
From: Miami, Florida
This AM did one more thing... fixed the mileage computer/compass on the truck.
It was the typical resistor packs that needed to be soldered back. All done... working well. Have to calibrate the compass.... but that's it.

It was the typical resistor packs that needed to be soldered back. All done... working well. Have to calibrate the compass.... but that's it.
FTE Stories
Ford Trucks for Ford Truck Enthusiasts

Top 6 Best Deals Available on New Fords & Lincolns Right Now
Brett Foote
This Hennessey Takes the Expedition Tremor's Off-Roading Capability to the Next Level
Verdad Gallardo
Top 10 Fords at 2026 Carlisle Ford Nationals
Joe Kucinski
3 Best / 3 Worst Parts of Modern Ford Ownership
Brett Foote
10 Amazing Upgrades That Solve Common Ford Truck Owner Headaches
Pouria Savadkouei
Every 2026 Ford Engine Explained
Brett Foote
10 Ugly Ford Trucks That We Still Kinda Love
Joe Kucinski
10 Things Every Truck Owner NEEDS (2026 Edition)
Michael S. Palmer
Rezvani's Latest Post-Apocalyptic Monster Is a Ford F-150 Raptor Underneath
Verdad Gallardo
Thread Starter
|
Junior User
Joined: May 2010
Posts: 58
Likes: 0
From: Miami, Florida
Alright folks.... update time. Not a huge amount done but holy crap did it take a good amount of time to get done! 
We have a vision of where we want to be with the truck overall on the exterior/body. We like the general color scheme but wanted to bring a bit more black in to tie in with the wheels a bit better.
The other thing are the plastics on the running board and the step covers on the rear bumper. They had seen better days. The tan does not hold up well to the sun in So. Flo. so rather than replace them, we have decided to go black with those as well and are going to have them Rhino Lined to get a good even color and, again, bring in some black into the mix.
Anyway.... what I did this weekend.
We refreshed the badges on the truck. I took off all the "Excursion" chrome and black badges and the two "Ford" ovals on the truck. Once off, I spent about 2 hours to get all the two faced tape and polished all the paint on the panels to remove any ghosts from the old badges coming off.
Once we had everything off I grabbed the new badges from Truck Emblem Warehouse that I picked up. I went with the "Excursion International" badges. They are real nice and the two fender badges used the pins to line up perfectly. The rear had to get the pins shaved down, but not a big deal.
The Ford ovals are from Amazon and are engraved billet and then painted black with a rough finish that we thought would tie in well with the steps and running boards we are doing.
Here are the results...


We have a vision of where we want to be with the truck overall on the exterior/body. We like the general color scheme but wanted to bring a bit more black in to tie in with the wheels a bit better.
The other thing are the plastics on the running board and the step covers on the rear bumper. They had seen better days. The tan does not hold up well to the sun in So. Flo. so rather than replace them, we have decided to go black with those as well and are going to have them Rhino Lined to get a good even color and, again, bring in some black into the mix.
Anyway.... what I did this weekend.
We refreshed the badges on the truck. I took off all the "Excursion" chrome and black badges and the two "Ford" ovals on the truck. Once off, I spent about 2 hours to get all the two faced tape and polished all the paint on the panels to remove any ghosts from the old badges coming off.
Once we had everything off I grabbed the new badges from Truck Emblem Warehouse that I picked up. I went with the "Excursion International" badges. They are real nice and the two fender badges used the pins to line up perfectly. The rear had to get the pins shaved down, but not a big deal.
The Ford ovals are from Amazon and are engraved billet and then painted black with a rough finish that we thought would tie in well with the steps and running boards we are doing.
Here are the results...
Thread Starter
|
Junior User
Joined: May 2010
Posts: 58
Likes: 0
From: Miami, Florida
The other item I was going to tackle was the 08+ mirrors with power telescope & fold. I had purchased all the connectors and appropriate pins from Mouser (based on the write up here) but when I went to pin up the wires, I found that Mouser had incorrectly labeled a set of pins/terminals. In short, the label on the bag showed the right part number, but a second inner bag had different pins with different part numbers. Mouser is taking care of the issue and sending me out a new set.
However, I did go ahead and install the '08 mirrors on the truck.... now I just have to wire them up so they'll be manual adjust mirrors for a couple of days.

However, I did go ahead and install the '08 mirrors on the truck.... now I just have to wire them up so they'll be manual adjust mirrors for a couple of days.
Thread Starter
|
Junior User
Joined: May 2010
Posts: 58
Likes: 0
From: Miami, Florida
Last thing done which is what killed us (the wife was called in to help as it was nuts to do this) was getting rid of the rain deflectors/guards/shield that had been installed by the previous owners.
These guards were on with two face tape on the painted frame of the door. This should have been a matter of an hour's work but it turned into 6 hours. The two faced tape would not come off. Tried WD40, Diesel, Goo Gone liquid, Goo Gone Gel and Rubbing Alcohol. It was insane.
Finally what worked was the Goo Gone Gel laid onto the tape left behind and letting it soak for about 10 minutes. That dissolved the "foam" in the tape and some of the adhesive. The remaining adhesive came off with the rubbing alcohol and a great deal of elbow grease.
The one thing that made me almost lose it was that on the back edge of the front passenger and driver windows, they seem to have used crazy glue or epoxy to glue down the back 2 inches of the guards. I guess they came loose over the years and were vibrating in the wind. The fix ended up being to glue/epoxy them down. I had to hit with wet sand paper on my mini polisher to get it down to the clear coat. Then when I polished the whole area, I brought the gloss back. Absolutely nuts! The ordeal took us most of Sunday to resolve.
Anyway..... they're gone now.
These guards were on with two face tape on the painted frame of the door. This should have been a matter of an hour's work but it turned into 6 hours. The two faced tape would not come off. Tried WD40, Diesel, Goo Gone liquid, Goo Gone Gel and Rubbing Alcohol. It was insane.
Finally what worked was the Goo Gone Gel laid onto the tape left behind and letting it soak for about 10 minutes. That dissolved the "foam" in the tape and some of the adhesive. The remaining adhesive came off with the rubbing alcohol and a great deal of elbow grease.
The one thing that made me almost lose it was that on the back edge of the front passenger and driver windows, they seem to have used crazy glue or epoxy to glue down the back 2 inches of the guards. I guess they came loose over the years and were vibrating in the wind. The fix ended up being to glue/epoxy them down. I had to hit with wet sand paper on my mini polisher to get it down to the clear coat. Then when I polished the whole area, I brought the gloss back. Absolutely nuts! The ordeal took us most of Sunday to resolve.
Anyway..... they're gone now.
VT Chapter Ldr


Joined: Apr 2004
Posts: 96,160
Likes: 294
From: Orange, Vermont

Alright folks.... update time. Not a huge amount done but holy crap did it take a good amount of time to get done!
We have a vision of where we want to be with the truck overall on the exterior/body. We like the general color scheme but wanted to bring a bit more black in to tie in with the wheels a bit better.
The other thing are the plastics on the running board and the step covers on the rear bumper. They had seen better days. The tan does not hold up well to the sun in So. Flo. so rather than replace them, we have decided to go black with those as well and are going to have them Rhino Lined to get a good even color and, again, bring in some black into the mix.
Anyway.... what I did this weekend.
We refreshed the badges on the truck. I took off all the "Excursion" chrome and black badges and the two "Ford" ovals on the truck. Once off, I spent about 2 hours to get all the two faced tape and polished all the paint on the panels to remove any ghosts from the old badges coming off.
Once we had everything off I grabbed the new badges from Truck Emblem Warehouse that I picked up. I went with the "Excursion International" badges. They are real nice and the two fender badges used the pins to line up perfectly. The rear had to get the pins shaved down, but not a big deal.
The Ford ovals are from Amazon and are engraved billet and then painted black with a rough finish that we thought would tie in well with the steps and running boards we are doing.
Here are the results...
We have a vision of where we want to be with the truck overall on the exterior/body. We like the general color scheme but wanted to bring a bit more black in to tie in with the wheels a bit better.
The other thing are the plastics on the running board and the step covers on the rear bumper. They had seen better days. The tan does not hold up well to the sun in So. Flo. so rather than replace them, we have decided to go black with those as well and are going to have them Rhino Lined to get a good even color and, again, bring in some black into the mix.
Anyway.... what I did this weekend.
We refreshed the badges on the truck. I took off all the "Excursion" chrome and black badges and the two "Ford" ovals on the truck. Once off, I spent about 2 hours to get all the two faced tape and polished all the paint on the panels to remove any ghosts from the old badges coming off.
Once we had everything off I grabbed the new badges from Truck Emblem Warehouse that I picked up. I went with the "Excursion International" badges. They are real nice and the two fender badges used the pins to line up perfectly. The rear had to get the pins shaved down, but not a big deal.
The Ford ovals are from Amazon and are engraved billet and then painted black with a rough finish that we thought would tie in well with the steps and running boards we are doing.
Here are the results...
 I personally would paint the raised "Ford" in white to give it contrast to stand out. Or in the same body color as the truck to tie them in

Fleet Mechanic


Joined: Nov 2015
Posts: 1,843
Likes: 191
From: NoVA

Last thing done which is what killed us (the wife was called in to help as it was nuts to do this) was getting rid of the rain deflectors/guards/shield that had been installed by the previous owners.
These guards were on with two face tape on the painted frame of the door. This should have been a matter of an hour's work but it turned into 6 hours. The two faced tape would not come off. Tried WD40, Diesel, Goo Gone liquid, Goo Gone Gel and Rubbing Alcohol. It was insane.
Finally what worked was the Goo Gone Gel laid onto the tape left behind and letting it soak for about 10 minutes. That dissolved the "foam" in the tape and some of the adhesive. The remaining adhesive came off with the rubbing alcohol and a great deal of elbow grease.
The one thing that made me almost lose it was that on the back edge of the front passenger and driver windows, they seem to have used crazy glue or epoxy to glue down the back 2 inches of the guards. I guess they came loose over the years and were vibrating in the wind. The fix ended up being to glue/epoxy them down. I had to hit with wet sand paper on my mini polisher to get it down to the clear coat. Then when I polished the whole area, I brought the gloss back. Absolutely nuts! The ordeal took us most of Sunday to resolve.
Anyway..... they're gone now.
These guards were on with two face tape on the painted frame of the door. This should have been a matter of an hour's work but it turned into 6 hours. The two faced tape would not come off. Tried WD40, Diesel, Goo Gone liquid, Goo Gone Gel and Rubbing Alcohol. It was insane.
Finally what worked was the Goo Gone Gel laid onto the tape left behind and letting it soak for about 10 minutes. That dissolved the "foam" in the tape and some of the adhesive. The remaining adhesive came off with the rubbing alcohol and a great deal of elbow grease.
The one thing that made me almost lose it was that on the back edge of the front passenger and driver windows, they seem to have used crazy glue or epoxy to glue down the back 2 inches of the guards. I guess they came loose over the years and were vibrating in the wind. The fix ended up being to glue/epoxy them down. I had to hit with wet sand paper on my mini polisher to get it down to the clear coat. Then when I polished the whole area, I brought the gloss back. Absolutely nuts! The ordeal took us most of Sunday to resolve.
Anyway..... they're gone now.

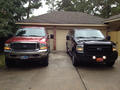
That EX is coming out nicely!!


Thread Starter
|
Junior User
Joined: May 2010
Posts: 58
Likes: 0
From: Miami, Florida
I'm sorry.... there was no saving them. They were all brittle as hell. The reason I removed them was that both the passenger and driver doors had a crack in the guard/shield halfway up the a-pillar. The rears essentially cracked as they came off the truck.