When you click on links to various merchants on this site and make a purchase, this can result in this site earning a commission. Affiliate programs and affiliations include, but are not limited to, the eBay Partner Network.
No work on the truck today. Helped my bro-n-law pour concrete. Yesterday, I decided to apply some more Chassis Saver on my frame. The lid might as well have been welded on. Once you open the can, plan to use it all. I punched a hole on the top and poured it into another container and applied as much as I could. And it is true, once it dries on your skin, it DOES NOT COME OFF. Lacquer thinner, fast orange, dish soap, nothing works.
I saw a tip a long time ago on Shadetree Mechanic or Trucks! or someplace, where they filled the empty part of the paint can with MAP gas or something before putting the lid on, to act as a barrier - or shield it from oxygen.
Not sure if the MAP gas trick would work for you, but I would try wiping off the lid, and its mating surface on the can, before putting on the lid.
Sorry for the delay. Between the Navy and family, I've been busy doing other stuff. Yesterday, I started off cussing a stupid dump truck for over loading his bed and dropped a nice rock and hit my freshly installed windshield. Sometimes I can't get a break. But it's just a chip, it will be fixed. When I got home I did little odds and ends like installed the old cardboard glove box, installed the freshly dyed seat belts (RIT dye is some good stuff), and installed cardboard backing on the back of the seat.
Today I am making preps for removing the bed. I removed the rear bumper (which I will replace), removed the forward gas tank (which is a pita solo), and soaked all bed bolts with PB Blaster. Hopefully bed comes off tomorrow.
Also, one more thing. Does anyone know if the bed bolts from a newer body style will work as far as upgrading from the old carriage bolts. Those are a pita. I was thinking that maybe SuperDuty bolts would be nice since they are around $50.
Also, one more thing. Does anyone know if the bed bolts from a newer body style will work as far as upgrading from the old carriage bolts. Those are a pita. I was thinking that maybe SuperDuty bolts would be nice since they are around $50.
I've read that SuperDuty bolts are the way to go. Grind the heads off the old bolts and install the new.
Just so you know, thoses stupipid overloaded dump trucks sometimes thro rocks from the tires. Not being over loaded.. and as far as the bolts go just grind the heads off and lift the box off.
I got the bolts off, some came off with no problem and others broke in half. I just want to upgrade to an easier way of removal and install. I have found, on a different site, a guy that actually bought the SD bolts and only 4 worked. The inside 4 were too long. So I will figure it out later. First, repair the rust areas then paint and protect.
Cautionary note - Rit dyes are known to run after use... I'd be real careful about sweating much unless you want to custom-stripe your shirts in a seat belt pattern.
Alright, so I have worked a lot on the bed in the past week, when ever I could get out there. I can now say with confidence that the under side of the bed is all rust free. I was really surprised how well the factory underspray is holding up. I applied Chassis Saver where needed and cut out and replace metal that couldn't be saved. Instead of welding the patch panels on, I used 3M body adhesive. I have used this stuff a couple time before and I am very confident that it will hold for a very long time.
I also applied Chassis Saver on the frame and suspension and axles.
I cut out the shape half an inch larger for the step flange.
This is the adhesive, in case anyone wants to do this.
Put the adhesive on the flange and insert panel and clamp like crazy (I used really really strong earth magnets too).
Same process with the wheel arches.
Do you ever wonder why arches rust out first? Because of the two inches of dirt and rocks that get trapped up there.
I will post up more when I have time. Gotta go to work now.
No work on the truck today. Helped my bro-n-law pour concrete. Yesterday, I decided to apply some more Chassis Saver on my frame. The lid might as well have been welded on. Once you open the can, plan to use it all. I punched a hole on the top and poured it into another container and applied as much as I could. And it is true, once it dries on your skin, it DOES NOT COME OFF. Lacquer thinner, fast orange, dish soap, nothing works.
I haven't posted in my build for a while... but found out there is something that takes off POR-15.
DOT3 brake fluid.
I looked at my master cylinder where DOT3 had dripped from new brake line installation... looked for an old opened bottle, and what do ya know... it eats POR-15...
Rubbed a little on my hands and what do ya know, it started peeling off what is supposed to only be taken off by time.
Not the smartest thing I've ever done... but when you spill 3/4 of a Chassis Saver quart can + work in an office (business dress), you kinda gotta go to extremes.
MSDS Sheet for DOT3 says: H302 Harmful if swallowed
H313 May be harmful in contact with skin
H316 Causes mild skin irritation
H318 Causes serious eye damage
H361 Suspected of damaging fertility or the unborn child
I would use DOT3 fluid ONLY AS A LAST RESORT.
Thought I'd pass it on for those who like to go to extremes
Originally Posted by PapaBearYuma
I've read that SuperDuty bolts are the way to go. Grind the heads off the old bolts and install the new.
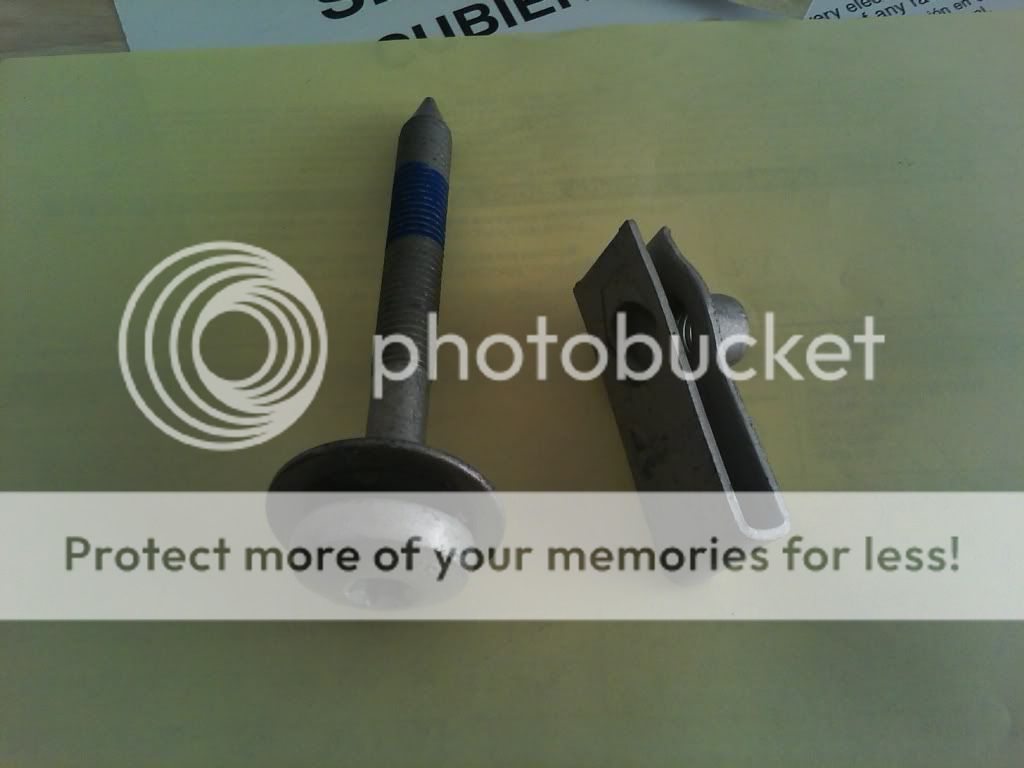
I also got the torx screw and nut which clips over the frame. Got them from a local Ford dealer. Already did the left front of the bed, got a new set to do the right front too.
Part numbers: Screw- N806251-S103Nut- N803334-S439 The nut is already pre threaded, but be sure to put plenty of anti seize on the screw and nut both to avoid rust issues in the future.
Originally Posted by FE_Rex
Interesting - I bought a complete Ford bed bolt and nut clip kit for an 03 Superduty. None of the nut clips were pre-threaded. I figured that was the reason why I was reading so many problems concerning stuck bed bolts in the SD trucks.
Big shout out for the DIY enthusiasm! Fellow New Englander here - I can appreciate the Chassis Saver.
DIY is all I like to do. This is the only way I learn. Where are you located?
Originally Posted by good to doo
Ya nice job, what kind of tool are you using for the flange?
After looking around everywhere local and online, I just picked one up at HF item number 1110, not to bad for $37. I also picked up a high speed air cutter (which is a pos) that worked but not as good as it should. The second I touched the panel the wheel would bog down to a stop. Thank goodness it only cost $10 and it will be going back, not happy with that purchase at all.

 07-30-2017, 06:50 PM