1961 - 1966 F-100 & Larger F-Series Trucks Discuss the Slick Sixties Ford Truck

1965 Mercury M250 Build

Thread Tools
 
Search this Thread
 
  #91  
Old 01-10-2016, 06:48 PM
dank4120's Avatar
dank4120
dank4120 is offline
More Turbo

Thread Starter
Join Date: Apr 2010
Location: Rocky Mtn. House, Alberta
Posts: 672
Likes: 0
Received 1 Like on 1 Post
Originally Posted by 6t6merc
Yeah that's the area I meant. I think there's a similar issue at the cowl. I have noticed that there are differences in two-tone break lines between the various assembly plants.
Eric
Yeah, me too. I've seen both types of Tu-Tone paint styles on Canadian '65 and '66 trucks, with the break following the cab and box body line or with the break underneath the anodized aluminum side trim.

We did some sanding tests on my F100 and we believe that the paint is original, so that is how Al painted the Mercury.

There seemed to be a layer of Wimbledon White underneath the Twilight Turquoise? I assumed that this was overspray or maybe the truck was painted Wimbledon White first? This seems like a big waste of paint!

Name:  tn_20151113_123643.jpg
Views: 1176
Size:  38.4 KBName:  tn_20151113_123704.jpg
Views: 1148
Size:  36.7 KBName:  tn_20151113_123713.jpg
Views: 1163
Size:  34.9 KB

On the Wimbledon White parts of the truck, both above and below the side trim clip holes, we saw no real evidence of the Twilight Turquoise colour.

Name:  tn_20151107_151520.jpg
Views: 1137
Size:  33.0 KBName:  tn_20151113_123729.jpg
Views: 1112
Size:  27.7 KB
 
  #92  
Old 01-10-2016, 10:38 PM
dank4120's Avatar
dank4120
dank4120 is offline
More Turbo

Thread Starter
Join Date: Apr 2010
Location: Rocky Mtn. House, Alberta
Posts: 672
Likes: 0
Received 1 Like on 1 Post
The box had been finished and in primer for months but I didn't get any detailed pictures until October.

Name:  tn_20151019_145540.jpg
Views: 1101
Size:  63.2 KBName:  tn_20151019_145558.jpg
Views: 1124
Size:  44.0 KB

Name:  tn_20151019_145605.jpg
Views: 1104
Size:  32.8 KBName:  tn_20151019_145629.jpg
Views: 1152
Size:  67.4 KB

Name:  tn_20151019_145643.jpg
Views: 1123
Size:  65.8 KBName:  tn_20151019_145654.jpg
Views: 1104
Size:  52.9 KB
 
  #93  
Old 01-11-2016, 04:35 AM
Paul2007's Avatar
Paul2007
Paul2007 is offline
New User
Join Date: Jan 2016
Posts: 4
Likes: 0
Received 0 Likes on 0 Posts
That's looking amazing already, can't wait to see it completed.
 
  #94  
Old 01-12-2016, 12:35 AM
dank4120's Avatar
dank4120
dank4120 is offline
More Turbo

Thread Starter
Join Date: Apr 2010
Location: Rocky Mtn. House, Alberta
Posts: 672
Likes: 0
Received 1 Like on 1 Post
Originally Posted by Paul2007
That's looking amazing already, can't wait to see it completed.

Hey thanks, you and me both!
 
  #95  
Old 01-12-2016, 12:48 AM
dank4120's Avatar
dank4120
dank4120 is offline
More Turbo

Thread Starter
Join Date: Apr 2010
Location: Rocky Mtn. House, Alberta
Posts: 672
Likes: 0
Received 1 Like on 1 Post
With all of the major parts in primer, we needed to pre-assemble the truck so Al could align the rad support, cab and the box.

We again used the tractor to place the cab back on the frame.

Name:  tn_20151019_132709.jpg
Views: 1113
Size:  56.2 KBName:  tn_20151019_132642.jpg
Views: 1114
Size:  67.3 KB

Name:  tn_20151019_153107.jpg
Views: 1085
Size:  60.3 KBName:  tn_20151019_153700.jpg
Views: 1091
Size:  66.6 KB

Name:  tn_20151019_153708.jpg
Views: 1078
Size:  52.0 KBName:  tn_20151019_154028.jpg
Views: 1068
Size:  68.2 KB


After many months, the box was back on the frame and we pulled the truck back into the shop.

Name:  tn_20151019_172352.jpg
Views: 1087
Size:  49.1 KBName:  tn_20151019_172402.jpg
Views: 1083
Size:  46.4 KB

Name:  tn_20151019_172432.jpg
Views: 1084
Size:  54.7 KBName:  tn_20151019_172444.jpg
Views: 1019
Size:  57.6 KB

Name:  tn_20151019_174052.jpg
Views: 1070
Size:  43.7 KBName:  tn_20151019_174119.jpg
Views: 1060
Size:  46.6 KB
 
  #96  
Old 01-12-2016, 08:29 PM
dank4120's Avatar
dank4120
dank4120 is offline
More Turbo

Thread Starter
Join Date: Apr 2010
Location: Rocky Mtn. House, Alberta
Posts: 672
Likes: 0
Received 1 Like on 1 Post
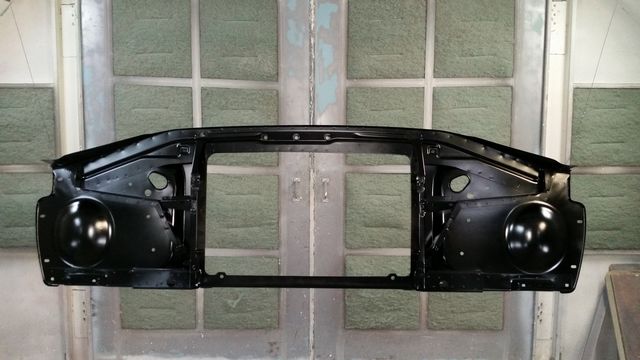
I purchased my re-popped fenders from Dennis Carpenter via a local reseller and I bought my rad support from LMC Truck.

Name:  tn_20151017_120212.jpg
Views: 1058
Size:  56.4 KBName:  tn_20151017_120221.jpg
Views: 1058
Size:  62.8 KB

Name:  tn_20151019_133627.jpg
Views: 1149
Size:  76.7 KBName:  tn_20151019_133639.jpg
Views: 1103
Size:  77.0 KB


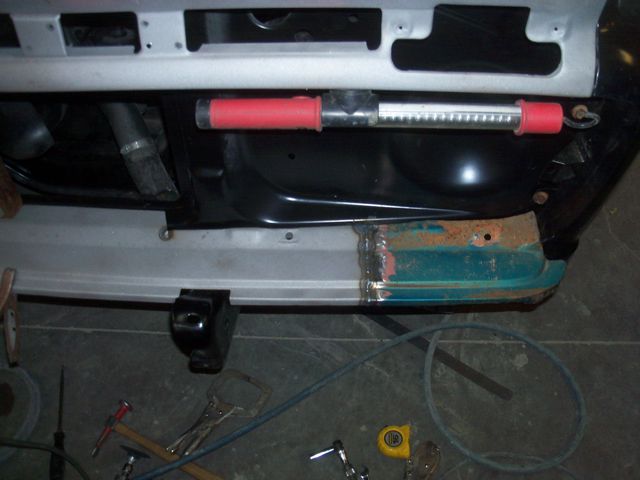
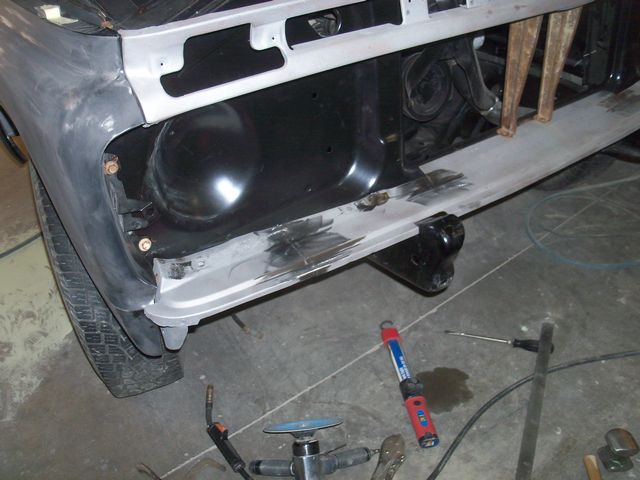
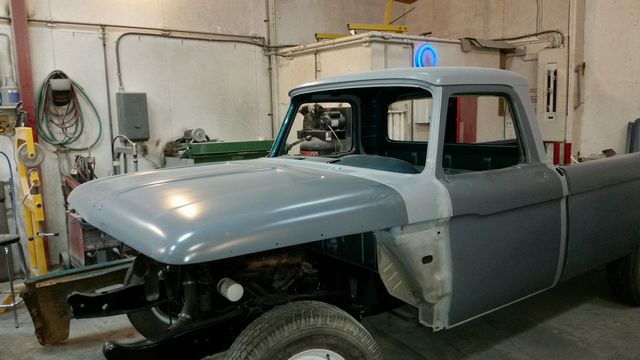
Al installed the rad support and tested the alignment of the hood to the front upper valance, the cowl and the front fenders. He wasn't happy with the fit of the driver's side fender to the cowl and the door, so he had to work on the fender a bit.

Name:  tn_100_2176.JPG
Views: 1090
Size:  246.9 KB


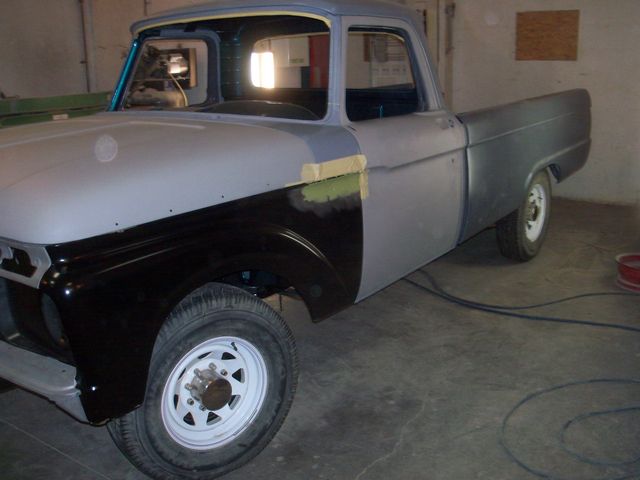
The stone deflector from my Mercury was bent and cut up in the middle, but the ends were in great shape. So Al spliced the ends of my Mercury stone deflector onto the middle of the stone deflector from my F100.

Name:  tn_100_2177.JPG
Views: 1139
Size:  247.4 KBName:  tn_100_2178.JPG
Views: 1066
Size:  258.5 KB
 
  #97  
Old 01-14-2016, 09:47 PM
dank4120's Avatar
dank4120
dank4120 is offline
More Turbo

Thread Starter
Join Date: Apr 2010
Location: Rocky Mtn. House, Alberta
Posts: 672
Likes: 0
Received 1 Like on 1 Post
I was back at the bodyshop on Halloween 2015. Al was shooting various black parts earlier in the week.

Here are the inner apron shims, various nuts, bolts (poked through cardboard), washers, cover plates.

Name:  tn_20151031_122106.jpg
Views: 995
Size:  39.9 KBName:  tn_20151031_122121.jpg
Views: 1041
Size:  38.3 KB


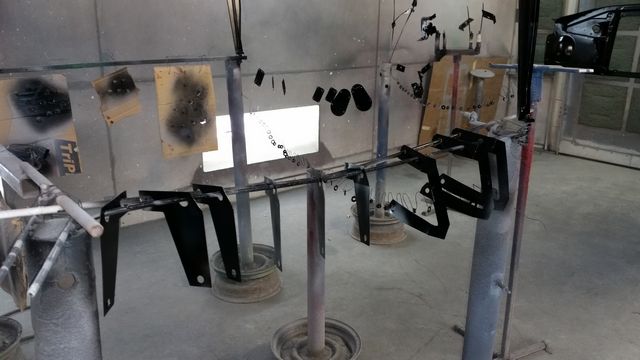
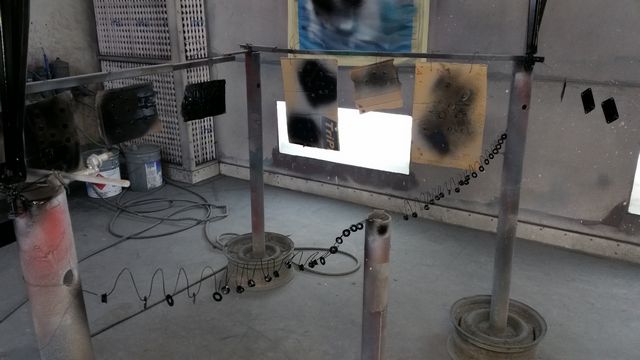
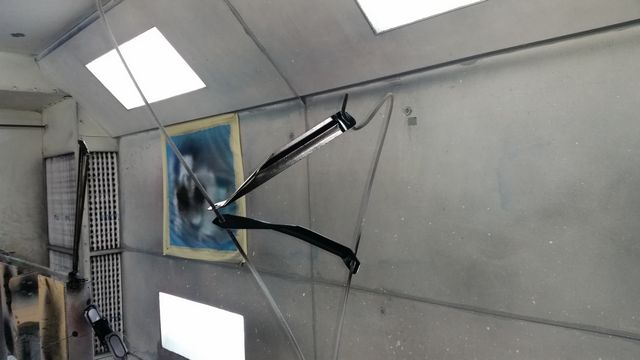
Here is one of the upper valance supports, horn, fuel tank upper mounting clips, and the hood latch.

Name:  tn_20151031_122131.jpg
Views: 996
Size:  43.1 KBName:  tn_20151031_122145.jpg
Views: 1043
Size:  28.2 KB


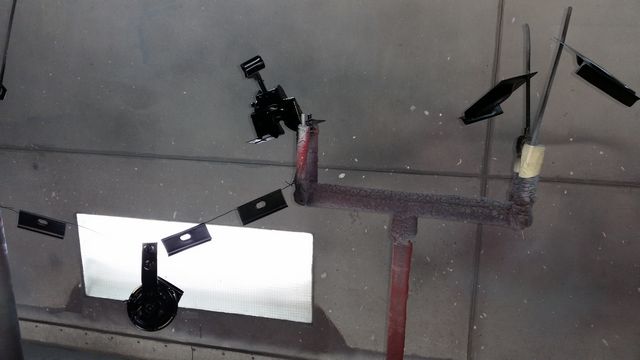
Here are the front fender brackets and the rad support.

Name:  tn_20151031_122222.jpg
Views: 1035
Size:  30.8 KBName:  tn_20151031_122243.jpg
Views: 1081
Size:  43.1 KB


I read in a post that the back of the tank was not supposed to be painted, as was the case with the F100 fuel tank, but we painted both sides of the Mercury fuel tank anyway.

Name:  tn_20151101_150544.jpg
Views: 1052
Size:  46.3 KBName:  tn_20151031_122234.jpg
Views: 1049
Size:  31.6 KB


At this point, I think that Al had inserted the proper shims and the hood, cab, doors and box were aligned correctly.

Name:  tn_20151031_122552.jpg
Views: 1036
Size:  42.6 KBName:  tn_20151031_122856.jpg
Views: 1021
Size:  36.7 KB


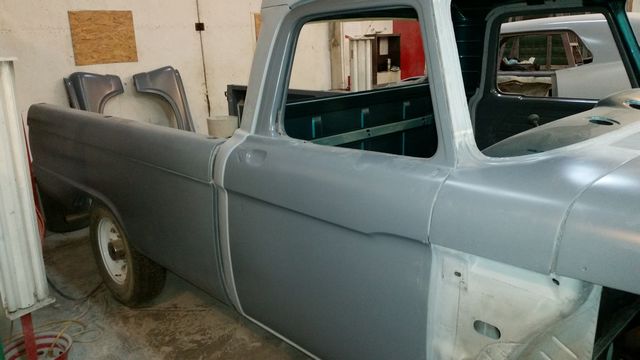
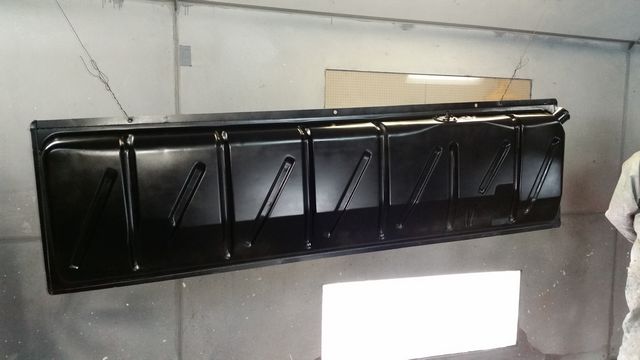
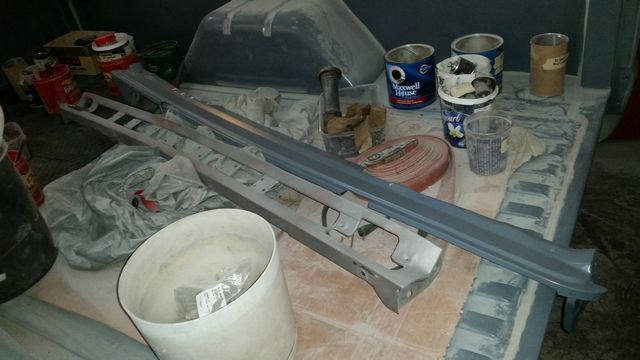
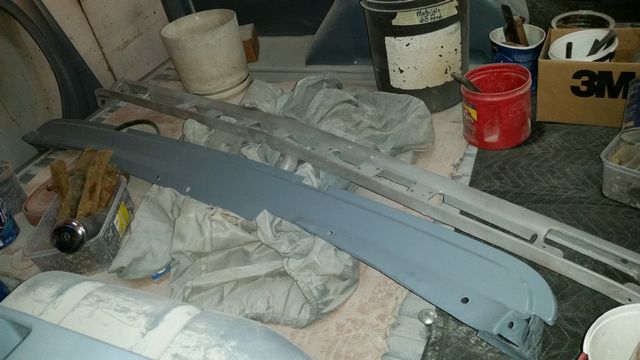
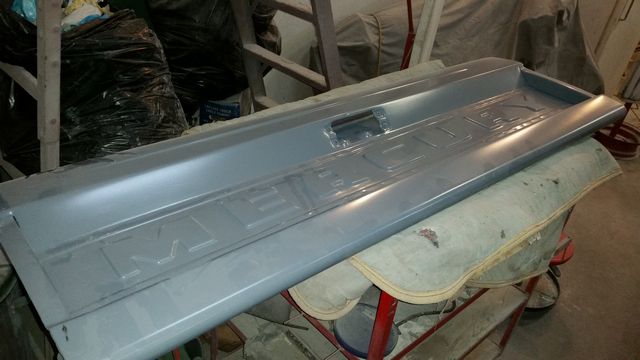
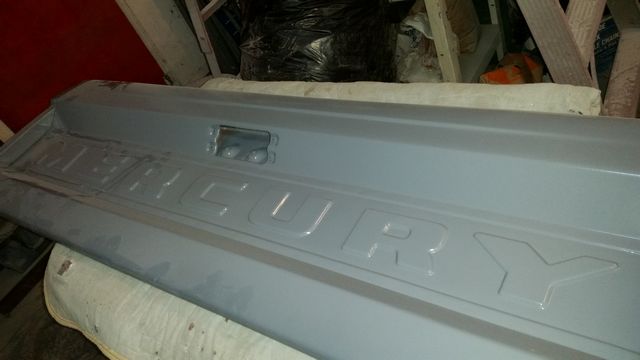
The upper valance, stone deflector and the tailgate were all finished and in primer.

Name:  tn_20151031_122730.jpg
Views: 1029
Size:  40.6 KBName:  tn_20151031_122920.jpg
Views: 1026
Size:  43.3 KB

Name:  tn_20151031_124549.jpg
Views: 950
Size:  39.7 KBName:  tn_20151031_124601.jpg
Views: 1005
Size:  27.8 KB
 
  #98  
Old 01-16-2016, 11:36 PM
dank4120's Avatar
dank4120
dank4120 is offline
More Turbo

Thread Starter
Join Date: Apr 2010
Location: Rocky Mtn. House, Alberta
Posts: 672
Likes: 0
Received 1 Like on 1 Post
By early November 2015, the pre-fit of body parts was complete. Al then prepared the cab and doors for the coat of Wimbledon White.

Name:  tn_20151107_140244.jpg
Views: 950
Size:  42.2 KBName:  tn_20151107_140255.jpg
Views: 1043
Size:  36.8 KB

Name:  tn_20151107_140302.jpg
Views: 993
Size:  41.8 KBName:  tn_20151107_140311.jpg
Views: 957
Size:  41.0 KB

Name:  tn_20151107_140321.jpg
Views: 1003
Size:  35.8 KBName:  tn_20151107_140330.jpg
Views: 992
Size:  39.9 KB

Name:  tn_100_2186.JPG
Views: 998
Size:  250.7 KBName:  tn_100_2187.JPG
Views: 1000
Size:  249.4 KB
 
  #99  
Old 01-18-2016, 09:25 PM
dank4120's Avatar
dank4120
dank4120 is offline
More Turbo

Thread Starter
Join Date: Apr 2010
Location: Rocky Mtn. House, Alberta
Posts: 672
Likes: 0
Received 1 Like on 1 Post
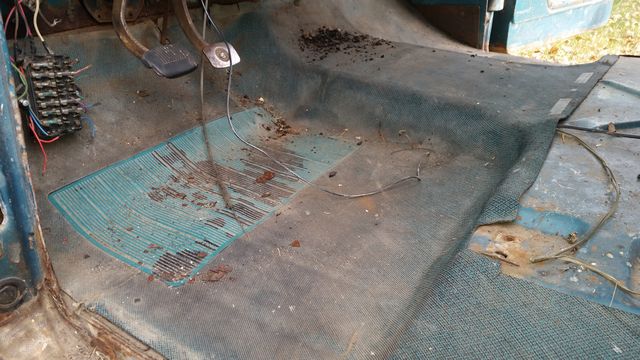
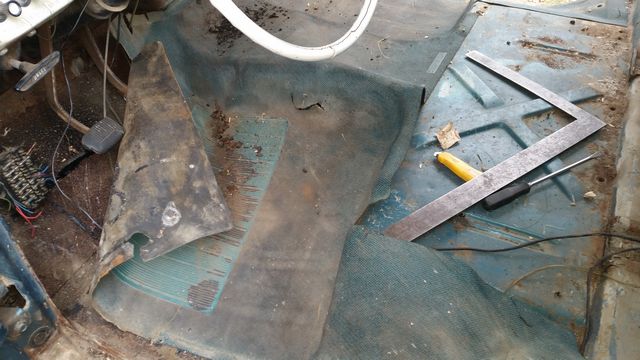
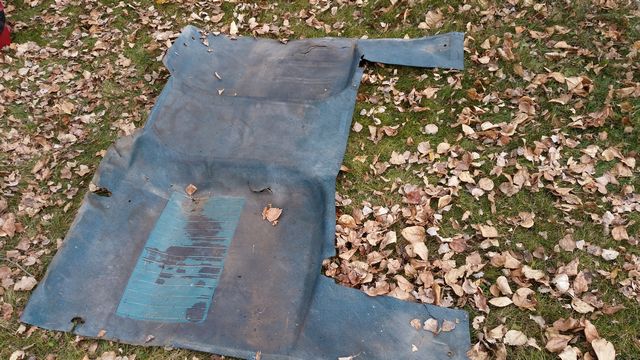
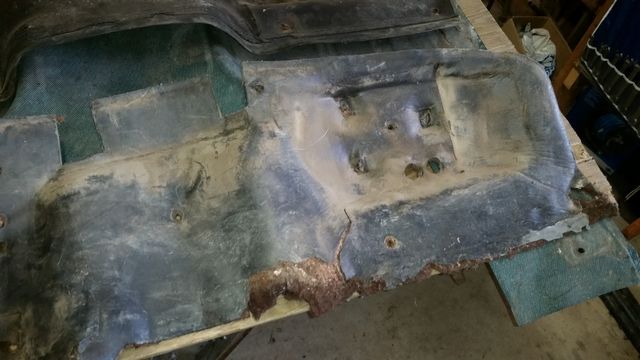
So I was really wanting to use the floor mat from my F100, even though I knew that it wouldn't be a perfect fit. My Mercury has a 4 speed and the F100 has a 3 speed, thus the transmission hump was lower on the Ford.

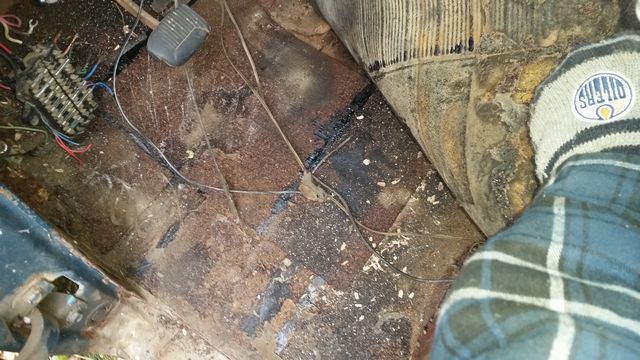
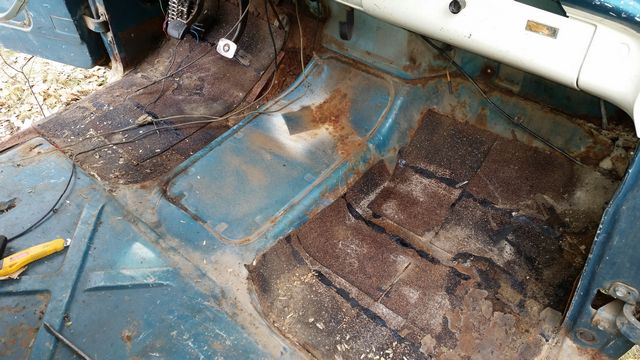
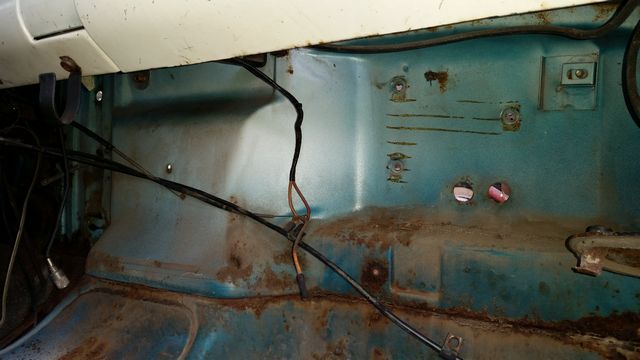
I started to pull the floor mat out, but it was really stuck in there? Turns out the PO put in a layer of roofing shingles instead of installing some new floor pans!

Name:  tn_20151113_121019.jpg
Views: 999
Size:  57.5 KBName:  tn_20151113_121705.jpg
Views: 1012
Size:  52.3 KB

Name:  tn_20151113_121733.jpg
Views: 995
Size:  65.6 KBName:  tn_20151113_122248.jpg
Views: 1007
Size:  61.1 KB

Name:  tn_20151113_122429.jpg
Views: 1004
Size:  83.0 KBName:  tn_20151113_122439.jpg
Views: 972
Size:  80.7 KB


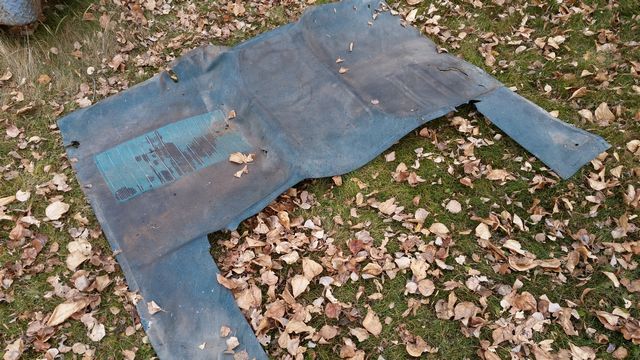
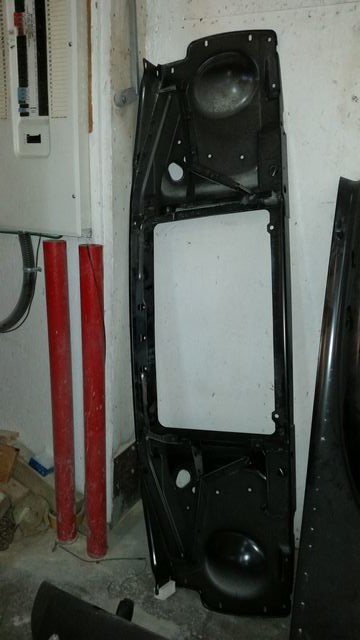
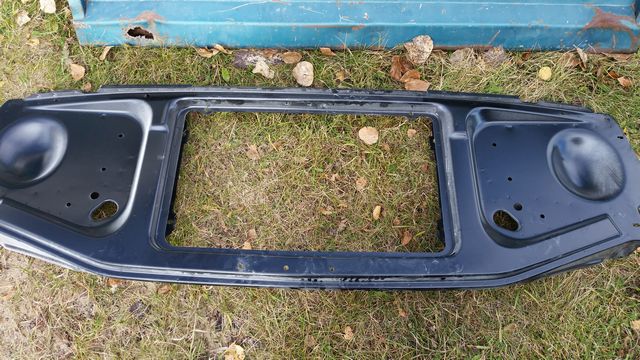
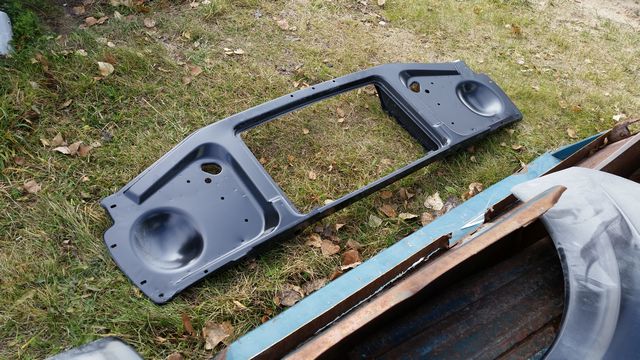
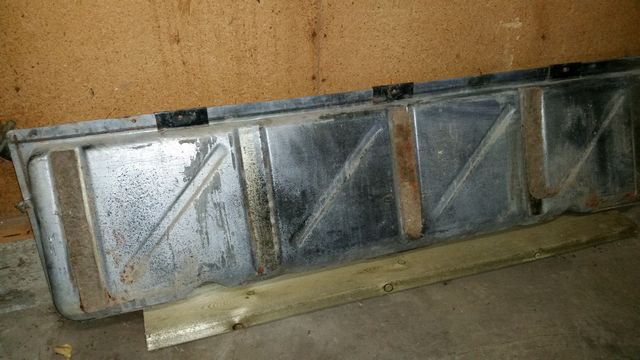
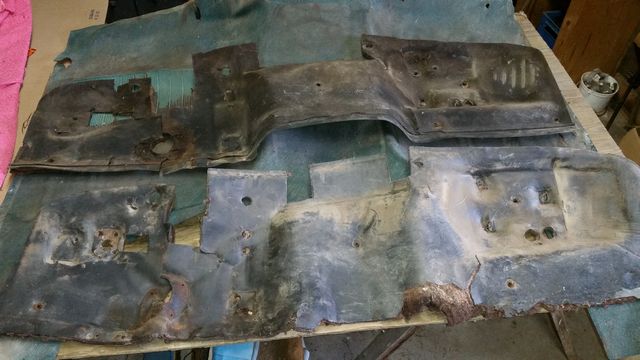
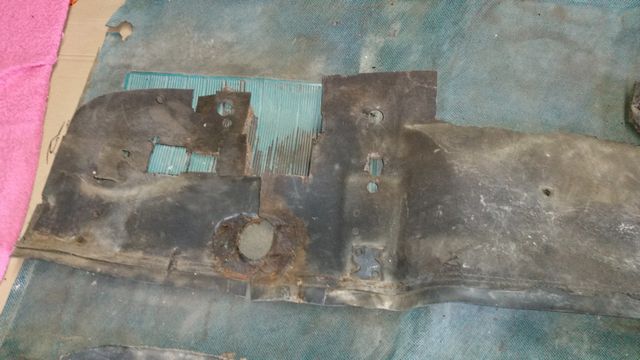
I also pulled out the F100 firewall cover, the paint underneath was not all that great. The F100 Custom Cab firewall cover is on the top, the M250 Standard Cab firewall cover is on the bottom.

Name:  tn_20151113_132748.jpg
Views: 1060
Size:  37.7 KBName:  tn_20151113_130841.jpg
Views: 991
Size:  46.7 KB


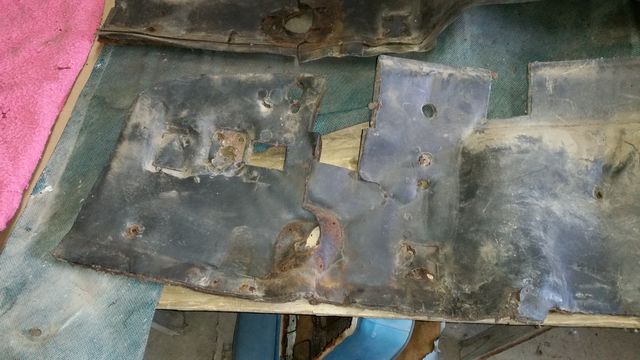
Here is the M250 cover again:

Name:  tn_20151113_130849.jpg
Views: 975
Size:  47.1 KBName:  tn_20151113_130854.jpg
Views: 957
Size:  42.8 KB


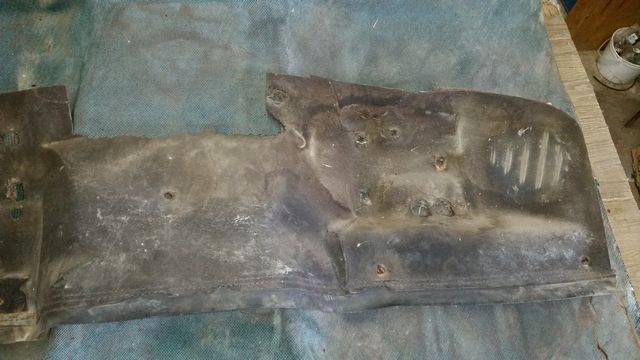
Here is the F100 cover again:

Name:  tn_20151113_130916.jpg
Views: 997
Size:  42.2 KBName:  tn_20151113_130923.jpg
Views: 975
Size:  43.1 KB
 
  #100  
Old 01-19-2016, 08:14 PM
dank4120's Avatar
dank4120
dank4120 is offline
More Turbo

Thread Starter
Join Date: Apr 2010
Location: Rocky Mtn. House, Alberta
Posts: 672
Likes: 0
Received 1 Like on 1 Post
By mid November 2015, Al had painted the Twilight Turquoise on the outside of the cab and the doors.

Name:  tn_20151114_122259.jpg
Views: 915
Size:  43.8 KBName:  tn_20151114_123101.jpg
Views: 971
Size:  41.3 KB

Name:  tn_20151114_123247.jpg
Views: 956
Size:  36.9 KBName:  tn_20151114_123514.jpg
Views: 962
Size:  43.4 KB

Name:  tn_20151114_123548.jpg
Views: 975
Size:  39.5 KBName:  tn_20151114_123559.jpg
Views: 944
Size:  52.1 KB

Name:  tn_20151114_123638.jpg
Views: 962
Size:  38.6 KBName:  tn_20151114_123650.jpg
Views: 915
Size:  40.2 KB

Name:  tn_20151114_123705.jpg
Views: 994
Size:  44.6 KBName:  tn_20151114_124134.jpg
Views: 974
Size:  42.5 KB

Name:  tn_20151114_124735.jpg
Views: 951
Size:  39.0 KBName:  tn_20151114_125658.jpg
Views: 944
Size:  47.5 KB
 
  #101  
Old 01-20-2016, 03:42 PM
yankbs 66f100's Avatar
yankbs 66f100
yankbs 66f100 is offline
Elder User
Join Date: Apr 2014
Location: Cumming, Ga.
Posts: 505
Likes: 0
Received 0 Likes on 0 Posts
Love that Twilight Turquoise, it pops out with that white. Great look.
 
  #102  
Old 01-20-2016, 06:59 PM
dank4120's Avatar
dank4120
dank4120 is offline
More Turbo

Thread Starter
Join Date: Apr 2010
Location: Rocky Mtn. House, Alberta
Posts: 672
Likes: 0
Received 1 Like on 1 Post
Originally Posted by yankbs 66f100
Love that Twilight Turquoise, it pops out with that white. Great look.

Thanks. It would have looked good as a solid colour as well but I'm pretty happy with how the Tu-Tone scheme has turned out.
 
  #103  
Old 01-20-2016, 09:48 PM
dank4120's Avatar
dank4120
dank4120 is offline
More Turbo

Thread Starter
Join Date: Apr 2010
Location: Rocky Mtn. House, Alberta
Posts: 672
Likes: 0
Received 1 Like on 1 Post
So these are my 8 bolt 'innie' rims. I have no idea what truck they originally came from, but the PO ran them on his '65 or '66 F250.

Name:  tn_20151113_125029.jpg
Views: 930
Size:  53.6 KBName:  tn_20151113_125050.jpg
Views: 946
Size:  50.4 KB

Name:  tn_20151113_125430.jpg
Views: 958
Size:  56.6 KBName:  tn_20151113_125836.jpg
Views: 949
Size:  63.8 KB


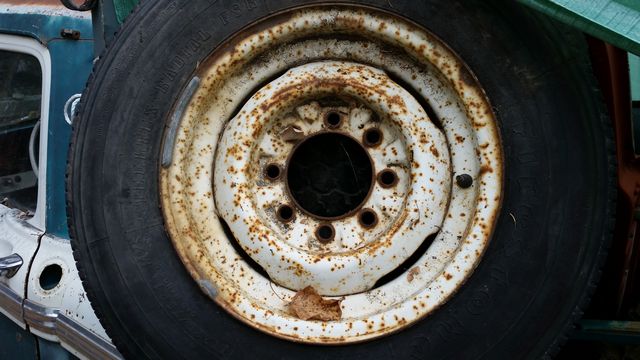
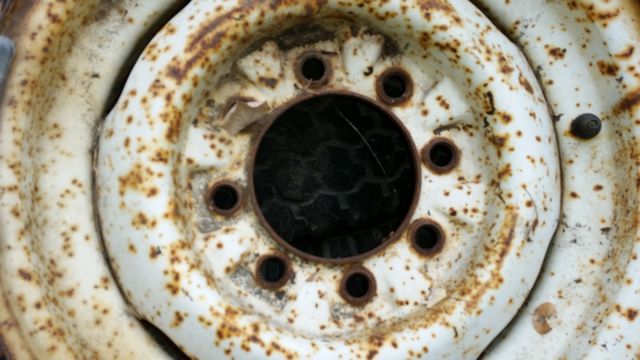
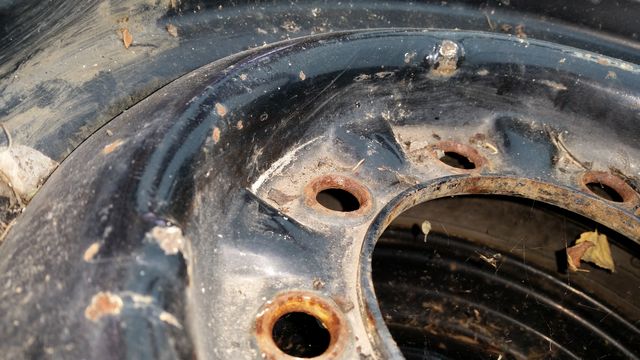
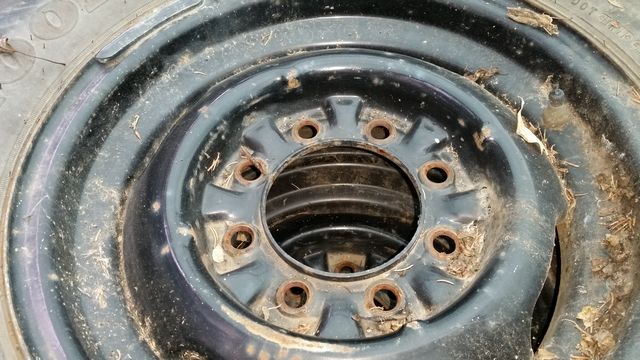
The PO ran LT 245/75R16 tires, which seem too big and too wide.

Name:  tn_20151113_125406.jpg
Views: 959
Size:  43.3 KBName:  tn_20151113_125414.jpg
Views: 961
Size:  37.1 KB


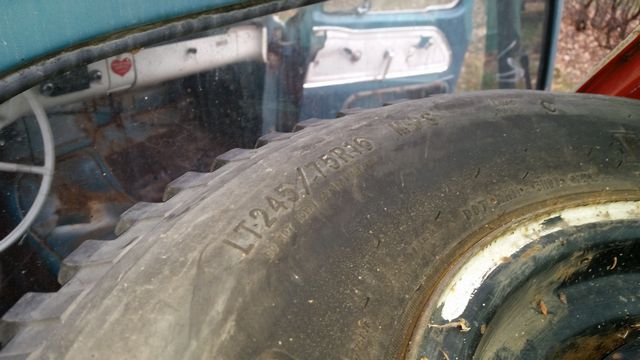
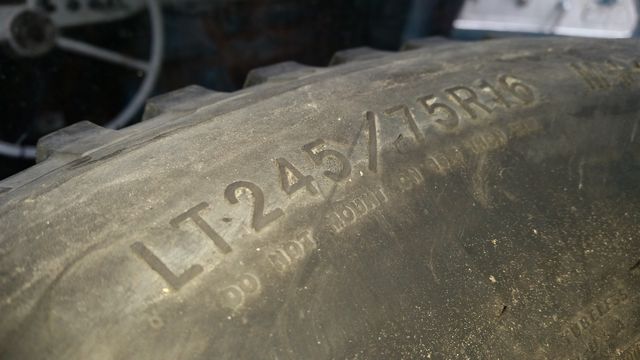
Once I get these rims cleaned up and painted, I'll probably get a set of LT 235/85R16 tires. This appears to be the closest diameter of tire to my original 750-16's, just 45 mm (1.77 in) wider.

I see that Coker Tire does have some 750-16 "Classic Blackwall" radial tires, but they use a tube and I don't think that will work with my rims?
 
  #104  
Old 01-20-2016, 10:48 PM
TA455HO's Avatar
TA455HO
TA455HO is online now
Lead Driver
Join Date: Aug 2012
Location: Seattle, WA
Posts: 8,673
Received 529 Likes on 422 Posts
You can always use a tube. But, with those rims a person can also run tubeless.

.
 
  #105  
Old 01-20-2016, 11:47 PM
dank4120's Avatar
dank4120
dank4120 is offline
More Turbo

Thread Starter
Join Date: Apr 2010
Location: Rocky Mtn. House, Alberta
Posts: 672
Likes: 0
Received 1 Like on 1 Post
Originally Posted by TA455HO
You can always use a tube. But, with those rims a person can also run tubeless..

Good to know I have some options. I still need to measure the width of my rims, then I'll start looking for tires.


Quick Reply: 1965 Mercury M250 Build


All times are GMT -5. The time now is 10:49 AM.